
How to Create & Use Product Tags in WooCommerce

When creating a WooCommerce site, applying product tags in your store is a major thing to do. There is no denying that product tags in WooCommerce have been integral in any online store. This is to say, its importance is undeniable because they work at their best to help your products, items, or services get a high rank on Google and facilitate the buying process of customers.
Understand your need and concern, we have written a detailed guide on how to create & use product tags in WooCommerce. As these tags will significantly contribute to your online store, follow our instructions and you will have fun with it. Now, let’s get started!
Why do we need to create product tags in WooCommerce?
So, how important product tags are? Sure, they are indispensable in creating a successful business. Just spend some moments to see what we could get from creating product tags in WooCommerce.
-
Be good for SEO: Product tags can help search engines recognize your store’s information. Therefore, your WooStore rises higher in the searching results.
-
Describe products, variables, and features: Special identifiers and markers are helpful for customers to seek what they want to look for.
-
Organize products well: Regardless of using tags on your Dashboard or your customer-facing site, they could supervise your products that relate to the others within the general brand.
How to create product tags in WooCommerce
Creating product tags in WooCommerce is extremely simple, with some easy steps. Follow us and keep scrolling to see how to create your WooCommerce product tag. In this article, we would like to mention two ways that you can use to create your product tags. One is to add tags in your WooCommerce Dashboard and the other entails using Store Manager. Either of them is simple and easy to follow. So, you can choose one of the two methods.
1. Use your WooCommerce Dashboard
Step 1: Go to WooCommerce’s Products
First and foremost, you need to go to your “Products” section in WooCommerce. Creating this type of tag is quite similar to creating your product categories. As soon as you navigate to “Products”, click “Tags”.
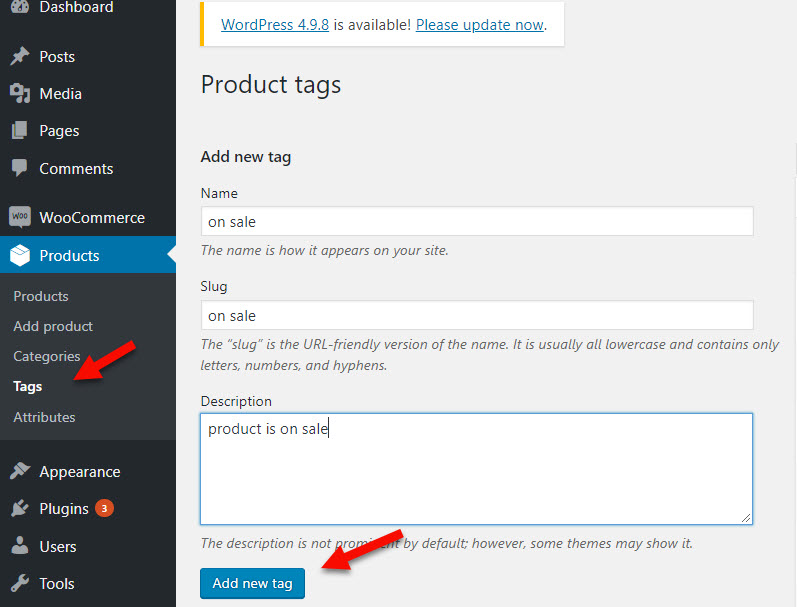
After selecting tags, another page will open up where you need to fill in some required information.
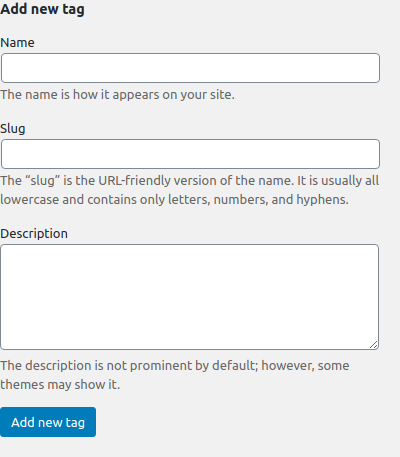
Some fields you need to enter some details:
-
Name: This field requires you to add the tag name that you are going to create.
-
Slug: You need to add URL versions for this field.
-
Description: Here, you have to describe your tag. However, it is not compulsory because it might not be shown in all themes.
Step 2: Create a new tag
After that, you will need to choose the button “Add new tag”. By doing this, you have created your new tag. Then, your next task is to navigate to the section “Products” to click “Add Products”. In this section, you are able to check if your tags are on your right panel or not. And they are below your “Product Categories”. Look at the below screen to understand more:
You could create three tags for WooCommerce products. You should also bear in mind that using commas is vital to separate each product tag in WooCommerce. As a result, you can create your tags neatly.
2. Use your Store Manager
This second is also straightforward too.
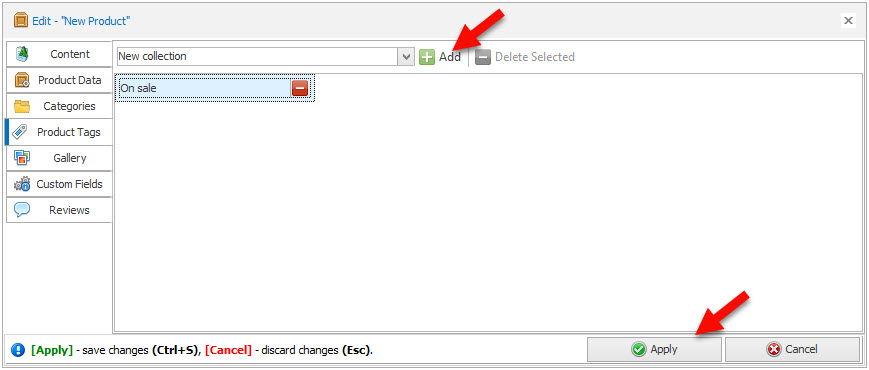
Step 1: Navigate to the section “Product Tags”
The first step is to open the tab “Store”. Then, you need to see the section “Product Tags”.
Step 2: Create new product tags
Next, move to click the button “Add New” and enter detailed information in the form “Edit” as below:

Besides adding a single product tag, if you are keen on creating myriad tags at the same time, you could also do that. In this situation, just simply use the multiple tags option. Create several different product tags in the field and you should not forget to separate them by a comma. Next, click the button “Add Multiple”.
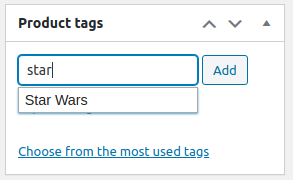
In case you are fond of assigning a specific tag to a certain product, you need to click two times on one item before scrolling down to your edit grid. Proceed to another step to open the tab “Product tags” to input your tags into each corresponding field. The good news is that you are able to add more tags instead of one and separate them with the use of a comma.
How to use product tags in WooCommerce
- Test your created product tags
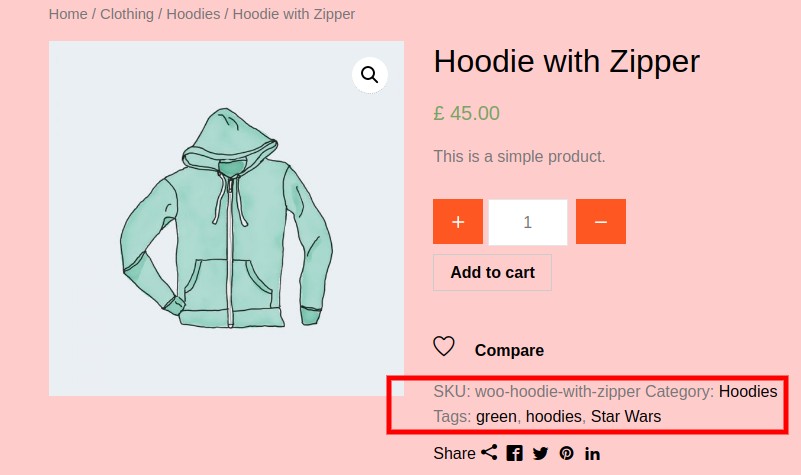
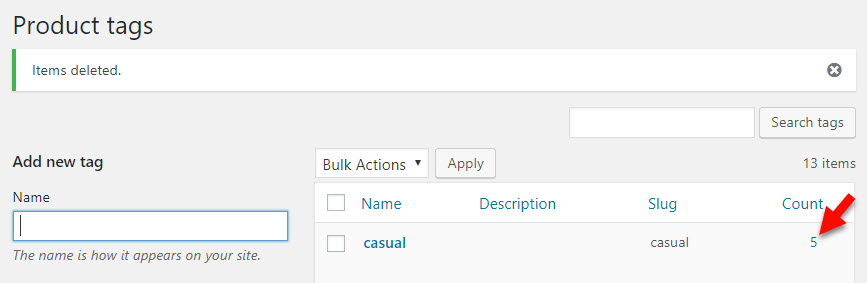
To use your created product tags, you need to test your created product tags. So, how can you quickly check which tags you have assigned to a particular product? It is a piece of cake. Penetrate the section “Products” and click “Tags”. After that, seek the column Test your created product tags which lies in a table coming with a product tag list. Here, you need to choose a displayed number.
- Edit product tags
In the previous part, we have guided you on how to create product tags. When you have successfully created product tags, you will need to use them. However, there are some cases where you want to modify these tags to make them suitable for your products or serve a specific strategy.
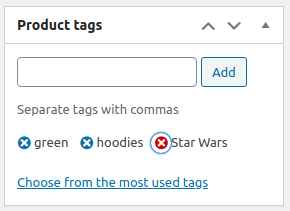
Navigate to the section “Products”, click “All Products” and choose “Edit Product”. Here, you are supposed to locate your product tags’ meta box. Hovering over the tags that have been created before. You can notice one cross sign on the following screen. Select it and you can delete your selected tag.
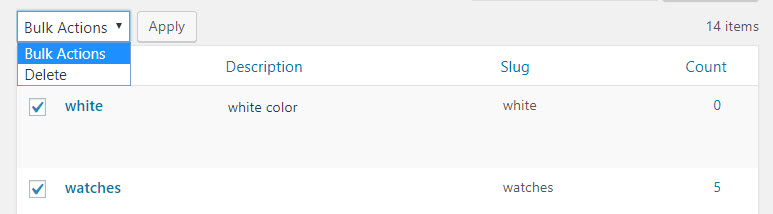
In case you wish to remove bulk product tags, you will tick chosen tags and click the action “Delete” from the drop-down menu “Bulk Actions” and click on “Apply”.
- Search by product tags
As product tags bring about tons of benefits for your online store, you could use them to search by product tags. You could implement a search by many different tags by separating your search via a comma.
Let us take an example. You are in search of all products that are tagged with helicopter and toys, what you need to do is to fill in your search box with “helicopter,toys”. Then, every product with these tags will appear in your searching result. Remember to input a comma to split each tag. It is easy, right?
Conclusion
Overall, WooCommerce stores can not exist without products and products can not exist without product tags. They are as important as product attributes, along with product categories. All of them contribute to a good WooCommerce site with good SEO, good structure, and good organization of product lists within the store. Therefore, you should, in our opinion, attach this instruction to your must-read list if you are running a WooStore. It will be useful for you, for sure.


