
WooCommerce to Shopify Migration: A Comprehensive Guide

Are you considering moving your online store from WooCommerce to Shopify? Whether you're looking for more features, better support, or a more user-friendly platform, WooCommerce to Shopify migration can be a great choice. However, the process can be daunting if you're not familiar with the steps involved.
- 7 steps to migrate from WooCommerce to Shopify
- 3 ways of WooCommerce to Shopify migration
- Potential issues during the WooCommerce to Shopify migration
Types of data you can transfer from the WooCommerce store to Shopify
Though you can manually export more types of data from WooCommerce, including products, customers, orders, and coupons, you can only import the product and customer data into Shopify. If you want to migrate the other types of data, you will have to use third-party transporters. They will help you to transport all the data as follows:
- Products: manufacturer name, status, name, full description, product tags, meta title, images, and variants in price, price, weight, SKU, and quantity.
- Product categories: name, image, meta description, meta title, and meta description.
- Customers: first name, last name, email, and shipping address (address, company, state, city, zip code, and country) and billing address (zip code, country, state, city, company, address, first name, last name)
- Orders: shipping price, discount price, order comments, tax price, product price, quantity, option, SKU, name.
- Coupons
- Reviews
- CMS pages
- Blogs
Exclusive Offer: Get Shopify 33 days for just $1 + The Online Store Starter Kit
Start your 3-day free trial, and enjoy your first month of Shopify for 1$ plus the premium package designed especially for new Shopify merchants!
Methods for WooCommerce to Shopify replatforming
3 ways to migrate WooCommerce store to Shopify store
There are 3 different ways to migrate to Shopify from WooCommerce:
1. Migrate from WooCommerce to Shopify manually
This free method offers complete control over the transfer process. However, it can be time-consuming, and there is a risk of errors if the data is not mapped correctly.
2. Migrate from WooCommerce to Shopify using an importer app
This option is faster and less prone to errors than manual migration. Additionally, most importer apps offer data mapping and customization options. However, this method can be more expensive than manual migration, and the quality of the migration may depend on the quality of the importer app chosen.
3. Hire an expert
This has the benefit of relying on the expertise of a professional to ensure that the transfer is done correctly and quickly. Furthermore, the expert can offer advice on best practices and help optimize the new store. However, this method is the most expensive of the three, and one needs to be cautious in selecting a reputable expert to avoid the risk of poor-quality work. Find expert here.
Which migration method is right for you?
The method of migrating from WooCommerce to Shopify that you should choose depends on your budget, time, and level of expertise. Here are some general recommendations:
- Manual migration: This method is best suited for users who have a small number of products, customers, and orders to transfer and are comfortable working with data mapping and formatting on their own. If you have a limited budget and are willing to invest some time and effort, manual migration can be a viable option.
- Importer app: This method is ideal for users who have a moderate to large number of products, customers, and orders to transfer and want to save time and reduce the risk of errors. Make sure to choose a reputable and reliable app that can handle your specific data types and configurations.
- Expert hire: This method is recommended for users who have a large or complex store to transfer and want to ensure a seamless and optimized migration. If you have a higher budget and want to rely on the expertise of a professional, hiring an expert can be a smart investment.
Pre-Migration
Step 1: Sign up for a Shopify account
You need a Shopify store before you can actually migrate WooCommerce stores to Shopify. To have one, you can just start a free trial first or buy a subscription plan.
Start a Shopify free trial
First, go to shopify.com, then click Start free trial.
You will be asked a few questions to get started, but you can skip them if you want. Don’t worry about your store name, just type in anything. You can always change it later after.
After that, you'll be directed to Shopify Dashboard. Your Shopify account is ready to go.
Purchase a Shopify subscription plan
Shopify offers a free trial that lasts for only 3 days. So, when considering migrating to Shopify, you must have already decided to commit to selling on Shopify. You can consider one of these main Shopify subscription plans:
 Shopify Pricing Plans Overview
With a Shopify account, you’re now ready for WooCommerce to Shopify migration.
During Migration
Step 2: Export WooCommerce data
- Go to WordPress Admin Panel
- Click Tools > Export
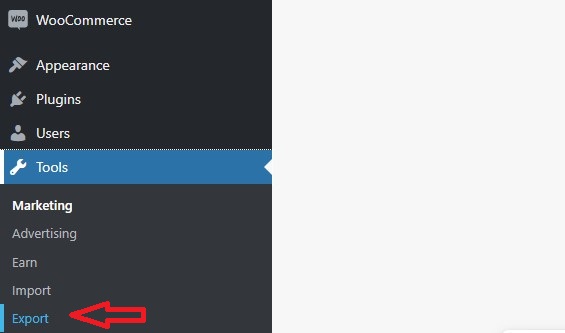
- Select the data you want to export, such as products, orders, customers, blog content, reviews, etc.
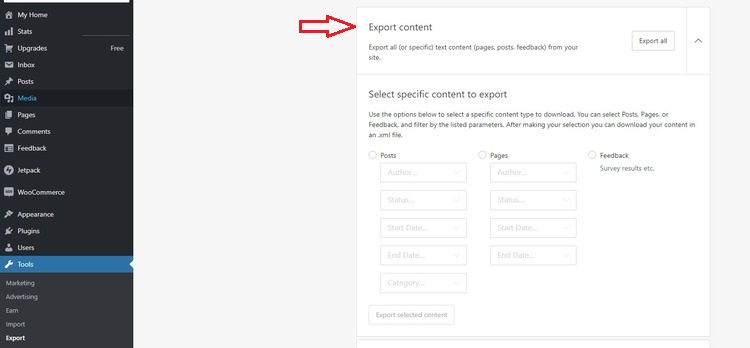
- Save the exported data as a CSV file.

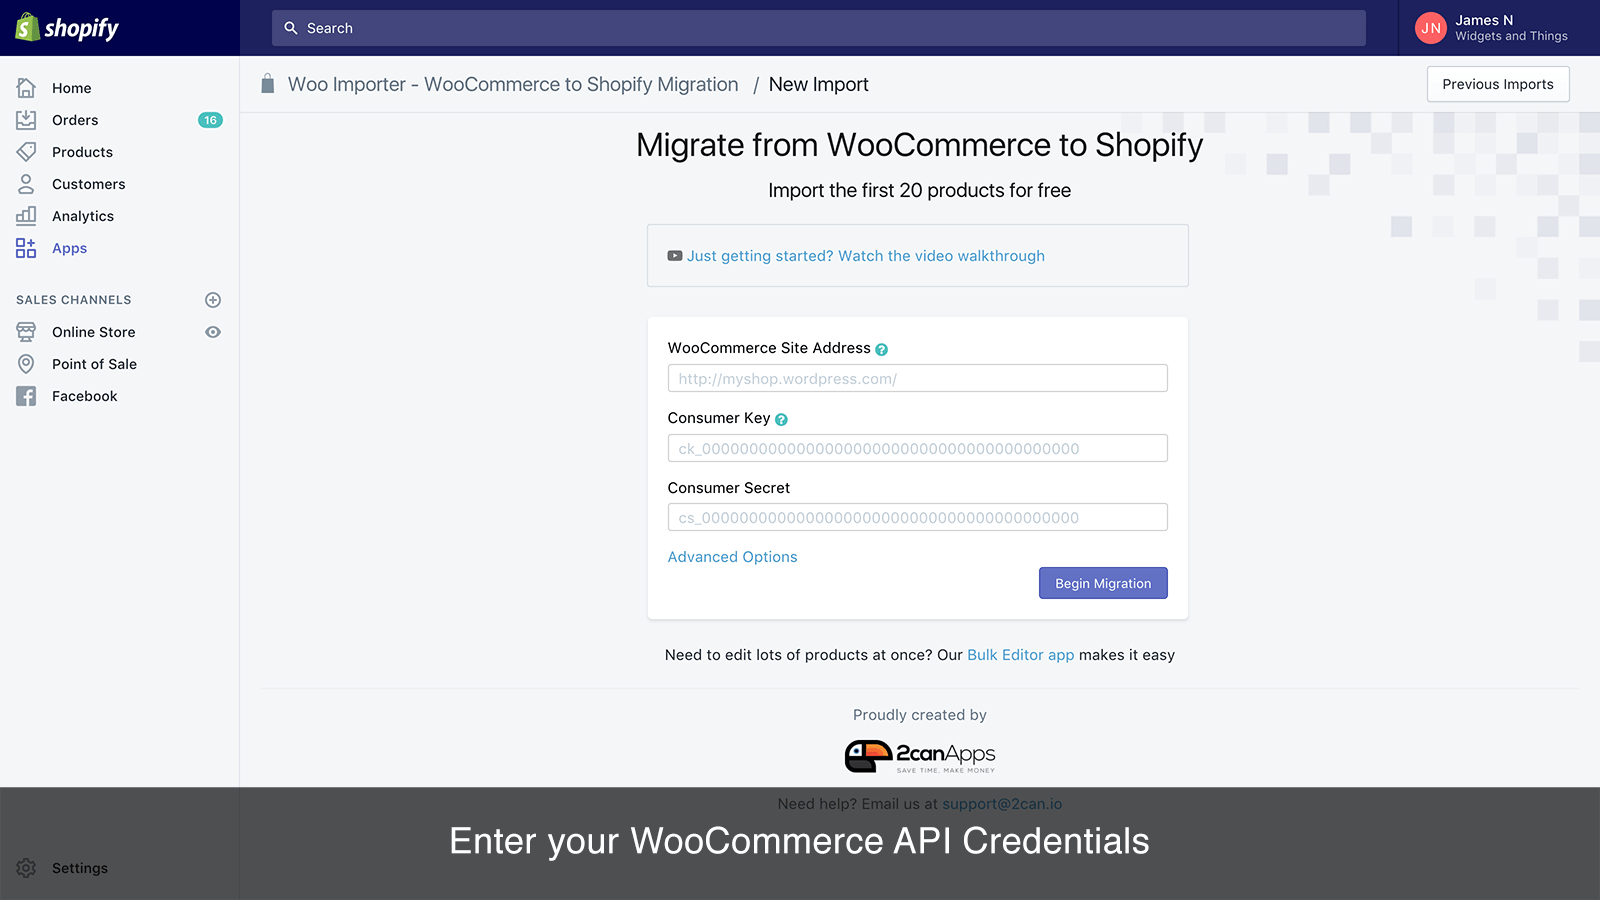
Step 3: Import WooCommerce products to Shopify
Migrating from WooCommerce to Shopify using an importer app
There are many importer apps on the Shopify App Store for you to choose from. Using an importer app, such as LitExtension or Cart2Cart, makes everything so fast and simple. The process is very straightforward:
- Select WooCommerce as a source cart and Shopify as a target cart.
- Select the data you want to migrate, such as products, orders, customers, and reviews.
- Click Start the migration process and wait for it to complete. This may take a while, depending on the size of your store and the amount of data being migrated.
Migrating from WooCommerce to Shopify manually
Import product data
- Go back to Shopify Admin Panel > Click Products > Click Import.

- Click Add file. You can either browse and choose a CSV file from your computer or drag and drop a CSV file there.
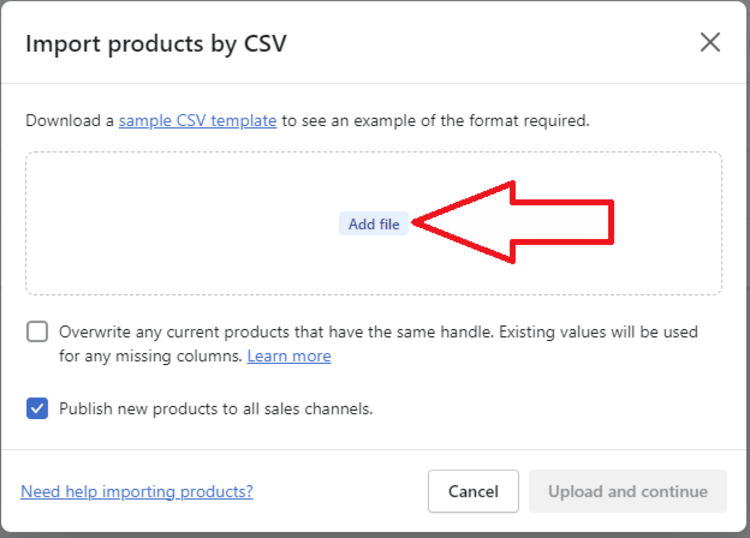
- Click Upload and continue. Click Import Products until Shopify finishes uploading and importing your data.
It takes a while for this to process. Once the importation process is complete, you can see products listed on the Shopify store.
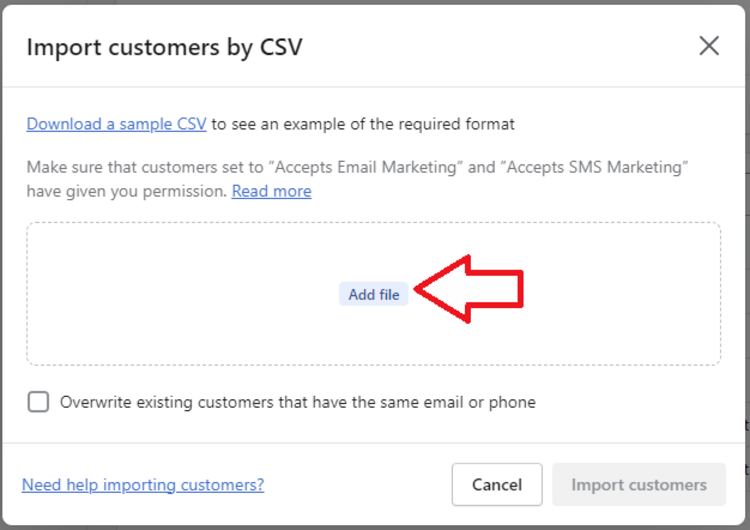
Import customer data
The same import process applies to importing other data, like customer data. Except that you now have to select Customers > Import > Add file > Import customers.
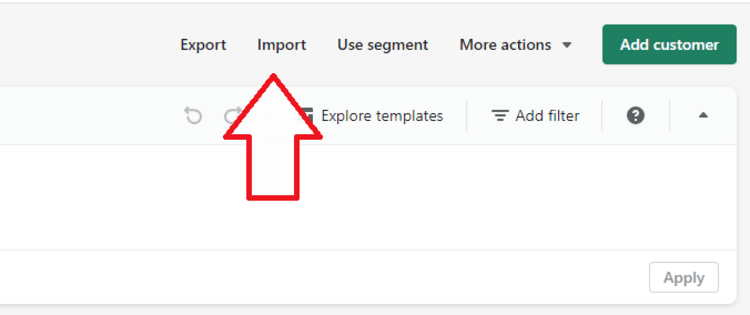
It takes a while for this to process. Once the importation process is complete, you can see products listed on the store.
Import images
To transfer your product images to your Shopify site after moving from WooCommerce, follow these steps:
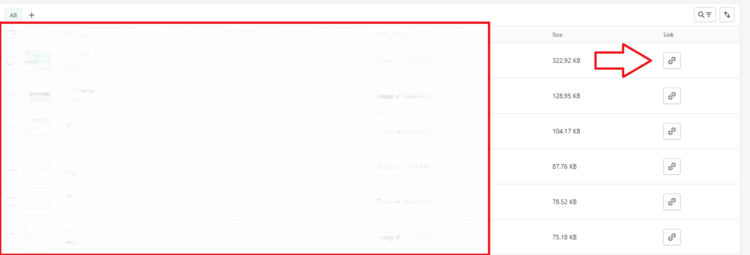
- From your Shopify admin, select Content and then click Upload files.
- Select all the images you want to upload to Shopify.
- Click the Copy link icon for each image you want to transfer.
- Open the CSV file that contains your products and add a new column called "image Src."
- Paste the image URL into each line of the "image Src" column and save the CSV file.
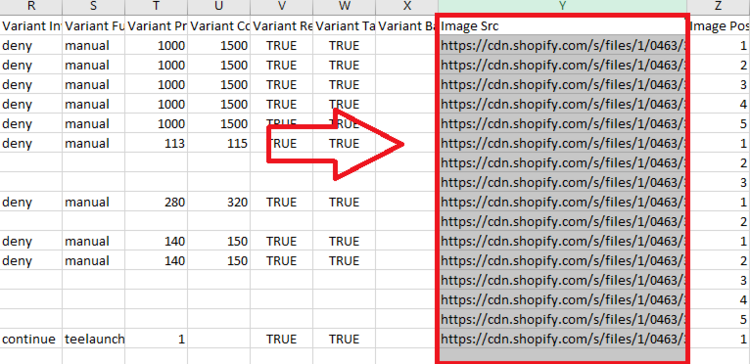
- Import the CSV file to your Shopify by selecting Import in the Products section of your admin dashboard.
- Wait for the import process to complete.
Post-Migration
Step 4: Transfer your domain name from WooCommerce to Shopify
Here's a detailed, step-by-step guide on how to transfer a domain from WooCommerce to Shopify:
- Log in to your account with your domain provider.
- Find your DNS settings. This is usually found under "Manage DNS" or a similar option.
- Locate the "www" CNAME record and change it to point to "shops.myshopify.com".
- If your domain provider requires a host name with the "A record," set it to the "@" symbol.
- Locate the "A Record" and change it to Shopify's IP address. The IP address is provided by Shopify and can be found in their help documentation.
- Confirm your settings and save them.
- In your Shopify admin, click "Settings," then click "Domains."
- Click "Connect existing domain" and enter your custom domain.
- Click "Next" and then click "Verify connection." It may take up to 48 hours for your custom domain to connect, but it could happen immediately.
- Once your domain is connected, you can set it as the primary domain for your Shopify store by clicking "Change primary domain" and selecting your custom domain as the primary.
*Note: the steps from #1 to #6 may be different depending on your domain provider.
Step 5: Set up redirects from WooCommerce to Shopify
Here are the steps to redirect your WooCommerce store traffic to your new Shopify store:
- Install and activate the Redirection plugin on WordPress.
- In the WordPress Admin Panel, go to Redirection.

- Click Add new redirection to create a new redirection rule.
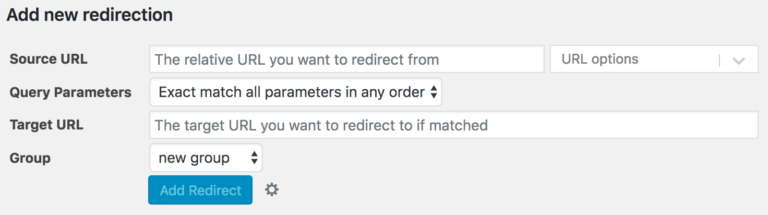
- In the Source URL field, enter the old URL of the page on your WooCommerce site that you want to redirect, for example, "https://yourwoocommercesite.com/shop".
- In the Target URL field, enter the new URL of the corresponding page on your Shopify site, for example, "https://yourstorename.myshopify.com/collections/all".
- Click Add Redirect to save the redirection rule.
- Repeat steps 4-6 for all the pages on your WooCommerce site that you want to redirect to your Shopify site.
- Test the redirection by entering the old URLs of your WooCommerce site in a web browser and making sure that they redirect to the corresponding pages on your Shopify site.
- Once you have confirmed that the redirection is working correctly, you can take your WooCommerce site offline or remove it entirely.
That's it! By setting up the redirection rules, you ensure that your customers will be automatically redirected to your new Shopify site when they try to access your old WooCommerce site. This will help minimize any disruption to your business during the migration process.
Step 6: Review and update imported data
After migrating your data from WooCommerce to Shopify, it's important to review the imported data and update it as necessary to ensure that everything is accurate and complete. Here's how to review and update your data in Shopify:
- Check your product listings: Review your product listings in Shopify to make sure that all of your products have been imported correctly, including product names, descriptions, images, and pricing.
- Check your orders: Review your orders in Shopify to ensure that all of the order details, such as customer information, shipping and billing addresses, and payment information, have been imported accurately.
- Check your customer information: Review your customer information in Shopify to ensure that all of the customer data, including names, email addresses, and order history, has been imported correctly.
- Update your data: If you notice any discrepancies or errors in your imported data, make the necessary updates in Shopify. For example, you may need to edit product descriptions, update pricing, or fix shipping information.
By carefully reviewing and updating your imported data, you can ensure that your new store is accurate and complete and that your customers have a smooth and seamless experience.
Step 7: Set up the basic information for your new store
In fact, you can start setting up your Shopify store—shipping, taxes, payment, etc.—or leave these settings after you migrate your data. Here are several things you need to do in this step:
- Choose a theme:
- To choose a theme, go to your Shopify dashboard > click "Online Store" in the left-hand menu.
- Click "Themes". You'll be taken to the Theme Library.
- Browse through the available themes > click "Preview" to see how they look.
- Click "Add theme" to install the theme you like.
- Clicking "Customize" and making changes to the layout, colors, fonts, and other design elements.
- Set up payment options:
- Go to your Shopify dashboard > click "Settings" in the left-hand menu.
- Click "Payment providers." Shopify offers a variety of payment options, including credit cards, PayPal, and more.
- Choose the payment options you want to offer, and follow the instructions to set them up.
- Set up shipping options:
- Go to your Shopify dashboard > click "Settings" in the left-hand menu.
- Click "Shipping and delivery." Shopify offers a variety of shipping options, including free shipping, flat rates, and calculated rates based on weight and distance.
- Choose the shipping options you want to offer, and follow the instructions to set them up.
- Set up taxes:
- Go to your Shopify dashboard and click on "Settings" in the left-hand menu.
- Click on "Taxes." Depending on your location, you may need to charge taxes on your products. Shopify can automatically calculate and add taxes to your orders.
- Choose the tax options you want to offer, and follow the instructions to set them up.
- Customize your store:
- Go to your Shopify dashboard > Click "Online Store" in the left-hand menu.
- Clicking on "Customize" if you want to make changes to the layout, colors, fonts, and other design elements.
- Clicking "Pages" and then "Add page" to create pages such as About Us and Contact Us.
- Click "Themes" and then "Customize theme" to upload your logo.
Step 8. Test and launch your store
Testing your store after migrating data from WooCommerce to Shopify is a crucial step to ensure that everything is working properly. Here's the checklist you can base on to test your store:
- Place a test order: Make a test purchase on your new store to check if the checkout process is working as expected. Make sure to complete the checkout process using different payment methods to ensure they all work.
- Check product listings: Go through all the products on your new store to ensure they have been imported correctly from WooCommerce. Make sure product titles, descriptions, images, and pricing are all accurate and complete.
- Test shipping and taxes: Test the shipping and taxes feature by placing a test order with a different shipping address and ensure that the shipping rates and taxes are calculated correctly.
- Test email notifications: Check if your customers are receiving email notifications for order confirmation, shipping updates, and other relevant communication.
- Test website speed and performance: Use a website speed testing tool to check the loading speed of your Shopify store. Ensure that the store is running smoothly and quickly, even during peak traffic times.
A thorough test of your new Shopify store is crucial to ensuring that your customers have a seamless shopping experience and your store performs well.
Step 9. Train your staff on how to use the Shopify platform
When migrating from WooCommerce to Shopify, it's important to ensure that your staff is adequately trained on the new platform. Here are some tips for effectively training your staff on Shopify:
- Provide training resources: Shopify offers a wide range of training resources that can help your staff get up to speed on the platform quickly. These resources include documentation, tutorials, webinars, and forums. Share these resources with your staff and encourage them to take advantage of them.
- Assign roles and responsibilities: Determine which staff members will be responsible for managing different aspects of your Shopify store, such as product management, order fulfillment, and customer support. Assign clear roles and responsibilities to each team member and provide them with the necessary training to carry out their duties effectively.
- Conduct hands-on training: One of the best ways to train staff members on Shopify is through hands-on training. Set up a sandbox environment where your staff can practice using the platform without risking any real data. Provide them with scenarios and tasks that simulate real-world situations, and provide guidance and feedback as needed.
- Use Shopify apps: Shopify has a wide range of apps that can help streamline various aspects of your business, such as inventory management, shipping, and customer service. Introduce your staff to these apps and show them how they can be used to simplify their workflows.
- Regularly review performance: After your staff has been trained on Shopify, regularly review their performance to identify areas where they may need additional training or support. This can include monitoring sales, customer feedback, and order fulfillment times.
Step 10. Let the customers know about your new Shopify store
When migrating from WooCommerce to Shopify, it's important to inform your existing customers about the change. Here are some tips for effectively informing your customers about your migration to Shopify:
- Send an email announcement: Send an email to your existing customers announcing the migration to Shopify. Explain why you're making the change and what benefits they can expect from the new platform. Include a link to your new Shopify store so that customers can easily find it.
- Post updates on social media: Post updates on your social media accounts to let your followers know about the migration. Share some of the new features and benefits of your Shopify store, and encourage your followers to check it out. Use hashtags related to your business or industry to reach a wider audience.
- Update your website: Update your website to reflect the migration to Shopify. Include a banner or message on your homepage informing visitors of the change and providing a link to your new store. Make sure all links to your store are updated to reflect the new Shopify URL.
- Provide customer support: Make sure your customer support team is aware of the migration to Shopify and is prepared to help customers who have questions or issues. Provide them with training and resources to ensure they're able to assist customers effectively.
- Offer incentives: Consider offering incentives to customers who make purchases on your new Shopify store, such as discounts or free shipping. This can help encourage customers to make the switch and build loyalty to your brand on the new platform.
- Monitor customer feedback: After launching your new Shopify store, monitor customer feedback closely. Pay attention to comments and reviews on social media and review platforms, as well as feedback from customer support interactions. Use this feedback to make improvements and address any issues that customers may be experiencing.
Problems when transferring your online store manually
When migrating your WooCommerce store to Shopify manually, there are several potential problems you may encounter during the import process. Here are some common issues and how to address them:
- Data compatibility: Some data from WooCommerce may not be compatible with Shopify, causing errors or data loss during the import process. To avoid this, ensure that you have a thorough understanding of the data types that can be imported into Shopify and double-check the format of your data before importing it.
- Broken links: When you migrate from WooCommerce to Shopify, some of your links may break due to differences in the URL structure. To fix this, you can set up URL redirects in Shopify to redirect traffic from the old URLs to the new ones.
- Missing images: If your WooCommerce store has images hosted on a different server, they may not be transferred to Shopify during the import process. To fix this, you'll need to manually upload the images to Shopify and link them to the appropriate products.
- Variants and options: Shopify and WooCommerce have different systems for handling product variants and options, which can cause issues during the import process. Make sure to carefully review your product variants and options after importing them to ensure they are accurate and complete.
- Shipping and tax settings: WooCommerce and Shopify have different settings for shipping and taxes, which can cause discrepancies during the import process. To address this, make sure to review your shipping and tax settings in Shopify and adjust them as needed to match your WooCommerce store.
By taking the time to carefully review your data and settings before and after importing, you can avoid these common problems and ensure a smooth transition from WooCommerce to Shopify.
Why do you need to migrate from WooCommerce to Shopify?

While WooCommerce is a powerful e-commerce platform with many great features and customization options, it may no longer work for you.
Firstly, WooCommerce requires a lot of technical knowledge and manual maintenance, which can be time-consuming and challenging for business owners who are not familiar with website development. This can result in additional costs and delays for updates and fixes.
Secondly, while WooCommerce has a large community of users and developers, it can be difficult to find reliable and compatible plugins and extensions for specific business needs. This can result in compatibility issues and limitations for the store's functionality.
Finally, as your business has grown and you need a more scalable and streamlined platform. Shopify offers an all-in-one solution with easy integration, a user-friendly interface, and excellent customer support.
Top 3 extensions to migrate from WooCommerce to Shopify
There are various extensions that you could rely on to perform your migration. In case you prefer using extensions to other methods, we have mentioned here the top three extensions to help you migrate data to Shopify from WooCommerce.
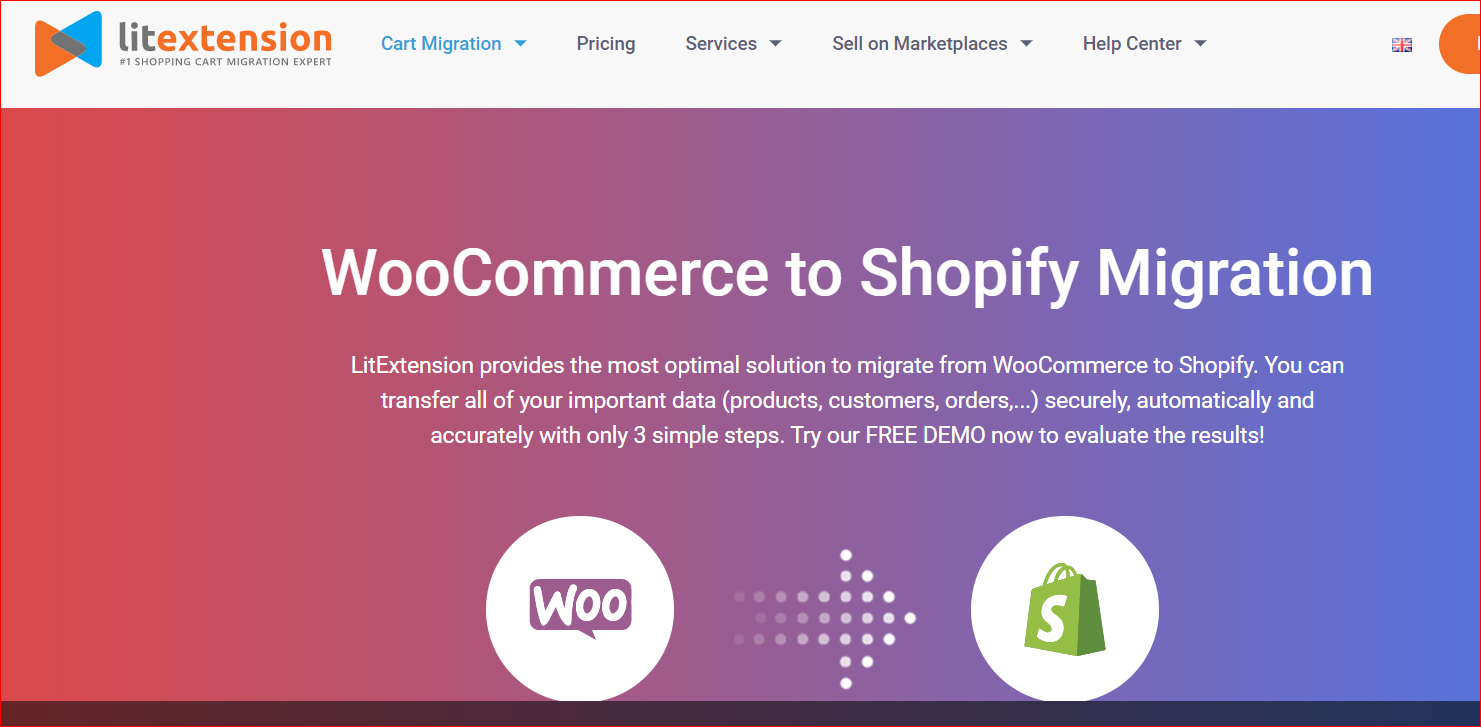
1. LitExtension
LitExtension offers you the most effective migration solution in which you could transfer everything from customers, orders to products automatically and securely. So, if you are relatively busy or not good at migration, let this extension do it for you.
Main features
-
Offer efficient all-in-one services for migration
-
Come with premium-quality migration with charging low cost
-
Perform the WooCommerce to Shopify migration process quickly and provide essentially convenient customization
-
Help you save time as well as minimize efforts
-
Have a dedicated and willing support team with 24/7 services to cope with your concerns through email, live chat, phone, or ticket
Pricing: Start at $89
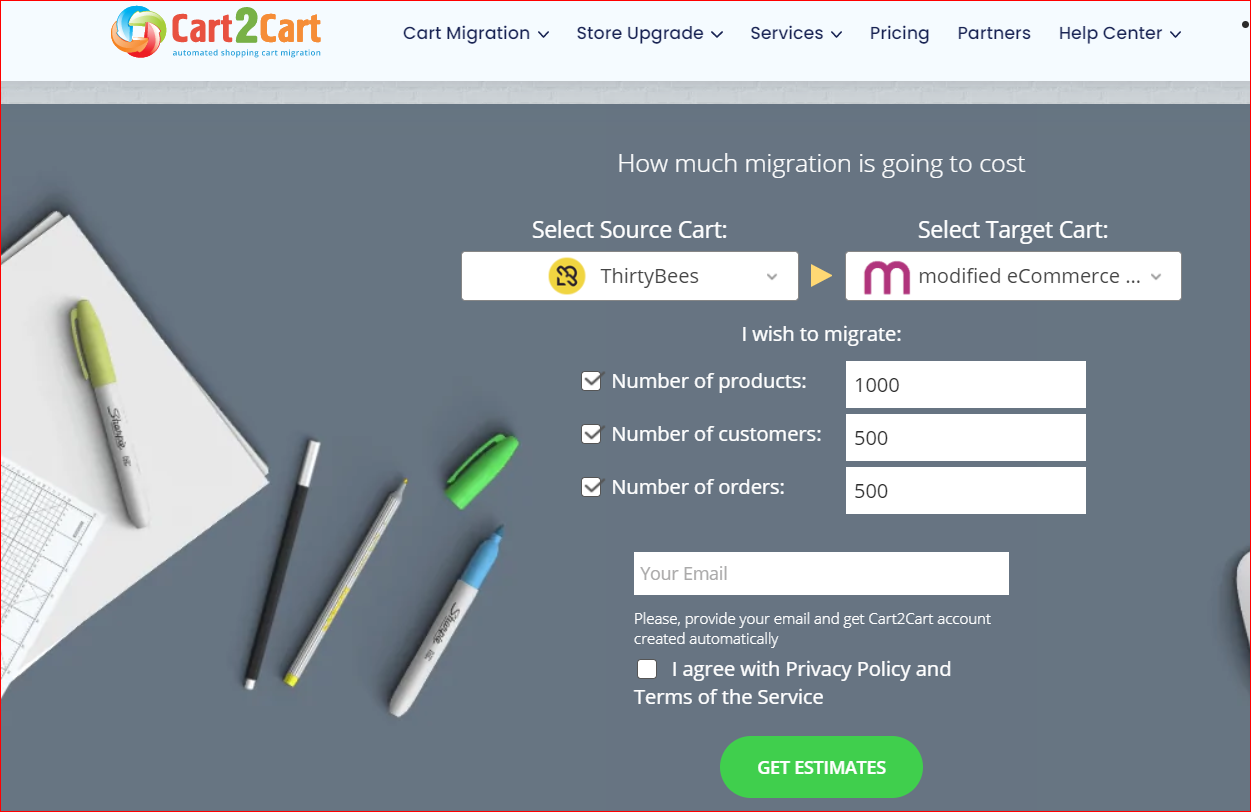
2. Cart2Cart
With Cart2Cart, everything becomes simpler. As one of the top-rated eCommerce migrating tools to support you to import the WooCommerce data to your new Shopify within a minute. Furthermore, it also assists you in importing products, customers, and orders automatically and completely without needed programming skills. The data can be transferred error-free and fast.
Main features
-
Get the data transferred accurately and efficiently
-
Come with one convincing site with good references as well as an effective calculation tool
-
Provide superb services
-
Offer step-by-step instruction throughout the process of migrating data
-
Supply competitive pricing while having professional help
Pricing: Start at $69
3. Ablestar WooCommerce Importer
As its name indicates, Ablestar WooCommerce Importer saves your time by importing orders and products to Shopify from WooCommerce quickly. It is such an awesome method that you could have an opportunity to test out one new platform and migrate your existing store. Moreover, you could also get your links of account activation generated for customers. Creating URL redirects helps you deal with broken links as you transform to Shopify.
Main features
-
Import your products variants, images, descriptions, and categories painlessly
-
Transferring customer data to Shopify without deleting the history of their order
-
Export the Product Reviews
-
Quick and effective service
Pricing: Start at $49.99
WooCommerce to Shopify migration: FAQs
- If you use a migration app: Everything is super simple. All you need to do is enter the required fields. The app will do the rest of the work for you.
- If you migrate manually, you need to export data as CSV files and import them containing product data, customer data, etc.
Whether you should move from WooCommerce to Shopify depends on your specific needs and goals.
Shopify offers several advantages over WooCommerce, including easier management and maintenance, faster website speed, and more intuitive design options. If these factors are important to you and you are willing to pay the monthly fees for Shopify, then it may be a good idea to make the switch. However, if you have already invested a significant amount of time and money into WooCommerce and are satisfied with your current setup, it may not be necessary to move to Shopify.
Conclusion
That's basically how to migrate from WooCommerce to Shopify in a nutshell. Although manual migration may appear to be the cheaper option, it can be quite time-consuming and require technical know-how to ensure a successful transfer. Conversely, utilizing a migration tool or service may be more expensive, but it can save you time and prevent potential technical problems.
So, if you're thinking about WooCommerce to Shopify migration for your ecommerce business, it's crucial to consider your budget, available time, and level of expertise.


