
How to Migrate from Shopify to WooCommerce

WooCommerce and Shopify are great eCommerce platforms to generate massive revenue for your online business. Both of them come with highly advanced and unique features to adapt to the worldwide market. However, there are some cases where you are fond of switching platforms from one to another. The reason is that the other platform will provide options that fit your needs and requirements.
If you want to sell on WooCommerce and are seeking a simple way to change between these two platforms, it might be a complicated and hectic problem to overcome. It is something that you are not keen on performing each week or each month. In case you have no technical knowledge, do worry! Follow us with this piece of article and we will guide you on how to migrate from Shopify to WooCommerce.
Why do we need to migrate from Shopify to WooCommerce?
WooCommerce is such a fantastic platform for boosting your business. So, spend some moments to figure out why we need to migrate to WooCommerce from Shopify.
-
Get more customizations and flexibility options: WooCommerce seems to provide more flexibility than Shopify, such as the ability to access myriad plugins and being an open-source as well as a self-hosted platform.
-
Be able to use different payment gateway: While you have to use the service of Shopify Payments, you could use various payment gateways without any additional fee.
-
Control pricing better: With WooCommerce, you do not need to pay for unwanted functionality
How to Migrate from Shopify to WooCommerce
Now, let’s get started to know how to perform this type of migration. Here, we have come up with three ways to help you migrate from Shopify to WooCommerce. So, read it carefully and select the one that fits you.
1. Manual migration
The first way to implement this migration is to do it manually. There are some basic steps you need to follow to perform this manual migration successfully.
Step 1: Pre-migration
If you want to migrate to WooCommerce from Shopify, you need to have a WooCommerce account. So, how to install a site with WooCommerce? It is easy, right?
- Select hosting
First and foremost, selecting hosting is a vital step in running your WordPress on the self-hosted website. You are able to work with several hosting companies with the provision of pre-installs of WooCommerce, WordPress, and Storefront themes. Moreover, they also offer you some eCommerce-specific features, including one dedicated IP & SSL certificate, aiming at keeping your store secure and protected.
To be more specific, you could approach such single sites as WordPress.com, SiteGround, or Bluehost. Or else, multiple sites like Pressable are also preferable.
- Install WordPress
Proceed to install your WordPress before getting your WooCommerce activated. Using a free software platform like WordPress has assisted you in laying a foundation to begin creating your site.
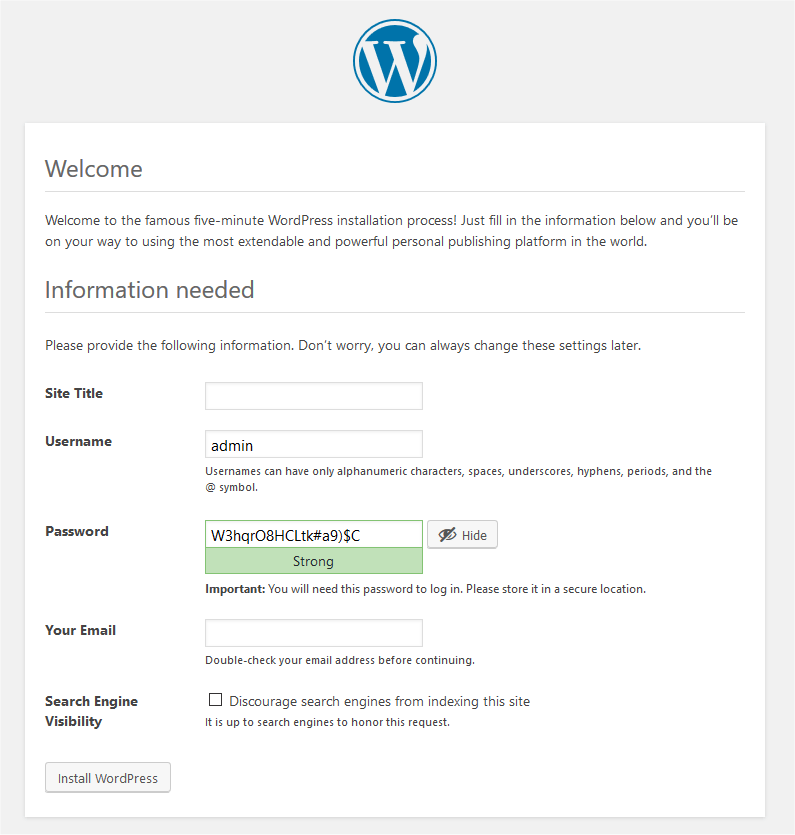
Various hosting companies come with the WordPress installation within one click. Hence, make sure that you should ask whether this option is available or not. If not, you could download it from the address WordPress.org. Next, install it.
- Get WooCommerce activated
As soon as your site runs, now your task is to set up WooCommerce functionality. You are able to access different methods to perform this activation.
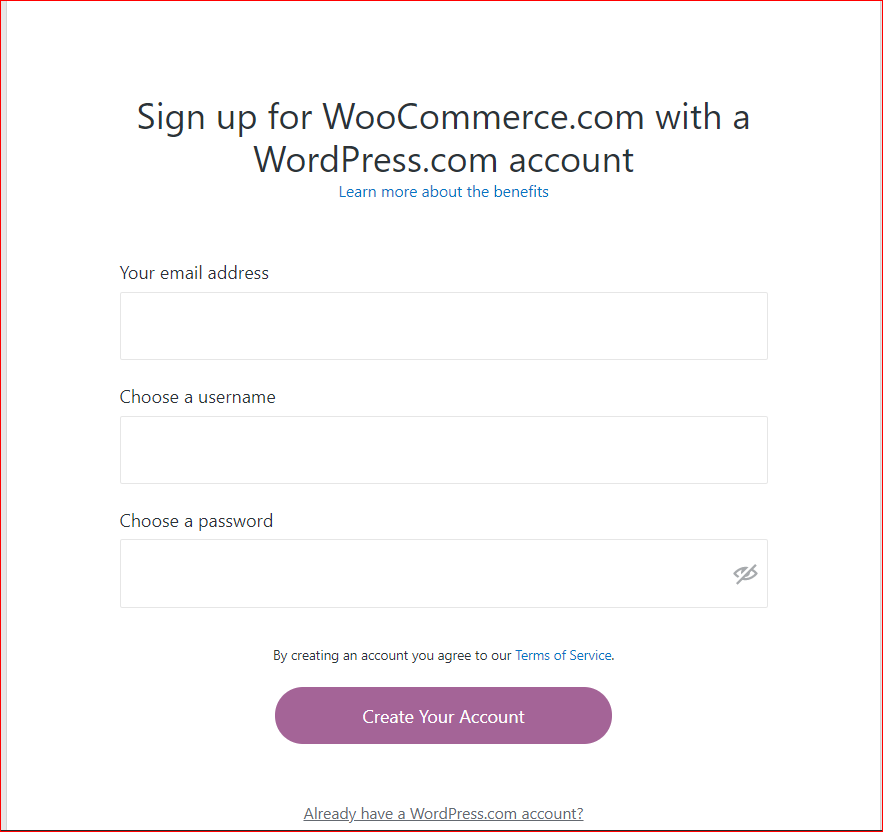
In the first way, you can choose to create an account for free on WooCommerce.com. You need to sign up for this account on WooCommerce.com as well as WordPress.com. To do that, the pre-installed solution that is assisted by one trust host can be selected. In case you have your WordPress website already, you can perform auto-installing WooCommerce.
In a second way, instead of creating a WooCommerce account on the website, you could install WooCommerce by downloading the plugin WooCommerce. Next, penetrate your site to access the section “Dashboard”, then click “Plugin” and choose “Add new” before hitting on the button “Upload”. Keep going by choosing your downloaded plugin to install and activate.
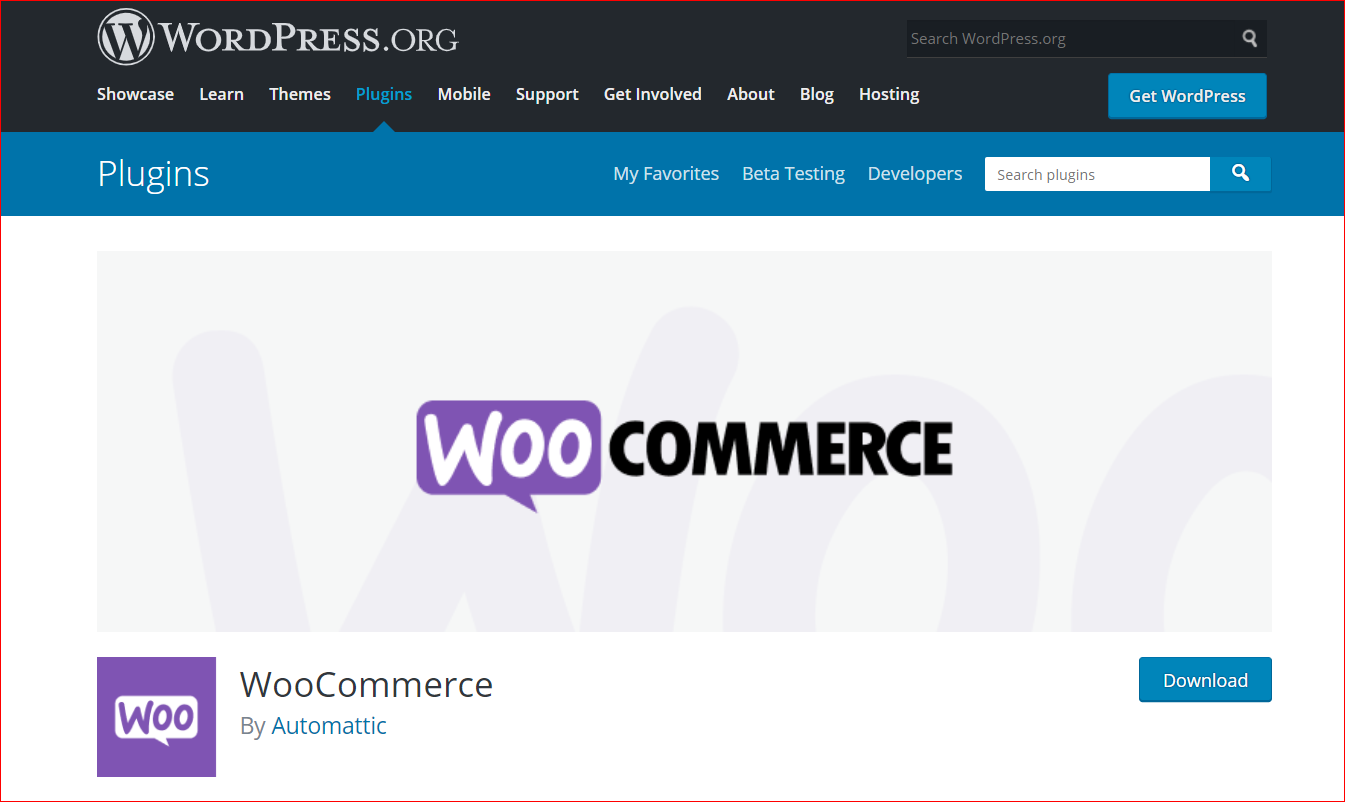
The last way in this article that you could use to activate WooCommerce is to search for this plugin from your own site. It is time to approach your website. Next, go to the section “Dashboard”, choose “Plugins” and click “Add New” to “Search Plugins”. Here, you could end up searching for “WooCommerce”. Once you have found it, click “Install”.
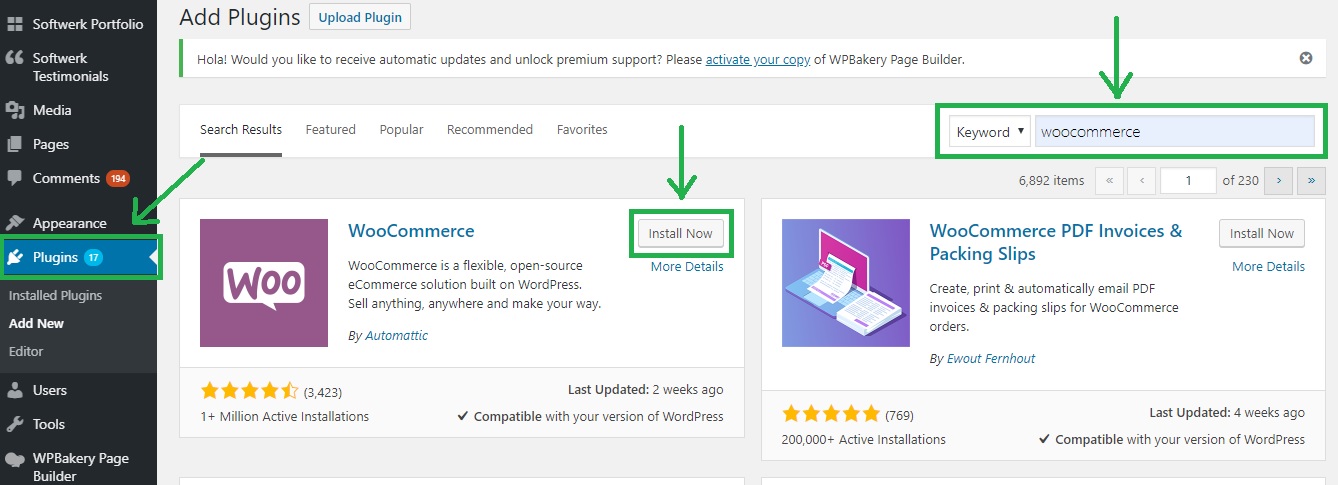
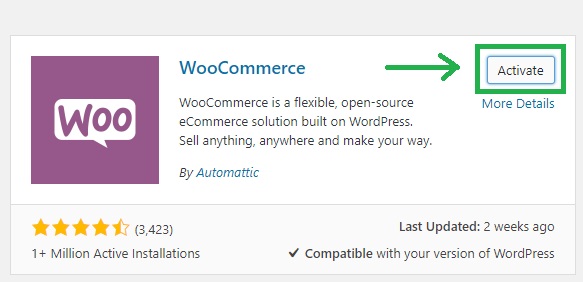
Next, it is a need to hit on the button “Activate”.
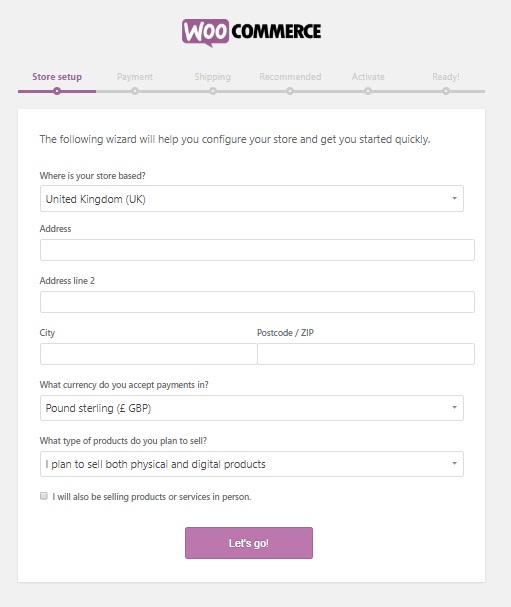
- Go with an initial setup
Here, you need to go through the setup wizard for your WooCommerce. After activating the WooCommerce plugin follow some basic steps as below to finish your initial setup. Spend some moments to fill in basic information as below:
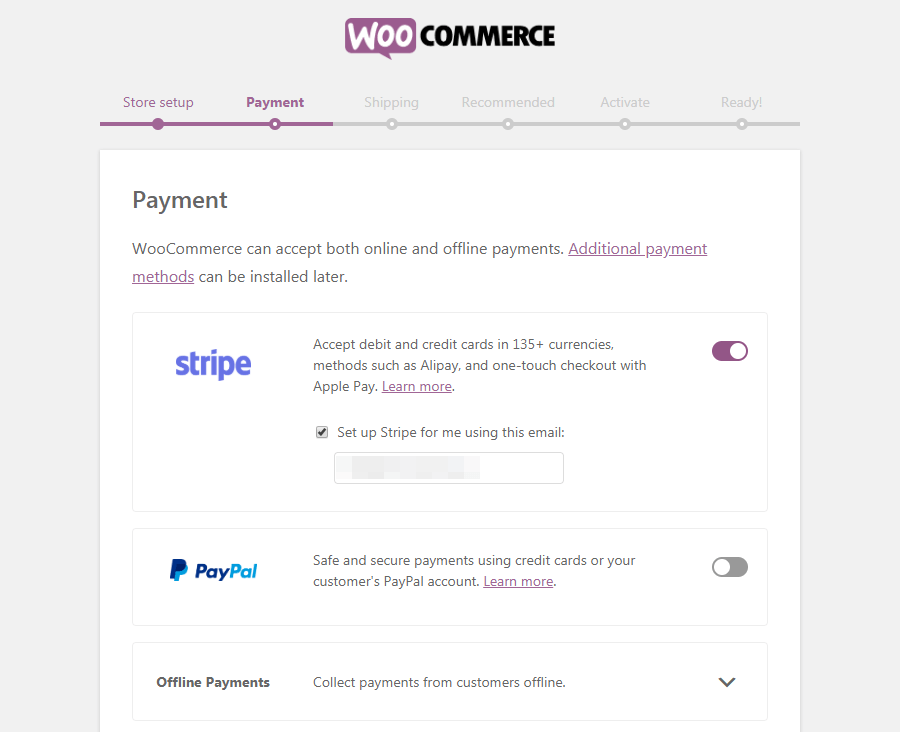
- Select the payment processors
An online store can not exist without online payments. In this step, you will make up your mind about what payment methods you will use.
- Customize the shipping options
It is time to set the shipping rate for your shipping zone.

- Review extra add-ons
Do not hesitate to work with some optional add-ons for your store.
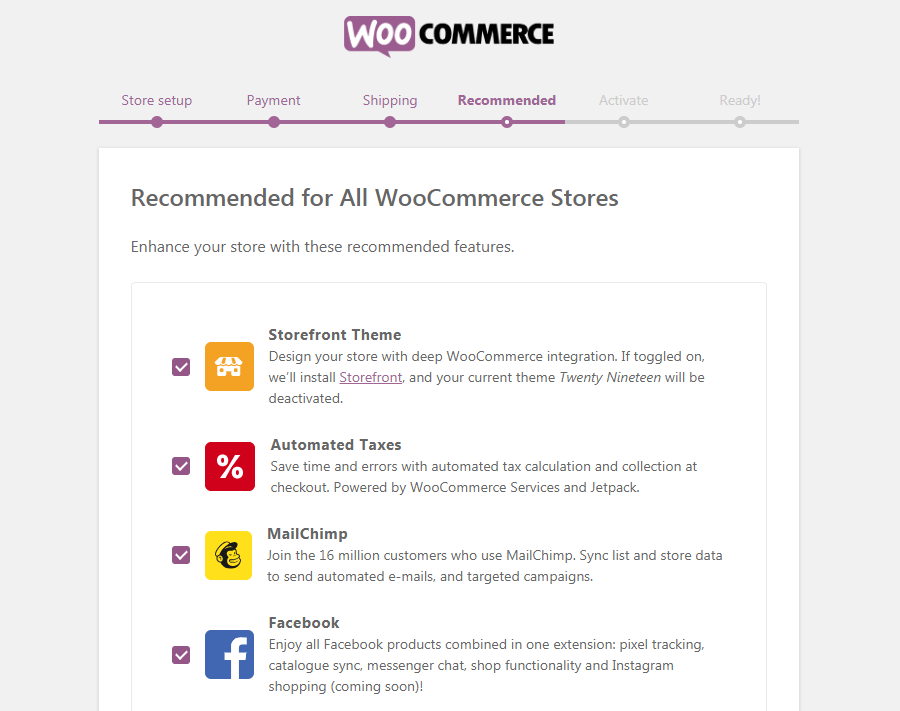
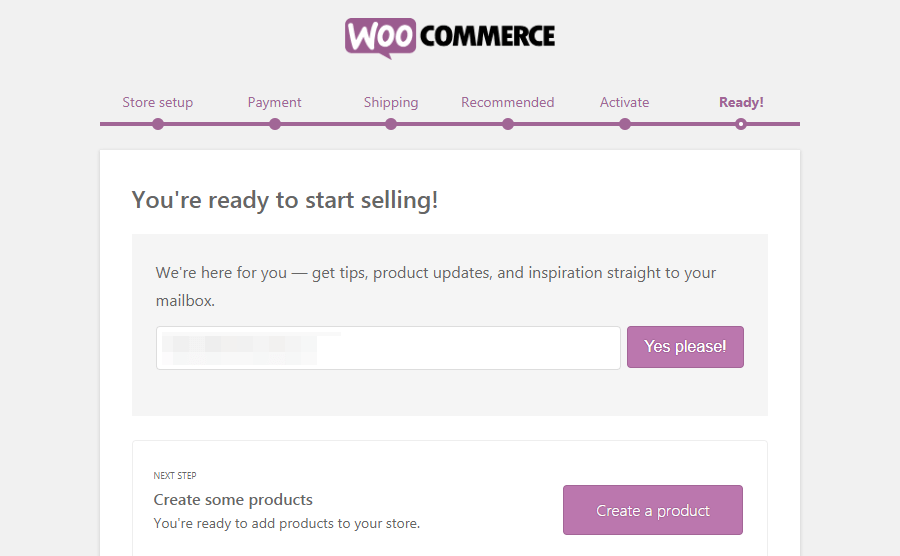
- Complete your setup process
Congratulations! You have now owned a WooCommerce store. Now, let’s keep going to implement the migration to WooCommerce from Shopify.
Step 2: Export Shopify’s CSV files
In the manual method, what you could migrate to WooCommerce includes products, orders, and customers. Shopify will allow you to export some CSV files that are then used for those three kinds of data. Move on to import these files to the WooCommerce store.
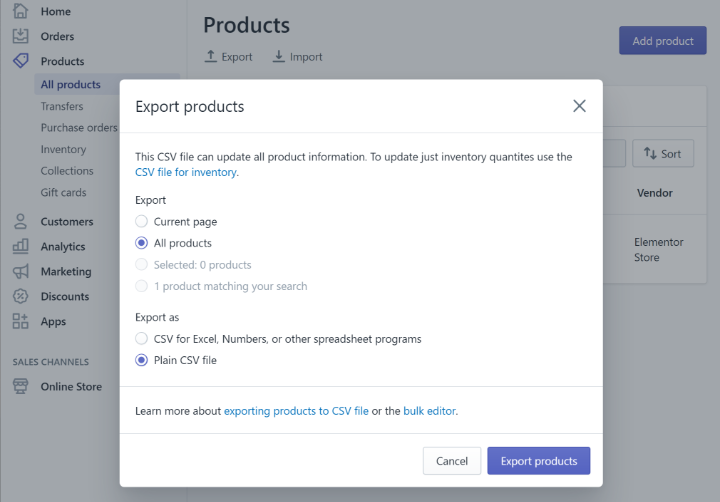
To begin with, exporting these CSV files of products, orders, and customers from your store on Shopify is a must. In doing so, you could go to your dashboard on Shopify, head to the tab “Products”. Here you could notice the button “Export”, hit on it.
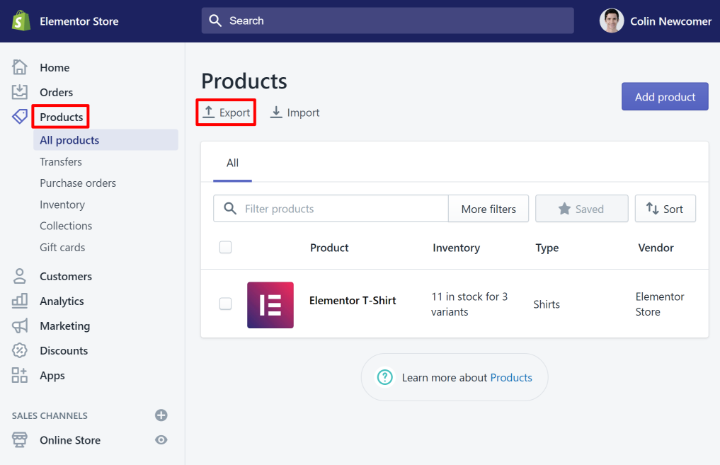
After that, Shopify sends you an email, coupled with one link where you can download this CSV file. When you are there, you have successfully finished exporting the CSV files for “Products”. And your next task is to repeat the similar process for exporting your customers as well as orders. It is a piece of cake to do so. Just head to the tabs “Customers” and “Orders in the dashboard on Shopify, then seek the option “Export”.
Step 3: Implement to import products
Besides exporting Shopify’s CSV files, you also need to import your products with the use of a tool for CSV import. In this case, you will apply the WooCommerce tool for the CSV importer to import the products from your Shopify.
To penetrate this tool, you need to head to the tab “Products” within your WP dashboard. Next, continue to hit on the button “Import”. See the below screen to deeply understand.
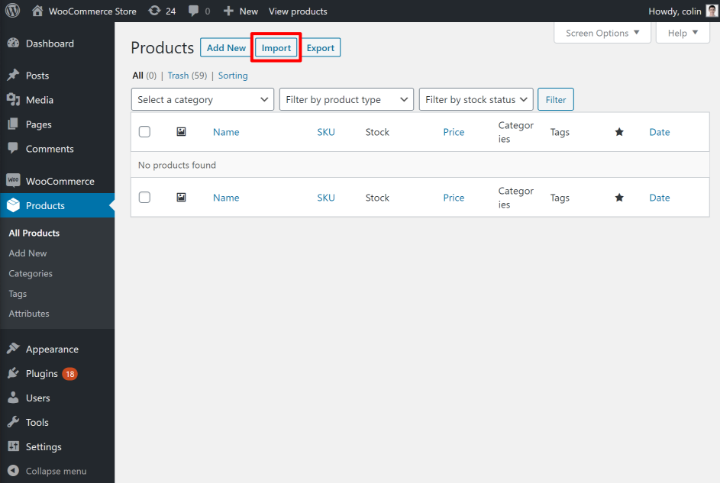
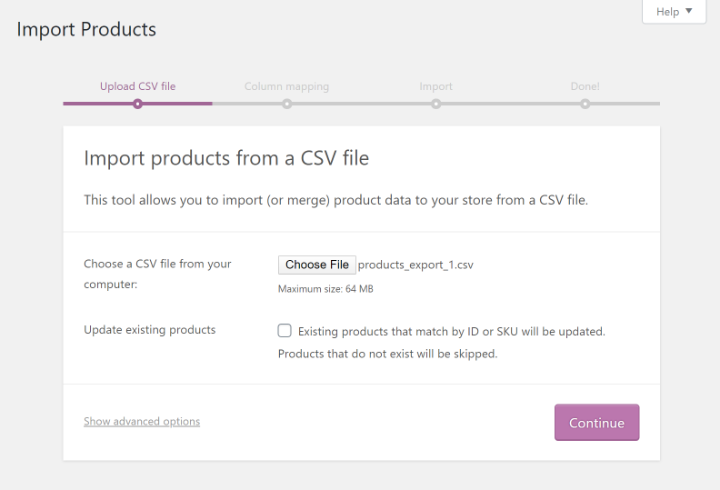
Then, you can notice another screen where your task is to choose a CSV file. This file is what you had gotten from your Shopify. Move on the click on the button “Continue” for further steps of migrating.
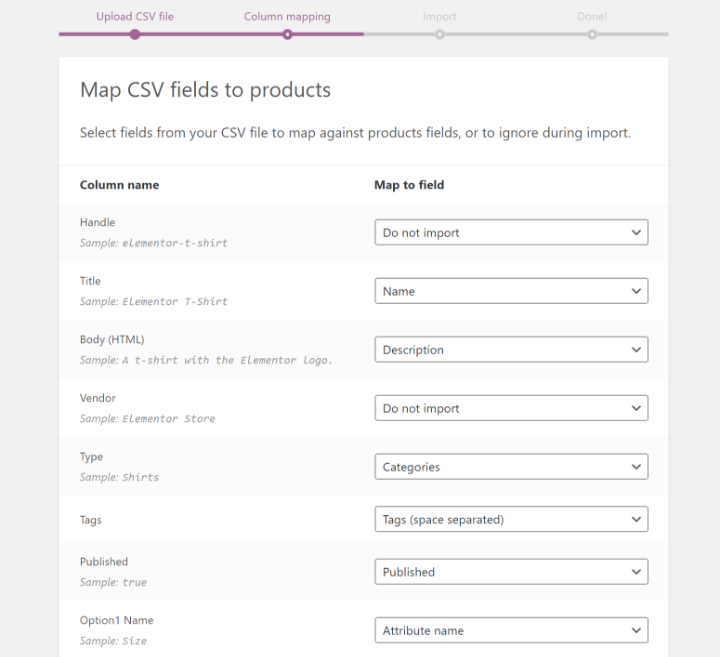
It is time to map which fields of your products on Shopify that you will associate with fields in the WooCommerce products. Moreover, skipping fields if you need is also what you could do then.
This tool will detect these fields automatically in almost all situations. However, you are still fond of going through as well as verifying manually that all things would be correct.
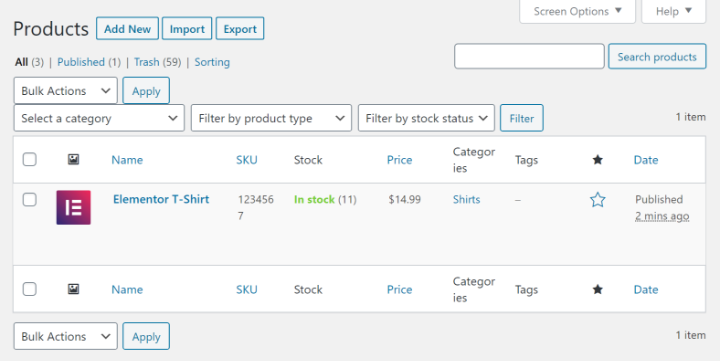
When you have done verifying every field that is mapped properly, it is time for you to choose the button “Run the importer”. Wait for a moment while WooCommerce will import your products. Then, you will notice one success message. By heading to your regular area “Products” in WooCommerce, you will see the imported products as the below screen:
Step 4: Implement to import customers and orders
Another not-to-be-missed step is to import your customers as well as orders. As WooCommerce does not come with an integral importer tool that can be used for importing customers and orders. Therefore, you should need support from a third-party WP plugin.
So, a solution for this case is to make use of the plugin Customer/Order/Coupon CSV Import Suite. Thanks to it, you could be able to perform a mass import of customers’ orders, and coupons to your WooStore. This importer provides the flexibility to tackle some types of import templates. In Particular, you are able to map the import column to your proper data in WooCommerce to build or merge orders, customers, and coupons. What is more, you could even import your data from myriad sources, including copy & paste, file path or URL, or the uploaded file.
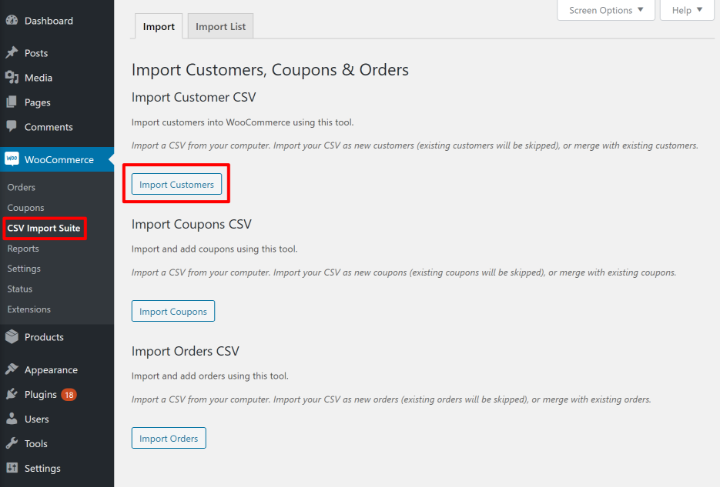
Once you have done installing and activating this plugin, you will approach “WooCommerce” and choose “CSV Import Suite” for accessing its settings.
Next, another task to do is to select the option that you wish to import. Depend on your need, you could click “Import Customers” if you wish to import the data of customers. Likewise, you could do the same with coupons or orders.
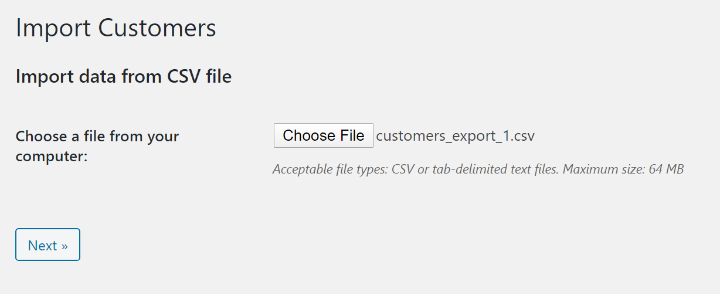
Proceed to the next step by selecting CSV as your file source. After that, you need to upload this CSV file you got from your Shopify.
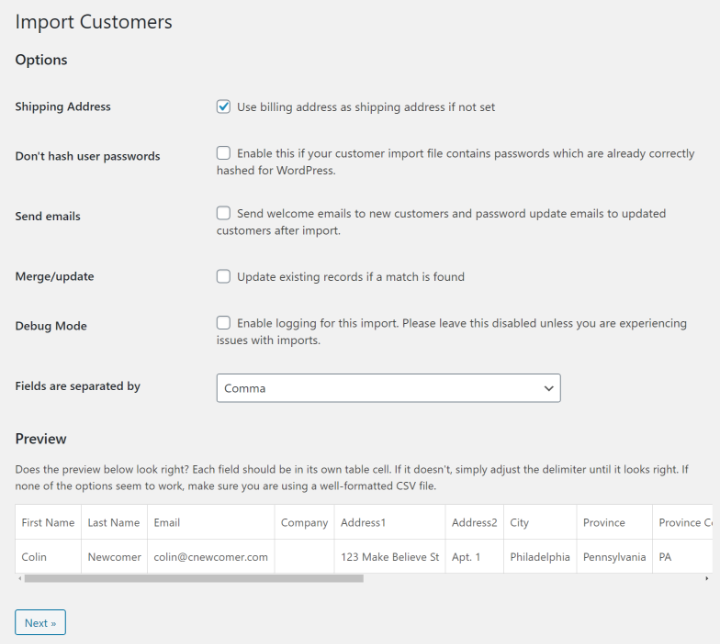
Next, another screen will open up. Here, you would get several settings to keep how this import will function in control and a preview of your import file’s data.
Let us take an example for you to understand easily. You could send welcome emails to your new customers. And when you have verified that all things are correct, your task is to hit on the button “Next”.
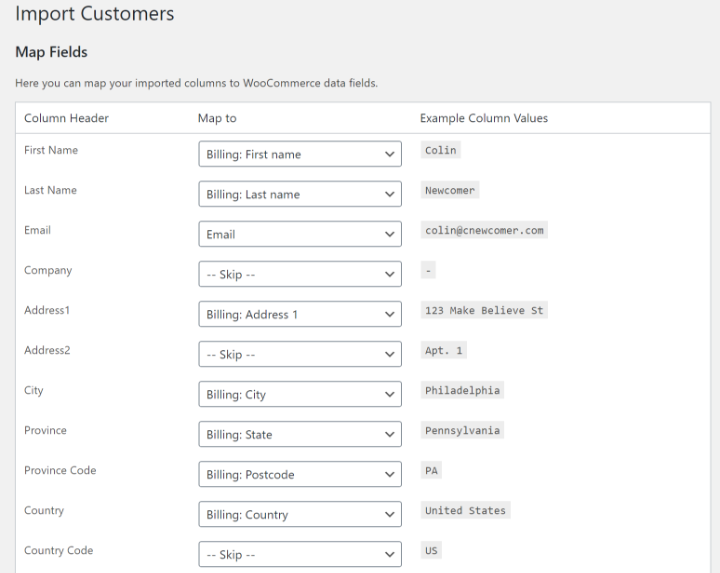
When you are here, you could obtain an interface in which you are allowed to map your data from Shopify’s CSV files to your data fields in WooCommerce. If there is any field that you do not apply to, just skip them.
As you have mapped everything successfully, you could now click on the button “Dry Run” to have one test import. When everything seems to be okay and meets your requirements, it í time to hit on a link named “Run a live import now” to implement this import.
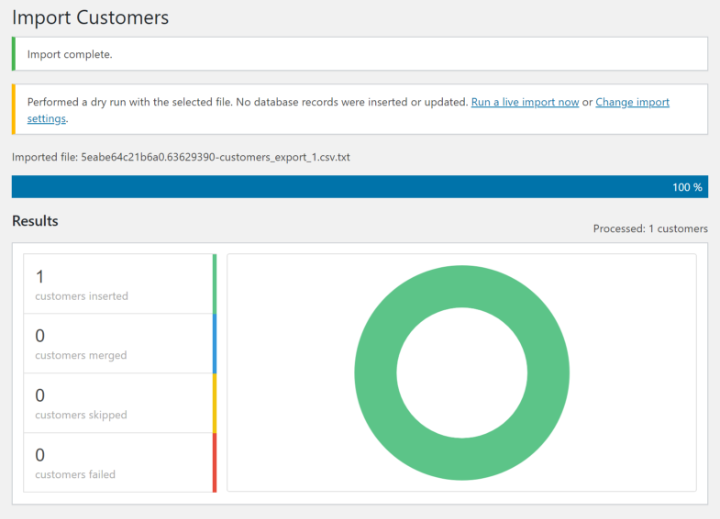
After that, you could see one success message. Furthermore, as you approach the area “Users”, you could also see the imported customers.
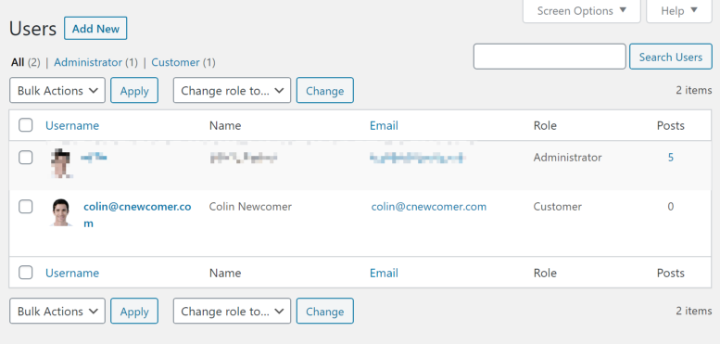
Besides importing customers, you could repeat the same process to apply for importing orders from your Shopify shop.
Step 5: Test as well as verify
Though you have been on the crest of a wave to import the Shopify store, from products, customers to orders. But in case, you are keen on testing everything, you could still make some manual modifications and adjustments. For instance, if you wish to modify the settings related to SEO for your category pages, products, and so on. Or in case you are missing such data as blog posts and coupons, you could test again to make sure everything will be correct and enough.
Migrating to WooCommerce from Shopify manually could be complicated as you need to precisely perform each step by yourself. So, in case you fancy a comprehensive migration, you are highly suggested to use a plugin. So, continue to the next steps to see how to execute this migration with the use of a plugin
2. Make use of Cart2Cart
Cart2Cart is famous for being a user-friendly tool to help you migrate your Shopify store to WooCommerce easily and quickly. It gives you an opportunity to export such data as products, orders, customers, or other eCommerce entities from your existing Shopify. By applying it, you could avoid destroying the relations between these two platforms as well as importing data to WooCommerce successfully.
Step 1: Create your Cart2Cart account
With Cart2Cart, you are able to migrate a lot of types of data, including products, customers, images, tags, manufacturers, product variants, product categories, coupons, orders, reviews, myriad languages, blog posts, URLs slug, passwords, taxes, and multistore.
Now, it is time to penetrate Cart2Cart, then hit on the button “Start Free Demo” to start your import process. Next, you will be taken to a page where you need to build an account for Cart2Cart. For sure, you need to have a Cart2Cart account before using it for migration. Some information involving full name, email, and password are prerequisites. In Particular, you could even use your Facebook account for signing up.

After signing up or signing in, you can encounter two options for your migration. The first is the option “Start Free Demo”. The other is the option “Get Migration Package”.

As soon as you finish creating your account, you may be required to click on “Start Free Demo” one more time for advancing.
Step 2: Set up the source store
This migration process begins with setting up the source cart and in this situation, the source store will be Shopify. Keep ahead by entering the Shopify store’s domain name. Along with that, it is also essential to enter the API key of Shopify. Check out the following screen to have a deeper understanding of what information you are about to fill in:
Now, you need to generate one API key. In doing so, you will navigate to the tab “Apps” in the dashboard of your Shopify.
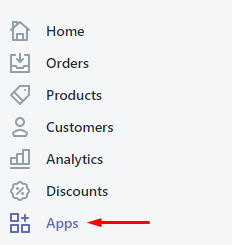
After that, your next task is to hit on a link with the name “Manage private apps”.
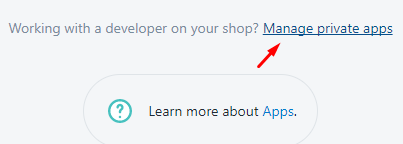
One important thing you should bear in mind is that to create this API key, you must be the Shopify store owner.
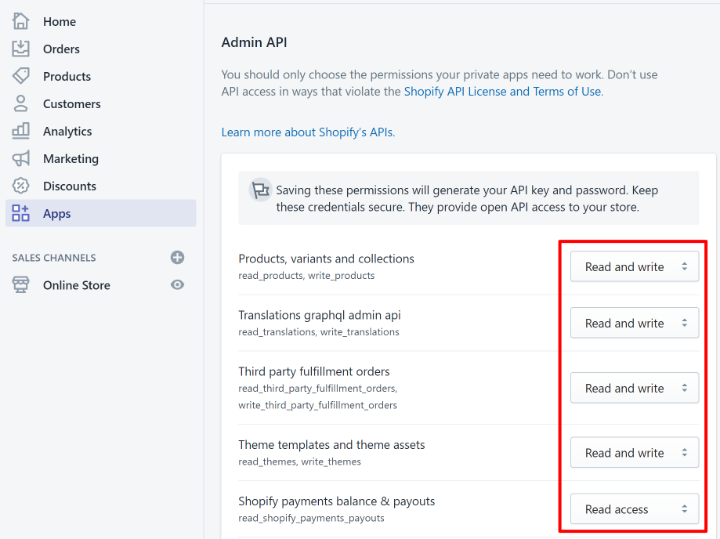
The next step entails clicking on the button “Create new private app” and giving your app’s name.

For instance, you could name it “Cart2Cart”. Proceed to navigate under the section “Admin API”. When you are at this step, you need to apply your dropdown for modifying every part to “Read & Write” (Otherwise, if there exists no choice for “write”, you could select “Read Access” only).
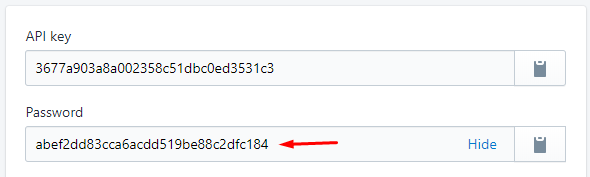
After all, you move on to select the button “Save” to create your password for the API. To see this password, you could go to the section “Admin Details”. This will be used later for adding to the plugin Cart2Cart.
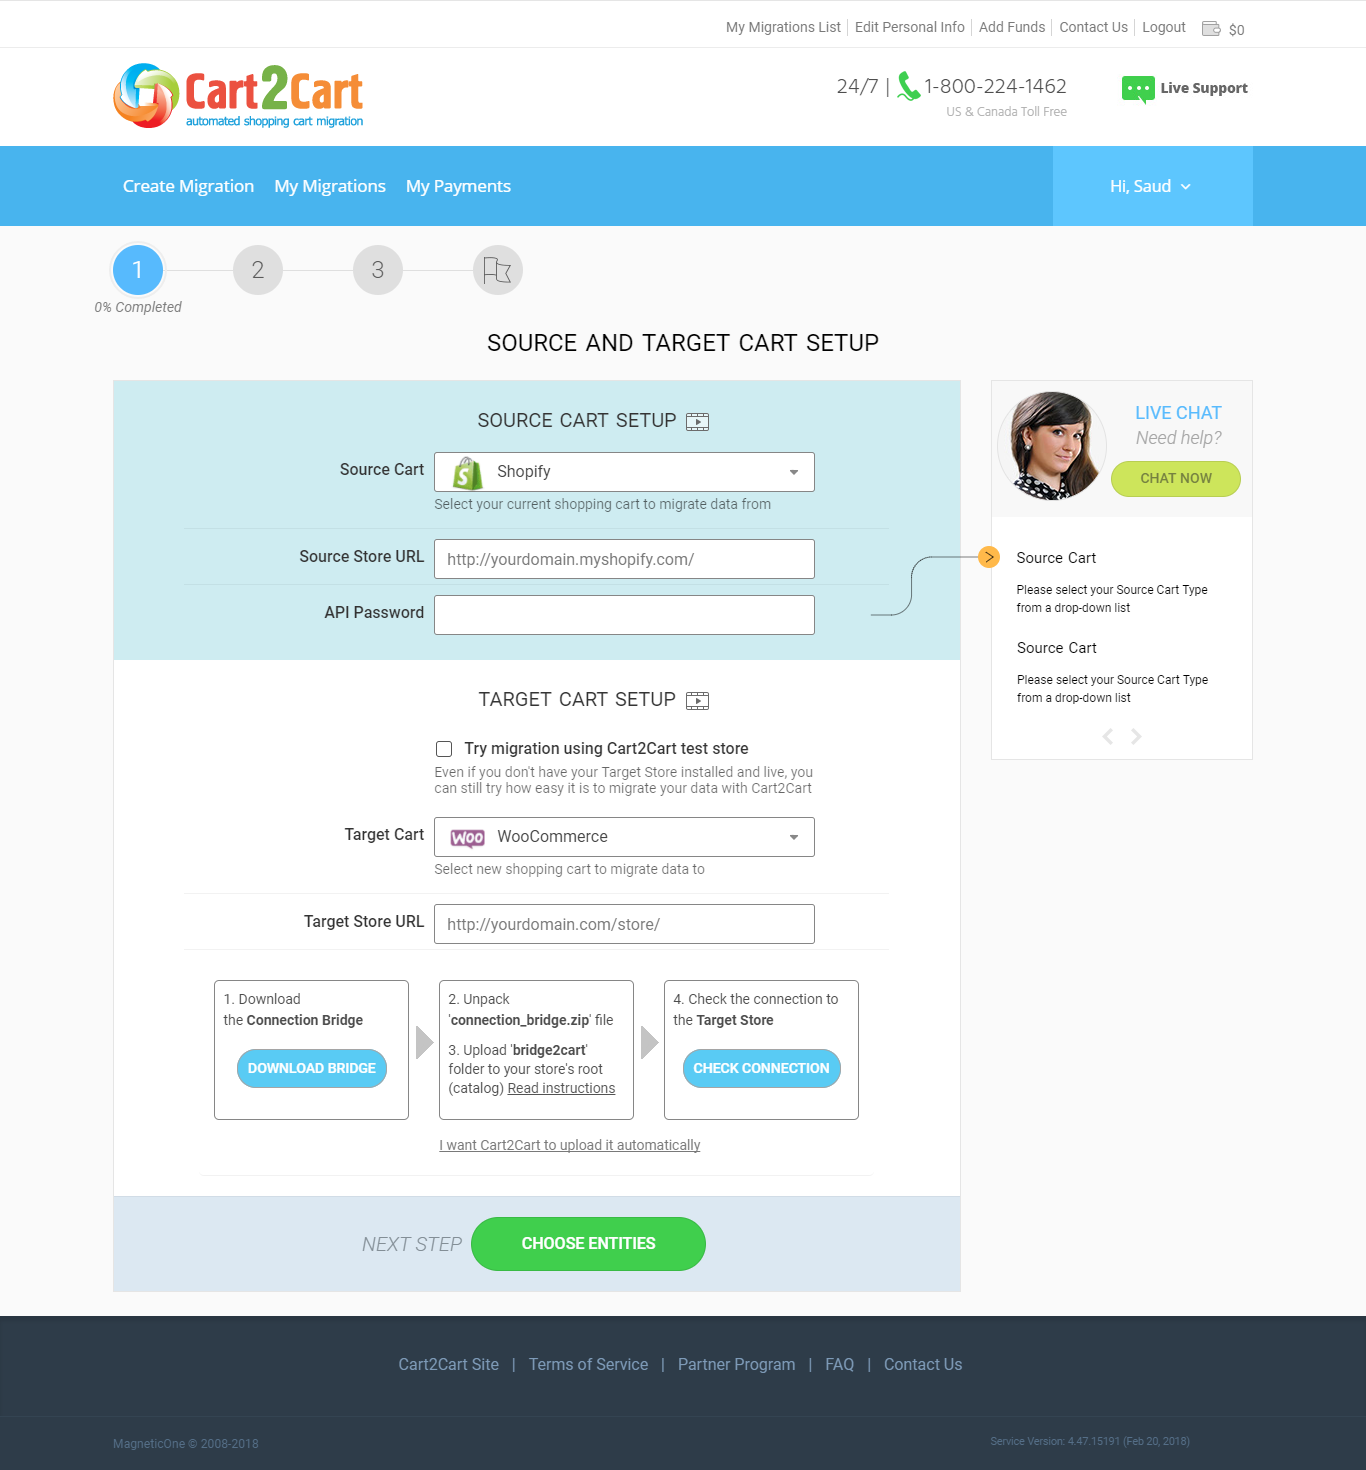
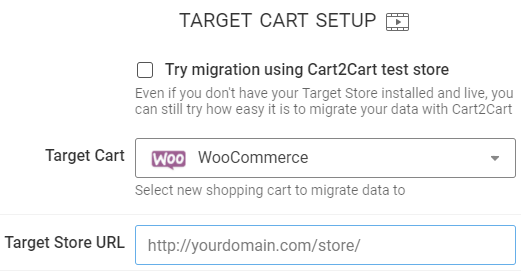
Step 3: Set up the target cart
Besides setting up the source cart, you also need to set up the target cart as well. This is a must to help you have an easier migration to WooCommerce from Shopify. In this migration, WooCommerce will be your target cart. To set it up, some information you need to enter is the admin URL of WordPress, the username of your admin account, and the password of your admin account. The below screen will clarify better what you are going to do:
After entering all the needed information, you will proceed to hit on the button “Choose Entities” for further migration steps.

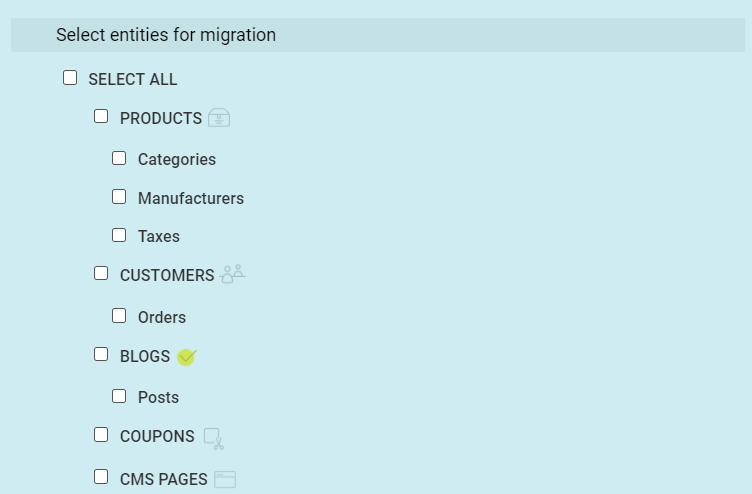
Step 4: Select content for the migration
This is a very important step, so pay attention to every detail here to see how and what kind of content you will select to migrate from Shopify to WooCommerce. You will see another page where you could select what data for migrating from the Shopify store. The data might include products, orders, customers, blog posts, coupons, and so on.
As soon as you have finished selecting your content, you will be offered several optional upsells by Cart2Cart. Let us take an example. Assume that you have several options to migrate the SEO URL, build 301 redirects, or preserve IDs of the order, this will be displayed as below:
Additionally, you also have a chance to get several options for mapping data, such as mapping the order status of your Shopify shop to the order statuses in WooCommerce. When you find everything okay, it is time to hit on the button “Start Free Demo” to run your sample migration.
Step 5: Complete your migration
The previous step requires you to wait a while for Cart2Cart to run the sample migration with the use of your data. What you could do is to have a preview of how the data of your Shopify store will look on the new WooCommerce shop. Nevertheless, it will not, in fact, make any change.
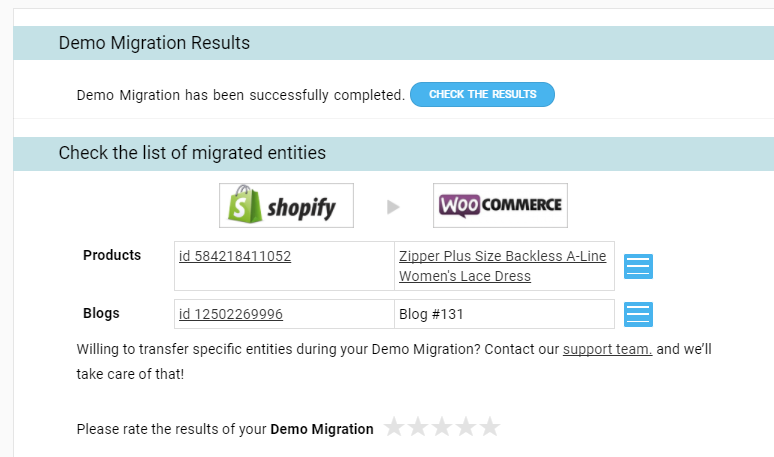
As above said, you have run your sample migration, now you need to complete this migration as well as make it live. To do that, you need to pay for any kind of service or associated add-ons you have used. In particular, the price can vary, depending on your store’s size. For instance, for this test, you need to pay $97.68 in total and this amount will include $59 for migrating blog posts.
3. Consult a migration expert
In case you are not fond of migrating data from your store yourself, it would be better if you consult a professional or expert to take care of such cases for you. One of the most popular consultants is WooExpert. WooExpert has a reputation for being hand-selected as well as high-quality developers working with WooCommerce on a regular basis.
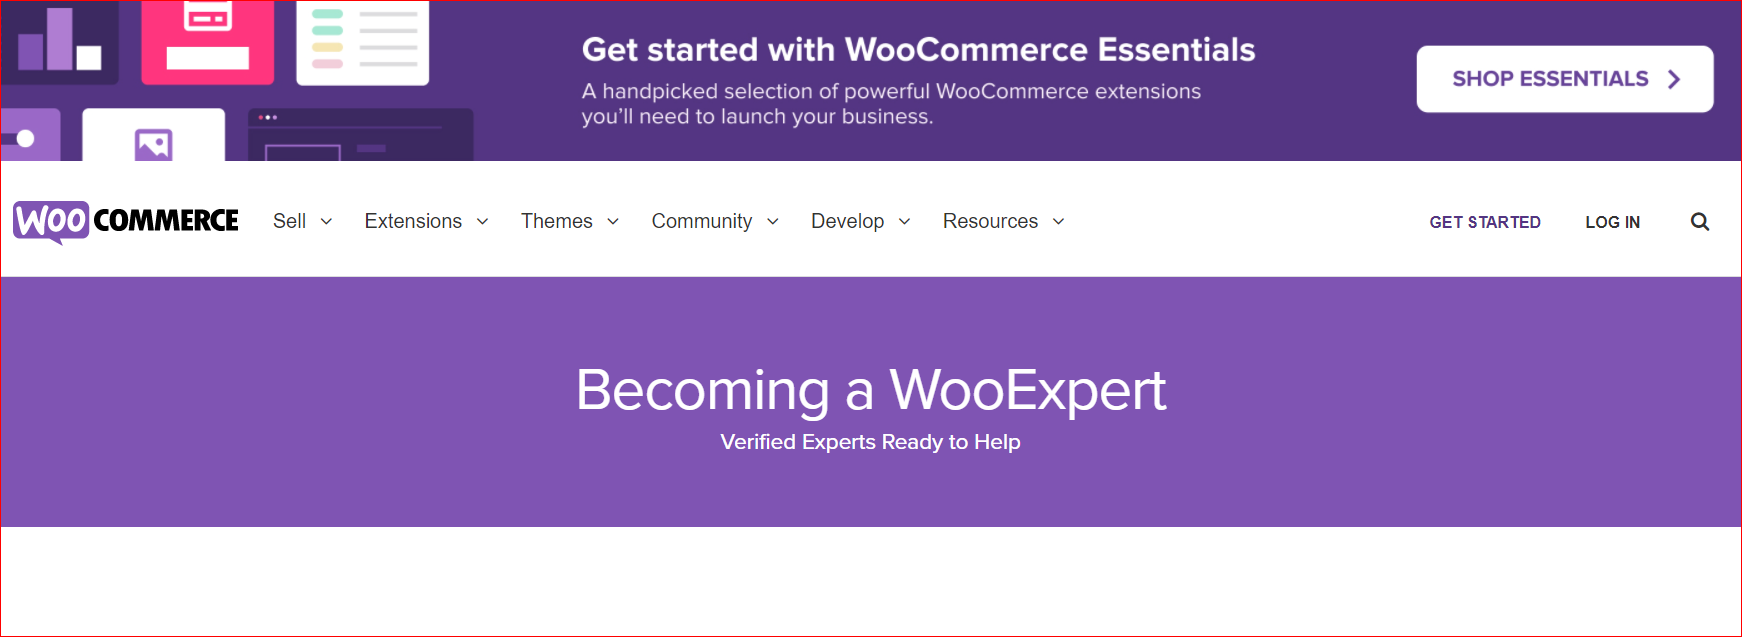
Thanks to using it, you could also be searched by filtering by country as well as viewing profiles for every expert that you could find their work sample and pricing or experience information. WooExperts offers verified experts who specialize in implementation, set up, along with development of sites. Therefore, customers seeking assistance should use this network to find a professional that fits their needs and requirements.
Top plugins to migrate from Shopify to WooCommerce
When it comes to switching between two eCommerce platforms, your task will become easier and more effective if you use a plugin. Besides saving quite much time, using the plugin even comes up with a provision of myriad additional adds-on. Hence, you could take your WooCommerce store to the next level. That is why we come up with this part to figure out the three best plugins for migrating from Shopify to WooCommerce.
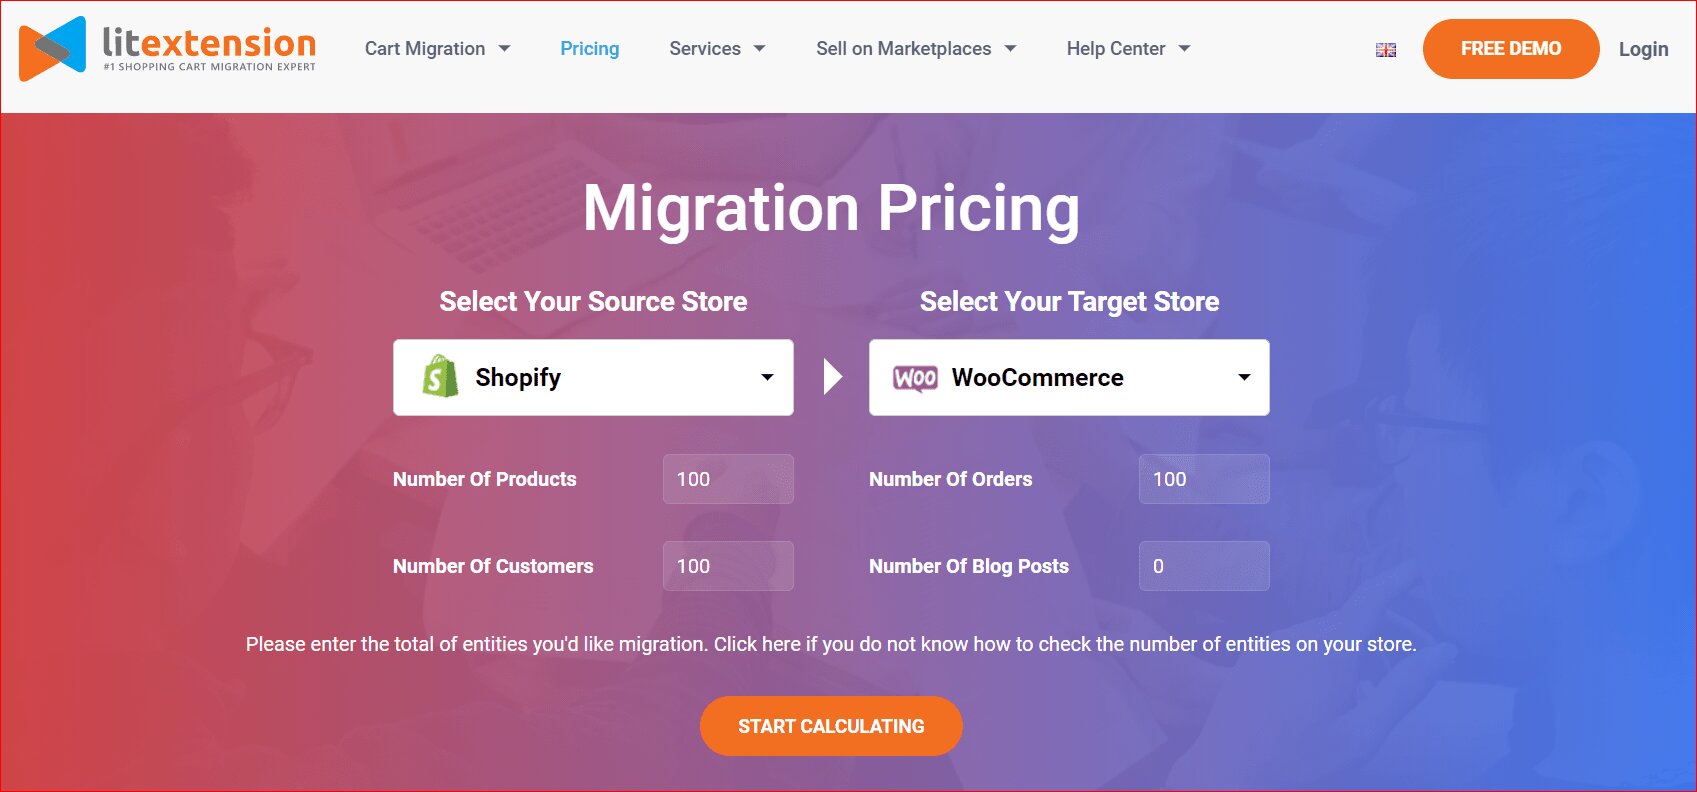
1. LitExtension
LitExtension is a world-known migration tool, and it also gains ever-increasing users thanks to its effectiveness for any migration process. The use of LitExtension could enable your migration procedure to be easier as it will walk you through every detail. Being specifically designed for easy-to-learn and intuitive ability, this plugin will transfer customer, order, and product data quickly.
Main feature
-
Migrate data easily, quickly, and accurately
-
Allow users to create product variants
-
Come with the ability for migrating images in product descriptions, blog posts, and categories to your Target Store from the Source Store
-
Let users change the product quantity
Pricing: Start from $59
2. S2W – Import Shopify to WooCommerce
Another not-to-be-missed plugin is S2W – Import Shopify to WooCommerce. It is one WordPress plugin that is simple to download as well as install. It will facilitate the migration process of your customers, orders, and products to WooCommerce from Shopify. What is more, you could also switch your product variants, so your pricing and inventory are also transferred.
Main feature
-
Transfer images and categories without having to organize and sort the data after migration
-
Be able to access various advanced features, including migrating shipping methods and zones, coupons, blog content, and tax information
-
Import product categories, images, variations, and galleries
-
Allow users to review their migration process within log files
Pricing: Start from $59
Conclusion
In short, Shopify might enable things easy for launching one eCommerce store. However, the more your store develops, the more flexibility you will need to boost your business. That explains why you should migrate from Shopify to WooCommerce to enjoy unlimited advanced features when it comes to WooCommerce and WordPress.
Thankfully, you could now implement this migration effortlessly with our step-by-step guide. Hope you could find this piece of article helpful. Do not hesitate to spread the word to those who are concerned. Keep following us for more great tips and tricks in the near future.


