
How to Integrate MailChimp with WooCommerce

Founded in 2001 by Ben Chestnut, Mark Armstrong, and Dan Kurzius, Mailchimp is a well-known name in the eCommerce industry. After 20 years of development, this company has become a favorite option of multiple merchants and is considered one of the best global software companies in 2021 by G2.
With Mailchimp, users will be offered adequate tools for marketing automation and email marketing. People no longer need to complete repetitive tasks for their marketing strategies manually, and this is the reason why WooCommerce store owners are advised to equip their store with Mailchimp.
But, how to integrate Mailchimp with their store?
Don’t worry, this post provides you with a detailed instruction to integrate Mailchimp with WooCommerce stores. More than that, you will be aware of the advantages of this integration as well as notes to remember.
Benefits of MailChimp and WooCommerce integration
Communicate with customers effectively: With Mailchimp, you can set rules for providing your customers with different content fitting their needs.
- Send customers personalized suggestions: By analyzing people’s shopping behaviors and demands based on their shopping history, Mailchimp can easily understand them and send them suitable product suggestions. It is a perfect way to help eCommerce stores to increase the rate of repurchasing with a small budget for marketing.
- Keep track of customers’ details easily: Mailchimp empowers users to keep track of everything in their marketing campaign, from emails, automation to social media, which helps them save time for switching between apps to see the data. Moreover, it provides them with detailed information of each individual customer from signing up in real-time.
- Increase lead conversion: Mailchimp is also an efficient assistant for increasing lead conversion rate. Via the marketing CRM in Mailchimp, your customers will be segmented into different categories and tags. From that, you can easily analyze and figure out the resolutions to turn each group of visitors into customers.
How to integrate MailChimp With WooCommerce?
Step 1: Download MailChimp
Open your Wordpress and choose Plugin. There, open Add new.
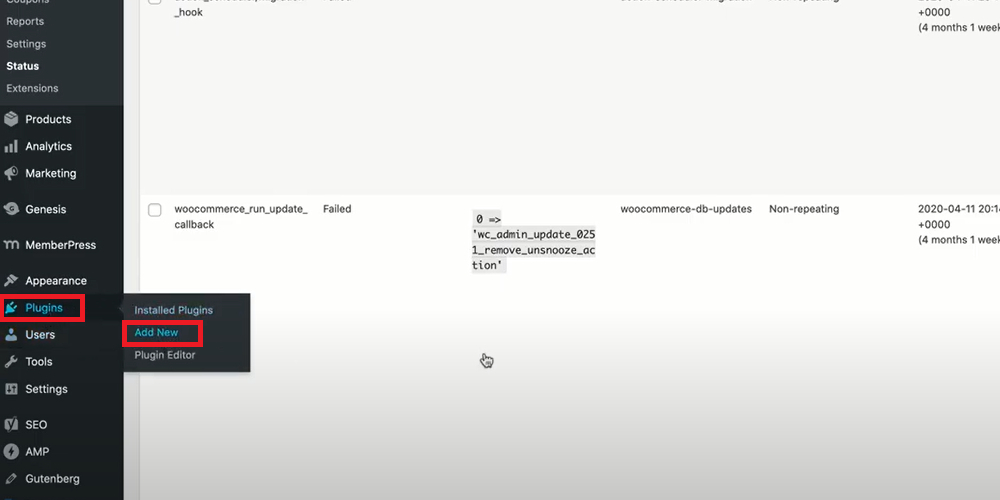
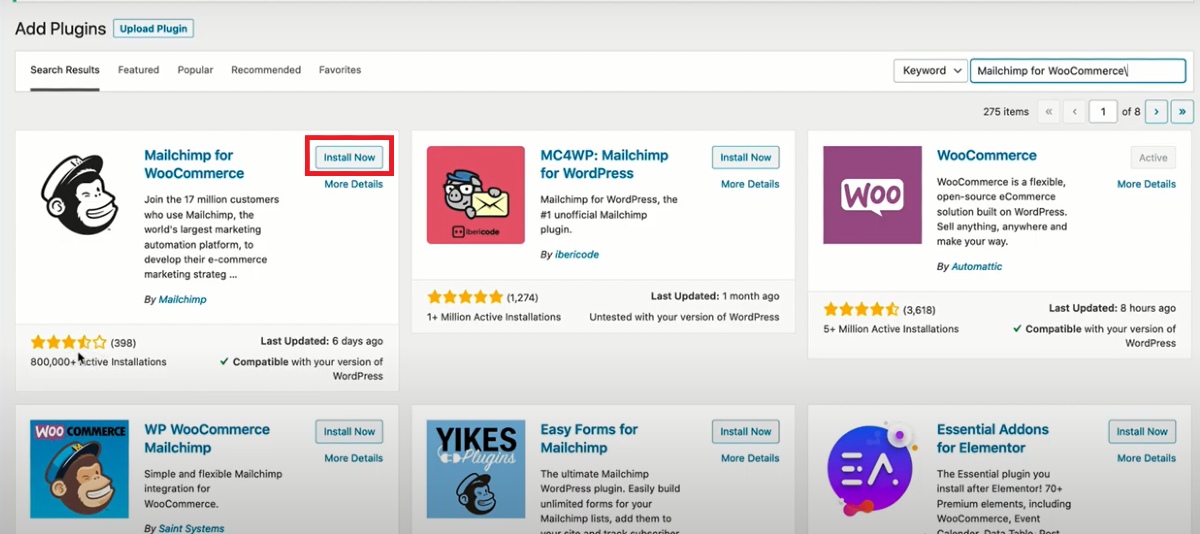
Then, type Mailchimp for WooCommerce. Click on Install Now button to download and install Mailchimp for WooCommerce.
Step 2: Activate Mailchimp
After installing Mailchimp for your Woocommerce, the install button will turn to Activate, click on it to activate Mailchimp for your WooCommerce store.
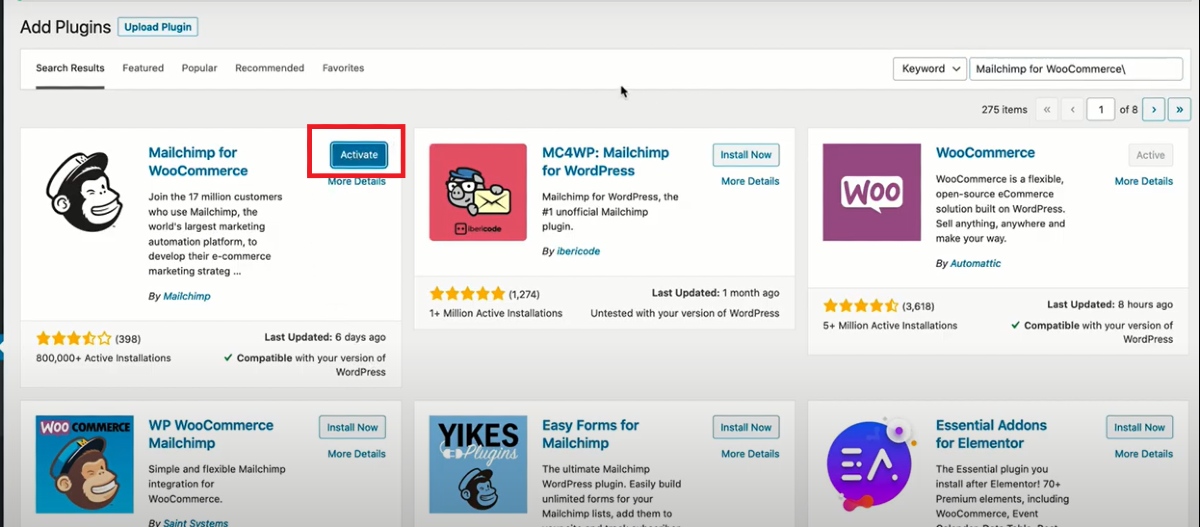
When the installation is done, select Activate Now and you can start using WooCommerce for your Wordpress account.
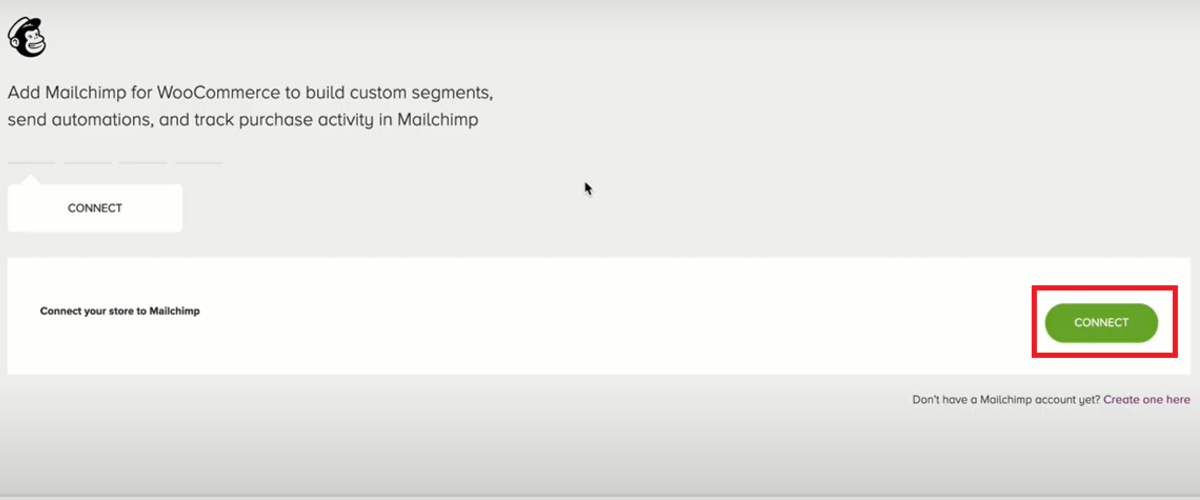
Step 3: Connect with your MailChimp account
After activating, click on Connect button to connect Woocommerce with Mailchimp.
Then, a new page will appear and you need to enter your Mailchimp account to connect Mailchimp with WooCommerce.
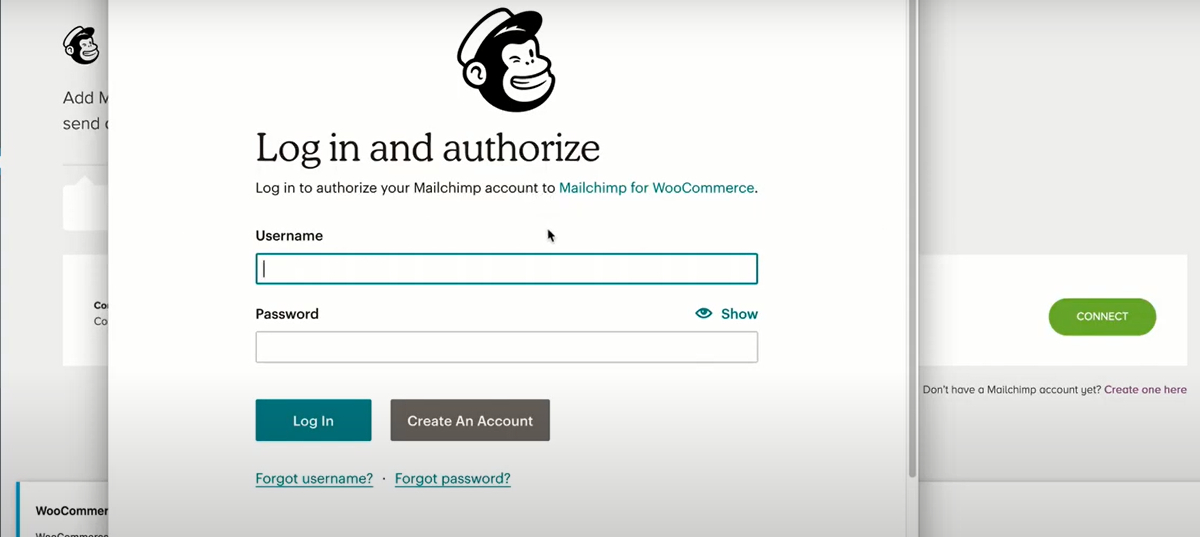
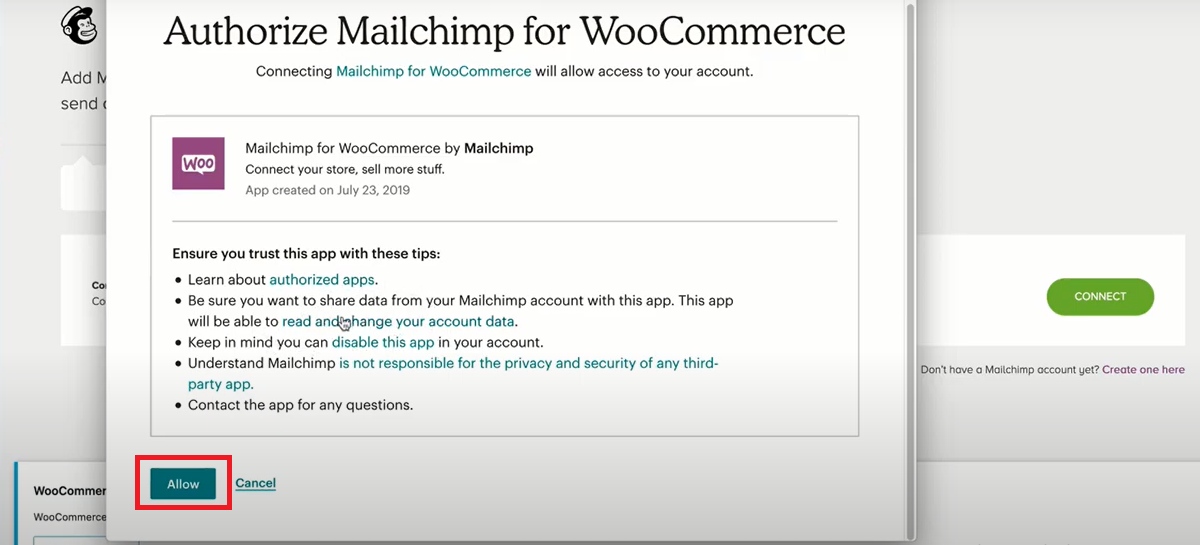
Then, enter your Mailchimp username and password to log in and select Allow to authorize the integration between two platforms.
Step 4: Add WooCommerce store settings
After allowing the integration, you will be redirected to a page where you have to fill in all the necessary information about your WooCommerce store, including:
- Name
- Street address
- City
- State
- Postal code
- Country
- Phone number
- Locale

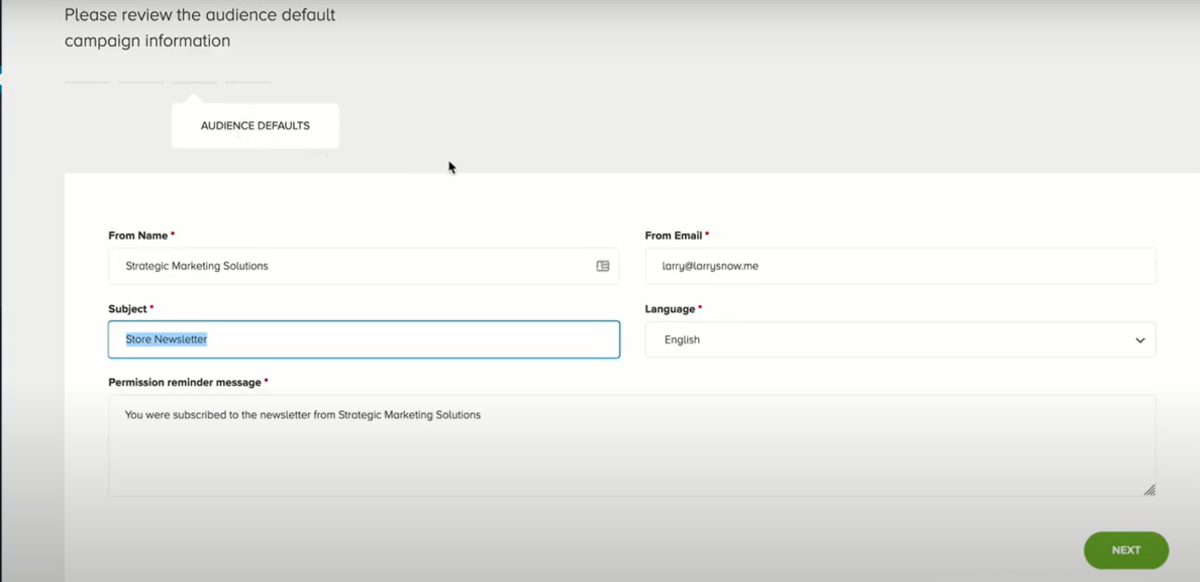
Step 5: Add WooCommerce audience settings
In addition to store settings, users are required to provide information about their audience to finish the integration process. They need to introduce about:
- Audience name (optional)
- From name
- From email
- Subjects
- Languages
- Permission reminder message
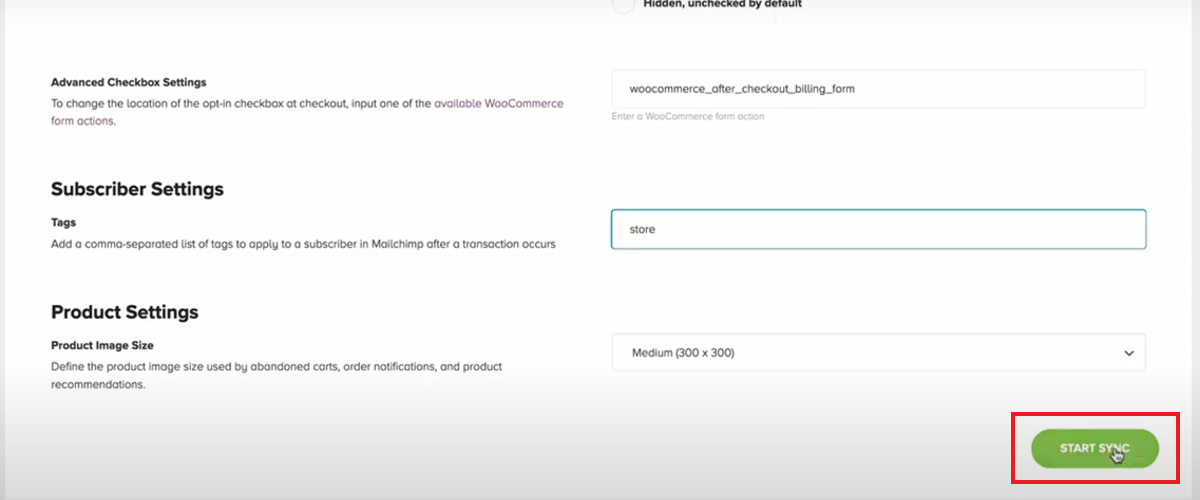
Step 6: Sync WooCommerce store with MailChimp
When you finish adding the data about your audience, click on Start Sync to synchronize your WooCommerce store with Mailchimp.
If you want to check the information, just open the Overview tab to see your progress.
Notes for users when using MailChimp for WooCommerce stores
- The WooCommerce plugin for WordPress needs to be no lower than PHP 7. Otherwise, your store data cannot sync with Mailchimp
- If order notifications automation is active in your store, don’t forget to deactivate it to avoid sending two same emails to customers.
- Mailchimp for WooCommerce version has to be 1.0.9 or later to live up to Mailchimp’s order notifications’ requirements.
- If you want to use pop-up forms and product retargeting emails, the version of Mailchimp for WooCommerce has to be no older than 2.1.20
- You can only send transactional and ad campaign emails to people who don’t subscribe to your email.
- If your WooCommerce store data doesn’t synchronize with Mailchimp, let’s try deleting and reinstalling it.
Final Words
Overall, it can be seen that Mailchimp is an effective assistant that helps WooCommerce store owners manage their store and build up a close-knit relationship with their customers. By following the six steps above, anyone, even the newbie to Wordpress can set up and connect Mailchimp with WooCommerce in minutes.


