
How to Set up and Integrate Gravity Forms in WooCommerce

Gravity Forms is a premium WordPress plugin allowing you to distribute, manage, and connect forms on your website. The plugin lets your customers select products and pay for them directly from the form.
With this in mind, in today’s article, we will give you comprehensive instructions on how to set up and integrate Gravity Forms in WooCommerce.
Let’s get started!
Benefits of integrating Gravity Forms in WooCommerce
Gravity Forms, as you may know, is a premium WordPress plugin that enables merchants to design sophisticated and front-end forms using its drag-and-drop form editor.
When integrating Gravity Forms with WooCommerce, you can enjoy numerous benefits:
- Gravity Forms assists event organizers in accepting online registrations and selling tickets to participants.
- Gravity Forms is a great option for online stores that require customers to fill out a form before making a purchase.
- If you offer takeaways, you can make things easier for your consumers by including a Gravity Order Form on your site.
- You have total control over how pricing appears on the front end of your store.
How to Set up and Integrate Gravity Forms in WooCommerce?
Step 1: Install and activate the Gravity Forms plugin
1. Install Gravity Forms plugin
First things first, click on this link https://www.gravityforms.com/ to install the Gravity Forms plugin in your WordPress store.
Remember that you have to purchase a license key in order to install the plugin.
The basic, elite, and pro licenses cost you $59, $259, and $159 respectively.
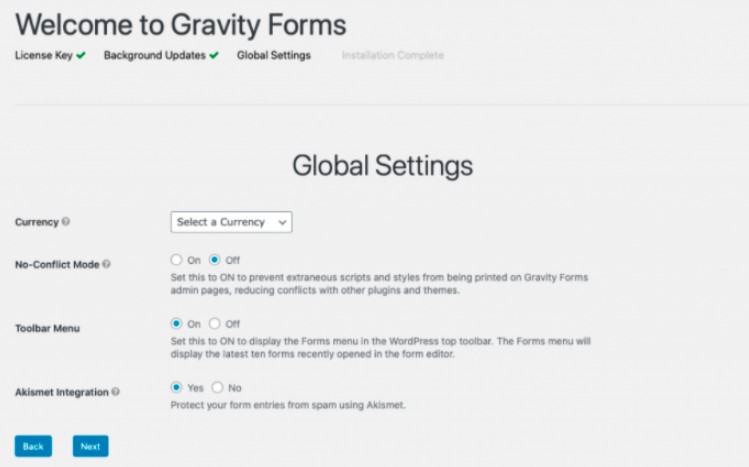
2. Choose your settings
After that, you need to choose your settings, including “Forms Menu” and “Form Entries”, “Global settings”.
Then, you can start creating a new Gravity form by clicking on the button Create a Form.

Step 2: Try creating a new form
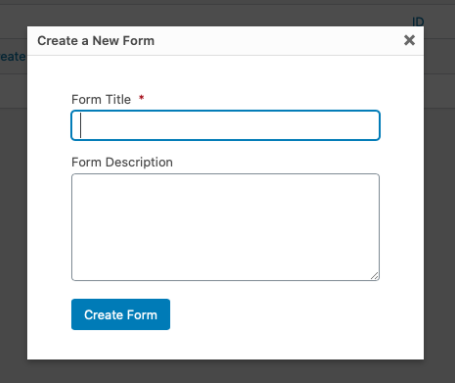
1. Click on Create A Form
To begin, click on the button Create a Form. Then, you need to add a title and description for this new form.
2. Select a field type
Next, you have to select a field type. There are numerous standard fields that you can choose from: checkboxes, hidden, HTML, dropdown, number, multi-select, page, radio buttons, paragraph text, single-line text, and section.
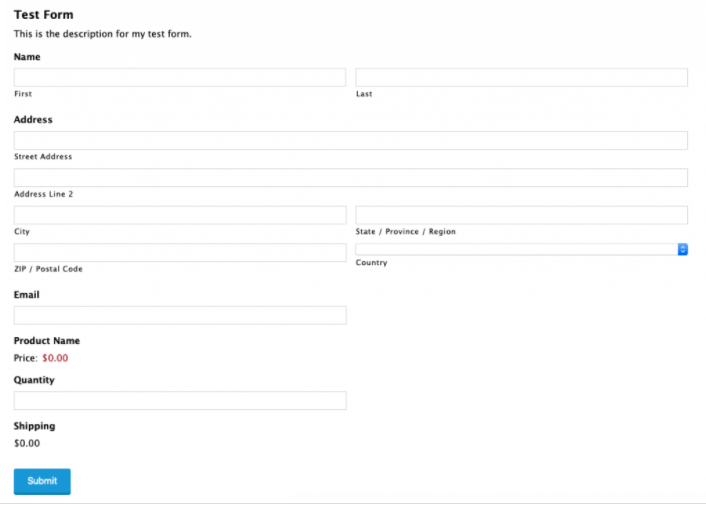
3. Customize each field
Following this, you need to click on each field, such as Data and Name, and then customize the details under each field. You can also move any fields to a new location to your preferences.
For example, when you customize the name field, you can add a description, change the labels, toggle first and last names on and off, edit the field’s appearance.
4. Click on Update
Once making all the necessary modifications, you can click on the button Update to finish building the form. It’s worth mentioning that you can adjust this form at any time you want.
Step 3: Integrate Gravity Forms with WooCommerce
1. Install and activate Gravity Forms Product Add-ons
To integrate Gravity Forms with WooCommerce, we’ll be using the extension called Gravity Forms Product Add-ons . So first of all, you need to install this extension and then activate it in your WooCommerce store.
2. Integrate Gravity Forms with WooCommerce
After successfully installing the extension, you can start using the extension to carry out the integration process. The extension will help you with everything during the integration process, so you just need to follow instructions from the extension. The instructions are pretty easy and you don’t need to manually configure any settings at all.
Final words
Gravity Forms is a useful plugin for any WooCommerce store, and with the Gravity Forms Product Add-ons, it can easily be integrated into WooCommerce stores.
Hopefully, our tutorial on how to set up and integrate Gravity Forms in WooCommerce brings you lots of helpful information.
If you have any questions, please feel free to ask us in the comment section.
Thank you for reading and we’ll see you in the next article.


