
How to Integrate Gravity Forms Product Add-ons in WooCommerce

Installing and customizing a shopping cart for your WordPress site can be a pain, especially if you own a small business or are just getting started with your blog and want to add an e-shop later. Gravity Order Forms are useful in this situation. Gravity Forms is a premium WordPress plugin that allows you to distribute, manage, and connect forms on your WordPress website.
Today’s topic will show you How to integrate gravity forms product add-ons in WooCommerce to ultimately upgrade your online store.
Reasons to integrate gravity forms product add-ons in WooCommerce
Gravity Forms’ connection with WooCommerce can be beneficial in a variety of ways. Consider the following scenario:
- If you’re an event organizer, Gravity Forms can help you accept online registrations and sell tickets to attendees.
- If your online store supports any charity, you could set up Gravity Forms to take online donations.
- Gravity Forms is an excellent option for online companies that require clients to fill out a form before purchasing.
- These forms are ideal for providing takeout. By including a Gravity Order Form on your website, you can simplify your consumers to place orders.
How to integrate gravity forms product add-ons in WooCommerce
Step 1: Install the Gravity Forms plugin
The procedures for installing Gravity Forms Product Add-ons are outlined here.
-
Install and activate the Gravity Forms plugin, which will prompt you to enter or buy a license key.
- Make your selections. Here are a few recommendations:
- Rather than manually updating the plugin, keep the update running in the background.
- For easier access, place the Forms Menu on the upper WordPress toolbar.
-
With Akismet integration, you may protect the “Form Entries” against spam.
- The final step is to configure your “Global Settings,” after which your installation will be complete.
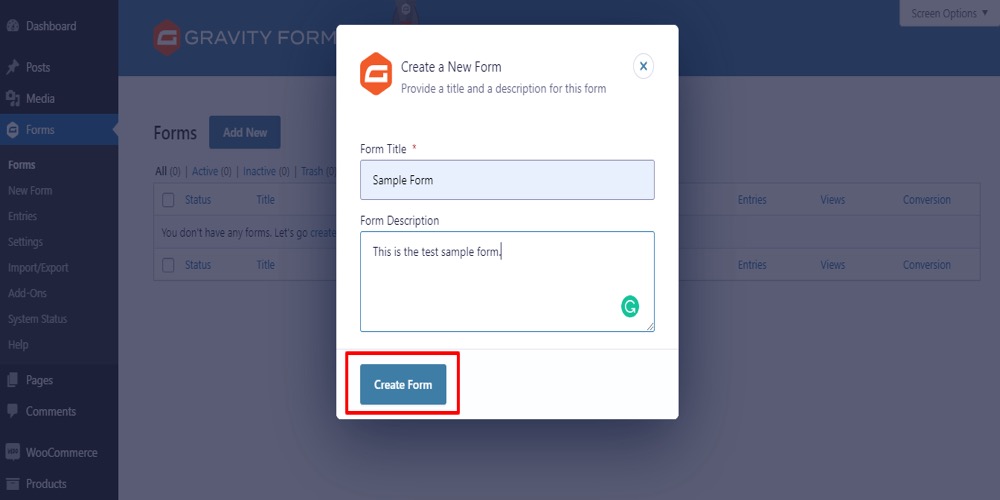
- Select Create A Form from the drop-down menu.
-
Click Create Form after adding a title and a description.
- Then click on Select a Field Type. The standard fields are as follows:
- Checkboxes
- Hidden
- HTML
- Drop Down
- Number
- Multi-Select
- Page
- Radio Buttons
- Paragraph Text
- Single-line Text
-
Section
- To design your form, click the fields (Data, Name, etc.) and then click any field to transfer it to a new spot.
- Each field can be customized. You can look at the other settings in these fields. You can add a description, change the labels, toggle first and last names on and off, and edit the field’s appearance by enlarging the name field, for example.
- After you have finished constructing the form, click Update. You can always change your mind afterward.
Step 2: Integrate Gravity Forms with WooCommerce
Gravity Forms may be integrated with WooCommerce using the Gravity Forms Product Add-ons extension. You may apply conditional logic, let users input pricing, calculate prices automatically, and more by linking any WooCommerce product to a Gravity Form in this way.
Simply put, it uses Gravity Forms’ form-building features to enable you to construct product add-ons in WooCommerce.
You have complete control over how pricing appears on the front end of your store. So, instead of using WooCommerce’s default pricing display (such as $199), you may use something more intriguing (such as $150 for a limited time only!).
The Product Add-ons plugin for Gravity Forms is a great method to ask customers for specific information. For example, if you sell furniture, you may need a proper approach to ask customers about their preferences, such as fabric or wood type.
Similarly, if you sell engraved jewelry & watches, you can use the extension to ask clients to enter the initials they would like engraved.
You can also employ the Gravity Forms Product Add-ons extension to offer more options for each product. This capability is helpful for SaaS and service-based organizations that want to upsell new goods.
Step 3: Configure Gravity Forms after integrating
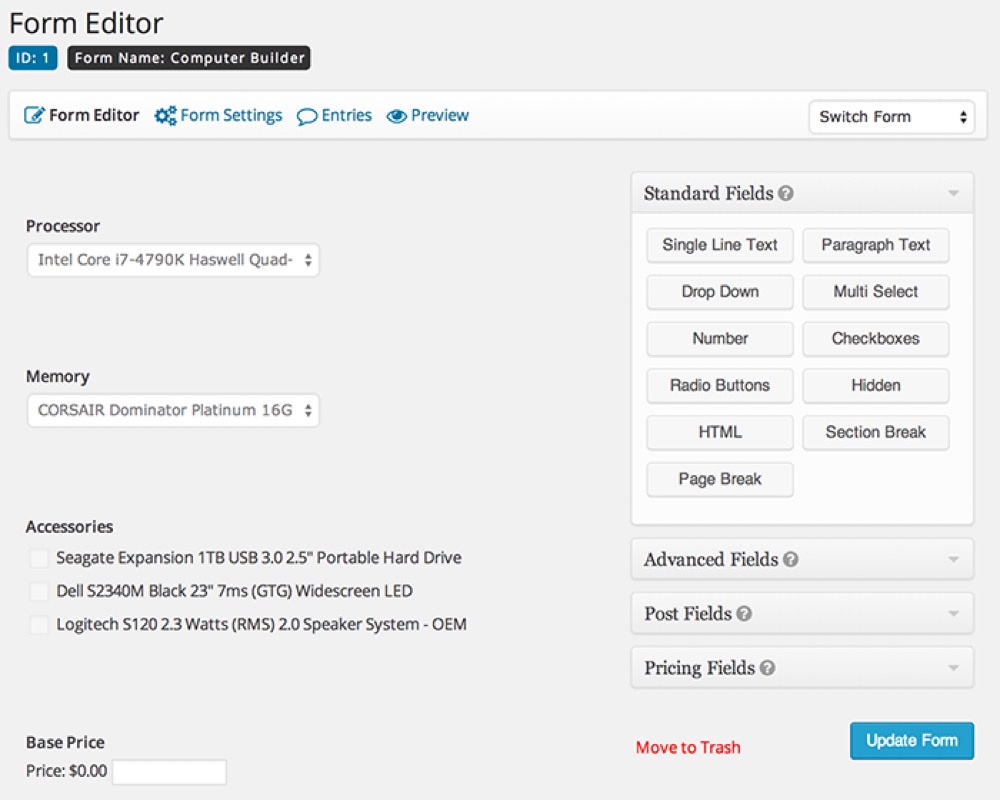
You will see a Pricing Fields area in Gravity Forms after installing Gravity Forms and the Add-Ons Plugin for your WooCommerce store.
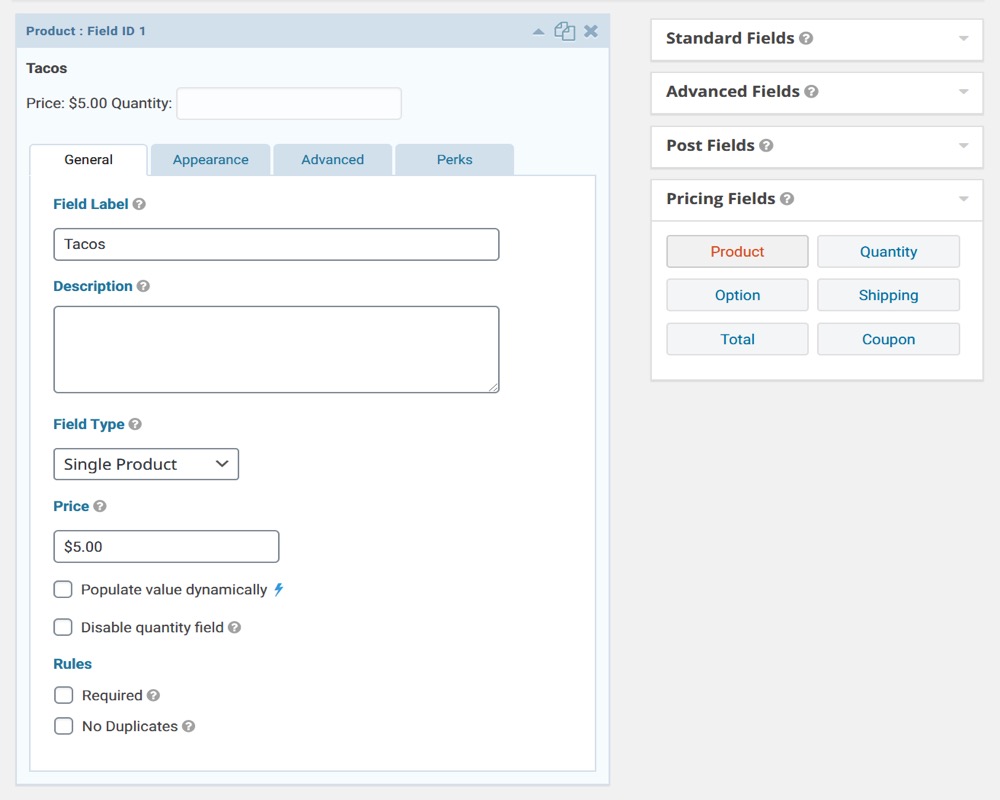
When constructing an order form that is related to a product, some additional fields can be used. When using any of the Pricing Fields, you must have the Total and Product fields present, regardless of how your “Form” is set up.
-Product Field:
You can utilize the Product Field to specify the product name and the basic price (or leave it blank if you don’t have one). This field will not appear on the WooCommerce Product page, but it will be processed during the checkout process.
Users can determine changeable product alternatives or product quality using the “Product List”single “‘s window,” “drop-down menu,” and “radio list” features.
-Quantity Field:
If you have added numerous items, the quantity field is always linked to the Product Field, and you must choose which product you wish to associate it to. “Drop-down,” “Number,” and “Hidden” are examples of field types.
- Number: You may use this option to allow clients to choose the amount while using “Range” to specify a restriction.
- Drop-down Menu: Use the “Drop-down” menu to set predetermined quantities.
- Hidden: It is useful when you want to set a quantity that isn’t modifiable or visible to the user.
Conditional Logic, which works in tandem with the Quantity Field, is another fantastic Gravity Forms feature. You can use Conditional Logic to hide or show this quantity field based on the values of other fields.
-Option Field:
The “Options Field” is commonly used to provide product options. You can add prices for add-on services to the goods on sale using the “Option Field.” This area can be used to list options such as size, color, and personalization.
Let’s assume you are selling a basic spa package; you may customize it by adding services like hot stone massage, manicure, and so on, and the corresponding prices will be added to the total.
-Total Field:
The “Total Field” is a key field for the Gravity Fields add-on. It instantly determines the entire price of your goods, taking into account all options, shipping rates, fees, quantity, and so on.
The entire cost of your purchase is then displayed in the field, and it is then added to the cart.
3 Best WooCommerce product add-ons plugins
1. YITH WooCommerce Product Add-Ons
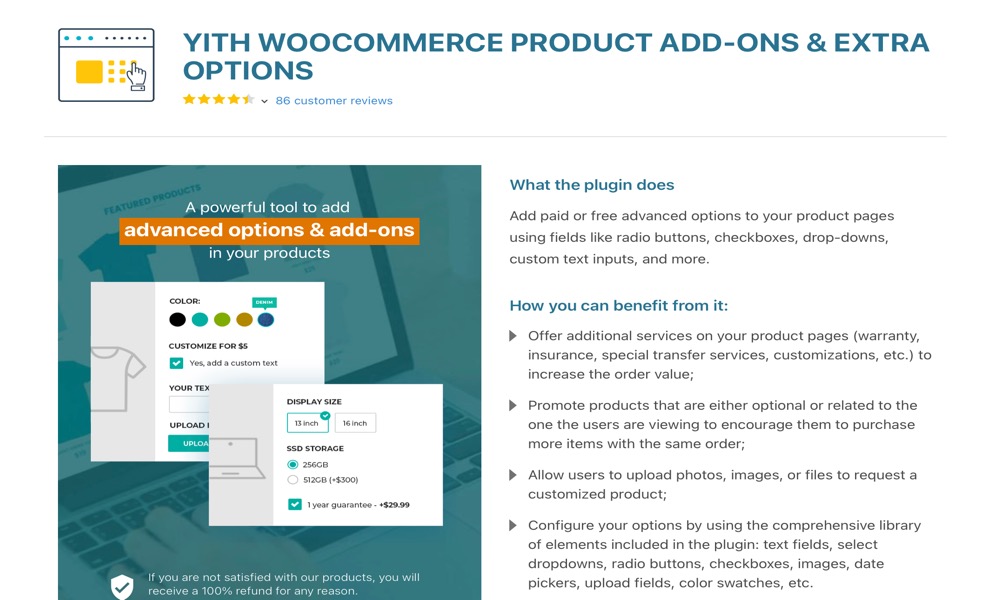
YITH WooCommerce Product Add-Ons allows you to boost the order value of your clients’ shopping carts while also saving time by handling multiple alternatives at the same time.
You will be able to construct option groups and apply them to all of your items as well as certain categories in your online store. You can also specify a dependency between options, such that a dropdown option is only visible to clients who choose the one that is dependent on it.
Features:
- Add a text field where your customers can enter a custom phrase or select a predetermined phrase using a checkbox or radio button on the single product page.
- Increase customer’s conversion rates and boost sales.
Price: Free
2. WooCommerce Product Add-Ons

Customers will be able to customize products while they shop through your online store with the WooCommerce Product Add-Ons plugin.
Dropdown menus, checkboxes, sample photos, and text fields can all be used to provide multiple options in your product table. You’ll also be able to sell your products using a variety of pricing strategies, including flat prices, percentage fees, and quantity-based pricing. This aids in the increase of sales and conversion rates.
Features:
- Image-based selections
- Percentage fees
- Text input
- Dropdown
- Checkboxes
- Custom price
Price: $49
3. Advanced Product Fields for WooCommerce
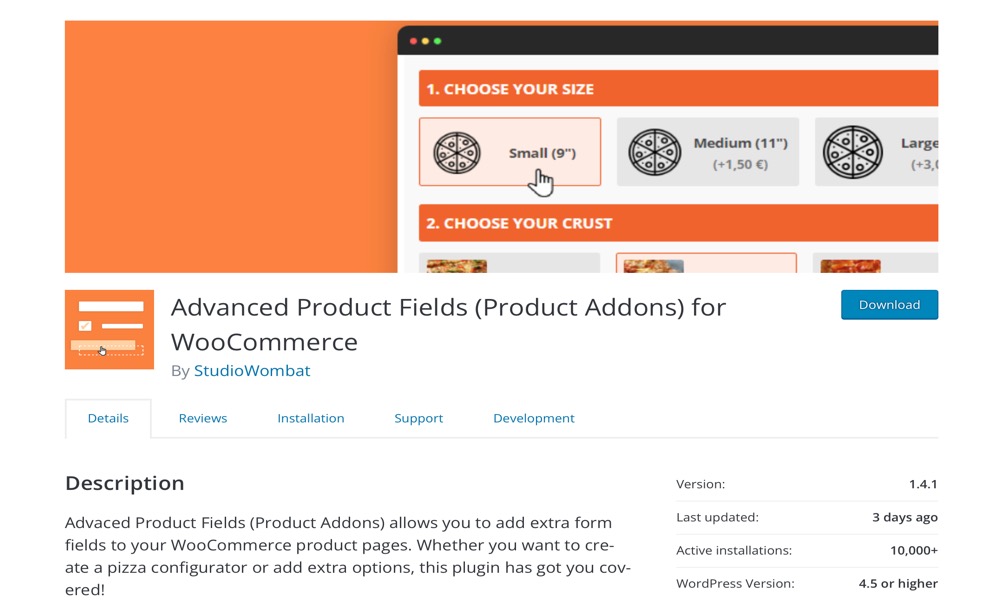
Advanced Product Fields for WooCommerce is a product add-ons plugin that works well with WooCommerce Product Table and WooCommerce Quick View Pro. It allows you to add numerous text boxes, dropdowns, checkboxes, radio buttons, picture and color swatches, and numeric fields to your product options.
Features:
- Per product or globally
- Quantity-based options
- Change the main product image
- Multi-currency support
- Edit cart
- New and fast
Price: $49
Conclusion
Gravity Forms is a convenient extension for most WordPress sites, and it can also be incorporated into WooCommerce stores with the appropriate add-ons. This WordPress extension would be handy for commercial sites that sell made-to-order products, as it allows them to accept custom values from customers.
Gravity Forms might be a fantastic choice for small businesses that don’t want to deploy a full e-Commerce solution for their site.
We hope you will find this article about How to integrate gravity forms product add-ons in WooCommerce essential!


