
How to Integrate WooCommerce with Etsy

Etsy and WooCommerce are both lucrative eCommerce platforms where you could sell multiple types of products. However, each platform comes with some limitations. Therefore, the integration between WooCommerce and Etsy is a perfect idea to make the most use of the two platforms, thereby yielding unlimited benefits.
If you are finding how to integrate WooCommerce with Etsy, it is the right choice. You could get a lot of benefits from them with the automatic synchronization of inventories, orders, prices, and many other aspects between the WooCommerce store as well as your Etsy marketplace. Now, let’s get started on this guide and you will love it soon.
Why do we need to integrate WooCommerce with Etsy?
Before getting to know how to integrate WooCommerce with Etsy, it is vital to figure out the benefits that are yielded from this integration.
-
Supply customers with flexibility: Etsy supplies sellers with the flexibility from setting their own layout and themes, adding custom scripts, to editing the CSS.
-
Be able to sell vintage, handmade, and unique products: Etsy stands out from other platforms because it can allow you to sell vintage, handmade, unique products.
-
Provide low overhead cost: When it comes to your overhead cost, it is low as you sell on Etsy with signing up for the free and low cost of listing products as well.
How to integrate WooCommerce with Etsy?
Step 1: Build Etsy store
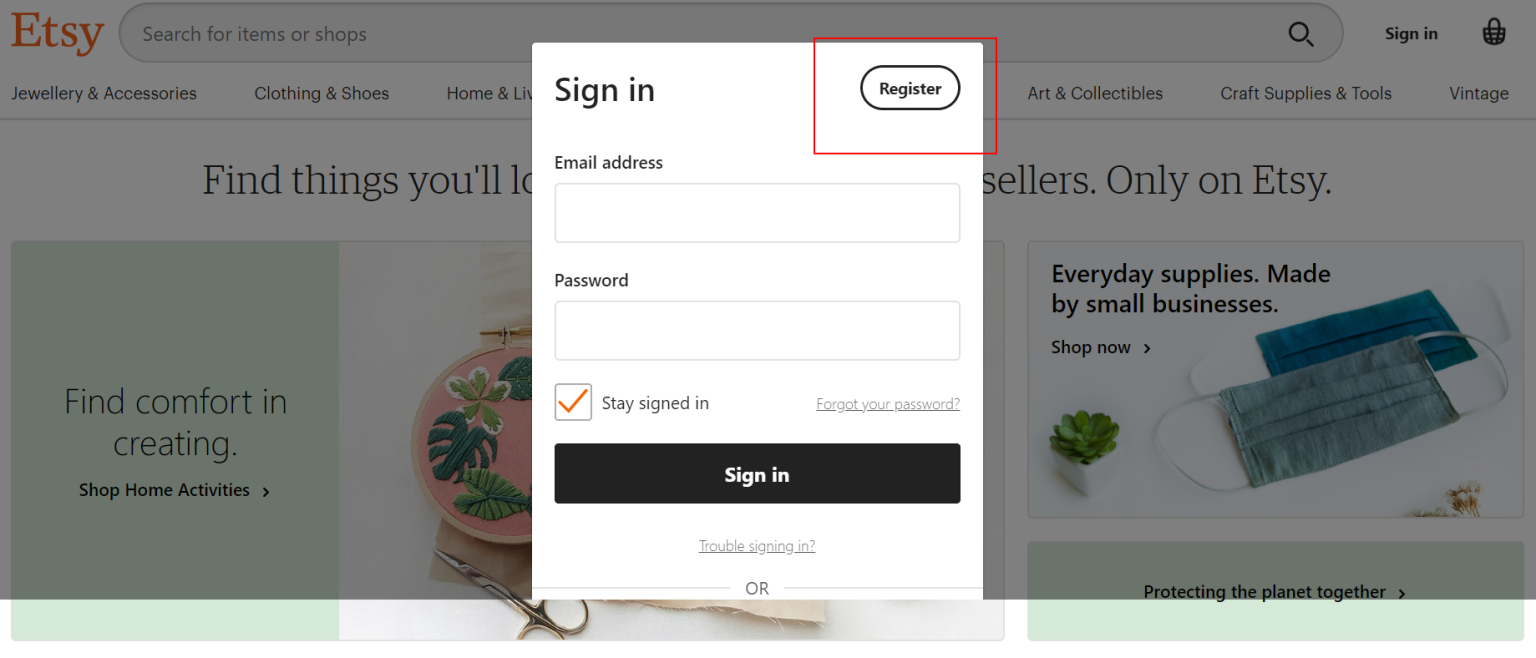
To integrate your WooCommerce store with Etsy, you need to open your Etsy shop so that the integration would be quicker. So, you will go to etsy.com, in order to begin with your seller account. When opening this link, Etsy Marketplace Click the button “sign-in” like the below screen:

Next, move on to choose the section “Register”:
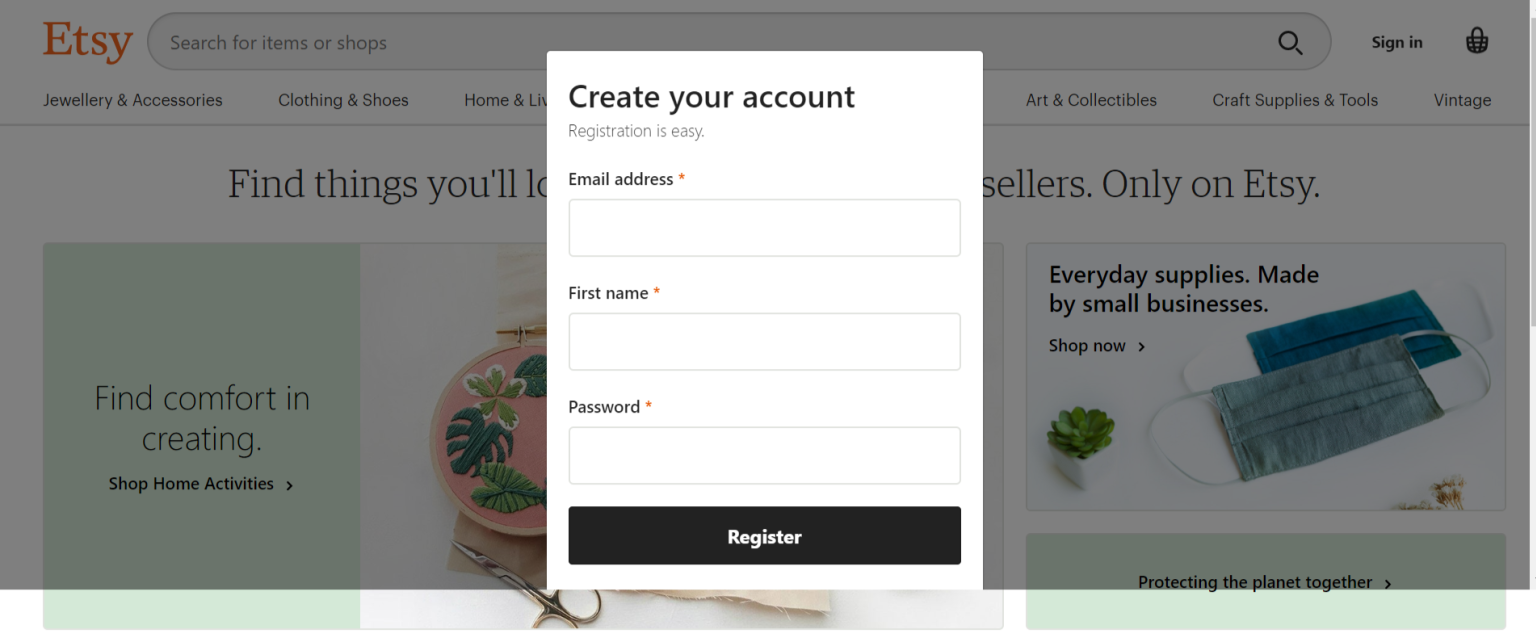
Here, you will select “Create your account” where you need to fill in some necessary information, including, name, email, along password. Then, press the button “Register”.
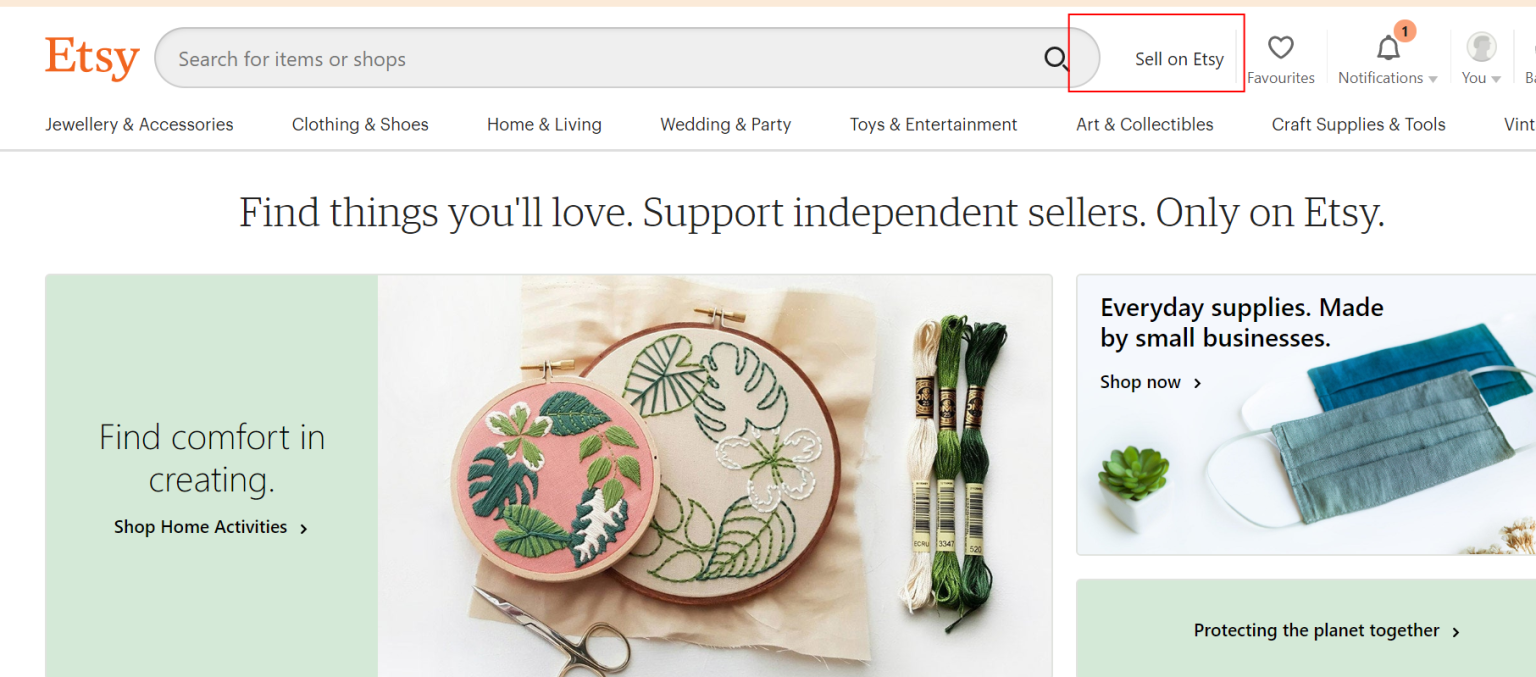
Once the registration is done, you will go to the Etsy marketplace. Here, click on the section “Sell on Etsy”.
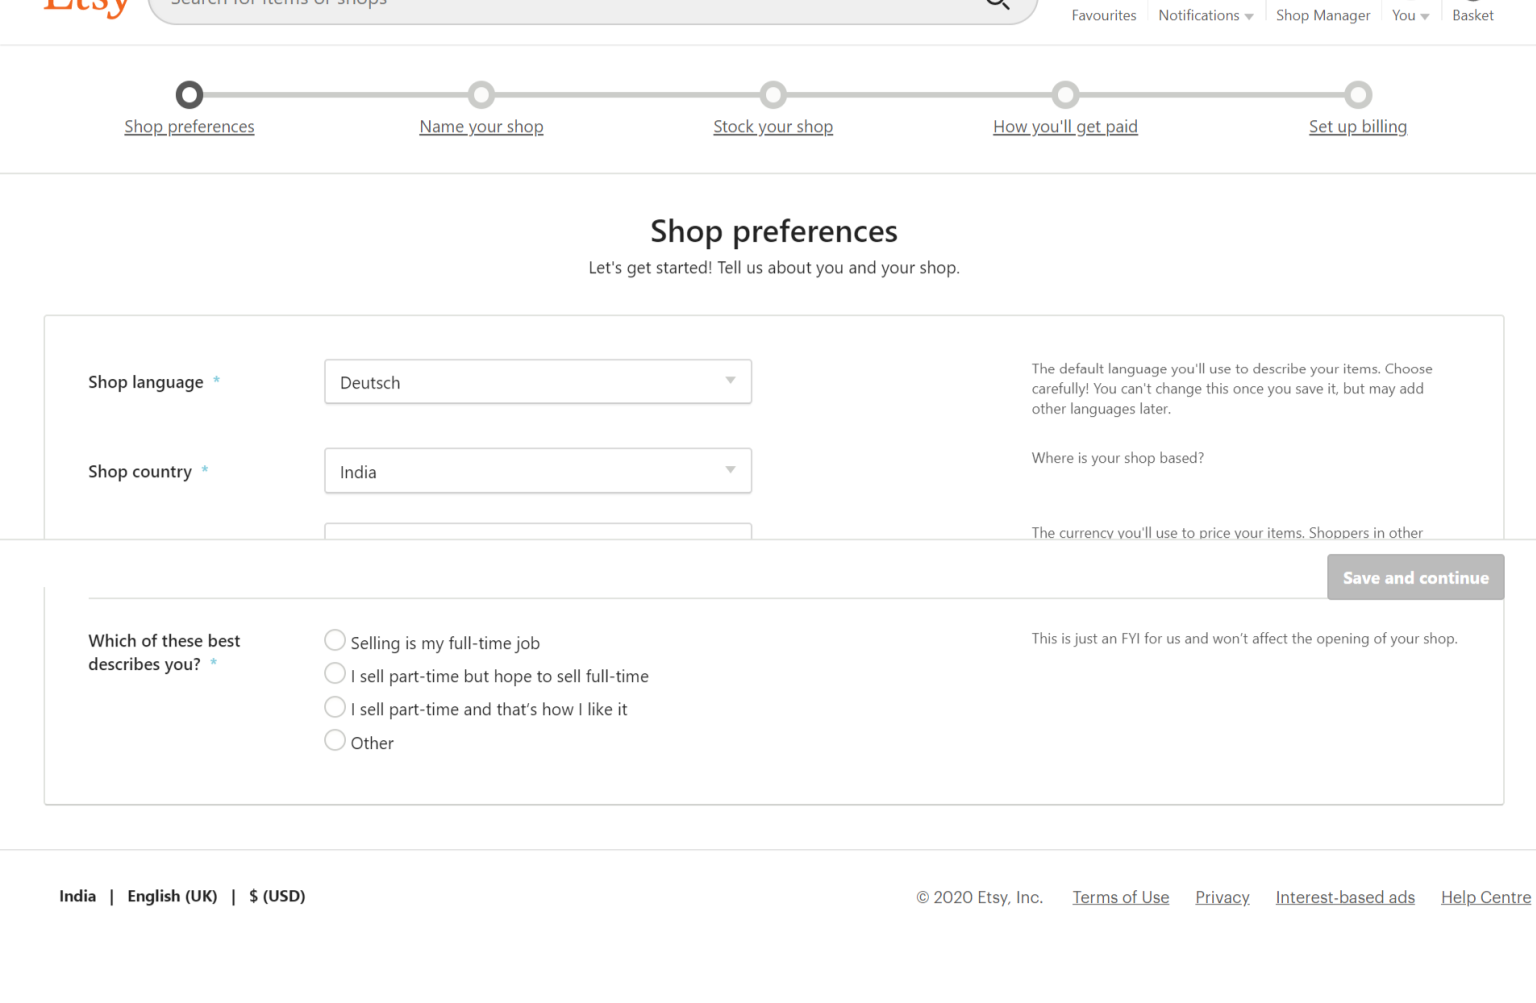
After that, it is time to enter some essential information. At first, you will set the shop references by selecting the language for your shop, currency, time commitment, as well as the country:
-
Shop language: As you select the language, it will be the default one you are about to use for describing items. Later, you can not change it. However, you could apply to other languages once your shop is opened if you are fond of adding the translation in some other languages.
-
Shop country: Do not forget to choose the correct country to apply for your shop.
-
Shop currency: In this section, the currency is a must to choose as you will apply it to price listings. What is more, the fees for currency conversion might also apply to the currency of your bank as opposed to one of your shops.
-
Time commitment: You need to choose if selling products is your part-time or full-time job.
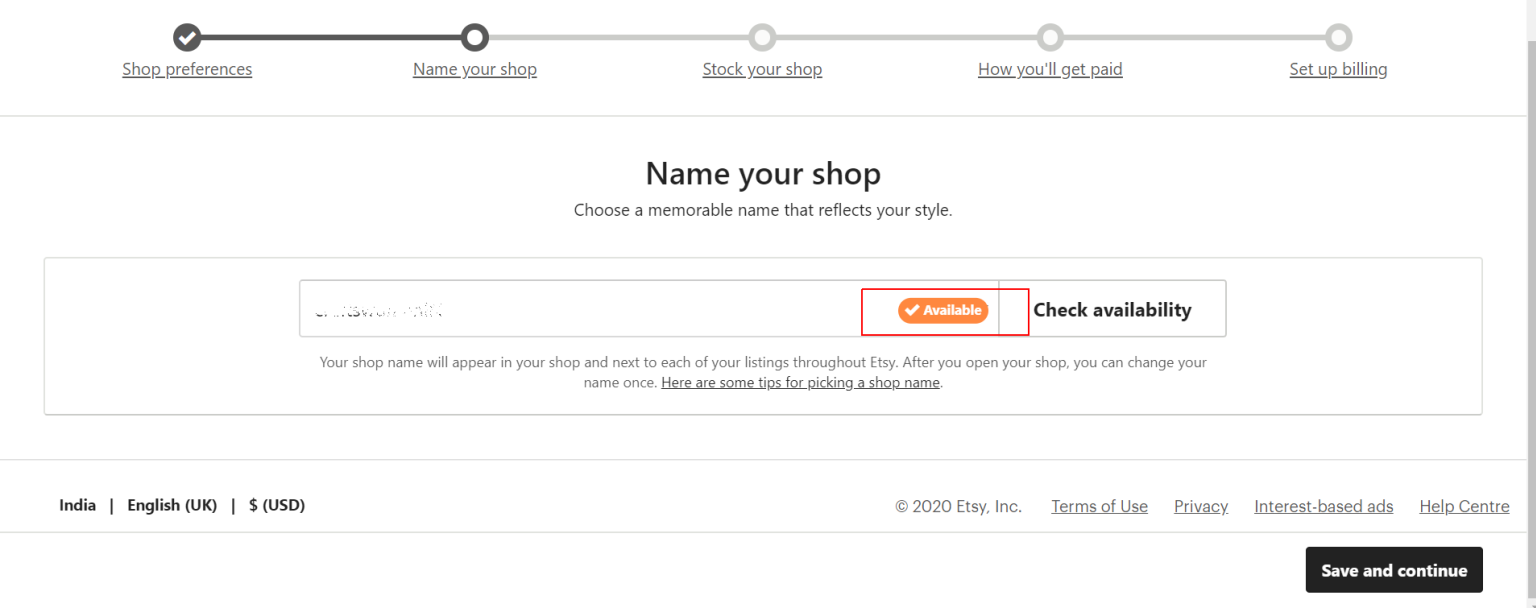
As soon as you have finished with shop preferences, now proceed to name your Etsy shop. Remember to select a catching name to reflect your style. Moreover, the name is supposed to meet the requirements involving length (4 to 20 characters), no special characters or spaces, no profanity, not used by any existing member on Etsy, and not violate another’s trademarks.
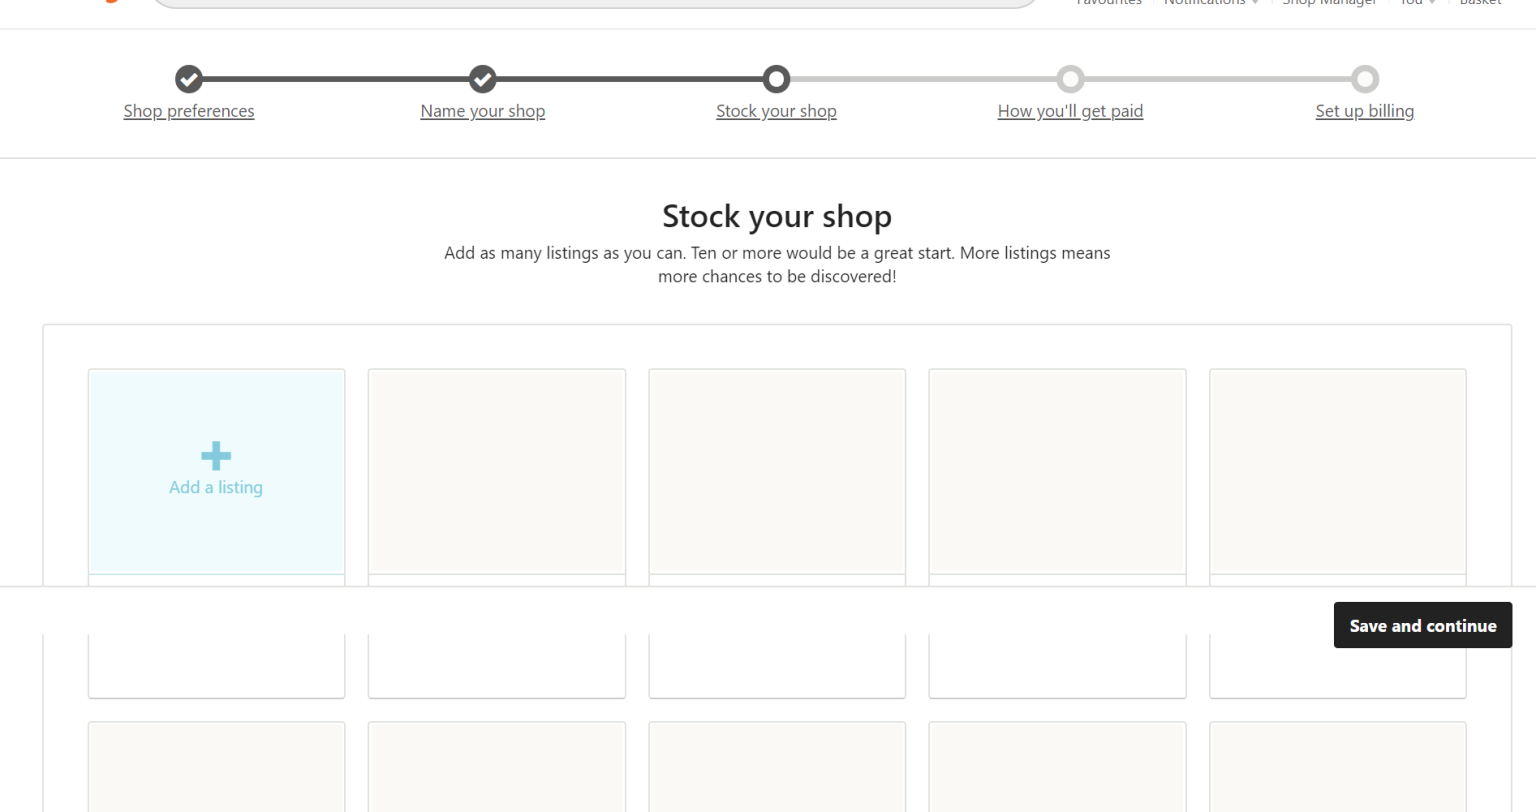
Next, stocking your Etsy shop is a must. In this step, you need to add listings of products to your Etsy shop.
Then, you decide how you will get paid. Now, select the payment options that you are going to offer. In case you are in the eligible country, Etsy Payments will be your payment method. This will provide customers various options for paying orders as well as consolidating every payment in your account of Etsy Payment.

Another not-to-be-missed thing is to set up your shop’s billing. This depends on the country that you are in. And you are required to fill in a debit or credit card for opening your shop. The card could be Visa, Carte Bleue, Discover, American Express, or Mastercard.
Step 2: Install and activate Etsy Integration for WooCommerce
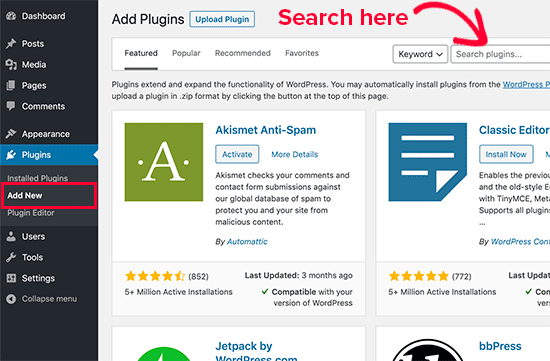
When you have finished checkout, you will be granted a link to download. Simply click the provided link to download it. Next, log in to your WordPress site. Head to the menu “WordPress Admin”, choose “Plugins” before selecting “Add New”. Move on to pick up the button “Upload Plugin”.
Click “Install” and “Activate” for getting Etsy Integration for WooCommerce enabled.
Step 3: Configure Etsy and WooCommerce
When everything is okay, proceed to the next steps by accomplishing your integration. To be more specific, you need to configure both Etsy and WooCommerce.
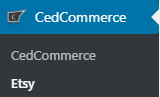
Navigate to the “Admin Panel” on WooCommerce. Here you scroll a bit under the CedCommerce to choose “Etsy”.
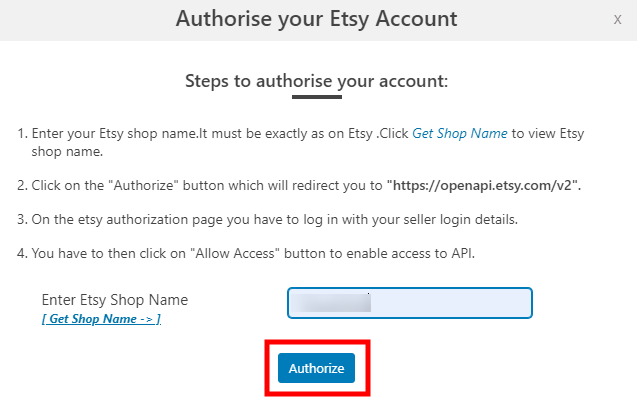
Your next task is to follow strictly the below steps to authorize your Etsy Account. Now, select the button “Add Account”.

By clicking “Add Account”, there appears a pop-up where you are required to enter the name of the Etsy shop. Next, click on the button “Authorize”, see the below screen:
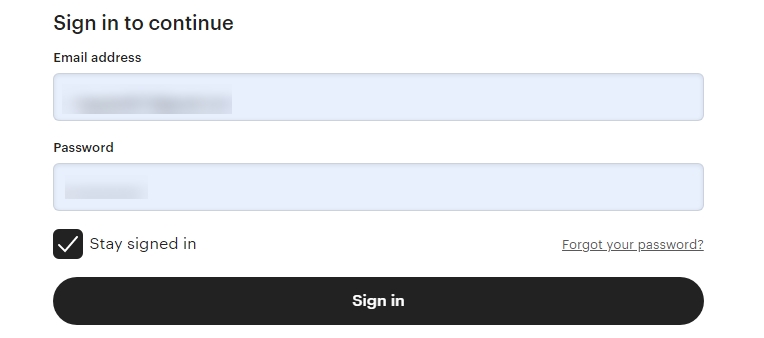
When you are done, you are taken to a page for sellers to log in. Now, fill in your Email as well as your Password. Then, hit the button “Sign In” before clicking the button “Save and Continue”.
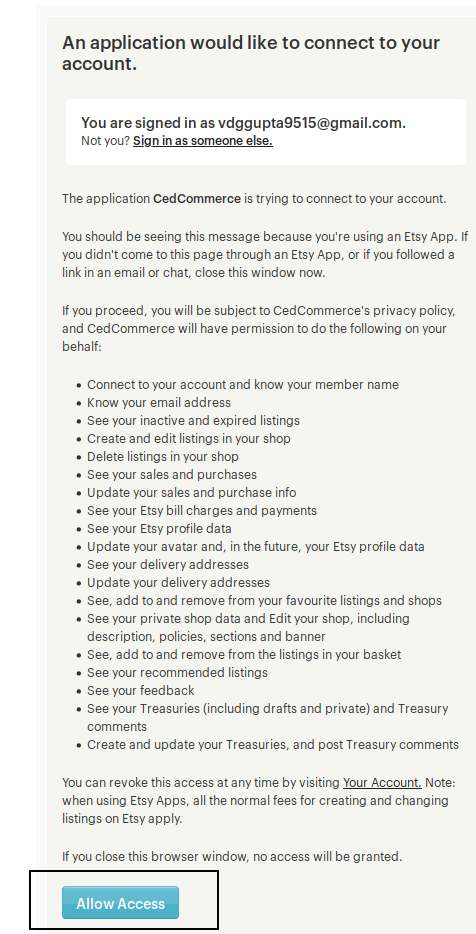
In the section “Add Account” entering the name of your shop is a must. After that, you will need to click on the button “Authorize”. Once you finish, another page will appear, and you will hit on the tab “Allow Access”. As a result, your shop on Etsy would be added.
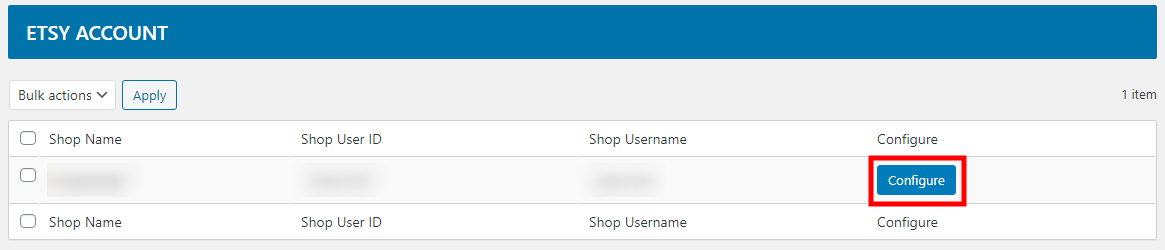
At this step, you are able to notice the “Shop Username”, “Shop ID”, coupled with “Shop Name”. Then, you will have to click on the button “Configure”, see the below screen:
Moreover, you could even delete your account by choosing the placed checkbox and click “Delete” from your dropdown menu.
Step 4: Execute the synchronization of the two platforms
In the previous step, you are done configuring your WooCommerce and Etsy shop. Now, it is important to execute some settings related to your products as well as order sync.
1. Global settings
In this section, you will be required to work with some of the specific settings to sync data from Etsy from WooCommerce.
1.1. Attribute and MetaKeys List
The Attribute and Meta keys list will assist you in selecting the required attribute and meta key where your product information will be stored. Especially, they will be used later for the settings of “Product Export” to list products from WooCommerce to Etsy.
To choose the required attribute or meta key, let’s enter your product name and keywords, along with the list that is shown under that. Pick up the attribute or meta key according to your requirement before saving the settings.

1.2. Settings of Product Export
As regards settings related to Product Export, you will need to fill in details of products that you are going to export:
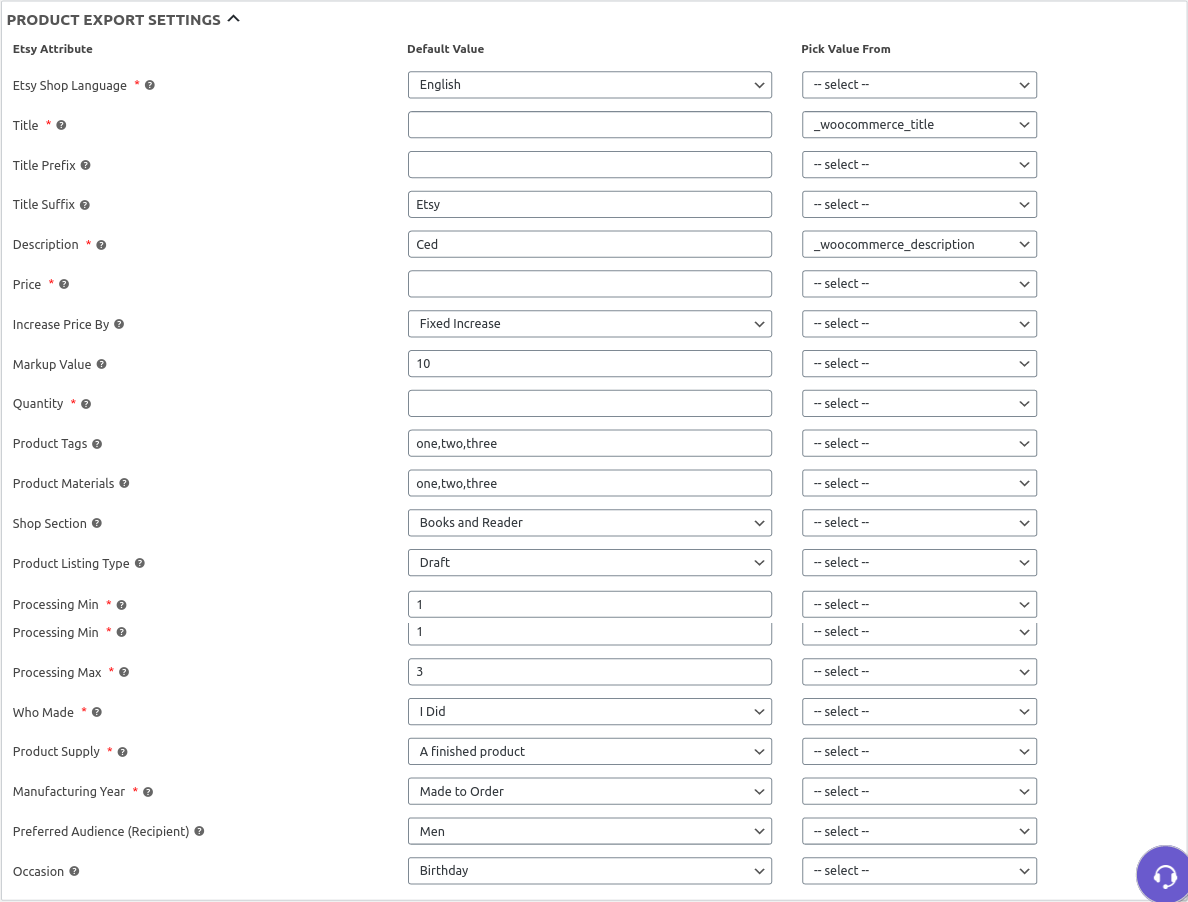
In this section, several fields involving Etsy Attribute as below:
-
Language of Etsy Shop: This is indicated in the previous part. But if you have not done that, fill in here the default language for your shop on Etsy.
-
Title: This is your product title uploaded on your Etsy. In case this field is left blank, your product title on WooCommerce would be used.
-
Title Prefix: You need to add the title prefix before the main title
-
Title Suffix: You need to add the title suffix after the main title.
-
Description: You need to give a description for each product that is uploaded on your Etsy. If you left it blank, a description of that product on WooCommerce would be used.
-
Price: This is the price of the uploaded product on Etsy. If you left it blank, the price of that product on WooCommerce would be used.
-
Increase price: This is by a specific amount of the product’s actual price when you upload on Etsy,
-
Markup Value: You need to enter your markup value that will be added to your price. For example 10
-
Quantity: This field refers to your store’s stock. In case you left it blank, the product price would be used.
-
Product Tags: You are able to fill in up to 13 tags and separate each of them by a comma. Remember to exclude special characters.
-
Shop section: This means the products that are listed in Etsy’s section if chosen.
-
Type of Product Listing: This explains if you are keen on uploading products in draft or active.
-
Processing Min: The minimum number of days to process this kind of listing.
-
Processing Max: The max number of days to process this kind of listing.
-
Who Made: Who makes listed items.
-
Product Supply: Uses of the product.
-
Manufacturing Year: When the product was made
-
Preferred Audience (or Recipient): Preferred Recipient or Audience to use that product.
-
Occasion: What the occasion for that listing is.
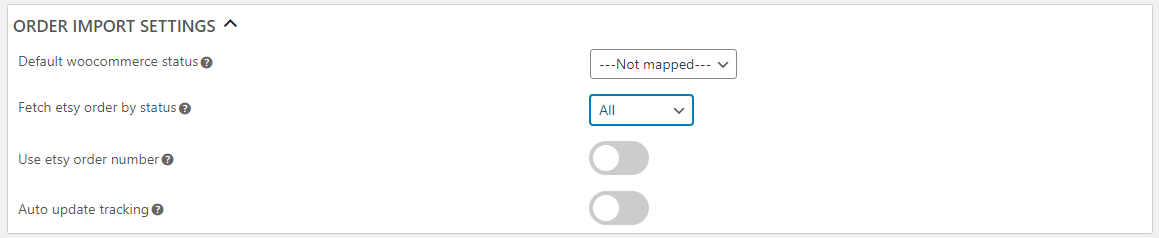
1.3. Settings of Order Import
As regards settings of order import, you are required to enter some fields for imported orders.
-
Default WooCommerce’s status: You have to select the status of order where you fancy creating Etsy orders. The default will be processing.
-
Fetch Etsy orders by status: Now, pick up the status of an order that will be fetched from Your Etsy. Default is every status. Furthermore, it limits fifteen latest orders.
-
Use Etsy’s order number: You are supposed to apply for the order number on Etsy rather than the ID on WooCommerce as you create Etsy orders on WooCommerce.
-
Auto updated tracking: This applies if you use the plugin Shipment Tracking.
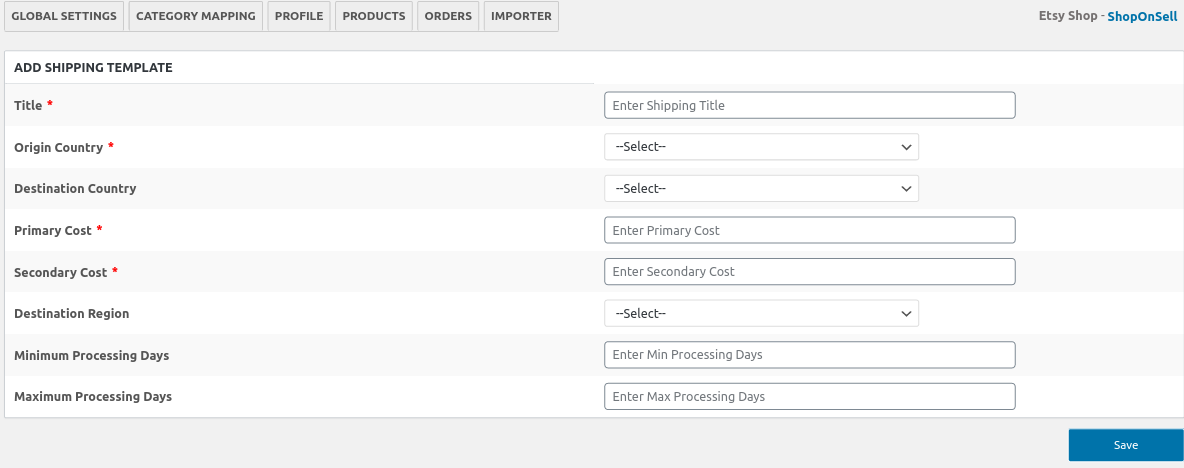
1.4. Shipping Profiles
Now, it is time to set your profiles of shipping by heading to the section “Shipping Profiles”. It will be used when you list a product from WooCommerce on Etsy. Additionally, you could also add a new one with the use of the button “Add New”.

Afterward, you need to select shipping profiles that will be used to upload the product on Etsy. After hitting the button “Add New” as mentioned above, you will need to enter every detail as in the following screen:
1.5. Schedulers
In the schedulers section, you will be able to automate the entire process of order, inventory as well as import your product sync. So, enable needed features according to your requirements in this Schedulers section.
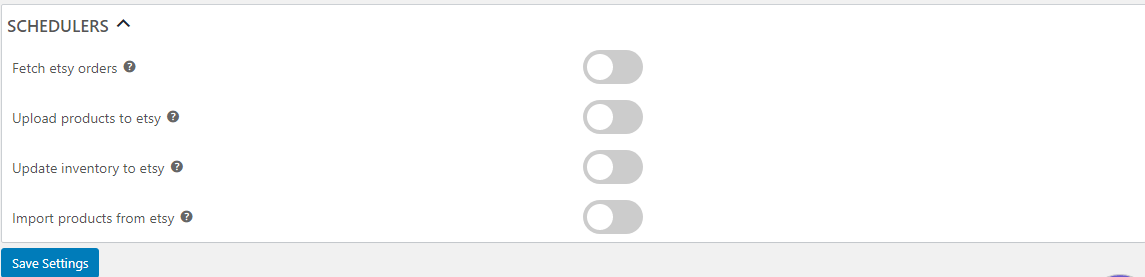
To be more specific:
-
Fetch Etsy order: If you enable this, it will fetch your Etsy’s orders automatically created in WooCommerce
-
Upload the product to Etsy: This will aim at uploading products automatically to Etsy from WooCommerce. Hence, you could select the profile or categories that you wish to be automatically uploaded in the section “Profile”.
-
Upload the inventory to Etsy: Enabling this feature means updating price as well as stock automatically to Etsy from WooCommerce.
-
Import the product from Etsy: This means you will be assisted in importing your active listings to WooCommerce from Etsy.
When everything is done, click the button “Save Settings” to save what you have made.
2. Category Mapping
Besides global settings, you also have to work with category mapping to ensure that your products will be listed in the right categories. In particular, this section requires you to map your store categories on WooCommerce to the categories on Etsy.
In doing so, your task is to choose your WooCommerce category with the use of a checkbox. Then, a list of your Etsy categories appears in the dropdown menu. Pick up the category in Etsy where you are keen on listed products of a chosen WooCommerce category on your Etsy. Look at the below screen to have a deeper understanding:
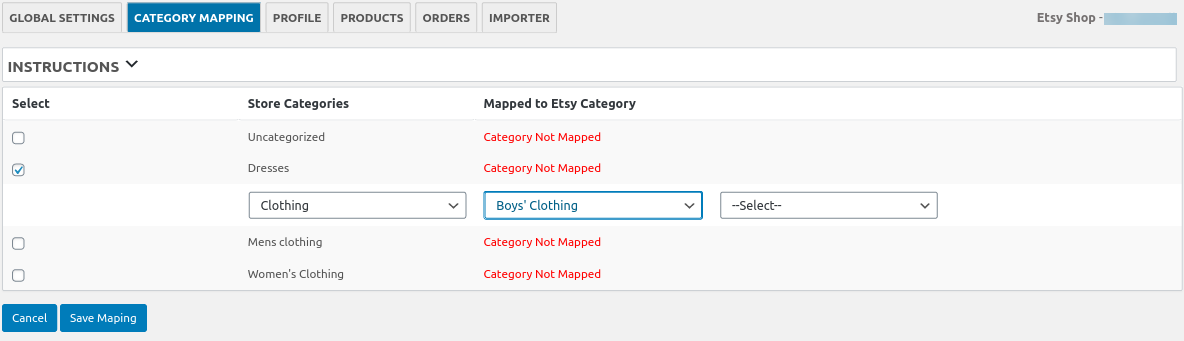
As you finished the above settings, hit on the option “Save Mapping” at the page bottom. After mapping, your category profiles would be created automatically. What is more, you could make use of the Profiles for overriding settings of the previous Product Export in your Global Settings.
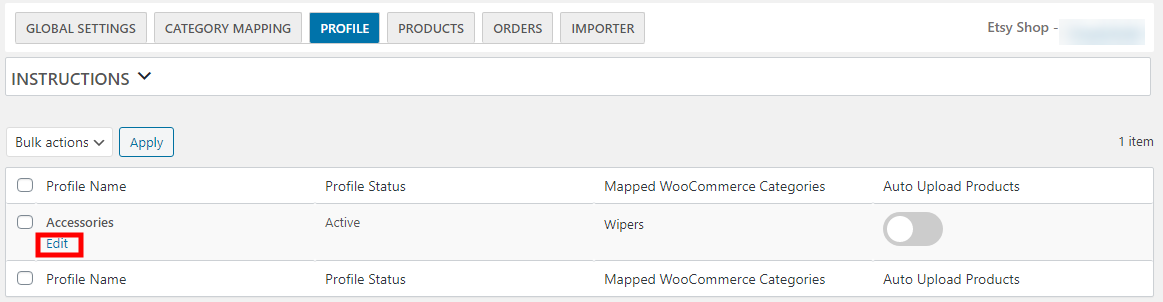
3. Profile Control
As soon as you map categories, you could notice all the created profiles here. By using the Profiles, you are able to override the settings of the previous Product Export in your Global Settings as regards category level. To accomplish overriding these details, you will edit necessary profiles thanks to the option “Edit” which lies under the section “Profile Name”.
You could implement some tasks with the role of admin. In terms of the profile or category, you could also select what you want for uploading. To modify the profile, open your profile section and proceed to hit “Edit” highlighted with red as below:
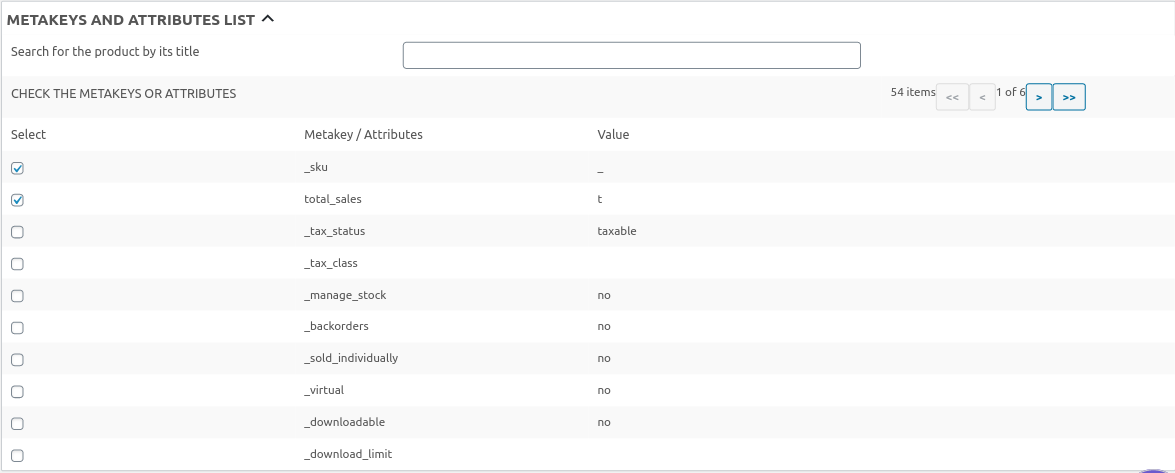
When you finish clicking on the button “Edit”, you will go to one page in which you could be having several attributes as indicated in the following screen:

- Attribute and Meta keys list: This list assists you in picking up the essential attribute of meta key where your product information will be stored. They could be further used in the settings of the Product Export section to list products on your Etsy shop from WooCommerce.
- Basic information: With this section, you are able to notice a profile name like in the below screen:

- Setting of Product Export: As regards these settings, you could fill in every detail of your product that you are about to export.

There are some fields that you need to pay attention to. These fields are quite similar to the settings in Product Export. So, you could see above and apply the same activity to this section
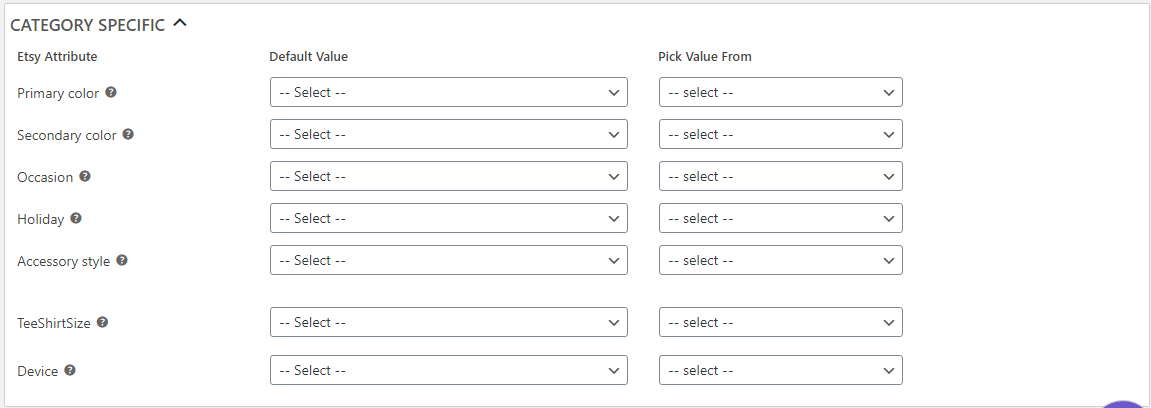
- Category Specific: When it comes to category-specific, you could edit Etsy’s attributes which are based on categories as below:
4. Product Control
In addition to managing your profiles, product management is also a not-to-be-missed thing to integrate your WooCommerce store with Etsy successfully. In this part, you are allowed to execute myriad operations, including “Update” or “Upload” products to Etsy from WooCommerce.
To implement any operation in the dropdown “Bulk Actions”, you have to choose the product that uses the checkbox in the list column of product, then click on the button “Apply”. You will obtain notifications for every implemented operation.
In the role of admin, you could perform such tasks as “Upload Products”, “Update Products”, “Update Image”, and “Update Inventory”. Now, it is time to deeply understand how you can deal with each part.
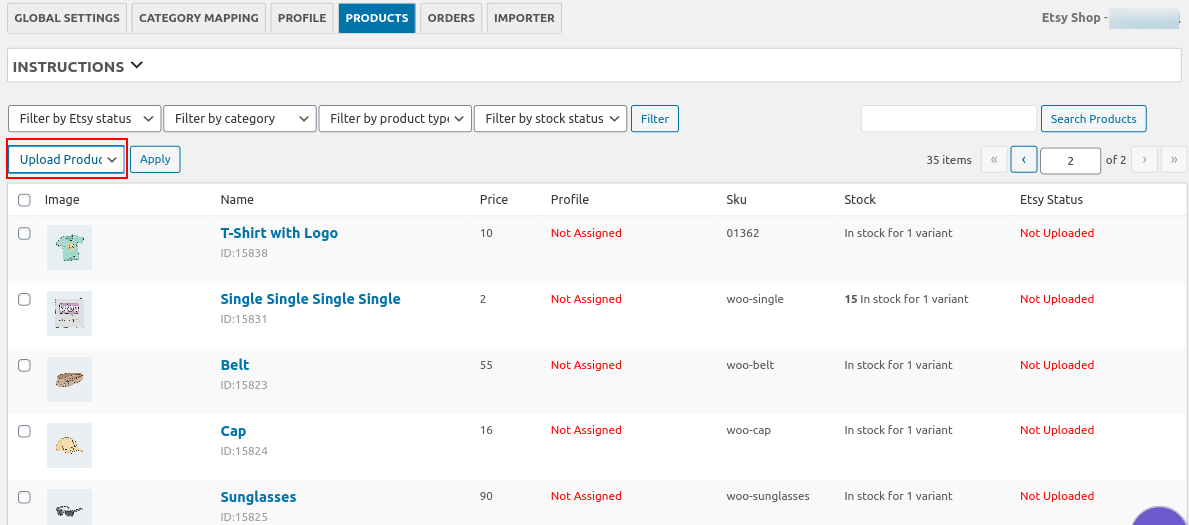
- Upload Products
Your task is to choose the checkboxes that are linked to products to be uploaded. When you are here, hit the button “Upload Products” before clicking on the button “Apply”. Next, keep going by clicking a dropdown box which is near the field “Bulk Actions”.
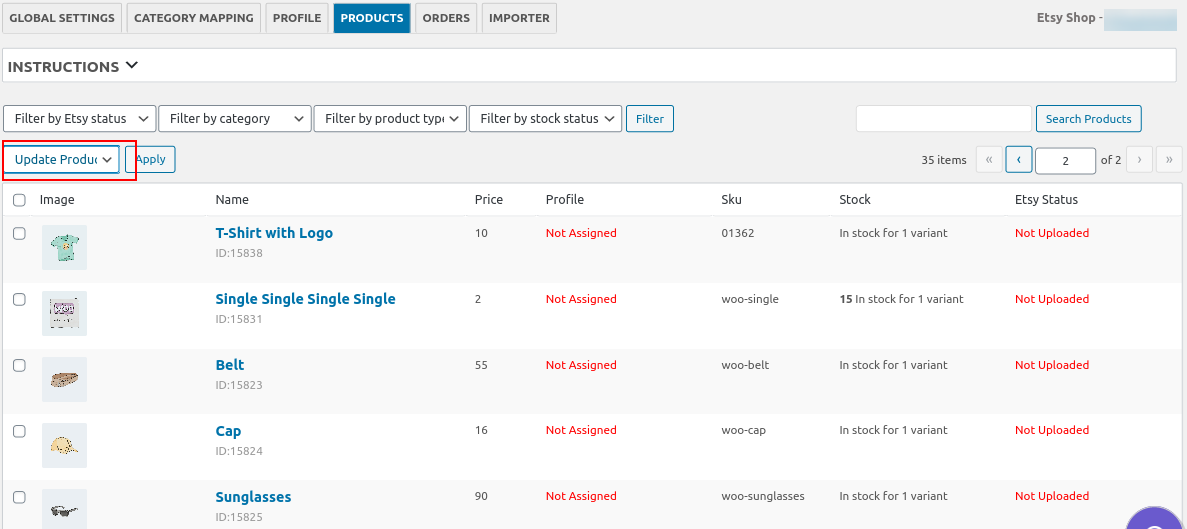
- Update Products
When uploading products is done, go ahead with picking up the checkboxes that are linked to the products to be updated. Then, choose a dropdown box that is near the field “Bulk Actions”. Here, you are required to hit on the button “Update Products”. Then, move on to choose the button “Apply”.
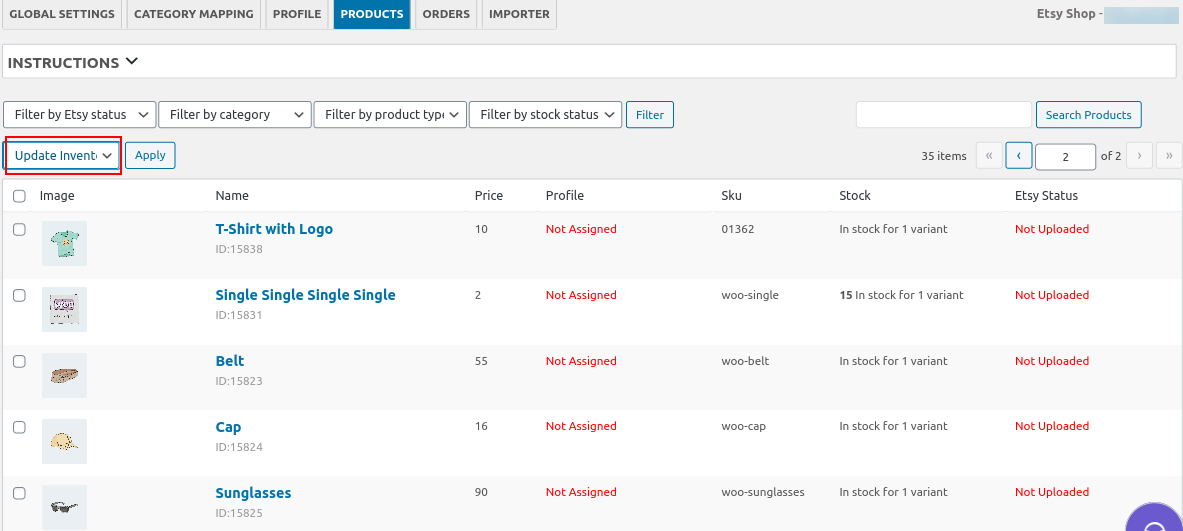
- Update Inventory
Updating inventory is important too. What you need to do is quite similar to the above two activities. By selecting the checkboxes that are linked to the products, you could update inventory. Likewise, click on the box dropdown to choose “Update Inventory”. Next, you have to choose the button “Apply” before moving to further steps.
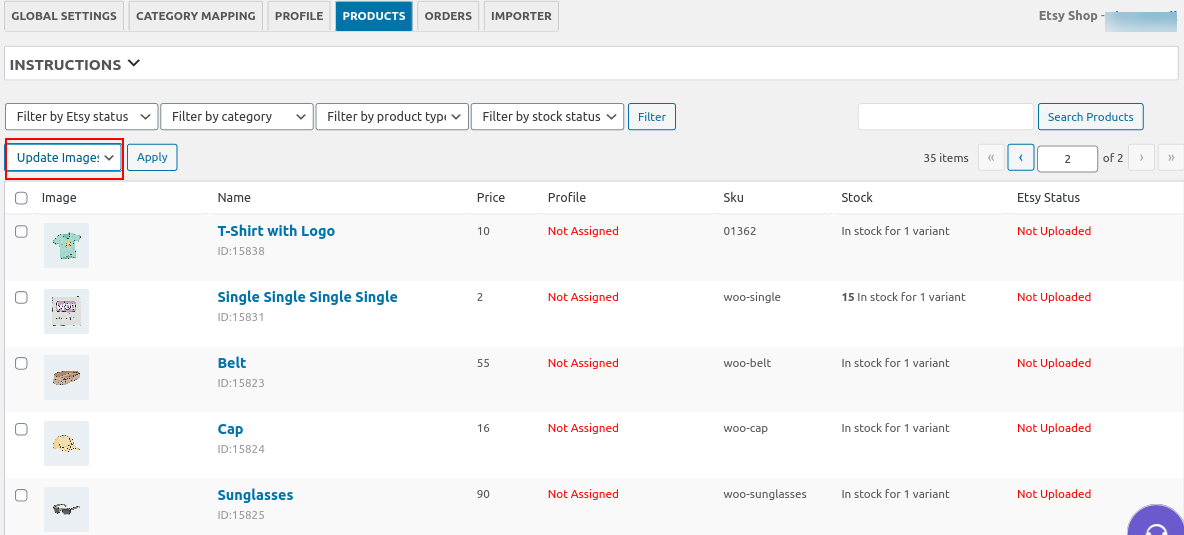
- Update Images
To update any image, you will choose the checkboxes that are linked to the products. Then, choose the box dropdown that is near the field “Bulk Actions” to pick up the button “Update Image”. After all, hit the button “Apply”.
Additionally, you could also be filtering out products in terms of Etsy status, stock, type, and category.

The option “Search Products” is useful in finding products. To do that, use product keywords or names to find. When you have uploaded products on Etsy successfully, you could now have a view link of products.
5. Order Control
Managing order is also vital. Your fetched orders on Etsy are shown here. You could fetch these orders on Etsy manually by hitting the button “Fetch Orders”. On the other hand, you could also enable the feature of fetch order automatically in the section “Schedulers”.
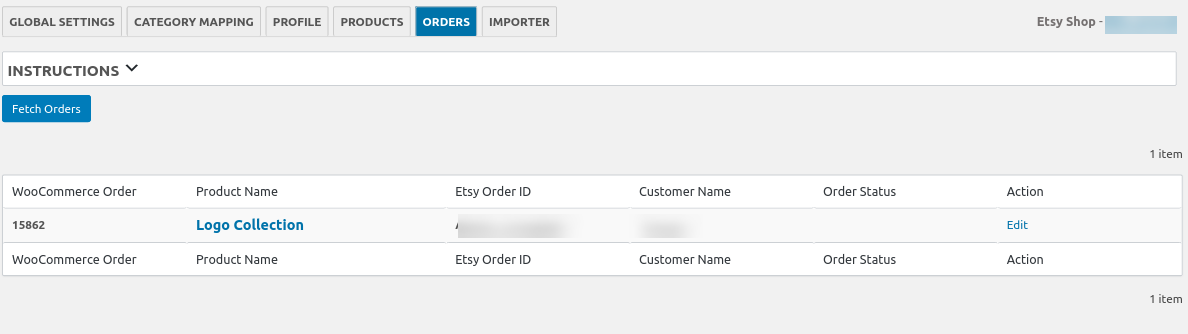
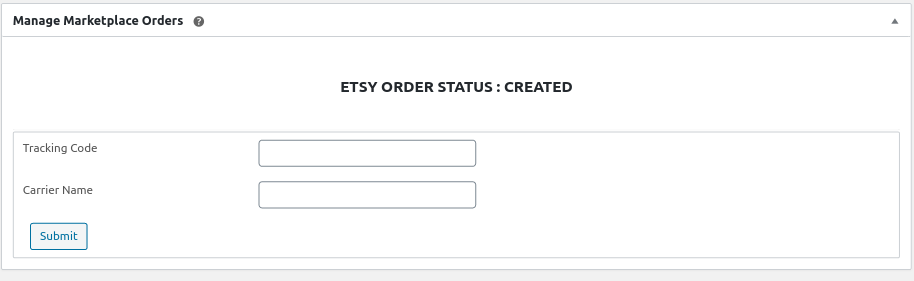
Be sure that you will have the SKUs available in every variation or product for syncing orders. A bonus point is that you could also submit your WooCommerce tracking details to Etsy. Navigate to the section “Order Edit” and use the option “Edit”. When you access this section, you can encounter another section that lies at the page bottom. Here, you could be able to fill in tracking information as well as update them.
6. Importer
The importer could be where Etsy products are displayed. Particularly, active products, by default, are displayed.
Fetching your Etsy products manually is what you can do then. To perform this, you have to choose it with the use of the checkbox in the table of product lists. Furthermore, you can also use the import operation from the dropdown “Bulk Actions”. Next, click on the button “Apply”. Then you could enable the feature of product import in the section Schedulers.
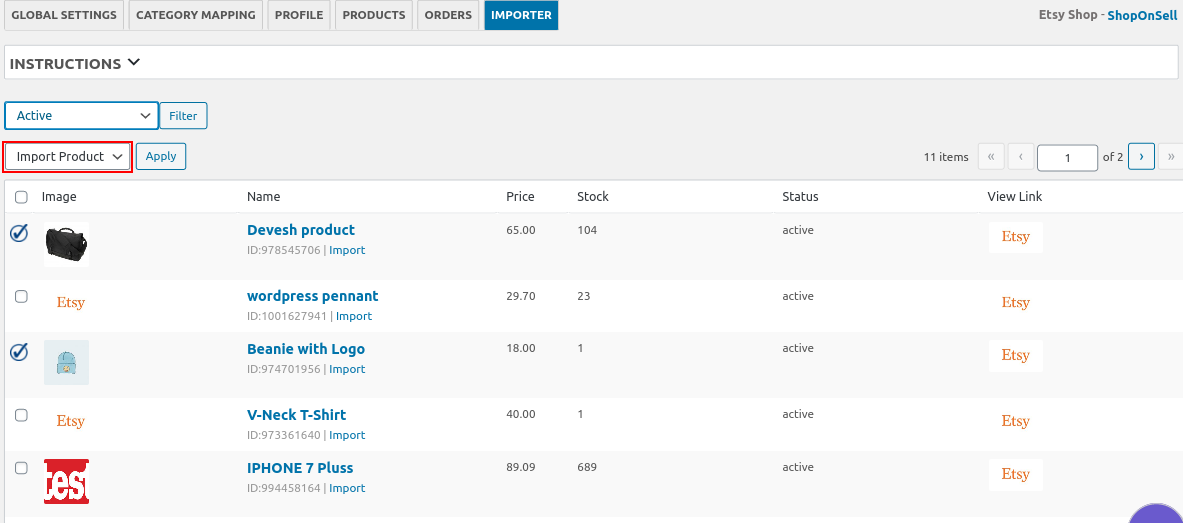
And you could also filter out your products on Etsy by using the dropdown “Import By Status”.
Congratulations! You have successfully integrated the WooCommerce store with Etsy and sync products, orders, profiles, and so on. Now, it is time for you to start utilizing the most advanced features of these two platforms for selling products.
Top 3 plugins to integrate WooCommerce with Etsy
There are several extensions you can use to facilitate the integration between WooCommerce and Etsy. In this article, we would like to come up with three popular extensions. So, you could scrutinize each of them and figure out what the best for your store is.
1. WooCommerce Products to Etsy
With the plugin WooCommerce Products to Etsy, you can create your item feeds on your WP site and export them to Etsy easily. This is to say, if you are not good at creating manually, this plugin will be your lifesaver. Moreover, it even helps you to minimize unwanted issues or problems happening while listings the products.
Main features
-
Provide with API connection to facilitate the stock sync
-
Take no effort to map the product features on Etsy
-
Create product listings on Etsy marketplace with two attributes
-
Be able to transfer myriad photos from your WooCommerce store to Etsy
-
Customize WooCommerce attributes to meet the requirement of listing specifications on Etsy
Pricing: Free
2. WPspring for WooCommerce · Etsy Integration Plugin
Another great plugin to help you integrate WooCommerce with Etsy simply is WPspring for WooCommerce · Etsy Integration Plugin. There is no denying that it simplifies the creation of your Etsy storefront as well as facilitates the streamlined management between WooCommerce and Etsy. To be more specific, you could also upload products from WooCommerce in bulk to your store on Etsy, along with defining pricing, shipping, listing details, and inventory.
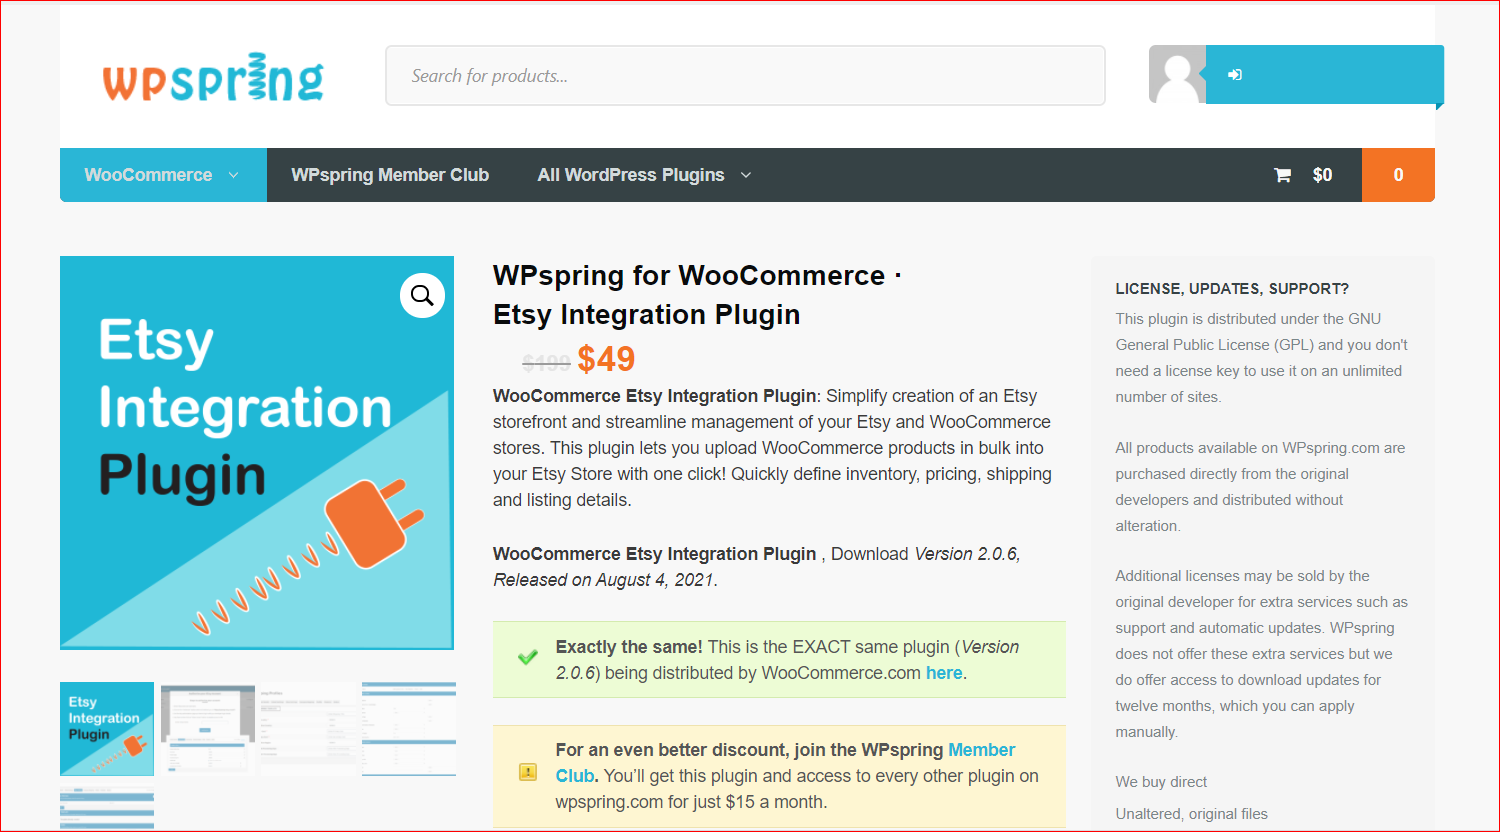
Main features
-
Bulk upload the products to WooCommerce to Etsy
-
Sync attributes, categories, inventory, and pricing quickly and correctly
-
Be able to sync the real-time between WooCommerce and Etsy
-
Ensure the accuracy of the inventory counts
Pricing: $49
3. Sync new WooCommerce products to Etsy Automate
To grow your eCommerce stores, using Sync new WooCommerce products to Etsy Automate would be a smart choice. This ready-made tool of integrating will grab your product data on WooCommerce quickly and move it to your new Etsy shop easily. What is more, you could also map such fields as Product Price, Product Description, and Product Name, or other fields to Etsy from WooCommerce.
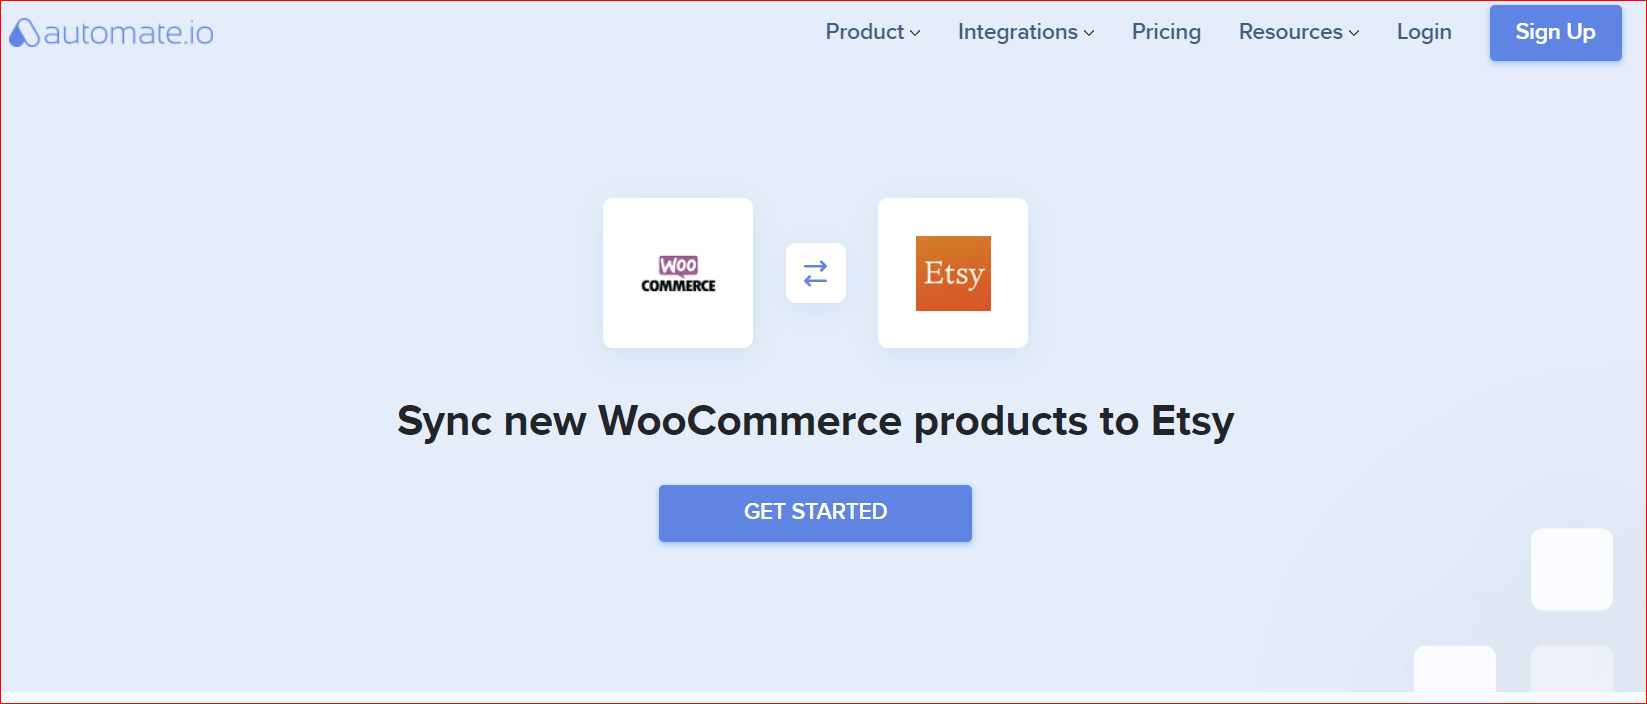
Main features
-
Real-time inventory and product sync
-
Bulk upload WooCommerce’s products to Etsy via direct upload or feeds
-
Simple for every merchant to centralize their work
-
Build feeds with multiple images as well as product variations
Pricing
- Demo: free
- Personal: $9.99 per month
- Professional: $19 per month
- Startup: $39 per month
- Growth: $79 per month
- Business: $159 per month
Conclusion
There is no denying that the integration between WooCommerce and Etsy yields tons of benefits to grow your eCommerce business. Now, you could sell on your Etsy shop easily thanks to the security and safety with the assistance of advanced and improved technologies. If you are selling unique and personalized goods, do not hesitate to integrate your WooCommerce with Etsy. Therefore, you will provide customers with an amazing shopping experience.


