
How to Integrate WooCommerce with eBay

eBay is a famous eCommerce platform that enables merchants to mix direct sales with auctions to boost their sales. If you are considering building up a better reputation for your online brand, eBay should be taken into account.
That is why we will be addressing the benefits of integrating with eBay and answering the question of How to set up WooCommerce eBay integration for your store in this article. Keep reading because it is going to be worth it!
Why should you integrate with eBay?

In the present age, eBay is one of the most well-known brands for online trading. It is an online retail portal that serves both the consumer and corporate markets. On eBay, buyers and sellers interact with each other for business purposes and creating an account is free for everyone. With every transaction done via this vendor, eBay will charge online merchants about 12-15%.
Up to this point, eBay has attracted up to millions of users across the globe. There are multiple reasons leading to its popularity in the eCommerce marketplace. First of all, since the very beginning, it has helped a plethora of retailers to increase their profits. Another prominent difference you may find in eBay is a large amount of competition, sellers and price range. For this reason, more and more customers have come to this place to look for their wanted products throughout time. If you are building your online business solely on your website, it might be a challenge to drive traffic. Plus, the eBay policies also make it much easier for online merchants to set up their stores.
How to set up WooCommerce eBay integration?
The above section has mentioned what you are going to get with WooCommerce eBay integration, this part will focus on How to set up one for your online store. We have divided the tutorial into small basic steps, so make sure you keep a close eye on them:
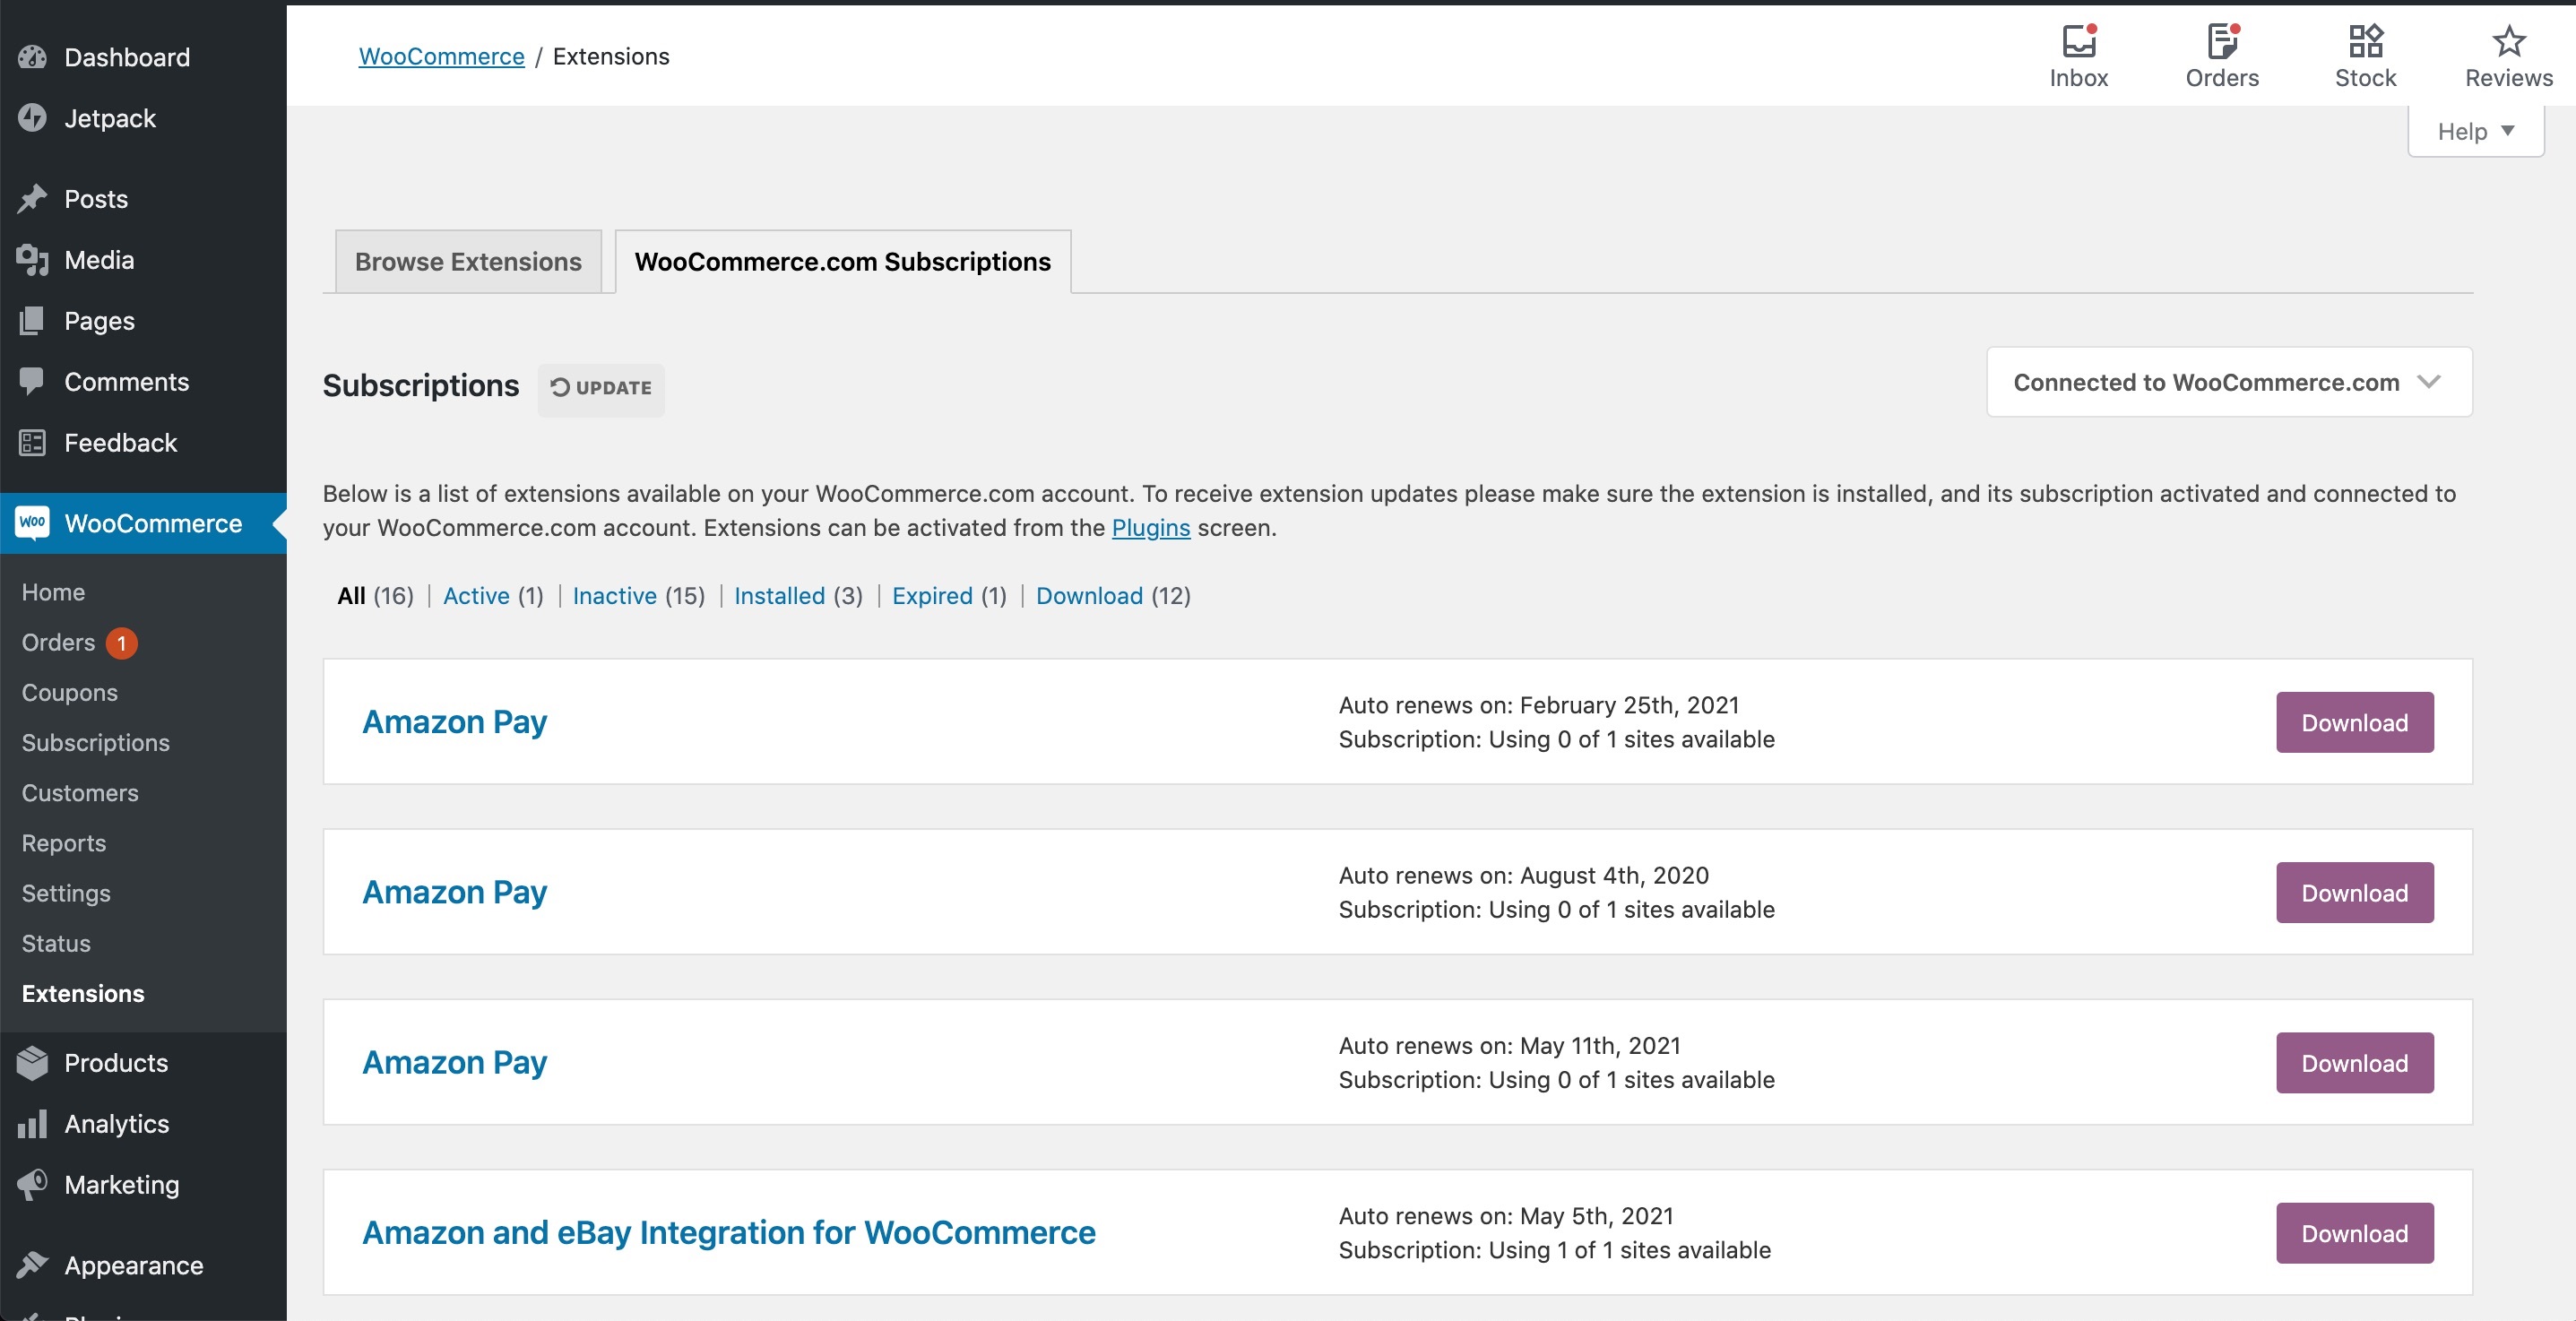
Step 1: Install the plugin
This is also the easiest step out of all, navigate to the WooCommerce > Extensions > WooCommerce.com Subscriptions section and click on the “Download” button next to the eBay integration for WooCommerce plugin. At this moment, you can see there is a file that has been downloaded to your device:
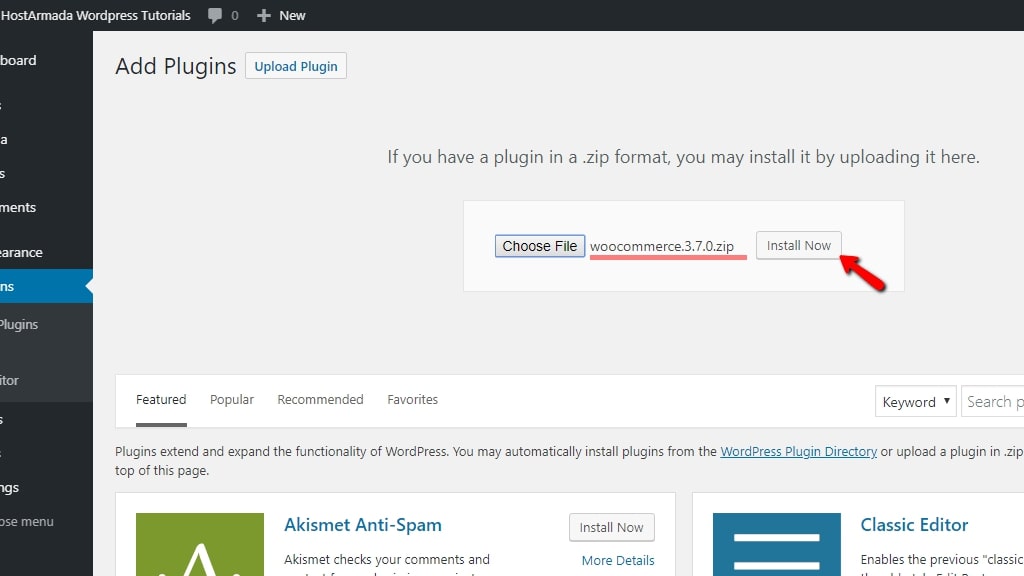
Next up, go to the Plugins > Add New page and locate the “Choose File” button, then select the file that has been downloaded previously. Now, all you have to do is click on “Install Now” and “Activate” to start using the extension!
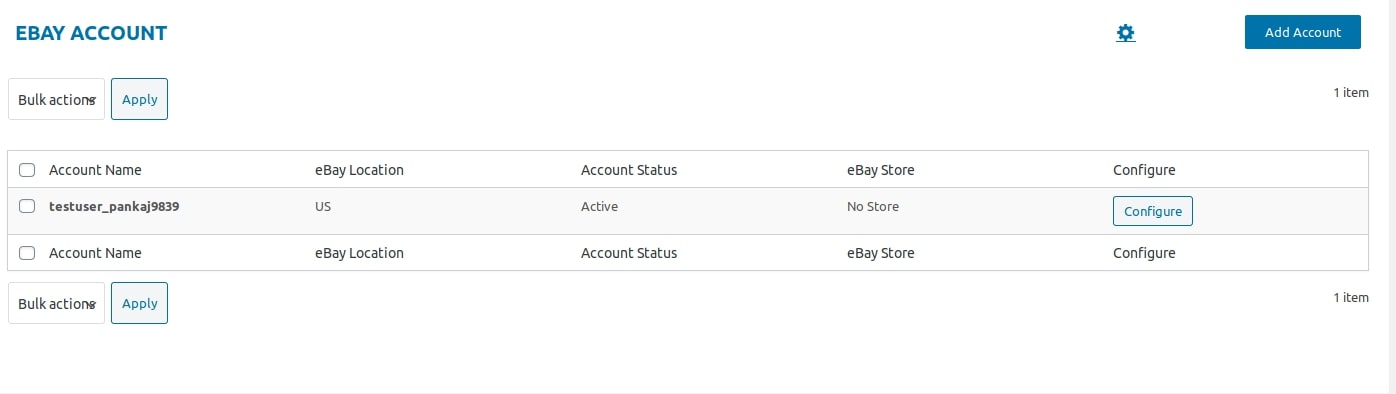
Step 2: Configure your eBay account
When you are done with the installation, go back to your WooCommerce Dashboard and enter CedCommerce > eBay on the left-hand side of the screen. This is how the menu will look like:
After that, we will click on the gear icon next to the “Add Account” option, a pop-up site will appear on your screen just like the image below:

This is where you have to choose whether you want to use the Sandbox Mode or Production mode as the application keys for your eBay account:
- Sandbox Mode: make sure we can access the eBay APIs to carry out actions such as uploading products, updating products, importing products, and inventory updates.
- Production Mode: designed to illustrate the listing actions on your eBay Seller Account
You can easily switch between the two modes by choosing the dropdown located on the bottom right. After that, don’t forget to “Save Application Details”! You will utilize application keys to create an eBay token that will enable your eBay Seller Account to access the plugin.
Step 3: Authentication process
After configuring your account, it is necessary to authenticate the WooCommerce eBay integration. By clicking on the “Add Account” button, the system will redirect users to an authorization page:
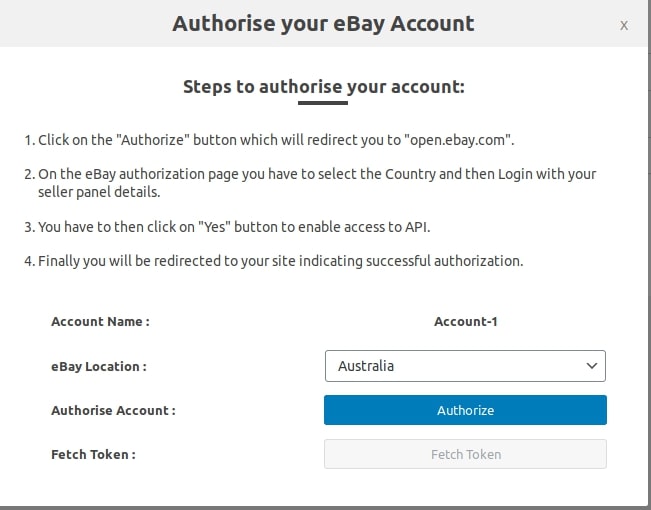
Carefully follow the detailed instructions listed in the image and you are ready to move on to the next step!
Step 4: Fill in your account details
When you have completed the authorization phase, you will be taken to your eBay account page, where you will be able to make adjustments for Account Details, Settings, Category Mapping and so on. For this step, we will take a look at your Account Details:
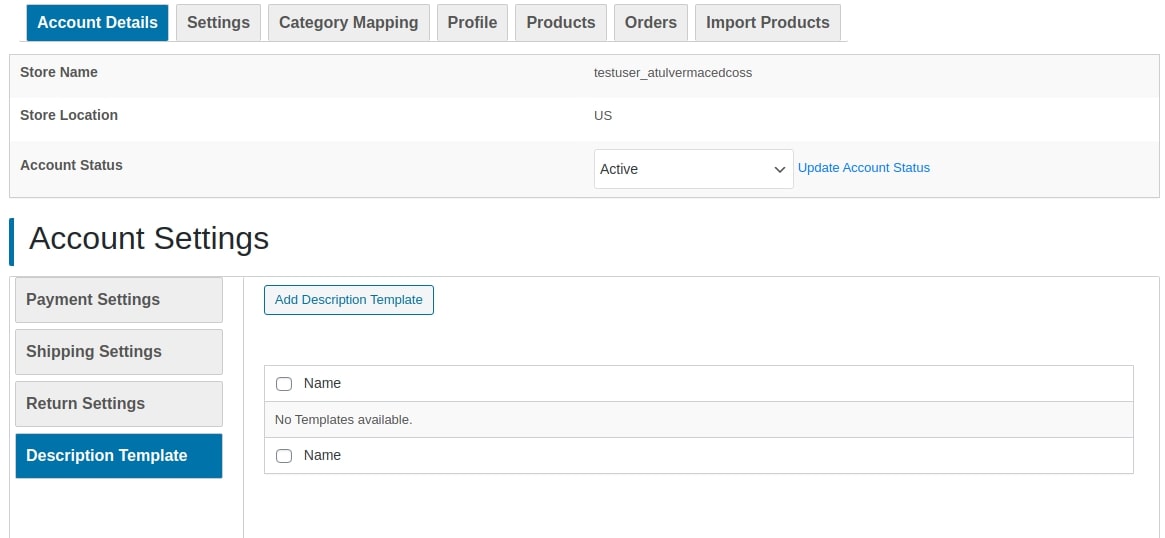
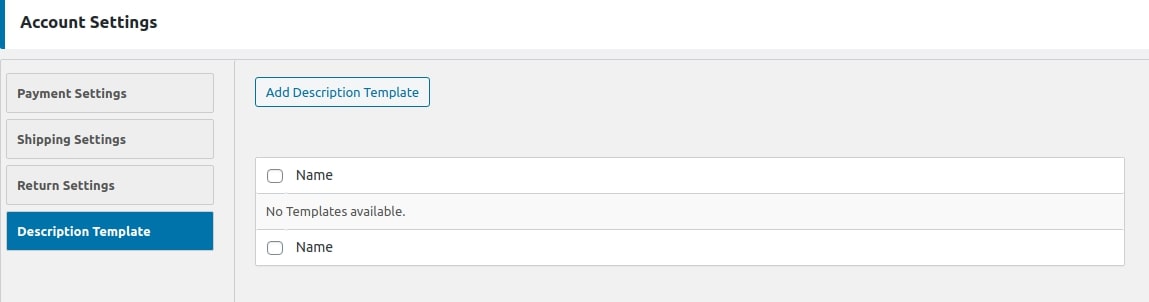
As you can see in the image, there are three sections in total; click on the “Update Account Status” and you will see four fields of Account Settings:
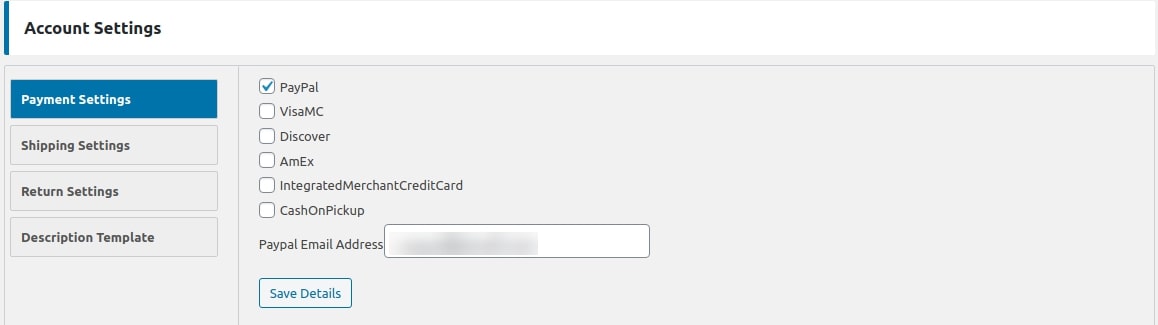
- Payment Settings: Customers may choose the payment method they want from the business owners:
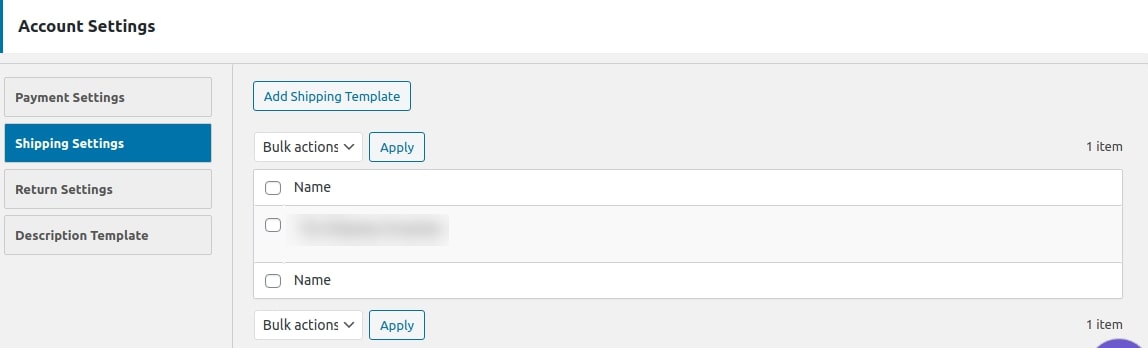
- Shipping Settings: provide the shop owners the option to design their own shipping templates for the goods they want to sell on the site. The WooCommerce eBay plugin has been created to automatically select the shipping template that is most appropriate for the product’s weight:
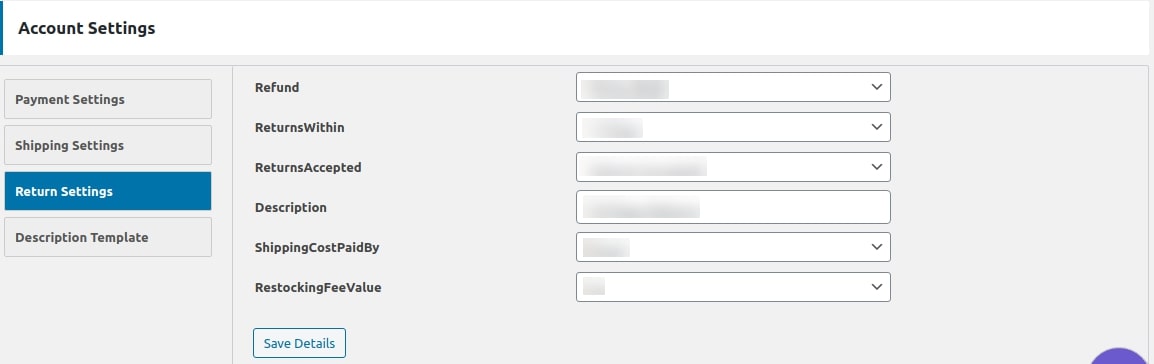
- Return Settings: Returns are permitted as long as the information are saved by the shop owners. In addition, the shop owners may also decide whether they would accept returns or not:
- Description Template: To help boost your product’s description on eBay, you may utilize a pre-made description template. Also, designing your product description using HTML and CSS and including other components, such as pictures, videos, to improve the overall presentation to the prospective buyer is possible:
Step 5: Customize further settings
You can find two sections of settings while using WooCommerce eBay integration: General Settings and Scheduler Information.
For the first one, then respectively fill in the form as below:
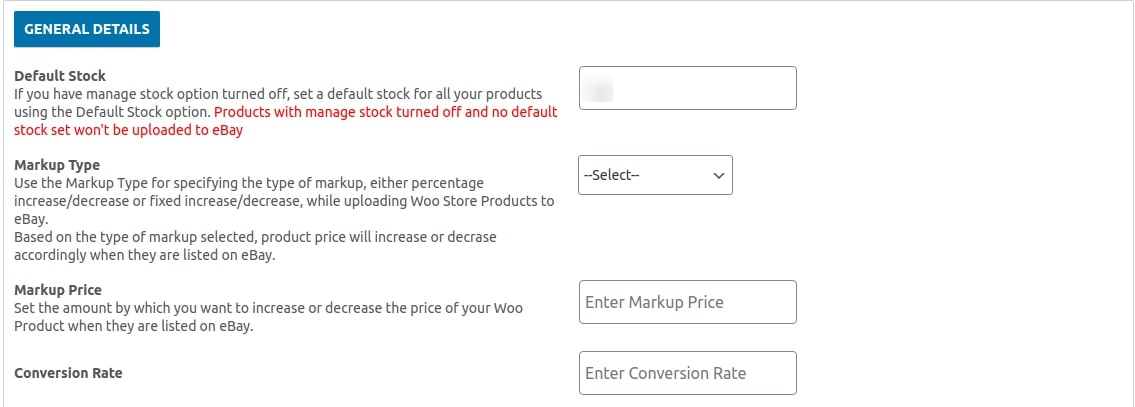
- Default Stock: it is essential if you have switched manage stock off for your WooCommerce product. Submitting the product to eBay will be an issue if you fail to update the default stock.
- Markup Type: decide whether you want to have the eBay fees go up or down by a set amount or in relation to an increment or percentage.
- Markup Price: If you would want to make a change in the listed listing rates to reflect a final price on eBay, use the “Markup Price” option.
- Conversion Rate: You will have the ability to choose whether you would want to convert your rates to either a different currency or the same currency.
With the latter, you will be given an opportunity to enable to disable the automatic scheduling tasks:
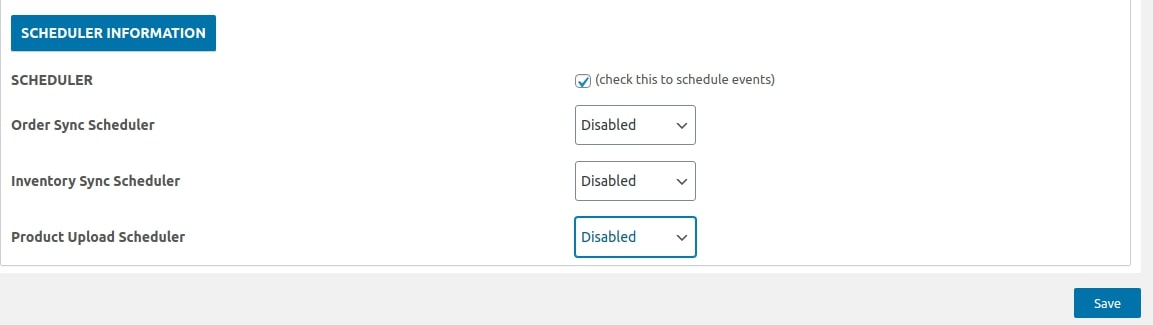
- Order Sync Scheduler: If you choose this option, your eBay orders will sync with the frequencies you’ve chosen.
- Inventory Sync Scheduler: This will sync your products from WooCommerce to eBay as you want.
- Product Upload Scheduler: allow you to choose the intervals for uploading goods from WooCommerce to eBay.
Step 6: Map your categories
Coming to the Category Mapping section, WooCommerce eBay integration asks e-tailers to associate their WooCommerce product categories with the marketplace categories on eBay. It is a must because eBay mandates that items be added to their defined categories. WooCommerce products may be associated with one or more eBay categories. A profile is generated based on the category mapped, all WooCommerce goods are listed in that category.
This process is pretty simple, starting with entering the Category Mapping section then clicking on the “Refresh Category” button to see all the eBay marketplace categories. Following that, select the dropdown as below:
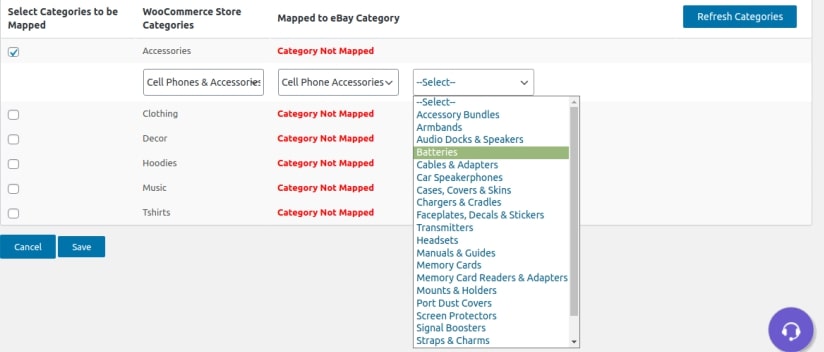
At this point, you have to manually pick the category that fits with your categories and continue to do the same thing until there is nothing left. Finally, remember to “Save” your work because no one wants to start all over again!
Step 7: Managing profiles
Profiles are used to help users avoid the additional work of inputting the product-level data required for a product to be listed on eBay. Once a user has filled out all of the information required for a product to be listed on eBay, they can assign a profile and group all of their products together within that profile based on their category.
In order to make changes to one of your profiles, just select the edit link under their Profile Name and feel free to edit it for any fields based on your preferences:
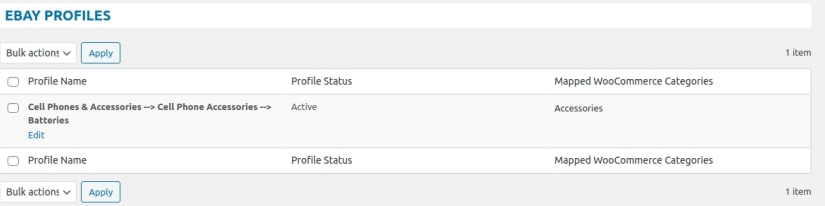
For the “Basic Details” the Profile Name and its category will be included:

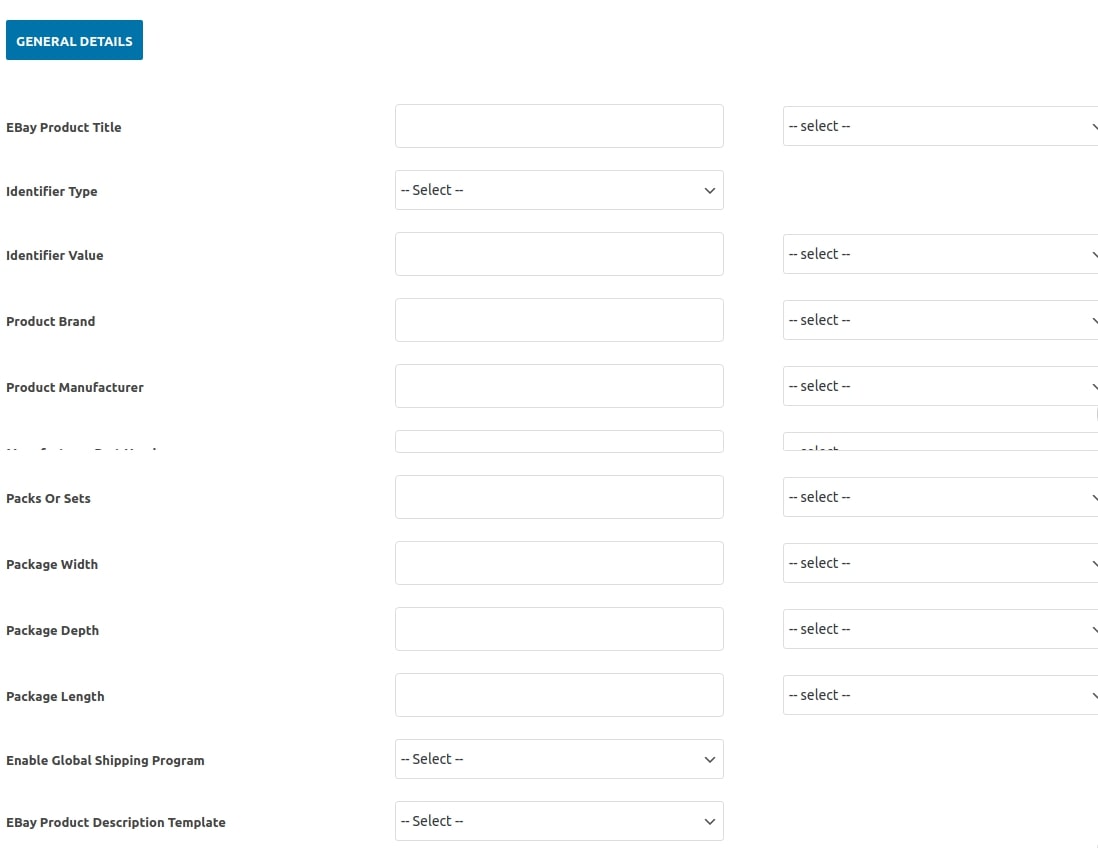
Besides, this is how your screen for the “General Details” will look like:
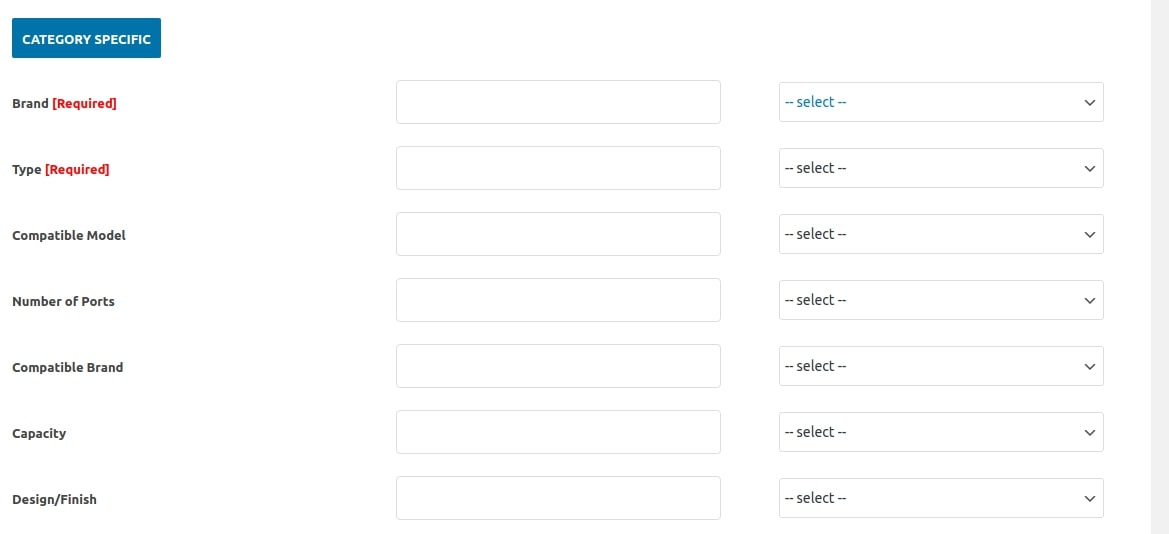
And then we have the “Category Specific”, in the option to fill out optional information that is not listed as Required, the shop owners may choose whether they want to provide that data or not. However, if they fill out the completed forms, it will boost their business’s sales and search engine optimization results on eBay:
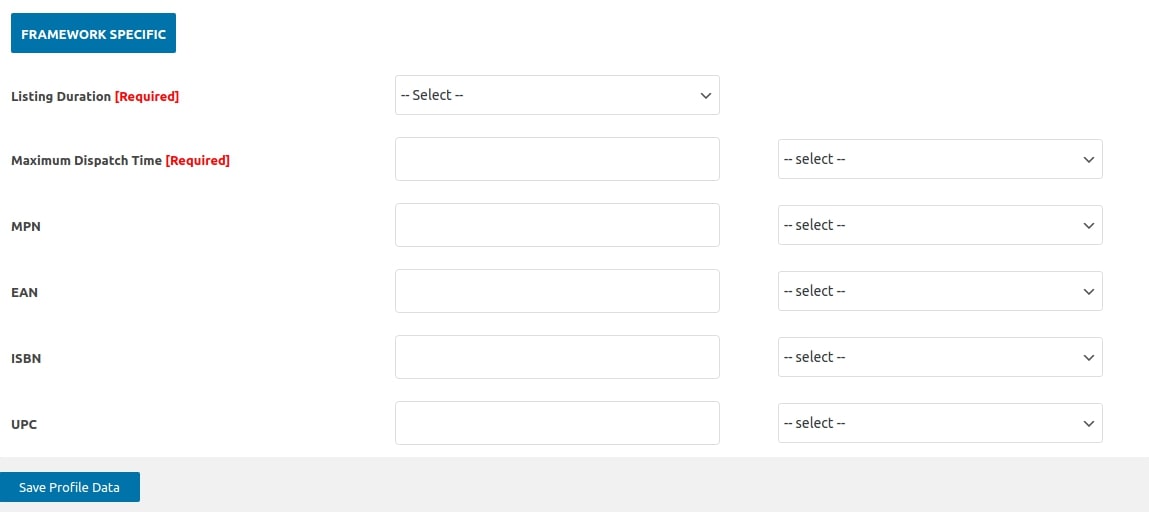
The “Framework Specific” section is no much different than the “Category Specific”, therefore, it is recommended that you should fill in all the fields:
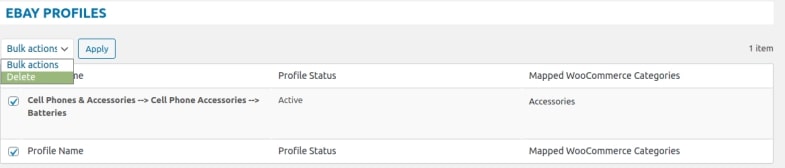
On the other hand, sometimes you may need to get rid of a specific profile, tick on the checkbox next to them and choose the “Delete” alternative like what we did here:
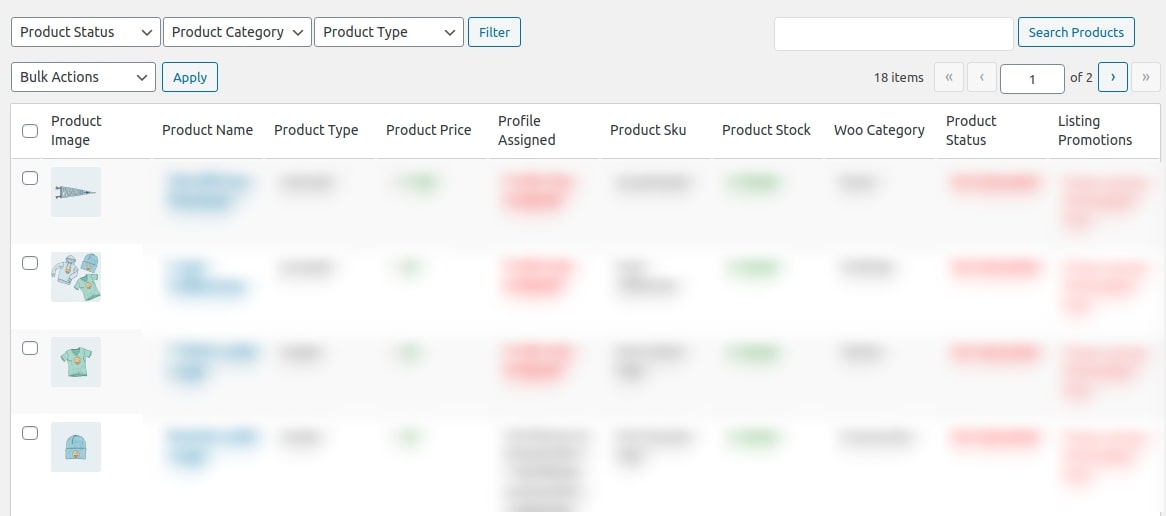
Step 8: Managing products
Moving on to the “Product Management” tab, store owners may see product information such as the allocated Profile name, Product selling price, and the Product inventory. Another feature is that the admin may add the chosen goods to the eBay marketplace:
If you wish to perform more than the discussed task for your WooCommerce eBay integration, check out here to have a clear understanding of it!
Top 4 plugins for integrating WooCommerce and eBay
In the article today, we have guided you through the setting up process of WooCommerce eBay integration using the eBay integration for WooCommerce plugin. Conversely, if this extension has not fulfilled your requirements, we have gathered other alternatives for online merchants to choose from on the basis of their popularity, customer reviews and, most importantly, efficiency:
Selro
At the top of the list, Selro might be the solution that you are looking for. This offers consumers the opportunity to select their own shipping alternatives, and it features some of the finest and smartest inventory management systems on the market today. Real-time inventory synchronization is a feature available in various plugins that connect WooCommerce with eBay. It includes many backend processes, and all of them are accessible via a simple interface.

Key features
- Stock managing
- Automatically process orders
- Calculating sales
- Updating product labels
Multichannel for WooCommerce: Google, Amazon, eBay & Walmart Integration
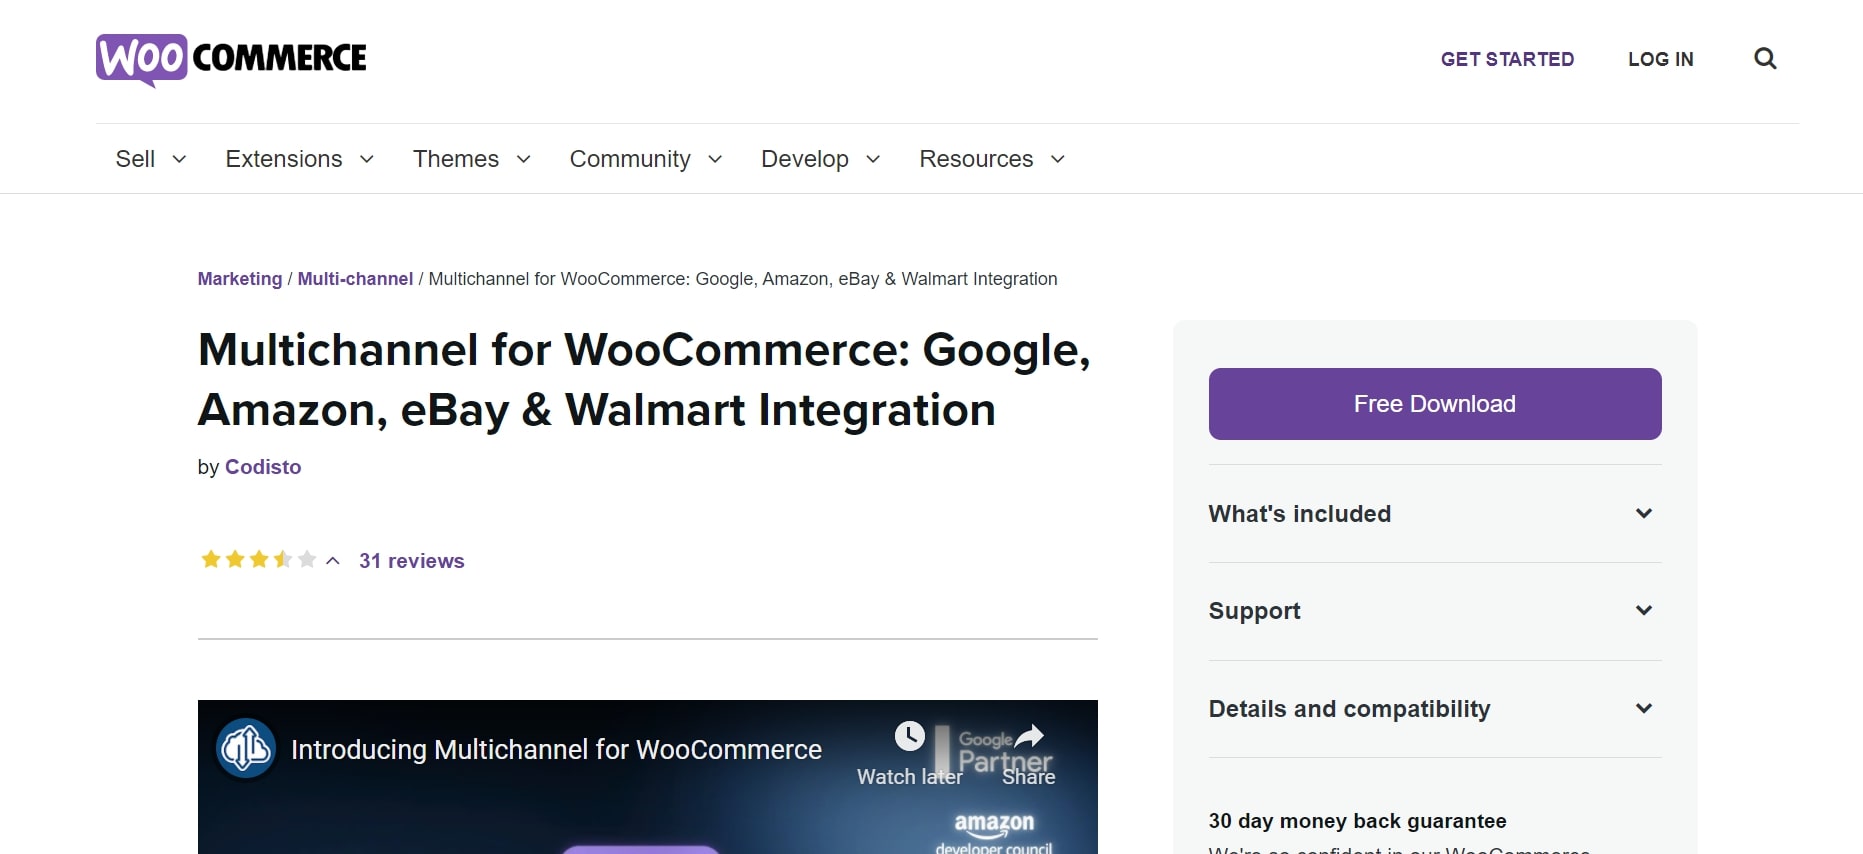
Multichannel for WooCommerce: Google, Amazon, eBay & Walmart Integration is a little bit more distinct compared to its rivals. Instead of only setting the integration for WooCommerce eBay, it also gives users the ability to grow their business by widening on other platforms. Moreover, if other plugins mandate their customers to manually export and upload the product profiles, it is completely automatic. This means that you have complete control of your Amazon, eBay, Walmart, and Google listings and Google Product Listing Ads.
Key features
- Product bulk listings
- Real-time synchronization, including inventory, price data as well as product information
- Globally integrating with multiple online trading platforms
- Provide custom-tailored titles, pricing, descriptions, and so on.
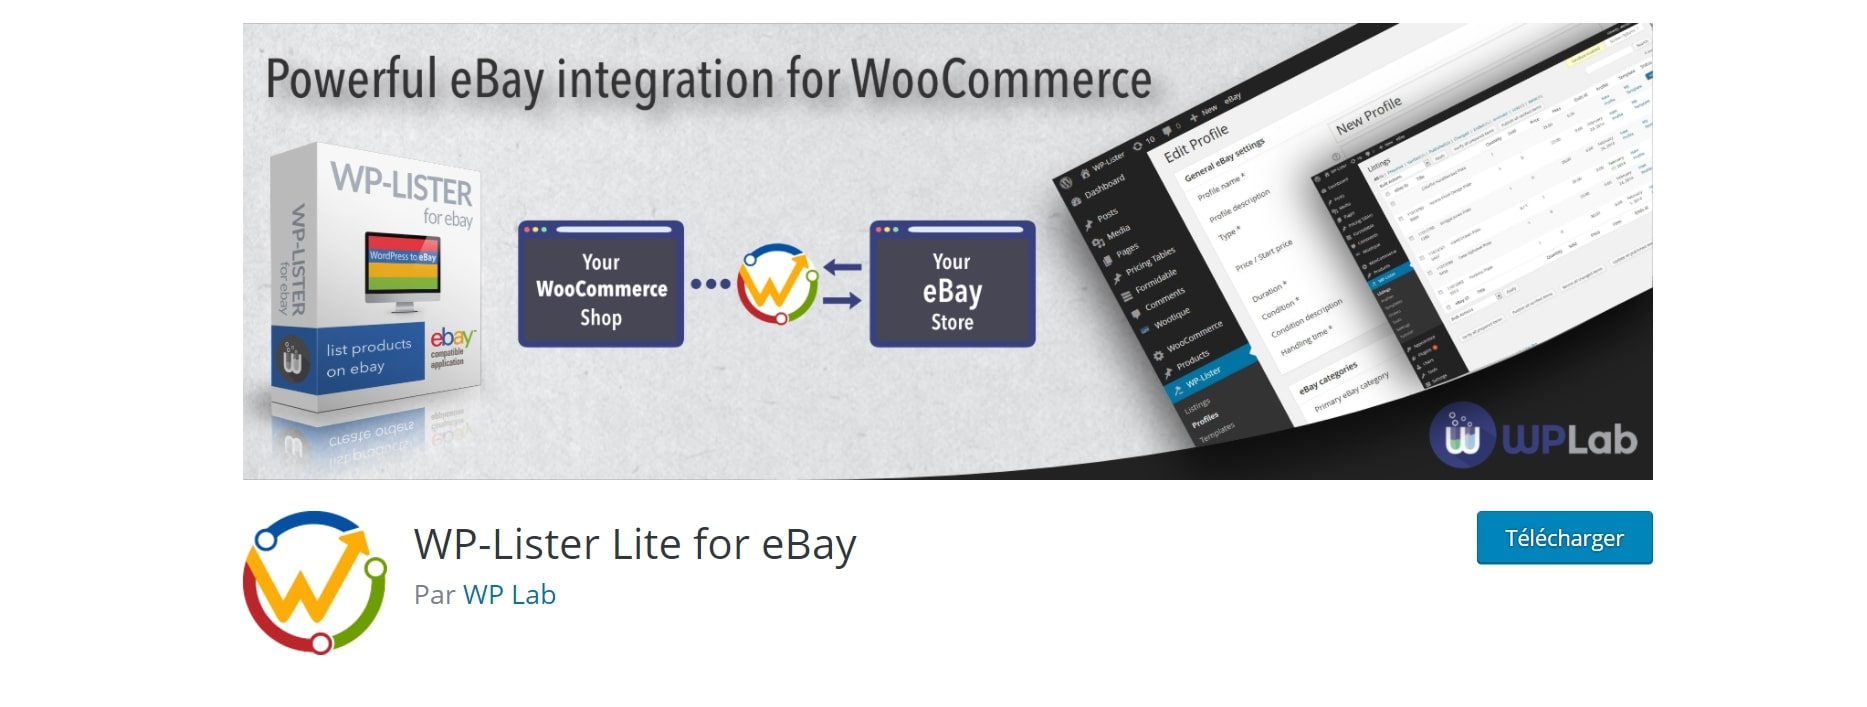
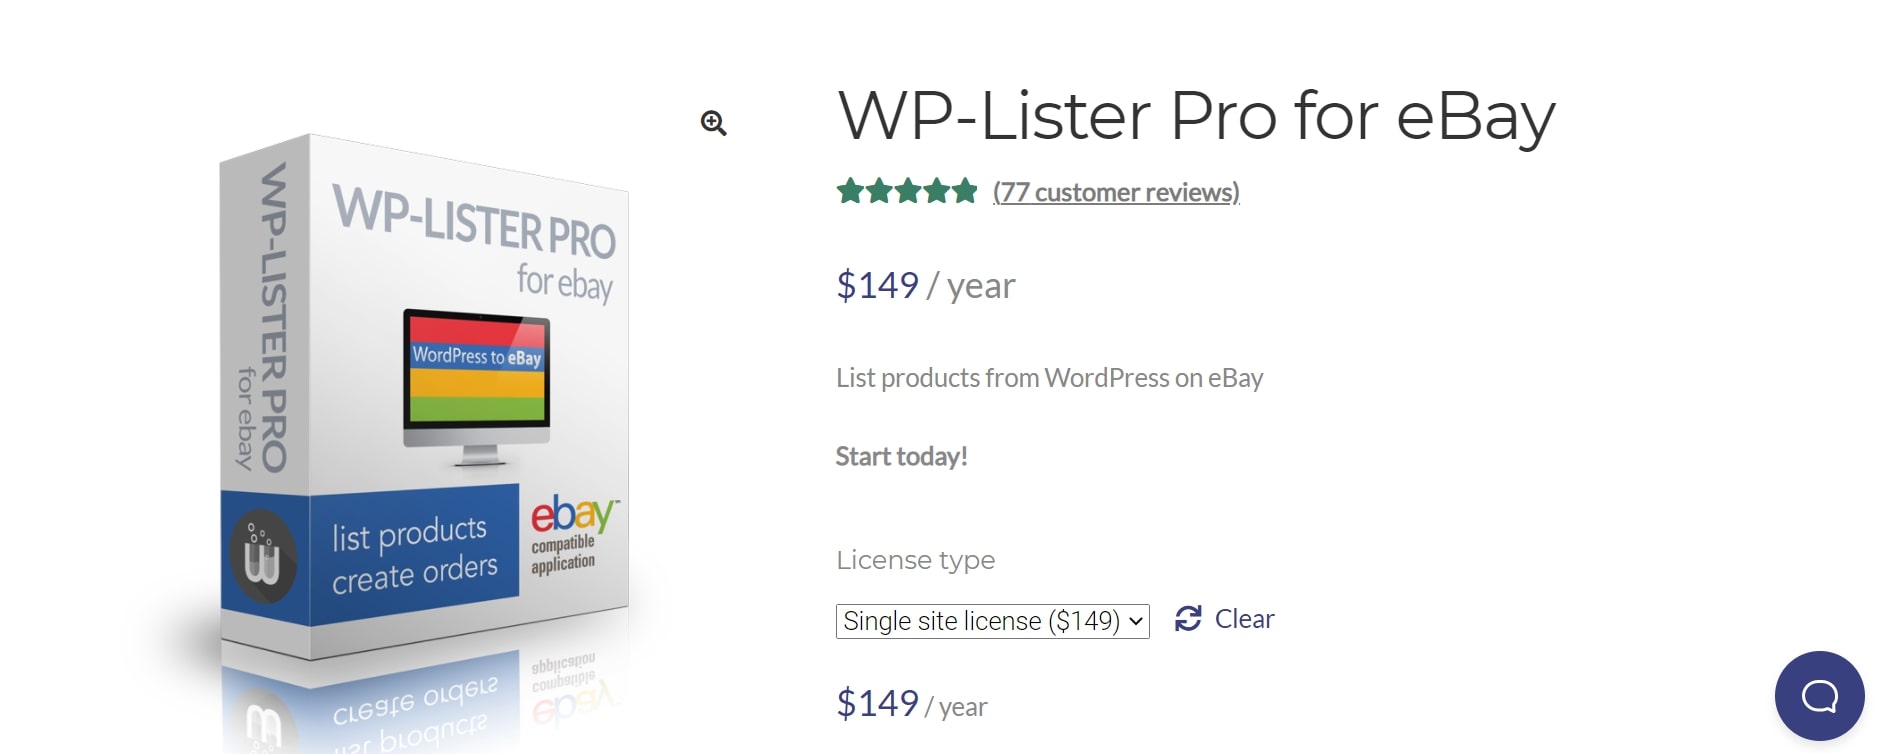
WP Lab Extensions
There are two versions of WP Lab Extensions for creating WooCommerce eBay integration - the “Lite” and “Pro”. While “Lite” is totally free, “Pro” charges users an amount of $149 to make use of them.
With the WP-Lister Lite, it links the two shops together, giving you the option to design and produce as many goods and listings as you like, and also providing the ability to incorporate many variants of the same product (sizes, colors, etc.):
Conversely, the more expensive version will automatically synchronize your inventory, enabling you to order once goods posted on eBay have sold. WP-Lister Pro offers further capabilities such as the ability to import goods from eBay to WooCommerce, variants split, and upload product pictures that are not available in Lite.
Veeqo
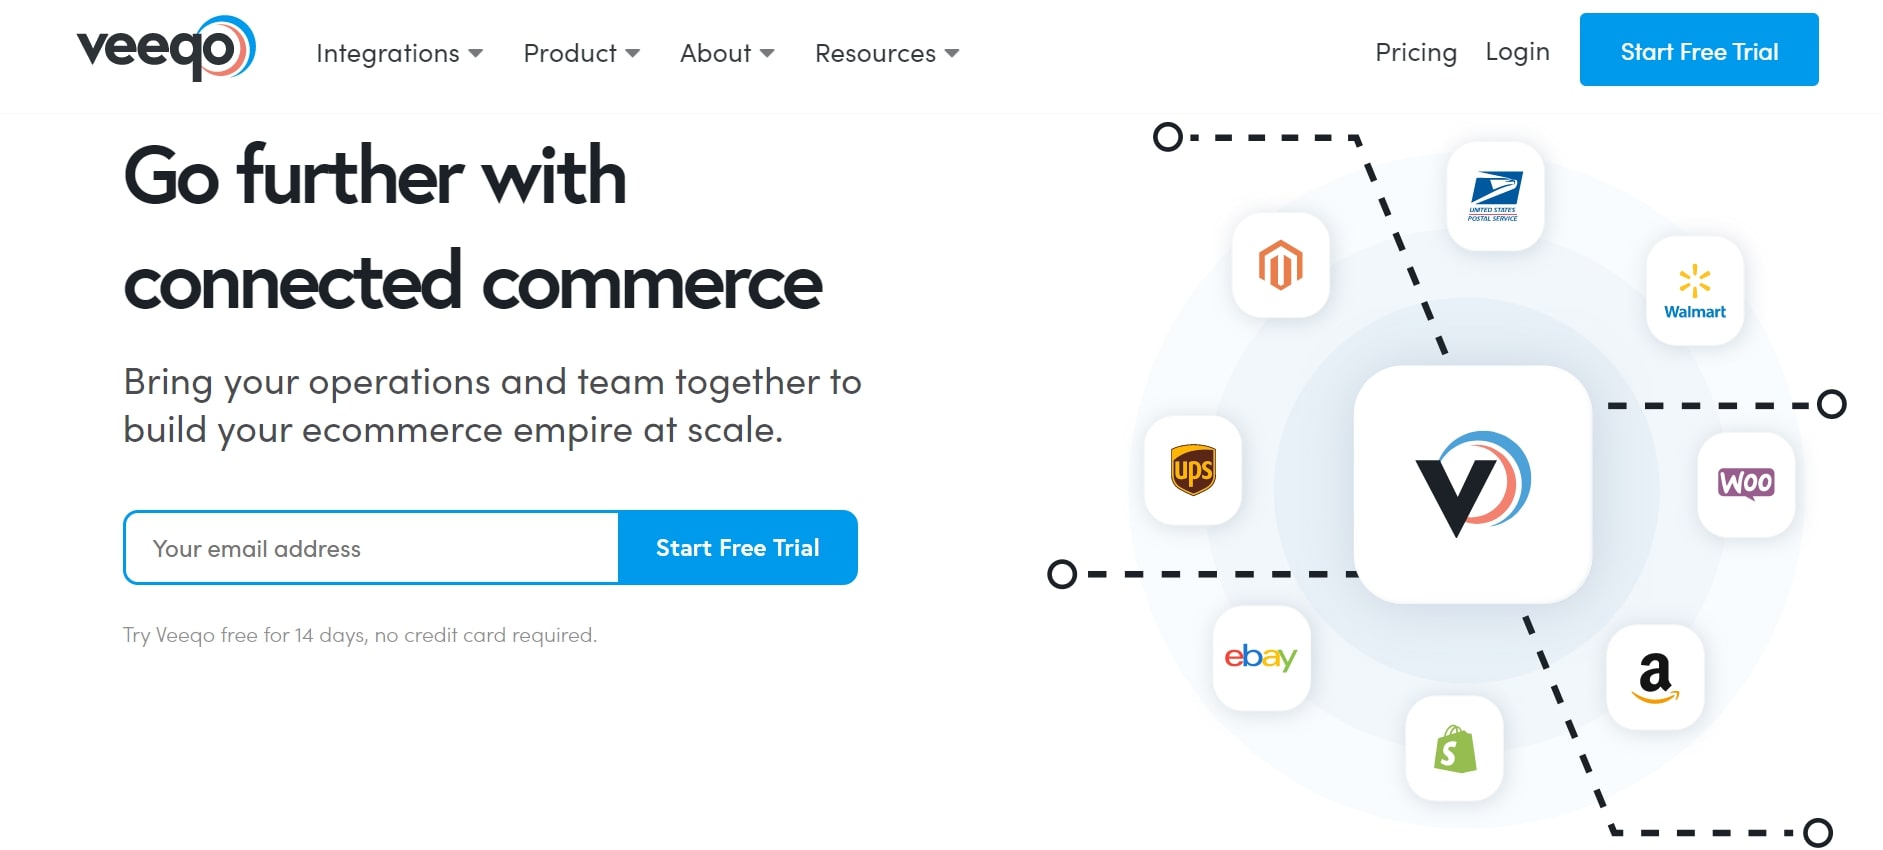
It is highly recommended for online sellers to use Veeqo with the aim to set up their WooCommerce Ebay integration. The WooCommerce, eBay, and Amazon integration are intended to monitor and sync goods across WooCommerce, eBay, and Amazon. With this tool, eBay shoppers will be able to sell and ship internationally, reaching foreign markets.
Key features
- Real-time synchronization
- Adjustable reports
- Cloud-based store management
- Frequently updating your orders between the two marketplaces
And all of these only come with a price of $160 monthly. Try it out now!
Conclusion
To sum up, opening another outlet for your brand on eBay may help you gain higher revenues in the long run. We hope that this article on How to set up WooCommerce eBay integration will give you an insight into this potential marketplace and make full use of it.


