
How to Integrate WooCommerce with Clover POS

If you own a WooCommerce store, your store will become better with the help of an effective method for receiving payment as well as checking out customers. In this case, a POS system from Clover, or known as point of sale, will be your lifesaver to accomplish your wish. We can be sure that merchant services would be an unexpected logistical nightmare if your store runs without them.
This is to say, the integration between WooCommerce and Clover POS has now become a must-do thing. So, do not hesitate to implement this to get a breakthrough and gain more benefits from it. Understand your need and concerns, we have come up with a simple and quick guide on how to integrate WooCommerce with Clover POS. Follow us and let’s get started!
Why do we need to integrate WooCommerce with Clover POS?
Before going into details of integrating WooCommerce with Clover POS, spend several seconds looking at obvious benefits from this integration.
-
Be easy-to-use and intuitive: Clover integrated the technology of smart devices, tablets, as well as smartphones with its product.
-
Offer additional security: Shoplifting is a worrying problem all of the time. And Clover utilizes the read readers with built-in encryption features to avoid cybercriminals and hackers.
-
Enable WooCommerce stores to be more data-driven and smarter: Clover POS assists store owners in analyzing and recording numbers and reports of customers, products, sales, and so on.
How to integrate WooCommerce with Clover POS
It is time to connect your WooCommerce with Clover POS. This integration guarantees good management of customers’ data, inventory, coupled with sales in each location. Moreover, it also lets you sell in different places and is not time-consuming because it keeps your brick-and-mortar and online shops as one.
Step 1: Create action for Clover POS
First, go to the dashboard of Kosmos Central, if you have not had an account, sign up for one before proceeding with other steps of integrating.
As you approach the Dashboard, you can see two menus “Tasks” and “Action”. Simply navigate to “Actions” to pick up the kind of data you want to sync between WooCommerce and Clover POS. If this is the first time implementing this, it means you have not yet created any action like the screen below:
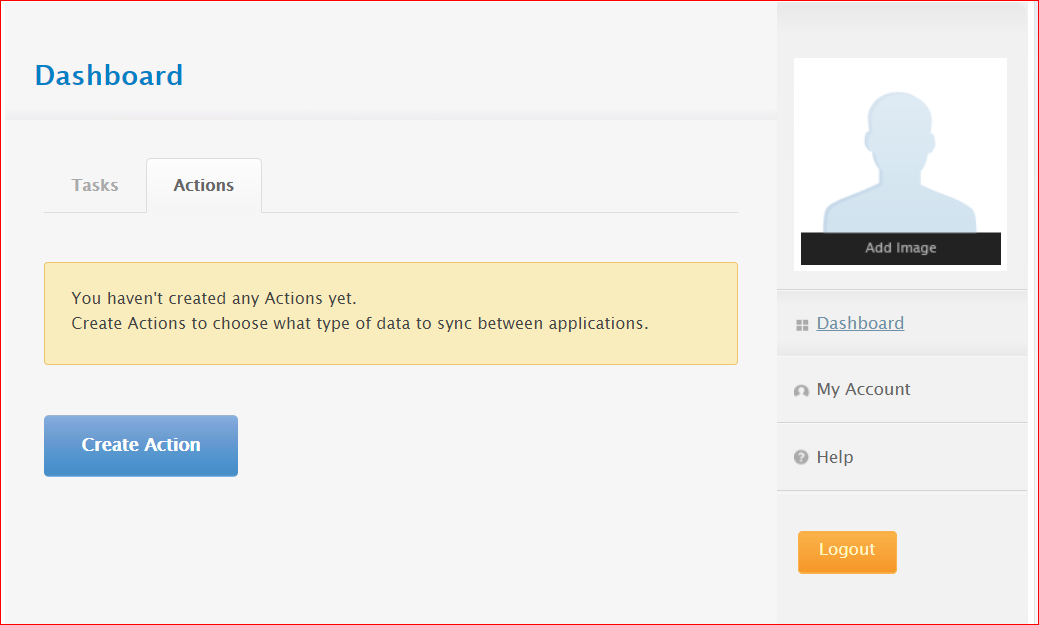
Next, move to click “Create Action” and keep going with the next step.
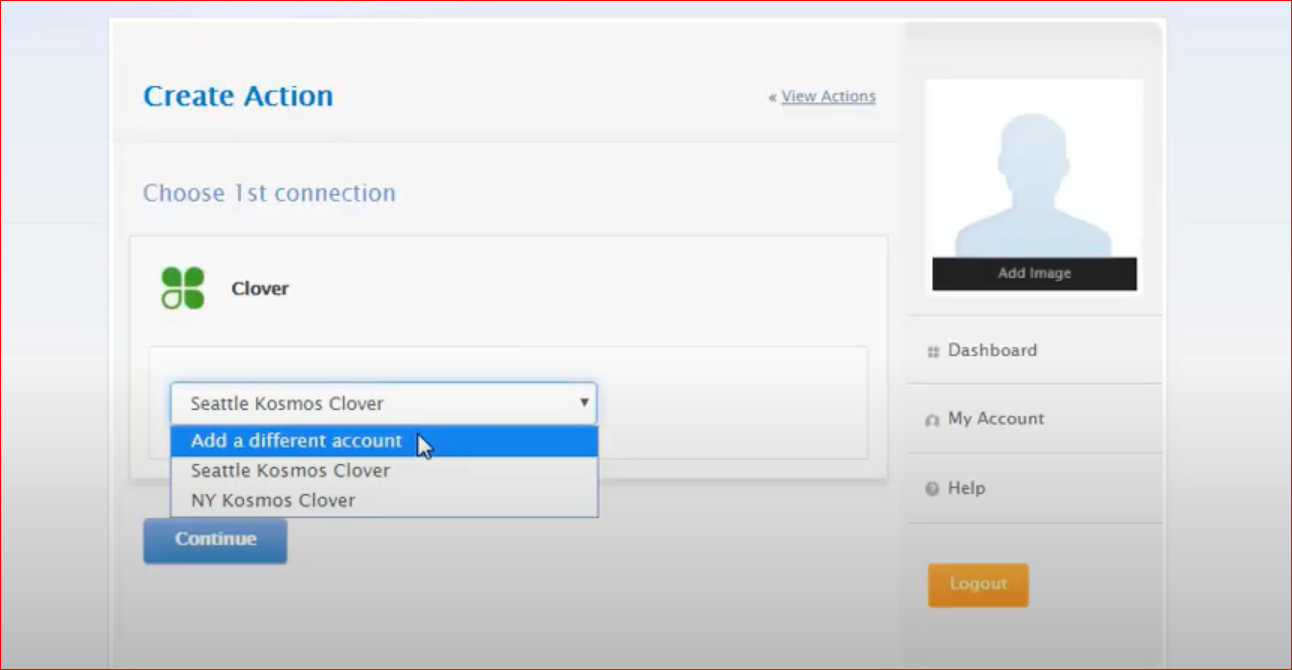
When you are done clicking it, you will be taken to a list displayed by icons of different applications. As we are about to connect Clover POS to WooCommerce, your task now is to choose “Clover”. Next, scroll down a little bit and select among several options. In this situation, we need to click “Add a different account” and click the button “Continue”.
Step 2: Grant access for Clover POS
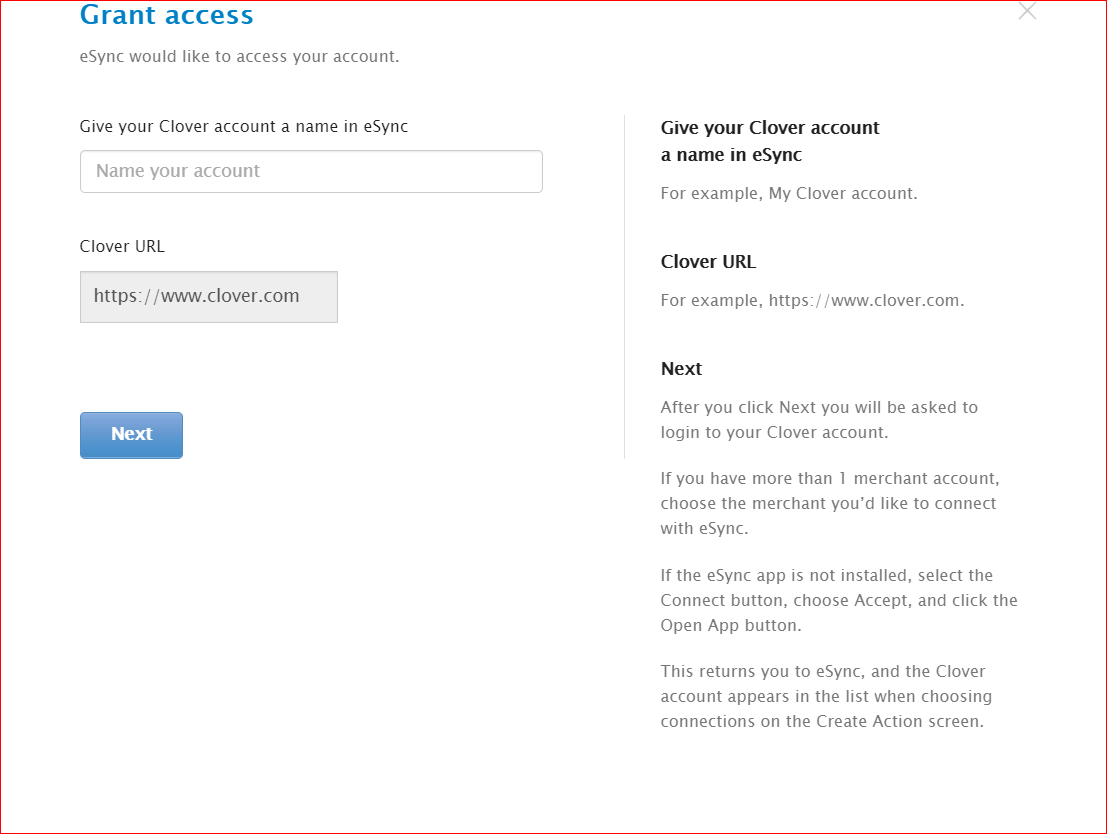
As soon as you click “Continue”, you will go to a section named “Grant access”. This is where you will create the name of your Clover in the eSync. Type the name you want in the first box “Give your Clover account a name in the eSync”. In the second box “Clover URL”, you need to fill in the URL of your Clover. When everything is done, just click the button “Next”.
After clicking the button “Next”, you are required to log into your account of Clover. In case you own more than one merchant account, you need to choose the one that you are going to integrate with eSync.
If the application the eSync has not to get installed, you are supposed to click the button “Connect”, select “Accept” and choose the button “Open App”.
This will then take you to your eSync. Next, the account Clover will appear in your list as soon as you choose connections right on the screen “Create Action”.
Step 3: Choose a Merchant
It is time for you to choose a merchant. The Clover’s OAuth is used to let developers access the data of your merchants. Therefore, you must choose the merchant that you want to use. As we mentioned above, in case the application has not been installed, you will go to the App Market of Clover.
Step 4: Create action for WooCommerce
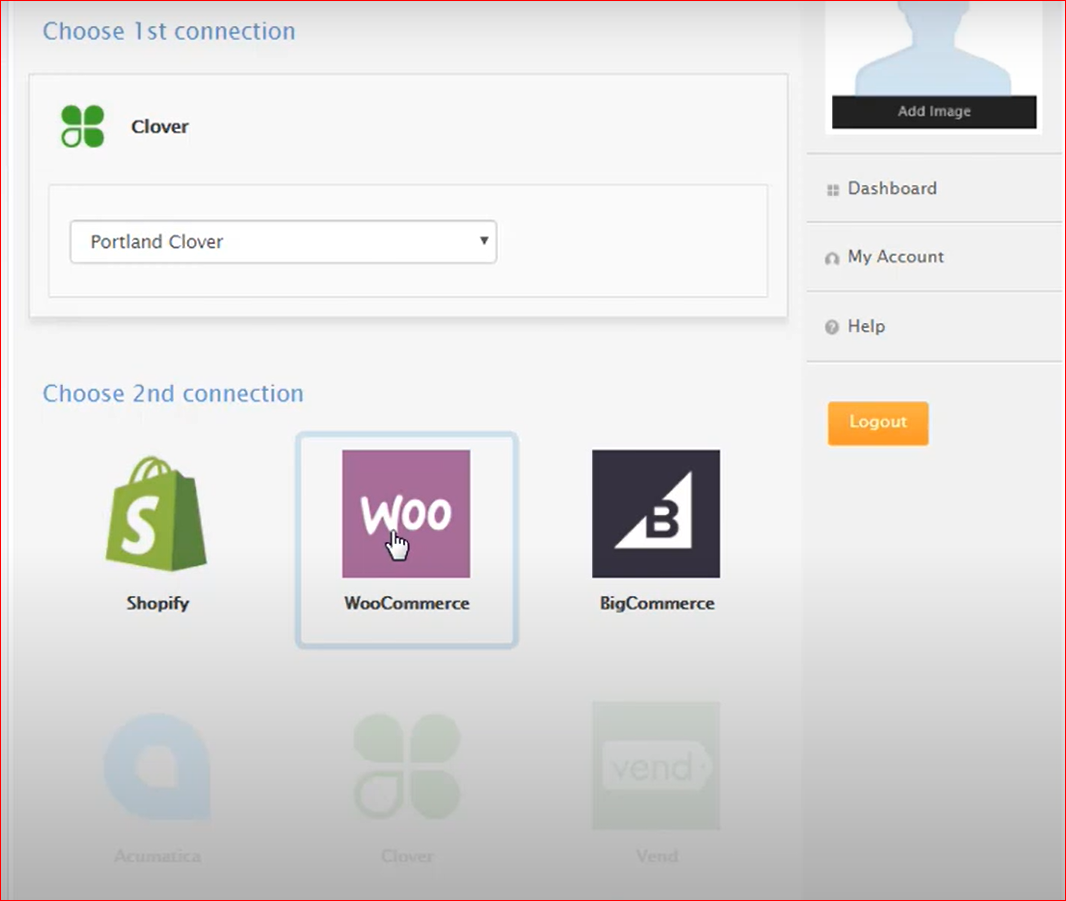
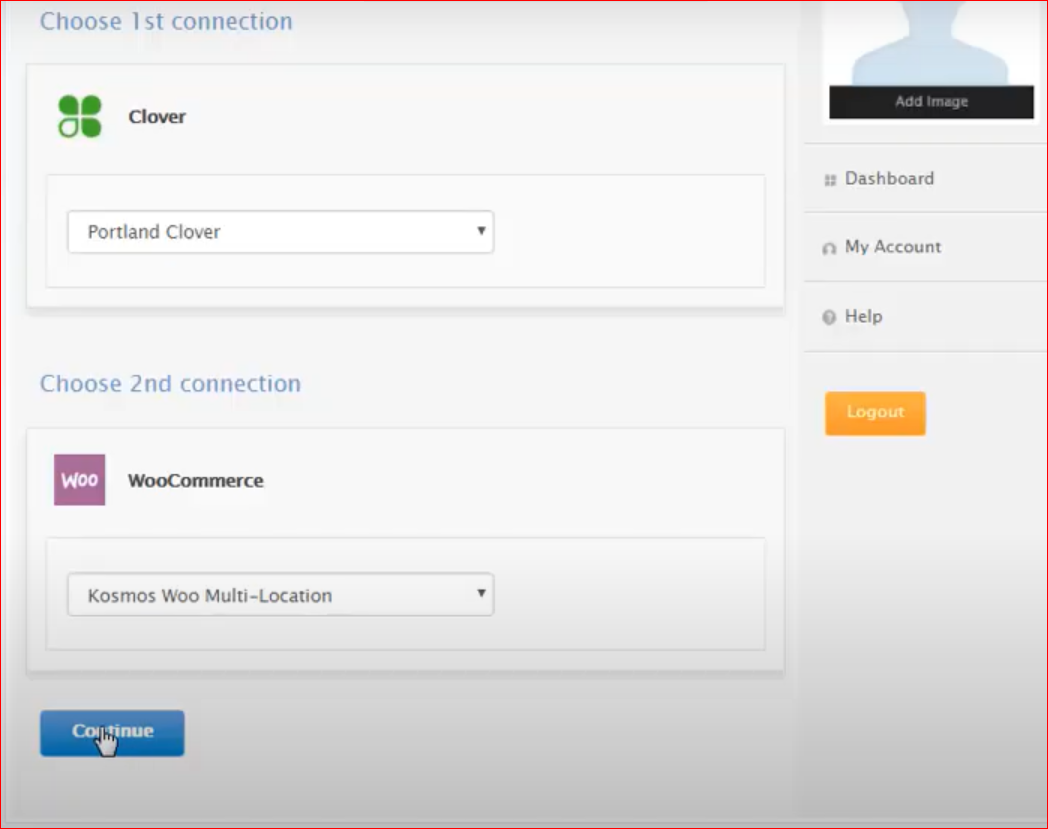
For example, you will be about to choose Portland eSync, then it will open up another page that is similar to the first step we have done above. Because you have chosen your merchant, this page will display your merchant here. Then, you click it. This means you have finished the first connection. Click “Continue” to go ahead with the second connection.
You are targeting the connection between Clover POS and WooCommerce, so click “WooCommerce”.
Now you have two connections: Clover and WooCommerce. What you need to execute next is to click the button “Grant Access”.
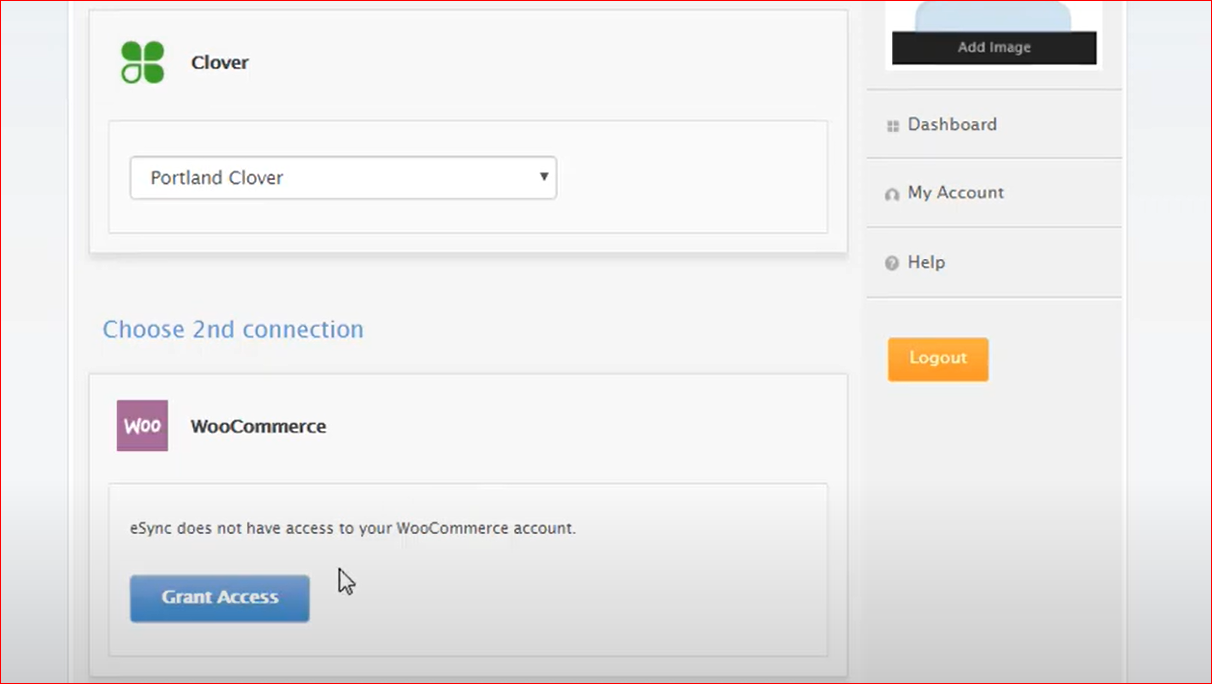
Step 5: Grant access for your WooCommerce
When you are here, you need to give the name of your account WooCommerce in the eSync. For instance, you are about to title it as “My account WooCommerce”, type it in the first box named “Give your WooCommerce account a name in the eSync”.
Move to the next step with entering the URL of your WooCommerce site. Let us take an easy-to-understand example. The URL of WooCommerce’s homepage is https://ourshop.com. Enter it in the second box “Enter URL of WooCommerce website”.
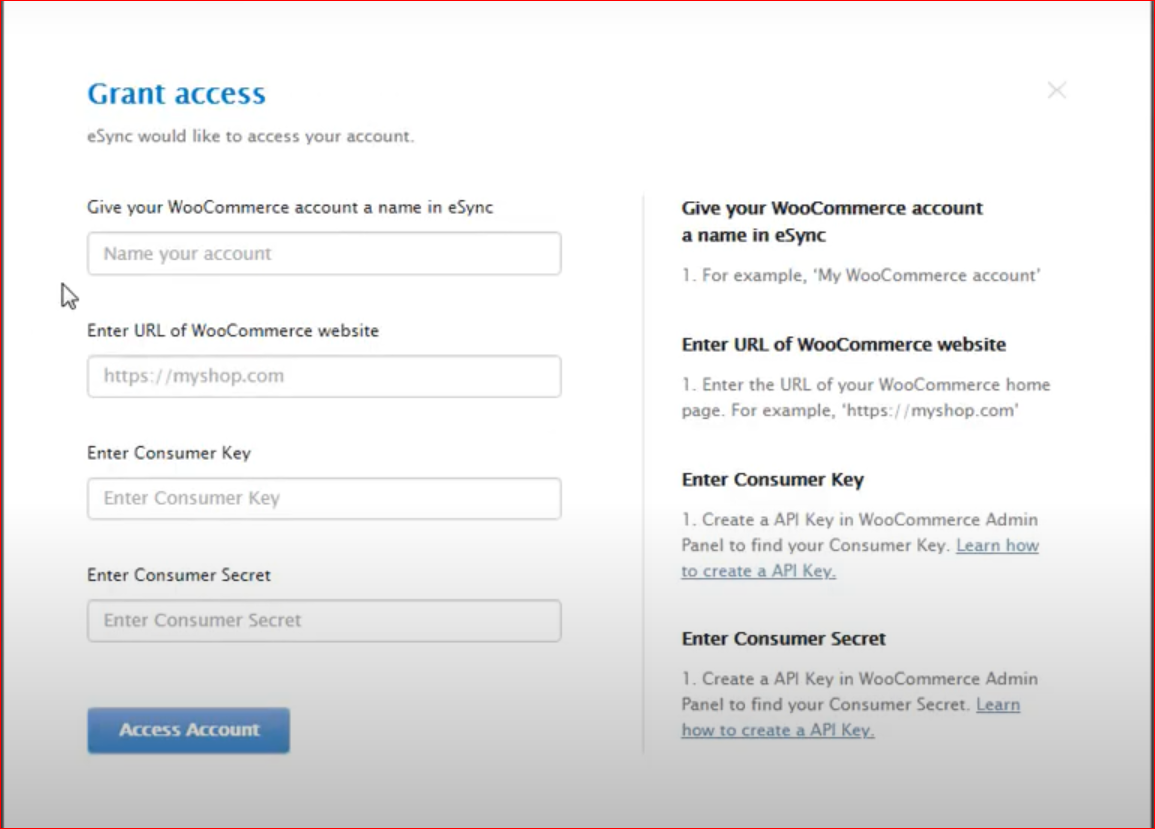
After that, you will need to enter the customer key. Get started by creating the API Key within the section Admin Panel of your WooCommerce. Then, enter it in the third box “Enter Consumer Key”. Besides Consumer Key, you also need to find the Consumer Secret. To get these kinds of keys, you need to navigate to WooCommerce Settings and follow our small guide as below.
The REST API on WooCommerce works based on one key system which is in charge of controlling access. Those keys will be linked to your website’s WordPress users. So, if you want to create as well as manage these keys for certain WordPress users, you need to go to your “WooCommerce”, select “Settings”, then click the tab “Advanced”, and choose the section “REST API”.
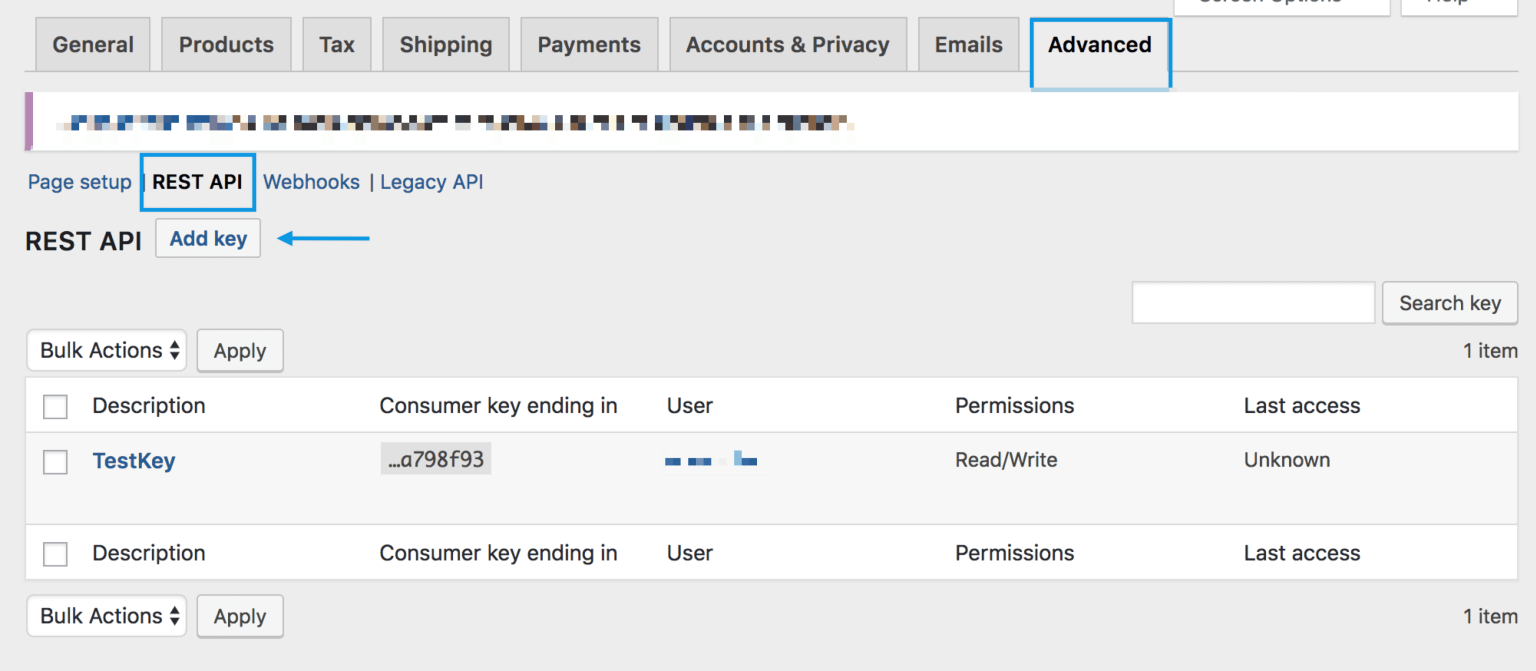
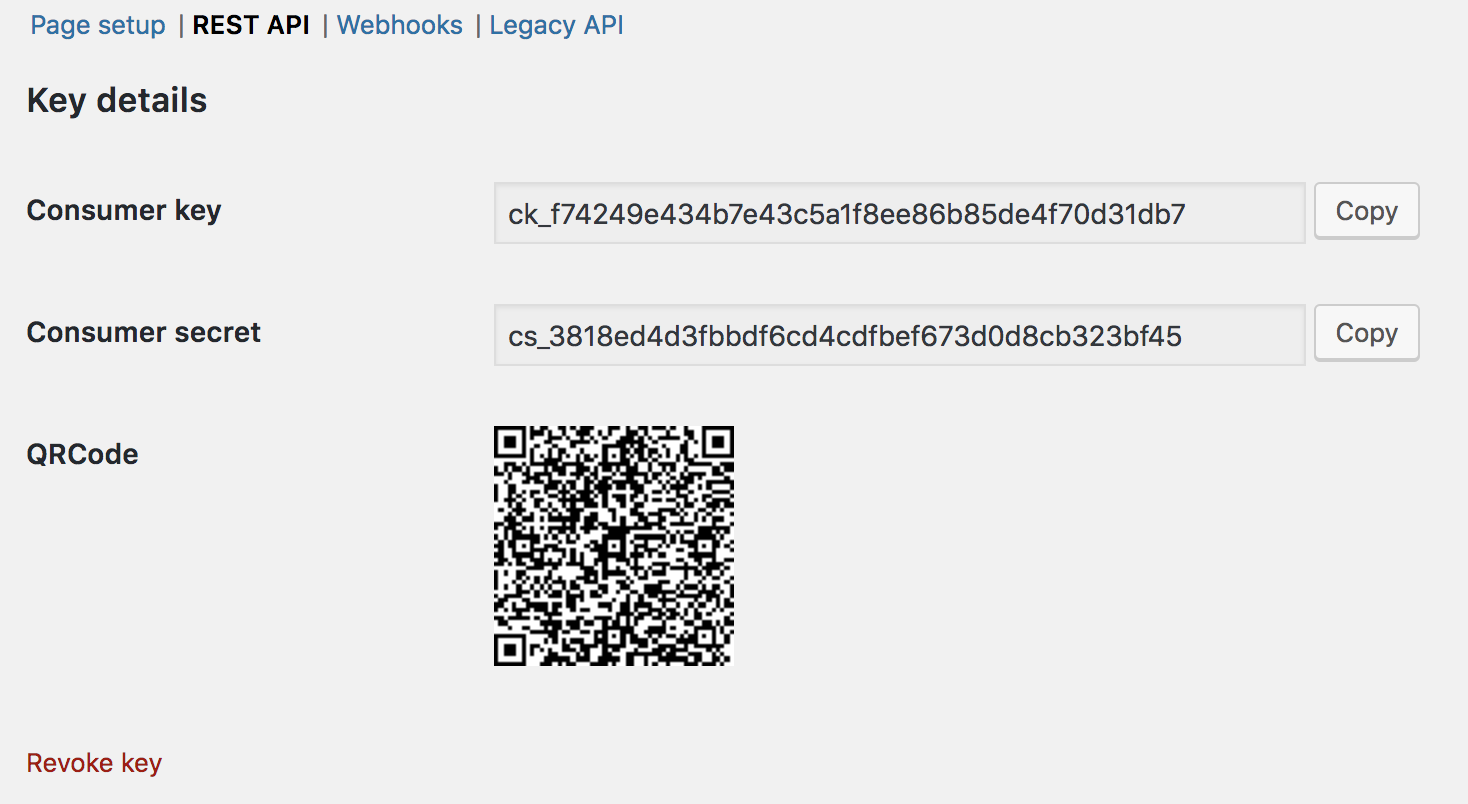
When you are done, keep ahead by selecting “Add Key” and you will go to the screen “Key Details” like the below screen:
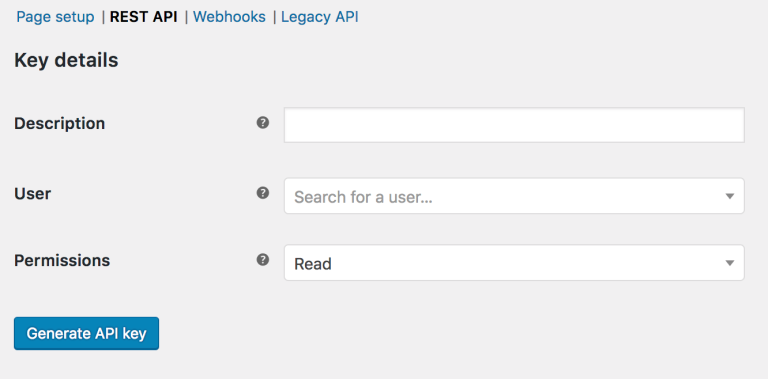
Next, you will be required to add a “Description” as well as choose the “User” that you are fond of generating a key in your dropdown. Choose the access level for the entered API key. This includes “Write” access, “Read” access, and “Read/Write” access. So, choose your expected access level.
Another thing to do is to choose “Generate API Key”, then WooCommerce will generate the API key for users. Now that generating key is complete, you can find your key details of the Consumer Key and Consumer Secret, along with a button “Revoke API Key” and a QRCode. This “Consumer Key” or “Consumer Secret” could be typed in the app that uses this WooCommerce API. In such a case, the app could also ask for your URL.
When you have successfully generated your API keys, you will copy them and paste them to the third box “Enter Consumer Key” and the fourth box “Enter Consumer Secret” accordingly. Everything has been completed, you now will click the button “Access Account”.
After that, you will go to the next section where the two apps Clover as the 1st connection and WooCommerce as the 2nd connection, are displayed. Here, click the button “Continue”.
This takes you down a bit where you need to make up your mind in selecting actions whether Clover would send the standard item to your WooCommerce, Clover will send the standard items’ inventory level to your WooCommerce, or Clover will send standard items’ inventory to your WooCommerce’s multi-stock location.
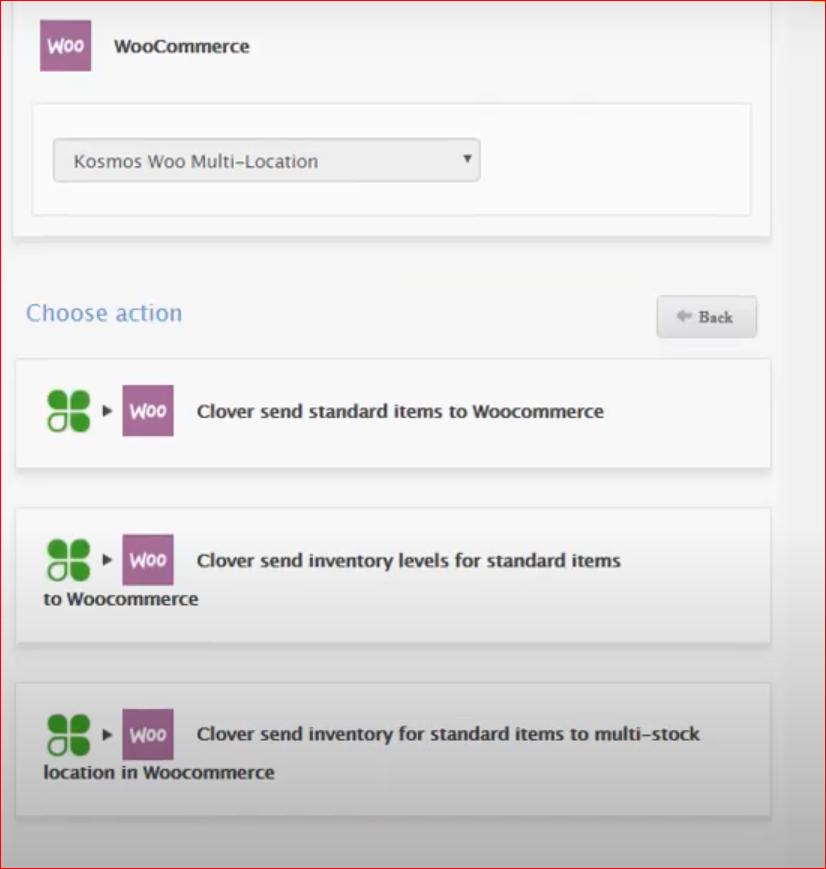
Click the action “Clover sends standard items to WooCommerce” and choose the button “Continue”. You will then see the section “Save action” in which you enter your action name. After all, click “Save action” to save what you have made. Under the modified action, you can see “Configure”, which is to the left of “Delete”, so click it to make a configuration.
Step 6: Configure the chosen action
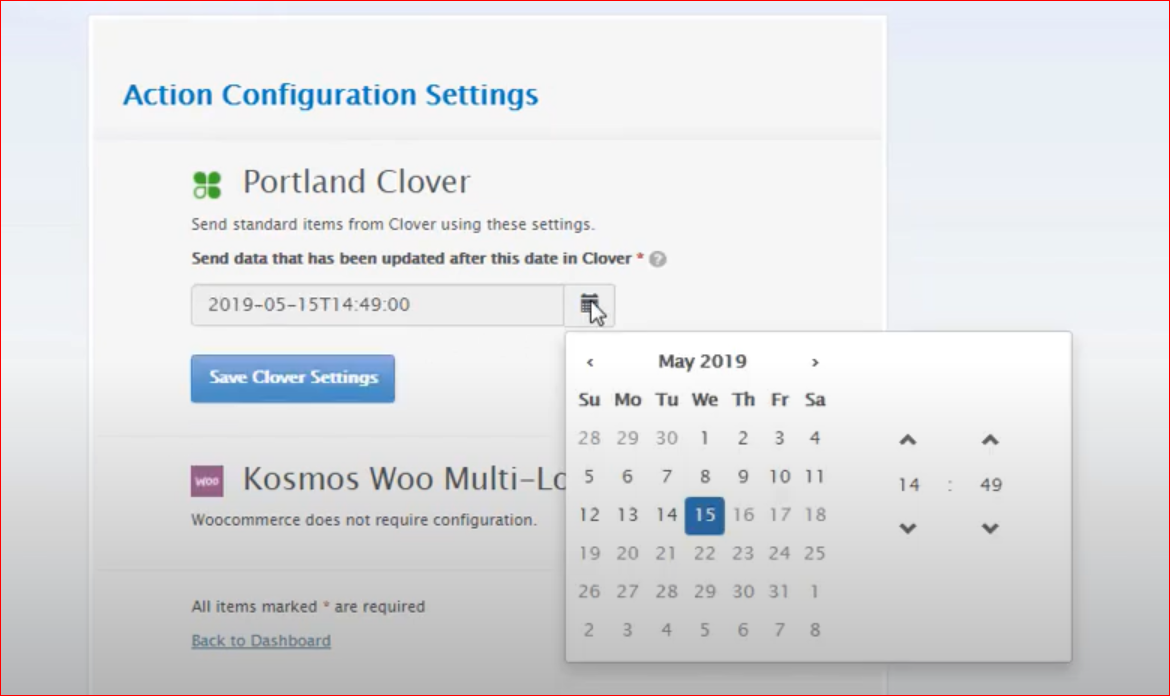
This step requires you to go to the settings of action configuration. In this section, you have to select a date. And it means that you will send updated data after this selected date in your Clover. Next, click the button “Save Clover Settings”.
After saving the settings, scroll down at the bottom. You will see the section “Back to Dashboard”, click it and you will be back to the dashboard you encountered at the beginning. Choose tab “Action” before selecting “Configure” under your chosen action. You check if you need to modify some more information by clicking the “View/Edit” section right on the “Clover Settings Saved”.
Step 7: Create tasks
Now, be back to the Dashboard one more time. At this time, you will choose the tab “Tasks” instead of “Actions”. Click “Create Task” to keep going. A different screen will be opened up, you choose the button “Add Action” and keep choosing the button “Add Action” which then will be turned into the button “Success”.
After that, you navigate down the page and approach the section “Task Name”. This is the place you will enter a name for your task. Next, click the button “Save Task” and you will be taken into a different section.
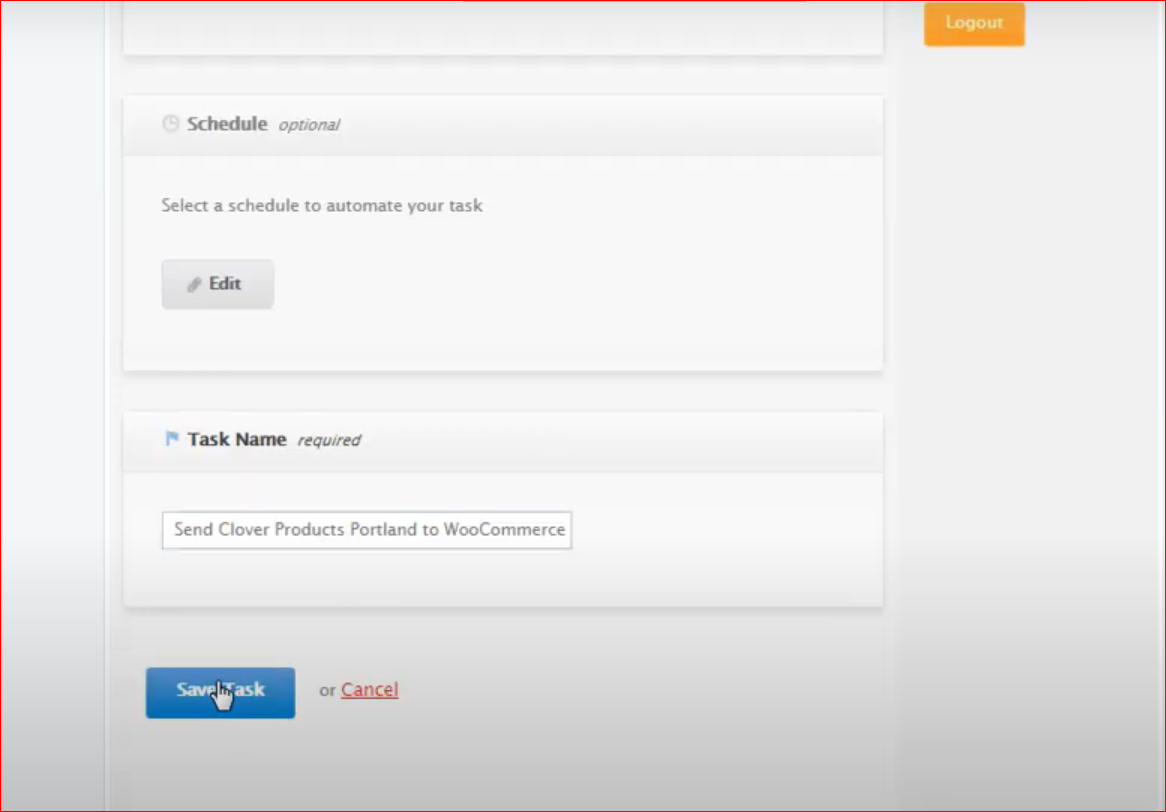
Here pick up “Run” that lies between “Delete” and “Activity”. This aims at running the task that you have created. When you click “Run”, your task is to send products in Clover to WooCommerce.
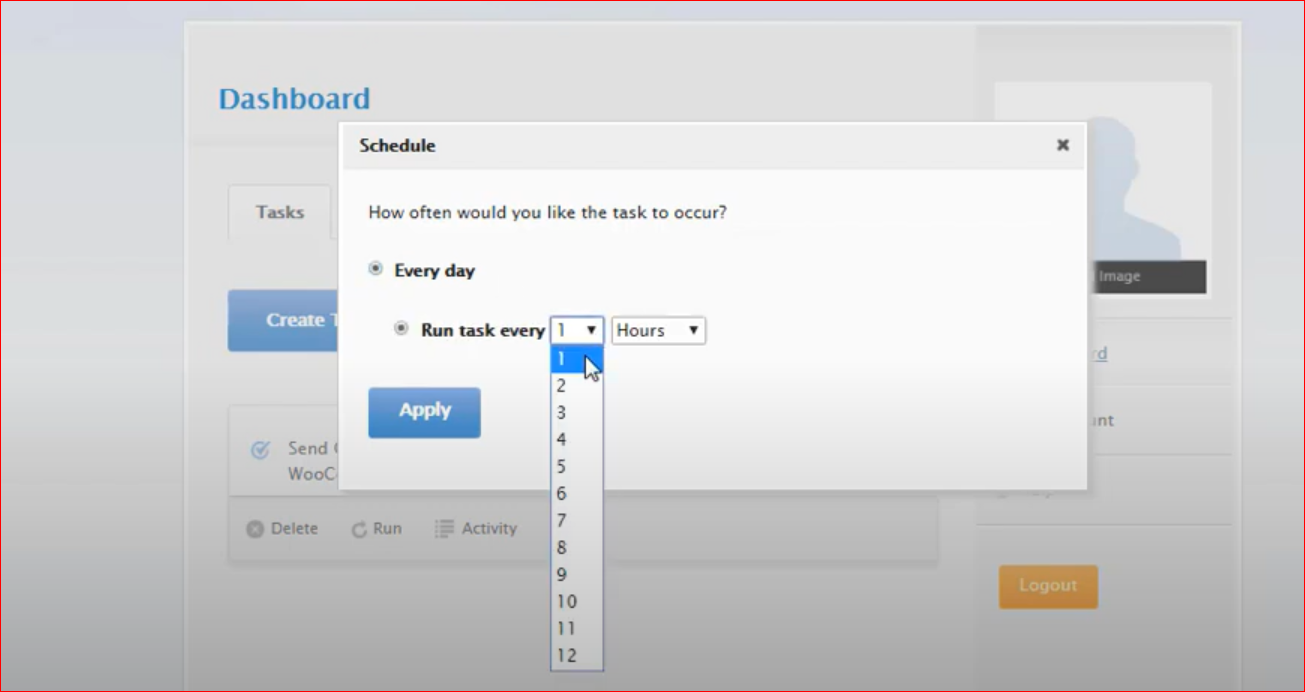
Once you have finished running the task, load this page again to schedule your task. To be more specific, this schedule will decide how often you want this kind of task to happen. Tick the box “Everyday” and select the frequency of whether you will run this task every 5 minutes/hours. Then, choose the button “Apply”.
The next thing to do is to click “Activity” and choose the button “Download Log File”. After you finish downloading it, click the tab “Action” again, pick up “Clover” and select the chosen merchant. On the second connection, you select WooCommerce before selecting the button “Continue”. Do the same activity with the other actions like the first one.
Congratulations! You have successfully integrated WooCommerce with Clover POS. Now you could list all products from your Clover POS in your WooCommerce store. What’s more, it also allows you to sync inventory, customers, and sales data between these two applications. Or you are now keeping track of all inventory as well as sales in all channels.
Conclusion
There is no denying that the integration of WooCommerce with Clover POS has brought about multiple benefits for sellers. While it takes you a lot of time to ensure accuracy as well as you need to deal with plenty of tension in your customer service process, integrating with Clover POS has enabled your orders to be correctly processed. So, let’s thrive in implementing it to take your WooCommerce store to the next level.


