
How to Enable the WooCommerce Shipping Address

One of the keys to optimizing your WooCommerce store’s customer’s purchasing experience is setting up the checkout’s billing and shipping part. WooCommerce, on the other hand, will only enable a Billing Address to be entered by default. It suggests that the billing and shipping addresses are identical. For online orders, some businesses want the same shipping and billing address. This is more typical with high-value items that could be attractive to credit card fraudsters. However, for a variety of reasons, customers may utilize a different billing address and shipping address.
As this frequently occurs, making this choice available to your clients is critical. You will improve their buying experience in this way, which may help you increase conversion rates. Even while some may argue that having fewer options on the checkout page is preferable, allowing your customers to enter a delivery address will benefit them. This article will explain why the Woocommerce shipping address should be enabled, as well as how to activate it.
Why Woocommerce shipping address needs to be enabled
-
Although requiring the same shipping and billing address for online orders might assist businesses to identify customers and cutting down on some steps of the checkout process, there are some cases where the person at the billing address is different from the person at the shipping address.
-
If it’s a gift order. Some customers want to have their orders delivered to someone else. The individual who lives at the billing address is not the same as the person who lives at the shipping address. For example, a guy wishes to surprise his girlfriend with a gift and requests that the shop transport the item to her address. In this instance, merchants must set the shipping address.
-
The customer’s proper mailing address is formatted differently than the credit card company’s address on file. It’s usually a minor distinction, such as “Unit” instead of “Apartment.”
-
This happens quite often so it’s important to provide your customers with this option. You’ll cover every scenario by giving the ability to offer a completely different delivery address or an optional shipping address field.
-
Furthermore, this is a way to improve the customer’s experience. They will believe that the company is genuinely concerned about their needs, making them more empathetic and choosing to shop on your website. Also, enhance their purchasing experience, which may help you increase conversion rates.
How to enable the WooCommerce shipping address
If your WooCommerce shipping address isn’t showing up, it’s because shipping address isn’t enabled. The Shipping Address box in WooCommerce can be enabled in one of two methods. Let’s take a closer look at these ideas.
Method 1: Use the Checkout Manager plugin
WooCommerce Checkout Manager is a module built to be the wizard of checkout pages. It helps to modify intuitively, allows fields customization, extends billing information, and creates any field required at WooCommerce checkout. There are over 80,000 active installs of this freemium plugin. There is a free version available here, as well as three paid subscriptions starting at 19 USD. We’ll utilize the free version for this tutorial.
Step 1: Install the plugin
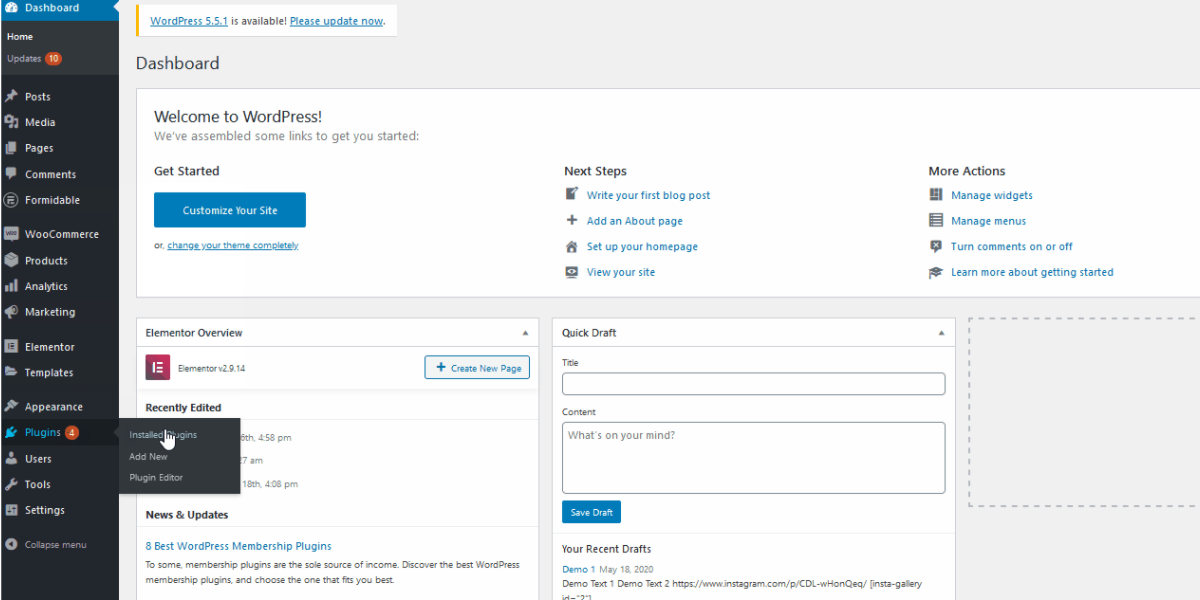
First step, log in to your WordPress Admin Dashboard and move to Plugins > Add New on the sidebar.
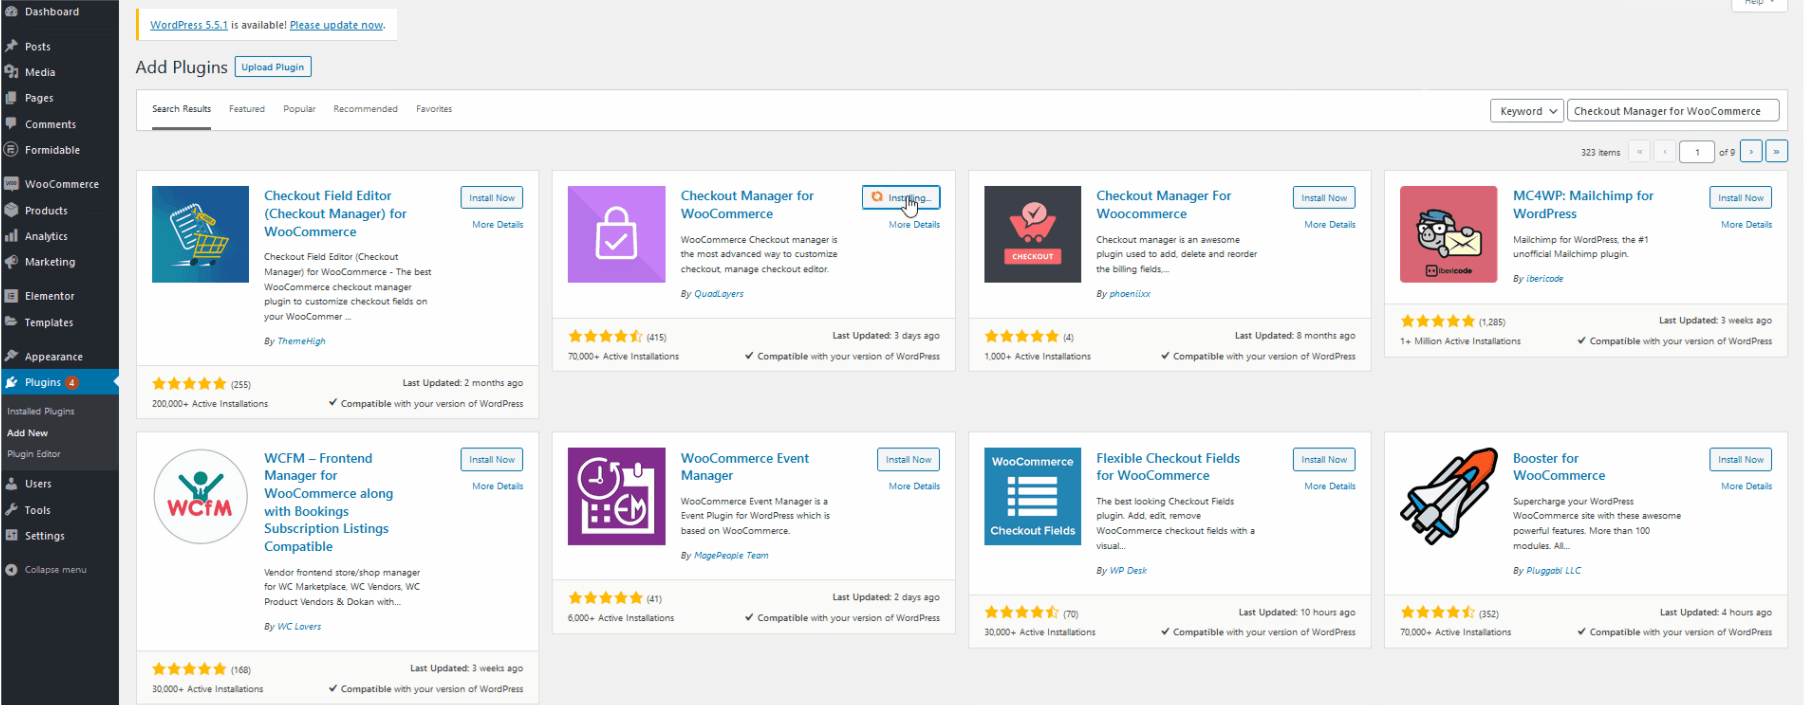
To find Checking Manager for WooCommerce, utilize the search box on the top right. Then, on the plugin card, click the Install button, and when the button changes to Activate, hit it again to complete the installation.
Step 2: Customize WooCommerce checkout page
Your plugin has been set up already. Next step, let’s customize your WooCommerce checkout page and enable the Shipping address.
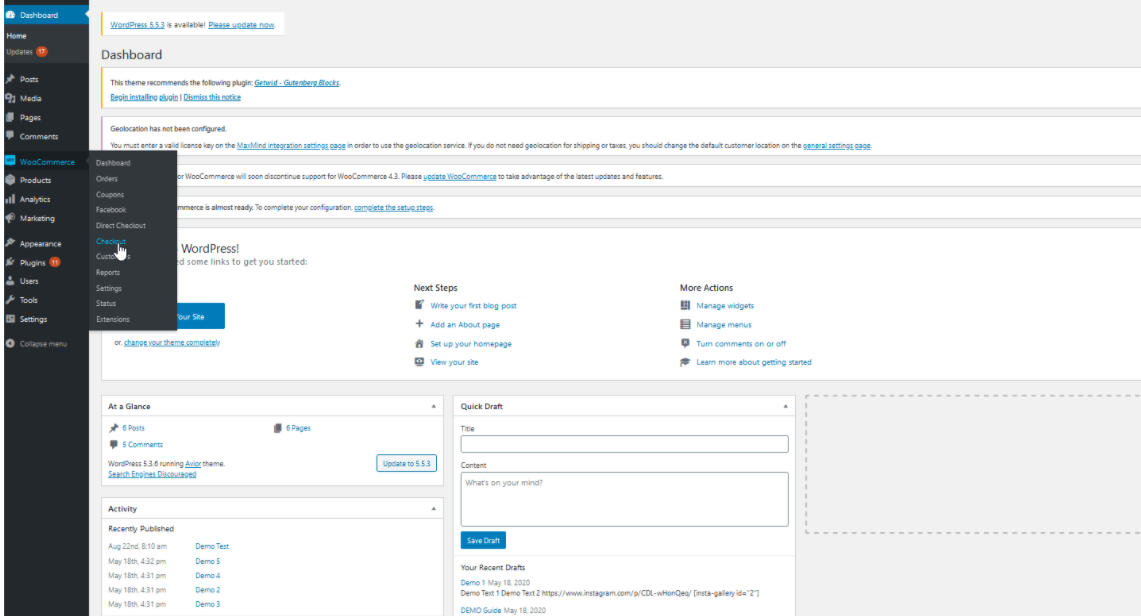
To access the plugin’s options menu, go to WooCommerce > Checkout on your WP Admin sidebar.
Then select the Force Shipping Address option and adjust it to Yes.
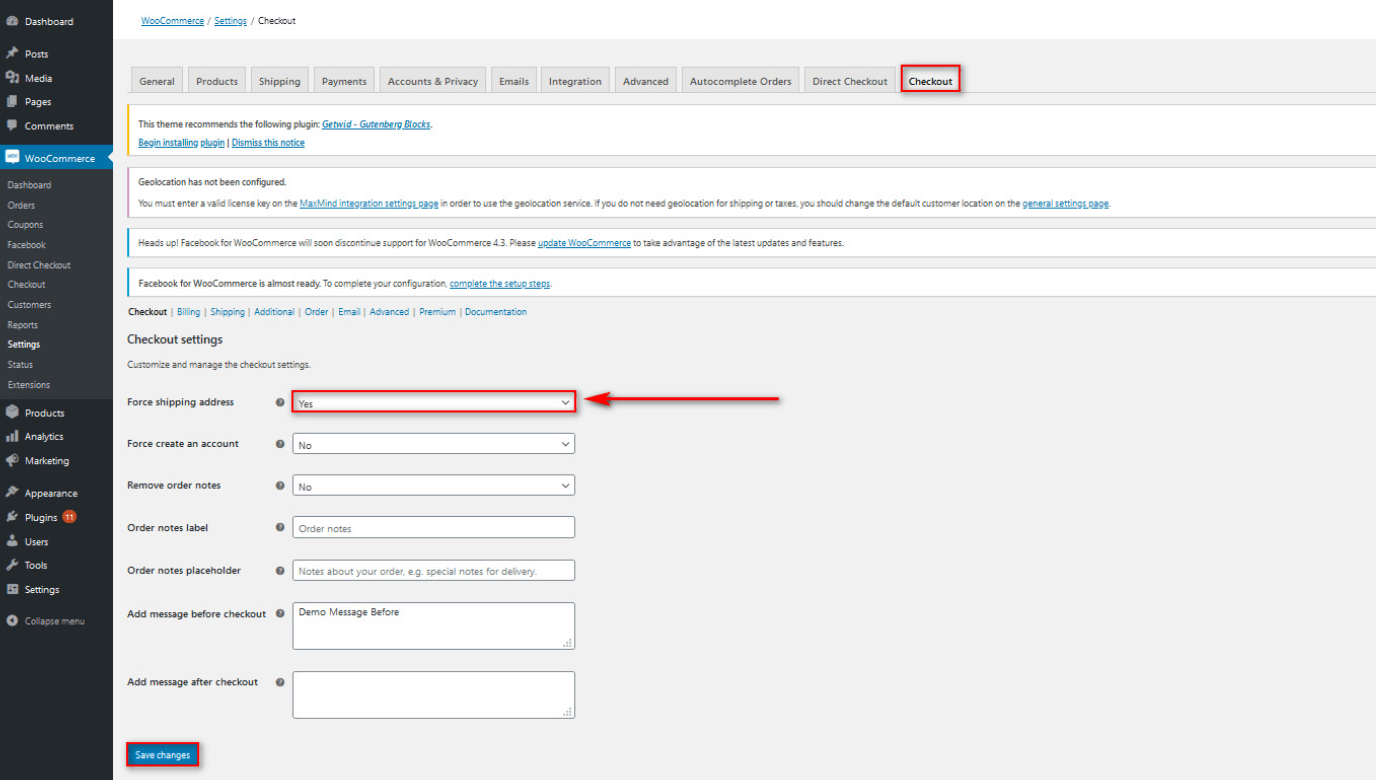
On your WooCommerce checkout page, your shipping address should now be visible. At checkout, your customers may simply enter their individual shipping addresses.
Method 2: From the WooCommerce settings
Step 1: Open your WooCommerce Settings
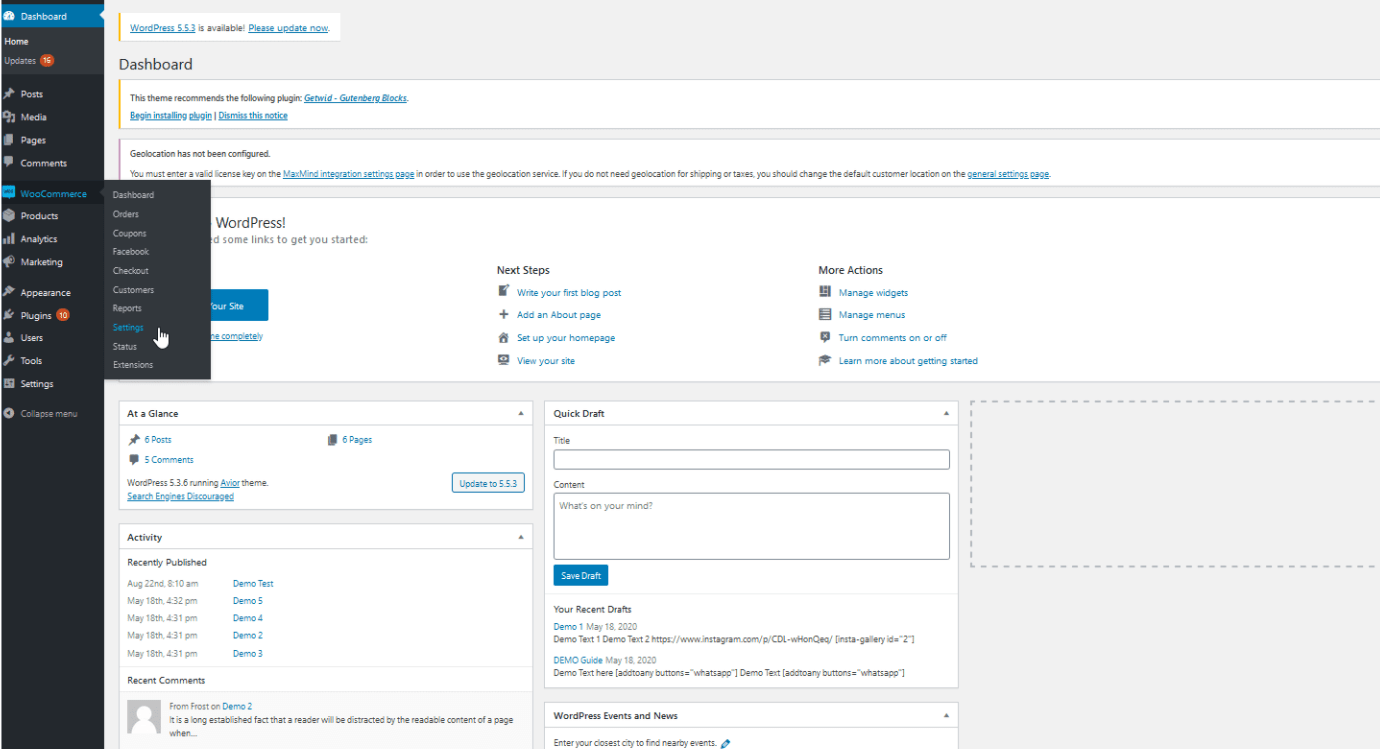
Access your WooCommerce Settings by clicking WooCommerce > Settings on your dashboard sidebar
Then, go to the Shipping tab.
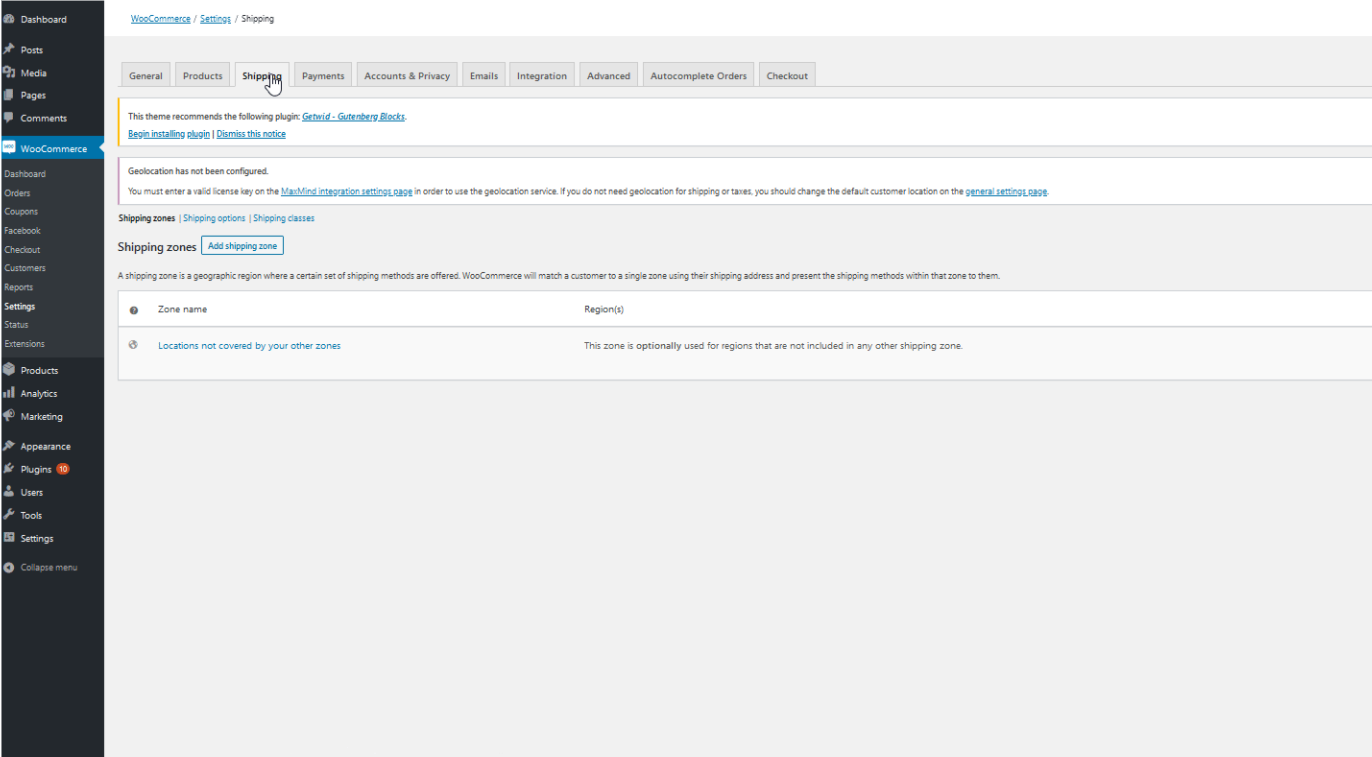
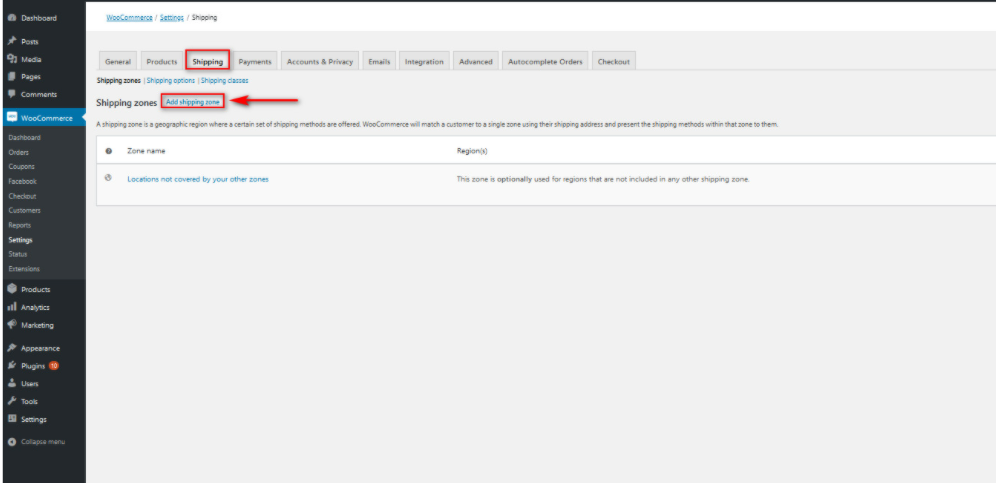
Step 2: Add Shipping zone
Click Add shipping zone button to set up the option to add shipping addresses.
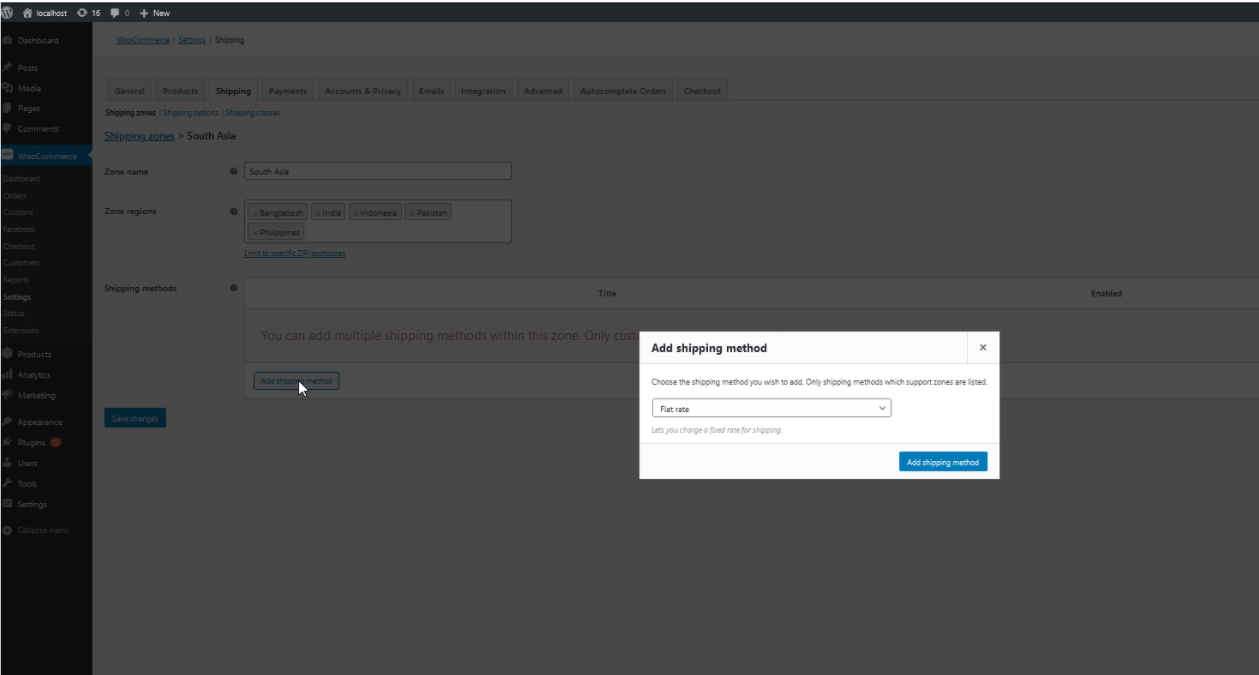
Specify a shipping zone for your customers by typing in the shipping zone in the Zone name box (for example, Asia, Australia, US, and Canada), and then choose which regions come under this zone in the Zone regions box.
Step 3: Add Shipping Method
Afterwards, click the Add Shipping Method button and select the type of shipping method you want for this region’s consumers.
Step 4: Save changes and get started
Click Save Changes and turn back to the Shipping tab.
Now, your customers can easily add a shipping address and the shipping settings will be applied based on the shipping regions you’ve customized.
What to do if the WooCommerce shipping address not showing?
The most common reason for the WooCommerce shipping address not showing is that the Shipping Address is not enabled. However, there are other causes of this problem. If the shipping address has been enabled but does not appear in your WooCommerce store, there are a few things you may attempt to solve it:
-
Shipping method and/or zone not set: This is by far the most prevalent problem. Otherwise, the mailing address will not be displayed until you have set up at least one zone and delivery method. Go to WooCommerce > Settings > Shipment > Shipping Zones to add the shipping method for your shipping zone. Then, as indicated above, choose your zone and add a delivery method.
-
Force shipping to the customer billing address: Make sure you disable this option since it eliminates the shipping fields and instead utilizes the billing address for both billing and shipping.
-
Theme/plugin conflict: Make sure there aren’t any issues with your theme/plugins if the shipping method and zones are appropriately configured, and the forced shipping to billing address option is turned off. Deactivate all of your plugins except WooCommerce to troubleshoot the problem. Then, change the theme to Twenty Twenty or any other default theme and observe if the mailing address appears.
-
Shipping isn’t allowed in some regions: If a customer enters an address from a country where shipping is prohibited, the shipping address may be hidden from view throughout the checkout process.
-
Wrong address: If the customer enters an invalid address, the shipping address may not be available.
-
Virtual and downloadable products: If your products are virtual or downloaded, the “Ship to a different address” option may not appear during checkout, so double-check that they’re set up correctly.
-
Ensure all of the products have the right dimensions: When a physical product has a dimension as well as a weight, it is considered a shipment. All of the products added to the store should have both of the aforementioned features.
-
Improper Configuration of Shipping Zone: At times, it so happens that the shipment zones aren’t configured properly. In case, any of the selected regions isn’t configured or added to the list of regions suitable for delivery, they won’t see the shipping option on the checkout page.
-
Wrong Login Credentials: In case, you are using a shipment carrier or a third-party service, you would have certain login credentials that you need to validate before aiding the shipment process. In case, the added details don’t comply with the actual ones, the shipment service denies access to their services. It is important to be careful when entering the desired details and, check twice before confirming.
Conclusion
In conclusion, setting and modifying WooCommerce’s shipping address can help you satisfy and improve your customers’ experience. You’ll maximize your conversion rates this way, and you’ll be more likely to convert those individuals into repeat customers. We’ve guided you how to enable the shipping address in this article. Both methods are easy to use and effective, so pick the one that best suits your needs. It takes a little work to enable the shipping field from the WooCommerce settings, but it’s extremely simple and offers you control over the shipping locations.
If you want to learn more about WooCommerce, you can discover more valuable articles on AVADA.


