
How to Display Product Description in WooCommerce

Providing the best website design as possible is the aim of every online business. In the present age, a beautifully designed website can attract more and more customers than ever. One of them is the position of your WooCommerce product description. Except for the brief description on the individual product page, WooCommerce only offers two types of description: short and more detailed. Plus, you can not freely place these descriptions on shop pages, category pages, or anywhere else.
For this reason, this article is exactly what you need at the moment. We will be introducing you to How to display WooCommerce product descriptions of your choice in multiple ways. All of the tutorials have been divided into small basic steps so that any of you can catch up well with the process.
Before we get started, here are a few reasons why you may want to give it a go.
Why should you show the WooCommerce product description?
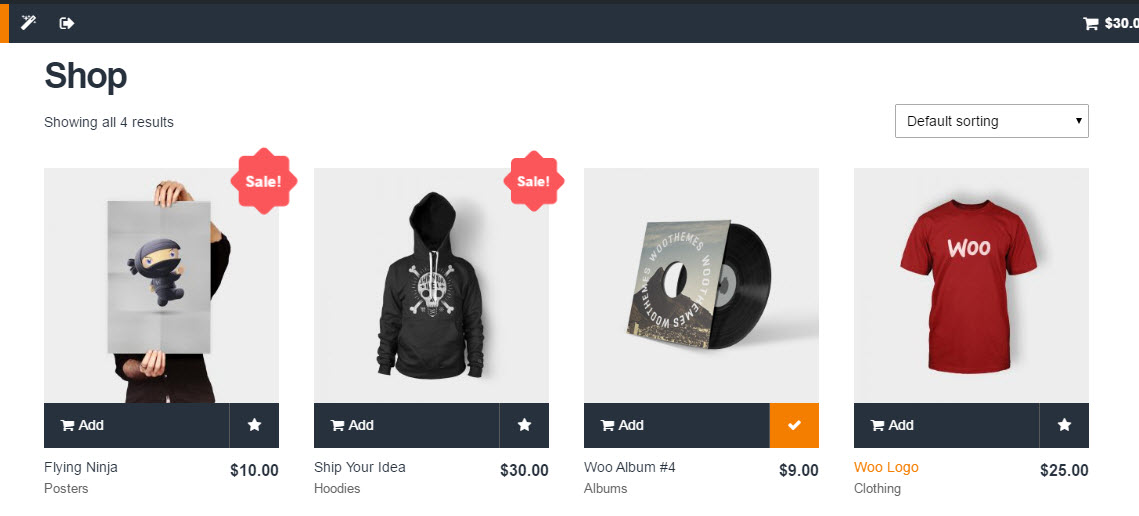
At the present, the default shop page layout is used by most WooCommerce businesses, which have a restricted number of display choices. The picture, reviews, pricing, title, and add-to-cart button are all shown for each product. However, this technique does not fit all kinds of eCommerce business. In the event that you offer a lot of similar-looking items, you’ll want a more effective means of informing buyers about the differences among them. And the only way to do so is via a short WooCommerce product description.
Add a WooCommerce short or lengthy description to the store or category pages can improve the shopping experience for customers in the following ways:
- Fasten shopping process: In order to read or view extra information about a WooCommerce item, visitors do not have to spend many clicks just to access the item’s single product page. Customers who regularly purchase multiple products at once will love this feature since it helps them fasten the purchasing process.
- Easily pick out the best product for visitors: In the main store page, customers may see the product’s brief description and even the extended description. Thus, customers may make a purchase more quickly, as they just have to locate what they’re searching for and add it to their cart. They won’t become disoriented if they have to look at many different pages.
How to display the product description on your WooCommerce shop page using a plugin?
In the previous section, you have gathered information about the advantages of using WooCommerce product descriptions on the category pages. It’s time to dig a little deeper. We will be showing you how to enable these descriptions on your website within two distinct plugins. You can choose either one of them to enhance the store’s performance.
No more beating around the bush, let’s get started!
Method 1: With WooCommerce Product Description on Shop Page
WooCommerce Product Description on Shop Page allows online store owners to add a brief description on listing pages such as the shop, category, and others. A one- to two-line description on listing pages provides extra information about the product. You may use perks, features, or your unique selling proposition (USP) to attract clients to click through to the product detail page, increasing your chances of a sale.
Step 1: Install the plugin
First of all, we will need to download the extension .zip file to the device by navigating to this link and click on “Buy Now”:

Then open a new tab directed to your WooCommerce Dashboard, look for the Plugins > Add New option on the left-handed sidebar and click on Upload Plugin > Choose File, then continue to select “Install Now” and “Activate” buttons to complete the installation phase and move on to the next step!
Step 2: General settings
You will quickly notice a new “Product Description on Shop Page” selection appears under the “WooCommerce” menu after the plugin is installed and functional. Now, for the very first tab “General Settings”, these are the customization options need you to decide on:
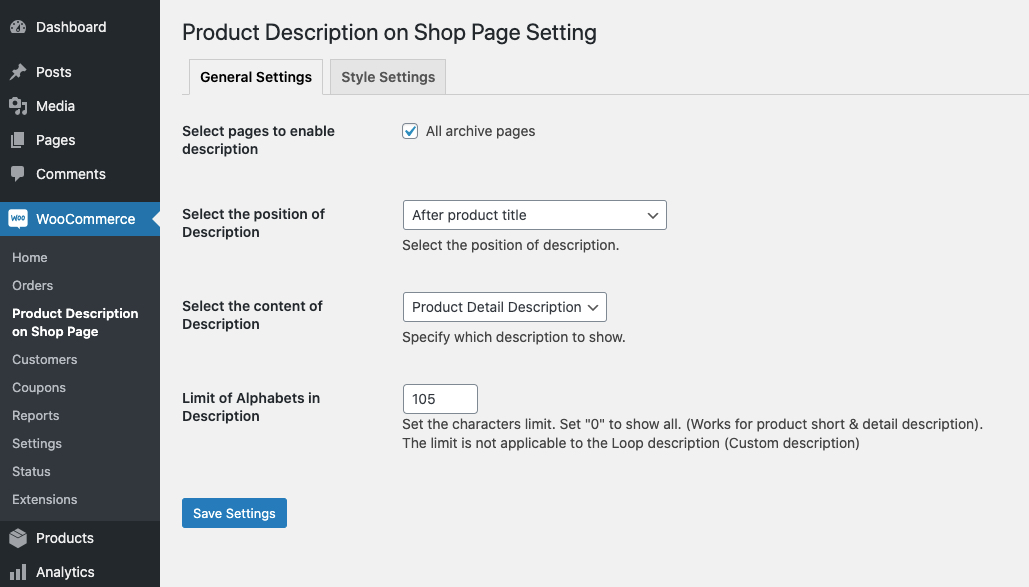
- Include a description on any or all listing pages
- Select whether to show a short, long, or custom loop description for a product.
- Pick out a position for these WooCommerce product descriptions to be displayed (before/after product title, before/after rating, before/after price,..)
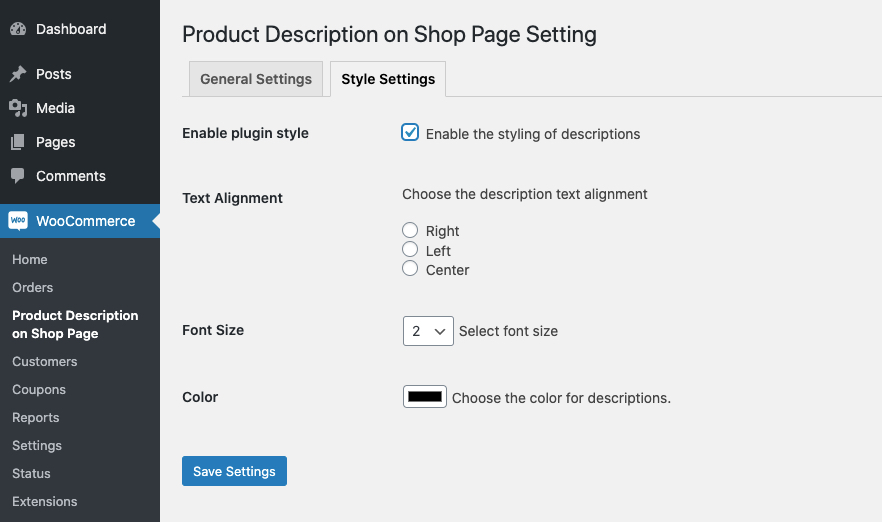
Step 3: Styling the description
Next up, we have another tab for styling, where you may either leave this field blank and let the theme’s style take over, or override it and apply your own styling on brief descriptions:
As you can see, there is text alignment, font size, and color for online merchants to pick out so that it goes well with their website’s general theme.
Step 4: Customize the loop description
You will see a new custom loop description tab on the product page when the installation is completed. As a result, your shop’s product pages will now have a well-written sales-oriented description:
Step 5: Save your changes
Once everything is finished with the settings, don’t forget to “Save” your modifications and go back to the website to check out the results!
Method 2: Using your own plugin file
Instead of installing a plugin and making use of its customized features, you can choose the second option - using your own plugin file. Even though it will require a decent understanding of the coding field, store owners will have more control over their WooCommerce product description appearing on the website.
Step 1: Create a plugin file
To perform the task, we will be starting by entering your wp-content/plugins directory and creating a brand new file named product-short-description.php. After that, activate the file in your code editor by double-clicking on it. You will need to insert the following information at the top of your file:
<?php
/*
 * Plugin Name: WooCommerce Product Short Description
 * Description: Add WooCommerce product short description to the loop in product archive pages
 * Version: 1.0
 */
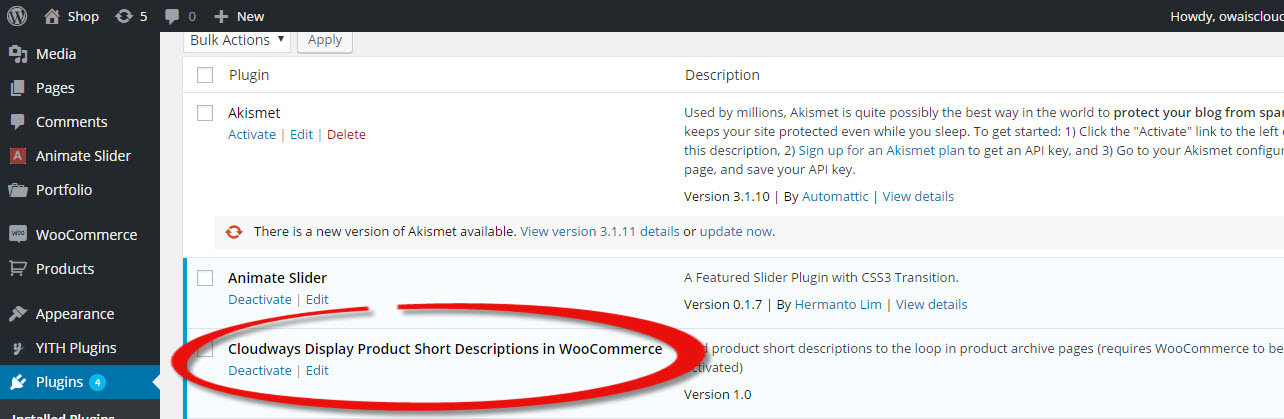
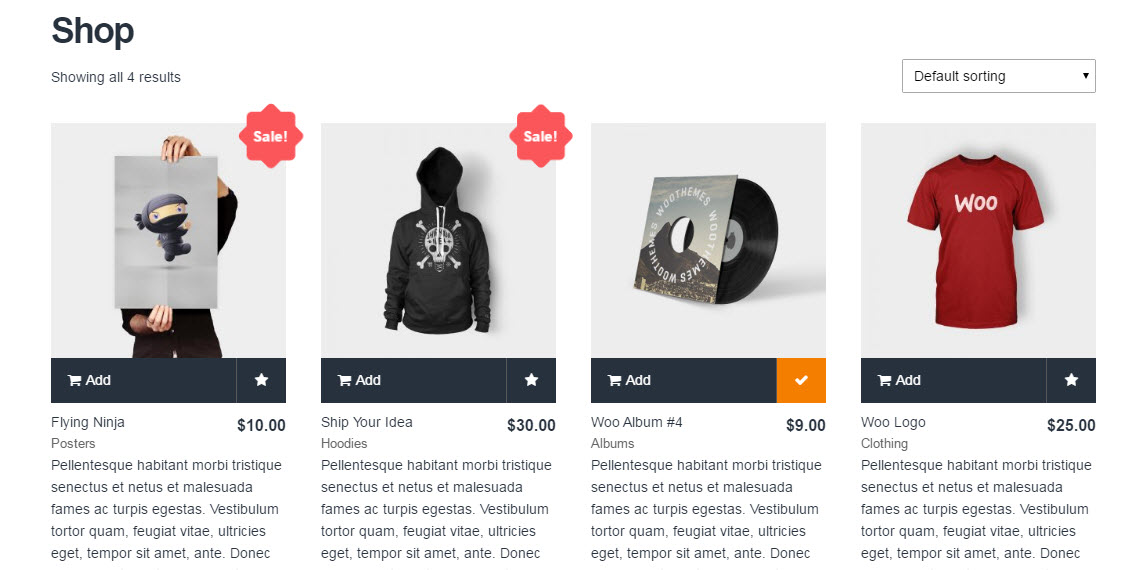
Now, when we return to the WooCommerce Dashboard, you can quickly notice the newly-created plugin has been added into your “Plugins” section:
Just click on “Activate” and your website will be something like this:
Step 2: Adding a hook function
WooCommerce uses the snippet from the article for the brief description of items. This means that all you need to do is present the post’s snippet to do so. When you open the plugin file, just paste in the below source code to enable your WooCommerce product description part:
function short_des_product() {
    the_excerpt();
}
Step 3: Paste the snippet into your plugin file
Why don’t we look at the WooCommerce file that outputs the loop’s content on archive pages? To find content-product.php, use the WooCommerce plugin’s product description hook, which is located in the plugin’s templates folder. All of the action hooks in the file are used by WooCommerce to generate different types of content.
The hook we must use is woocommerce_after_shop_loop_item_title since our excerpt must appear below the product’s title. When you access the php file, you will see two sub-folder attached to this hook - woocommerce_template_loop_rating() and woocommerce_template_loop_price(). In this case, we need to provide a higher priority number to guarantee that our function runs after those before it. We will use 30 as a priority by pasting the snippet:
add_action( 'woocommerce_after_shop_loop_item_title', 'short_des_product', 30 );
Complete WooCommerce product description code now goes as follows:
function short_des_product() {
    the_excerpt();
}
add_action( 'woocommerce_after_shop_loop_item_title', 'short_des_product', 30 );
Step 4: Front-end view
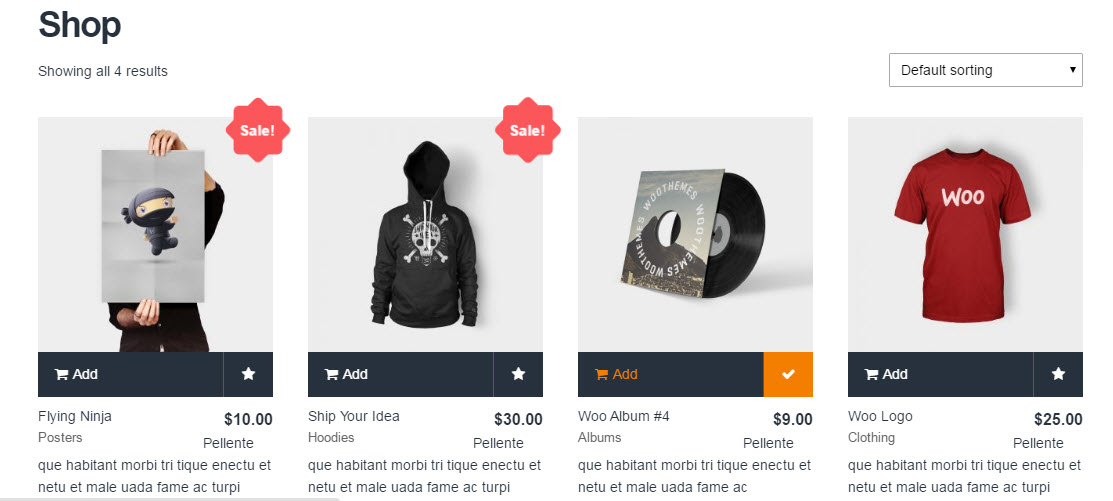
Lastly, reload the store page in your browser after saving your plugin file:
But, there is one last thing we need to do. As you have noticed in our front-end view, the WooCommerce product descriptions are pretty long, which may worsen the entire design of your website and confuse the customer’s eyes. To fix that, go back to your functions.php file and paste this source code:
function get_ecommerce_excerpt(){
$excerpt = get_the_excerpt();
$excerpt = preg_replace(" ([.*?])",'',$excerpt);
$excerpt = strip_shortcodes($excerpt);
$excerpt = strip_tags($excerpt);
$excerpt = substr($excerpt, 0, 100);
$excerpt = substr($excerpt, 0, strripos($excerpt, " "));
$excerpt = trim(preg_replace( '/s+/', ' ', $excerpt));
return $excerpt;
}
How to display WooCommerce product description using a table?
Another way of displaying WooCommerce product description is to ask for the help from a plugin called “WooCommerce Product Table”. The most outstanding feature of it is the ability to show more product information on the store and category pages. Using this plugin, you can create a beautiful, front-end WooCommerce product description table that lists all of your items along with their vital details. Your clients will be able to see more at a glance as a result of this.
Step 1: Install the plugin
The first thing you need to do, as always, is to install the WooCommerce Product Table plugin by hovering over the “Buy plugin” button:
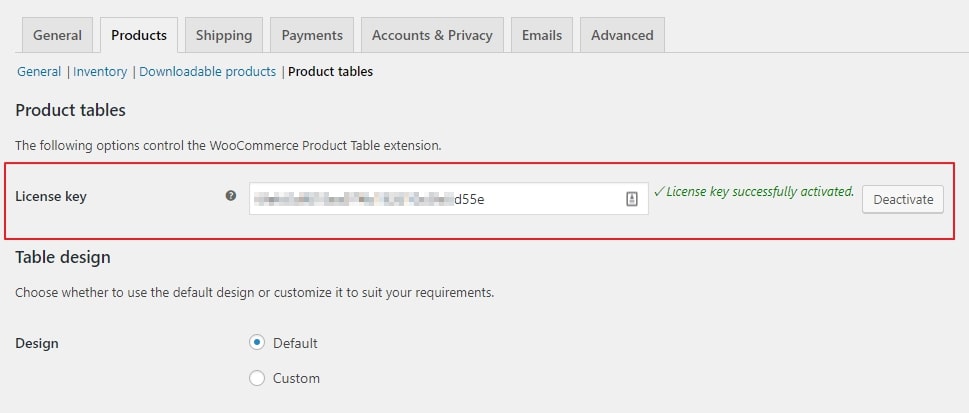
When the transaction steps have been completed, there will be a .zip file downloaded to your device. Then open a new tab going to your WooCommerce dashboard, where you can upload this file by moving to the Plugins > Add New sidebar and click on “Choose File”. Make a note of the plugin’s license key and paste it into WooCommerce’s Settings > Products > Product Tables as seen in the screenshot below. Now that you’ve installed the plugin, you’re ready to start using it:
Step 2: Configurations
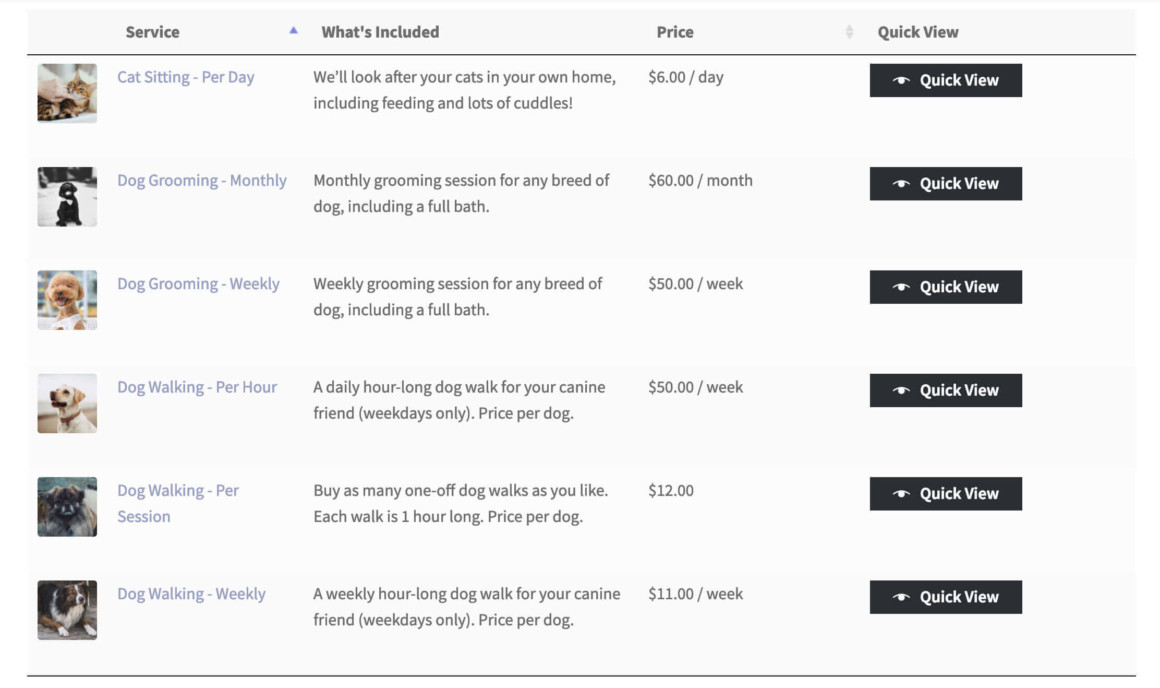
In this step, feel free to configure the WooCommerce product description table in any way you want. Filters, bulk add to cart, and other features are all available. You must pay close attention to the “Columns” choice while displaying the product’s short or lengthy description.
Including your brief description, you can choose exactly which columns will appear in the WooCommerce product description table. A decent beginning point is something like this:
Image,name,price,short-description,buy: If you use this method, a product table will be generated with a brief description in it.Image,name,price,description,buy: As a result, a product table will be generated with a lengthy primary description column.
In the WooCommerce product description table, the brief description will always show in its entirety. Scroll down a little bit and you’ll see an option to change the description length. Choose whether to display the lengthy product description or automatically truncate it here if one is present.
Step 3: Presenting the table
There are two ways for you to choose from in order to display the WooCommerce product description section on your website:
- Any post or page may use the
[product_table]shortcode. These are shortcode modifiers that allow you to choose goods from specified categories, tags, and more. - Alternatively, you may set your shop’s and category’s category pages to automatically activate the product table style. Make changes to the template files in your WooCommerce store to replace the default WooCommerce shop and archive pages with the new table layout you created.
Step 4: Check the results
If everything goes well, this is how your consumers are going to view the website:
Conclusion
To sum up, we hope that our article today on How to display the WooCommerce product description has gained you a deeper insight into the importance of these product descriptions and benefits from them. It seems to contribute only a small part to your website yet significantly impacts the conversion rate. So, how was your experience after setting up the WooCommerce product description? Let us know by commenting below!


