
How to List & Display Products by Category in WooCommerce

Clear navigation is critical when it comes to eCommerce. Customers appreciate being able to locate what they’re looking for and make purchases quickly. As a result, maintaining a well-organized inventory can significantly improve your customers’ experience and satisfaction.
For WooCommerce users, the good news is that WordPress includes taxonomies for categorizing posts, products, and other content. By categorizing your products, you can make it easier for customers to find what they’re looking for. Additionally, by categorizing products using tables, customers can browse and search your catalog more efficiently.
This article will discuss the advantages of product categories and How to List & Display Products by Category in WooCommerce to help your online store perform better. Let’s begin!
Benefits of displaying Products by Category in WooCommerce
WordPress includes categories as a standard feature. They organize posts, pages, and custom post types (such as products) based on their content similarity. This aids in site navigation by allowing visitors to search a specific category for specific information within a broader topic or for additional details about previously viewed content. The following are some of the primary reasons why a product list is superior to the default layout:
1. Improve navigation: According to studies, if customers are unable to locate an item, they will most likely abandon your store without purchasing. As a result, categorizing your offerings into distinct product categories is critical to the success of your eCommerce site, and significantly increases sales for online merchants.
2. Simple to find products: By including search, sort, and filter functionality in your tables, customers can navigate through your items to find what they’re looking for.
3. Access to numerous products with a single click: Customers can add multiple products to their cart at once when WooCommerce products are displayed in categories. This saves them time by eliminating navigating to individual product pages, viewing product details, and adding products to the cart.
4. Better displayed product details: WooCommerce product categories enable you to present product details in an organized manner. You can create distinct columns for each product detail you wish to display, including the product description, reviews, and SKUs.
5. Improve customer’s shopping experience: If you sell non-image-centric products or if you sell a large number of products, you may want to consider displaying them in a WooCommerce product list instead of the default shop page layout.
How to List and Display Products by Category in WooCommerce by default on Shop page
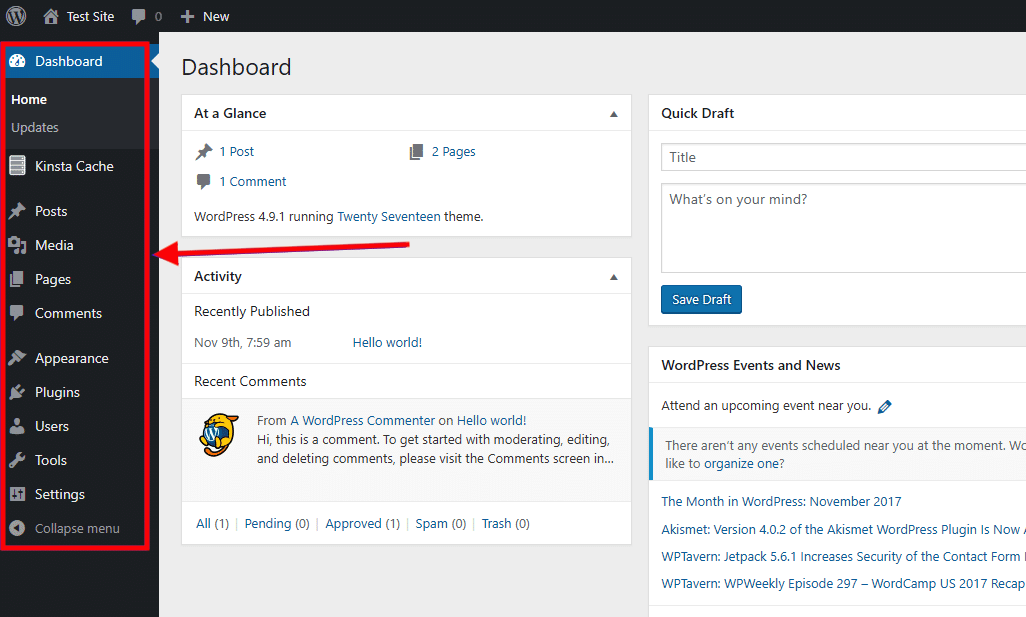
Step 1: Login to WordPress dashboard as an admin user
Step 2: Display Product Categories
Navigate to Appearance > Customize from the dashboard.
Select the Shop page, then click on WooCommerce > Product Catalog.
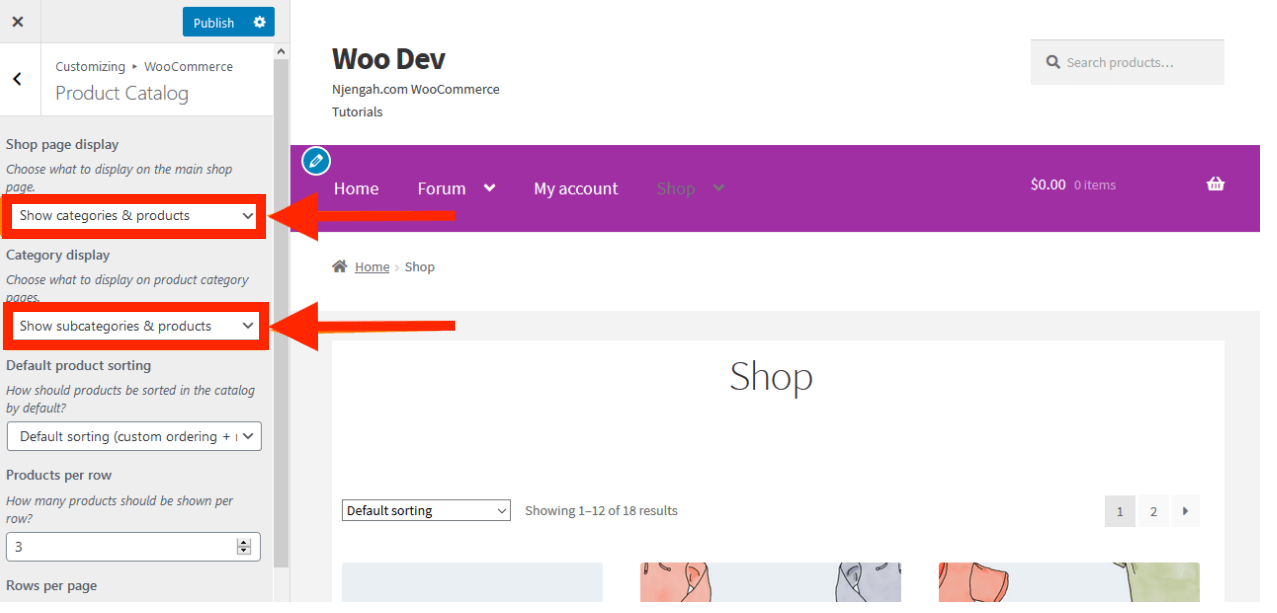
- Choose Show Categories & Products from the Shop page display dropdown menu.
- Choose Show Subcategories & Product form the Category display dropdown menu.
Step 3: Click on Save Changes after finishing
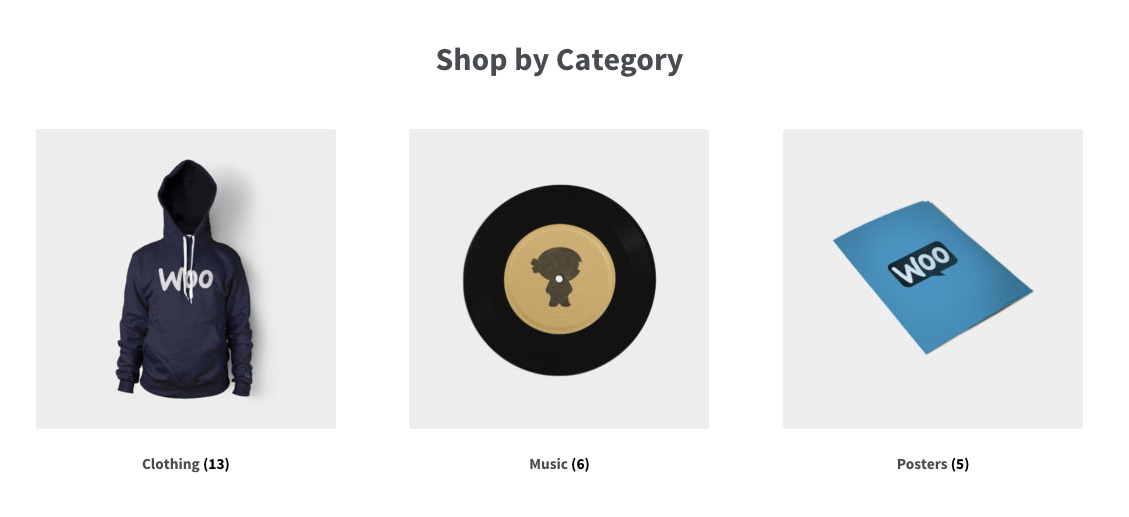
Here is what you can see from the frontend:

How to List and Display Products by Category in WooCommerce with code snippet
Step 1: Login to WordPress dashboard as an admin user
Step 2: Find the theme functions file
Navigate to Appearance > Theme Editor from the WordPress dashboard.
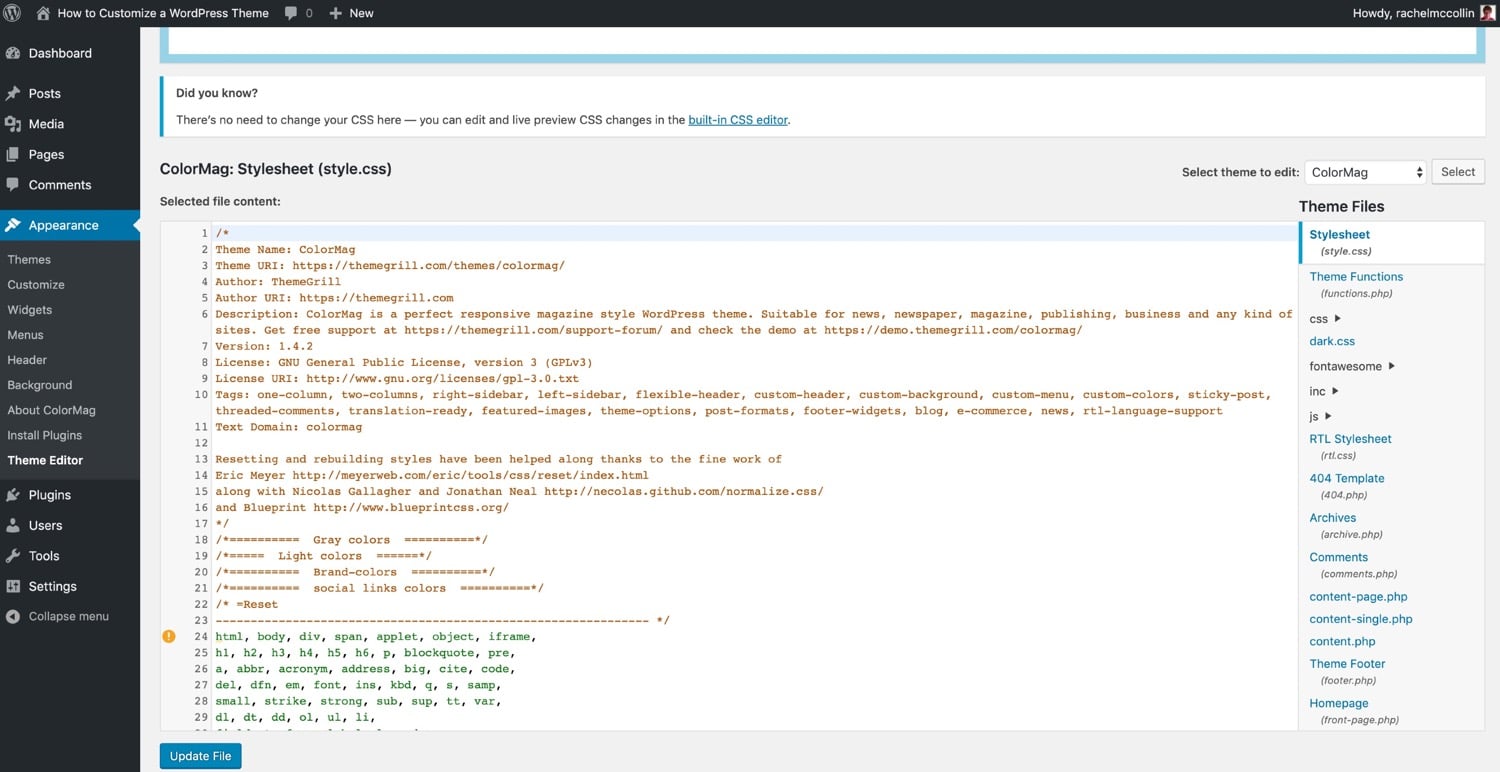
Find the theme functions file from the Theme Editor page. This is where we will insert the code snippet for displaying WooCommerce Product Categories.
Step 3: Insert the code to the php file
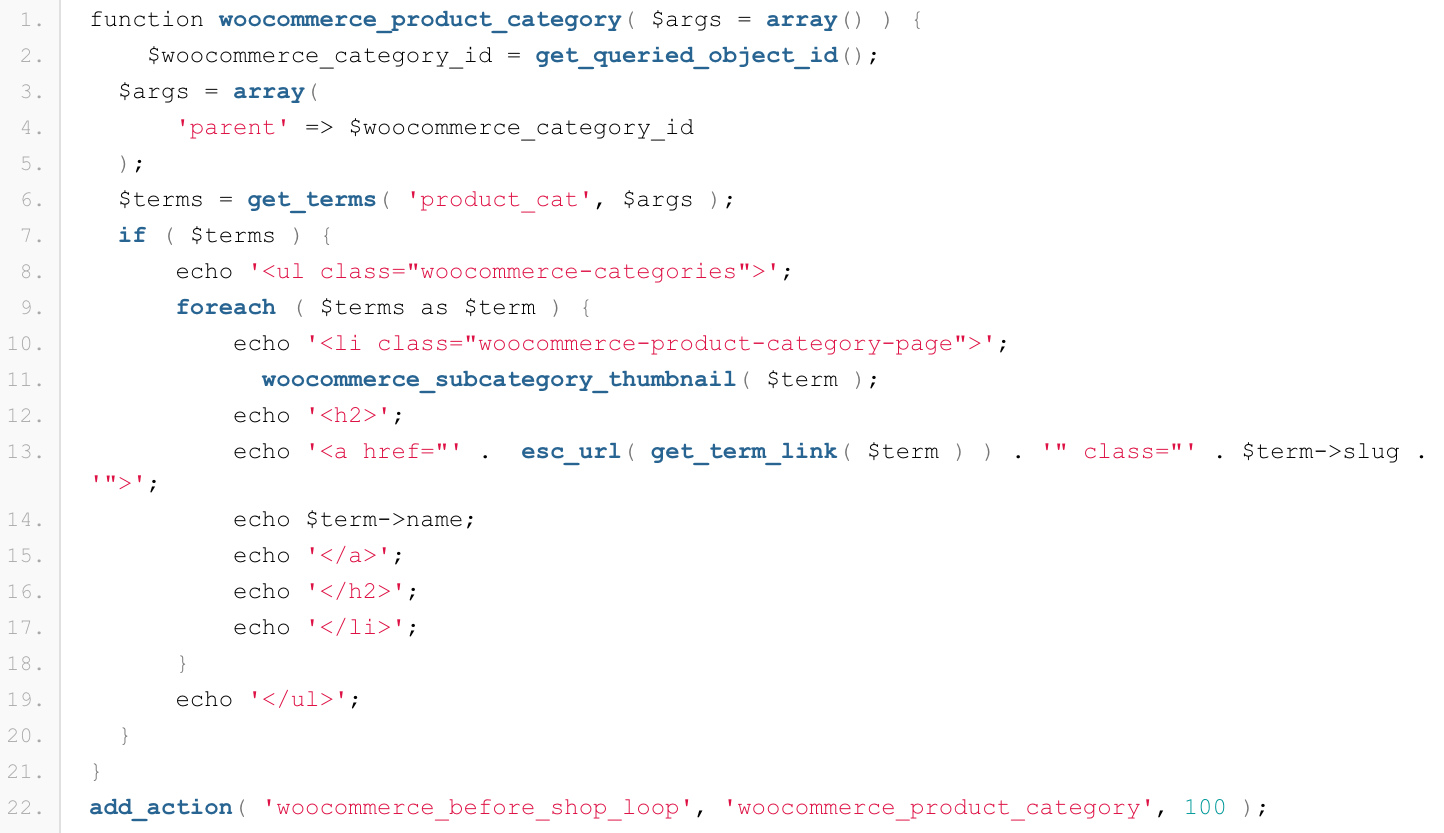
This is the code to display WooCommerce Product Categories. Thus, there is a function woocommerce_product_category() function that outputs the categories or subcategories prior to running the loop that outputs the products. The function is pluggable, which means that the theme can override it.
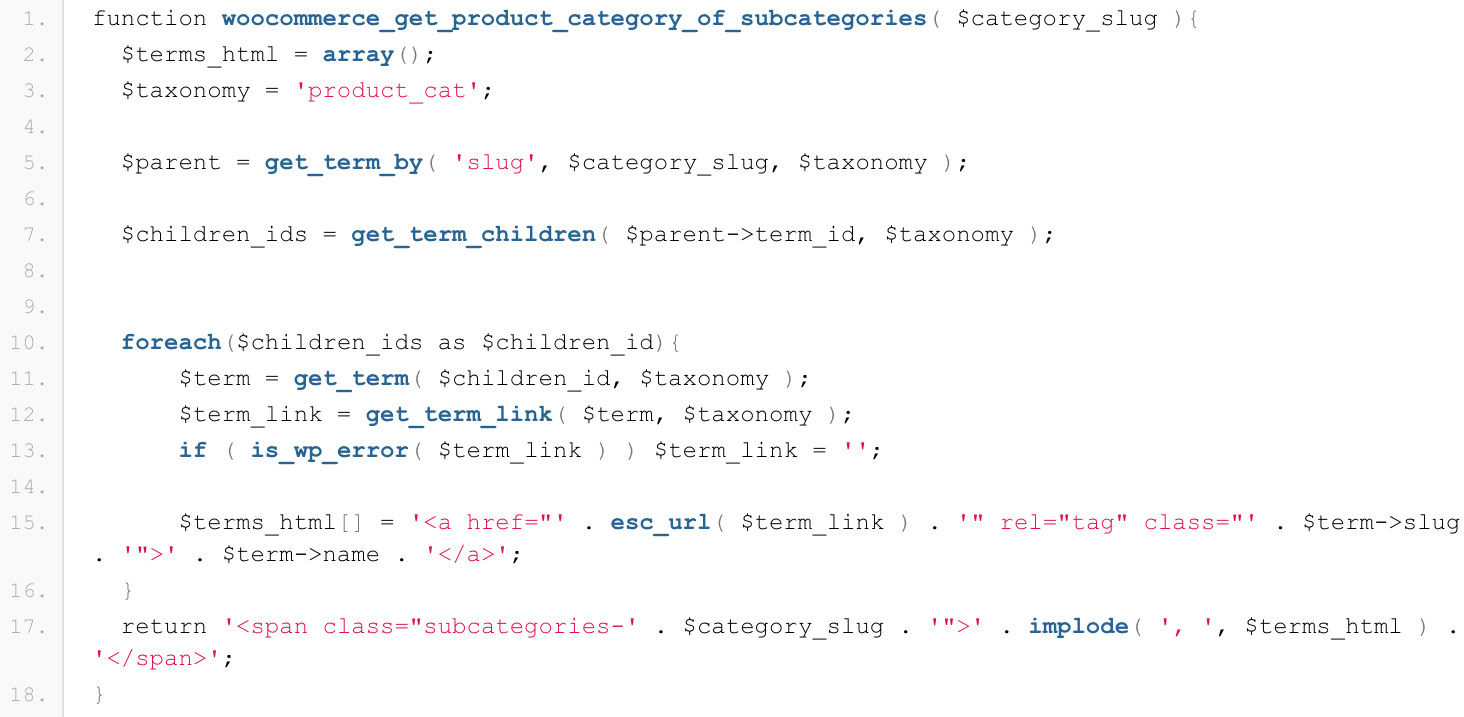
This is the code to display WooCommerce Product Subcategories. In the preceding code snippet, the WP_Term object retrieves the parent product category. Following that, it retrieves the child ID from an array. Finally, the HTML code displays the child categories by looping through the child ID array.
How to List and Display Products by Category in WooCommerce with plugin
In this example, we use WooCommerce Product Table plugin to help you with the process. This is an excellent way to add category tables to your WordPress site. It generates tables by default that contain all of the products in your store. However, with minor modifications, it can also list products in separate tables according to category.
Step 1: Classify your products according to their intended use
You must first create your product categories before you can create category tables. When deciding how to organize your products, keep in mind that the objective is to make it simple for customers to locate items. As a result, you’ll want to organize your products in a way that makes sense to customers.
Additionally, you can create ‘parent categories’ that encompass multiple subcategories. For instance, the parent category “dishes” may contain subcategories such as “mugs,” “plates,” and “bowls.” Parent categories can be advantageous for customers who haven’t made up their minds about specific items and simply want to browse.
Step 2: Create WordPress Product Categories
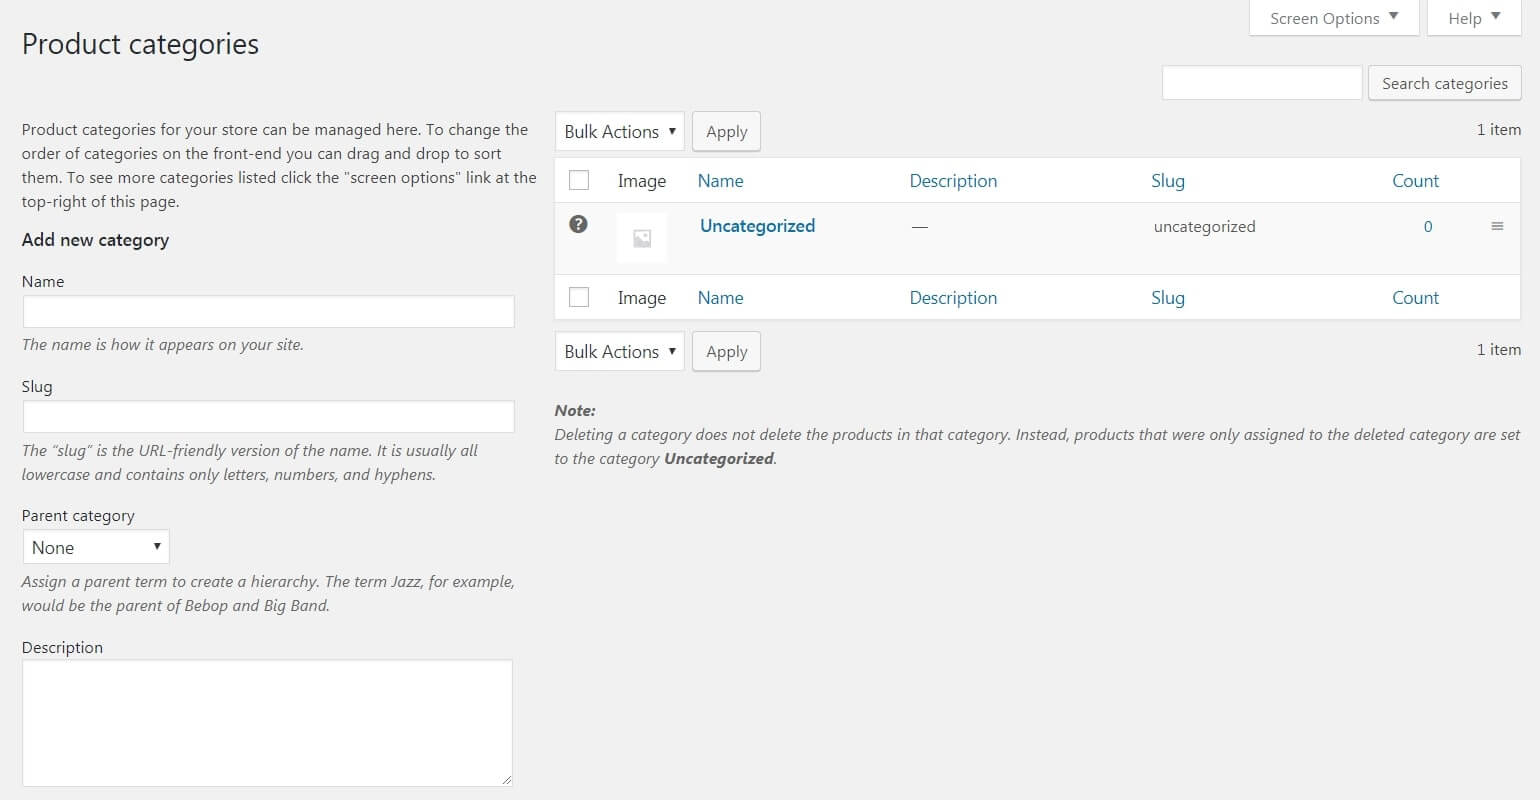
To configure your WC product categories, navigate to Products > Categories in your WordPress dashboard. You will see an empty category list and fields for entering new category information on the left on the right side of the screen.
Begin by selecting a category Name (for example, “clothing”) and a Slug in the fields on the left. The slug is simply the end of the category’s URL. Thus, if you desired the URL example.com/clothing for your category, you would enter “clothing” as the slug:
Following that, you’ll see a drop-down menu where you can choose a parent for the newly created category. Additionally, you can include a description and an image if you wish – these can be beneficial to customers browsing your store. Additionally, you’ll want to select the Display type from the second drop-down menu. The Default option will display your categories in the following manner.
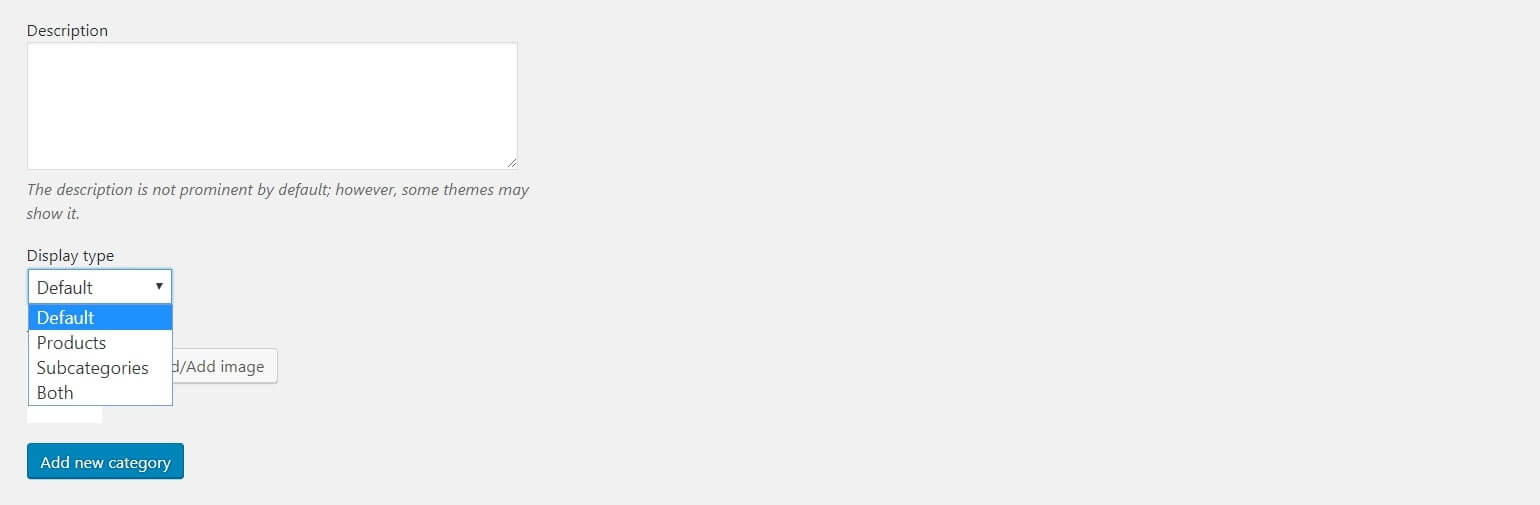
Alternatively, you are able to set the display type to Products, Subcategories, or Both to have the appropriate content displayed on your category pages. Even though category tables will be created later, you can still include the default category pages if you wish.
Once complete, click the Add new category button. Repeat for as many categories and subcategories as necessary. After that, edit each product and assign it to the appropriate categories and/or subcategories.
Step 3: Install and activate the plugin
After creating your categories, you can use WooCommerce Product Table to display products in your store by category. To begin, you must download, install the plugin, and download the.zip file for WooCommerce Product Table.
Make a note of your license key, which will be emailed to you following your purchase. Then, navigate to Plugins > Add New > Upload Plugin on your WordPress site. Upload the.zip file you previously downloaded to your site. Once the installation process is complete, click the blue Activate button:

Navigate to the WooCommerce Product Table settings in your Plugins list:
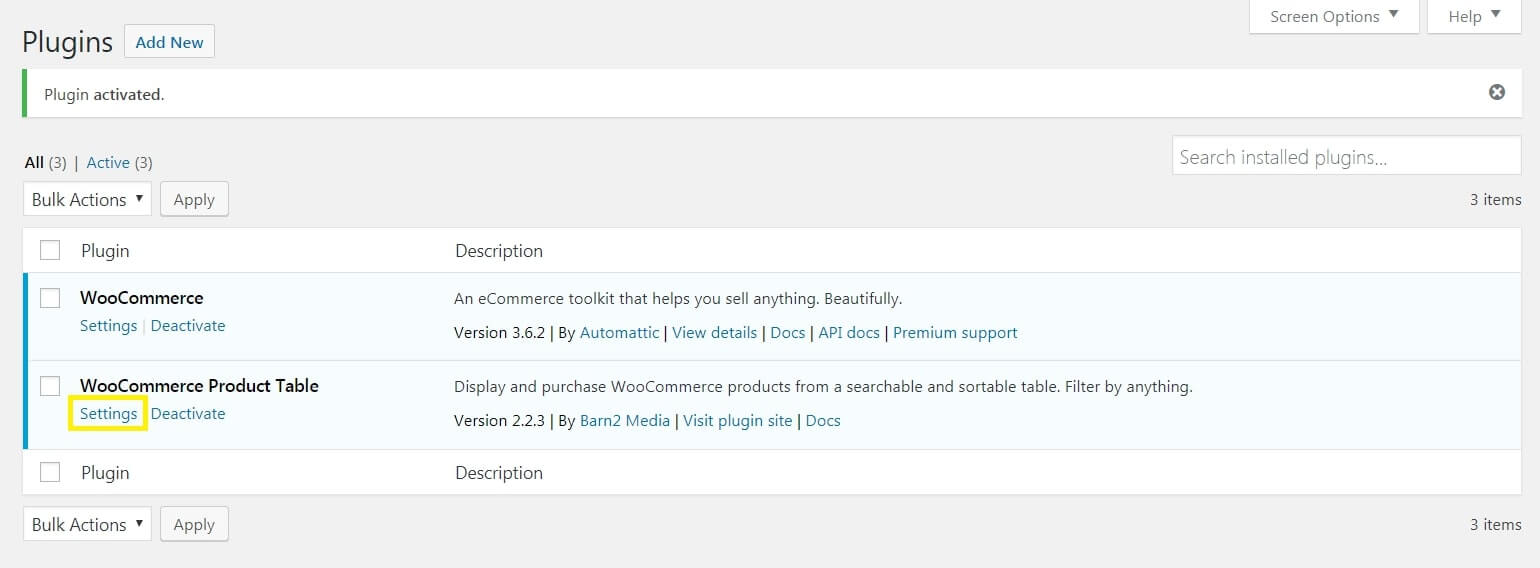
Your license key will be entered in the first field. Enter it and then click Save to apply your changes. Your plugin has now been completely installed, activated, and is ready to use.
Step 4: Customize the settings for your Product Table
To accomplish this, begin by scrolling down to the Sorting section on the Settings page.

Here, you can use the first drop-down menu to specify which data should be used to sort the products in the table. The second drop-down menu specifies whether the products should be displayed in ascending or descending order.
Following that, scroll down to the Table Controls section and enable the Product Filters option. This enables customers to view specific items in your tables by using a filter drop-down menu.

Additionally, you can enable the search box and specify its location further down. If a customer is looking for something specific, they can type it into the search bar to quickly locate it in your table. When you’re finished configuring the settings, don’t forget to save your changes to this page.
Step 5: Add Product categories Tables to your store
Now that your category tables have been created, you can add them to the appropriate pages. There are several ways to accomplish this. For example, individual category tables can be added to existing category pages in addition to or in place of the default product display. Alternatively, you can create a single page containing all of your category tables or create new, distinct pages for each.
Once you’ve determined which pages to use, you’ll need to display each table using a shortcode. Typically, the shortcode used to display a WooCommerce Product Table is simply: [product table].
This will, however, display a table of all your products, not just those in specific categories. Fortunately, this shortcode is easily customizable. To display only products from a specific category, use the following format: [product table name=”example” category=”example”].
Simply substitute the name of the category or subcategory you wish to display for “example.” The page will then be saved or published. This process can be repeated indefinitely to create as many different category-based product tables as necessary.
3 Best WooCommerce Plugins to List & Display Products by Category
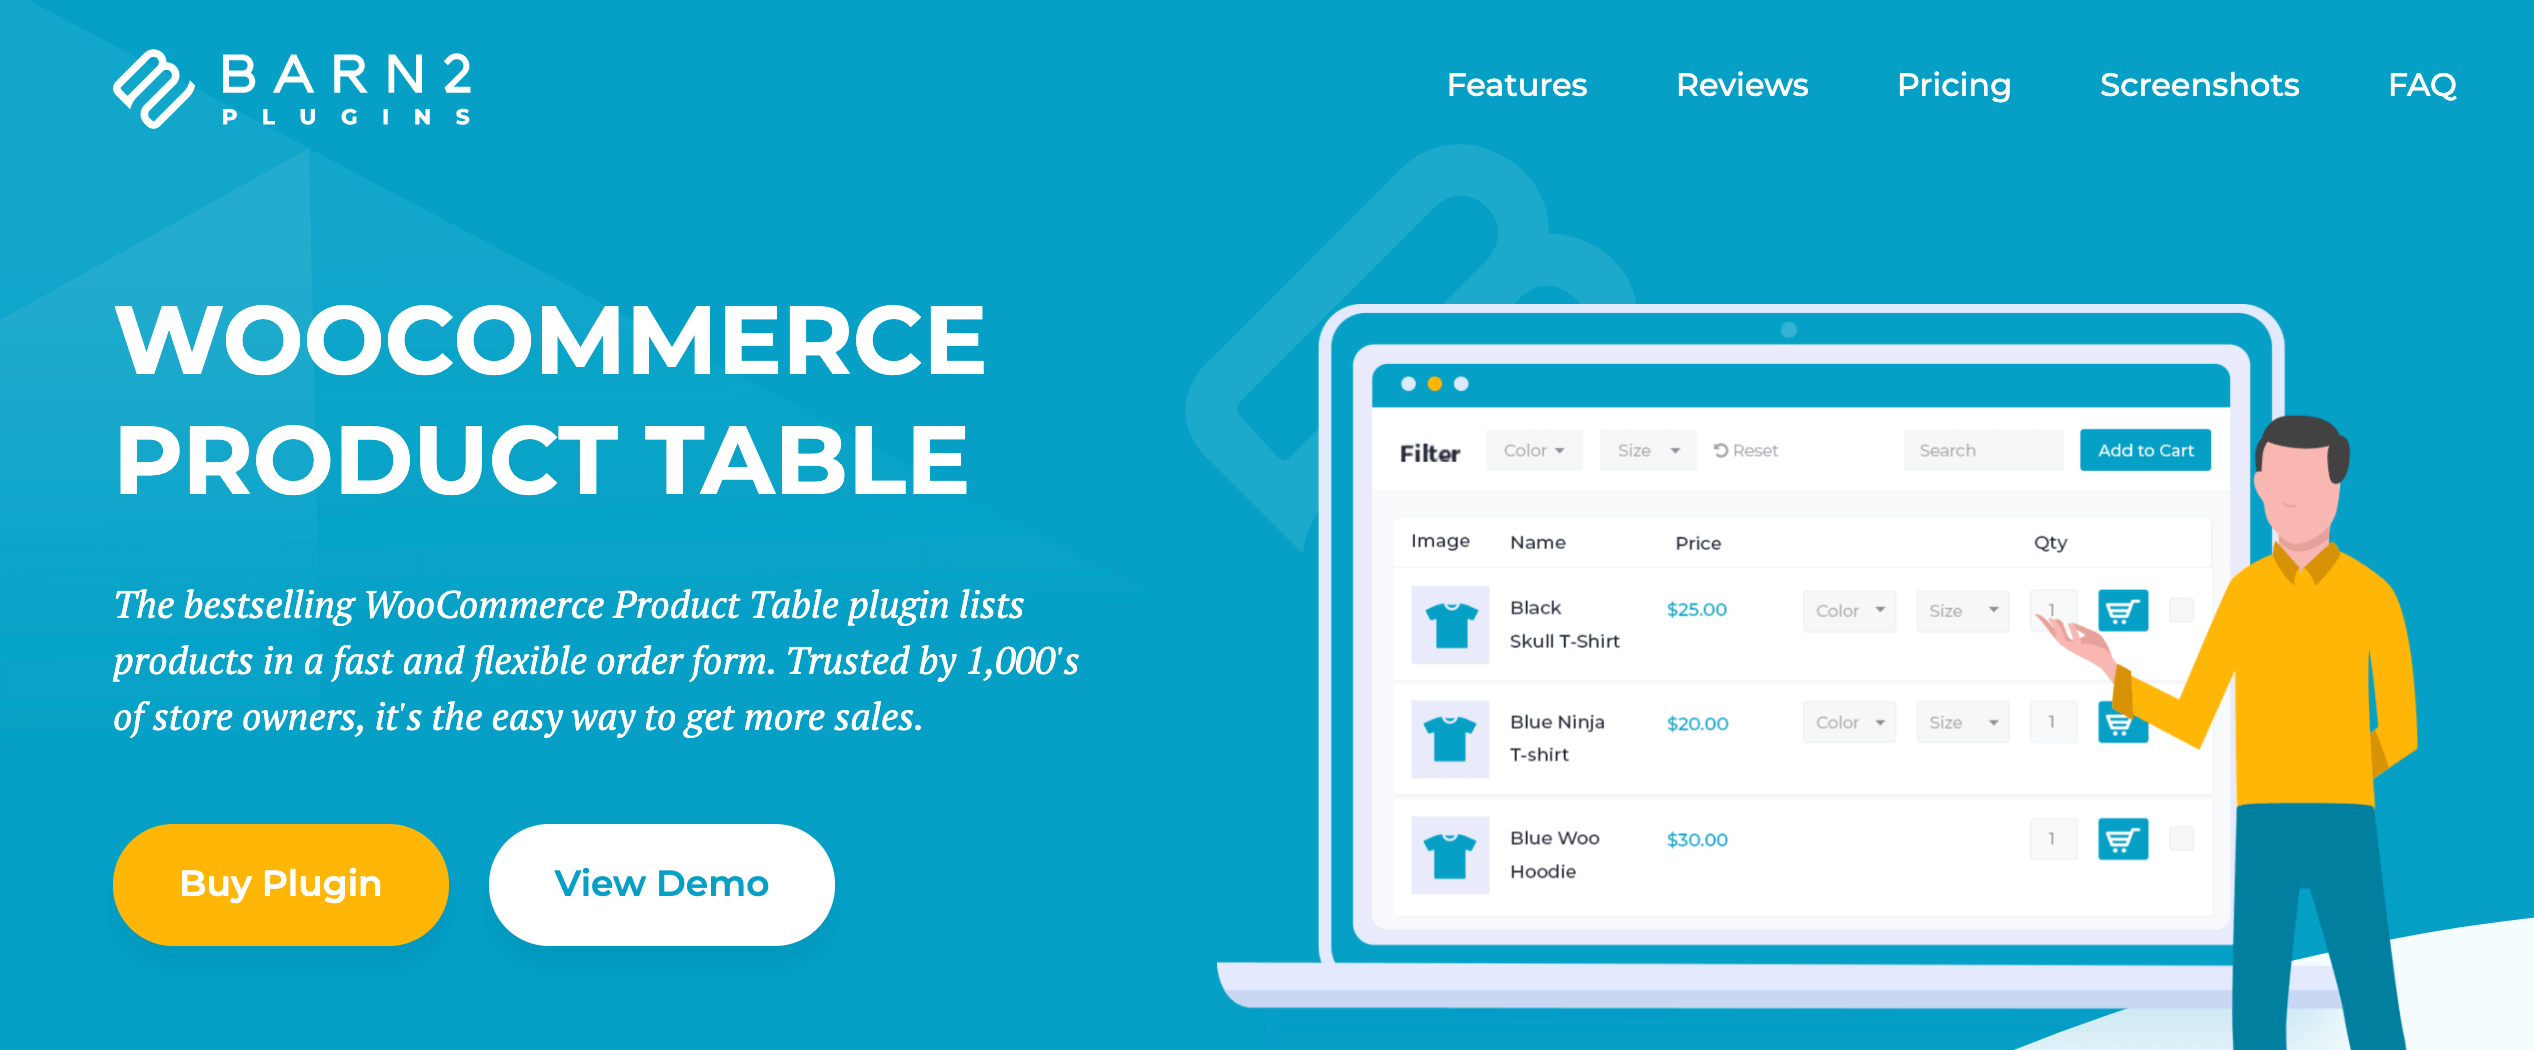
1. WooCommerce Product Table by Barn2
The popular WooCommerce Product Table plugin displays products in an easy-to-use order form. Trusted by thousands of business owners, it’s the simple way to add category tables to your WordPress site, and increase sales. Utilizing a plugin that automates product organization and display can significantly improve your online store’s performance with minimal effort. It’s a win-win situation that benefits both you and your customers.
Key Features:
- Utilize a shortcode, a Gutenberg block, or enable tables on shop and category pages to add them anywhere.
- Hundreds, if not thousands, of products can be listed.
- Display any data you want, including specific products, custom fields, attributes, taxonomies, SKUs, and videos.
- Simple and intuitive.
- Extremely adaptable and customizable.
- Designed for developers and store owners who do not possess any coding abilities.
Price:
There are 3 available price plans with a 30-day money-back guarantee of this plugin
- Starter: $99 per year, or $299 lifetime - 1 site.
- Business: $149 per year, or $449 lifetime - 5 sites.
- Agency: $349 per year, or $999 lifetime - 20 sites.
2. WooCommerce Product Table Ultimate
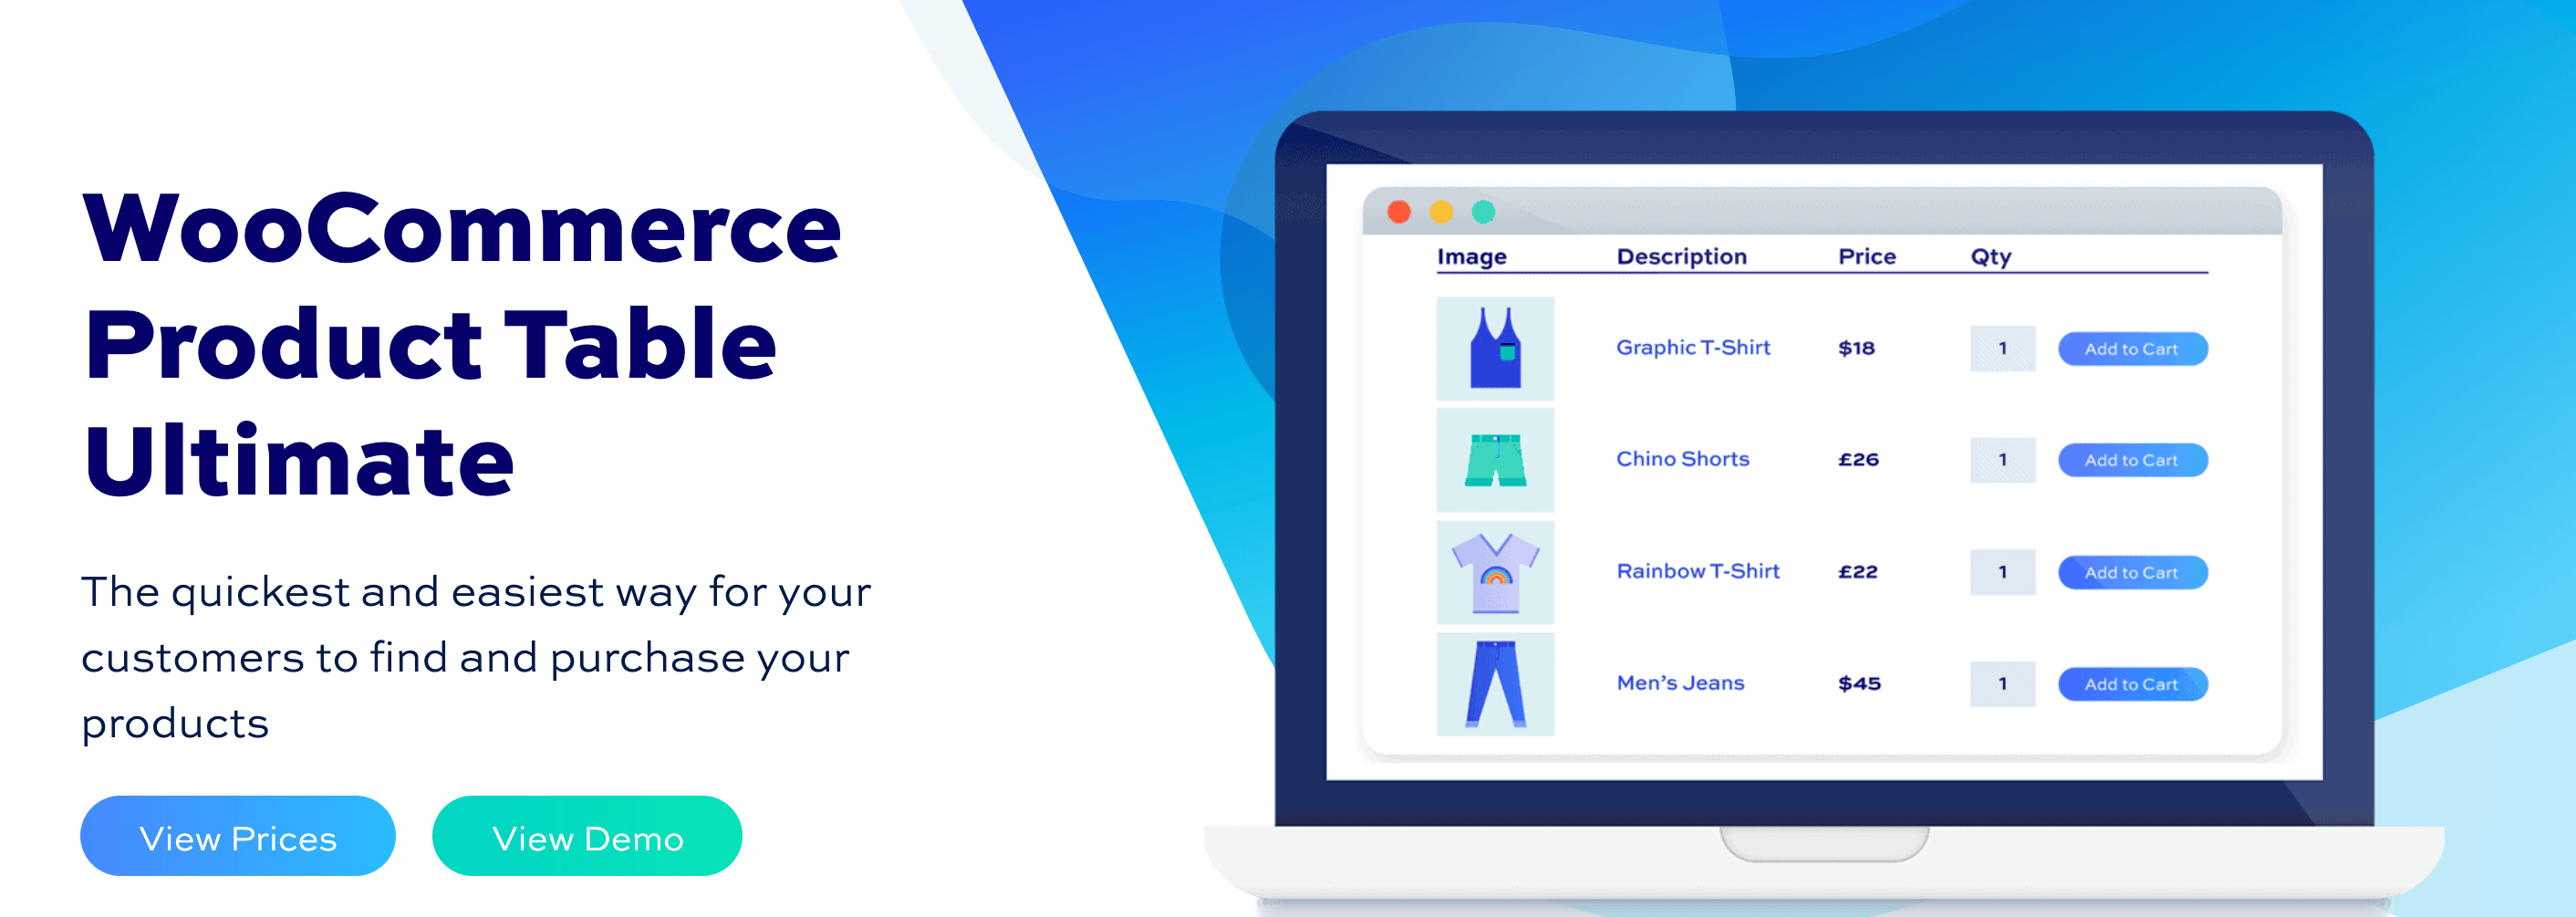
The WooCommerce Product Table Ultimate plugin enables the simultaneous display of multiple products on a single page. You can customize the front-end list layout by specifying which columns to display. Customers can easily add items to their cart by checking the checkboxes next to their purchase items. The product tables can be displayed anywhere on your WooCommerce store. Additionally, it’s worth noting that the WooCommerce Product Table Ultimate extension enables you to add as many product tables as you like to your site. Separate product tables can be created for distinct product categories.
Key Features:
- Allows you to customize the columns displayed in the product table.
- Allows for the creation of a single-page order form.
- Supports products that are variable in nature and products that include add-on fields.
- Customers can quickly and easily add multiple products to their carts with a single click.
- Front-end product tables can be displayed via Gutenberg blocks or shortcodes.
Price:
The plugin provides 2 different price plans with a 14-day money-back guarantee for your to choose from:
- Basic: $59 per year, or $149 lifetime - 1 site.
- Pro: $99 per year, or $249 lifetime - unlimited sites.
3. Product Table for WooCommerce
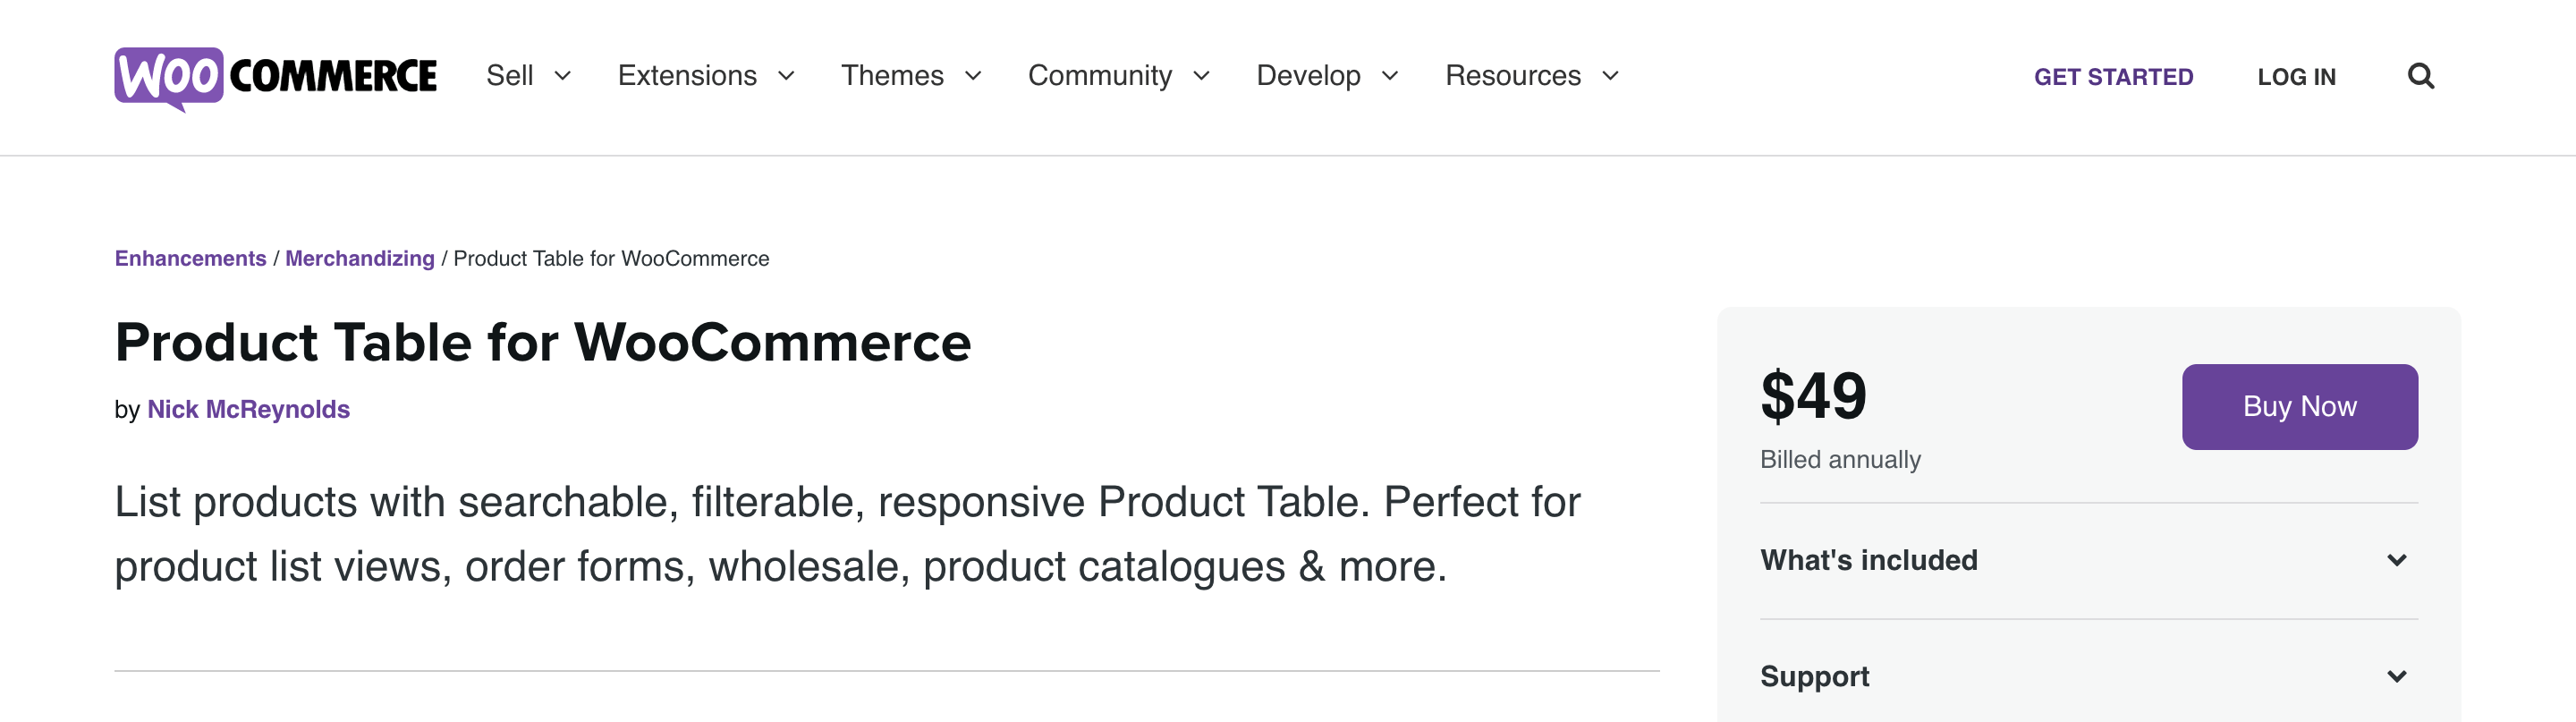
Product Tables for WooCommerce extension displays your products in a searchable table layout with filters. It’s extremely popular for creating quick order forms, large product catalogs, restaurant ordering systems, wholesale layouts, and price lists, among other things. Display items in a responsive table that is generated automatically, giving you complete control over what is displayed – without requiring any coding. The plugin enables you to incorporate product tables into any area of your website. To list products in a table, simply add them to the table using a sortable and searchable form, select the product properties you wish to display as columns and insert a table via a shortcode on any page.
Key Features:
- Add products using the flexible form and filter them by author, category, tag, or attribute.
- Completely compatible with variable products.
- Filter results according to attributes, categories, tags, and price, as well as custom taxonomies.
- Allow shoppers to add multiple products and variations to their cart directly from your product list page to increase sales.
- Maintain the attractive and proper appearance of your page, which is adapted to the screen dimensions and functions properly on a variety of devices.
Price:
The price of this plugin is $49 annually.
Final thoughts
With your conversion rate on the line, it is critical to creating a user-friendly navigation system for your eCommerce store. Categories are a tried-and-true method of improving site navigation, and choosing to display products by category in customized tables can help customers navigate your store even easier.
While WooCommerce’s product categories are an excellent feature, their display is not always optimal. From this tutorial, you have learned How to List & Display Products by Category in WooCommerce in 3 different ways, as well as which plugins are suitable for creating product categories or subcategories.
We hope you find this article fulfilling what you are looking for. If you do, please show your support by sharing this post with your friends and colleagues, and stay tuned for more useful tips and tutorials from AVADA.


