
How to Display Custom Fields on WooCommerce Product Page

Adding custom fields in WooCommerce merely takes a few moments of your time, whether you want to add precise specifications to a WooCommerce product page or present alternative product versions with a single click.
Following that, you can modify every aspect of your WooCommerce dashboard and quickly include site data that would otherwise require manual data entry.
Today’s tutorial will show you How to display Custom fields on WooCommerce product page to upgrade your online store ultimately.
2 Types of WooCommerce Custom fields
-
Additional information about the product is presented in these fields. We will start with WooCommerce extra product data fields, which are custom fields that display more information about your products. Extra product data fields that reveal additional information about a product are highlighted in the highlighted section.
-
Fields allowing the user to personalize the product. We will look at custom input fields (also known as product add-ons) such as text fields, select fields, checkboxes, and other types of input fields that allow a user to submit additional, personalized information about a product.
The distinction between the two sorts of custom fields is as follows: Data fields just provide information about the product; add-ons allow the user to enter information about the product.
How to display Custom fields on WooCommerce product page
Step 1: Create a new field group
Install the free Advanced Custom Fields plugin on your WordPress site to add custom fields to WooCommerce products.
- Begin by creating a new field group.
- Create a custom field (s)
- Additional field group options can be configured.
- Add details to products
- Front-end display of custom field data
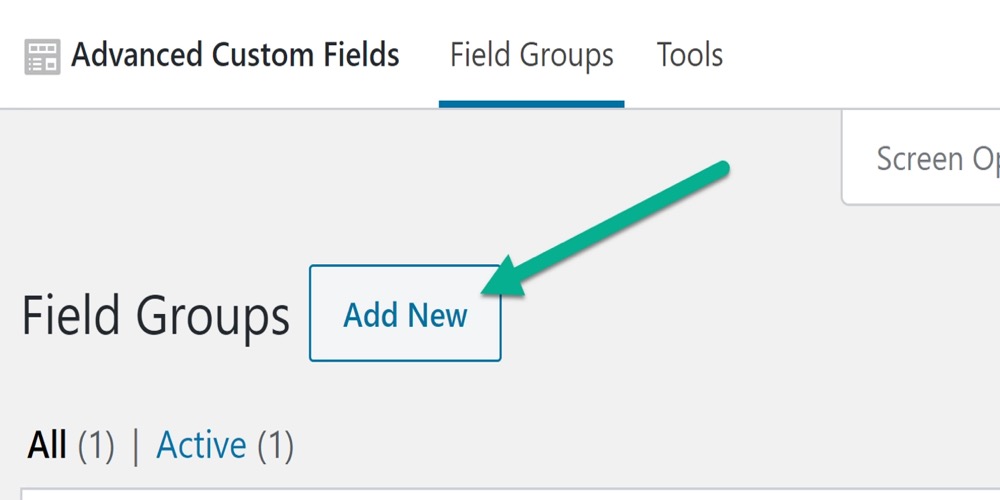
Go to the new Custom Fields tab in your WordPress dashboard. Then, at that point, close to Field Groups, click Add New.
Give your field group a name. For instance, “Computer Fields.” A Field Group is a gathering of fields for a solitary item or segment of your site, for example, a rundown of determinations that should show on all PC item pages.
Step 2: Add the custom field
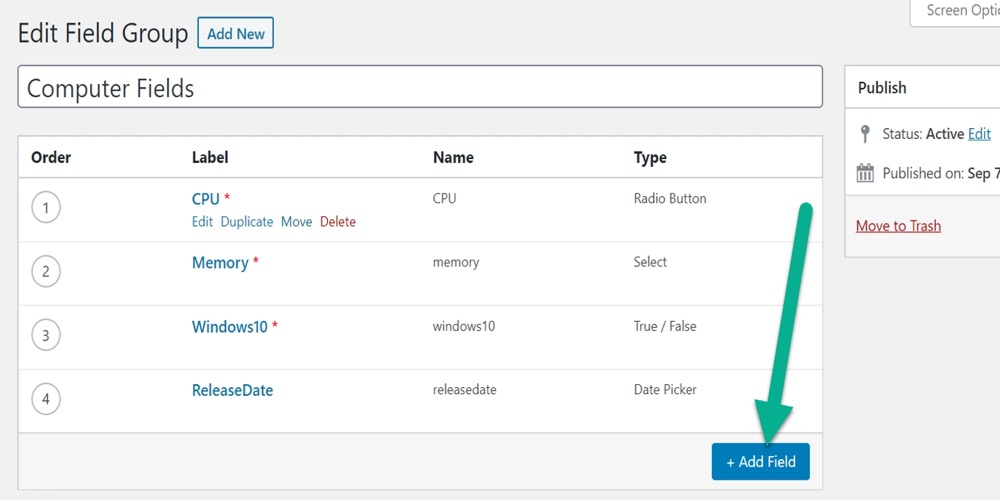
To add a field to this group, click the Add Field button.
Make the following:
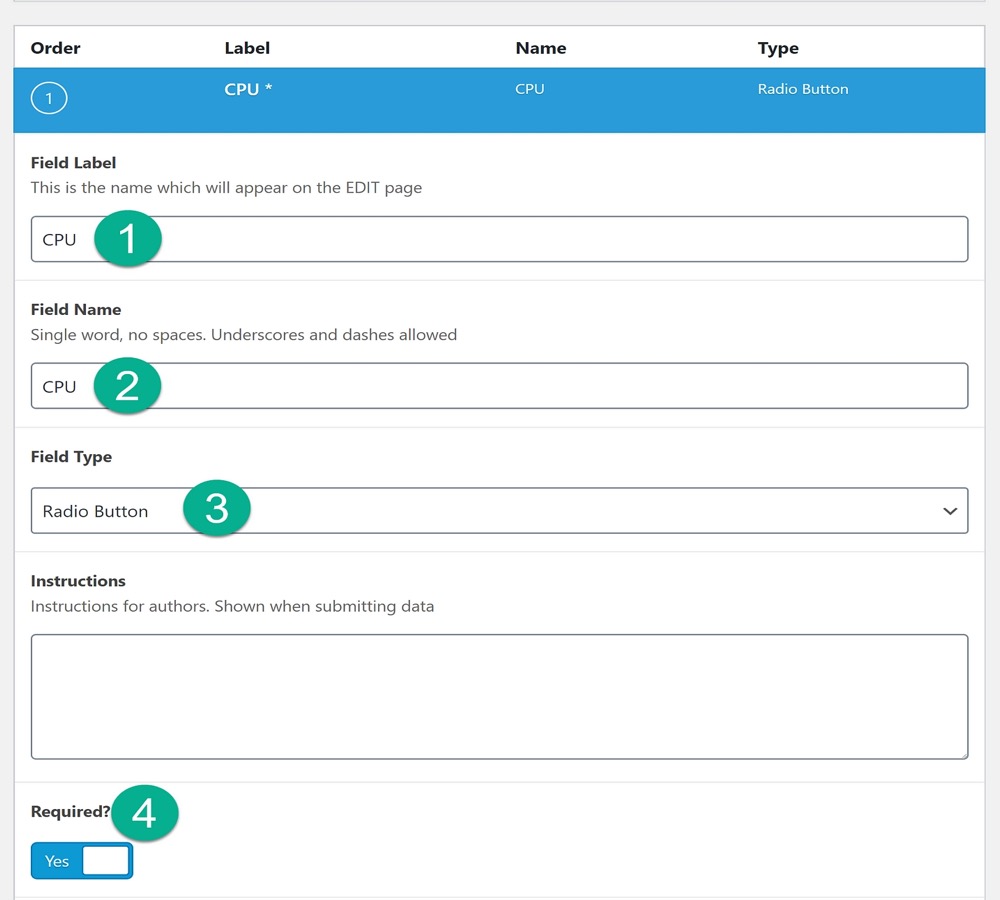
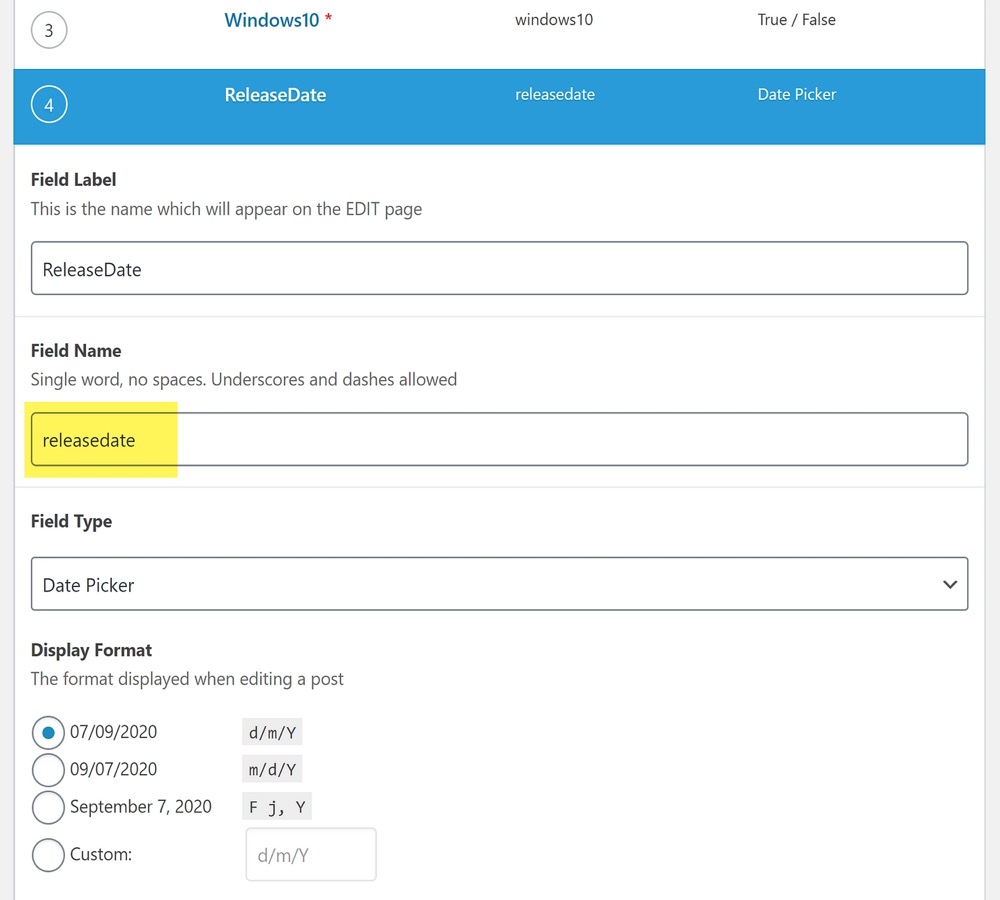
- Field Label – this is primarily for your own use.
- Field Name — these are the letters you’ll use in your own custom code, or in our case, a shortcode. You can leave this as the plugin’s default.
- Field Type – the format for that field you’re creating. Date selectors, checkboxes, dropdowns, and radio buttons are among the possibilities available.
You might also include instructions for yourself or the developer, as well as a statement about whether or not this field is necessary.
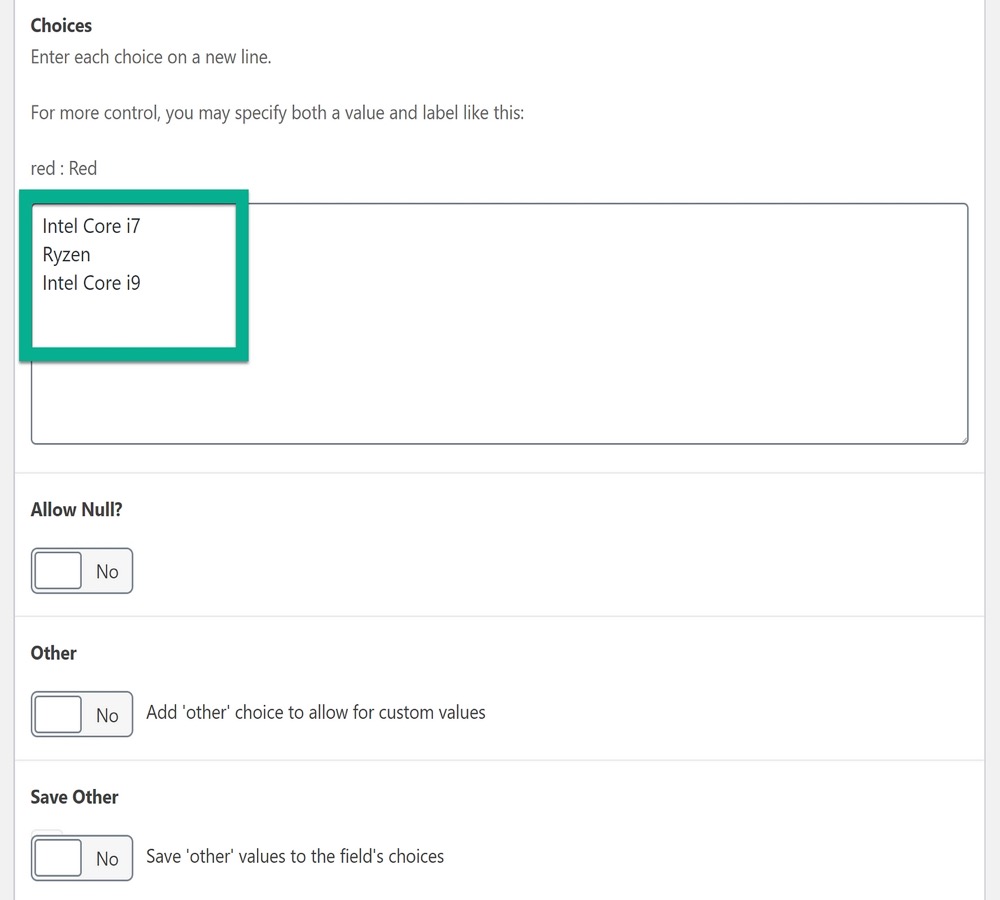
You will need to include your field Choices if you are working with a field that has several possibilities (like radio buttons). The selection options you want to present on the backend of your product page, such as different core processors, are listed here.
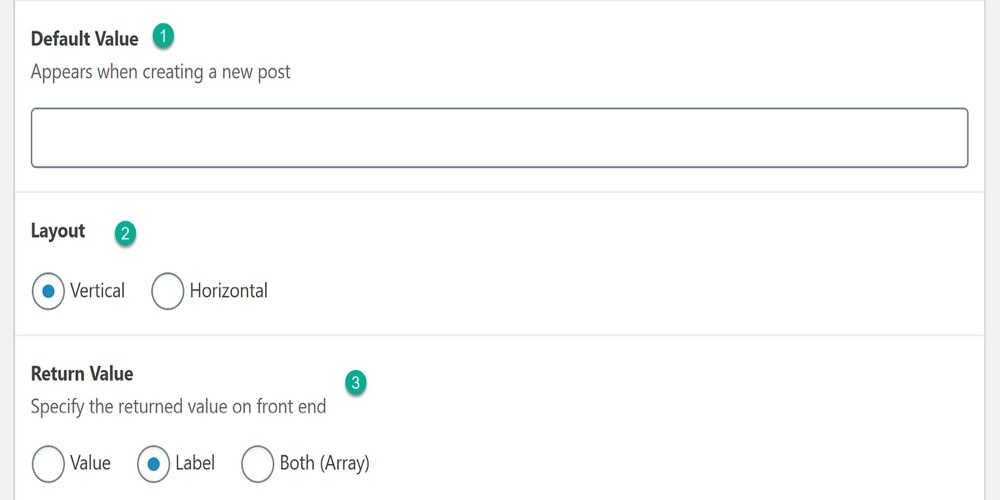
The rest of the options, such as the default value, layout, and whether or not to display the value or label, are usually optional.
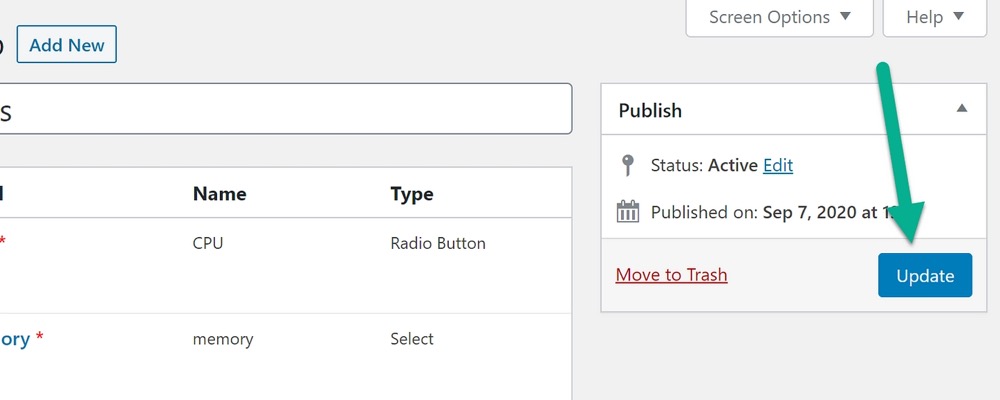
When you are finished working with a field or group, click the Publish or Update button to save it.
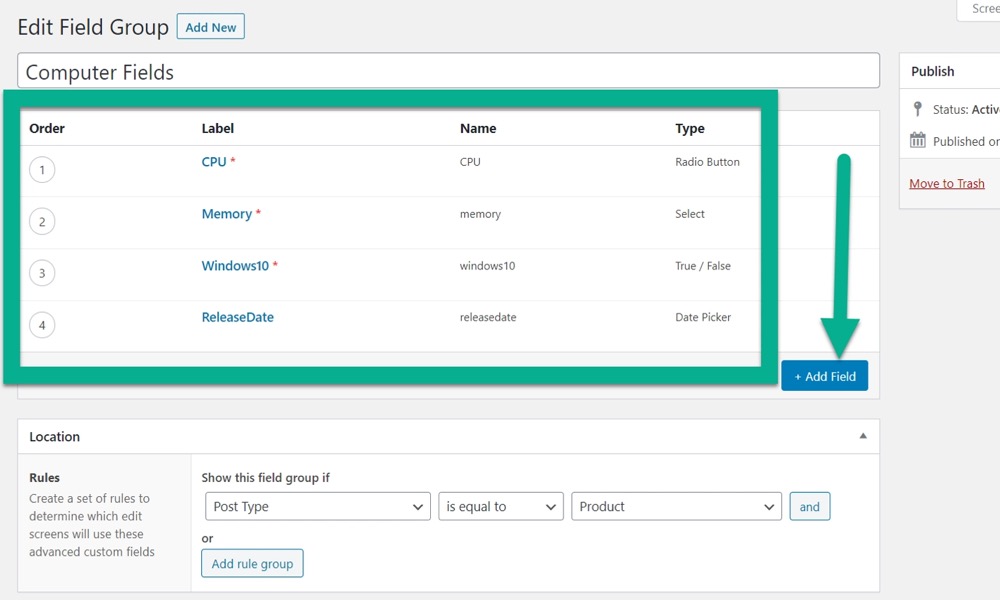
Click the Add Field button again to add other fields to your group.
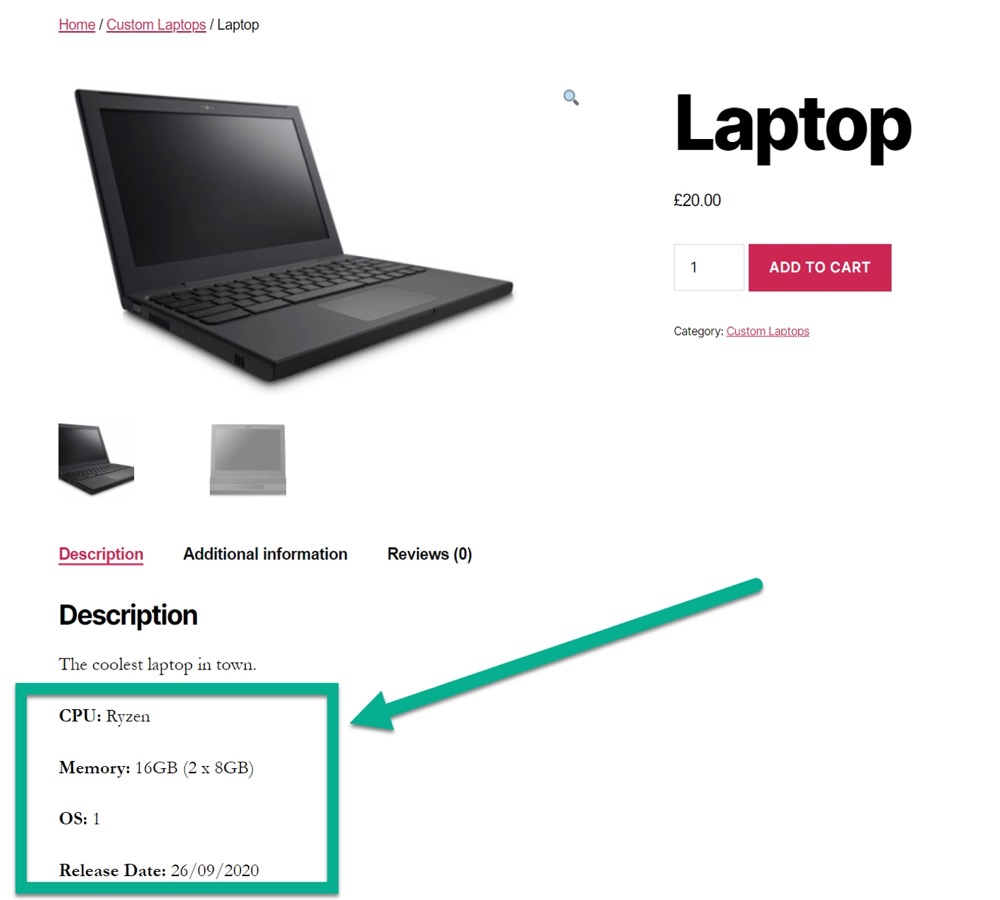
This is how it appears with four fields in this group: CPU, Memory, Operating System, Release Date.
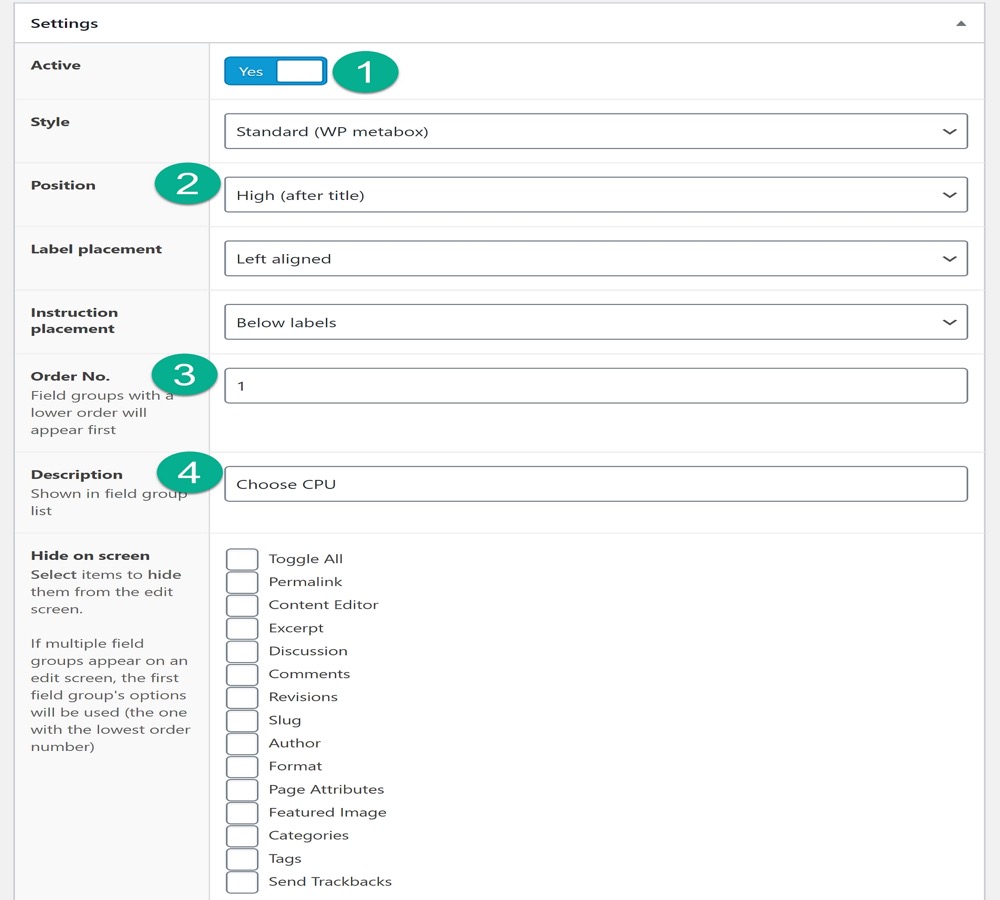
Step 3: Configure additional field group settings
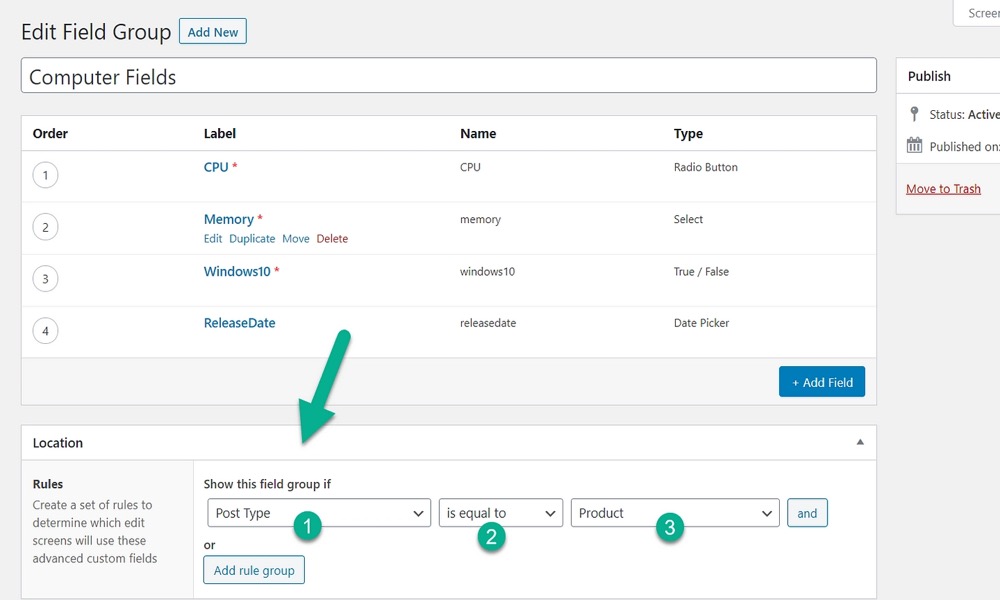
After you have completed the field grouping, move on to the Location module. This is where you specify where on your WordPress dashboard you want the field group to display.
Change the Post Type to Product. You can also choose a specific product category if you want to be more specific.
Make sure the Field Group is active in Settings. This permits you to see it on those item pages and perhaps show your purchasers the field choices.
The style is determined by your personal preferences. The same can be stated for the location of the position, labels, and teaching materials. That is entirely up to you and how you choose to format your backend. If you are unsure, just use the defaults.
If numerous field groups appear on product pages, set the Order Number. This decides the request where certain field bunches show up.
You can also give your screen a description and hide some features.
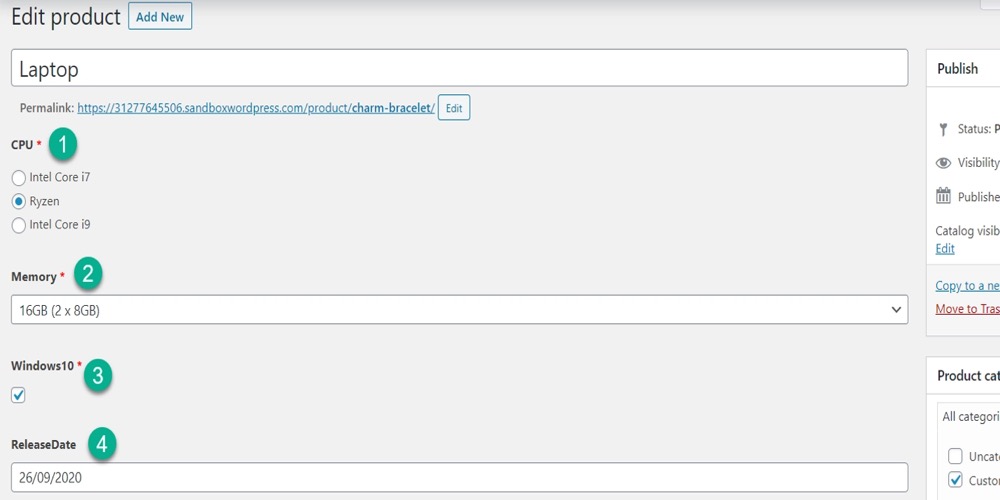
Step 4: Add information to products
Then, go to the editor for the product to which you want to add custom fields.
You should see the custom fields underneath the Product data box if all settings are right.
If you want to create a new laptop product page, you can choose the CPU, memory, operating system, and release date.
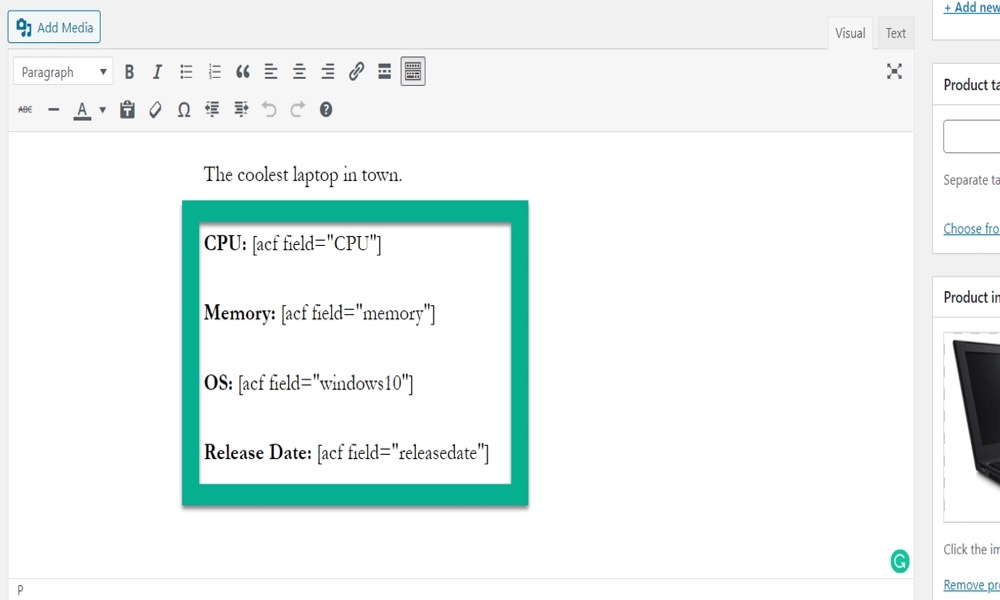
Step 5: Display custom field information on front-end
Finally, the information from your custom fields must be displayed on the front-end single product page. You can include this information wherever, but the lengthy or short description of the product is a smart place to start.
Utilize the [acf field=””] shortcode to show field data toward the front. Between the quote marks, add the Field Name:
The Field Name for each field can be found in the field bunch altering interface:
To complete the process, click the Publish or Update option.
When you open your product on the front end, you should see your custom fields where you inserted the shortcodes:
3 Best WooCommerce Custom fields plugins
1. Advanced Custom Fields
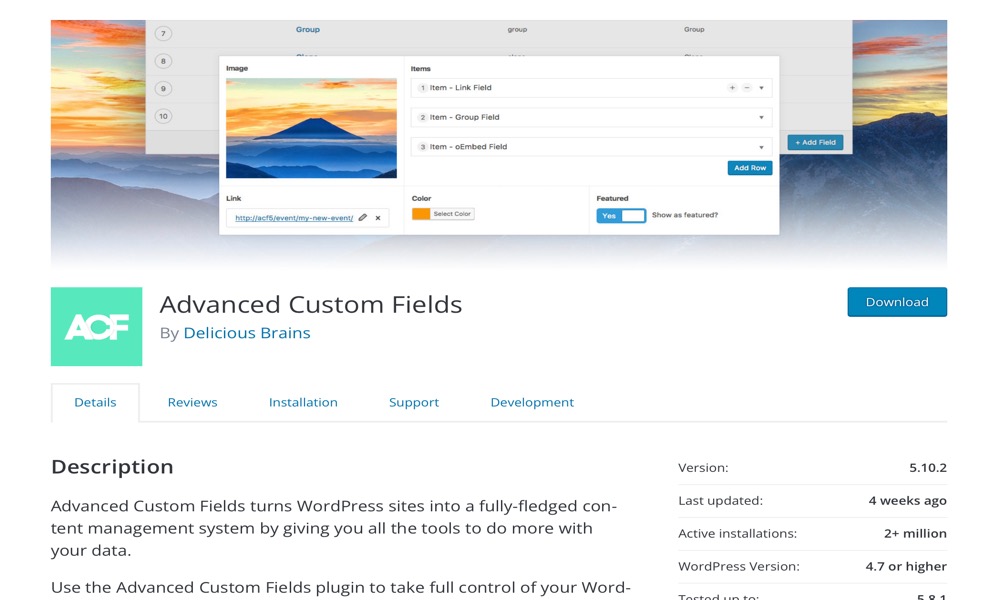
By providing you with all of the tools you need to do more with your data, Advanced Custom Fields converts WordPress sites into a full-fledged content management system.
The Advanced Custom Fields plugin gives you complete control over your WordPress edit screens and custom field data. Fields can be added as needed. With only a few clicks of a few buttons, you can add fields to your WP edit screens fast and efficiently. Put them wherever you like. Fields can be added to posts, users, taxonomic terms, media, comments, and even custom options pages in WordPress. Show them out wherever you go. You can easily load and display your field values in any theme template file with our developer-friendly functions.
Features:
- Simple and Intuitive
- Powerful Functions
- Over 30 Field Types
- Extensive Documentation
- Millions of Users
Rating: 4.9/5
2. WooCommerce Product Table
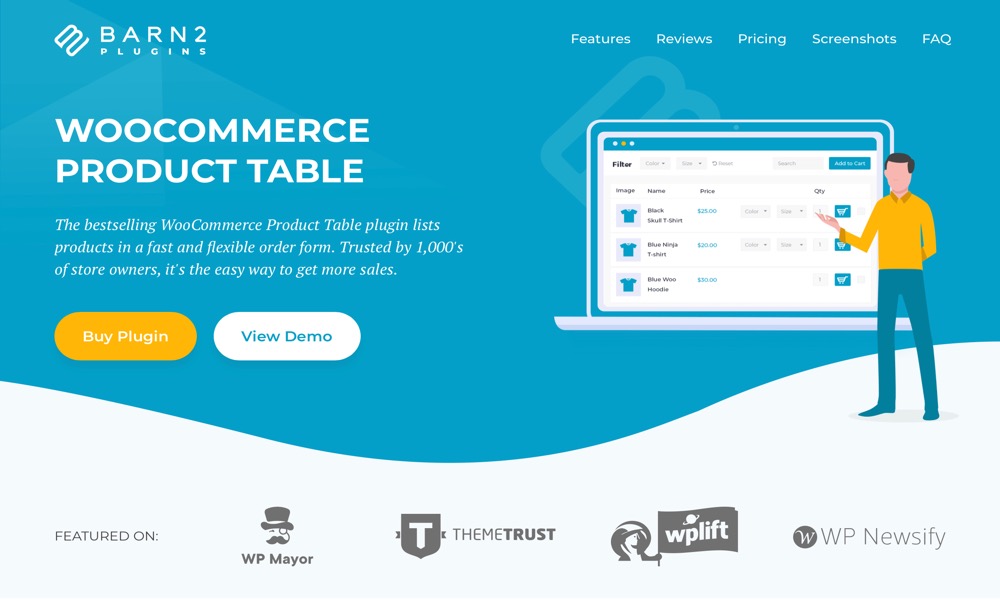
This WooCommerce Product Table module allows you to show your WooCommerce items in an adaptable table design. You can handle precisely what data shows in the table and how it’s arranged. While WooCommerce Item Table allows you to show any of your WooCommerce items, one of its channel choices allows you to show just items that the current client has bought.
Features:
- Request various items and varieties with a single tick
- Rapidly discover items with movement search and sort
- Add tables anyplace utilizing a shortcode, Gutenberg block, or empower on shop and classification pages
- Rundown hundreds or even a large number of items!
- Show any information you need: explicit items, custom fields, ascribes, scientific classifications, SKU, recordings and more
Rating: 4.9/5
3. WooCommerce Product Add-Ons Ultimate
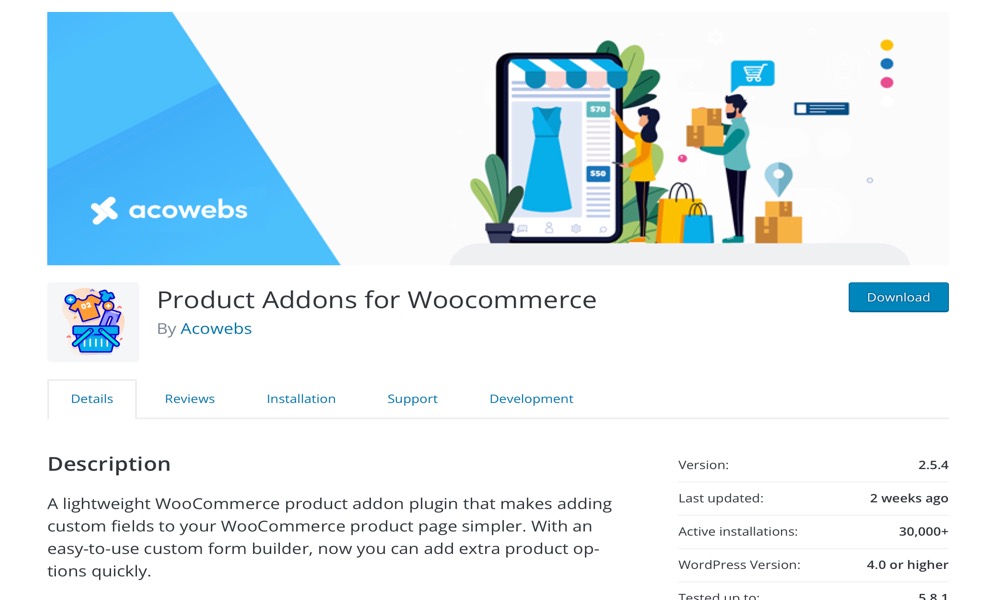
A simple WooCommerce Product Add-Ons Ultimate plugin that simplifies the process of adding custom fields to your WooCommerce product page. You can now rapidly add more product options with an easy-to-use custom form builder.
You can simply customize the WooCommerce product ordering page (by adding new product options or custom fields), and any additional form data entered by customers will be shown in the website backend and bundled with the order information.
Features:
- Text field is a normal text input field to collect text data.
- Radio field is used for selecting one option from multiple choices.
- Select field is a drop-down to choose from the available list.
- Date field (depends on the browser) is HTML5 default date picker.
- Color field (depends on the browser) is HTML5 default color picker.
- Hidden field is a hidden input field for admin.
Rating: 4.8/5
Conclusion
You can add and show WooCommerce custom fields without composing a solitary line of PHP utilizing different WordPress modules.
Remember that you should simply: Create a field bunch for Advanced Custom Fields and relegate it to WooCommerce items. You can use however many custom fields as you wish. While adding/altering WooCommerce items, fill in the custom fields with data. In the WooCommerce Product Table, add custom fields as sections. Any place you need your request structures to show up, utilize the WooCommerce Product Table shortcode.
We hope you will find this article about How to display Custom fields on WooCommerce product page fundamental!


