
How to Customize WooCommerce Category Page Template

If you offer a variety of items, you’ve most likely organized them into categories. On the category page, WooCommerce shows products in a grid-style layout by default. While this is sufficient for some online businesses, others need a specialized WooCommerce category page. A custom WooCommerce category is ideal for business owners who offer less visually appealing hardware, technology, pet food, or flowers. This allows them to display extra product information right on the category page.
Customers are likely to spend a significant amount of time looking through your WooCommerce category pages if you have a vast product inventory. As a result, you must optimize them to assist clients in making educated purchase selections. With this in mind, we’ll walk you through the process of how to customize the WooCommerce category page template in this article.
The advantages of customizing WooCommerce category page template
Customers that visit your store will spend a substantial amount of time on your WooCommerce category pages exploring items. This is why it is critical to provide clients with the most significant purchasing experience possible. The simplest method to accomplish this is to design a custom WooCommerce category page for your online business. Here are some top benefits that you may consider:
- Increase your total sales: Customers, as is customary, only visit your product page when they are confident of the item they want and are prepared to make a purchase. Meanwhile, the store page has hundreds or thousands of various goods, making potential consumers feel confused.
- Improve your SEO: Product page optimization is essential in WooCommerce shops. You may improve a WooCommerce WordPress custom category page by searching for keywords and creating content that describes a specific set of items.
- Enhance shopping experience: Creating a custom WooCommerce category page on your online store improves the shopping experience for your consumers. This can help you raise your average order value and generate more sales.
- Better store management: You may have greater control over the appearance and feel of your WooCommerce business by building a custom WooCommerce category page. This can help you better represent your brand and attract new customers to your online business.

How to customize WooCommerce category page template
In this tutorial, we’ll show you how to utilize three different methods to make a custom WooCommerce category page. We ensure you already have a WordPress site set up with the WooCommerce plugin installed and enabled for this guide. We also presume you’ve added some products to your WooCommerce store that have been organized into categories. Now, let’s dive in!
Method 1: Using Page Builder
The first method is using a page builder or a landing page provider to set up your category template. In this tutorial, we will use Divi - a popular WordPress theme with various outstanding features. This theme has a drag-and-drop builder that allows you to design a custom category page template. You may build a template for category pages and use it for all of them in your WooCommerce store this way.

The live preview lets you see all of the changes you make with the builder in real-time, making Divi soo simple to use. Divi also has several modules that allow you to add various components to your pages, saving you a significant amount of time when building or modifying your category pages.
Step 1: Install the page builder
To begin using Divi, you must first install and activate it. You can get the Divi zip file from their official website. Then, navigate to your WordPress account and click Appearance > Themes > Add New.
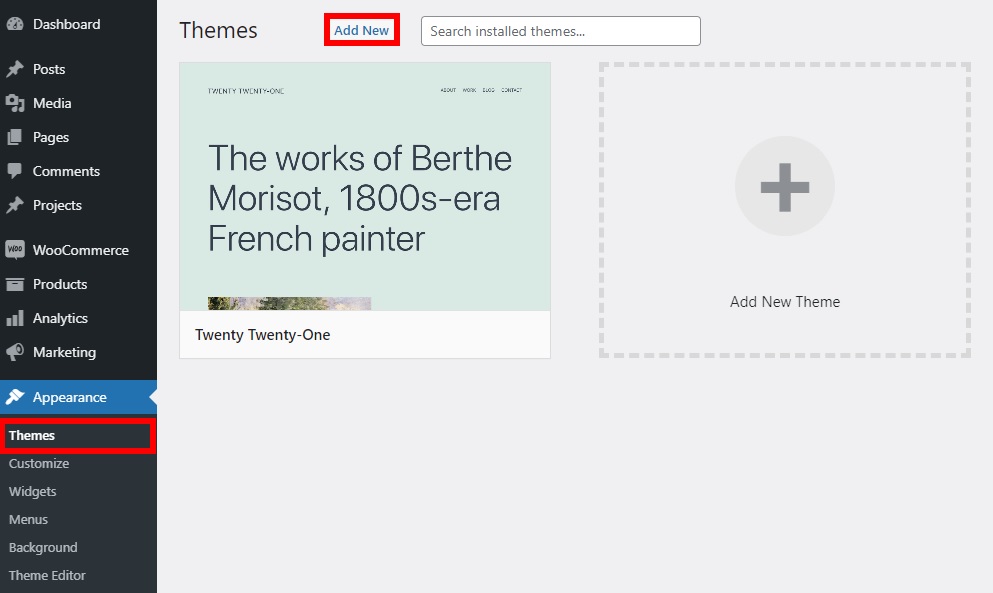
Select the freshly downloaded Divi.zip file to add to your site by pressing Upload Theme. Once it has been uploaded, click Install Now to install the theme and activate it once it has been installed.

When we activate the Divi theme, it will also install the Divi Builder - the in-built page builder used to edit the category pages.
Step 2: Add a custom WooCommerce category page template
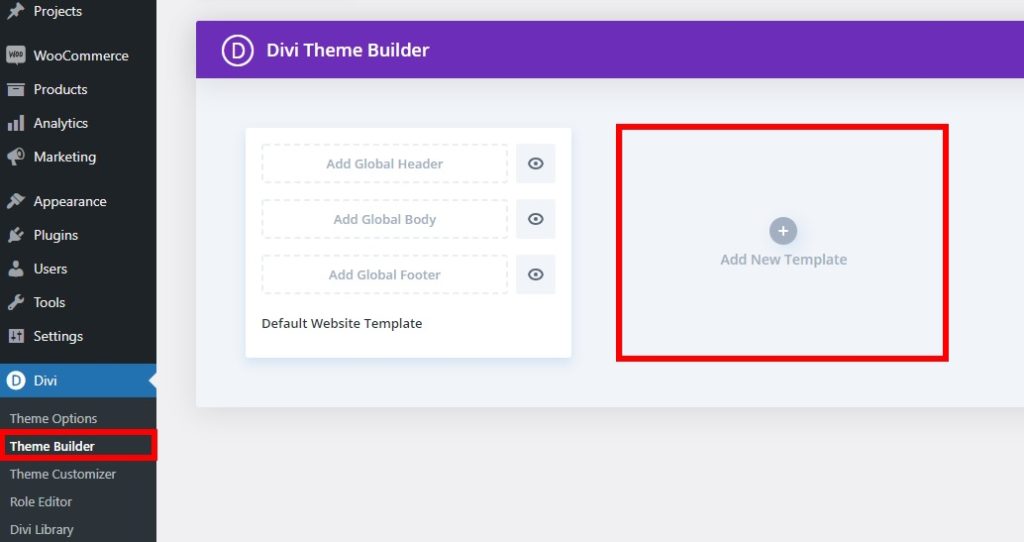
To start building a custom category page template, navigate to Divi > Theme Builder and click the Add New Template button.
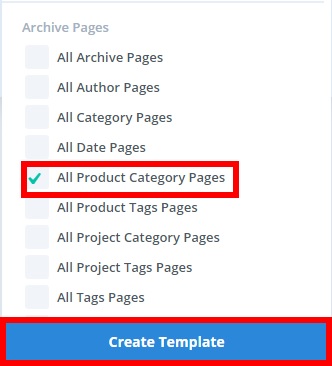
Then, under Archive Pages, check the box for All Product Category Pages and click Create Template.
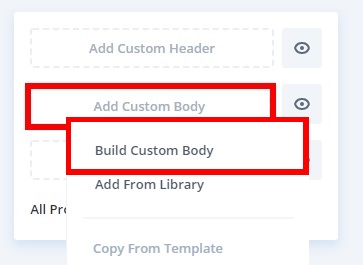
Then, on the newly created template, select Add Custom Body. Choose the Build Custom Body option as well because we are constructing a whole new template using Divi.
There are three choices available:
- Create your template from scratch.
- Use a template from the Divi collection to further personalize your WooCommerce category page.
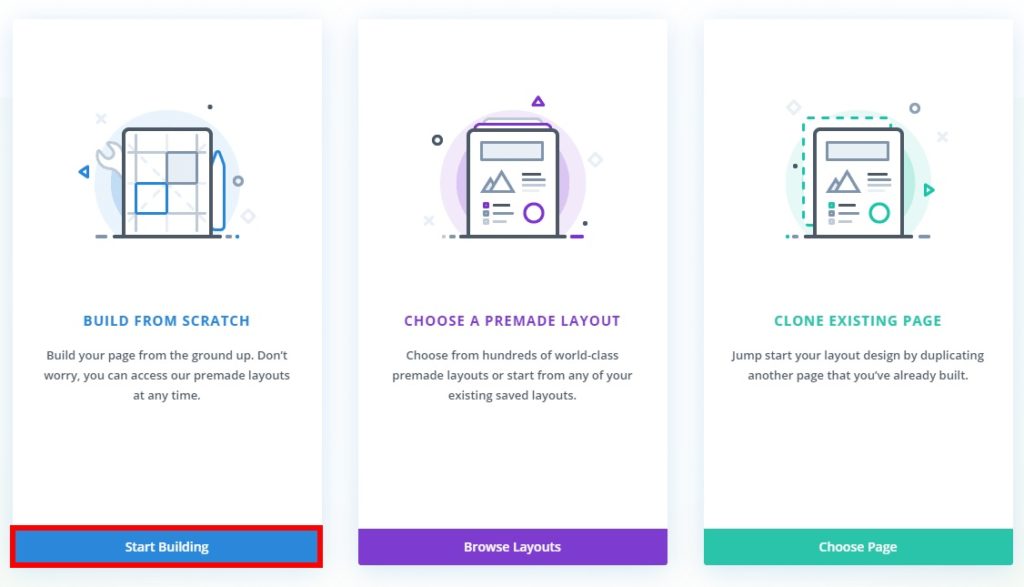
- Use an existing page as a template for all of your product category pages by cloning it. You may select any of the choices that best fit your needs. We’ll choose Build from Scratch for this tutorial. Therefore we’ll click the Start constructing option.
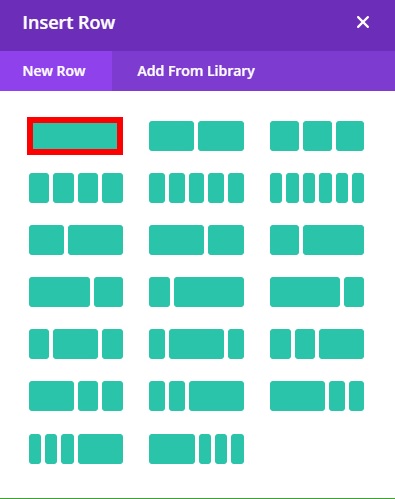
You’ll be taken to the Category page layout, where you’ll utilize the Divi Builder to build your template. To begin creating your template, you must first choose a framework. Select the sort of row you want for your category pages under New Row. You may add as many rows and columns as you like. You’ll need at least two rows for the category page header and body, but you may add more columns if you want to include a sidebar on the category page body.
After you’ve decided on the number of rows and columns, you’ll need to add the Divi modules to further personalize the category page layout.
Step 3: Customize category page header
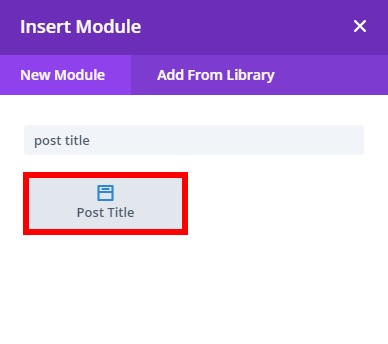
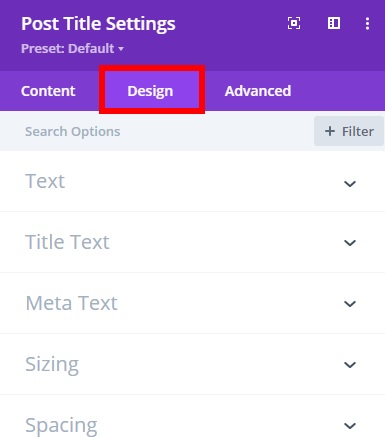
You could include the page title and breadcrumb for your category pages in the category page header. Click the ’+’ symbol in the row to add the post title, type Post Title into the search field, and pick it.
You will see many post title choices. You can add the meta and featured image, but we won’t use them in this example, so we’ll turn off the Show Meta and Show Featured Image settings in the Elements area.
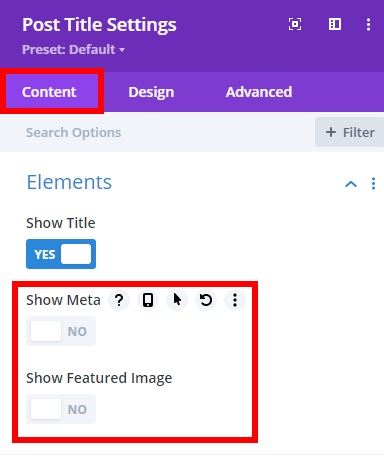
It’s worth mentioning that you don’t need to provide a title here because the dynamic post title will be displayed when you preview the website. You may also change the background color and fonts of the header from the Design tab.
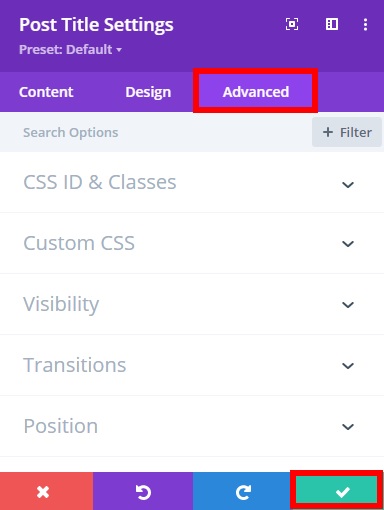
There are some additional options such as adding CSS ID, classes, custom CSS, scroll effects, and other features on the Advanced tab. After you’ve completed all of the necessary adjustments, click the “tick” symbol to save your work.
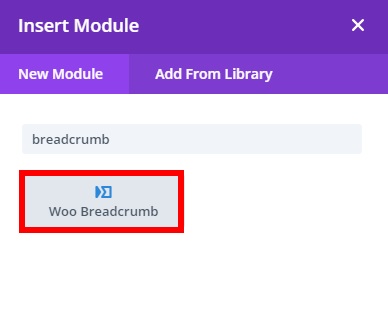
Step 4: Create a breadcrumb module
You’ll also need a breadcrumb module for extra navigation on the category pages, so click the ’+’ symbol once again to add a new module and search for “Woo Breadcrumb.”
Then, under the Product section of the Content tab, pick the option This Product. This will add the dynamic title for the product category that your consumers are interested in.
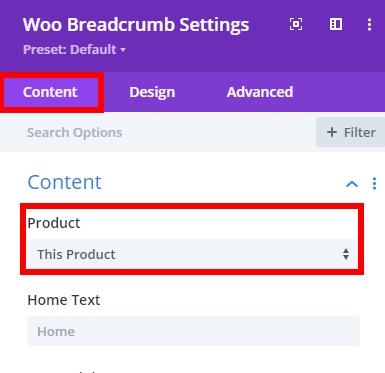
Make any required adjustments using the Design and Advanced tabs, and then click the “tick” symbol to save the changes.
Step 5: Customize category page body
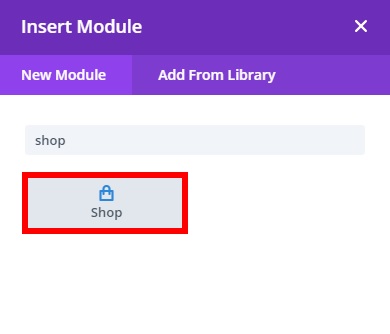
After you’ve finished changing the header, you may go on to the body of the category page. If you haven’t already, click the green ”+” symbol and choose the sort of row you wish to add. Then, because it includes all of your shop’s items, you’ll need to install the shop module here. In the row, click the ”+” symbol and look for the Shop module.
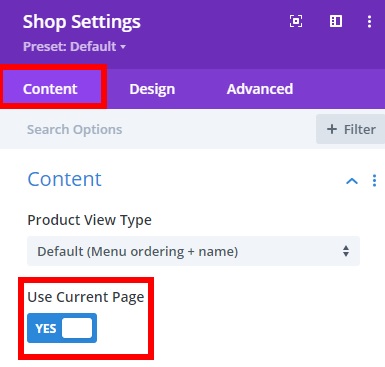
When you click it, you will be sent to the category page, where you may customize the variables for your items. All products for your category page may be edited under the Content tab. Ensure that the Use Current Page option is turned on so that the goods from the same product category that your clients pick on your online shop are shown.
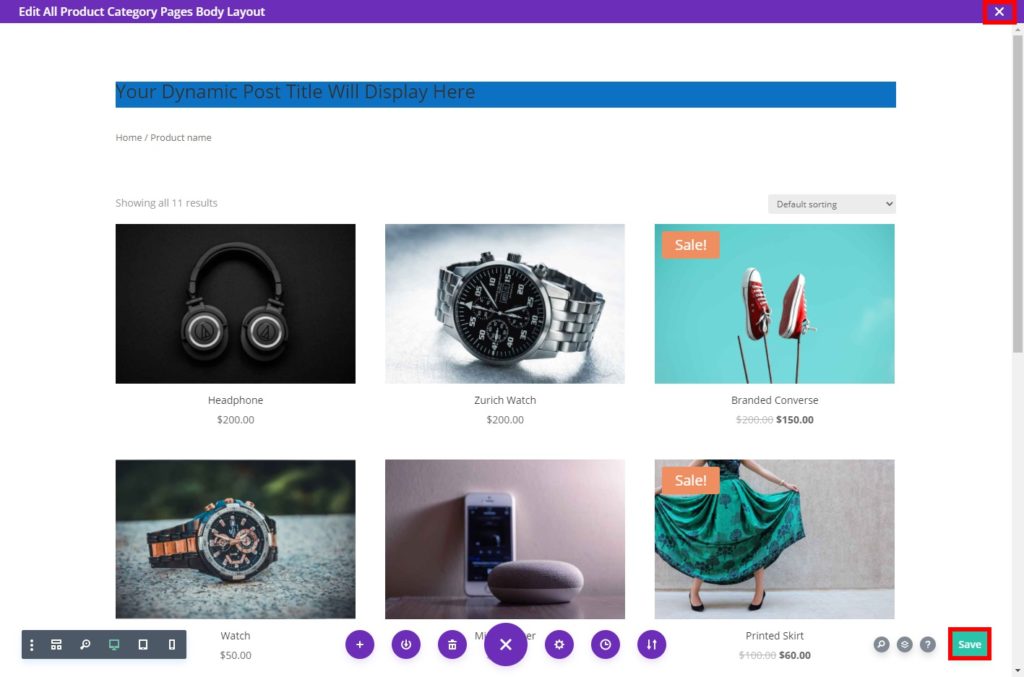
All that remains is to update the page’s other display components. For example, you may choose the number of columns or items to display per page and pagination from this page. The Design and Advanced tabs also allow you to change the typefaces of the product and pricing text, among other things. Once you’ve completed all of the necessary adjustments, click the “tick” symbol to save your work. With the Divi Builder, you can add extra rows or change the footer sections; remember to keep the page template body at the bottom right of your screen after you’re finished.
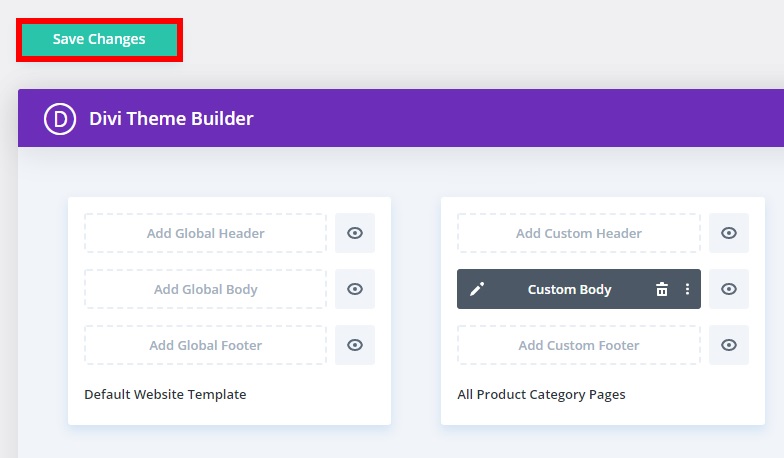
To save the changes to your template, click Save Changes again. Close the Divi Builder after saving your modifications, and you will be returned to the Theme Builder dashboard. All of your adjustments will now be visible when you preview the category page of any product category.
Method 2: Using Third-Party Plugins
Users may design unique WooCommerce category pages for their online business with the WooCommerce Product Table Ultimate plugin. You may display multiple product categories, items, and product variants in a table-style structure on the category page. Customers may pick goods by checking the box next to them and adding them all to their cart with a single click.
This makes it easy for buyers to purchase several goods. They can quickly locate what they’re looking for and add it to their shopping cart. Making the entire buying experience straightforward not only increases sales but also improves client retention. If a client had a positive experience with your store, there is a strong chance they will return to buy from you again.
Step 1: Install the plugin
Begin by downloading and installing the WooCommerce Product Table Ultimate plugin on your WordPress site. Then, go to WooCommerce > Settings > Product Table Ultimate > License and input the license key in the field labeled “License Key.”
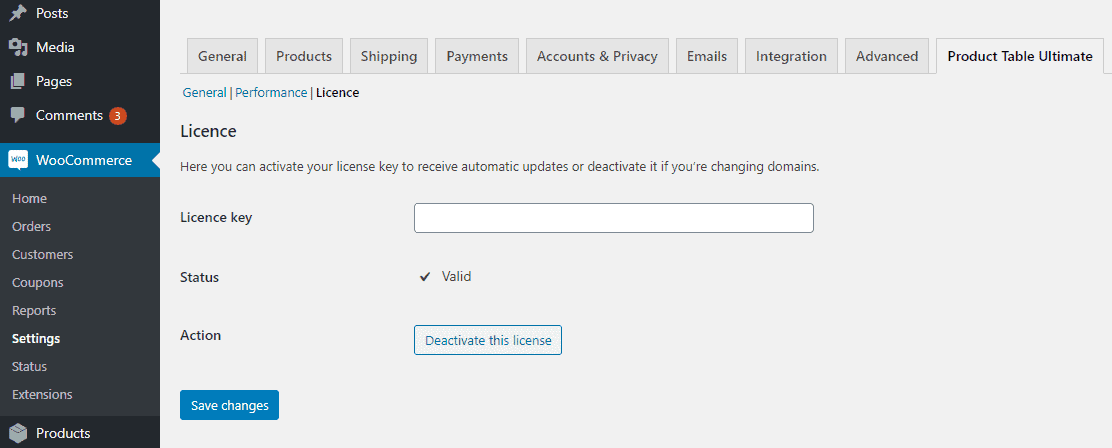
To proceed, click the Save changes option.
Step 2: Create a category page
The following step is to build a new custom WooCommerce category page. Go to Pages > Add New to create a new page and rename the category page. Click the Add block button to add a Gutenberg block to your freshly built custom WooCommerce category page. Search for the “Product Table Ultimate” block and apply it to your layout to present items and product variations on your WooCommerce category page in a clear and ordered manner. When you’ve finished changes, click the Publish button to continue.
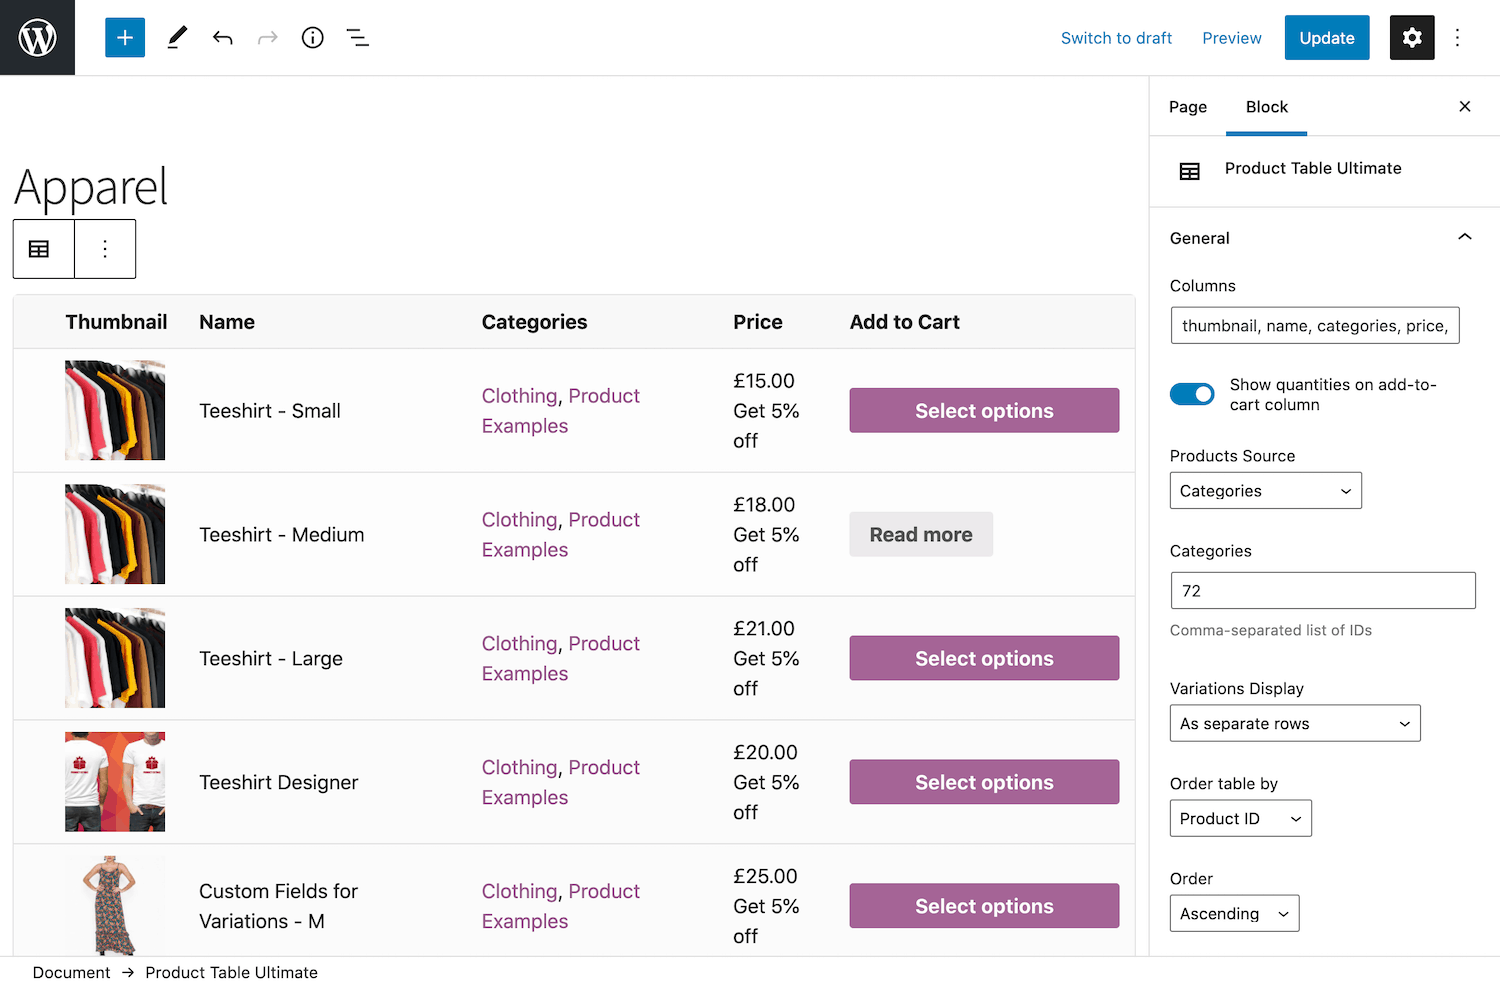
We can now begin modifying the various layout options available on the custom WooCommerce category page. Go to WooCommerce > Options > Product Table > Layout and configure the different settings to start customizing.
Step 3: Configure Sorting and Filtering settings
On the Sorting and Filtering settings page, you can modify your custom category page with the following options:
- Sortable columns: You can choose which sortable columns appear in the table. Type the column name into the text area. This will add a column header to your store’s product table on the front end. Customers can sort the rows by clicking the column headings. Customers can sort columns in either alphabetical or reverse alphabetical order. It may also be used to sort goods by price, from low to high or from high to low. In this way, customers will be able to discover the goods they are searching for quickly.
- Filterable columns: Filtering is also possible for the various columns in the product table. This means you may allow consumers to enter a keyword and only see items in the table that match that phrase. Categories, Tags, and Attributes may all be used to narrow down your search.
- Filter methods: You may specify the ways consumers can filter keywords if you’ve added filterable columns to your custom WooCommerce category page. Among the possibilities offered are clickable terms and dropdown fields.
- Select filters locations: If you decide to utilize dropdown fields as the filter technique, this option allows you to choose where the dropdown fields will be shown. You have the option of placing it above, below, or both.
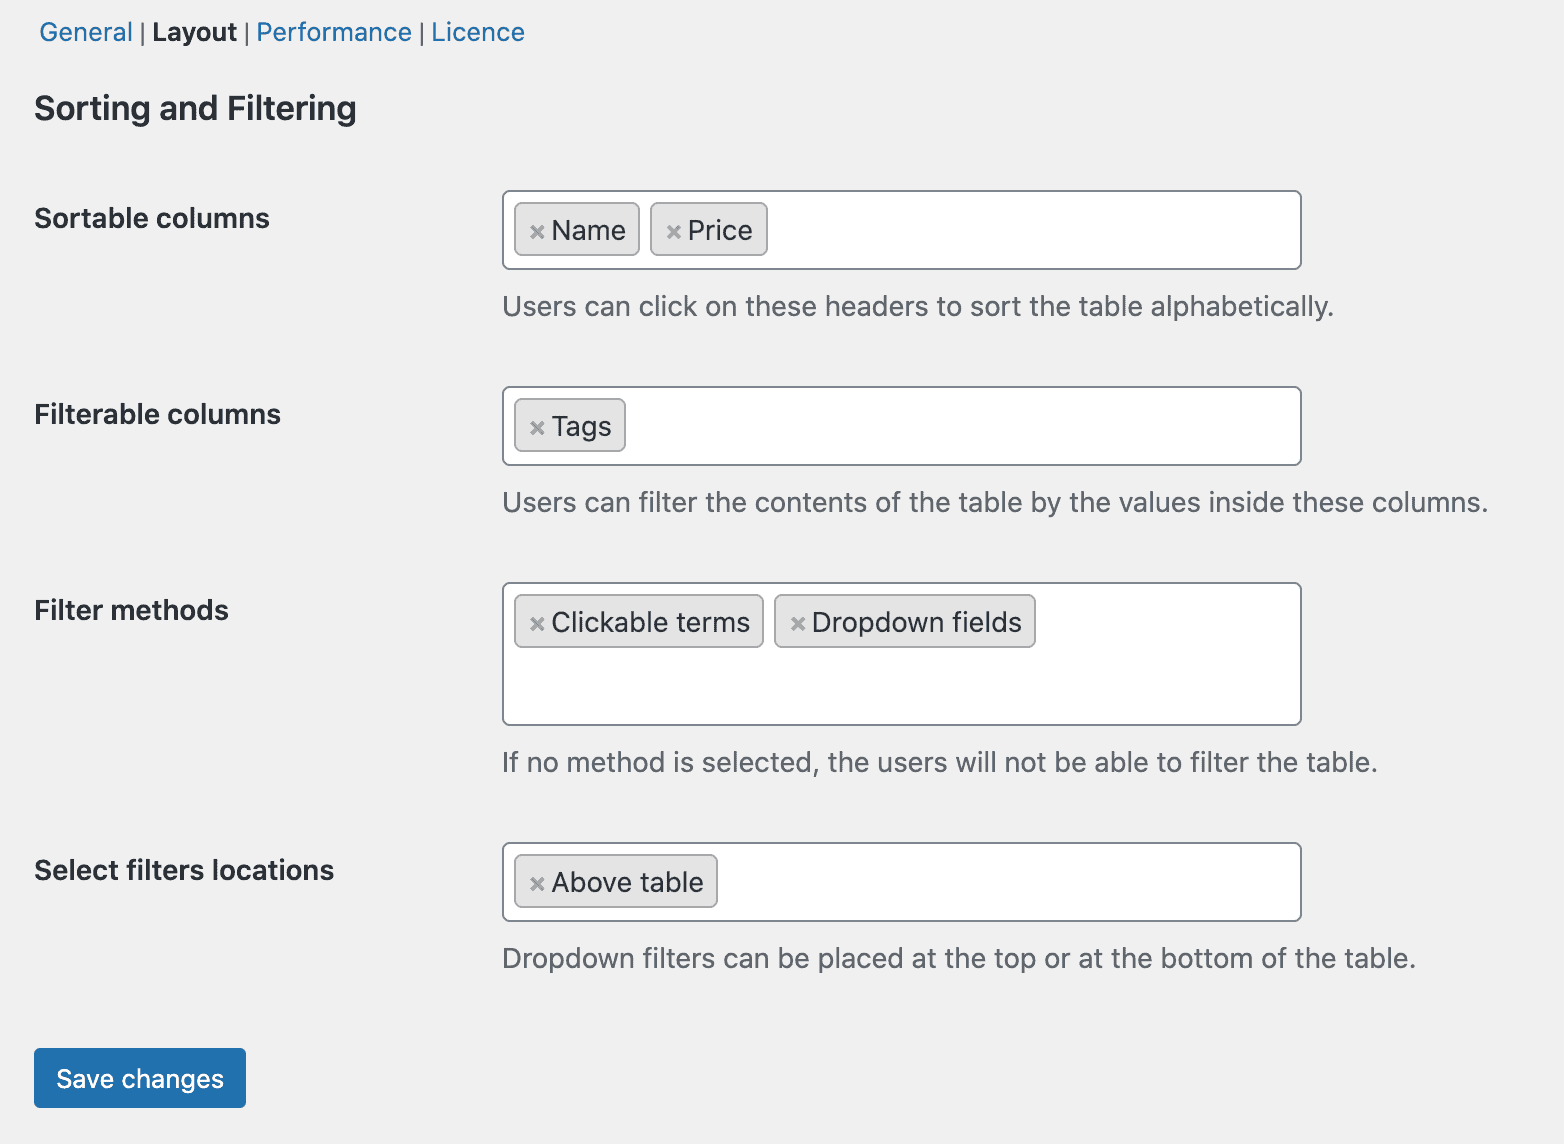
When you’ve finished editing, click the ‘Save changes’ option to continue.
Step 4: Add your new custom category page to WooCommerce
The last step is to add your category page to your online store. This may be accomplished by heading to WooCommerce > Settings > Product Table.
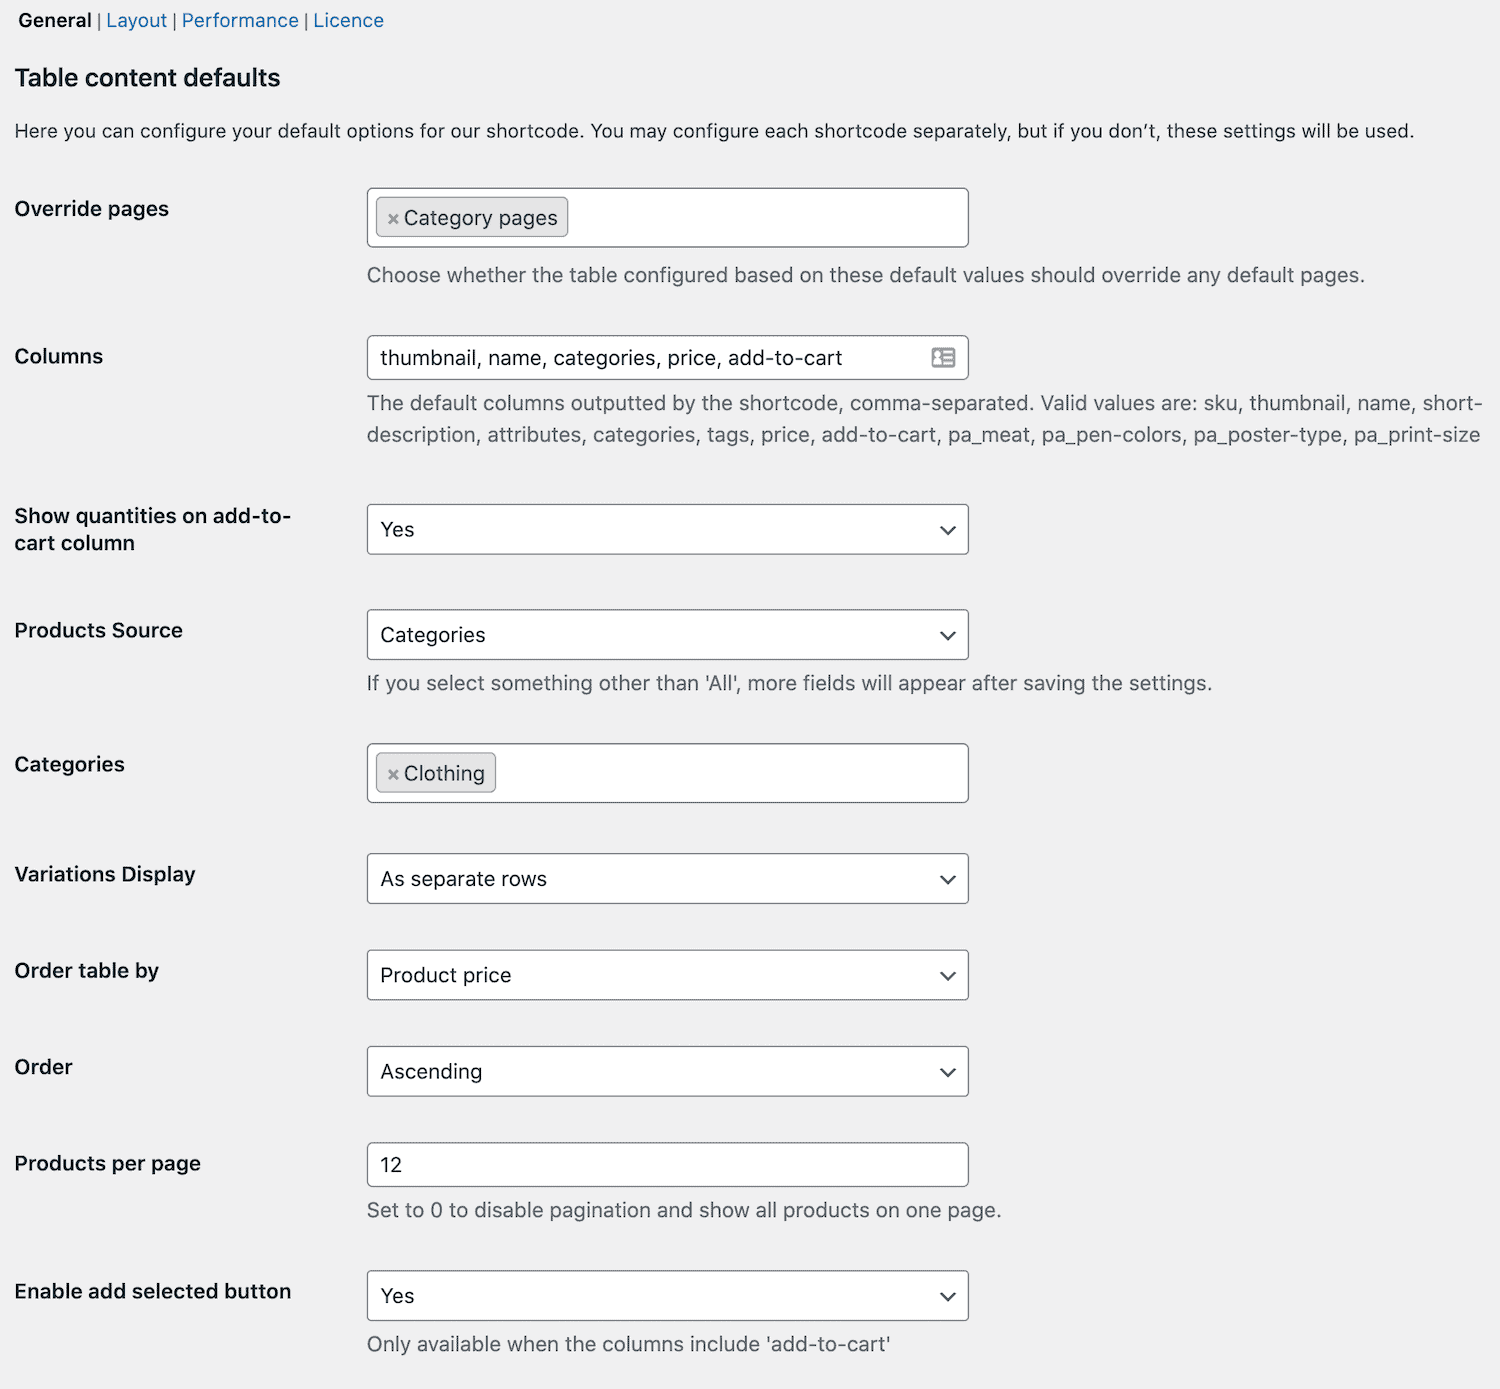
Change the “Override pages” setting to “Category pages.” This will take precedence over the default category page. When you’re finished, click the “Save changes” option to move to the next step. You may also add your custom WooCommerce category page to the main menu. This makes it easy for consumers to discover the category page from your homepage. Navigate to Appearance > Menus and add the custom category page to your default navigation menu.
Method 3: Coding
Programming is an excellent choice if you don’t want to install any third-party tools or utilize Divi. The primary benefit of updating the category page by coding is that it gives you more flexibility. Even if you are not a professional developer, WooCommerce offers you a plethora of shortcodes and shortcode features to support you in the process. If you’re not associated with shortcodes, read this tutorial to learn how to utilize them. You can use these shortcodes to display product categories on any page:

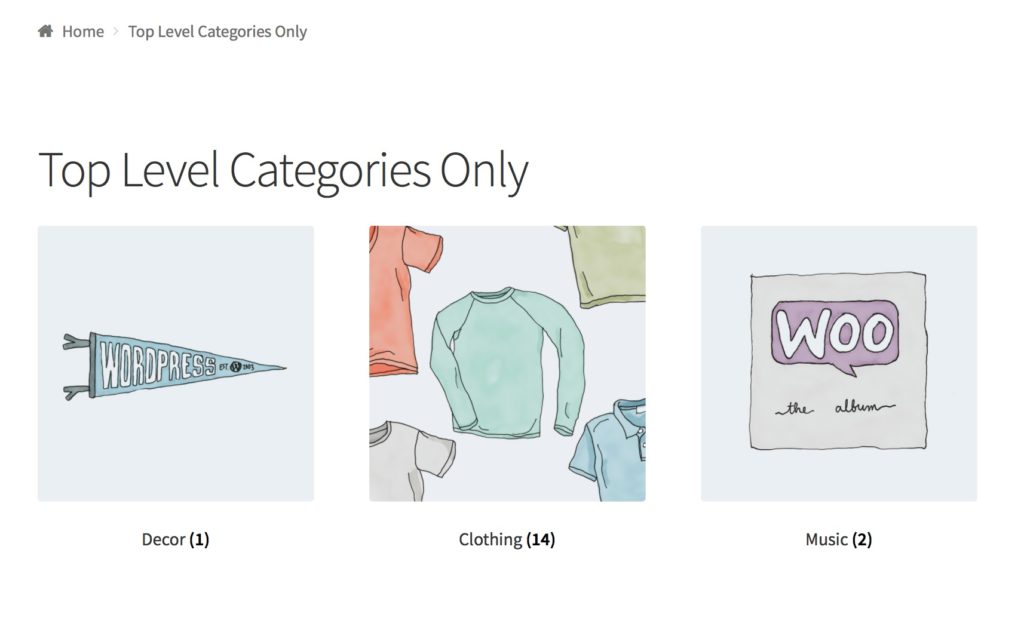
You can also use them with product category variables to change how the product categories are displayed. For example, if you want to show the top-level product categories while hiding the subcategories, use the following shortcode:

When you preview your page, you will be able to see the top-level categories look like this:
You may also use numerous code snippets to alter your WooCommerce category page. Creating a custom category is one of the most famous instances. Make a backup of your WordPress website and utilize a child theme before using this method. We will be changing several fundamental theme files, so your site may be broken if something goes wrong. That’s why it’s always a good idea to keep a backup version that you can restore if something goes wrong.
Add a custom category page title
To use a code snippet to generate a custom category page title, go to Appearance > Theme Editor and add the following code snippet to your child theme’s functions.php file.
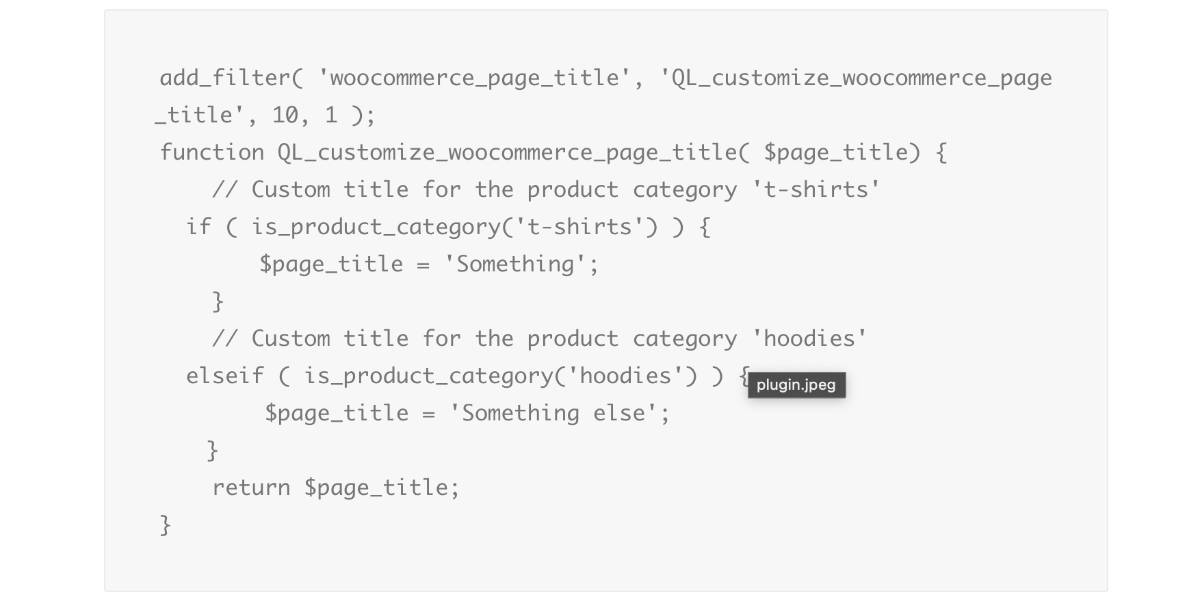
Check out this website for additional information about the snippet. You can use this method to show a custom title instead of the default category title on the category page.
Change Background of Product-Category Page
Similarly, you may use code snippets to alter the backdrop of your product category page. Copy and paste the following code snippet into the functions.php file.
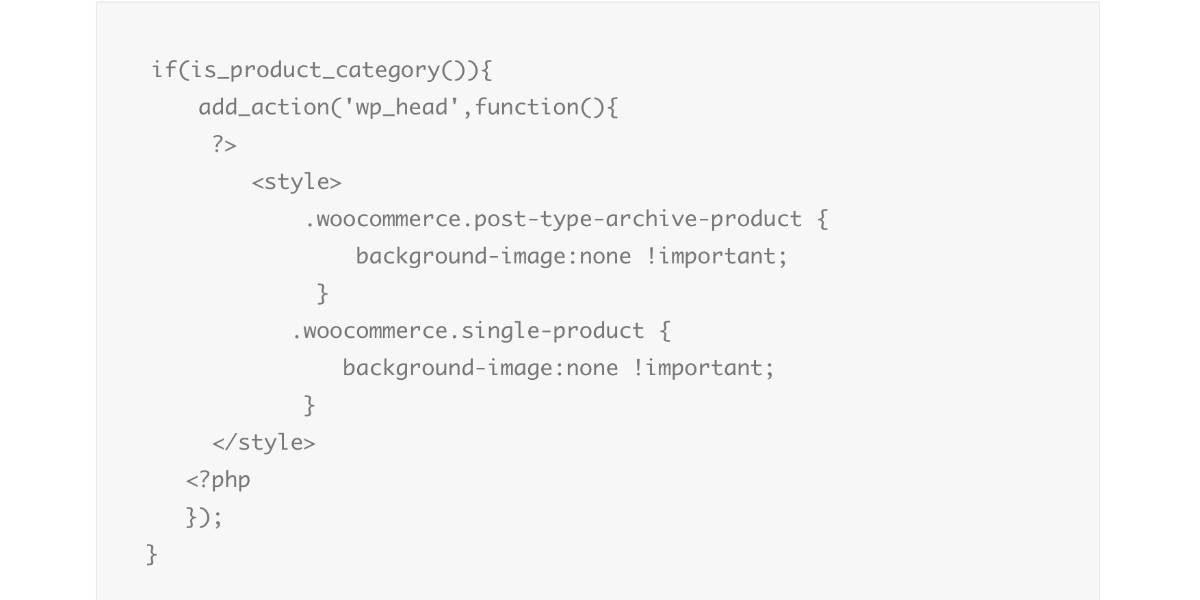
If the element is a product category, the code will change the background color. Visit this website for additional details of the code explanation. These are just a few ideas, but you can create more to adapt to your requirements. Take this snippet as a starting point and add your unique code to personalize the category page in your business.
3 other great plugins to customize your WooCommerce category page template
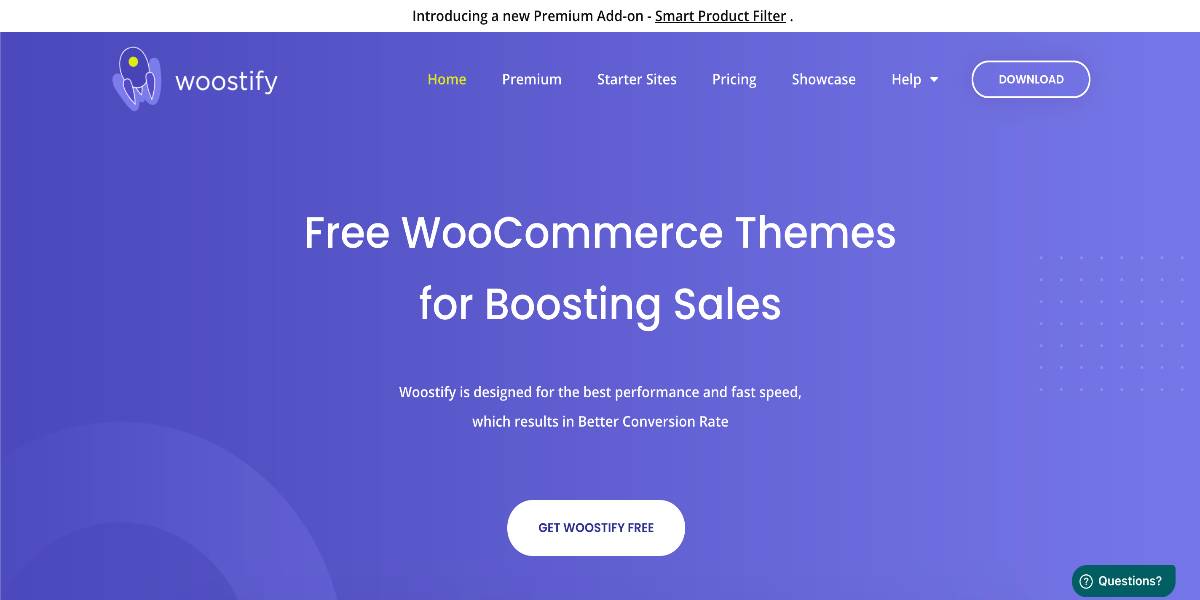
WooBuilder by Woostify
Woostify has been updated with WooBuilder, a very useful functionality that allows store owners to design great, interactive eCommerce sites, particularly shop pages, single product pages, cart pages, checkout pages, empty cart pages, my account pages, and thank you pages, all of which contribute significantly to increasing conversion rates to your online store. WooBuilder allows you to create the ideal Elementor WooCommerce shop page for your company. With a simple drag and drop editing, you may select any place on the page that suits what you want, much like building a product page or checkout page.
Outstanding features:
- With sortable components such as brand, product name, SKU, price, rating, and so on, you may present every single product page element in the precise position that you need.
- Allow you to effortlessly design and configure WooCommerce single product pages using drag and drop editing.
- You have complete control over the Elementor WooCommerce checkout page, including billing, shipping, and different areas such as security enhancement, order review & payment, and so on.
- You can add filters to your stores such as a search form, a product tab, a product slider, a nav menu, recently seen products, and much more. With widgets like Cart collaterals and Cart form, you can keep your cart page in the most logical and contented state.
Price: Woosify offers a separate license for each requirement. The $49 personal license is ideal for new WooCommerce users. Furthermore, the professional license, which costs around $79, is popular for revenue-generating enterprises. The final choice is the agency package, which costs $129 and is ideal for creating websites for customers.
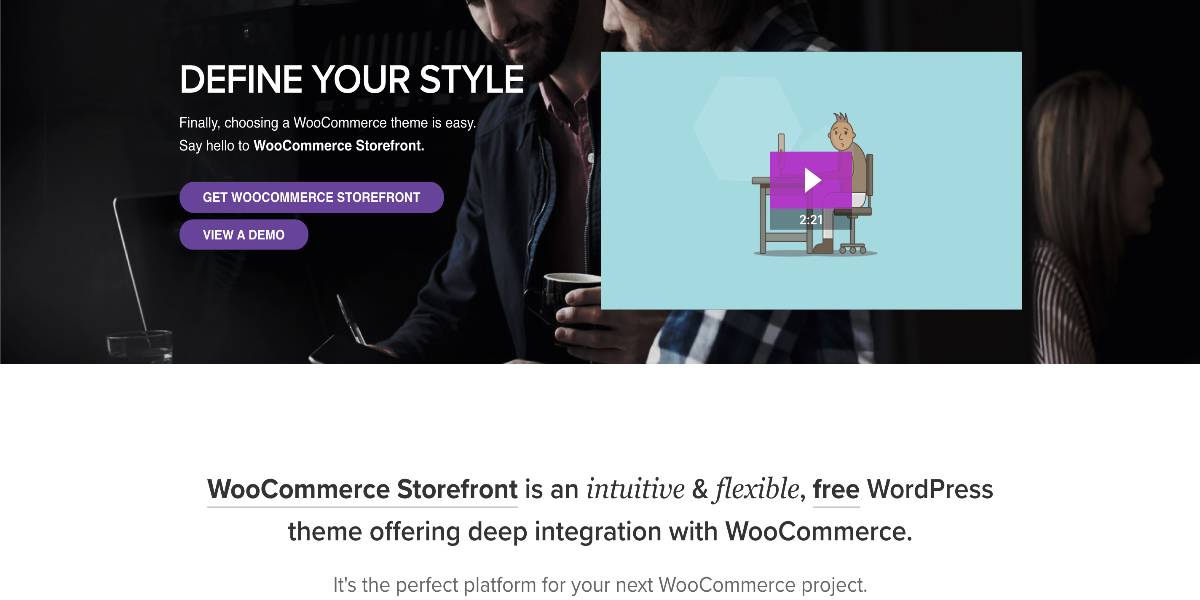
WooCommerce Storefront
WooCommerce Storefront is based on the Underscores starter theme, which Automattic uses to generate all WordPress.com designs. It’s the ideal foundation for Storefront since it’s lightweight, fast-loading, SEO-friendly, accessibility-ready, responsive, and easy to customize. Storefront was created to be a simple WordPress theme that can be expanded upon with child themes. As a result, when you first activate the theme, the basic version has a simple, minimalistic look. You can quickly alter colors and view changes in real-time using the WordPress theme customizer, but if you want to put your stamp on the theme, you’ll need to make adjustments yourself or acquire the Storefront Powerpack plugin. Storefront’s barebones nature will appeal to developers, as will the fact that actions and filters may be added to pages through Storefront Hooks.
Outstanding features:
- WooCommerce core and numerous WooCommerce plugins are fully integrated.
- Your business will adapt and show attractively, whether viewed on a PC or a mobile device.
- The adherence of WooCommerce Storefront to accessibility requirements makes your business accessible to the broadest potential audience.
- Change the appearance and feel of your shop with a few clicks and witness the changes in real-time.
- You may display product categories from your homepage, recent, highlighted, on-sale, and top-rated goods.
Price: Although it is provided for free, Automattic offers excellent support for Storefront. There is extensive documentation explaining how the theme works, a development blog, and a discussion board for feature requests. WooCommerce clients can also obtain help via the WooCommerce help desk, while everyone can get help from the WordPress.org Storefront support forum.
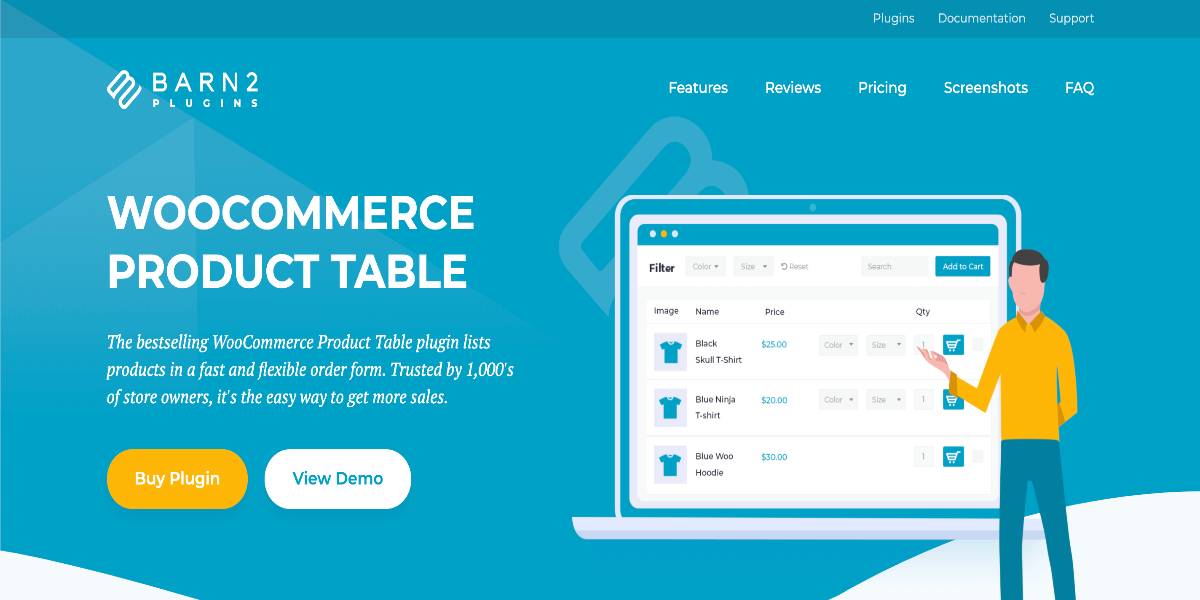
WooCommerce Product Table
WooCommerce Product Table plugin has two simple methods for listing products: To put tables anywhere on your site, use a simple shortcode, or utilize the options on the plugin settings page to automatically apply the product table layout on the store and product category pages. This changes your theme’s default layout. The plugin takes advantage of product data that WooCommerce has previously produced. This means you may manually add items to WooCommerce or import them using a CSV/XML import plugin, and they will appear in the product table.
Outstanding features:
- Enhance the user experience by providing quick search and filtering options. By clicking on any column, visitors may sort the way they wish.
- Increase sales by letting customers immediately add numerous goods and variations to their basket from your product list page.
- List all of your items in a table, or show and conceal certain products depending on data like category, tag, or ID.
- Display almost any column you may think of, including images/videos, price, characteristics, custom fields, SKU, and more.
- You can list hundreds or even thousands of goods in one or more tables using the lazy load (AJAX) option.
Price: There are three different licenses for each demand. The starter license at the expense of $99 is perfect for newcomers. In addition, the business license, which costs about $149, is popular for revenue-generating stores. The last option is the agency bundle, which costs $349 and will be perfect for building sites for clients.
Conclusion
Creating a custom WooCommerce category page improves product visibility and product variant visibility and makes it easier for customers to purchase from your store. Users will add numerous goods to their cart with just a few clicks from particular category sites.
We hope this tutorial will clear your mind on how to customize the WooCommerce category page template. Instead of showing your items in the usual category page layout, you can use a product table to showcase all of them in an orderly manner. Customers may now find what they’re seeking more quickly. This can also help you enhance the user experience on your WooCommerce online store and peak your sales.


