
How to Create a Subscription Plan in WooCommerce

How to ensure stability in running a WooCommerce store? And how to guarantee that the revenue of your business will not be subjected to a fluctuation tomorrow? If you can answer these questions, you are on the right track to having a business model. To know the solution to these common issues, building a subscription plan is one of the most important aspects in driving your online store into success.
If you are in search of how to create a subscription plan in WooCommerce, this guide is for you. Now, follow us step-by-step instructions and have success with it.
Why do we need to create a WooCommerce subscription plan?
Before getting into how to create a subscription plan in WooCommerce, take some moments to scrutinize what we can get from creating this kind of plan.
- Make sure the revenue does not fluctuate
By building a subscription plan, you could achieve stability for your eCommerce store. So, there is no need to worry about whether your revenue will fluctuate month on month, or year on year.
- Enable your WooStore to become one business model
There is nothing quite like becoming a renowned business model. The reason is that your business, in this case, is recurring, predictable, and automatic.
How to create a subscription plan in WooCommerce
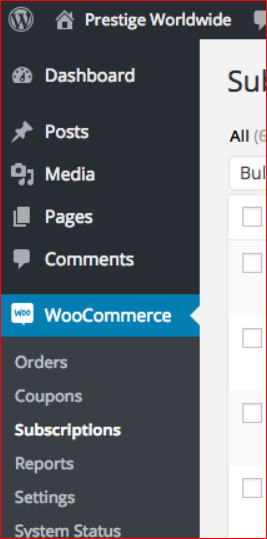
Step 1: Navigate to WooCommerce’s subscriptions
The first and foremost thing in creating a WooCommerce subscription plan is to navigate to your WooCommerce and scroll down a bit to click “Subscriptions”.
Step 2: Select the button “Add Subscription”
When you are here, your task now is to select the button “Add Subscription”. This means that you are adding a subscription manually without sending out the order email.

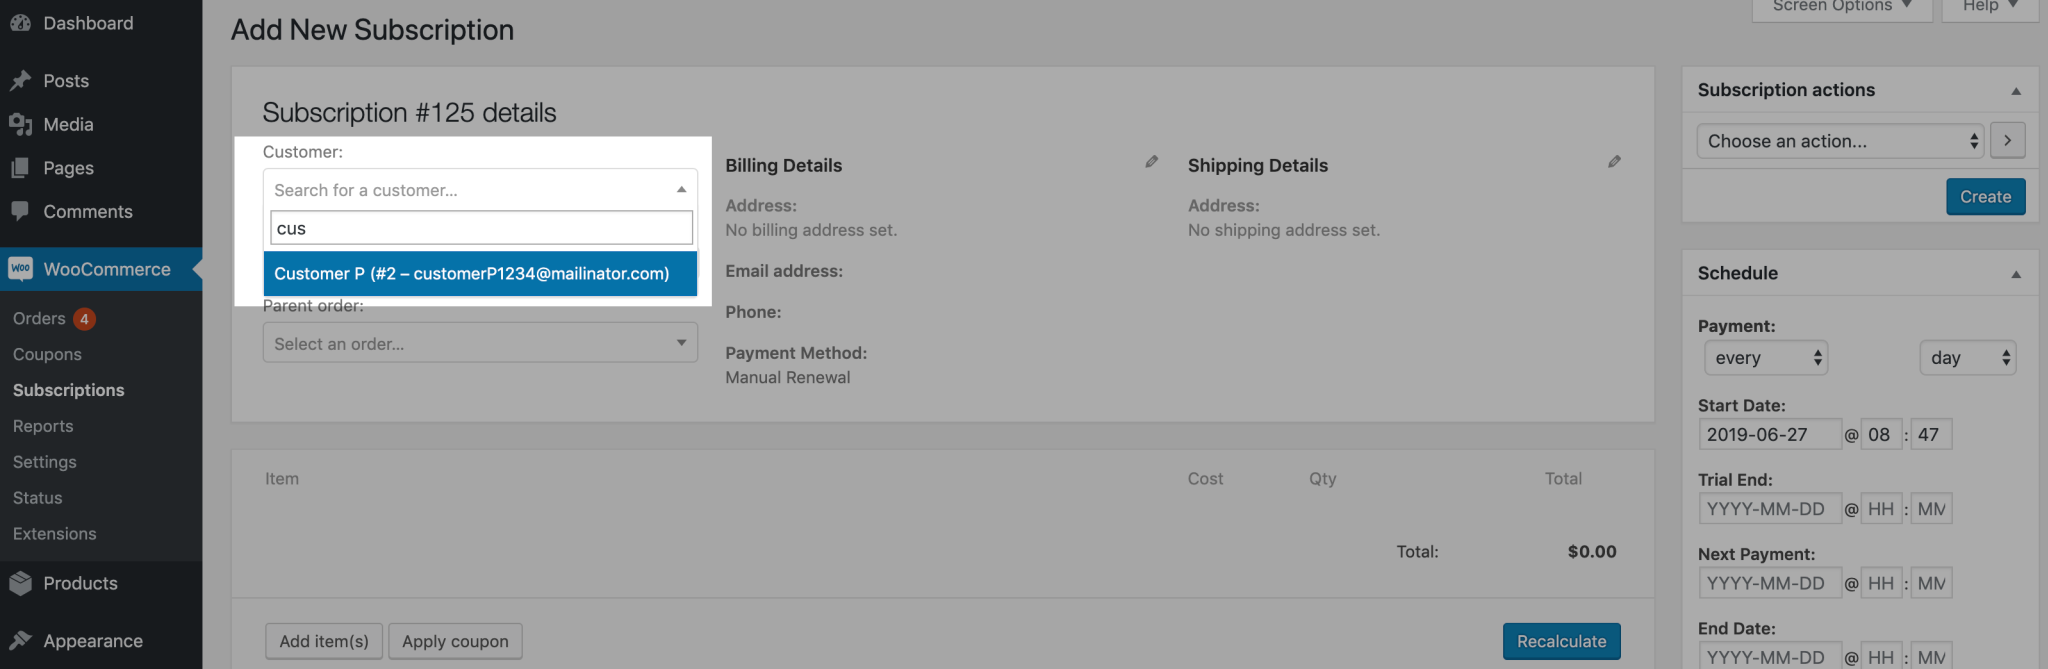
Step 3: Add subscribers
Once you have finished adding a subscription, it is time to add subscribers. As there is a close association between a store’s subscription and a user account in WordPress, it is a must to connect your customers’ account to a subscription. This is the very first step if you want to create a WooCommerce subscription plan.
Next, you need to check if the subscriber has already owned an account with your WP site or not. If yes, go ahead with the next steps. If not, you can add your user through the “Users”.
Keep going with choosing the “Customers” and pick up the box which is under the meta box of subscription details. Then, you will type some letters related to the email or name of your customer. Wait some moments for your WooCommerce to seek matching accounts. When the loading of accounts is done, select the customer and click the button “Create” immediately save him/her on your subscription.
If you add a new customer to your subscription, enter his/her shipping addresses and billing details to keep recurring payments and shipments in control. If the account of your customer has already existing addresses, they will be loaded automatically into “Shipping Details” or “Billing Details” of the meta box in the section “Subscription details”. To add such information, click the icon beside “Billing Details” > “Load Billing Details”, then select the icon beside “Shipping Details”.
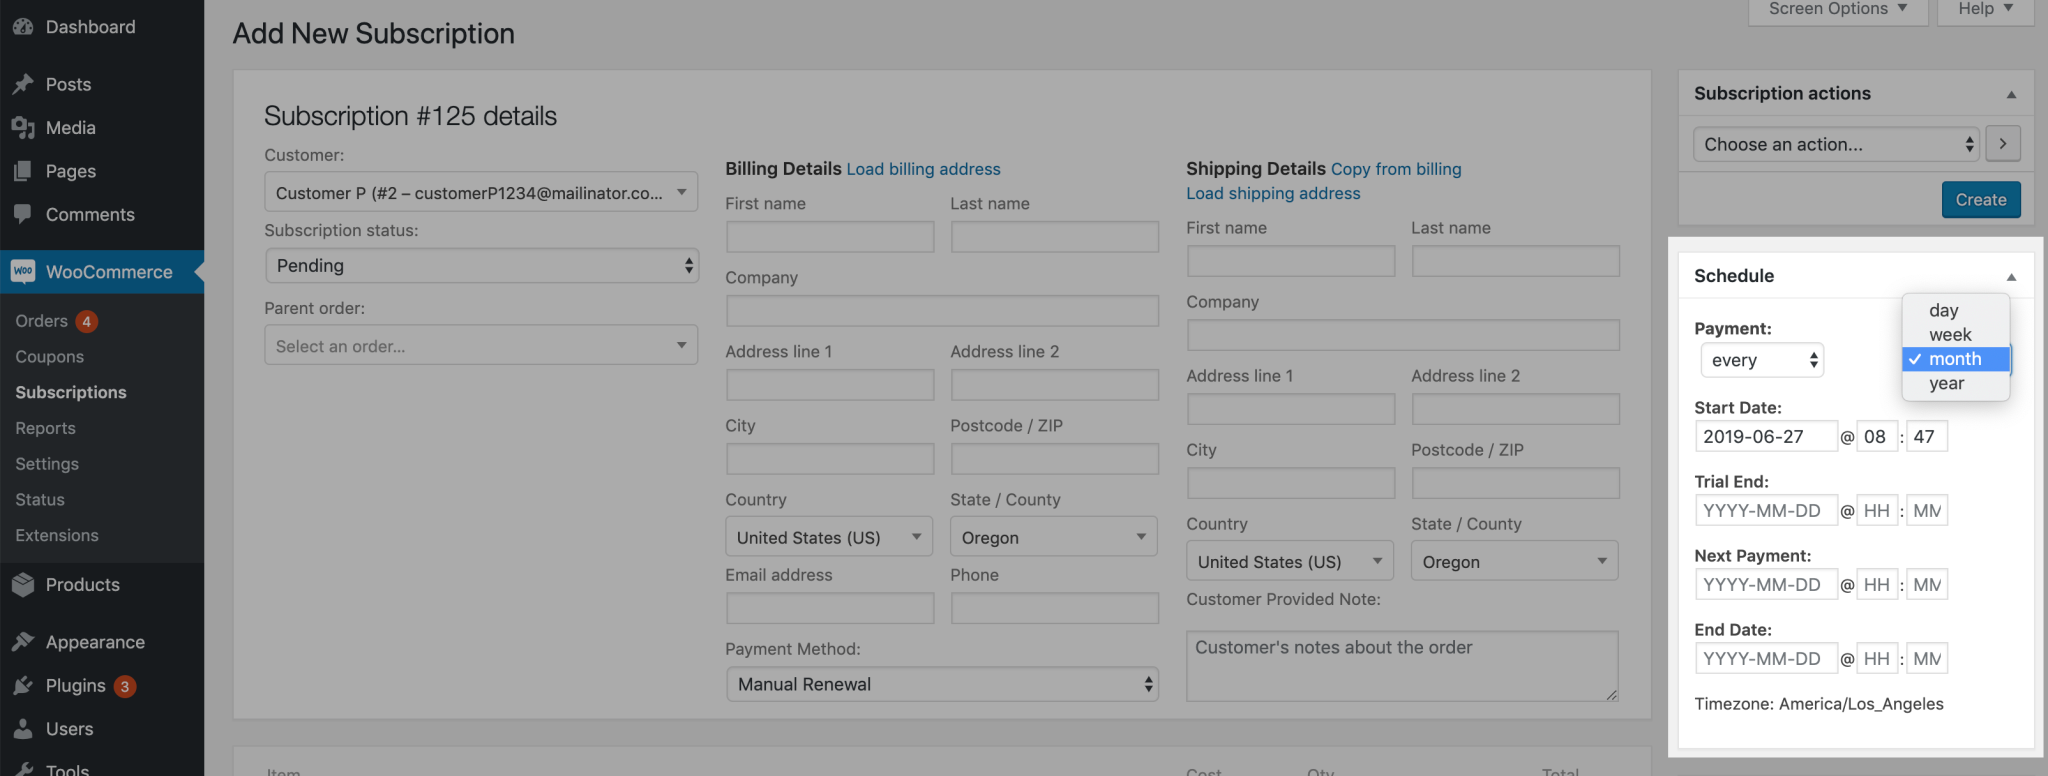
Step 4: Work on one billing schedule
A subscription plan can not survive without a billing schedule that comes with dates for significant events. Those dates might be the date for the trial of a subscription to end, the date of a subscription to end itself, or a recurring period or interval where the generation of renewal orders happens.
You can set the recurrence or upcoming dates for that subscription’s line items as you add or edit a subscription plan manually. This activity is required because any subscription’s billing schedule that is already put in as the line items can not be automatically used as the newly created subscription’s billing schedule anymore.
So, if you want to work on one billing schedule on one subscription, simply do as follows. As you encounter the section “Recurring” of the meta box “Schedule”, choose the 1st select box, then set the subscription as “Billing interval”. This will be set once each day, each week, each month, or each year by default and the renewal order will be generated.
The next step involves selecting the 2nd select box, which lies in the section “Recurring” in the meta box “Schedule”. As you get here, set the subscription as “Billing period”. After that, select the text box “Start Date” and type or choose a date. The starting date should be the date that went by. Proceed to select the text box “Next Payment Date” and select a date or pick up one from using the calendar.
An optional step is to click the text box “Trial End Date” or “End Date”. Use the calendar to select a date or manually type a date.
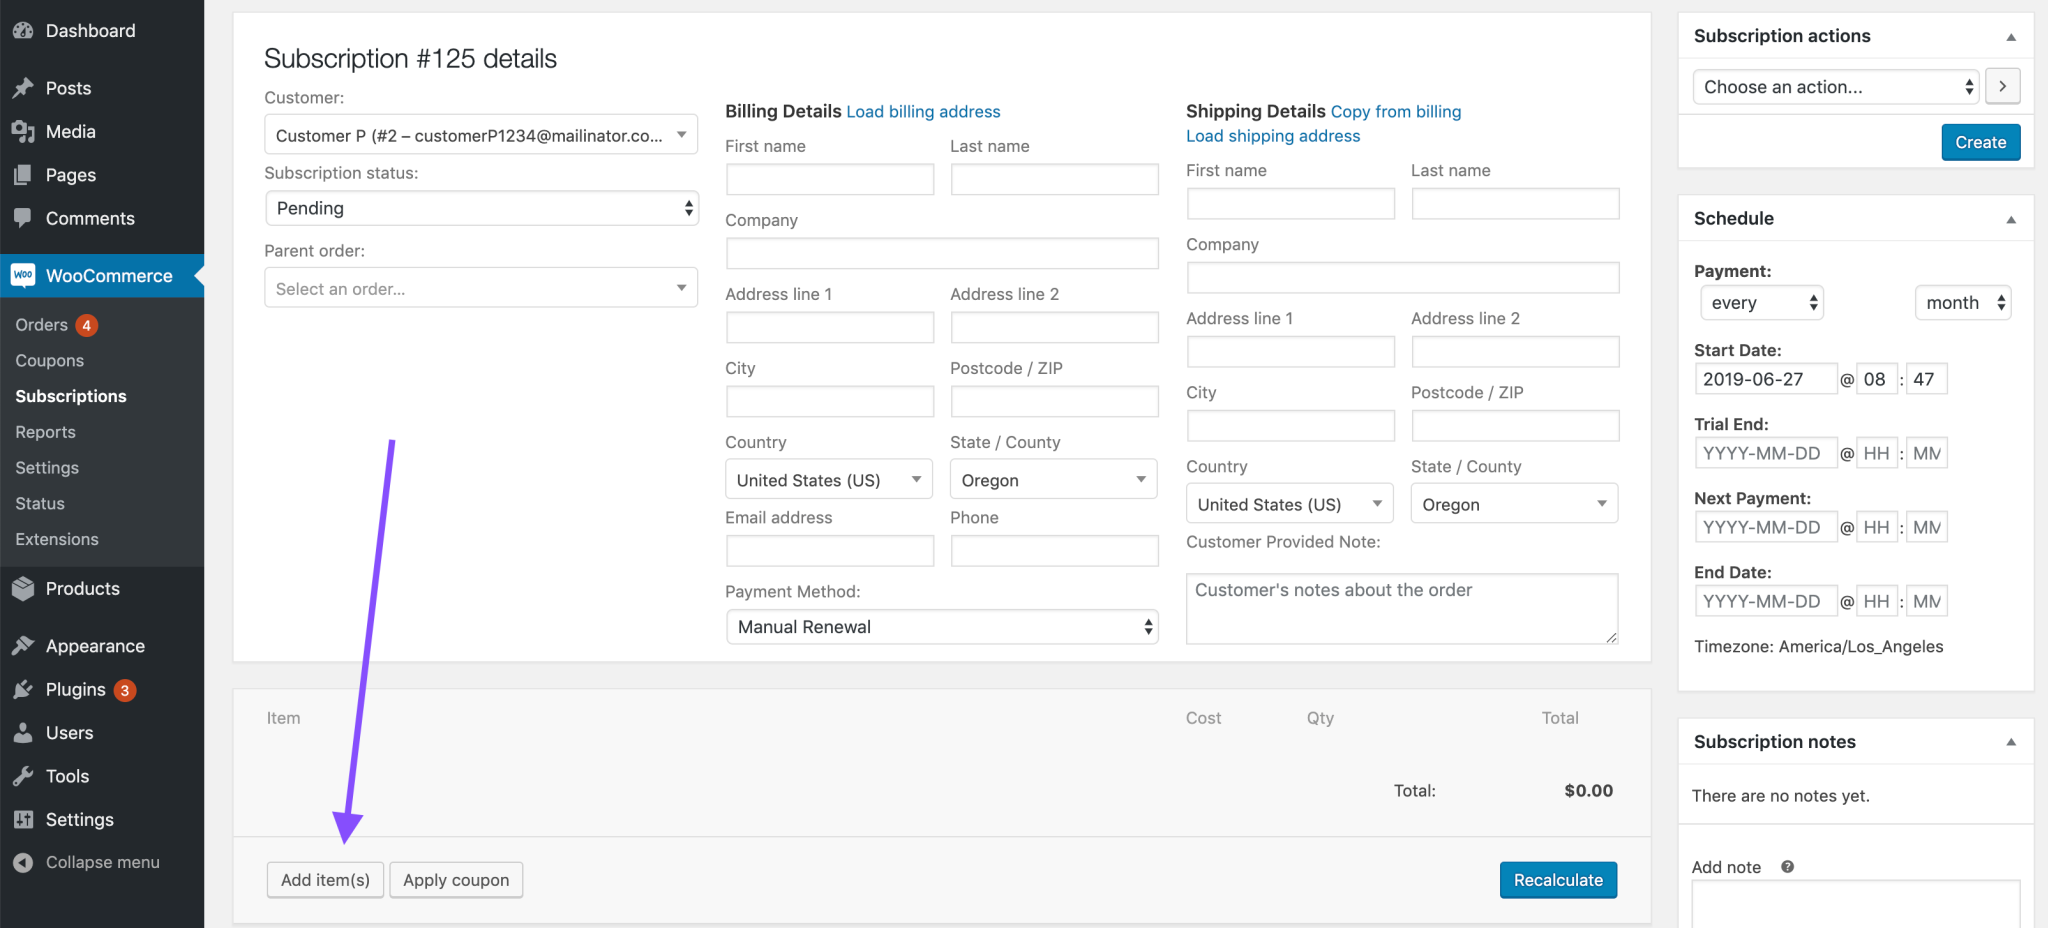
Step 5: Build such line items as shipping, fees, and products
It is known that a subscription will offer customers an entry into a specific product. That kind of subscription might come with a fee or a shipping cost closely linked to it. In this situation, they are named line items.
- Create the line item for products
In case, you wish to create the product line items for a subscription, it is easy as a pie. Select the button “Add item(s)” in the meta box “Items”. Next, select the button “Add product(s)”. Go ahead with clicking a text box that showcases the placeholder named “_Search for a product”.
When you are here, it is time to enter several letters to name your product and keep waiting a few seconds to let WooCommerce seek matching products. Now, select the product name that you want to add as it loads. It is necessary to have these steps repeated in case you are fond of adding more products.
After all, choose “Add” and the selected products would be shown as the line item in the meta box “Items”. Click “Save” to save what you have made changes.
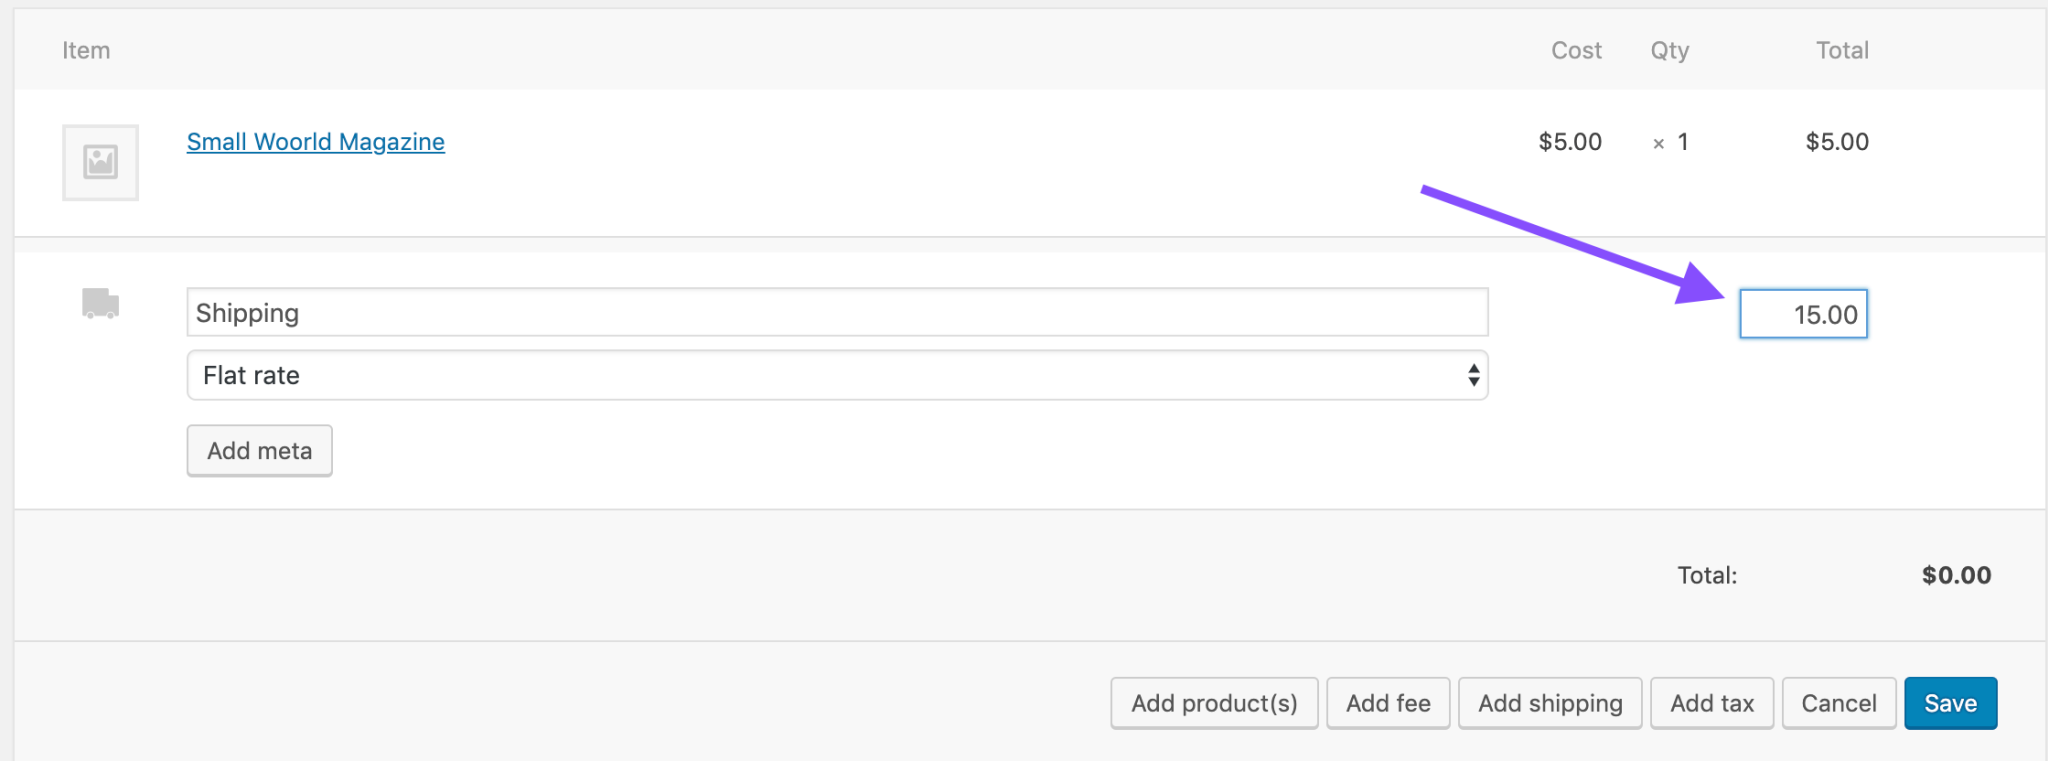
- Create the line item for shipping
If you have not known how to create a line item for shipping, follow us with simple steps. Click the button “Add item(s)” in the meta box “Items”.
Next, select the button “Add shipping”. Then, a line item for shipping will be displayed in the meta box “Items”.
When you finish, click in a text box that shows the placeholder with “Shipping Name”. Then choose the “Shipping Method” that you are about to apply. This determines the shipping taxes as well as the cost of this line item. Click “Save” to save what you have made changes.
Step 6: Create recurring taxes
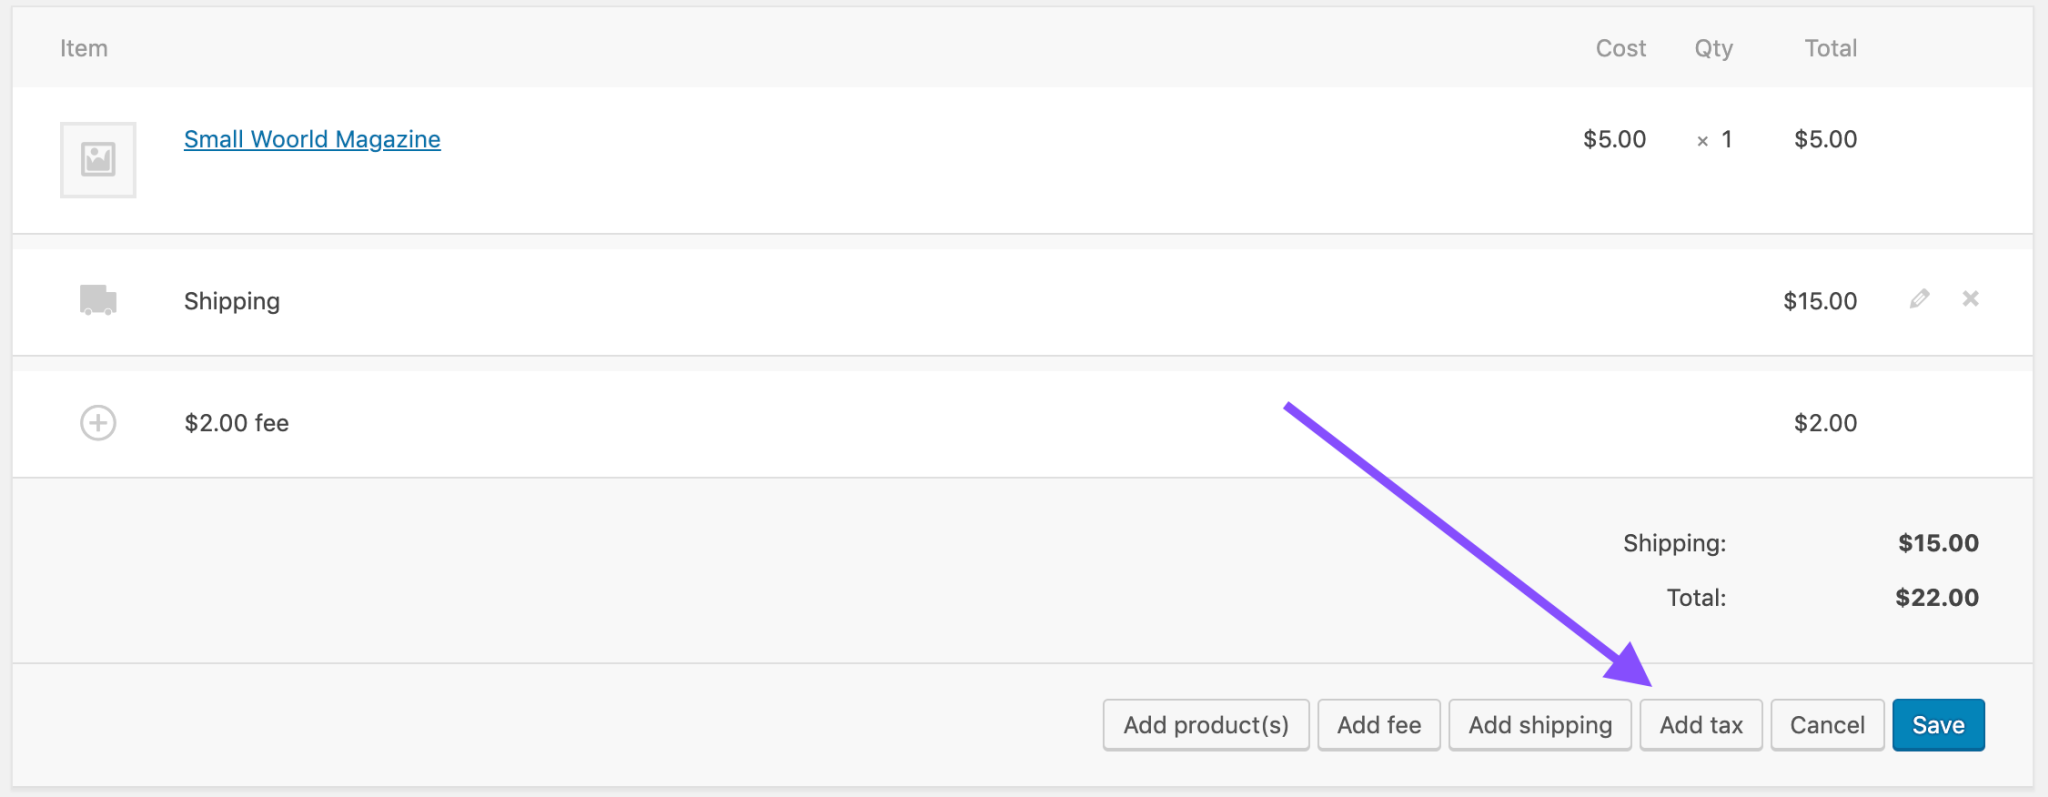
Adding tax rates is required when you want to include taxes in every renewal payment. So, start with setting up your WooCommerce tax rates before jumping into creating tax rates for the subscription.
To add the tax rate, click the button “Add item(s)” in meta box “Items”, then keep clicking the button “Add Tax”. You will see a radio button which is next to the added tax rate. After that, choose “Add” and select “Recalculate”. Repeat these steps if you want to add different tax rates for each subscription.
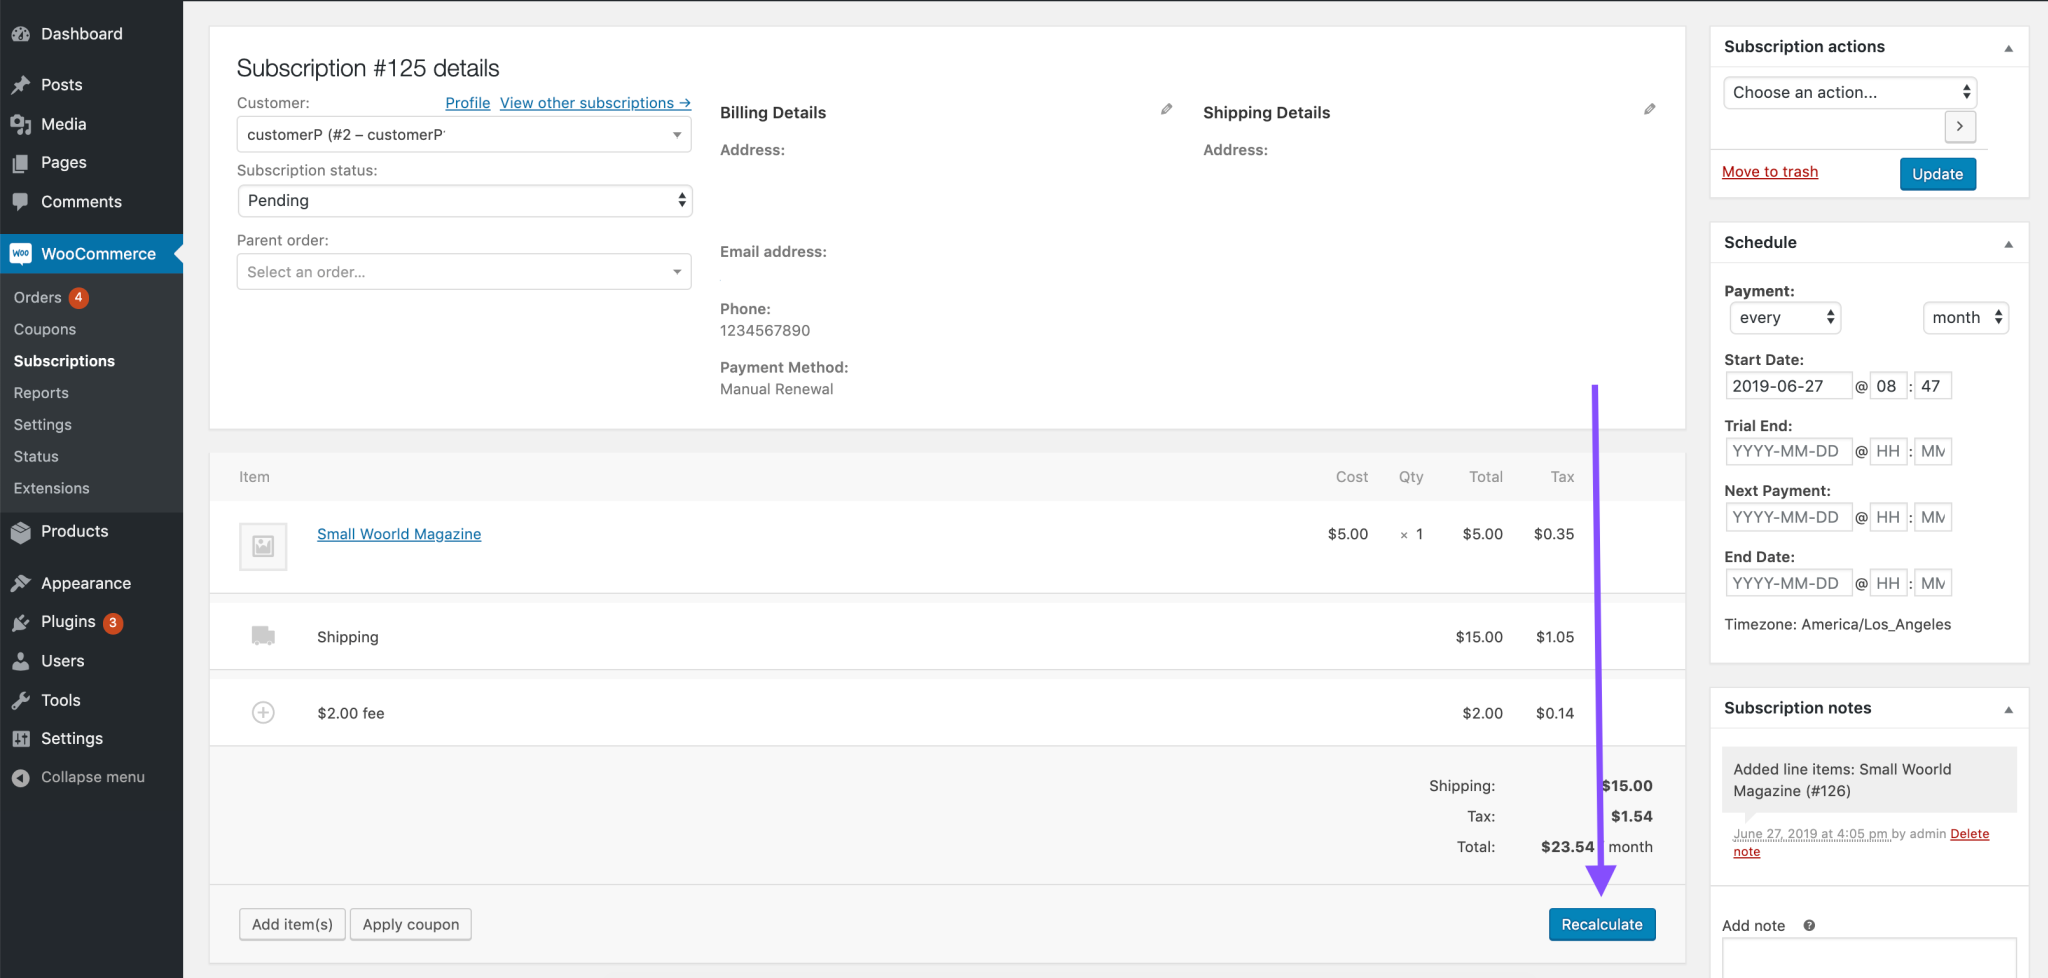
Step 7: Work out recurring totals
WooCommerce could now make a calculation of taxes for every line item, coupled with the total charged for every renewal after creating taxes or line items. To calculate recurring totals, choose the button “Recalculate” on the meta box items.
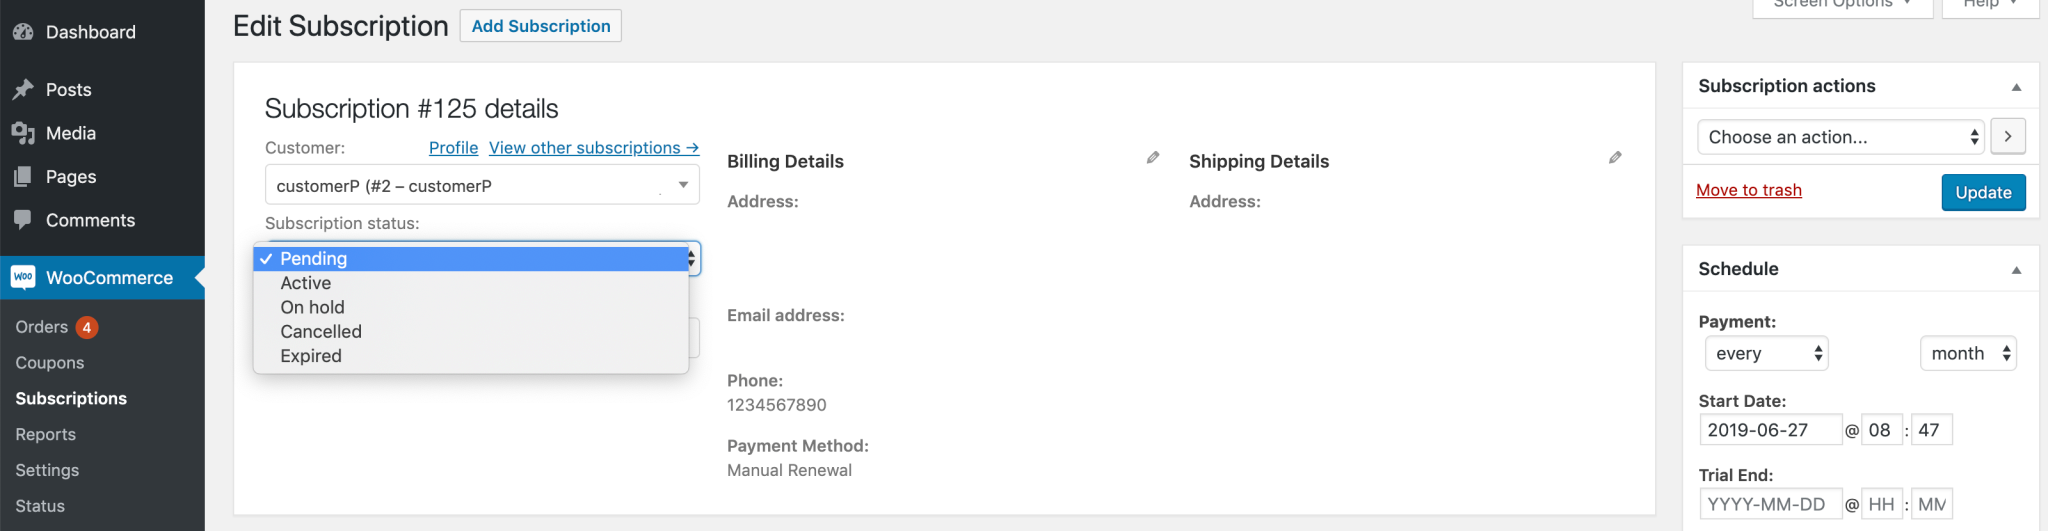
Step 8: Customize subscription status
Obviously, new subscriptions, by default, come with the status “Pending”. This means that future renewals would not be executed. As a result, customers can not get any special access to every product. Nevertheless, you can modify this “Pending” status to the “Active” one when line items, billing schedule, and a customer is added to the subscription, along with calculated recurring totals.
In case you want to modify the status of a subscription. Choose the select box “Subscription” in the meta box “Subscription details”. Then, move to select the status that you wish to give a subscription. And remember to click “Save Subscription”.
As soon as you have set the active status to a subscription, the customer who is added to a subscription will be provided with the role as default subscriber.
Step 9: Create a subscription plan
When you finish all the above steps, you will proceed to create the subscription with the requirement of renewal payment. This payment is used for every billing cycle. What is more, you are also able to create a connection between a subscription and a gateway of payment for recurring payments.
Conclusion
Hope this guide will help you create a subscription plan on WooCommerce easily. Do not hesitate to implement it and take your WooCommerce store and products to the next level. Spread the words to those who are concerned and keep following us for more interesting tips and tricks.


