
How to Create a Product Vendor in WooCommerce

Maintaining a distinctive, lucrative product line is quite difficult. Pricing those products, administering an eCommerce store, and dealing with administrative responsibilities such as shipping or website hosting may significantly add to a load of many entrepreneurs, which is why eCommerce marketplaces have grown in popularity.
If you currently manage your own store and have a sizable audience, a marketplace can also be a method to diversify your revenue stream, as you can invite other merchants to sell through your site. This earns you a commission in exchange for administration, which you’re already doing if you manage your own store.
Product Vendors for WooCommerce enables you to immediately transform a WooCommerce-powered business into a marketplace complete with multiple vendors, products, and payout options. In this article, we will walk you through How to create a Product Vendor in WooCommerce as well as give you a brief overview of some available to help you with it.
Why should you use Product Vendors for WooCommerce?
- Create a marketplace where anything can be sold: From physical, handmade items to digital downloads such as pictures, themes, fonts, audio, and video.
- Keep selling your products: Display vendor products right alongside your products.
- Establish commission rates for specific vendors: Incentivize new vendors to join your market or reward loyal vendors with vendor-specific compensation rates – all while maintaining a separate base commission rate across your marketplace.
- Reduce the number of admins: Allow merchants to handle their items independently. Allow merchants to manage their own products.
- Pay no commissions on unfulfilled orders: Establish commissions to be paid to vendors only when the order is fulfilled.
- With sales reports, you can stay on top of your marketplace: Gain a comprehensive snapshot of vendor sales, commissions, and earnings per month.
- Commission payments can be delayed to accommodate for refunds: Utilize PayPal Payouts to postpone commission payments in the event of actual product returns.
How to create a product vendor in WooCommerce?
If you’re building a place to sell shippable goods for your WooCommerce store, the WooCommerce Product Vendors plugin may be the answer. In this part, we’ll go through how to use this extension to create a marketplace with WooCommerce and what marketplace owners and vendors can accomplish with this setup. We also recommend using this plugin with WooCommerce Booking extension for a more streamlined process.
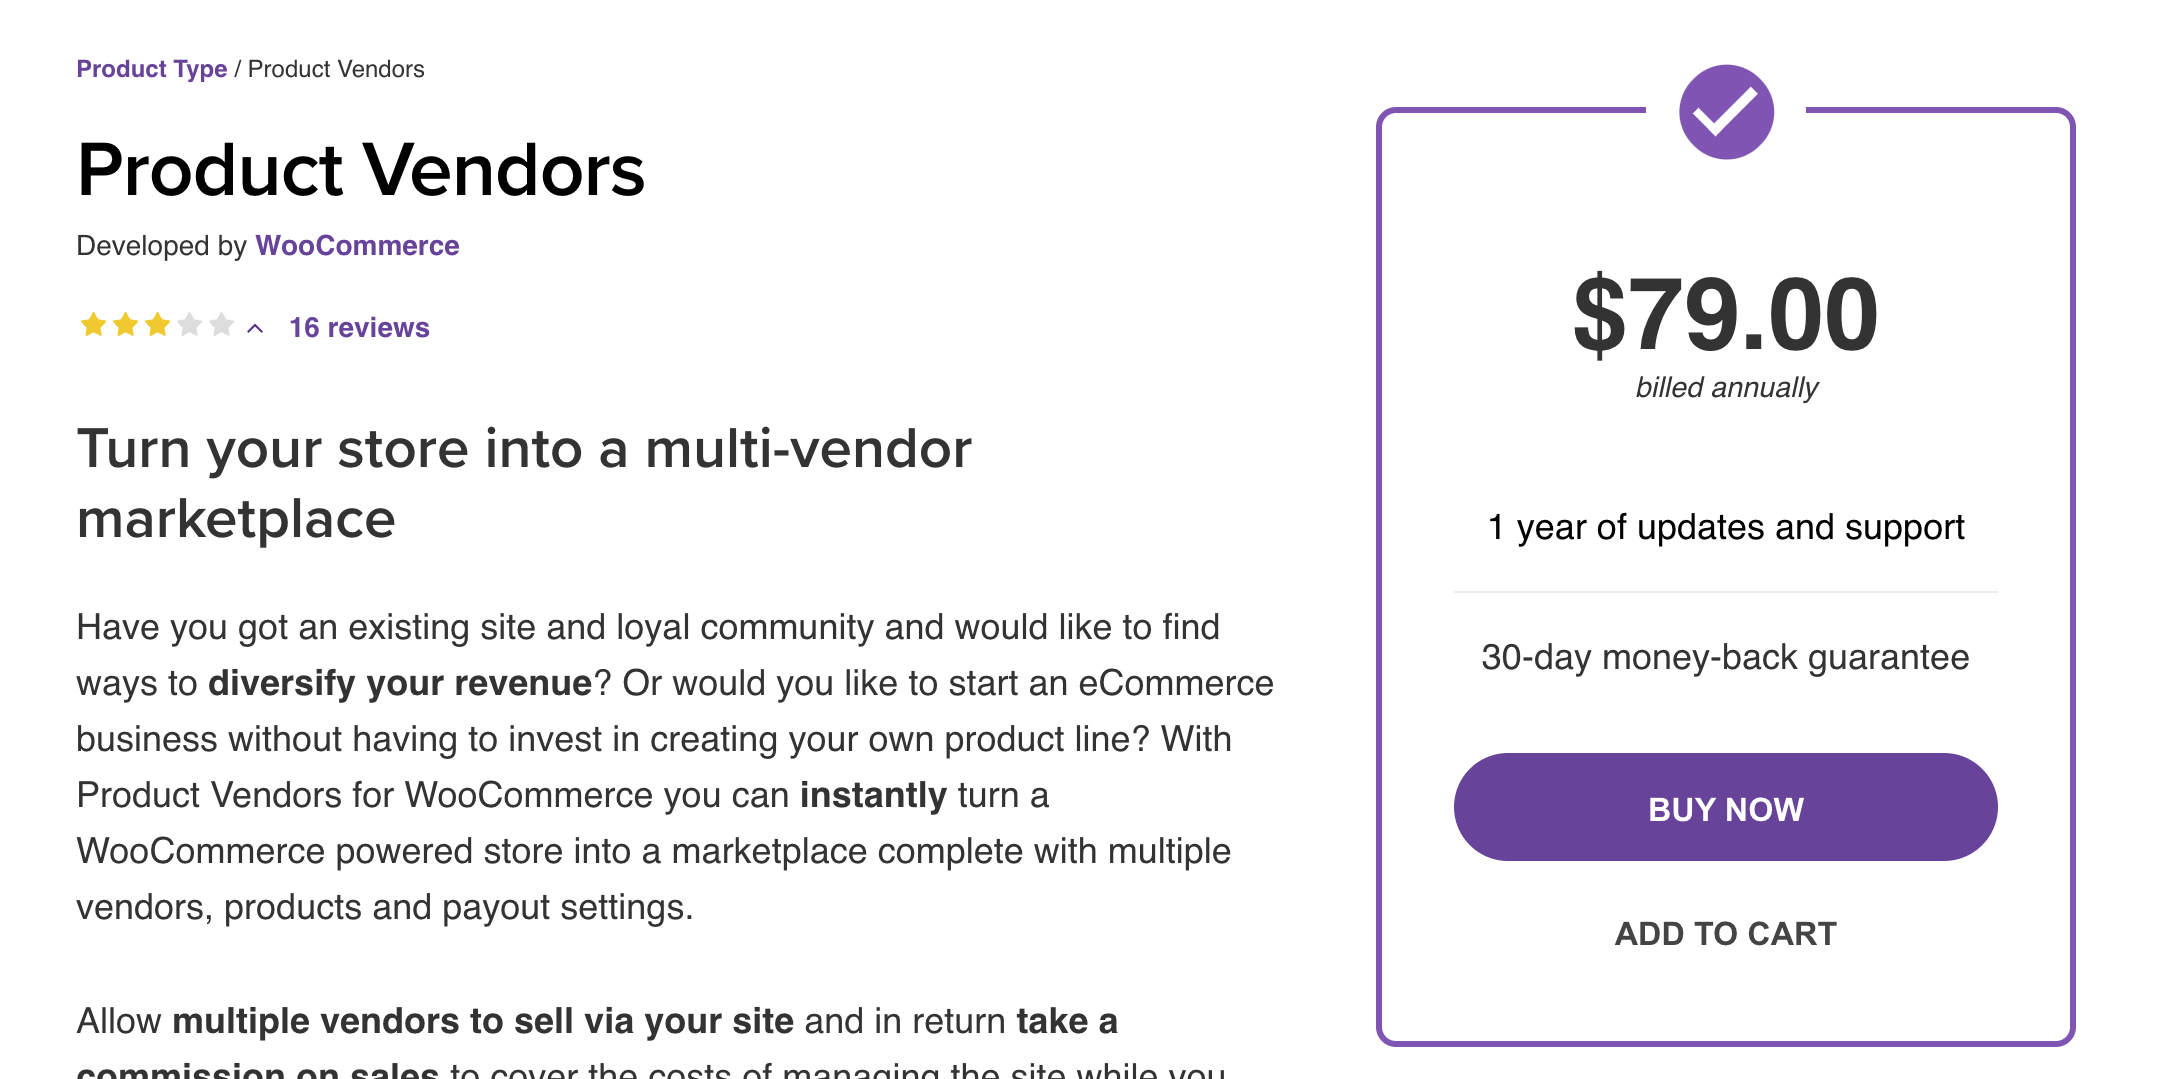
Step 1: Install the WooCommerce Product Vendors plugin
The $79 Product Vendors plugin is required to create a marketplace with WooCommerce, but all other setup costs are optional. Vendors of Products will cover the process of inputting vendor information and tracking commissions.
Step 2: Create a New User
Login as Administrator and navigate to Users > Add New.
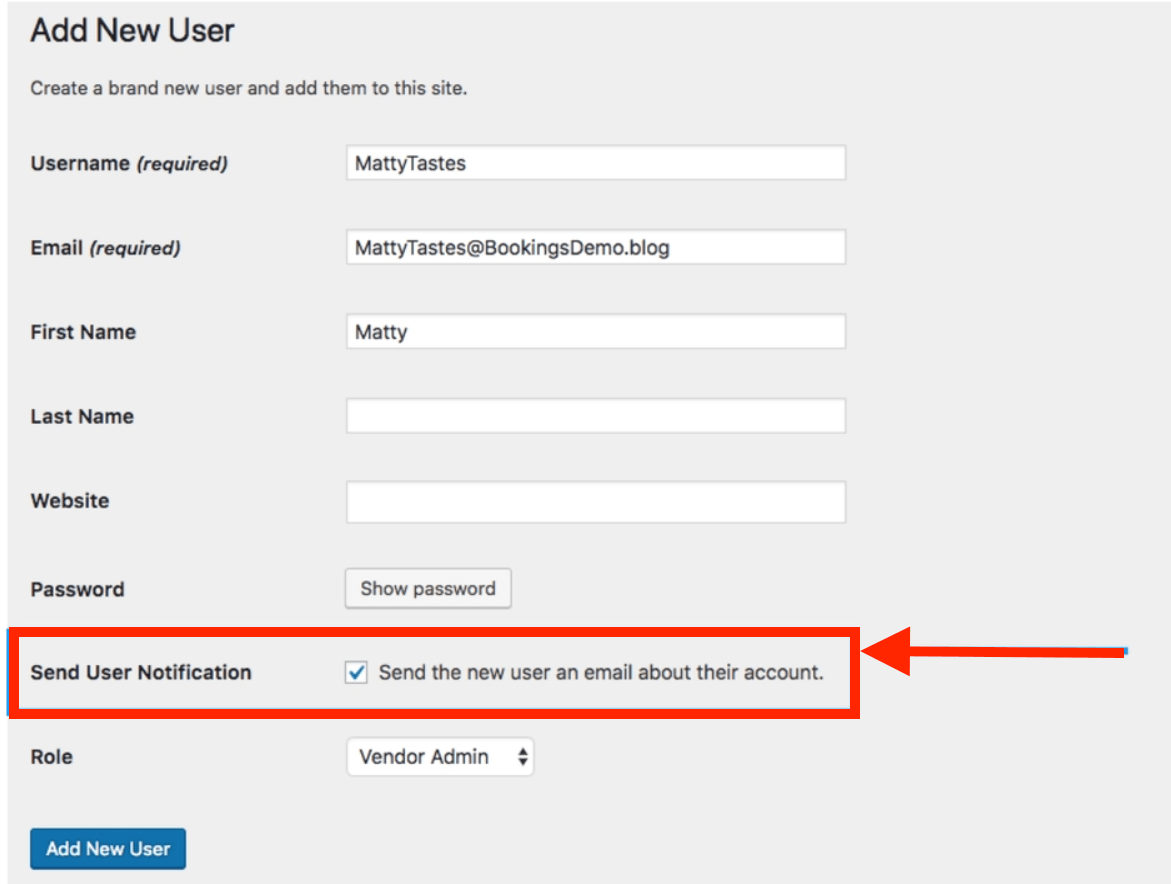
Complete the fields on the Add New User page as desired. This will be the account for your Product Vendor. It is critical that you select Vendor Admin as the new user’s Role from the drop-down menu. This enables your Product Vendor to manage their items.
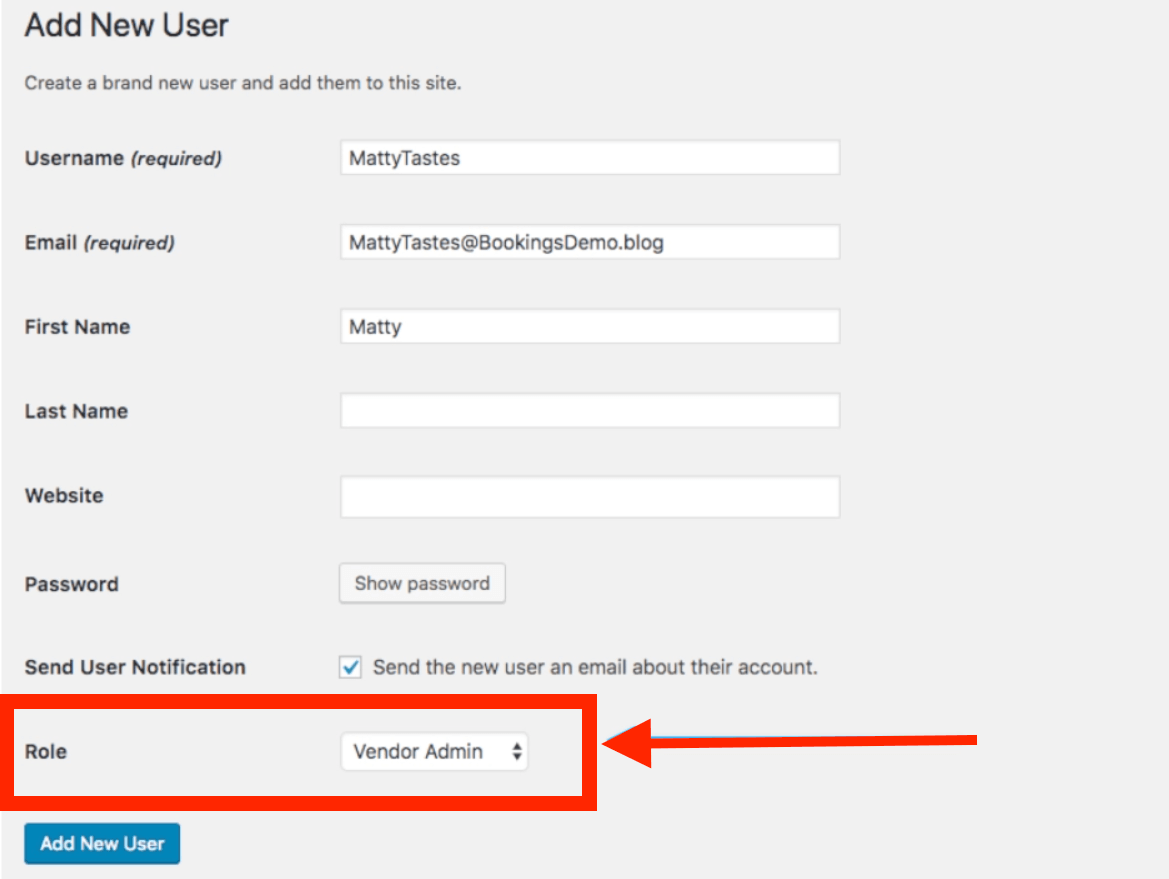
Ensure that you provide their credentials to the newly formed Product Vendor.
Step 3: Create a Product Vendor
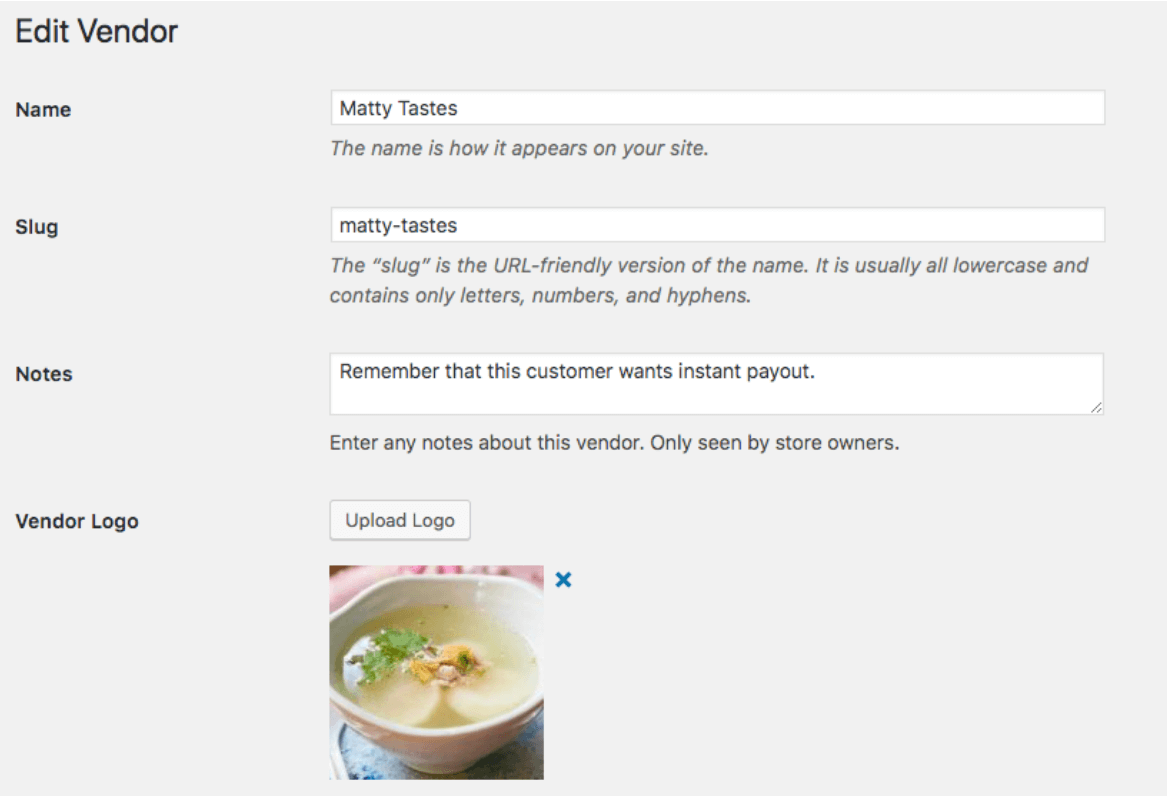
Navigate to Products > Vendors and establish a new vendor.
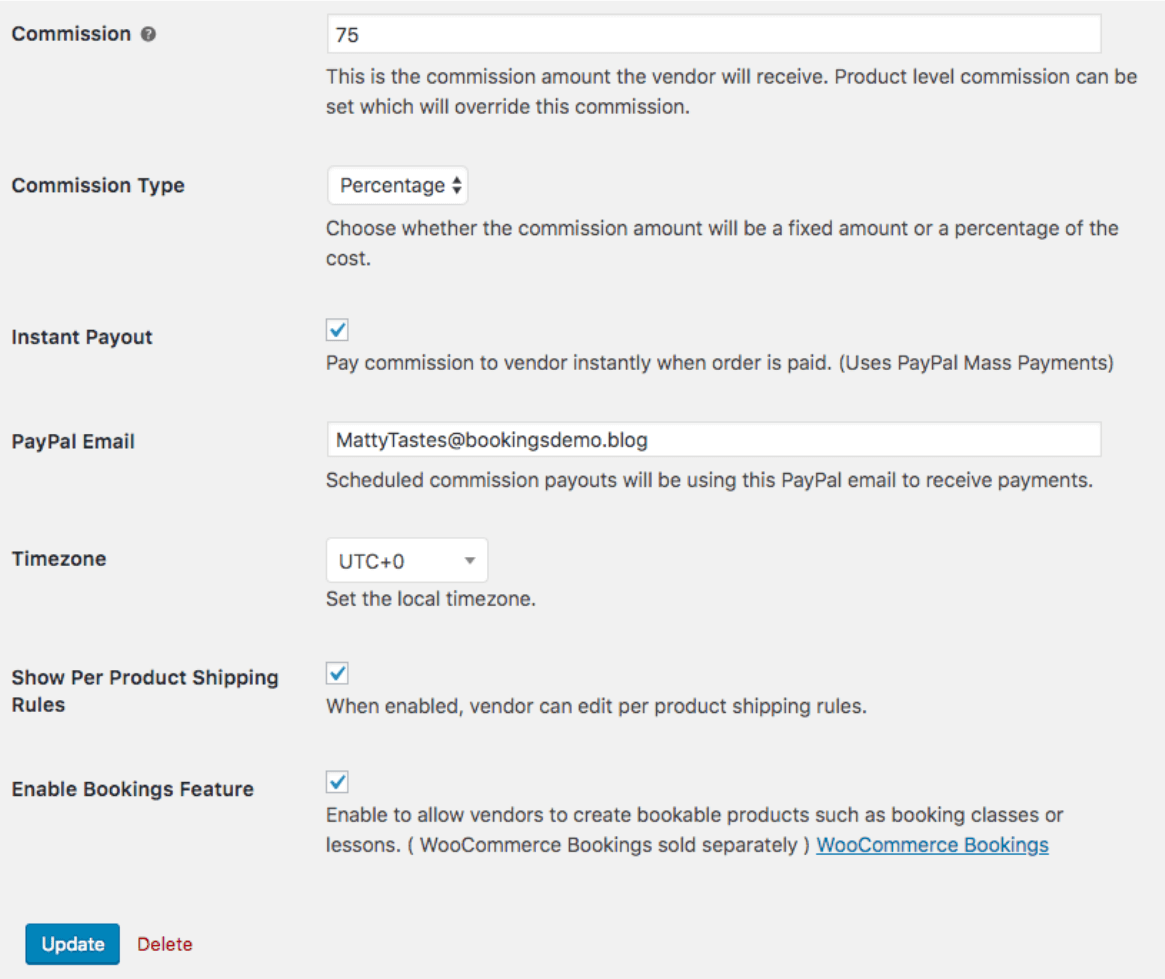
- Ensure that the Vendor Admins field contains the email address of the Product Vendor. You can search for users by clicking on this field. By including the Product Vendor in the Vendor Admins field, the user will be able to manage their items.
- Only the Name, Enable Bookings Features, and Vendor Admins fields are required. Without enabling the Bookings feature, Vendors will be unable to generate Bookable Products.
- The remaining fields are either for display on the Vendor’s Profile page or are commission-related. As the Vendor Admin, you can set the commission here or on the product.

The new Product Vendor will be able to create an account and begin adding products. You can go to the following set of steps by logging in as the Product Vendor.
Step 4: Create a Bookable Product
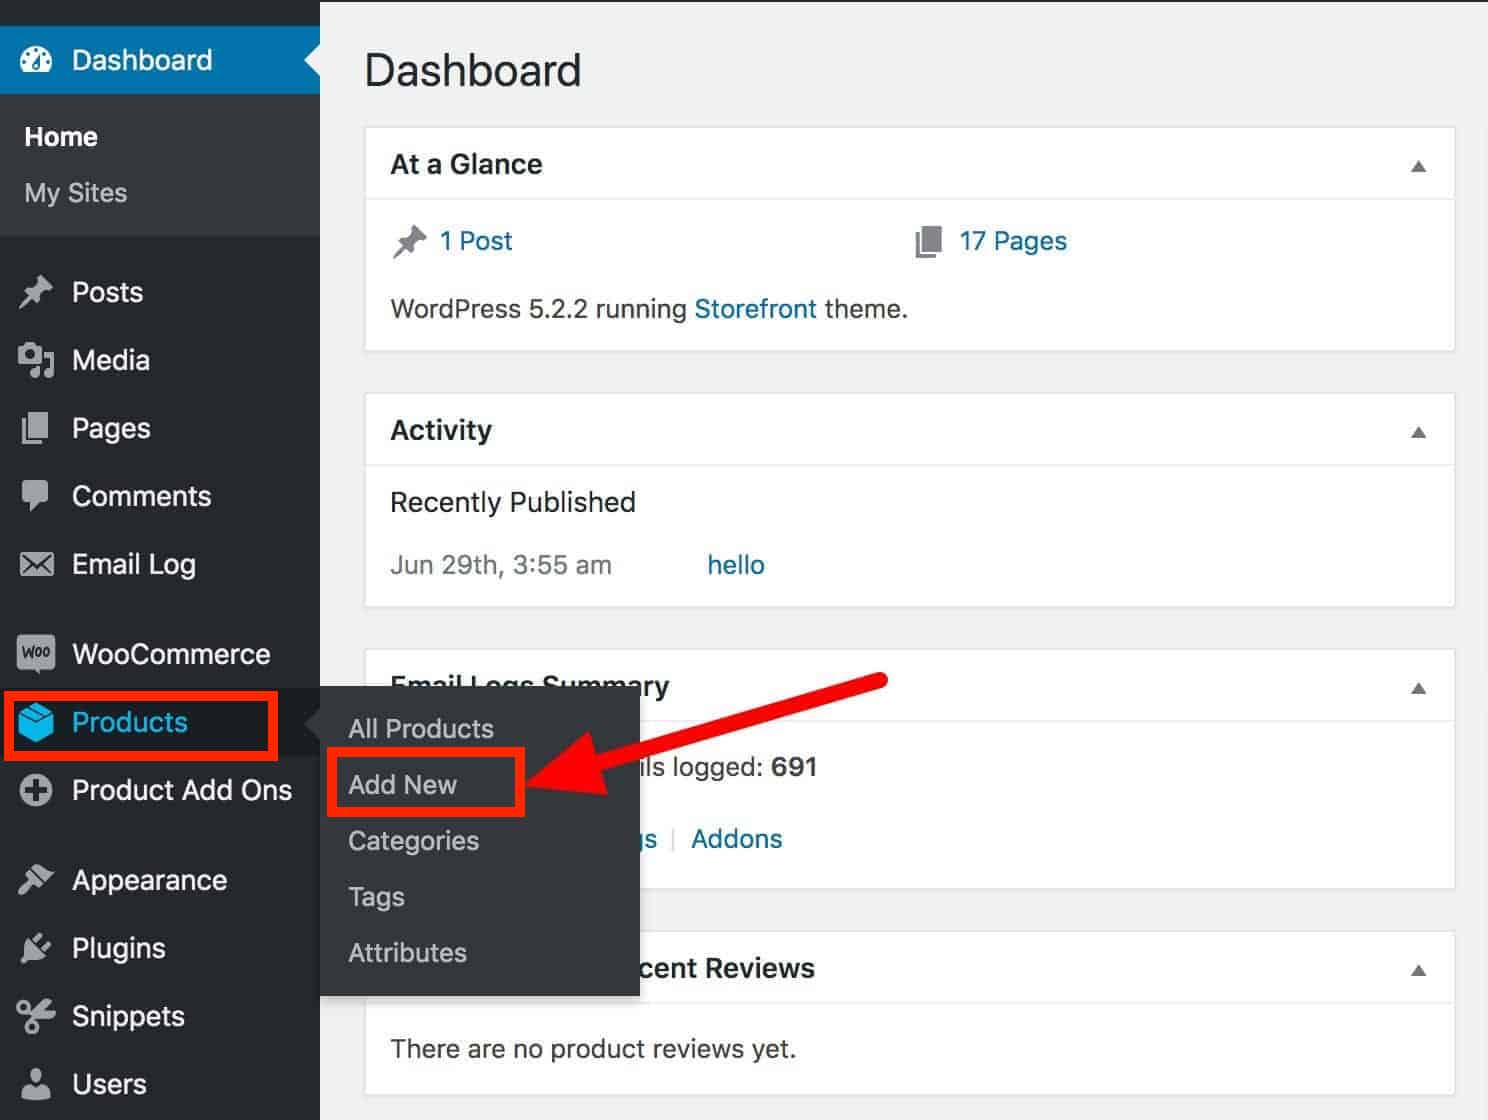
Go to Products in the WordPress Admin dashboard. Select the Add New button on the top.
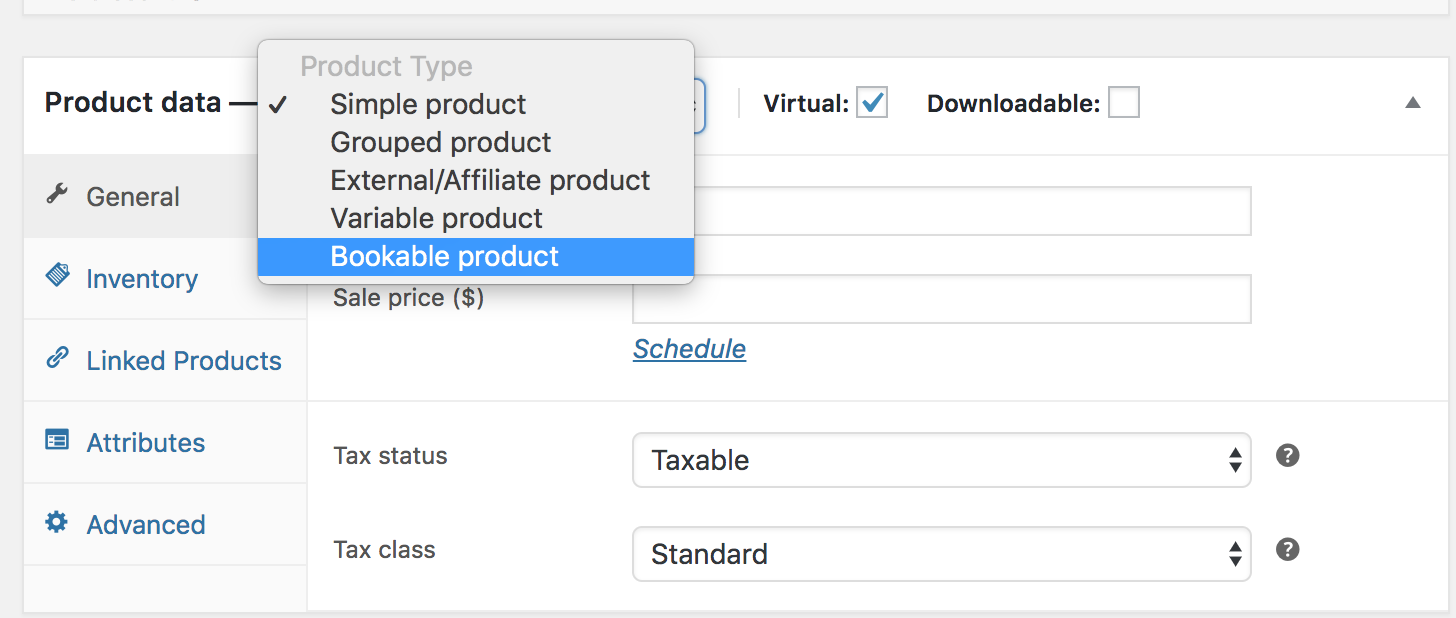
In Product data choose Bookable product.
To the side of the Product data box, tick on Virtual and Has Persons.
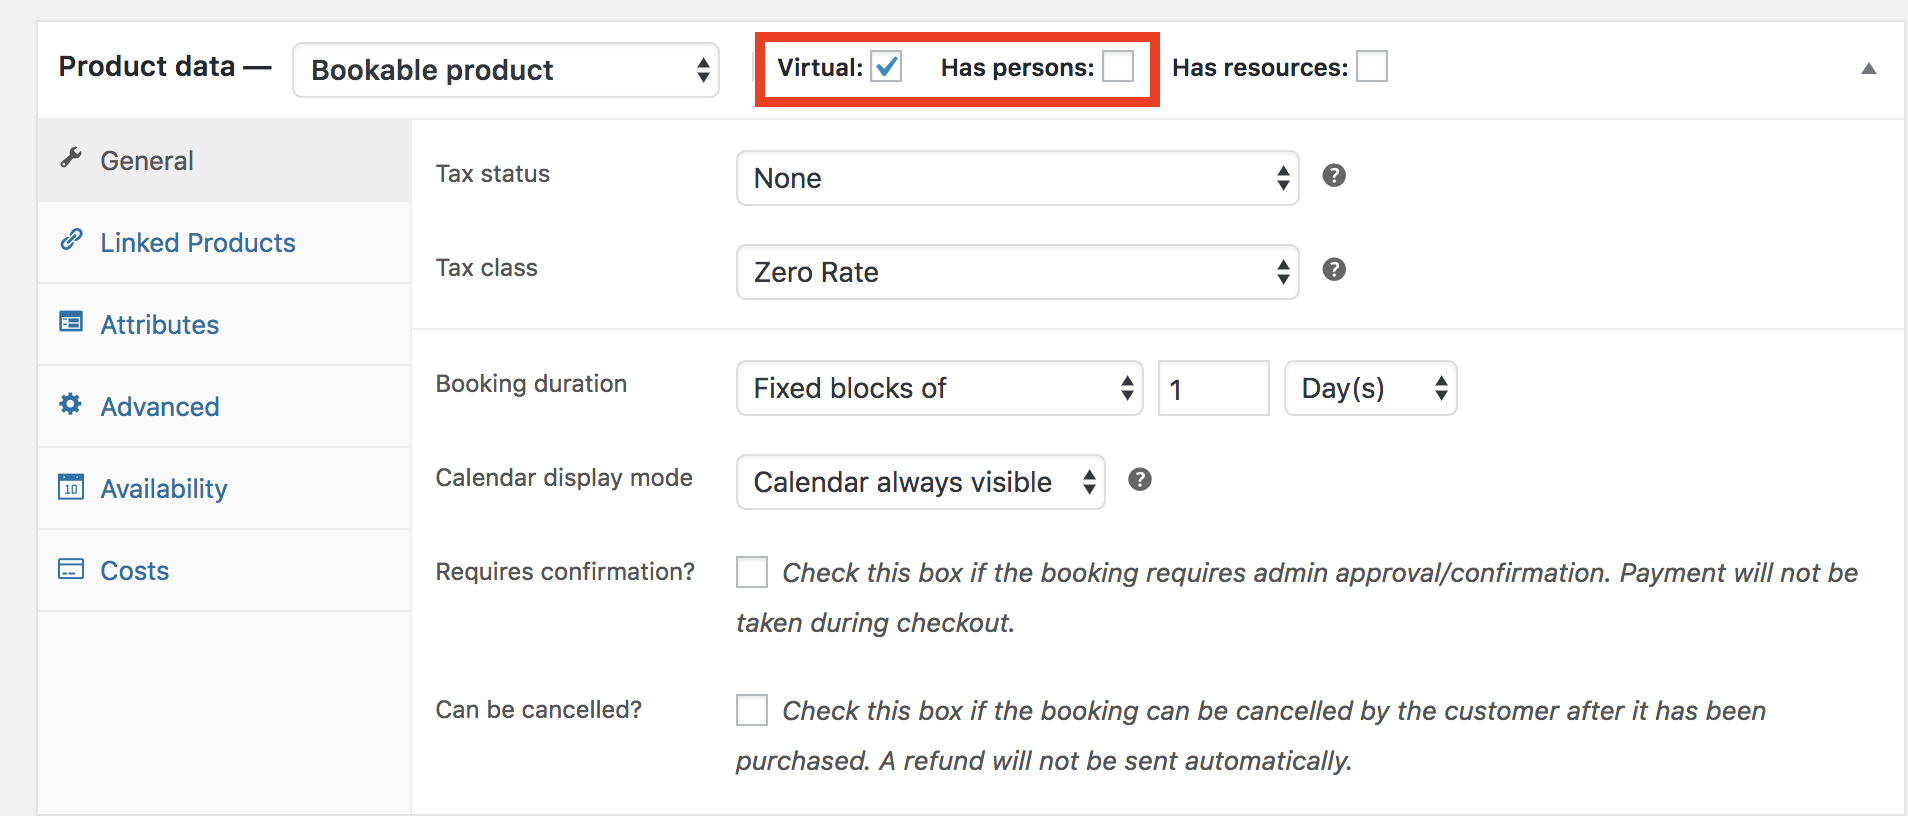
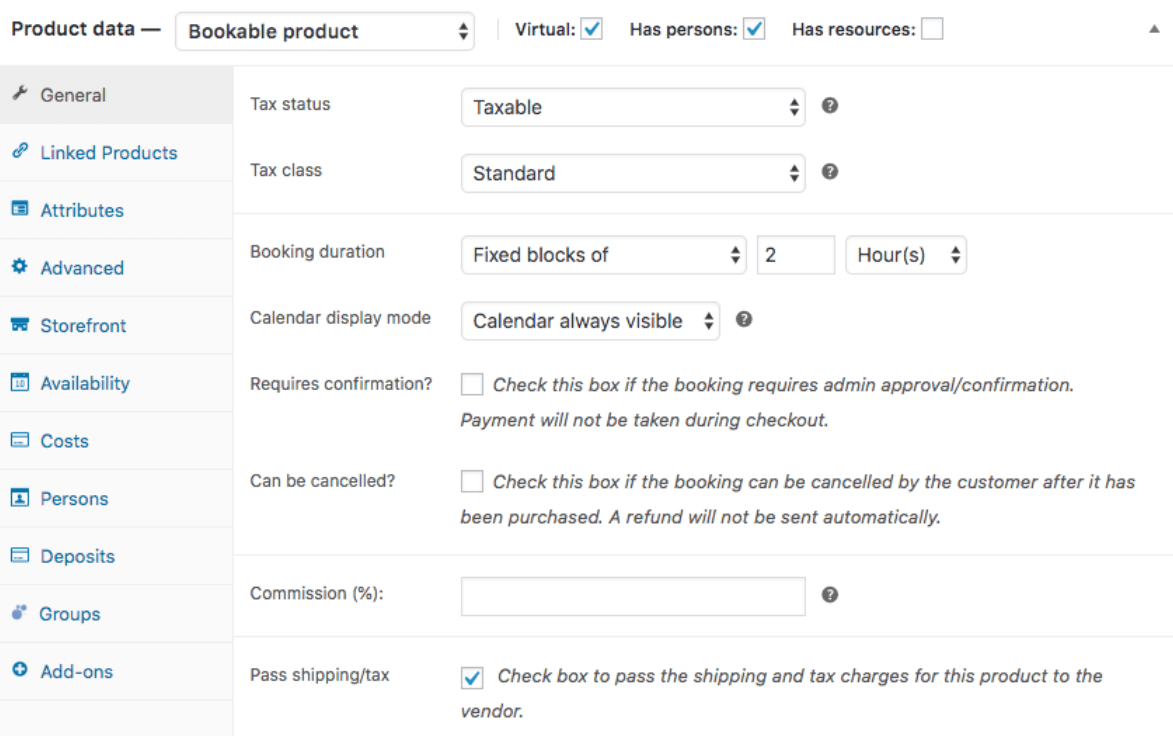
Step 5: Set up the General tab
In the Bookings duration, set the box to Fixed blocks of 1 hour.
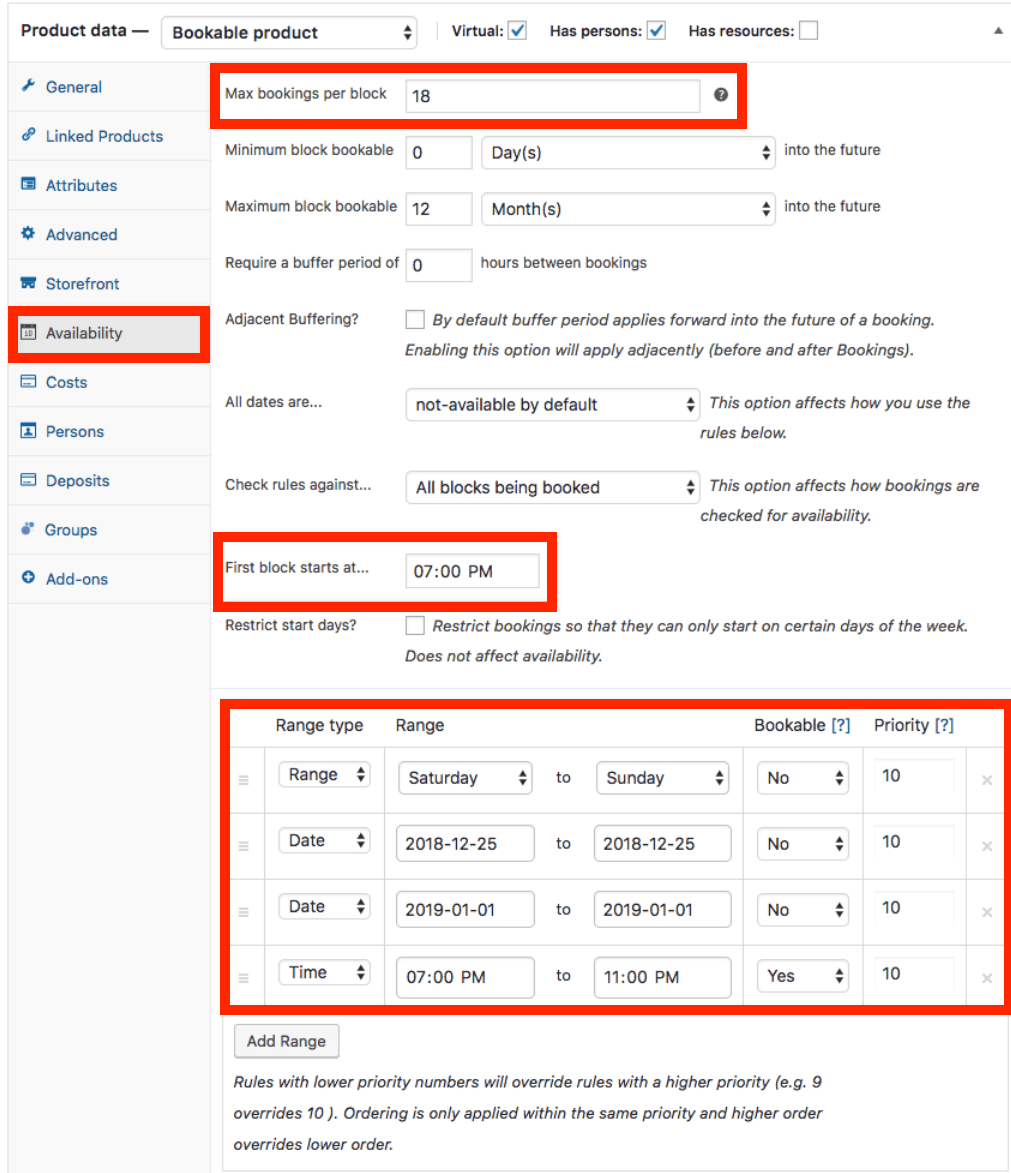
Step 6: Set up the Availability tab
When designing complex availability criteria, setting the All dates are… to not-available by default is frequently the best strategy. It’s simpler to add what’s available than to add what’s not. Our buffer interval offers sufficient time for our trainers to travel between locations.
 In this example, the Product has:
- Max bookings per block of 18.
- Require a buffer period of 1 hours between bookings.
- All dates are… not-available by default.
- First block starts at … 7:00 PM
The 4 rules for this Bookable Products are set as follows:
- Saturday and Sundays (weekends) are not bookable.
- December 25th 2018 is not bookable.
- January 1st 2019 is not bookable.
- The hours that can be booked fall between 7:00 PM and 11:00 PM.
Step 7: Set up the Persons tab
In this example, we would like to charge children and adults at various prices.
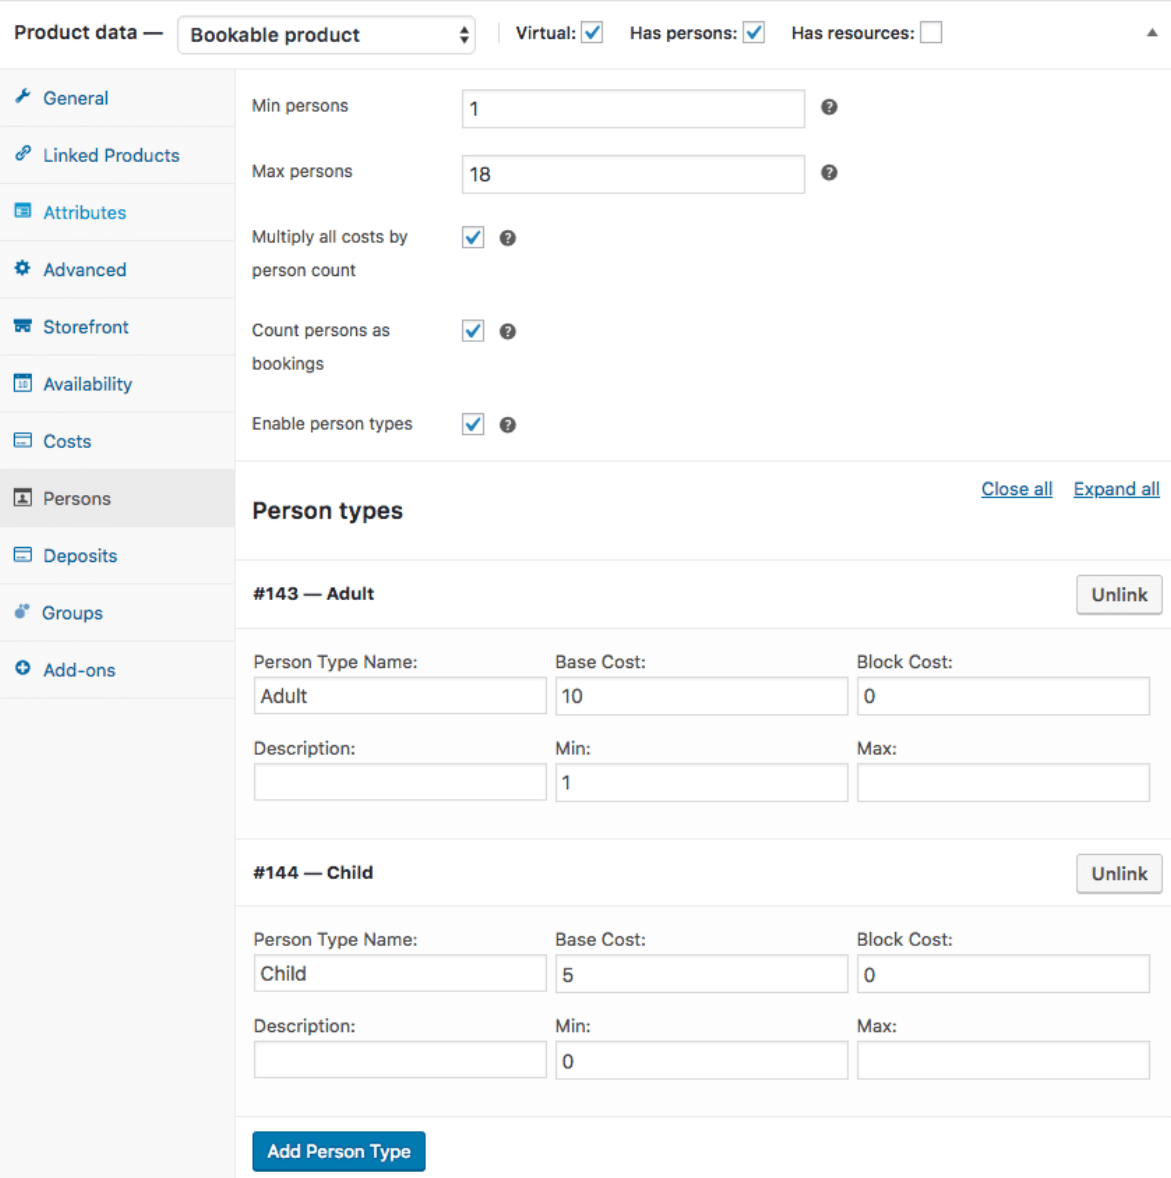
- We want to demand at least one booking and a maximum of 18 bookings. We’re going to multiply all of the fees associated with this booking by the number of people, and we’re going to count bookings as individuals. This enables us to associate a person with a booking. Due to the fact that each individual counts as a booking, each person picked will deduct one slot from the booking.
- Finally, we specify the name of the person type, the fee of the person type, and the requirement that at least one Adult book be purchased. We are not interested in reserving just for children.
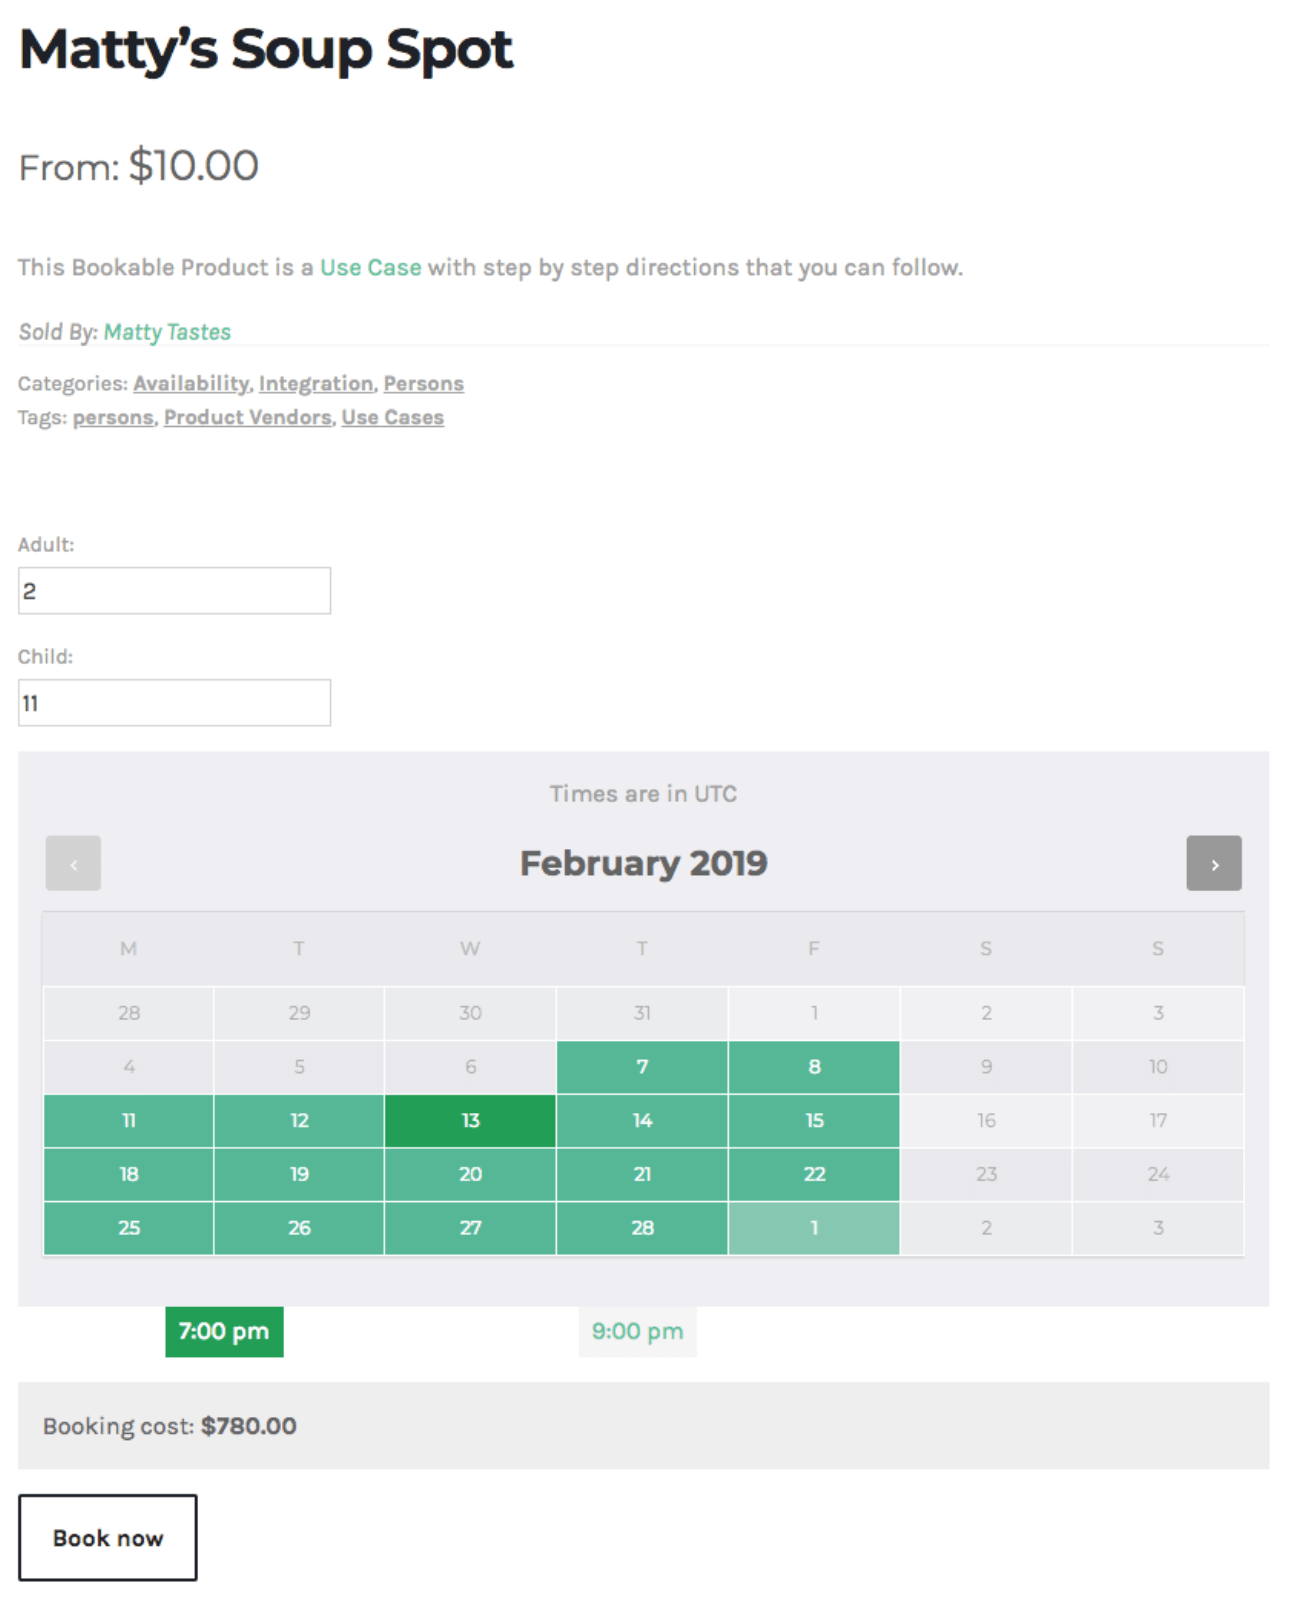
THE RESULT ARE IN
This is what is shown in the frontend:
2 best plugins to create a product vendor in WooCommerce
1. WooCommerce Product Vendors
Allowing many vendors to sell through a WooCommerce store and charging commissions on purchases is possible with the Product Vendors plugin. This plugin is ideal for businesses looking to convert their existing WooCommerce store into a multi-vendor WooCommerce store in a matter of minutes. While doing so, your store will continue to be able to sell your own products as usual. Because the WooCommerce team develops it, you can rely on the Product Vendors Plugin’s support and stability.
Key Features:
- Allow suppliers to handle products to lessen the administrator’s responsibilities.
- Payments to suppliers can be made instantly, weekly, biweekly, monthly, or according to a predetermined schedule.
- Commissions are deducted from suppliers on a product-by-product (%), vendor-by-vendor (%), store-by-store (%), or fixed-amount basis.
- Commissions may be delayed in the event of a conflict (e.g., product returns).
Price: $79
2. WC Vendors Marketplace
The WC Vendors marketplace plugin is utilized by over 10,000 stores on the WordPress platform. It enables marketplace owners to customize the business entity for vendors using a user-friendly interface that provides an exceptional user experience. Customization of modules developed by WC Vendors is simplified. Additionally, you can charge commissions for memberships and allow vendors to add flat/table rate shipping costs to end-user orders. This plugin is also compatible with over a hundred different payment gateways.
Key Features:
- Unlimited Vendors.
- Manage restricted order and user capabilities administration duties via the WordPress dashboard.
- Percent-based commission and shipping functionality.
- Improved vendor dashboard and expanded options for customizing vendor websites.
- Advanced commission and order management; premium support; complimentary upgrades when new features are released.
Price:
This plugin has a free version. Annual subscriptions cost $199, while lifetime subscriptions cost $599. We recommend that you begin with a yearly subscription and then upgrade to a lifetime membership (if satisfied).
Final thoughts
Managing a marketplace can be an excellent method to launch an eCommerce business without developing your own product line - you can instead manage the site and sales community. Merchants gained from the reduced administrative burden and increased traffic or audience that a marketplace provides, and in exchange, the marketplace charges a commission on each product sold to cover the costs of administration (such as time, shipping fees if you ship things, and so on).
After reading this post, we hope that you are now able to create your own eCommerce marketplace and find a suitable and helpful plugin for your existing WooCommerce store.
Are you finding this post beneficial? If you answered yes, please share this blog with your friends and coworkers to help spread the knowledge, and stay regularly tuned for additional AVADA instructions and tips.


