
How to Create a Product Lightbox in WooCommerce?

One of the most popular methods to level up conversions is to improve your online store’s interface and user flow. A product lightbox can help you achieve just that since it allows customers to open product images, galleries, details, and purchasing options.
In this article, we’ll show you how to create a product lightbox in WooCommerce. Let’s get started!
Why should you create a product lightbox in WooCommerce?
As you might know, customers must visit individual product pages to learn more about each product in WooCommerce. As a result, the shopping experience isn’t intuitive or user-friendly.
Creating a product lightbox in WooCommerce can assist your consumers in rapidly accessing product information. They don’t have to go to the single product page to see product photographs, choose variations, or add items to their cart.
Therefore, the online shopping experience for your customers will undoubtedly be improved. This is especially beneficial for online businesses that offer image-centric products like clothing, jewelry, photography, or gifts.
How to create a product lightbox in WooCommerce?
In this part, we’ll show you how to create a product lightbox in WooCommerce using the plugin WooCommerce Quick View Pro .
This is a product lightbox plugin that easily adds the quick view option to your product. Customers can open items in a lightbox with this plugin, which will show them the whole product gallery, as well as product details and purchasing choices.
Step 1: Install and activate the plugin
First of all, you need to purchase the WooCommerce Quick View Pro plugin. Then install and activate it in your WooCommerce store. Once done, you then need to activate the plugin license key.
To do that, from your WP admin dashboard, go to WooCommerce > Settings > Products > Quick view and find the License key option.
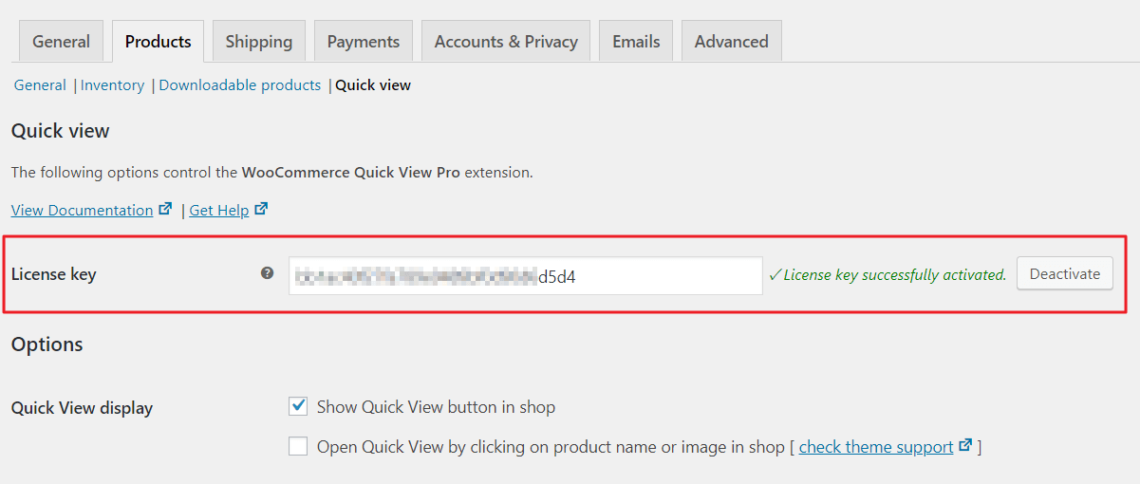
Next, enter the license key that you got in the email after purchasing the plugin and click the button Save changes.
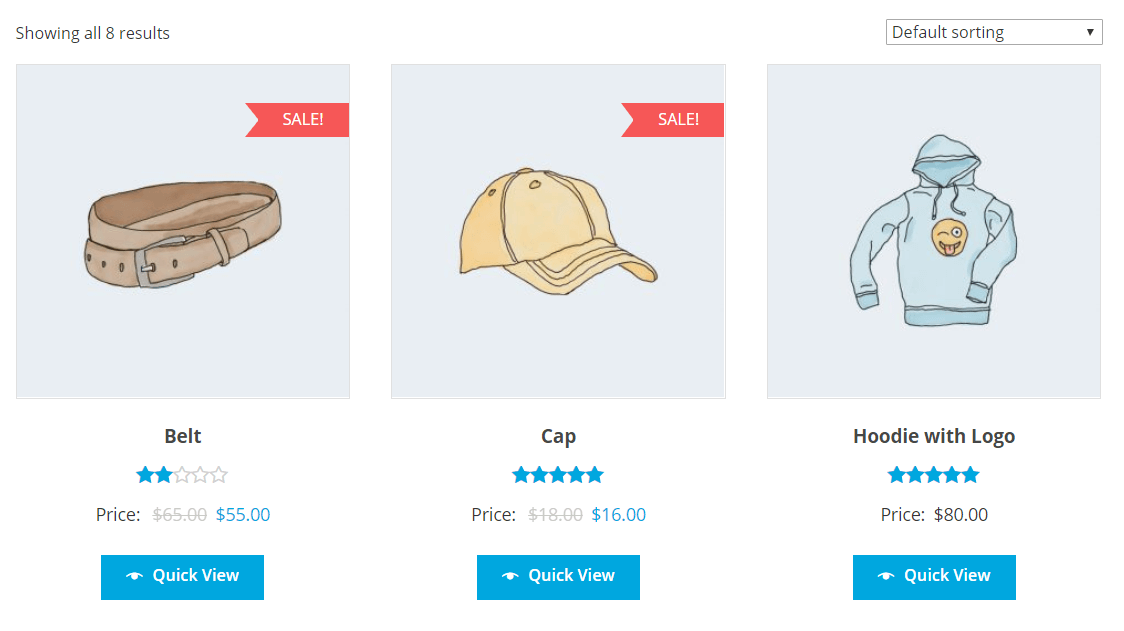
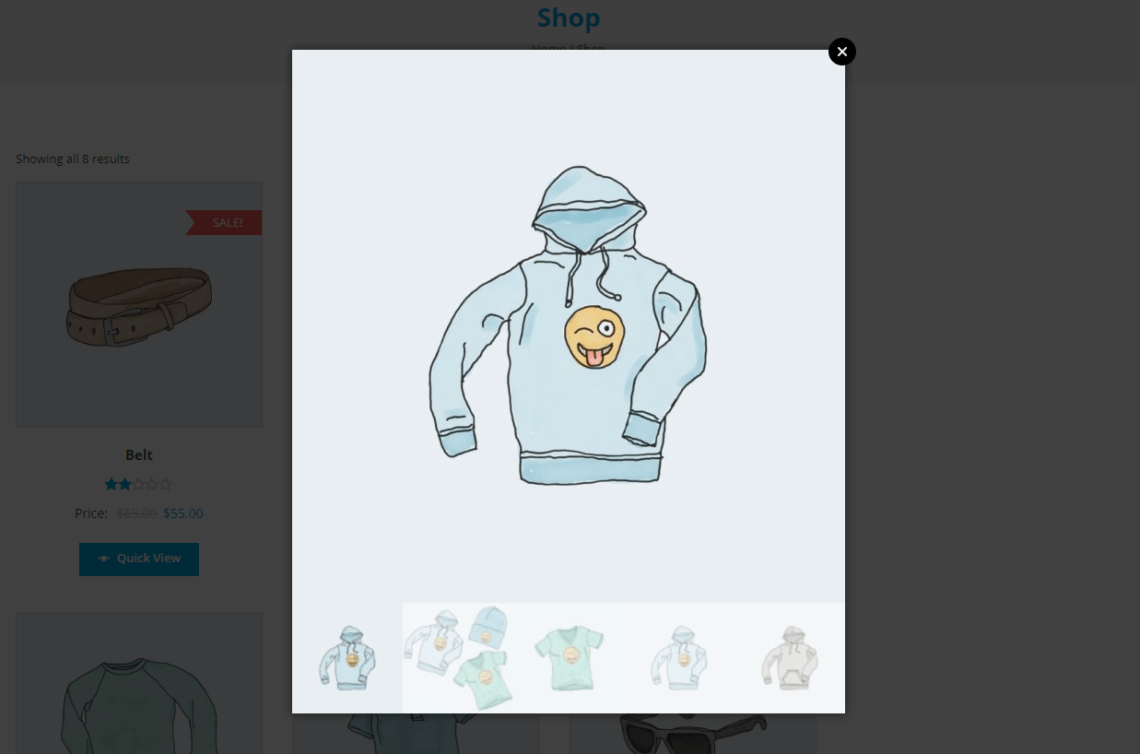
The module adds Quick View buttons to your online store’s main shop page and category pages by default. Below’s an example of how it may appear:
This plugin lets you display many details in the lightbox view, including the product’s description, image gallery, price, reviews, and metadata.
Step 2: Select how customers open the WooCommerce product lightbox
Now from the WP dashboard, go to WooCommerce > Settings > Products > Quick view and scroll down to the section Options.
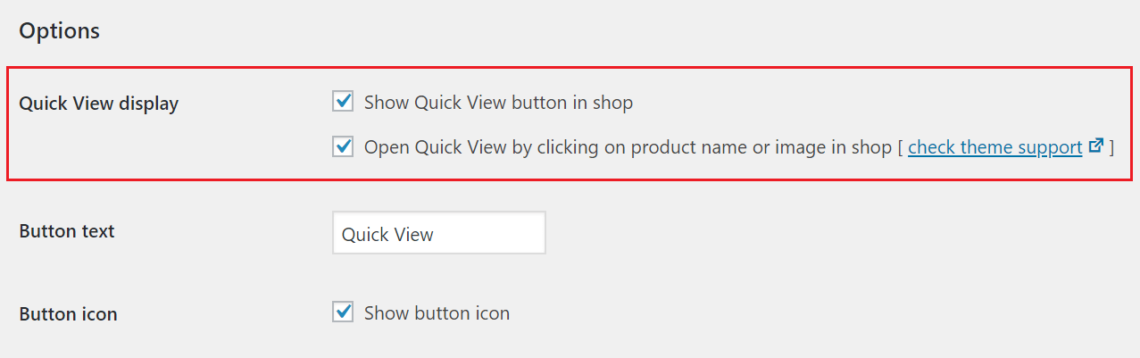
There are two options you have as to how customers will open the WooCommerce product lightbox:
- By using the Quick View button, which is located just under each product.
- By clicking on the product’s name or image.
If you choose the first option (using the Quick View button), you can also edit the button text and switch the button icon on or off.
Step 3: Display product image
Now you will learn how to display product images and a full product gallery in the product lightbox.
First, let’s talk about the product image in the WooCommerce product lightbox.
Under the option Quick View contents, you must choose whether to display the picture, product details only, or both the image and product details in the lightbox under the option Quick View contents.

If you want to use images solely, your WooCommerce product lightbox may look like this:
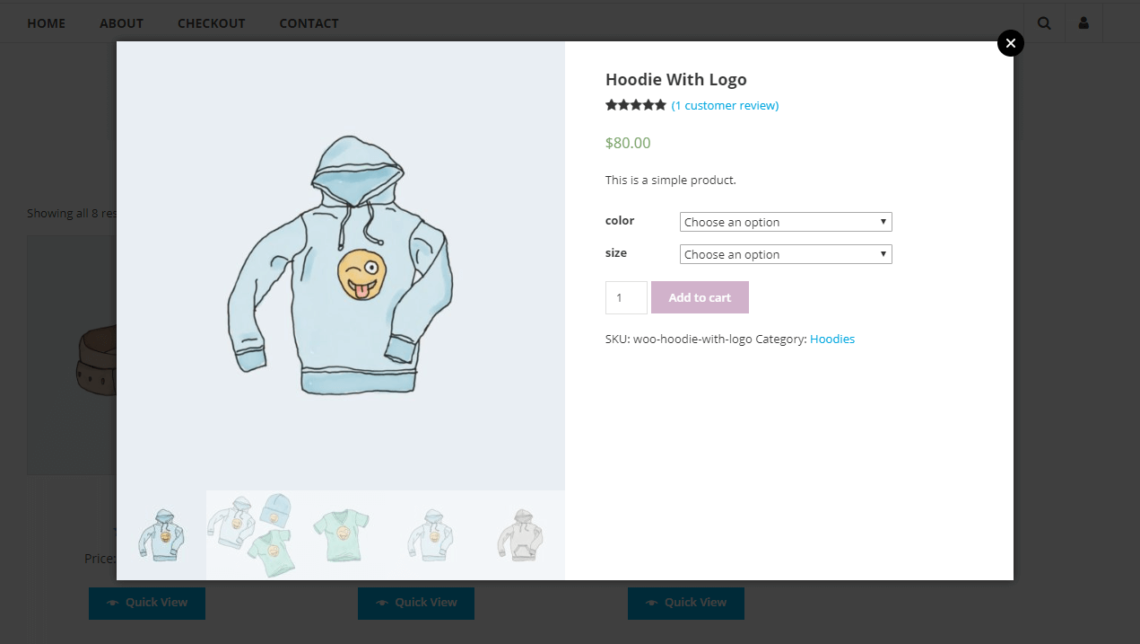
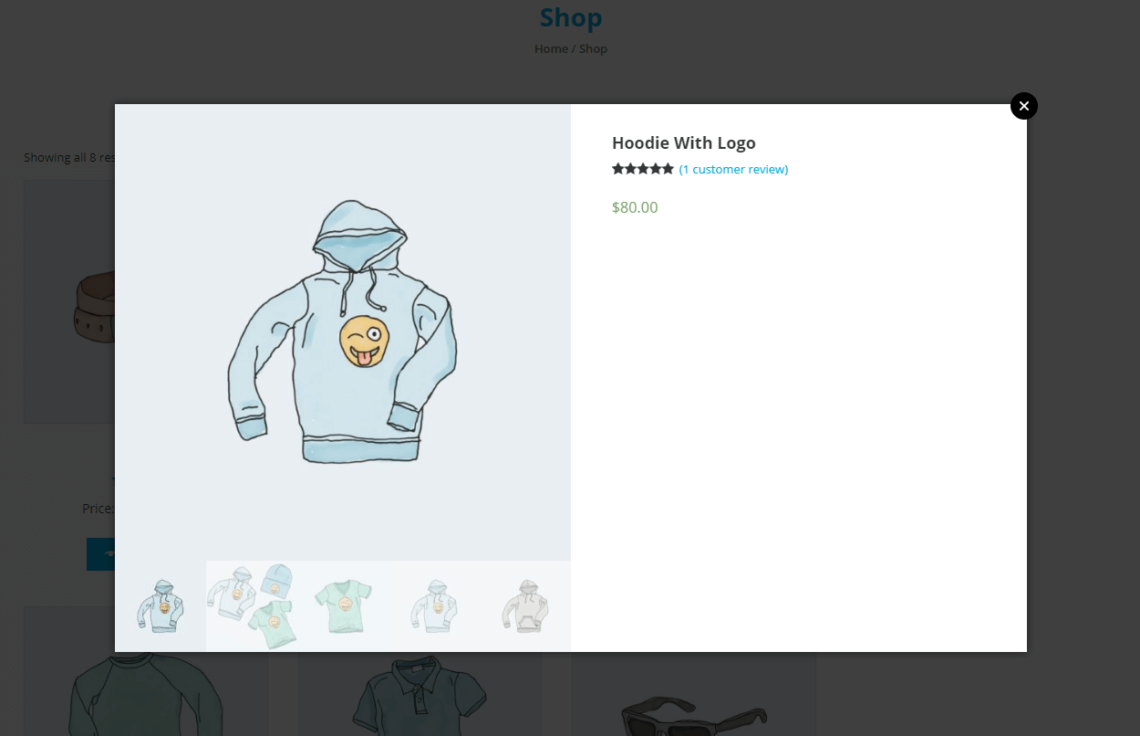
If you want to show both photos (with full gallery) and product details, you must choose Image and product details from the dropdown menu.
Step 4: Select which product details to display
If you choose to display both the Image and product details in step 3, you can use the Product details option to determine which product information will show in the quick view lightbox. Here are details that you can display in the lightbox:
- Reviews
- Price
- Short description
- Add to Cart button
- Meta information (such as categories and SKUs)
If you wanted to show the reviews and pricing for your items, for example, your WooCommerce product lightbox might look like this:
If you wanted to encourage your visitors to purchase your products, you could choose the option Show add to cart button. By doing that, shoppers can easily add items to their cart straight from the quick view lightbox. Here is what it would look like:

And that’s it! Now you can totally create a product lightbox in WooCommerce for your own business.
Top 4 plugins to create product lightbox in WooCommerce
In this part, we give you our handpicked list of the top 4 best plugins that would help you create a product lightbox in WooCommerce. Let’s check them out!
1. WooCommerce Product and Variation Gallery Images
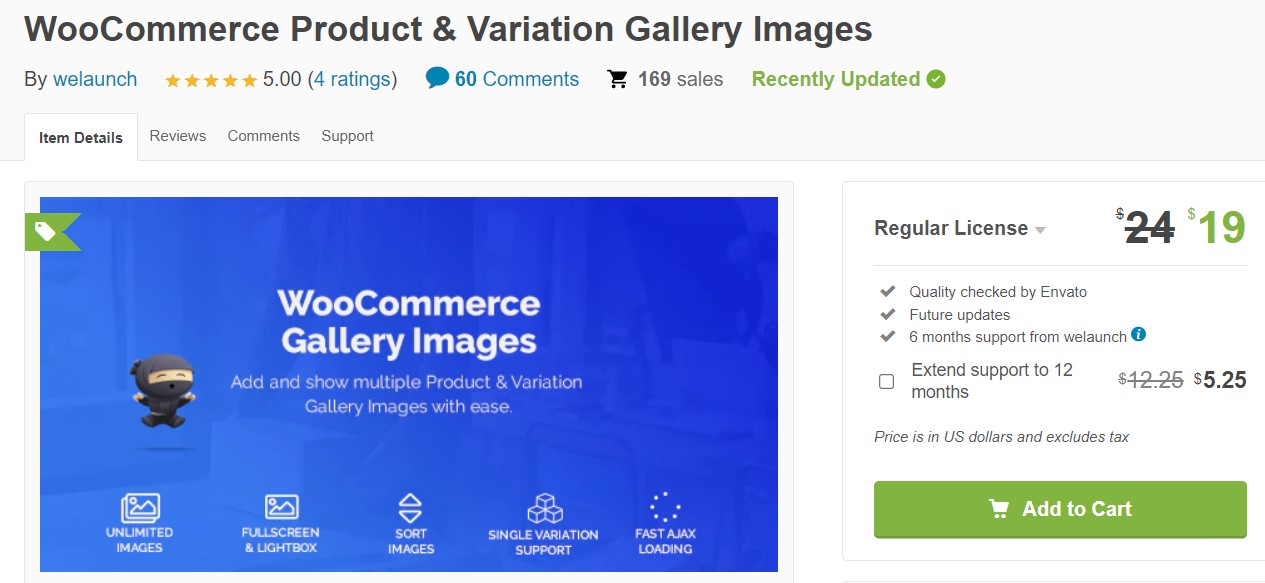
WooCommerce Product & Variation Gallery Images allows you to add lightboxes to WooCommerce products and their variations. This module is super easy to use and also affordable. You’ll get a neat set of customization features, which customers well receive.
Features
- Show unlimited variation images
- Lightbox, Zoom, Navigation Arrows, Full-Screen mode
- Show all variation images
- Easy to add variation images in the backend
Pricing
The regular license is currently on sale at $19. The extended license is charged at $99.
2. WooCommerce Zoomifier
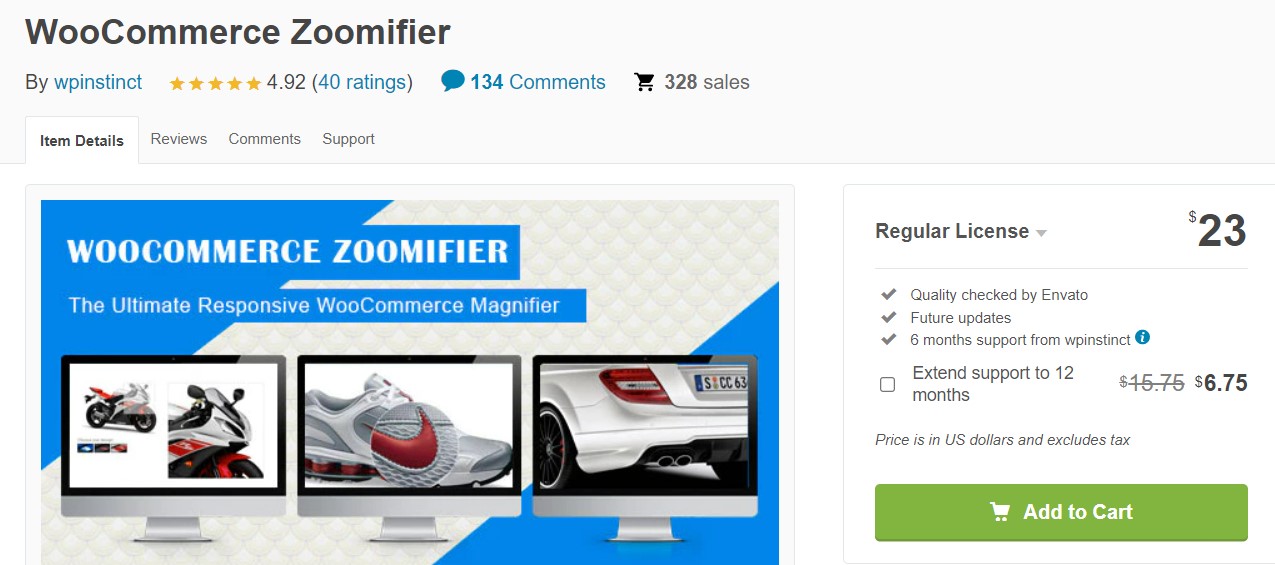
WooCommerce Zoomifier is another low-cost yet effective plugin for turning your product photos into lightboxes. You can not only include a lightbox button on your product photos for visitors to click to view them, but you can also include a zooming option, similar to what you might find on Amazon product sites.
Features
- Zoomer/ magnifier: mouse cursor type - default, cursor, pointer, crosshair; image easing; zoom type - window, inner, lens; contain zoom lens…
- Lightbox on images
- Slider: thumbnail slider, slider styles and settings
- Responsive
Pricing
The regular and extended licenses cost you $23 and $105 respectively.
3. Smart Product Viewer
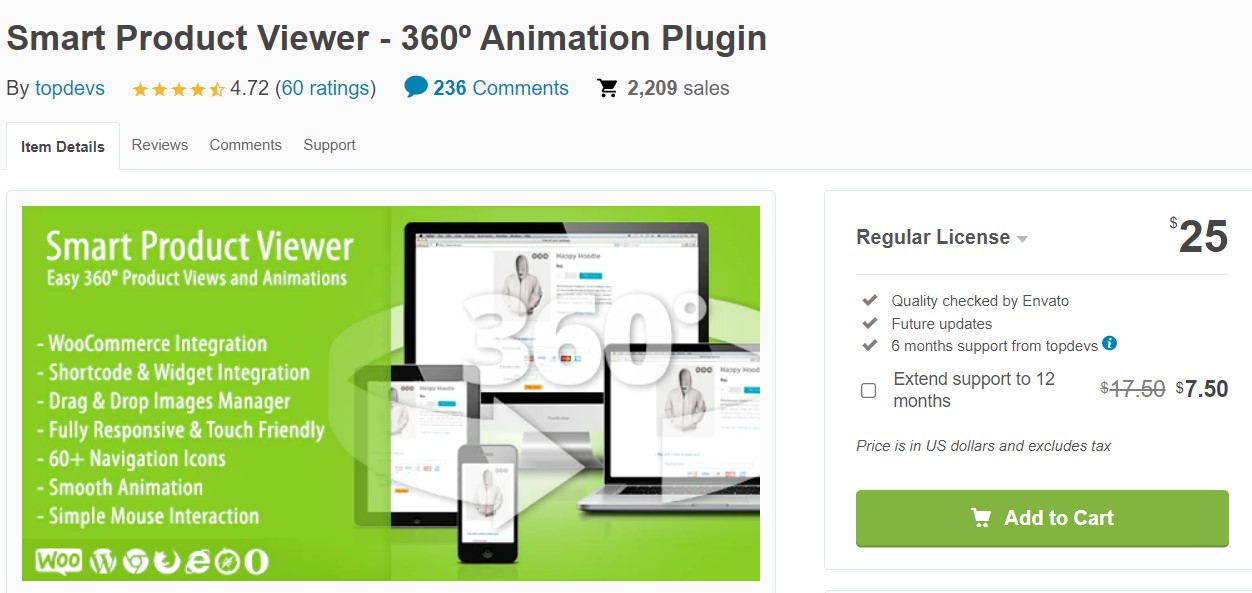
With Smart Product Viewer , not only can visitors open product photographs in a lightbox, but you can also transform photos into a 3D viewer.
This plugin allows you to upload a sequence of photographs for a product and turn them into a spinning 360-degree viewer, which may be more than you need. However, this plugin is a must-have tool for your WooCommerce store if you want to provide users a comprehensive insight into your items.
Features
- Page Scroll
- Shortcode generator
- Drag and drop images manager
- 64 navigation style and color combinations
- Flawless step-by-step product animation
- 360° photography examples included
Pricing
The regular and extended licenses are charged at $25 and $100 respectively.
4. WooCommerce Quick View by WooCommerce
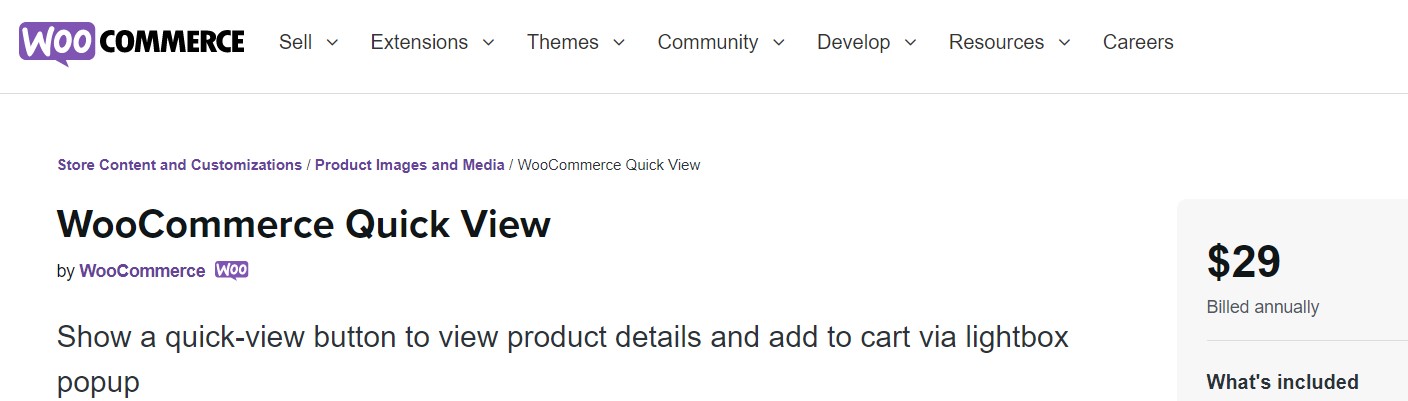
The nicest thing about WooCommerce Quick View designed by WooCommerce is how simple it is to use. All you have to do is to install it. The archive pages will add a “Quick View” button to your products, which visitors can click to see a preview of the product. All of the essential product information is included in the preview, as well as the function to add it to the cart.
However, this plugin’s capabilities might be too limited for some online retailers. There is no option to change the lightbox’s style or other properties. With that being said, there are some useful developer settings, so if you’re comfortable with plugin and theme coding, you’ll get a lot more out of this plugin.
Features
- Easy to set up
- A quick view button to view product details
- An add to cart button via lightbox popup
Pricing
$29 per year
Final words
Having a product lightbox in your WooCommerce store can be a gamechanger if you know how it works and uses the right plugins. After reading our detailed instructions on how to create a product lightbox in WooCommerce, we hope that you could successfully build awesome lightboxes and have a thriving business.
Thank you for reading, and don’t hesitate to reach out to us in the comments section below. We’d love to hear from you.


