
How to create Product Attributes in WooCommerce

Attributes are a crucial element of most WooCommerce stores, particularly and in eCommerce businesses in general. When it comes to consumer goods, shoppers want products that meet their specific needs. As a result, they’re finding and purchasing these goods based on specific product attributes.
Moreover, today consumers are long on information but short on time. They’re supposed to purchase your products with the tap of a finger—as long as they can easily tell that it’s exactly what they’re looking for.
Knowing this mainstream of creating product attributes, this article will mainly focus on How to create product attributes in WooCommerce, especially for the new owners. We will guide you step by step in the easiest way. So don’t worry too much!
Why should you create product attributes?
Product attributes are characteristics, which are used to represent a certain feature of a product. Apparently, it helps you define your products for users that visit your eCommerce stores.
Using product attributes makes your product stand out to customers in an eCommerce marketplace. Specifically, it helps separate your products from those of competitors.
As mentioned before, attributes are also useful for searching and filtering products. If you give attributes to products, users can use filters to find out products. Consumer searches and queries have become extremely specific over the years, so your attributes should be designed in a way that catches up with the target market’s interests.
How to create product attributes in WooCommerce
Step 1: Go to Products
You choose “Attributes” section from your left menu bar like this:
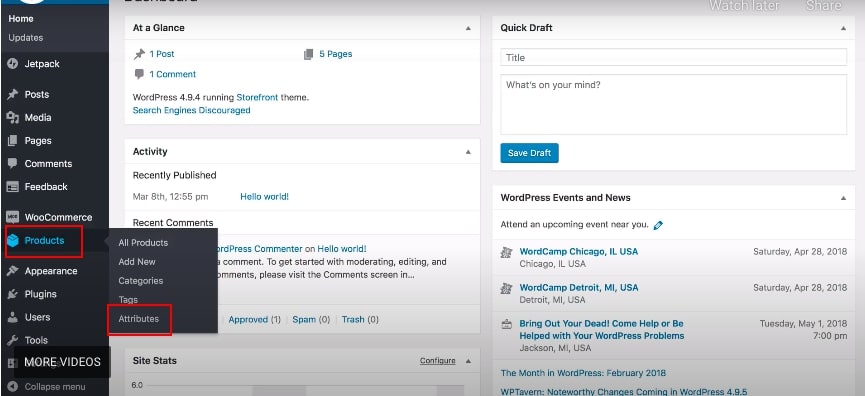
Step 2: Navigate to “Attributes” section
By default, no attributes are set in your eCommerce store yet, so you must create it yourself if you have started running.
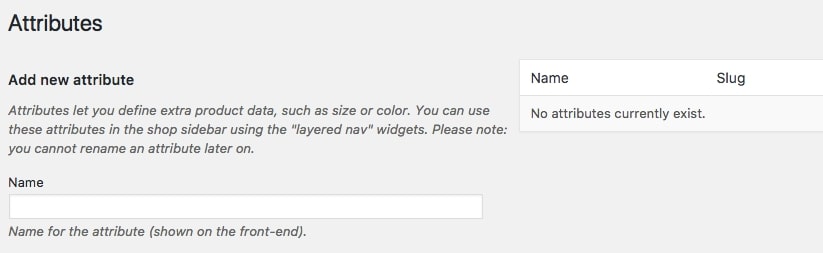
Now, as required, you need to fill out the name, slug (optional) - URL friendly version of the attribute name. The slug is actually formulated, controlling how you can search for attributes. Moreover, you have to select the options of type such as:
-
Enable Archives: if you enable it, you can view a page with all products having that attribute
-
Default sort order: include name, name (numeric), term ID, or custom ordering (you drop products into your preferred order)

Finally, click on the “Add Attribute” button to create a new attribute.
Step 3: Create product attributes
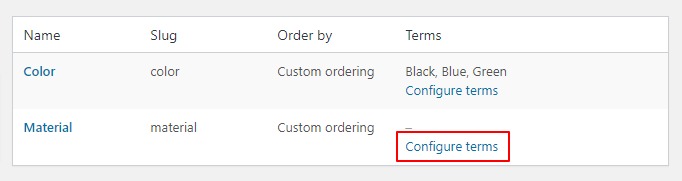
After creation, now move on to create some different styles for each attribute. In this tutorial, we created an attribute called Styles as an example, then we’ll want to add the specific materials in the terms.
Select the Configure terms text in the “Terms” column of the table to add your attribute terms.

Your screen will appear in this table to ask you to add the styles for that attribute - Styles in the example:
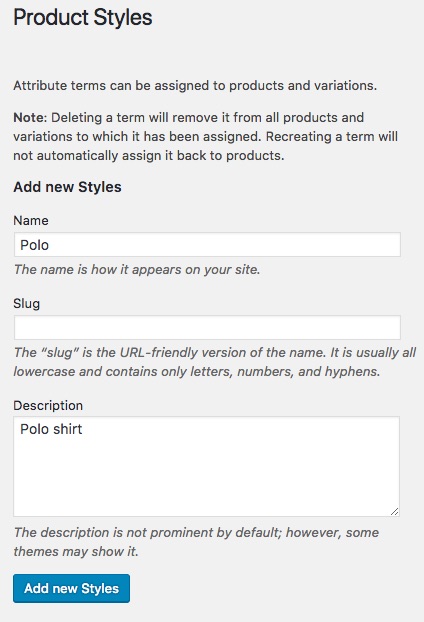
You can add as many features as you want according to product attributes. Once you think adding is enough, keep in mind that save the features by choosing “Add New Materials”.
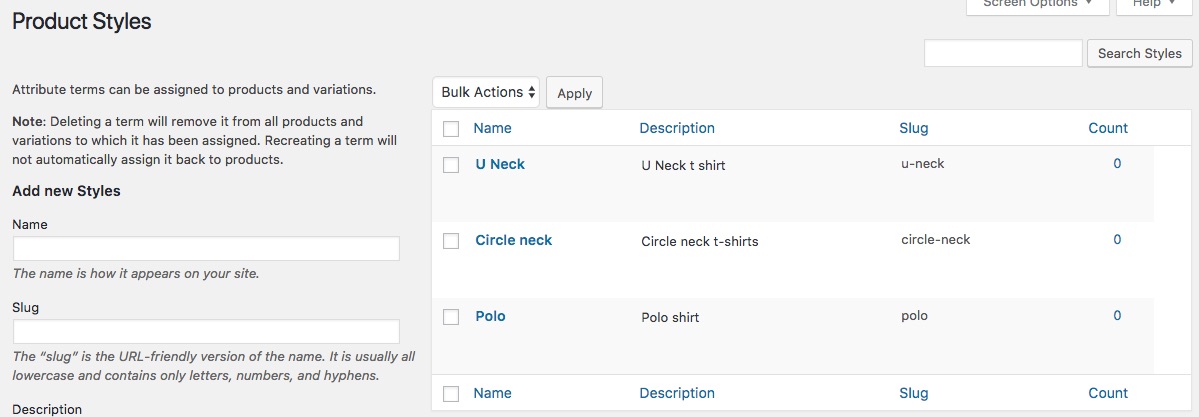
If you want to add more, all you need to do is go back “Attributes” and select “Configure terms” respective with the chosen attribute.
Step 4: Add product attributes
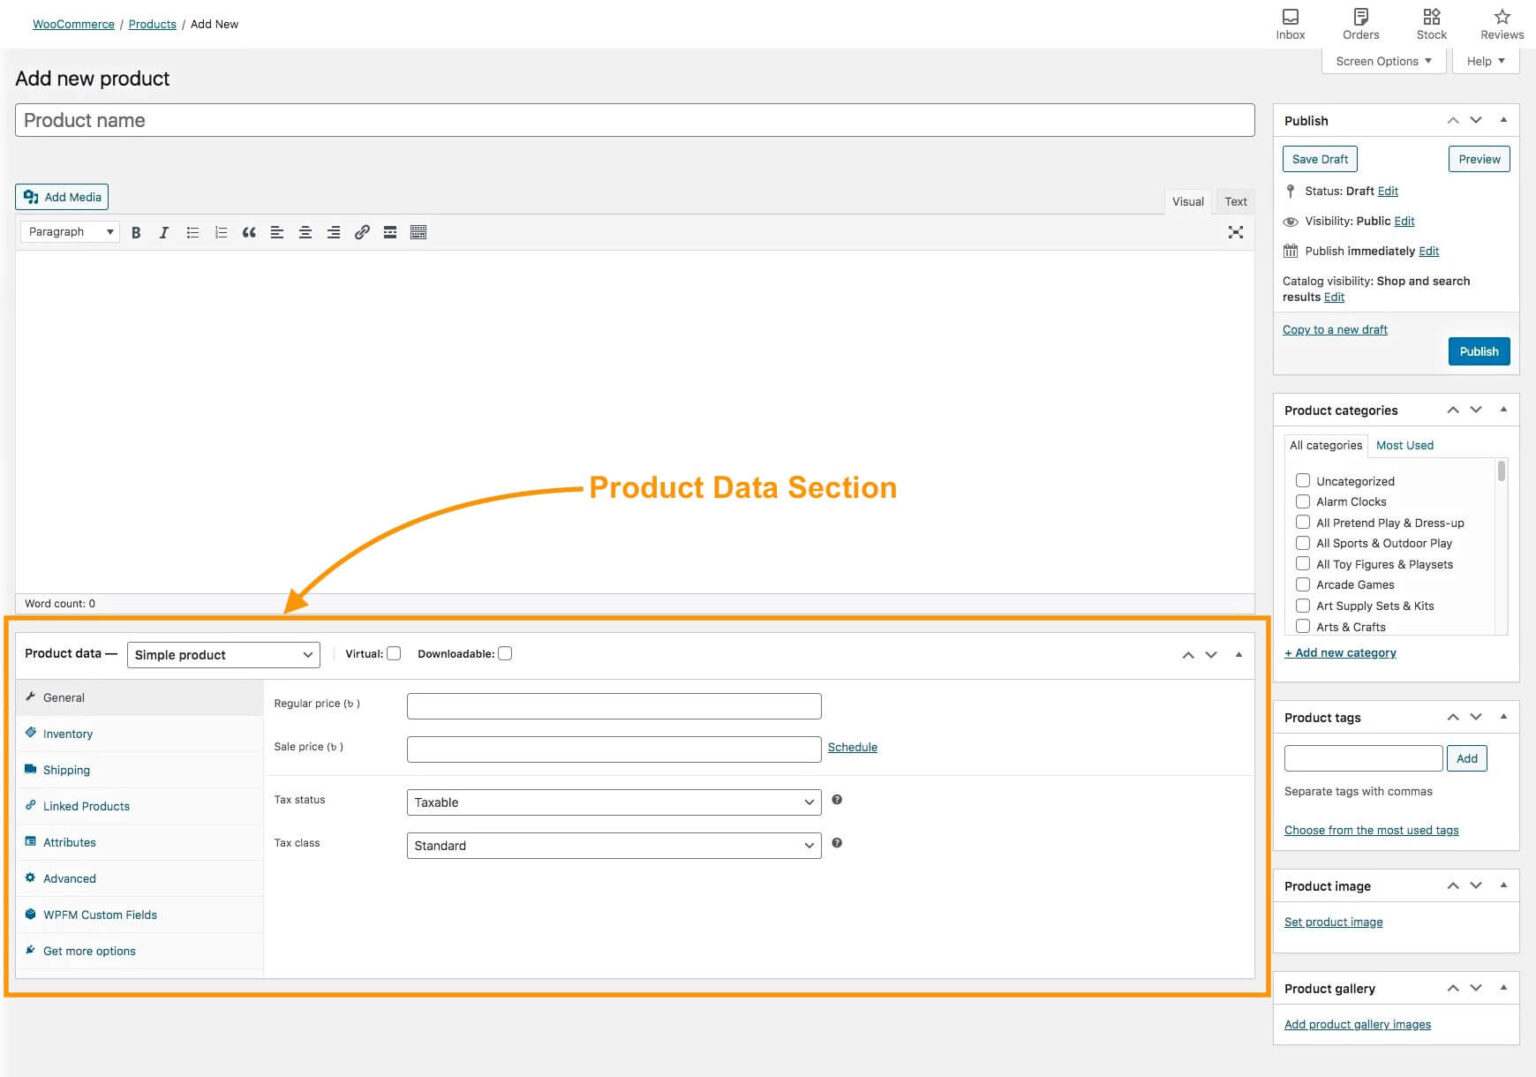
Now it is time to show the attributes on the product table. Go to Products > Add product. You can either add a new product or edit an existing one which is up to you. Next, scroll down to the Product data section to add attributes.
Heading to “Attribute” menu.
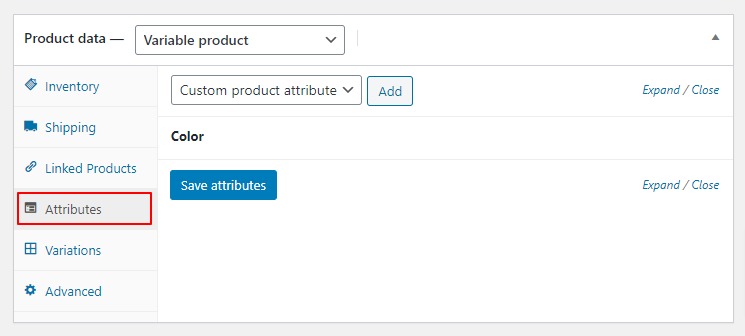
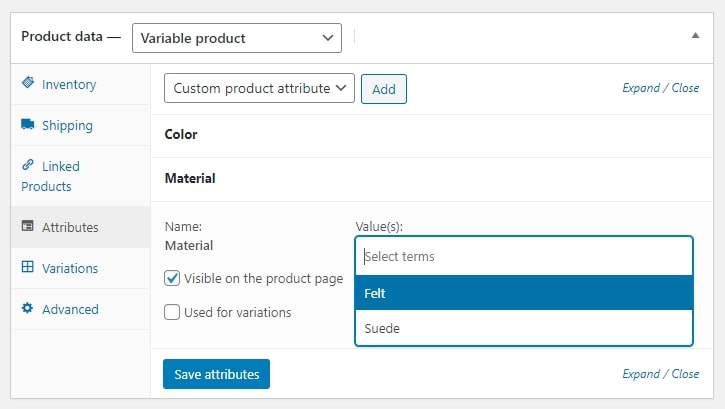
Here, you can see there is a dropdown menu that writes “Custom product attribute” select your newly added attribute by clicking an ‘Add’ button beside it.
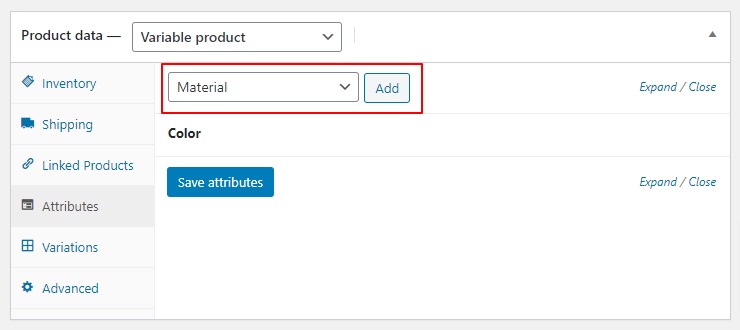
This will then add the attribute to your product. The ‘Name’ field refers to the Attribute name, and the ‘Value(s)’ field refers to the Attribute terms. Please fill them out as required.
Furthermore, on the left side, you can see the option “Visible on the product page”. That is check-marked by default, which means this attribute term will be displayed on the product page. Here is a display of how you should add the attributes:
Eventually, ending up saving the attributes that you added to publish the product.
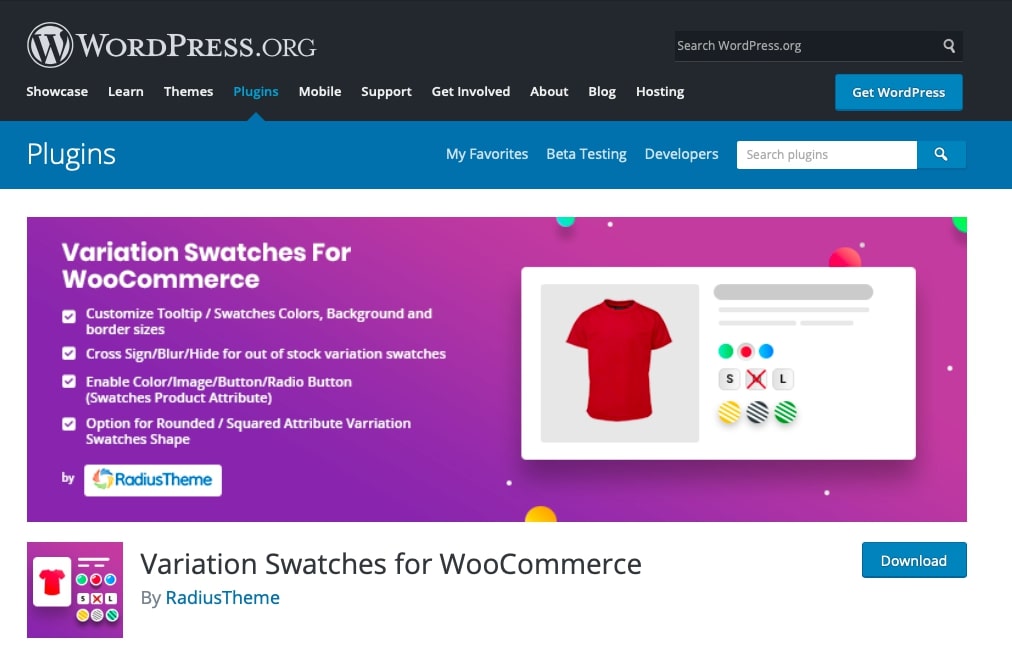
4 best plugins to create products attributes in WooCommerce
Here are 4 WooCommerce plugins for improved product attributes in your WooCommerce store if you want to implement more advanced functions.
WooCommerce colors and swatches
WooCommerce Colors and Swatches for Variations helps you with selecting variations. Moreover, it will beautify and manage your eCommerce site through colors and swatches rather than name attributes. There you can apply product images to your WooCommerce products intact that will give a perfect swatch image.
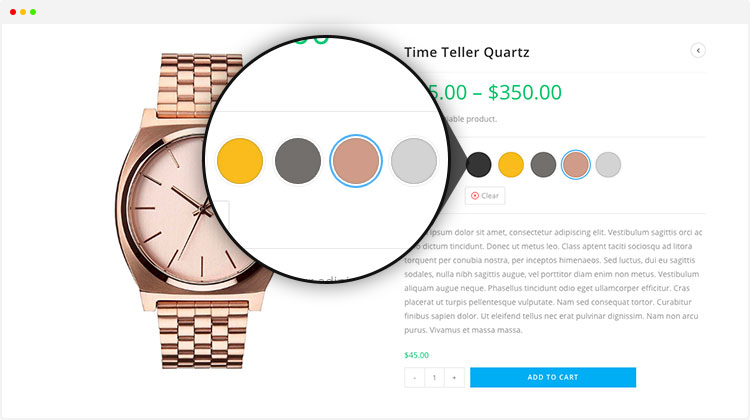
On the other hand, WooCommerce color swatch is applied to extending product attributes, giving a streamlined look of your store to your customers who are buying things from your excellent and unique platform. WooCommerce color swatch provides a beautiful, friendly interface that helps to attract your customers and gives a real swatch image of your WooCommerce product.
WooCommerce color and image variance swatches
Similar to WooCommerce colors and swatches, this plugin works the same. From converting normal variable attribute dropdown to good-looking color or image selection. It literally helps customers imagine what exact product they want to buy through the swatches. Additionally, you can display images or colors in all common sizes as well as display them in round or square mode.
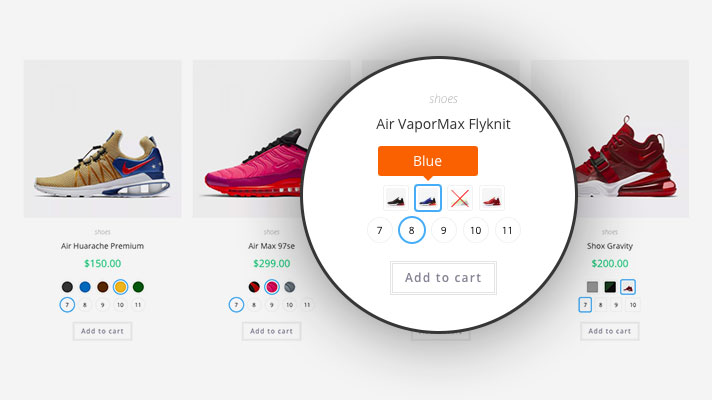
There are also some outstanding features of this plugin that we guess you will like:
-
Mix color or image selection with the default dropdown selects
-
Work on mobile phone
-
Show/change color or image swatches on shop/category/tag archive pages
OpenSwatch
Coming to another recommendation, OpenSwatch is a plugin for WordPress and WooCommerce with a lot of new features. Like other plugins, it brings your store a better look with many more friendly functions for the customers while searching for a specific product. Your store is allowed to add and change swatch images for variations or products attributes.
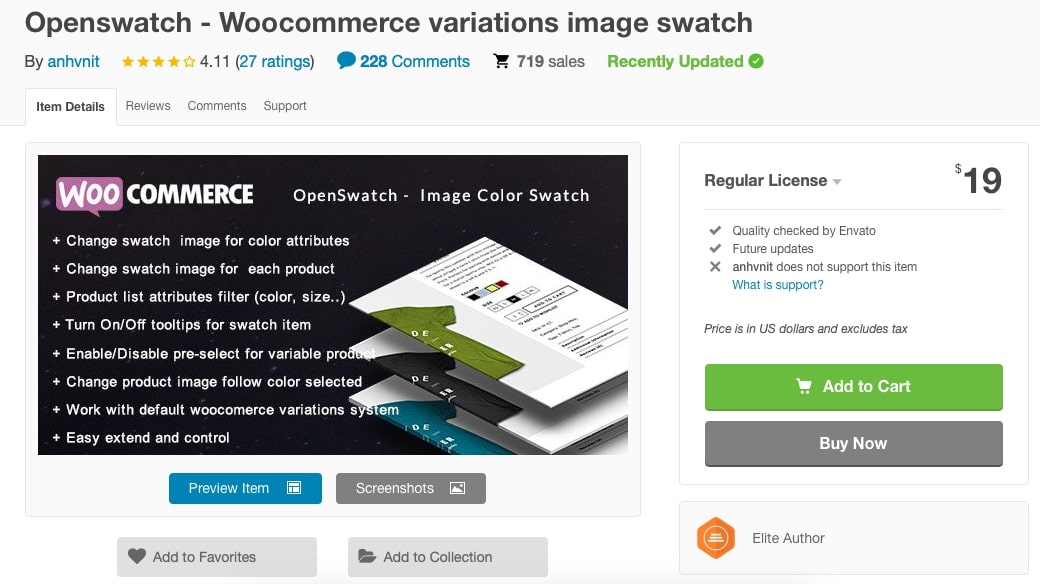
Feature:
-
Display swatch image for variations item on the shopping cart and order details
-
Turn On or Off tooltips for swatch item feature
-
Turn On / Off opensswatch on each product
-
Enable / Disable swatch color on product list and pre-select for products
-
Easy extend and control
WooCommerce swatches
WooCommerce Swatches - the most advanced WooCommerce Swatch extension of product attributes is the last WordPress plugin we would like to introduce. With no surprise, it lets you display your variable product options as colors, images, labels, or text swatches of product attribute display types in your WooCommerce product page.
Not only are the custom swatches more visually appealing, but they’re much more informative as well. With this plugin, you can display customized swatches on catalog and shop pages. This makes customers convenient when they are browsing your store to see exactly what’s available, even before visiting a product page specifically.
Final words
We are done with going through the main aspect of this article about product attributes. With a step-by-step guide of How to create product attributes in WooCommerce, you will find it easy to practice yourself.
Don’t worry if you face problems during creating it, since we are pleased to help you anytime you need our support. By getting our help, please leave your comment down the question chat box or contact us directly through email. Good luck with your work!


