
How to Create an Account in WooCommerce

In the e-commerce market, adding new teammates to form a powerful crew and organizational structure is inevitable as the business expands. For WooCommerce users, you will add your team members by creating new WooCommerce accounts for them.
In the below sections, we will guide you through some basic processes that you may need to face when creating a new WooCommerce account. In addition, you’re also going to take a look at some of the most asked questions regarding the new WooCommerce account that you may wonder about.
Okay, let’s get started!
How to Create an Account in WooCommerce
Creating an account in WooCommerce is an almost effortless process.
To begin, you need to go to the WordPress Sidebar on the admin panel, then choose the Users option and click the Add New button. After that, the below window will come up on your screen.

Provide fundamental information
The first 5 fields require the personal information of the new user. While the first 2 fields (Username and Email) are compulsory, the other 3 (First Name, Last Name and Website) are optional.
As you can see, in the password field, there’s a Show password button. Clicking this button leads you to a password automatically created for a new user. If you want to reveal the password under dots, just click the Show button with the Eye symbol.
If you want to create a new password, you’re recommended to think about a strong one. When it’s strong enough, you’ll be noticed as below.

Next, if you wish to send a notification to the assigned user, you just need to tick in the Send User Notification box.
Choose a user role
When forming a crew, the most important thing that matters is assigning the right roles to your teammates. So, the most crucial part in creating a new WooCommerce user account is to decide which user role is suitable for this user.
In the Role field, which is the last one, there’s a dropdown menu in which you can choose among 7 default WooCommerce user roles.
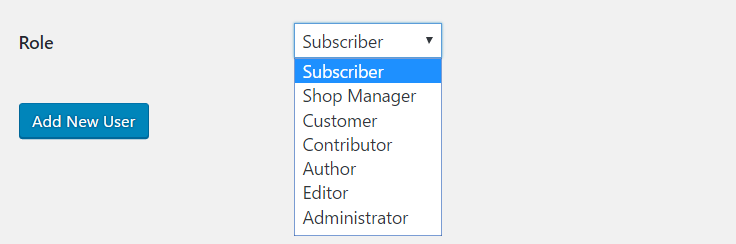
After all, you just need to click the blue Add New User button at the bottom of the window to finish the process of creating a new WooCommerce user account.
Check the Users list to see if the newly added user is with the other ones.
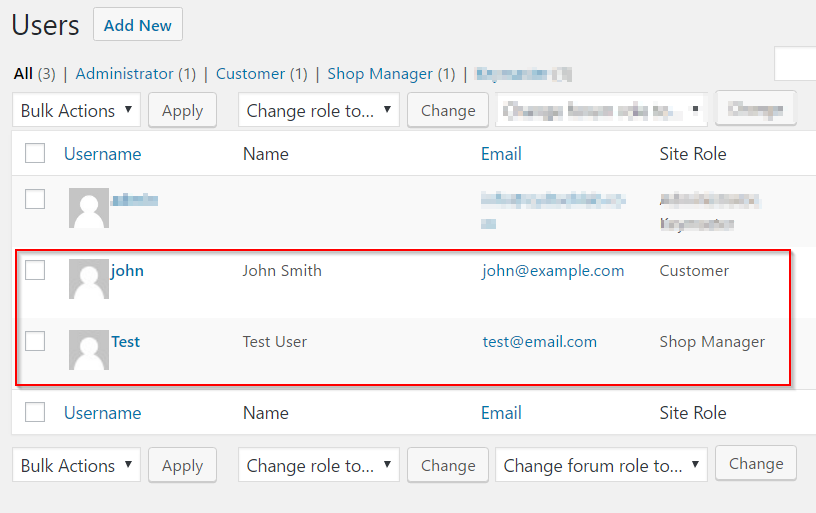
Make changes in the profile
When you can already see the name of the new user in the Users list, you can make changes to the profile at any time. Just point at the user in the list, you’ll see the Edit option. Then, there’ll be a list of information fields that you can modify about the user as listed below.
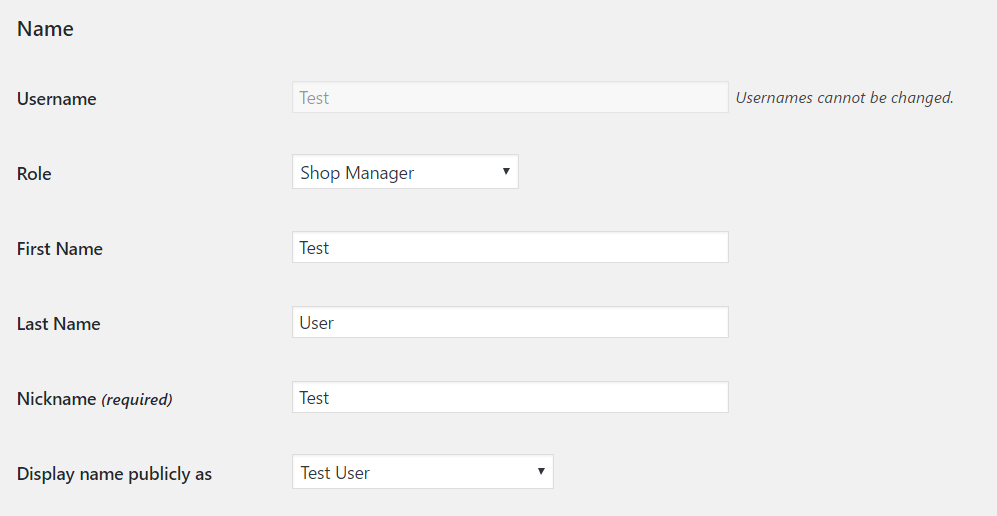
- Personal Options: All the user’s options for displaying on the site
- Name: This contains different aspects of the user’s name, including Username, Role, First Name, Last Name, Nickname and Display name publicly as (also known as User role). However, you must notice that the Username cannot be modified and Nickname is mandatory.
- Contact info: This is where you can change email address and website
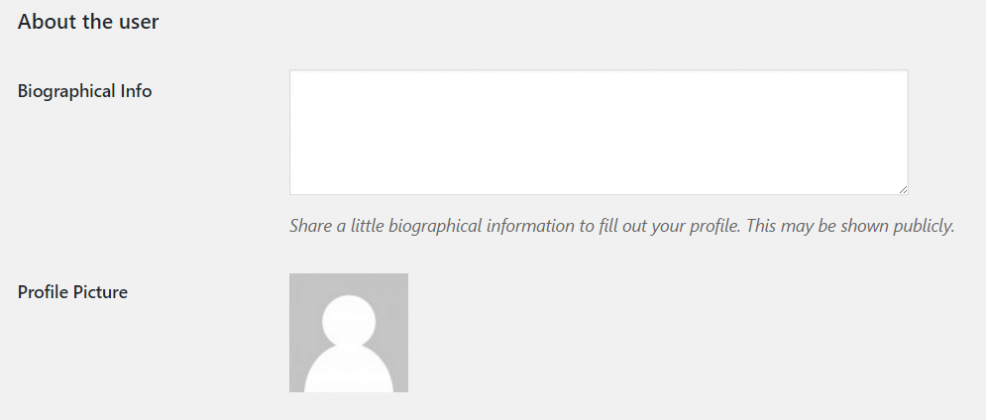
- About the user: When you choose to modify this field, you’ll see the below interface in which you can write a short introduction in the Biographical Information as well as upload a Profile Picture so that people can identify the user,
- Account management: In this field, you can create a new password for the user by clicking the Generate password button.
Remove a user account
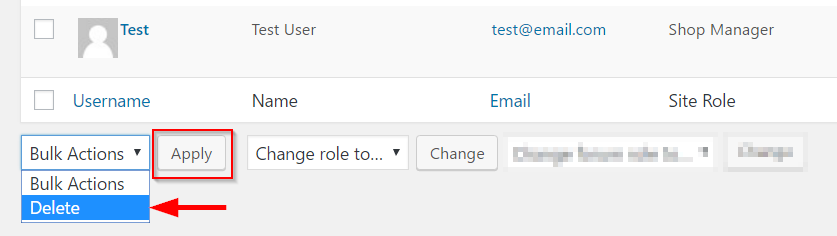
There are 2 ways to remove an existing account. First one is to go to the Users list > All Users. You can choose one or more accounts to be deleted by ticking in the checkbox next to the users’ profile picture.
In the Bulk Actions drop-down list, choose Delete option. Then click the Apply button the remove them from the list.
If you just want to remove 1 account, it may be quicker to choose the red Delete option right beside the Edit button when you point at the user.

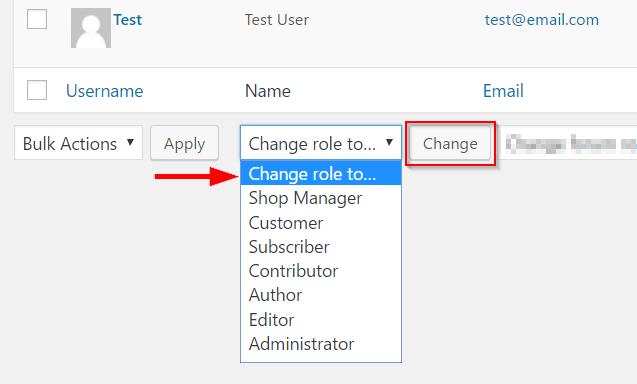
Convert into another user role
To change the user role for one or a group of users, again, you have to tick in the checkbox beside the users’ profile picture. Then, click the arrow in the Change role to… button to see the list of roles. Choose the preferable one and click the Change to the right to apply the changes.
Frequently asked questions about WooCommerce user account
Though Creating an Account in WooCommerce is a simple process, it is an important step to make a strong foundation for your business because it directly impacts the efficiency of your human resources management and the smooth running of your business.
Therefore, it’s worth minding the following questions to effectively add new members to your crew.
How can I create a strong password to enhance security?
When generating a password, you need to make sure that it is really strong ‘cause the stronger the password is, the greater your business’ security is. WooCommerce store owners often pay little attention to this step, resulting in serious security breaches in the future.
Regarding this issue, we’ll give some practical tips so that you can protect your business from security problems.

Some easy practices that you may need to follow
- Think of a password that contains different types of characters like uppercase and lowercase letters, numbers, symbols, special characters, etc.
- Apart from being easy to remember, a password should also be as long as possible. You can choose special things which are closely related to your private life (Make sure few people know it), such as your pet’s name, your first day of work, etc.
- One thing you should keep in mind is that you shouldn’t reuse the password that you already use for other accounts.
- You must notice the WooCommerce password strength indicator to see if your password is strong enough.
Use external password auto-generator
If you want to create a password effortlessly, just go for a password management system. However, because it is generated automatically, the password may be too complex and difficult to remember.
Anyway, if you still want to choose this option, we recommend Google Chrome’s password suggestions . In case you need a space to store all your passwords, 1Password can take the responsibility.
What does each user role actually do?
WooCommerce has its default user roles for you to choose when creating a new account. Each of them has its own capabilities. Let’s see what these user roles really are!

-
Subscriber: Subscribers can only read and comment about all the posts of your sites along with the management of their own account.
-
Shop Manager: A user with a Shop Manager Role can get access to your site’s back end. This role allows users to have all the capabilities of a Customer. In addition, a Shop Manager is entitled to making changes in the WooCommerce settings and products as well as checking WooCommerce reports.
-
Customer: This role is automatically allocated to everyone who registers in your store. Being a Customer, one can only manage their account. They can read, leave comments on your blogs and view orders.
-
Contributor: A Contributor can only write and edit posts on your site, not publish them. Therefore, this role may be most suitable for freelancers or interns whose posts still need to be corrected by the Editor.
-
Author: When it comes to content, we cannot miss an Author. Users with an Author role can be both content creators and publishers. Their capabilities are limited with their own outputs, not with others’ posts.
-
Editor: When you entitle a user this role, they can make changes to other users’ posts. Therefore, Editors are tightly attached to all aspects of content ranging from blog posts to comments.
-
Administrator: An administrator takes full control over the site, including removing user’s pages and posts, generating and removing any users, etc. Because Administrator is a powerful role, you should make careful decisions on which user to be in this role.
How can I better manage user roles?
When you already have profound insight into each of the WooCommerce default roles, it would be more vital to apply them properly. To answer this question, we’ll give you some practical tips that will help you in the process and form the best team for your business.

- Minimize the number of privileged role users: The privileged roles that you may need to put an eye on when assigning roles to users are Shop Manager, Author, Editor and Administrator. You should make sure that all users are entitled to sufficient permissions and relevant capabilities of each role. In particular, you should keep the number of administrators as few as possible to centralize the power over the site.
Make periodical checks over the roles: This helps you ensure that users are assigned relevant tasks. When users leave or join the company, you may need to remove or create new WooCommerce accounts. The most vulnerable to a changing role should be the Contributor.
- Customize new roles to best fit each user: If you cannot find a role to fit with users as well as your business’ targets, it’d be a good idea to create custom user roles manually or with external plugins. This problem will be more specifically solved in the next question.
What if I can’t find a suitable user role with WooCommerce default ones?
When you can’t find a suitable user role with WooCommerce default ones, just create the one you like! There are two methods to generate a custom user role as listed below.
Manually modify user roles
There are 5 easy-to-use functions for you to manage the users’ roles and capabilities:
- add_role(): For adding a custom role.
- remove_role(): For deleting a custom role.
- add_cap(): For adding a custom capability to a role.
- remove_cap(): For deleting a custom capability of a role.
- get_role(): For getting details of a role and its capabilities.
For example, we’ll create a custom role named Comment Moderator, which allows users to have read access on your site, moderate comments, and edit not only their posts but also others’. Below is the code:
add_action('init', 'wps_add_roles');
function wps_add_roles() {
    add_role(
        'comment_moderator',
        __('Comment Moderator'),
        array(
            'read' => true,
            'edit_posts' => true,
            'edit_other_posts' => true,
            'edit_published_posts' => true,
            'moderate_comments' => true
        )
    );
}
Customize user roles with a plugin
The other way to customize user roles is to get yourself a plugin to help with this. We’ll give you 5 names of WooCommerce roles and capabilities management plugins that you may find useful for this process.
- User Role Editor
- PublishPress Capabilities
- Roles and Permissions for WooCommerce
- Advanced Access Manager
- WPFront User Role Editor
Final thoughts
Forming an effective team with the proper contribution of each member must be the critical factor to the success of your business. While Creating an Account in WooCommerce is such a simple process, it requires careful decisions to make the best use of your organizational structure.


