
How to Check & Update the PHP Version for WooCommerce

Are you fond of updating your WooCommerce PHP version but feel unsure of how to do it? There is no need for you to be good at PHP. However, you must be sure of using the most updated version. This is of great significance as you would prevent these updated versions from being hacked by hackers exploiting your outdated ones to hack into your sites.
Fortunately, you are now able to avoid this, along with preventing any great damage such as malicious ads or visitors being redirected to some harmful sites. You could avoid all these unexpected things from happening only by checking, then updating your WooCommerce PHP version. Now, go with us on this instruction to learn how to check & update the PHP version for WooCommerce.
Why should we check and update the PHP version for WooCommerce?
You are highly recommended to know why you should check as well as update the PHP version for your WooCommerce store. By understanding that, you could appreciate its importance. Now, spend some moments to read about the benefits brought about by this kind of activity.
-
Increase the performance & speed: Once PHP is improved, the new version comes with new features and upgrades. Therefore, you could notice a load speed and performance enhancement for your site.
-
Provide high security: Updating PHP means removing the vulnerability, thereby making your site more secure.
-
Improve SEO: Specific PHP updates result in a faster loading site, thus retaining visitors better.
-
Offer compatibility: When updating the PHP versions, the themes, as well as plugins, will also apply the most updated versions. So, they would be perfectly compatible with your WooCommerce site.
How to check the PHP version for WooCommerce?
To update your PHP version for WooCommerce, you must check which version you are currently using. That is why it is crucial to check your PHP version before updating it. In reviewing this, we offer you four easy methods you could apply. Please read all of them and find the one that suits you most.
1. Use cPanel
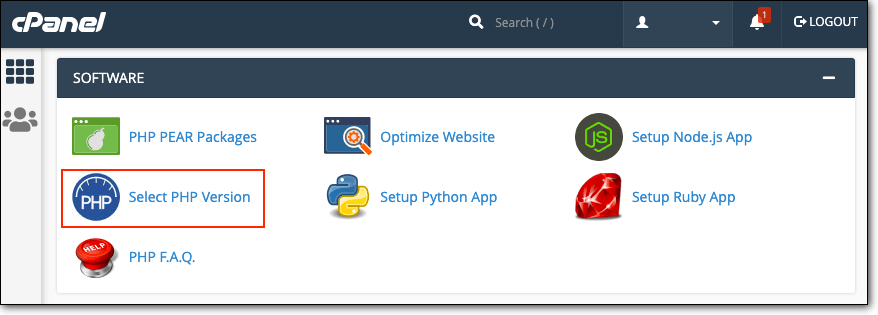
One of the most popular methods is to use cPanel for checking. First and foremost, you are required to access your account of the web hosting, then head to the section “cPanel”. Here, you would encounter a section with the name “Software”. Navigate under a bit and click on “Select PHP version”.
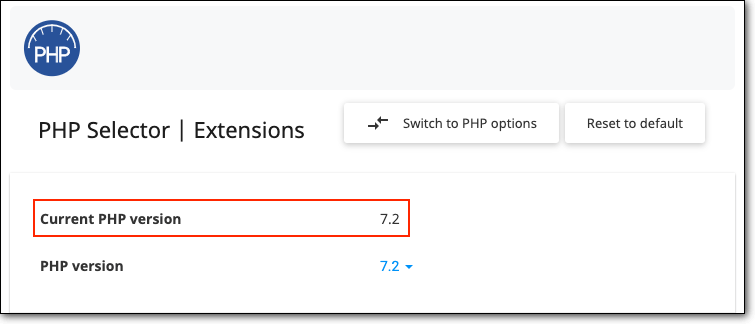
When you are here, you will be taken to another page where you can see what version of PHP is currently running. Let’s see the below screen, and you can know how the PHP version is displayed when it comes to using cPanel. However, there are several cases, this option will be unavailable in the hosting account. Hence, you should install a plugin to check your WooCommerce PHP version.
2. Use the Display PHP Version
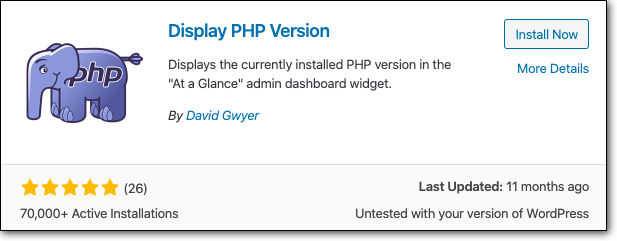
Besides using cPanel and WooCommerce dashboard, using a plugin to check the PHP version is also a great way. In this case, the plugin Display PHP Version, as its name indicates, would assist you in checking it quickly and simply.
Step 1: Install and activate the plugin
To enable the Display PHP Version plugin for use, you are supposed to get it installed and activated first. It is easy to do so because this plugin is available in your WordPress repository. Hit on the “Install Now” and then activate it for use.
Step 2: Check the PHP version
When you are done installing and activating the plugin, you proceed to the next step by visiting your WordPress dashboard. Then, head to the section “Home” and hit on “At a glance”. This is the place you could check what PHP version that your site is running.

As you can see from the above screen, the available PHP version is 5.6. Nevertheless, this is an outdated version. And this means you need to update your PHP as soon as possible to make sure your WooCommerce website will run and operate smoothly.
But there is one vital thing to keep in mind: the latest PHP version is probably 7.4 and you have missed such other versions as 7.3, 7.2, 7.1, and 7.0 (version 6 had been abandoned). Do not update directly to 7.4 from 5.6 because it causes your website to malfunction or break.
3. Apply the PHP file
The last method in this piece of article is to apply the PHP file. This way is a bit challenging as it requires you to have some technical knowledge. But, if you are keen on it, go ahead. If you do not have the right to access cPanel and you cannot locate the information of your PHP version, using this PHP file will be a not-to-be-missed option.
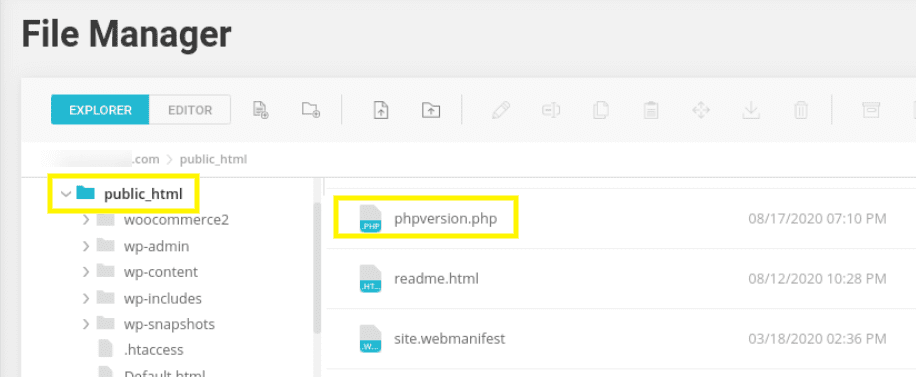
The first step in this method is to open the text editor in your computer, Notepad, to be more particular. Next, you will create one new file called phpversion.php. Inside the file, you need to place the below code:
<?php phpinfo(); ?>
Then, you will save that file and connect to the server that uses “File Transfer Protocol”, or FTP for short. Then, you go to your WordPress’s root directory for uploading your phpversion.php file.
When the file has been uploaded, you could be able to see it in the web browser. To view the file, enter phpversion.php/yourwebsitedoemian.com to your address bar. Do not forget to replace the text “yourwebsitedomian.com” with the actual URL of your site). This activity then opens another window where the PHP version’s detailed information is displayed.
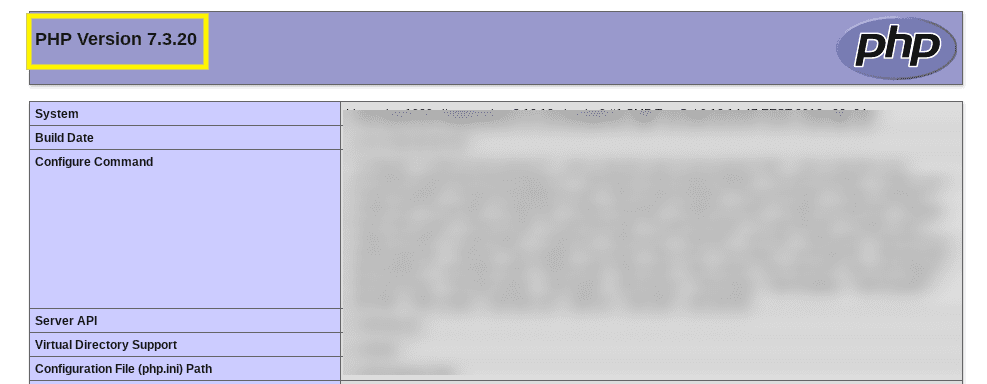
When you are done, you should delete the file phpversion.php from the directory to ensure security.
4. Check from your WooCommerce dashboard
Another super simple way to check what version of PHP WooCommerce is to use at the moment.
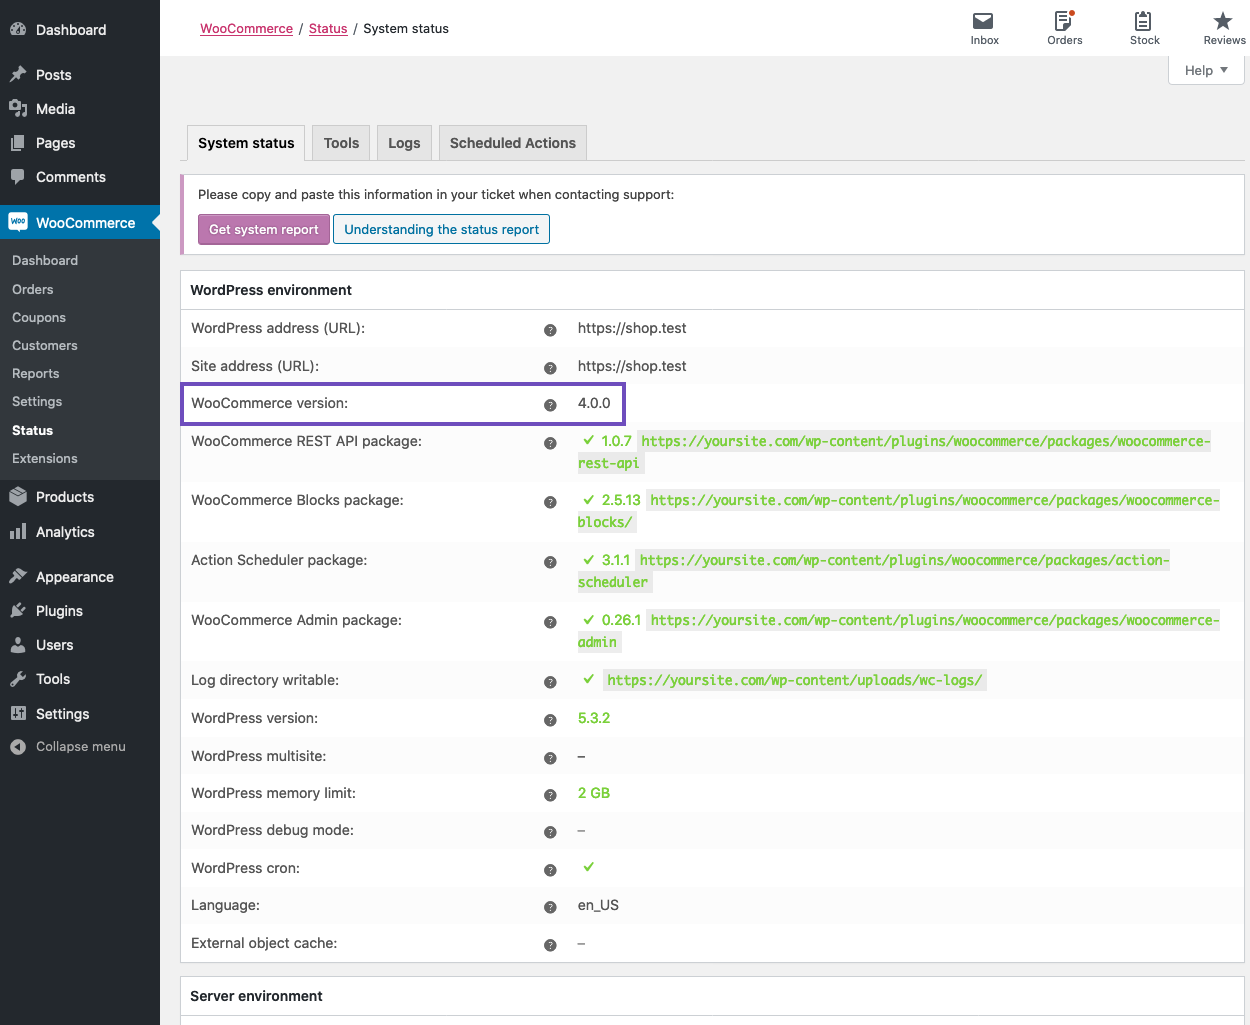
To determine it, you will navigate to your WooCommerce dashboard. Within the dashboard, you see the section “Status”. Click on it to explore the section “WordPress environment”. Scroll under a bit, you will notice the “WooCommerce version”. And that is the PHP version that your site is running.
How to update the PHP version for WooCommerce?
In the above part, you know how to check your PHP version. So, when you have already checked what version of the PHP your site is currently using, proceed to update it. We come up with the below instruction to help you perform this activity.
Step 1: Pre-updating
The first step is to have careful preparation before updating. This prevents your site from causing any malfunction or break. Now, take a look at some useful measurements to take in advance of any update process.
- Create a backup
Taking a complete backup is of great importance to help your site be restored in case anything can go wrong. Therefore, you should create a backup of the entire website. In this case, you could choose to use BlogVault for backing up the data.
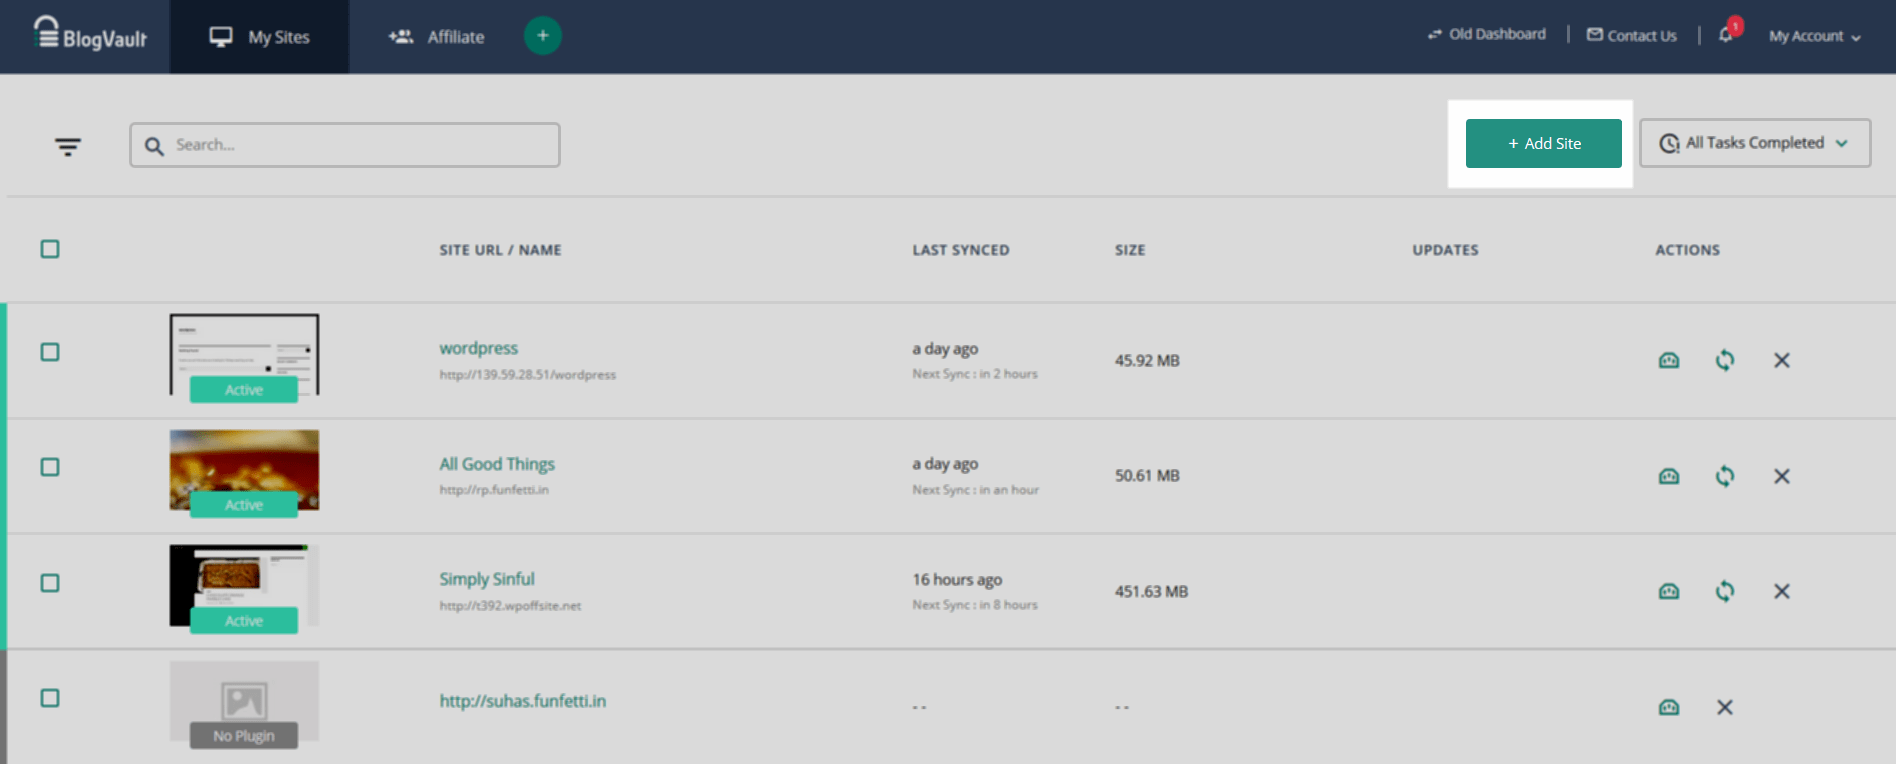
Before creating a backup, it is a must to add your WooCommerce to the dashboard of BlogVault. In doing so, you can choose the hit on the button “+” or “Add Site” (choose one between them).
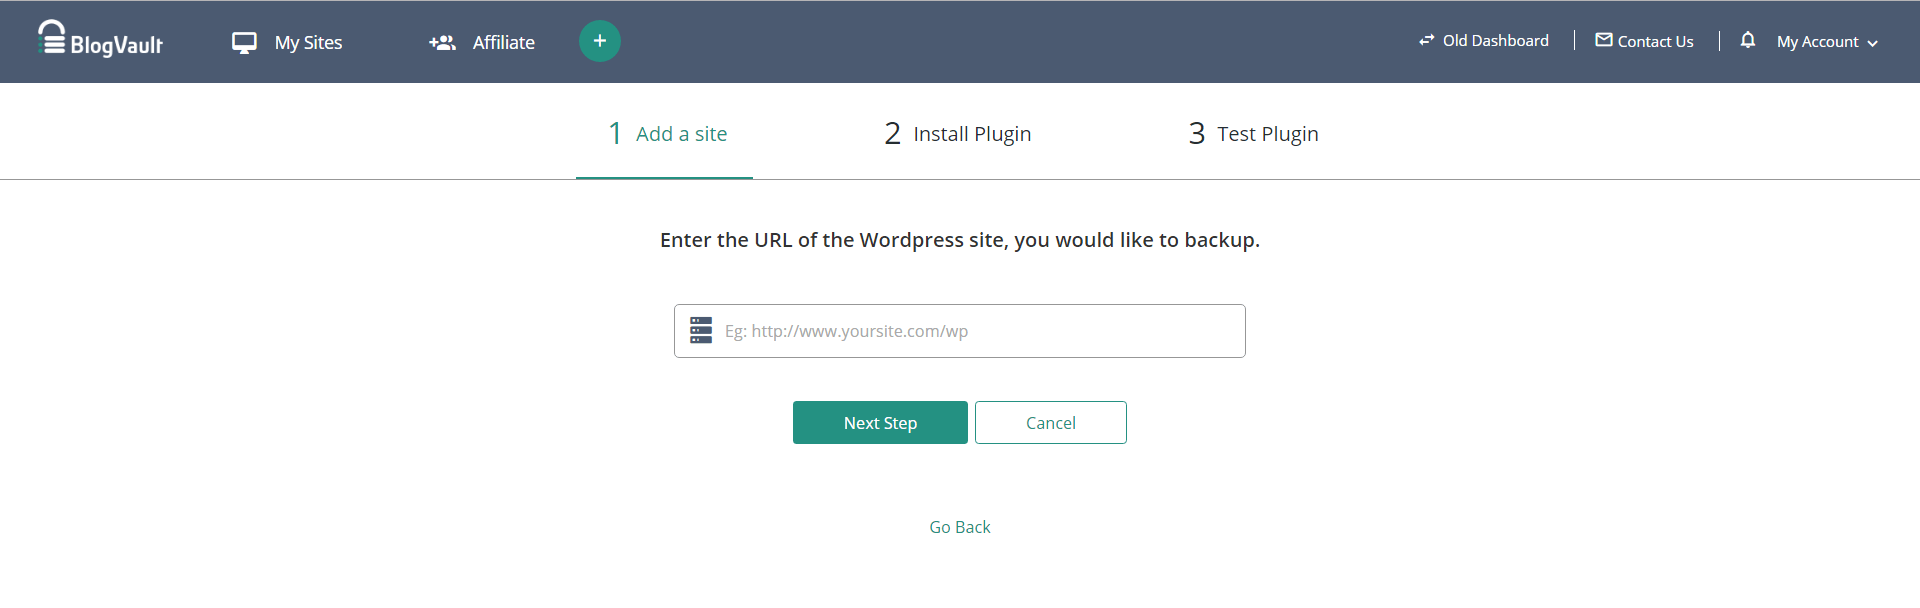
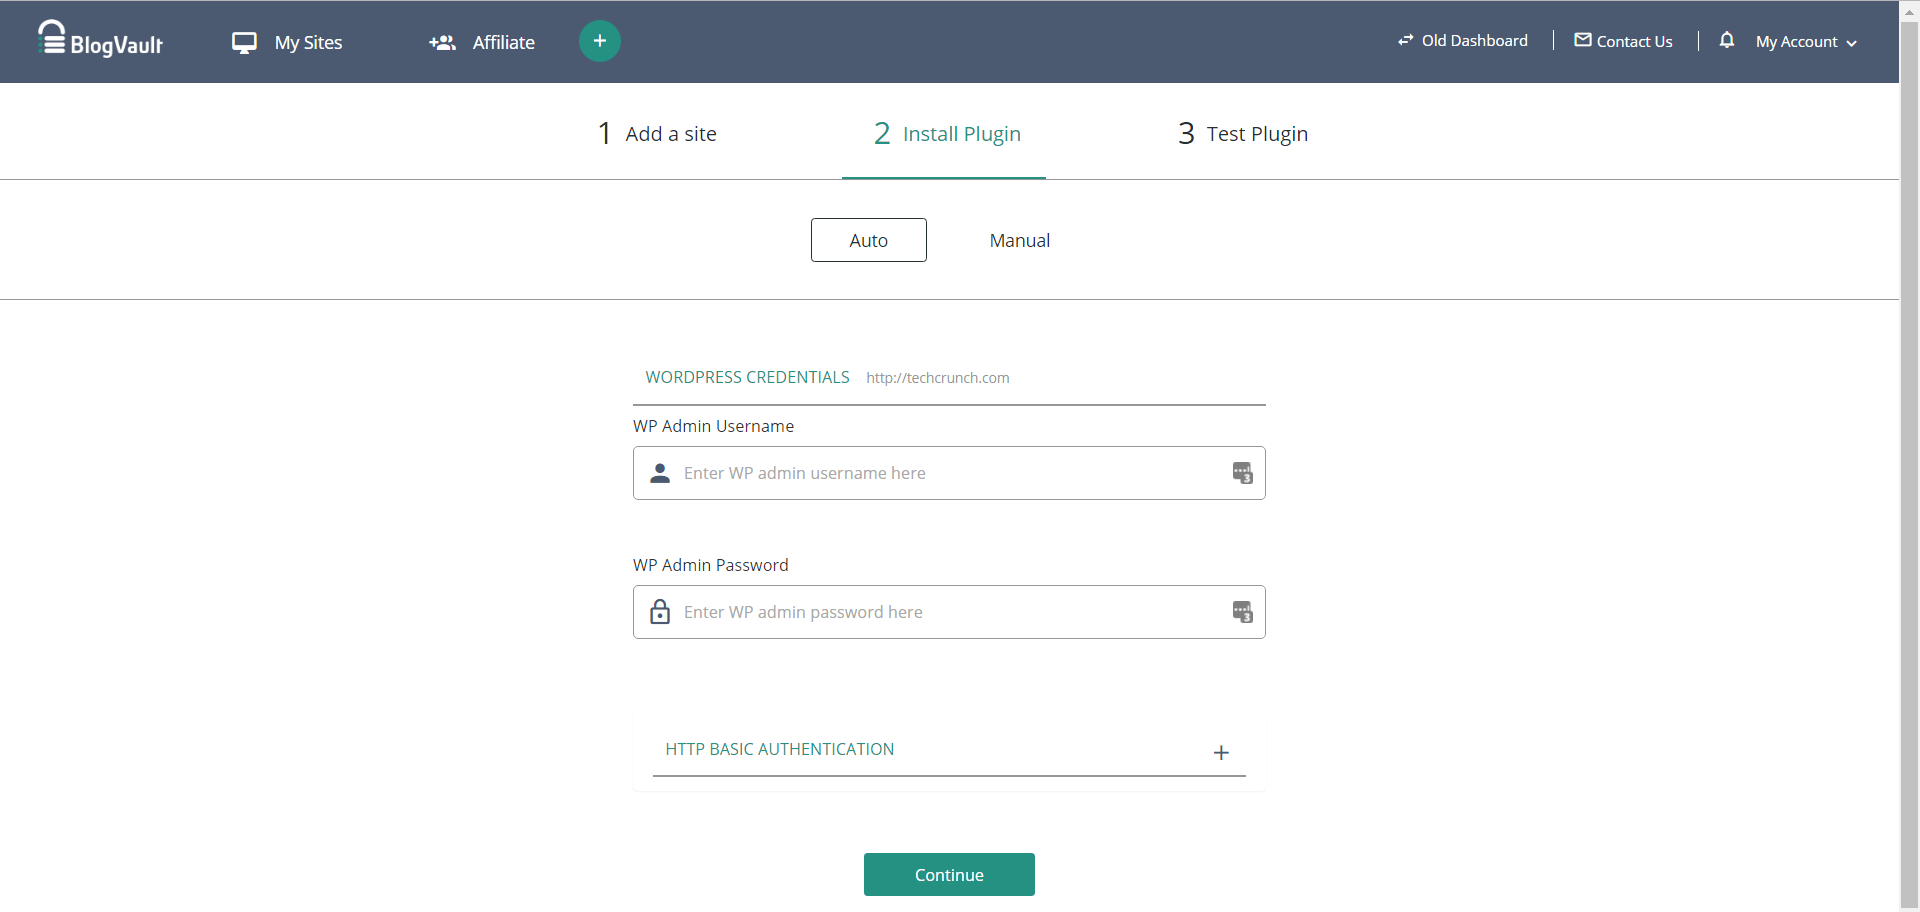
Then, you can view a form like below. You will be asked to enter the site’s URL that you are about to add when you are here. Keep ahead by clicking on the button “Next Step”.
You then notice the option “Auto” where you are allowed to install the plugin automatically. Here, you need to install and activate BlogVault to implement the backup. In case, you are fond of installing it manually, you can download this plugin from its website and proceed to get it installed like other plugins. You could select to have an auto-installation by signing up for BlogVault before adding your WooCommerce site to its dashboard. Next, there will be a page appearing, and that is when you could install this plugin automatically. This page will require you to fill in the website credentials. Your task is to enter your username as well as password.
After you finish adding your site to BlogVault, it will create a backup automatically and let you restore your website with only one single click.
- Update your WooCommerce
The next thing to do before updating your PHP version is to update your WooCommerce. This will make sure that no undesirable problems would happen during the updating procedure of PHP. The reason is that there exist some incompatibility problems if you run the outdated version. Hence, you should always update your WooCommerce to the latest version.
In updating your WooCommerce, you need to update its database to make them match your installed and updated plugin version. The database aims at organizing, storing, and including your products, pages, posts, and orders. Moreover, you should also understand more about the updates.
In case you have updated or upgraded a new WooCommerce version, the notice named “WooCommerce Database Updates” will be displayed.
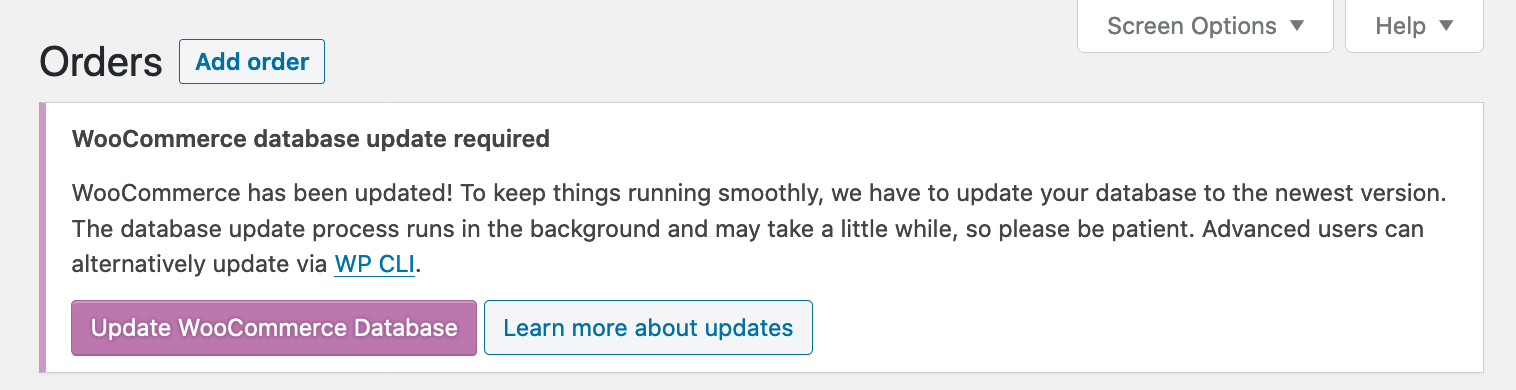
Make sure that you create a WooCommerce backup in the right place, then hit on the button “Update WooCommerce Database”. After that, the process of updating will begin. Your next job is to choose “View Progress”. And you will be taken to the section “Scheduled Actions”. This will display some pending actions of this update.
When everything is okay, by viewing the admin page for the upcoming time, you can be able to notice the complete banner of your dismissable update.

- Check your themes and plugins
After updating your WooCommerce, it is time to check your themes and plugins. In doing so, you should visit your WordPress dashboard to check your list of installed themes and plugins. In case there are some pending updates, you should prioritize updating them first. This is because several plugins might not be compatible with your new PHP version.
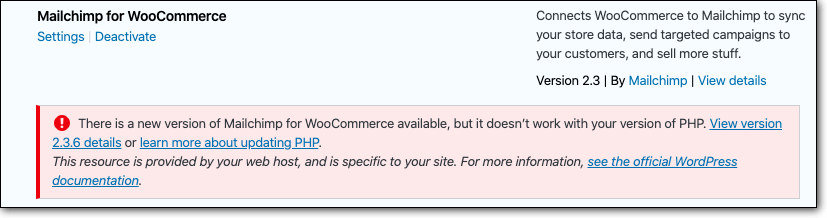
So, you are advised to disable the incompatible plugin before you update to the latest PHP version.
Step 2: Update WooCommerce PHP version
When the pre-updating process is done, you will move on to update your WooCommerce PHP version. Depending on what hosting provider that you are using, you will access different ways of updating your PHP version for WooCommerce. See below some of the most popular hostings and check how to update it easily.
- Update PHP version in your Bluehost
To update your PHP version in your Bluehost, you will log into your hosting account and hit on the tab “Advanced” that lies on your left column.
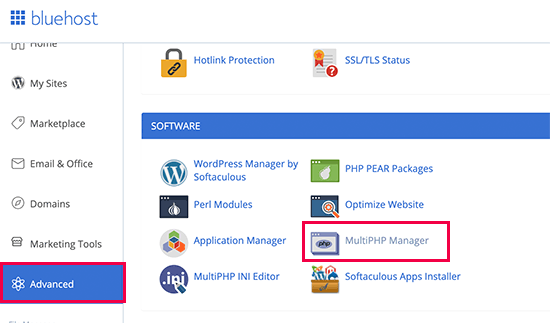
This action will take you to an advanced page where you can manage and control the hosting account. When you are here, proceed to select the icon “MultiPHP Manager”. On its next page, you will choose your site before picking up the latest version of PHP.
When you are done, take no hesitation to hit on the button “Apply” to save what you have made changes.
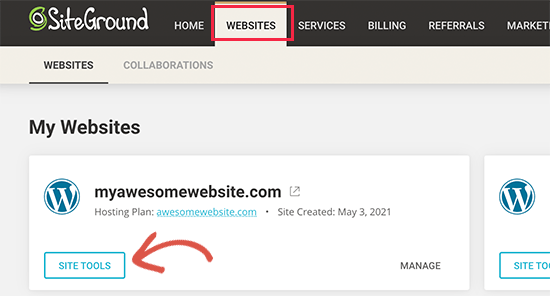
- Update PHP version in your SiteGround
When it comes to SiteGround, you also need to penetrate your hosting account and go to its dashboard. The next step involves switching to the page “Websites” as well as clicking on the button “Site Tools”. Check out the below screen to have a deeper understanding in case you are using SiteGround.
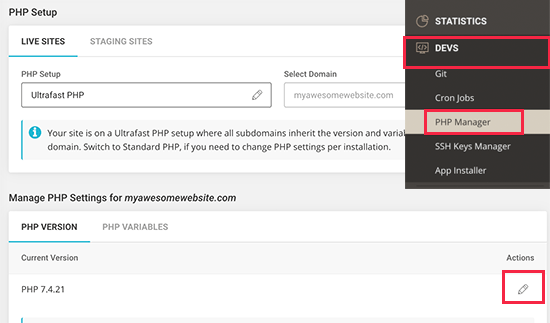
Another must-do step is to approach the section “DEVS”. Here, you will choose “PHP Manager” which is in your left column. In this situation, you can make up your mind to use Standard PHP or Ultrafast PHP. What is more, to update to the most updated PHP version, you need to hit on the icon “Edit”.
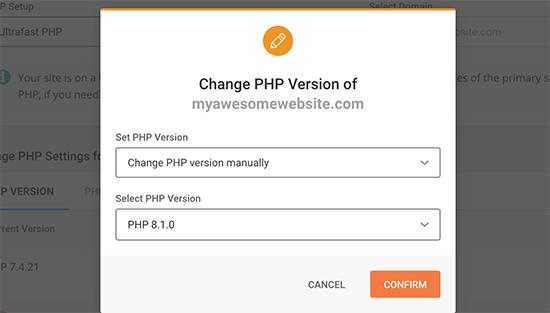
Then, you will be taken to a popup in which you have to update the version of your PHP manually under the option “Set Version PHP”. In this part, you will choose it from your dropdown menu. When you finish, remember to hit the button “Confirm” to apply your recent changes.
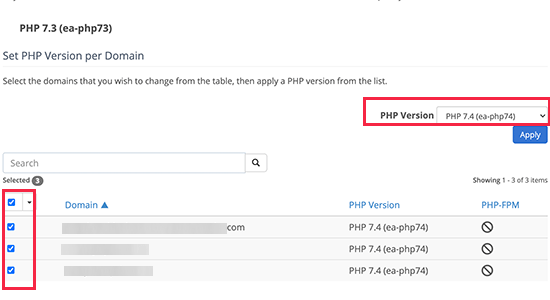
- Update PHP version in your HostGator
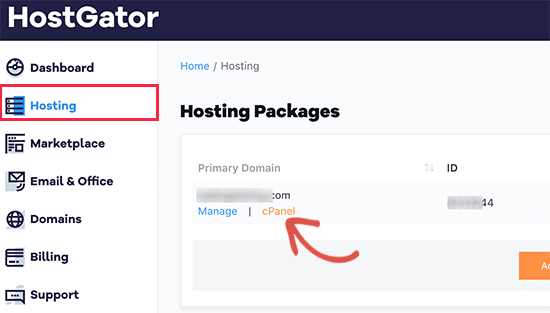
Using the hosting provider HostGator, you also have to log into your hosting account and penetrate the HostGator dashboard for updating the PHP version. When you are here, you must choose the link cPanel that is below the hosting account.
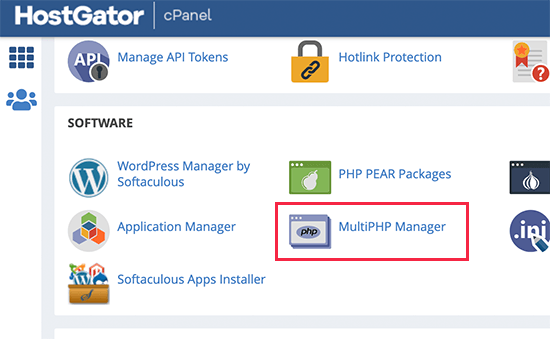
By doing that, it will issue the cPanel dashboard in which you can manage advanced settings of the hosting account. Furthermore, your task is also to navigate under to find the section “Software” and hit on the icon “MultiPHP Manager”. This is where you will make up your mind to update to the latest WooCommerce PHP version.
The next step is to pick up the domain name as well as choose the latest version for updating. Remember to select the button “Apply” so you will not miss recent changes.
- Update PHP version in your WP Engine
If you are using WP Engine, the process of updating the PHP version is also as easy as the previous hosting providers. It is even simpler as WP Engine is under the management of the WordPress hosting provider. Nevertheless, you could choose to upgrade or downgrade the version of PHP for your site manually.
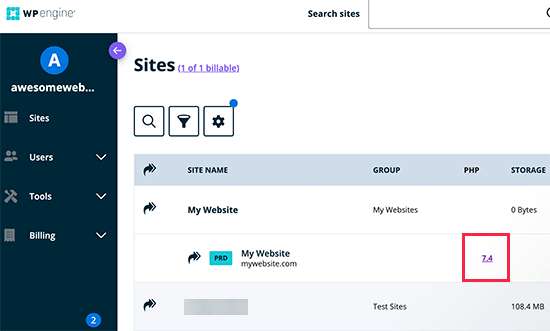
Like other hosting companies, you just need to log into the dashboard of WP Engine to select the PHP version that you want to use.
After that, you will be taken to a popup where you can upgrade or downgrade your PHP version.
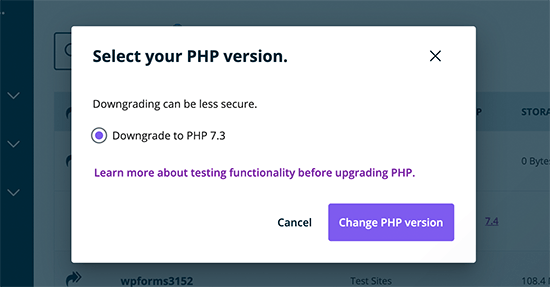
When you are done, hit the button “Change Version PHP” to save what you have changed.
- Other hosting environments
If you are using other hosting environments, do not worry because the process of updating the WooCommerce PHP version bears a resemblance to the above-mentioned hosting providers. It is undeniable that most hosting companies use the same hosting dashboards as well as similar customizations.
So, what you need to do is simply find the icon MultiPHP Manager in your cPanel dashboard. If you could not find it, an alternative is to contact your hosting provider to ask them to modify the PHP version for your site.
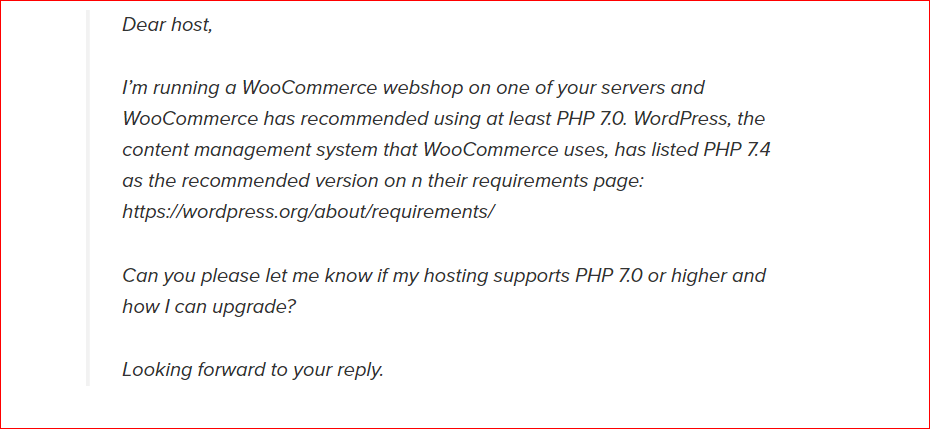
- Contact the host
In several cases, you are not capable of updating the version of WooCommerce PHP. So, do not hesitate to contact the host to help you deal with this unwanted problem. After that, your host will assist you in updating it without exerting any impact on your site or charging no fee at all. Check out the screen below to consult a letter you could send to the hosting company.
Step 3: Re-check your site
Re-checking your site after any update is a not-to-be-missed thing. So, one of the recommended activities to do is to visit your site and notice if any issues are available. This will ensure that everything on your site will work as expected.
Then, you could log into your site to re-check whether it is running on the latest WooCommerce and PHP version or not. More than that, it is also a good thing to check the compatibility among plugins, themes, and your site. Therefore, you can make your site run smoothly.
Conclusion
There is no denying that checking and updating the PHP version for WooCommerce is a frequent and must-do activity to make sure that nothing is happening to your site. That is why you should take time to check and keep the information related to your WooCommerce PHP version in control. Only by doing so, could you be able to improve the speed and performance of your site. Along with that, you could avoid being hacked due to outdated versions. Share the words with those who are concerned and keep following us for more useful tips and tricks.


