
How to Change Number of Products Per Row in WooCommerce

WooCommerce has grown in popularity because it provides shop owners with a wide range of customization choices for their online stores. Set your shop’s look in virtually every area to make it more user-friendly, which may boost sales by increasing product exposure, streamlining the buying process, and increasing your conversion rate. However, sometimes their default settings may not entirely adapt to the size of your online store. One of them is the number of products per row.
That’s why the main topic for our article today would be revolving around How to change the WooCommerce number of products per row. Besides, its advantages will also be discussed. Keep reading to find out more!
Benefits of changing the number of products per row in your WooCommerce store
There is a default page layout in WooCommerce that shows 3 to 4 items per row. An add-to-cart button is usually located next to a big picture of the product as well as the product name, price, and quantity. However, this isn’t the best option for every online business. It may work for tiny shops selling a few dozen items. If you are managing a large number of products, changing the WooCommerce rows will be more beneficial.
Here are the reasons why we declared that statement:
- Customers may have trouble finding what they’re searching for if your WooCommerce store is set up using the default page layout. Customers will lose interest in your goods if they have to click through a zillion pages of them to get what they want.
- Having an excessive number of items, pictures and widgets not displaying correctly may damage your website’s usability. Adding additional product information and altering the page’s overall look may improve the user experience and increase sales.
- By altering the product picture size and other elements of the appearance of your WooCommerce store page, it is no surprise that your customers would be significantly impressed.
How to change WooCommerce number of products per row?
You can easily alter the WooCommerce number of products per row, but we’ll focus on the simplest ones in the article today. Just in case one of the methods does not turn out as what you have expected, quickly move on to the next one to reach our final goal. No more beating around the bush, let’s get everything started!
Method 1: Customizing the theme file
Using a simple code snippet in your theme’s functions.php file will work if your theme does not display the default WooCommerce option or offers a custom setting for altering the number of items. The first thing we need to do is to locate the file when navigating to Appearance > Theme Editor and there you will find the functions.php file on the right sidebar:
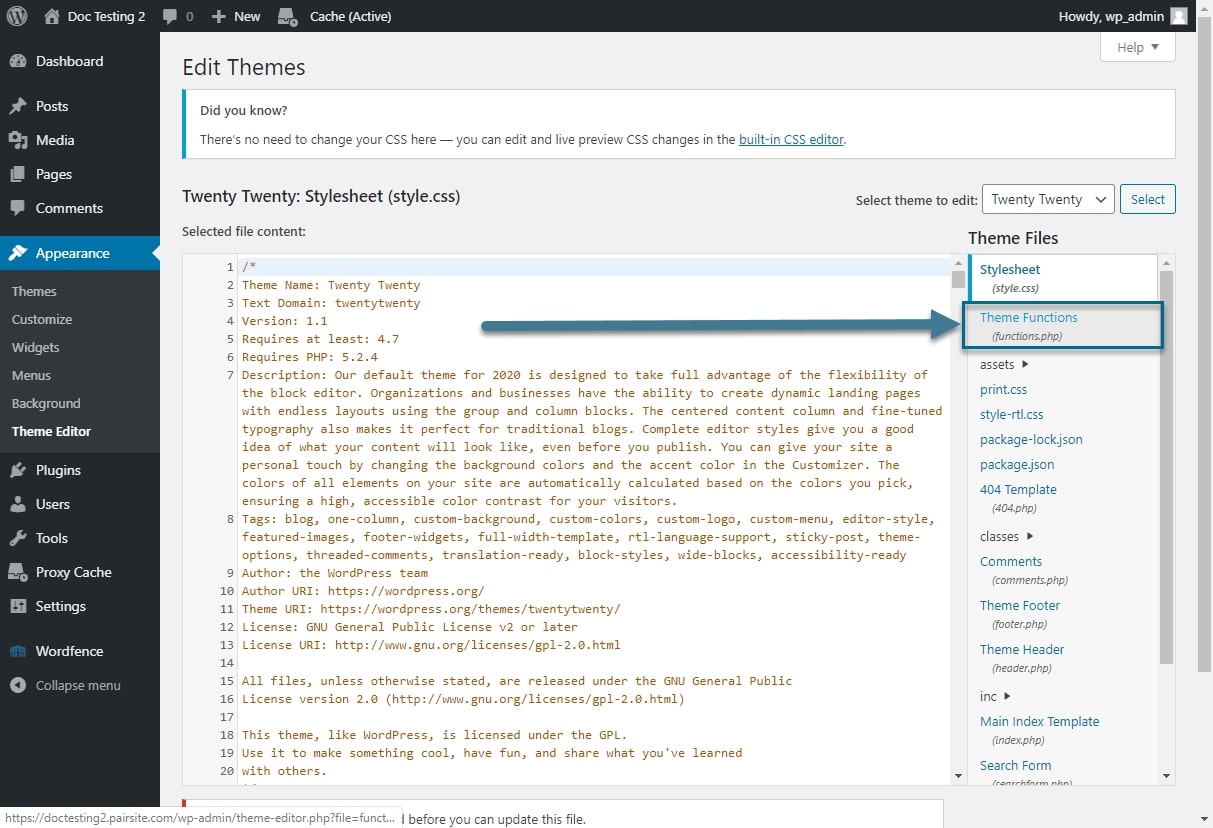
Scroll down to the end and paste in the following snippet. Change the number 12 into one of your choosing.
// Change the Number of WooCommerce Products Displayed Per Page
add_filter( 'loop_shop_per_page', 'lw_loop_shop_per_page', 30 );

function lw_loop_shop_per_page( $products ) {
 $products = 12;
 return $products;
}
You can also use this code to change the WooCommerce number of products per row on your website:
// Change the Number of WooCommerce Products Displayed Per Page
add_filter( 'loop_shop_per_page', create_function( '$products', 'return 12;' ), 30 );
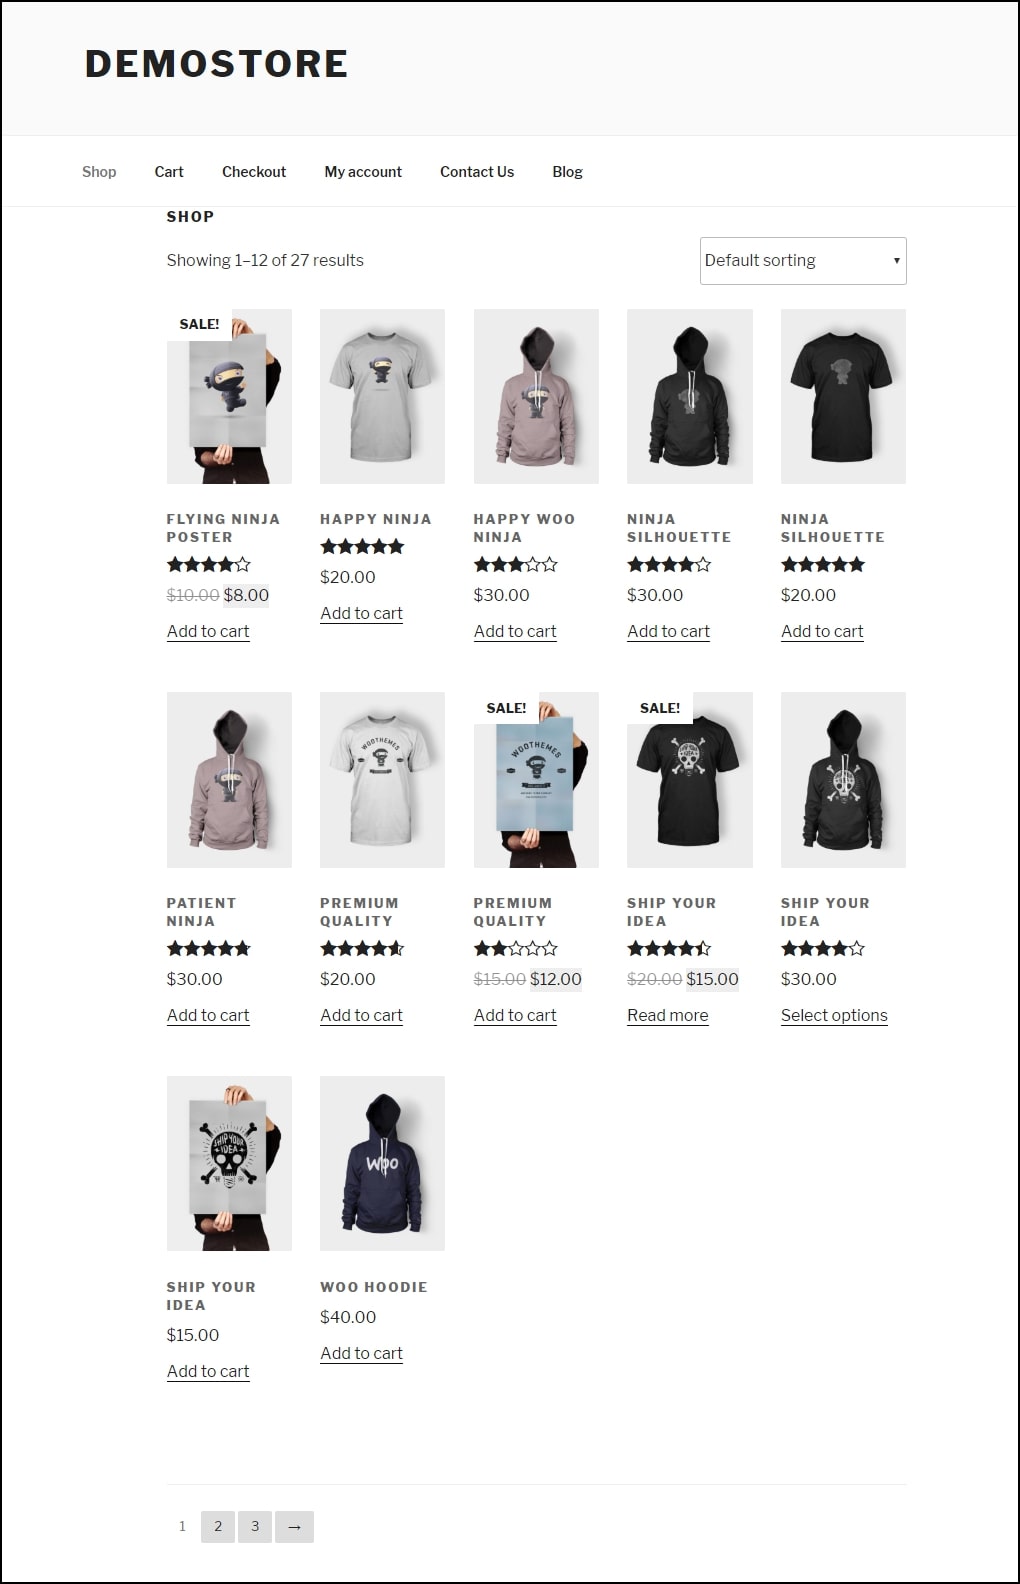
Here’s an example: using the code snippets described in the previous sections to alter the number of items per row from 12 to 5, we obtain a store page similar to the one shown in the screenshot below:
Method 2: Changing the WooCommerce settings
There are many easy methods for modifying the WooCommerce number of items per page, but before you begin, make sure that your theme supports the adjustment. If this doesn’t work, try out our next method.
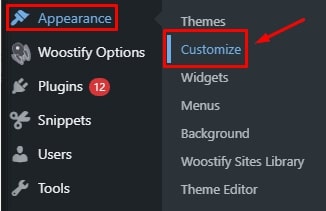
First of all, from your WooCommerce Dashboard, go to Appearance > Customize page located on the left-hand side of the screen:
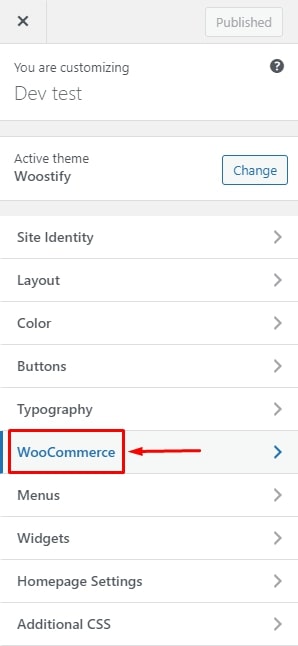
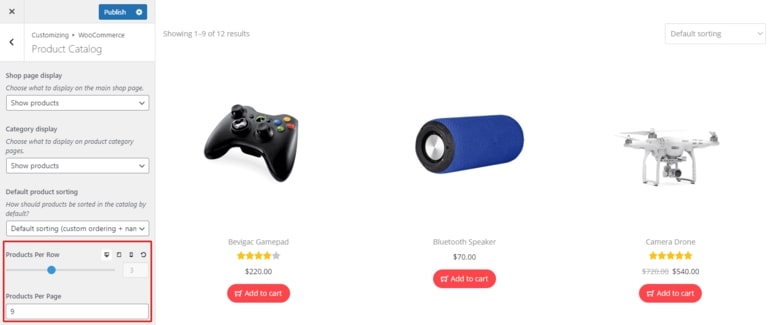
A menu of customization choices will appear in the left-hand sidebar. The next step is to go to the WooCommerce settings and then to the “Product Catalog” in the list:
Scroll down to the left sidebar to find the “Products per row” option and choose how many products are shown in each row. With the “Rows per page” option, you can also define how many rows will be shown on each page. These options allow you to choose how many items appear on each page:
Method 3: Adding shortcode
WooCommerce shortcodes are code shortcuts that make it easier to include dynamic information in posts, pages, and sidebar widgets. You can use them as a tool to change the WooCommerce number of products per page. The steps are easy for this one.
To begin, make changes to the post or page where the shortcode will be placed. To add a shortcode block, click on the add block button after that:
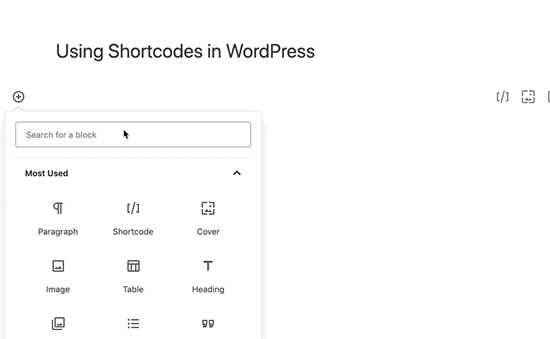
To use the shortcode block, just add it to your page and then paste the below shortcode, which divides your page into 5 columns of 12 items for each:
[recent_products per_page="12" columns="5"]
Method 4: Installing a plugin
If the above strategies somehow still do not fulfill your requirements towards customizing the WooCommerce number of products per row, then a plugin will definitely help. For this one, we will be installing an extension called “Woostify” where their WooBuilder Elementor addon will make a big difference.
Starting with downloading the file in this link and upload it into your WooCommerce by entering the Plugins > Add New and “Choose File” button.
Continue to click on “Install Now” and “Activate” to complete the installation. Once it has finished, you can easily view the Woostify Options from your Dashboard. A list of the theme’s features will appear next. To enable WooBuilder, locate and click on the “Active” switch next to the WooBuilder option:

Then choose the “Settings” option:

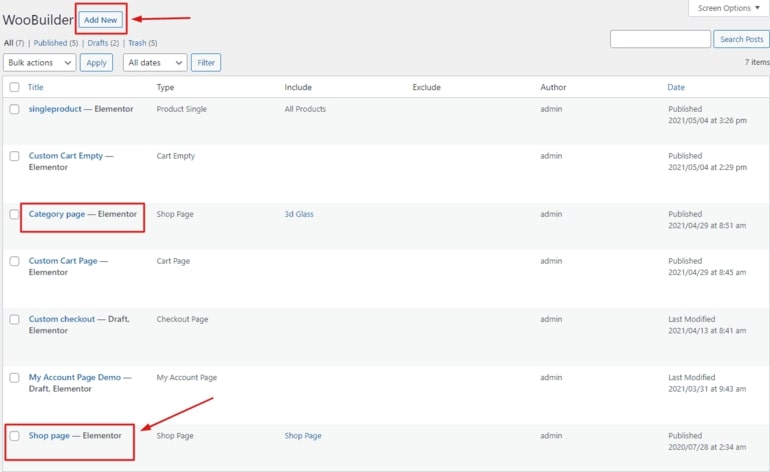
Shop pages and category pages are both options for displaying your goods. By clicking on the “Add New” button, you may create a new shop/category page or make modifications to the existing store pages:
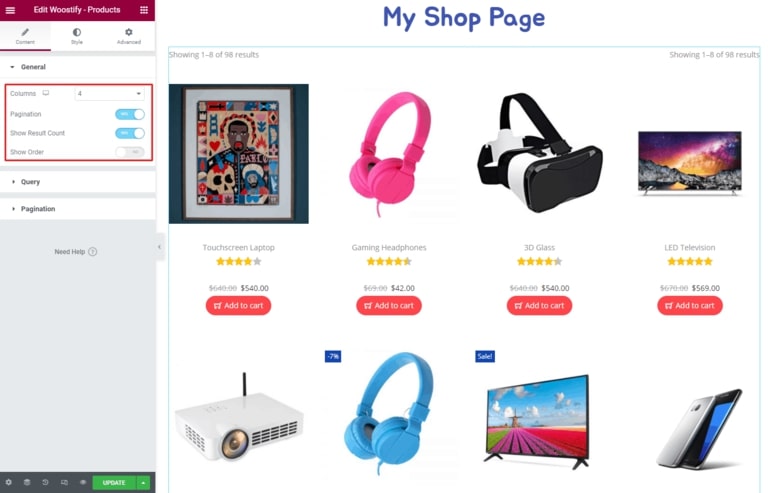
The Woostify-Products widget is used to show the products on the store page. Feel free to adjust the number of products per row and page by changing the settings in the widget:
Don’t forget to “Save” your changes before leaving the site!
Conclusion
Making changes to the number of items per page in your WooCommerce store has many advantages. Your store layout may become more attractive; your goods may become more visible; your customers’ shopping experience may be improved; and the buying procedure may be optimized depending on what you offer.
We hope that our article today has answered your questions related to the matter and helped you better understand How to change WooCommerce number of products per row. In the meanwhile, if you’ve come across any additional workarounds, please let us know about them in the comments.


