
How to Change the WooCommerce Checkout Page Template

Like any other page in your WooCommerce, the checkout page also plays a key role in the success of your online business. Hence, store owners should pay more attention to it to make it attractive and appealing in the eye of customers. This is to say, you need to work with its template to ensure that it looks good and well-structured. The template of your WooCommerce checkout page will contribute a lot to draw the attention of not only long-time customers but also new ones.
Now, let’s get started to work on this immediately. In case you have not known how to change the WooCommerce checkout page template follow us on this instruction. We will guide you step by step to get an awesome checkout page template.
Why should we change the WooCommerce checkout page template?
Do you know how important the WooCommerce checkout page template is? Yes, without it, your page looks unattractive and badly structured, thereby making customers frustrated. Thus, let’s have a look at some reasons why we should change the template of your checkout page within WooCommerce.
-
Boost your store’s conversion rate: A good template of the checkout page will optimize your store’s checkout process. Thus, they can speed up the process completion.
-
Encourage customers to buy more products: As the process of checkout is now easier, customers can select alternatives without having to return to the single page of the product.
-
Provide a safe checkout experience: You should be sure that customers’ billing and contact information should be kept safe. Hence, make your checkout page template trustworthy to create trust from them.
How to change the WooCommerce checkout page template
In changing the WooCommerce checkout page template, there exist two methods that you could use. So, you should go through each of them to see which one will fit your needs and requirements. Let’s thrive in creating trust, optimize your checkout page as well as boost revenue.
1. Change the template manually
If you are comfortable changing the template of your checkout page manually, just go ahead with editing the code. In this situation, your task is to go with your child theme, then you could make some modifications to your functions.php file.
Step 1: Change custom fields in the template of your checkout page
Changing the template means you need to change some custom fields. To achieve this, use the below code and enter it into your functions.php file:
// checkbox field
add_action( 'woocommerce_after_order_notes', 'quadlayers_subscribe_checkout' );

function quadlayers_subscribe_checkout( $checkout ) {
woocommerce_form_field( 'subscriber', array(
'type' => 'checkbox',
//'required' => true,
'class' => array('custom-field form-row-wide'),
'label' => ' Subscribe to our newsletter.'
), $checkout->get_value( 'subscriber' ) );
}
The above code aims at adding a checkbox field to your WooCommerce checkout page. Then, users can be able to subscribe to the newsletter of your site and store. Likewise, you could also add any different field types. For example, when you add input of a custom field, then you could ask your consumers where they will hear about you.
Step 2: Save values of added custom fields to your database
Now, it is time to use those custom fields to edit your checkout page template and collect information about orders on WooCommerce. To complete this activity, your next job is to retrieve custom fields’ values. What is more, you are also required to save the custom fields’ values in your database as soon as your consumers finish the form as well as hit on the button “Place order”.
In this case, using the hook ‘woocommerce_checkout_update_order_meta’ is a good thing to do. Implement to copy the below code, then enter it to your functions.php file:
add_action( 'woocommerce_checkout_update_order_meta','quadlayers_save_function' );
function quadlayers_save_function( $order_id ){
if ( ! empty( $_POST['subscriber'] ) ) {
update_post_meta( $order_id, 'subscriber', sanitize_text_field( $_POST['subscriber'] ) );
}
if ( ! empty( $_POST['feed'] ) ) {
update_post_meta( $order_id, 'feed',sanitize_text_field( $_POST['feed'] ) );
}
}
Once you have completed adding the above script, you now could retrieve your saved data using the WP object global “$post”. In case you want to have the Metabase related to subscribers, do not hesitate to use the following code and add it to the orders list’s backend in your WooCommerce:
global $post;
$order = wc_get_order( $post->ID );
$c_meta = $order->get_meta('subscriber');
Step 3: Make required or mandatory fields
One of the most efficient ways to change the template of the WooCommerce checkout page is to make required or mandatory fields. This will allow customers to enter information in necessary fields for their transactions, thus boosting their shopping experience.
For example, you are selling virtual or downloadable products and you wish to create the field “Address” in the section “Billing”. It is super simple! What you need to do is just to copy the below code and paste it in your functions.php file:
add_filter( 'woocommerce_billing_fields', 'wc_address_field_optional');
function wc_address_field_optional( $fields ) {
$fields['billing']['billing_address_1']['required'] = false;
return $fields;
}
Step 4: Change the content of your checkout page
If you are not satisfied with your template regarding the content, you can change it quickly and easily. Just by using the checkout hooks, you can insert different types of content, from images and texts to titles. To be more specific, you could be able to use the following script for adding an image involving the trust badge right before the button “Place order” on your WooCommerce checkout page:
add_action('woocommerce_review_order_before_submit','quadlayers_checkout_content');
function quadlayers_checkout_content(){
echo '<img src="https://www.heresylab.com/wp-content/uploads/2019/01/paypal-1.png" />;
}
Besides changing the image, you can also change your header text by applying the below script:
add_action(woocommerce_checkout_before_customer_details
,'quadlayers_checkout_header');
function quadlayers_checkout_header(){
echo "<h2>This is a custom Header<h2>
";
}
Step 5: Change your checkout page’s background color
Your WooCommerce checkout page’s background color is so important that it keeps visitors stay on your site longer. If you have a not-good-looking background color, take no hesitation to change it as soon as possible. Or else, your consumers will not stay on your site.
In such cases, you should edit your CSS style. Only by executing several changes, can you optimize your checkout page. Now, let’s begin changing fonts, colors, borders, or margins. Then, you will witness amazing improvements in the conversion rate.
By applying a customized CSS style, you can edit your background color easily. The below code is helpful for your checkout page template:
add_action('wp_head','quadlayers_checkout_style');

function quadlayers_checkout_style(){
         if(is_checkout()==true){

                 echo '<style> body{background:#dfdfff!important;}<style>';
         }
}
2. Use a plugin
In the first method, you know how to change the WooCommerce checkout page template. Though it is a bit hard for you to get acquainted with coding, it is useful if you want to understand more about the operation of your checkout page template. In this part, we introduce another method that takes no effort to change the template. It is to use a plugin.
Step 1: Install and activate CartFlows
To use the CartFlows plugin to change your template at the checkout page, the first and foremost thing to do is to get this plugin installed as well as activated.
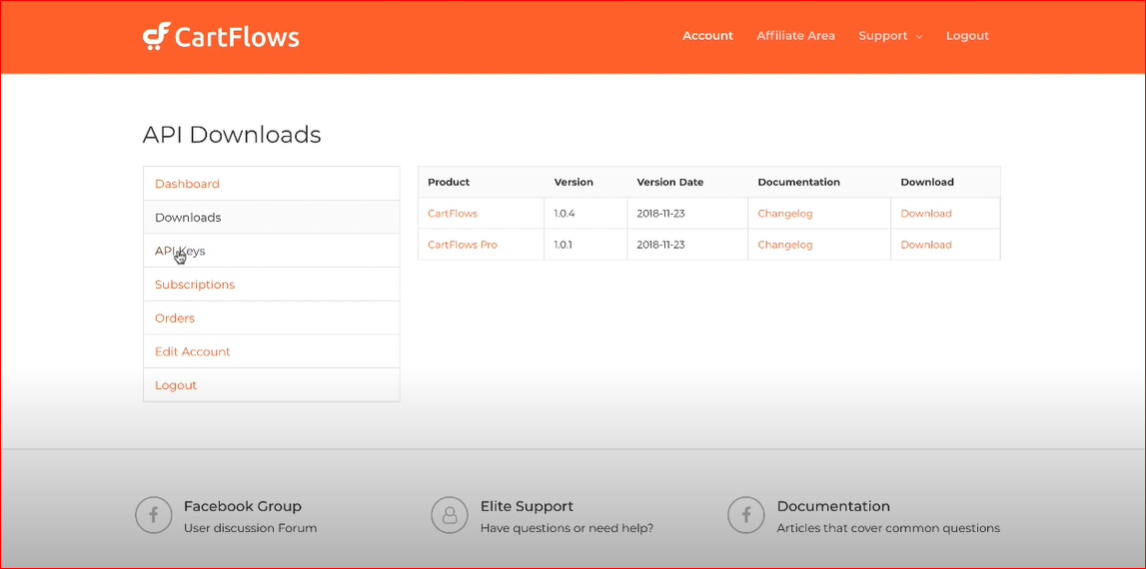
The first step is to log into your WordPress account and go to the dashboard. And you should also make sure that you have a CartFlows account. After logging into your CartFlows account, you will see several sections, including Dashboard, Downloads, API Keys, Subscriptions, Orders, Edit Account, and Logout.
When you are here, your task is to click on “Downloads”. After that, you could see two options for you. One is CartFlows and the other is the pro version. Click on the button “Download” to download the version that you will use.
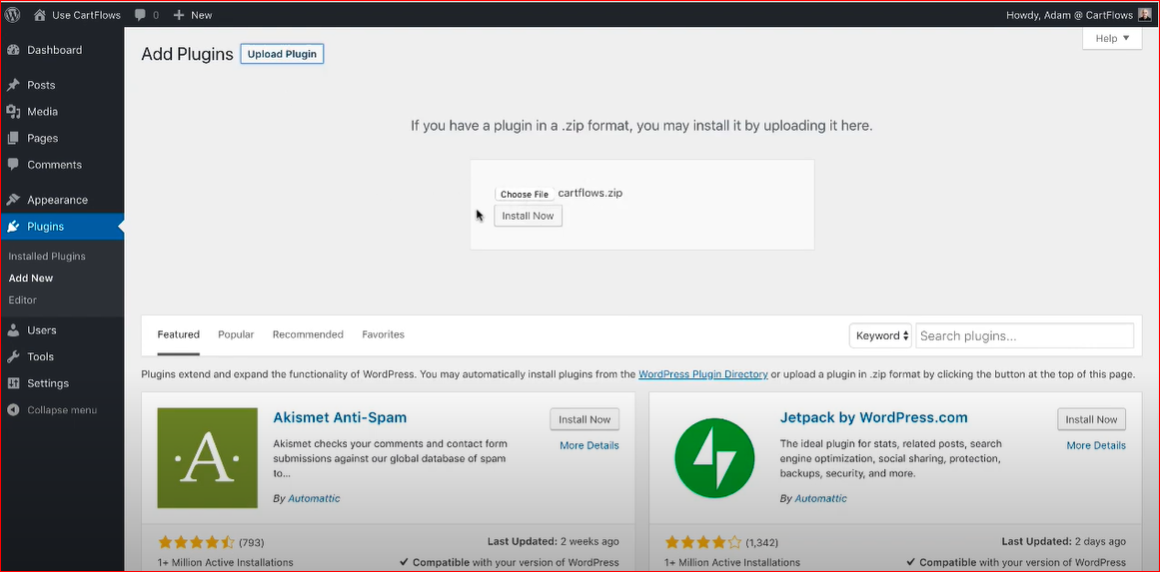
Now, go back to your WP dashboard, hit on the section “Plugins” and select “Add New”. Then you will notice a section named “Add Plugins”, along with the button “Upload Plugin”. Then, click on “Choose file” to upload the downloaded plugin. Next, you will see the button “Install Now”. Hit on it and it takes you a few moments for the plugin to be uploaded and installed.
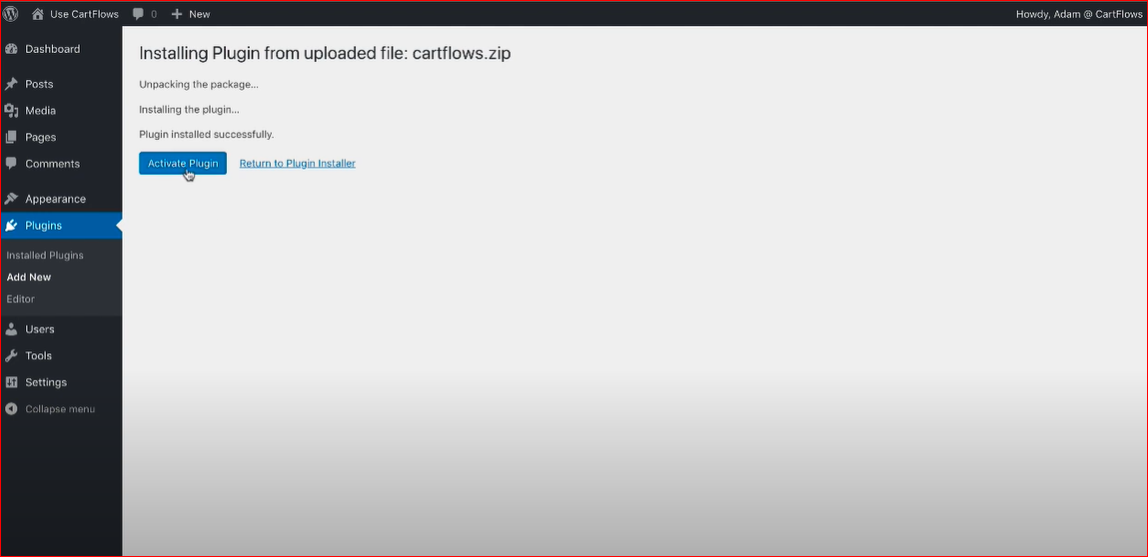
Move on to activate CartFlows by selecting the button “Activate Plugin”.
Step 2: Configure the settings of your checkout page
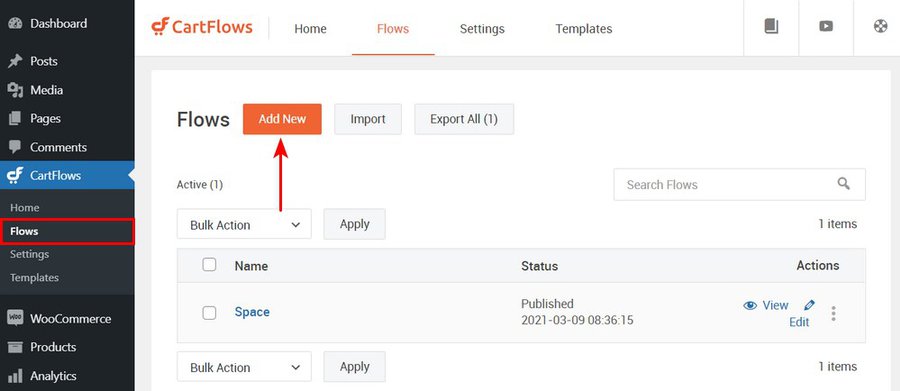
It is simple to use the template of your WooCommerce checkout page with the help of this plugin. Now, navigate to your WordPress dashboard to choose “CartFlows” before clicking on “Flows”. Once you are done, a flow template list will appear. Proceed to the next step by picking up the button “Add New”.
As you could notice below, there are tons of templates that you could select for your checkout page. You can choose to change or create a new template in this section. Or else, you are able to choose one ready-made template that you could make customization later.
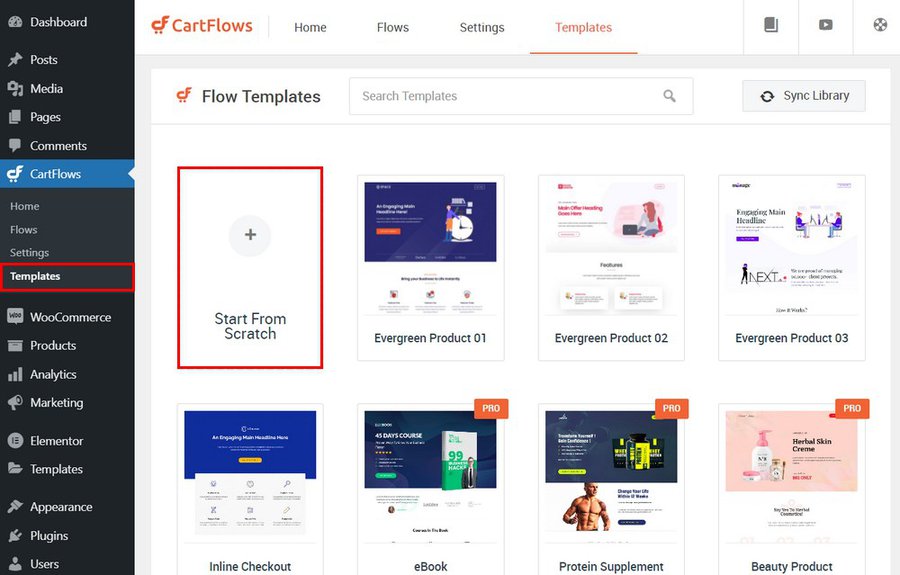
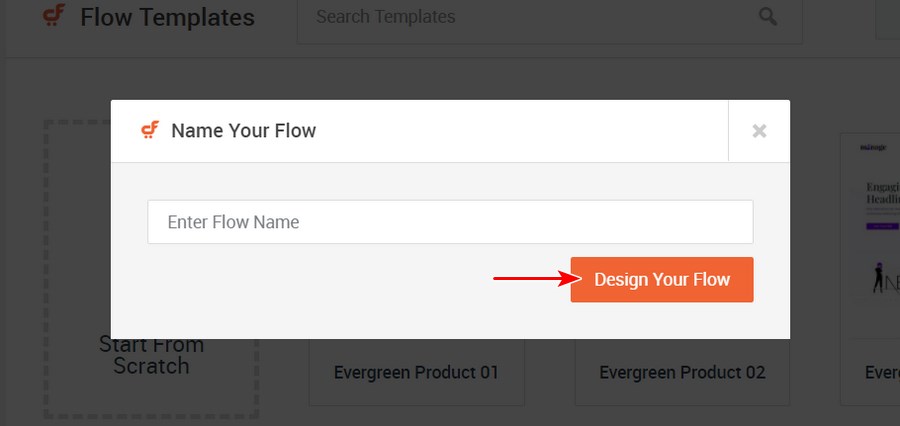
If you are fond of customizing yourself, hit on the section “Start from scratch”. This is where you will design your flow template. Keep going by entering the name for your flow, then select “Design Your Flow”.
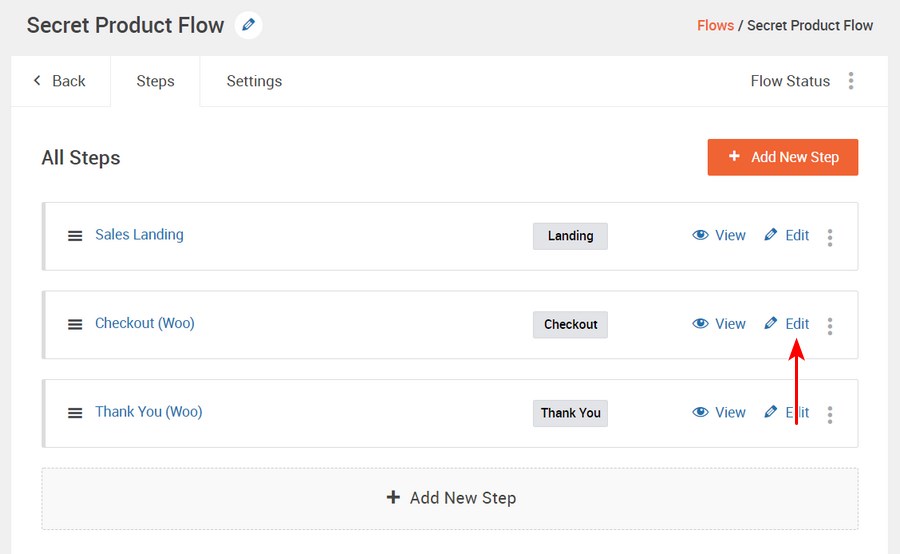
After that, you will be taken to another page where you will implement the customization of all the below steps. Hit on the section “Edit” next to the pencil icon.

There are some different things you will work on to change the template of your WooCommerce checkout page.
- Landing page
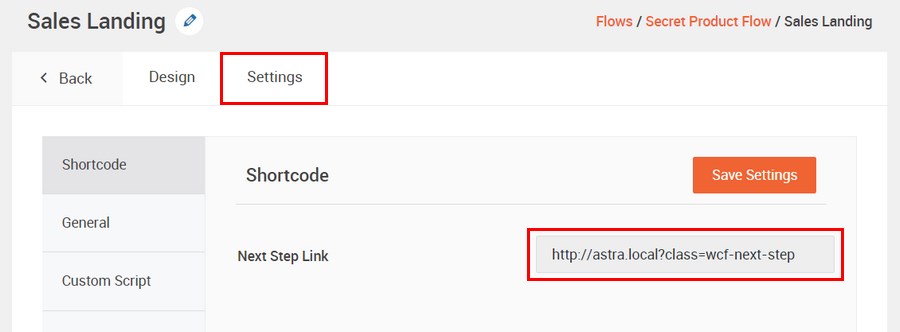
The landing page should be prioritized to make some changes. When you are here, your task is to hit on the tab “Settings”, then copy a link in the box of a section named “Next Step Link”. You could apply your favorite page builder for creating or changing this landing page. Next, you need to paste this link to proceed with further steps in this flow.
Once everything is ok, it is time to click on the section “Back to edit Flow”.
- Checkout page
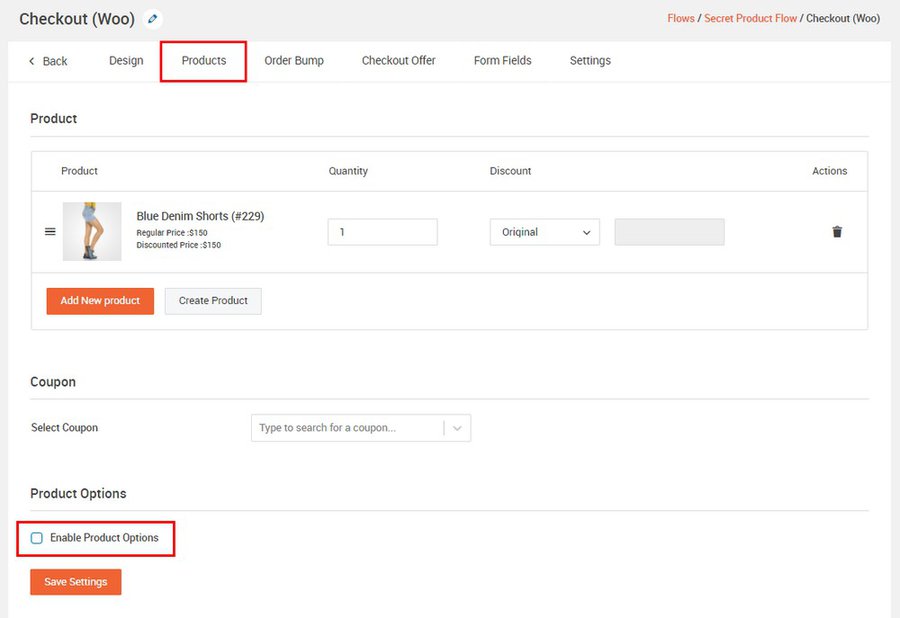
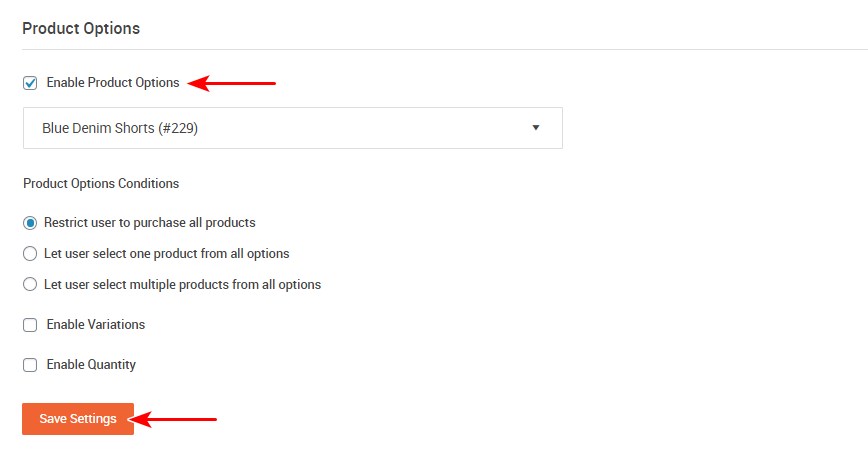
After finishing the modification of the landing page, you continue to edit your checkout page. As you might also get a notification that there is no product to be assigned. Keep ahead by clicking on “Edit”. Then, you will hit on the tab “Products” to create or add the products. In this part, you can choose to enable your product options by ticking on the box highlighted in red as below:
Moreover, it is also a good idea to enable your “Product option condition”. Once these sections are chosen, you will hit on the button “Save settings” to save what you have made changes.
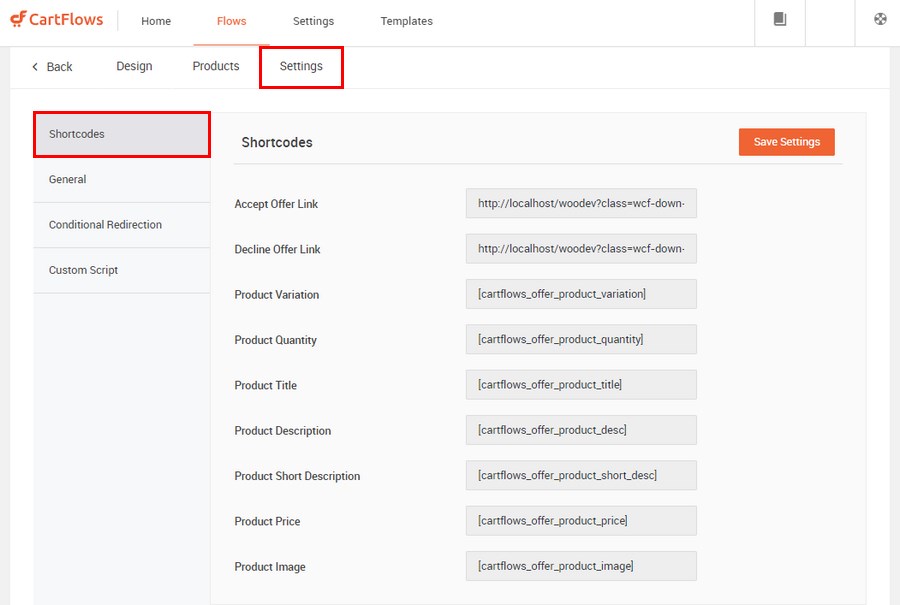
Another required step is to choose the tab “Settings” where you could copy your shortcode for creating the WooCommerce checkout page. This will be positioned in the section “Shortcodes”.
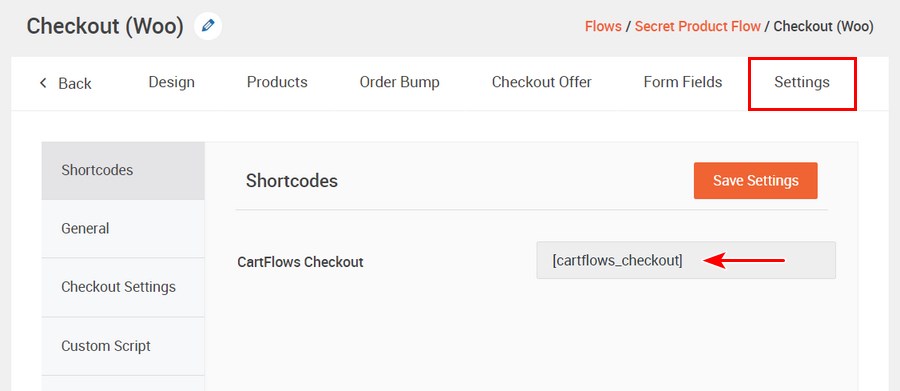
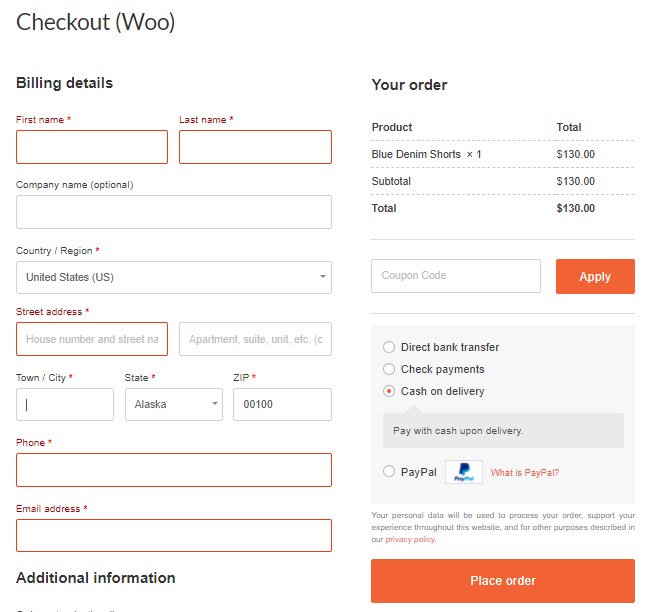
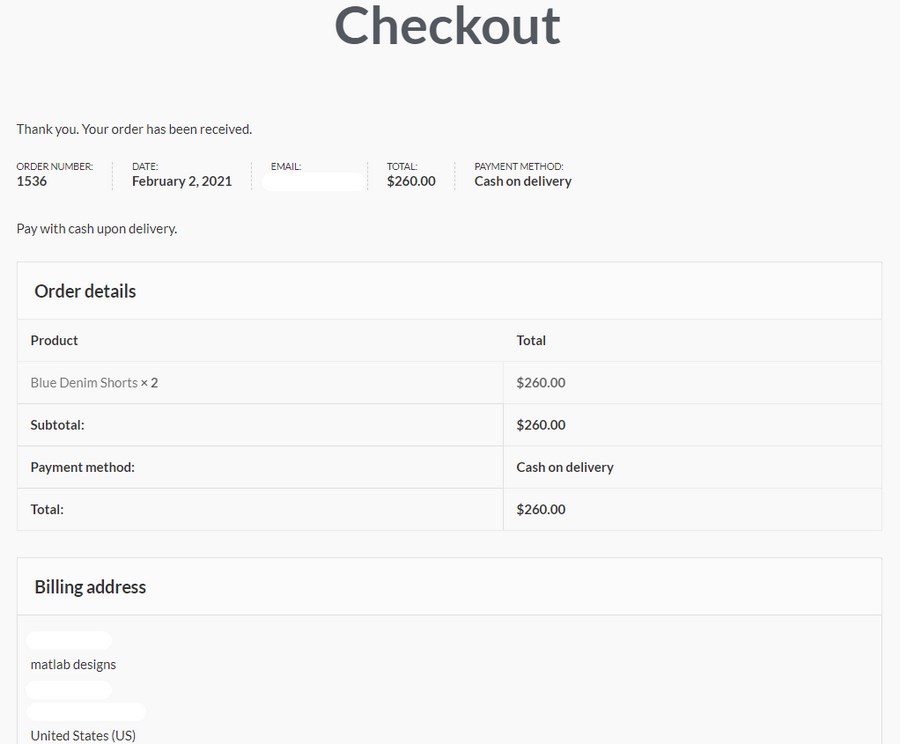
After copying the shortcode, you now enter it to your checkout page in WooCommerce that you are about to create. Now, when you have done the above steps, let’s see what you will achieve as below:
- Thank-you page
To make the template of your checkout page more alluring to customers, we recommend that you should edit the thank-you page as well. This step requires you to click on the section “Settings” before choosing another tab named “Shortcode”. It is time to copy this shortcode and enter that shortcode to the thank-you page.
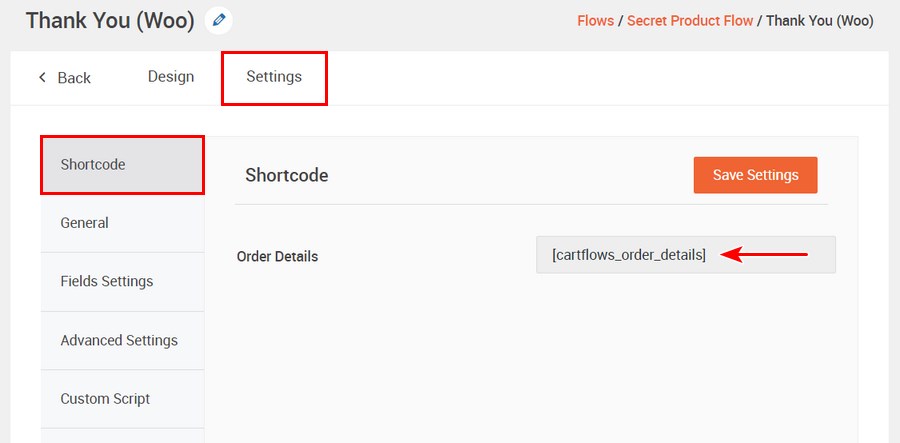
When you are done, you will see the outcome as below. The checkout page will come with a line for saying thank you to customers. There is no denying that this will be very effective in satisfying shoppers to your store.
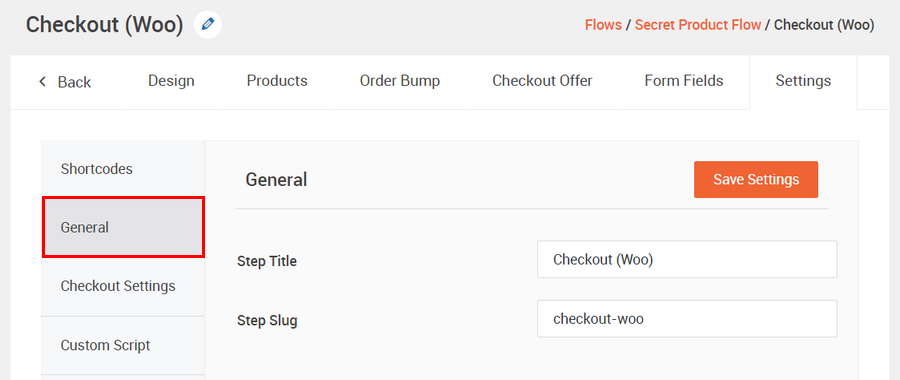
Proceed to the next step by hitting on the tab “General”. Here, you are going to change the slug as well as the title of your checkout page.
What is more, you could be able to enable several fields where you are keen on displaying on the page. Those fields are under the tab “Field Settings”.

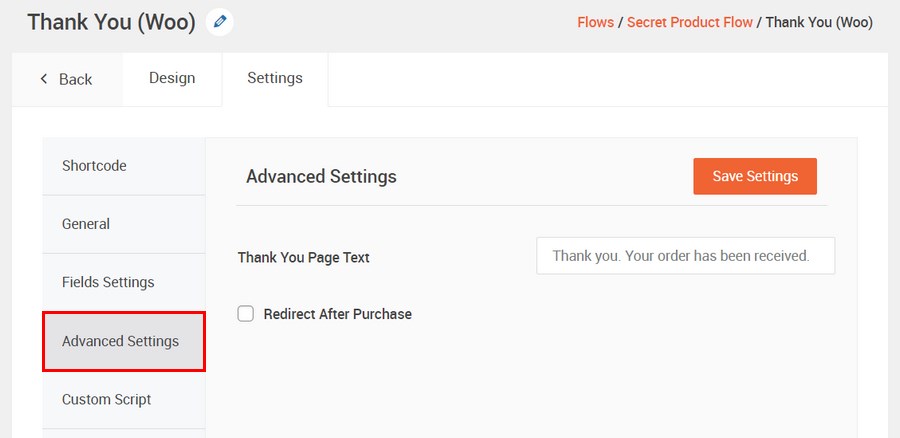
Through this part, we could realize that the plugin CartFlows works great with features to optimize your WooCommerce checkout, thereby boosting sales significantly. On another tab “Advanced Settings”, you could edit the text of the thank-you page as well as get redirects enabled after purchase. Do not forget to save all the above steps by hitting on the button “Save Settings”. Otherwise, they will disappear, and you need to restart.
Step 3: Make changes to the checkout page template
Now, there are some sections on your checkout page that you are not satisfied with. So, let’s make some changes. By using CartFlows, you will simplify the customizing process of the WooCommerce checkout page’s design. Begin changing its design by hitting on the pencil icon “Edit”.
Next, you will be taken to the settings section of your checkout page. Navigate under a bit and you can notice the section “Design settings”. Click on the option “Enable Design Setting” as well as the tab “Checkout Design”.
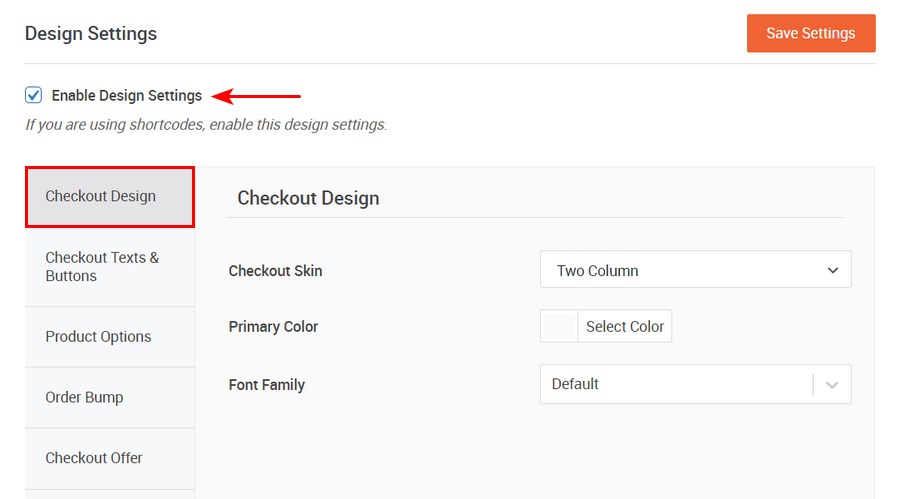
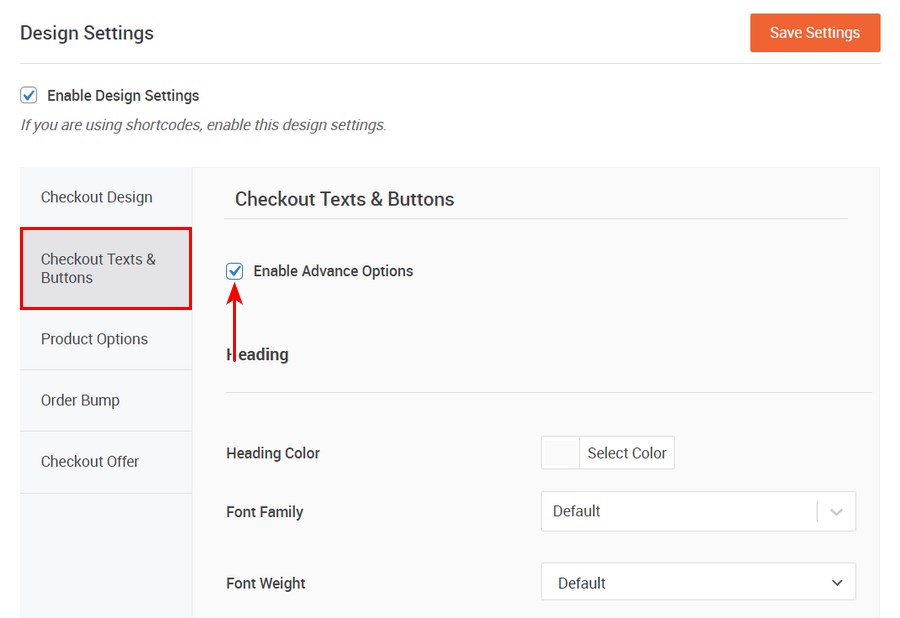
Scroll down to change the font family, primary color, coupled with checkout skin. Click on another tab “Checkout Texts and Buttons”. And you could also activate the “Advanced Options” to perform the customization of sections, buttons, input fields, and heading.
Additionally, changing the design of your checkout offer or order bump is easy to implement. After everything is done, remember to hit the button “Save Settings” to update your recent changes. Check out the below screen to see how you will receive it after changing the design of your checkout skin to a column.
In case you do not fancy the text of the button “Place Order” and find that it does not fit the general background of your WooCommerce checkout page template. Let’s change it. To do it, select the tab “Checkout Settings” and you can change the text of that button.
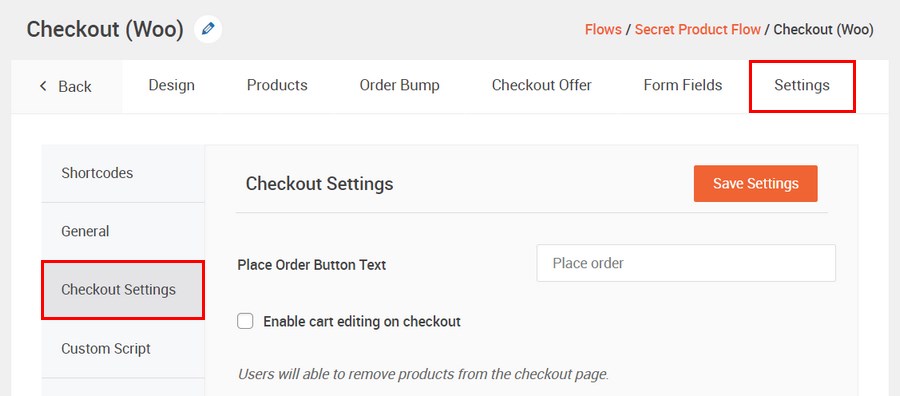
Once you are done, click “Saves” to update your changes.
Step 4: Create/ remove fields from the checkout pages
Sometimes, the template of your checkout page is not good-looking due to the insufficiency of some fields or the redundancy of other fields. This is when you should take action to create or remove such fields. Now, your job is to navigate to the section settings and hit “Form Fields” on the tab.
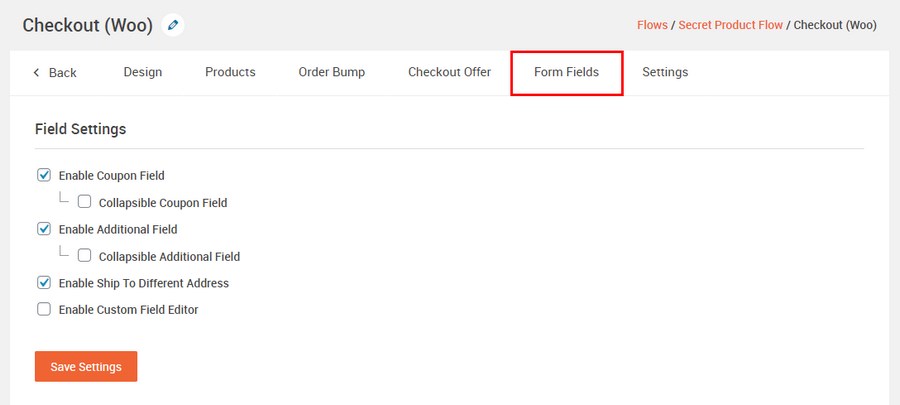
Enabling the field editor helps to remove any unwanted field by hitting on the below eye icon. For instance, just do it if you want to disable the field “Company name”.
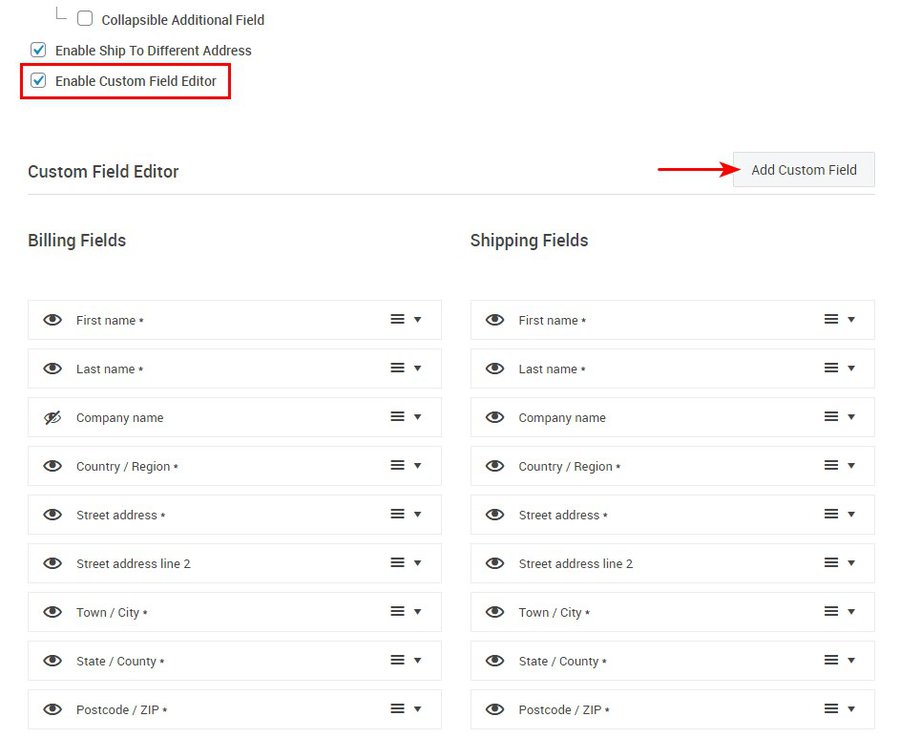
If you fancy adding one custom field, select the button “Add Custom Field”.

When everything is completed, you need to click “Save Settings”. One recommendation is that you should only add the necessary field for completing the order. Adding too many fields can lead to an increase in the rate of cart abandonment.
Step 5: Further modifications
You can see that you have finished the basic changes of your WooCommerce checkout page. However, you can still work on some further modifications to improve the performance of your checkout page.
- Upsell
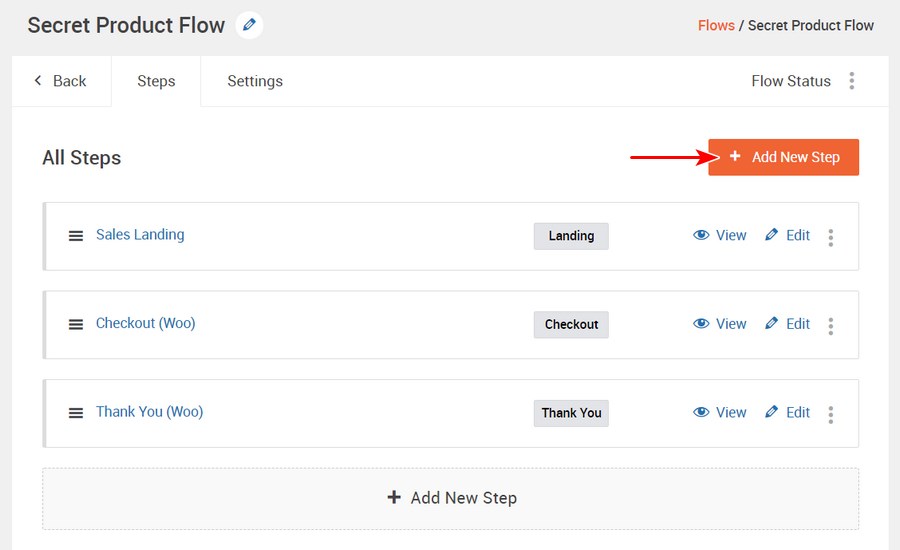
There is no denying that an upsell is efficient in increasing your store’s sales on the checkout flow. Owing to upselling, you could encourage one consumer to buy another version of the product that is more expensive than the one that already had in their shopping cart. For instance, you could recommend his/her to buy the MacBook Pro after they choose a MacBook.
In adding this kind of upsell offer, your job is to choose “Add New Step”. Check out the below screen:
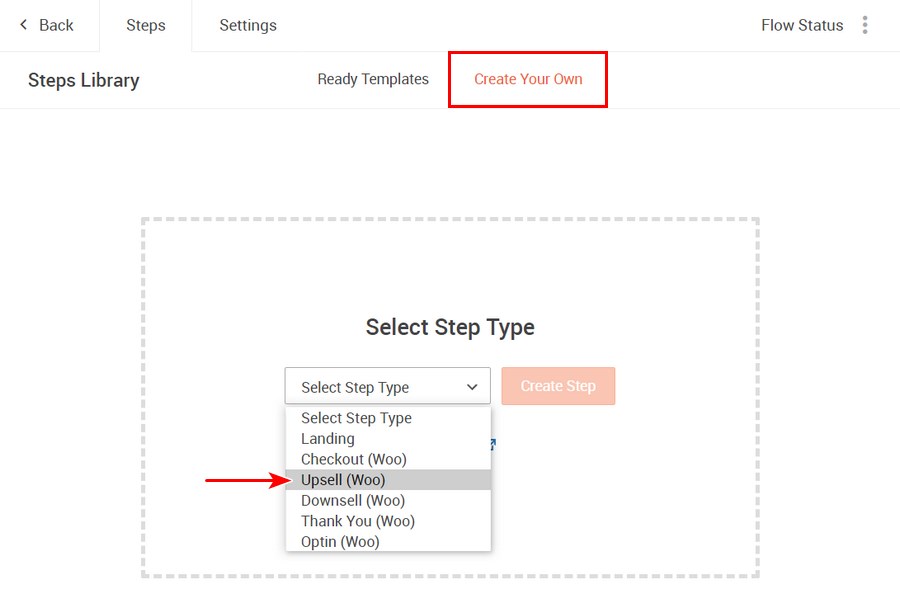
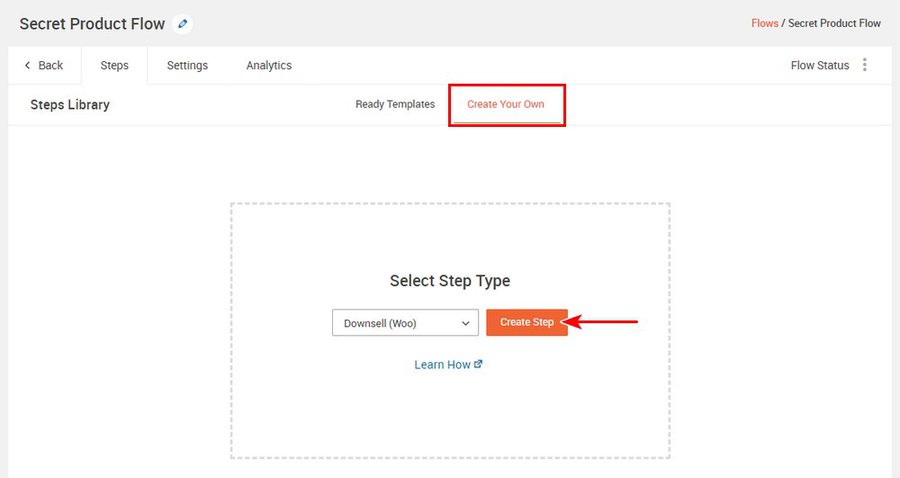
Then, you will be taken to the library page. Here, you will pick up the “Create Your Own” tab and choose “Upsell” from your dropdown menu. Proceed to the next step by hitting on the button “Create Step”.
After that one new step would be added to your checkout flow. Here, you need to fill in the name of this step and drag as well as position it under the step of checkout page as below:
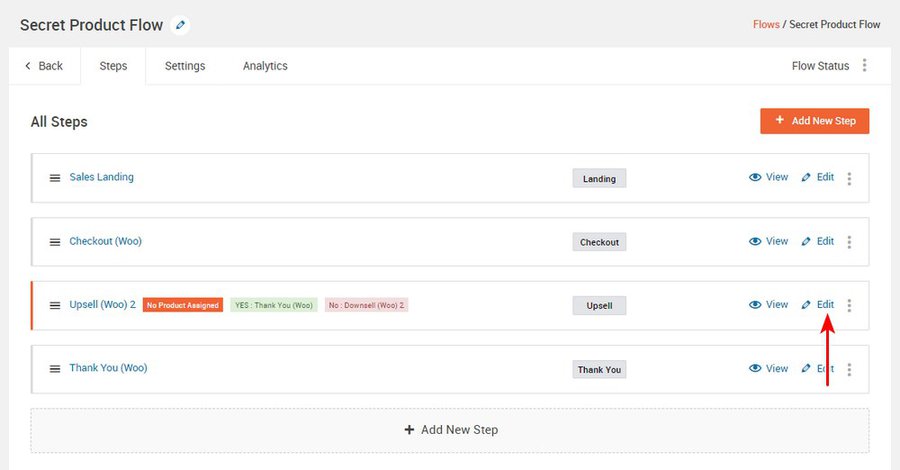
Then, you will get a notice that informs you of no product being assigned. So, if you wish to assign any product, you will click “Edit” before choosing the tab “Product” to choose your upsell product.
Another step is to pick up the tab “Settings”. Here you could explore many different shortcodes for your offer page.

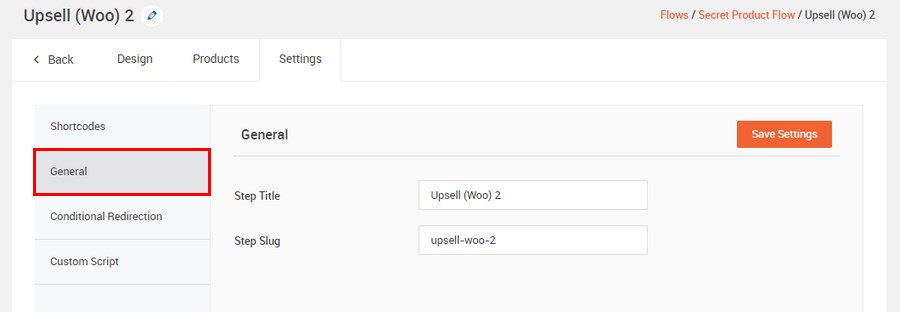
On editing the slug as well as title, choose the tab “General”.
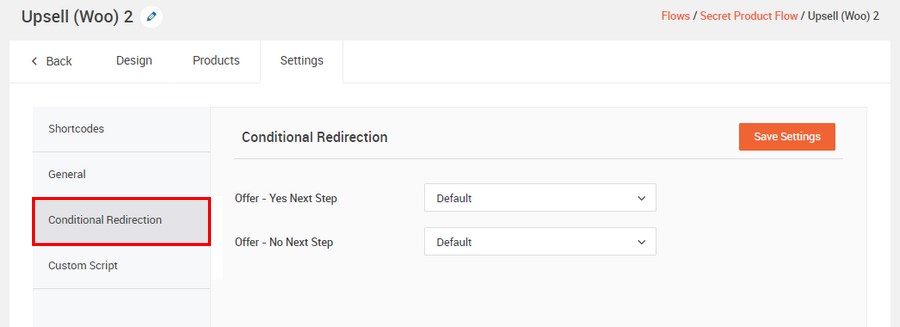
On adding conditional redirects, clicking on the tab “Conditional Redirects” will let you perform that.
Now, hit on the button “Save Settings” to update your recent changes.
- Down-sell
Down-sell offers are also a good way to boost your sales. They function as cheaper alternatives in case they refuse to buy any product. Creating down-sell offers is similar to the upsell one. Click “Add New Step” on the checkout flow.
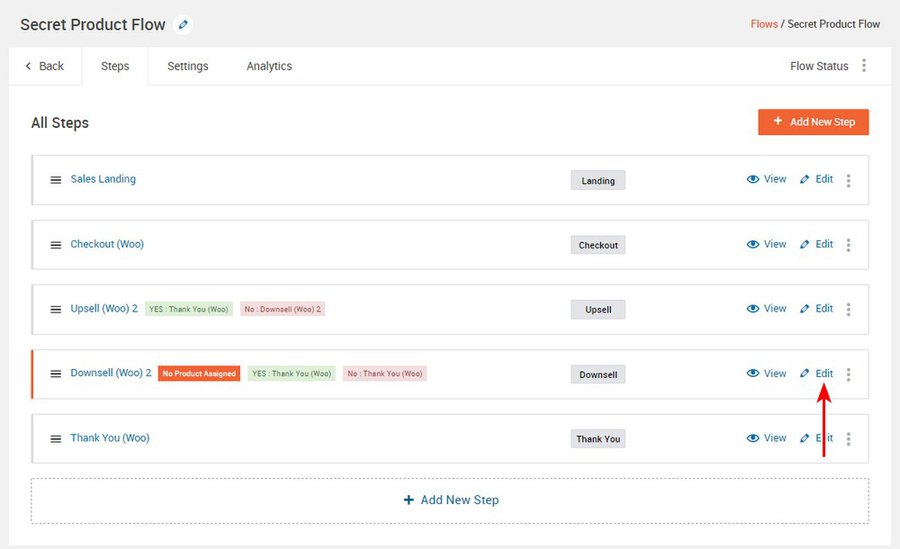
Go ahead by adding one new step, then drag and position it under your upsell step. It is time to assign your product by selecting the link “Edit”.
The last step is to choose the tab “Settings” to discover many different shortcodes for your down-sell offer.
Top 3 extensions to change the WooCommerce checkout page template
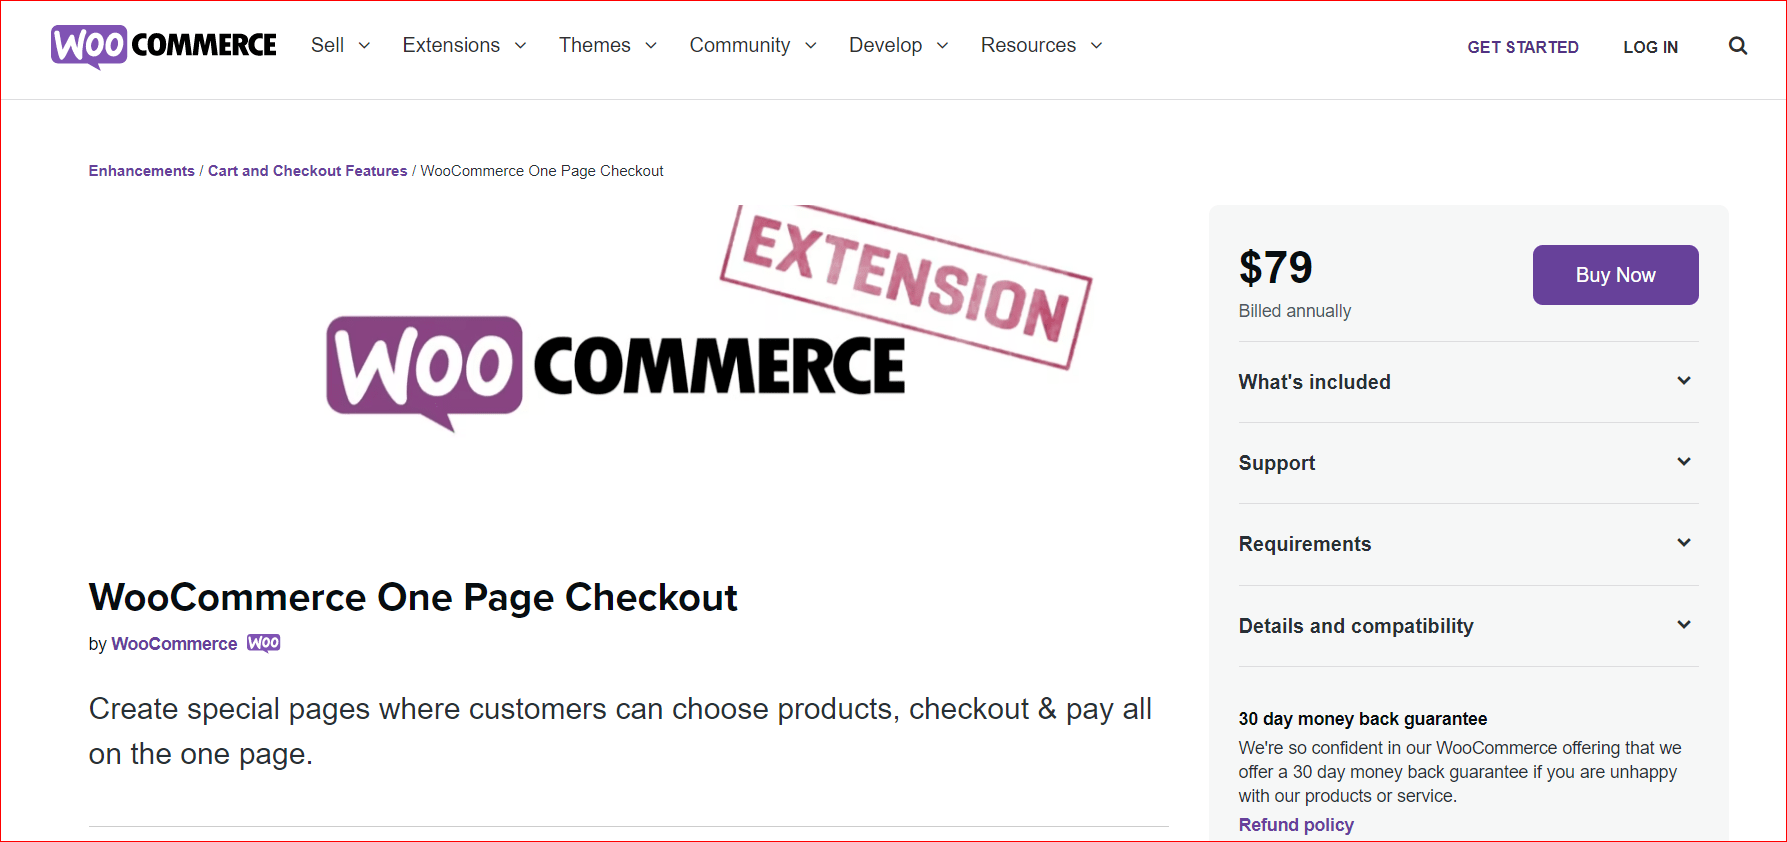
1. WooCommerce One Page Checkout
WooCommerce One Page Checkout is one of the most popular extensions for changing the template of your WooCommerce checkout page. Thanks to it, users can display not only checkout forms but also product selection on only one single page. Therefore, it aims at optimizing customers’ checkout process to make it easier and quicker.
Main features
-
Help customers to remove or add products from the cart
-
Facilitate consumers to finish the payment without having to wait for loading pages or leaving pages
-
Display the checkout fields on the single product page
-
Come with the ability to add custom fields to your landing pages to perform unique promotions
Pricing: $79
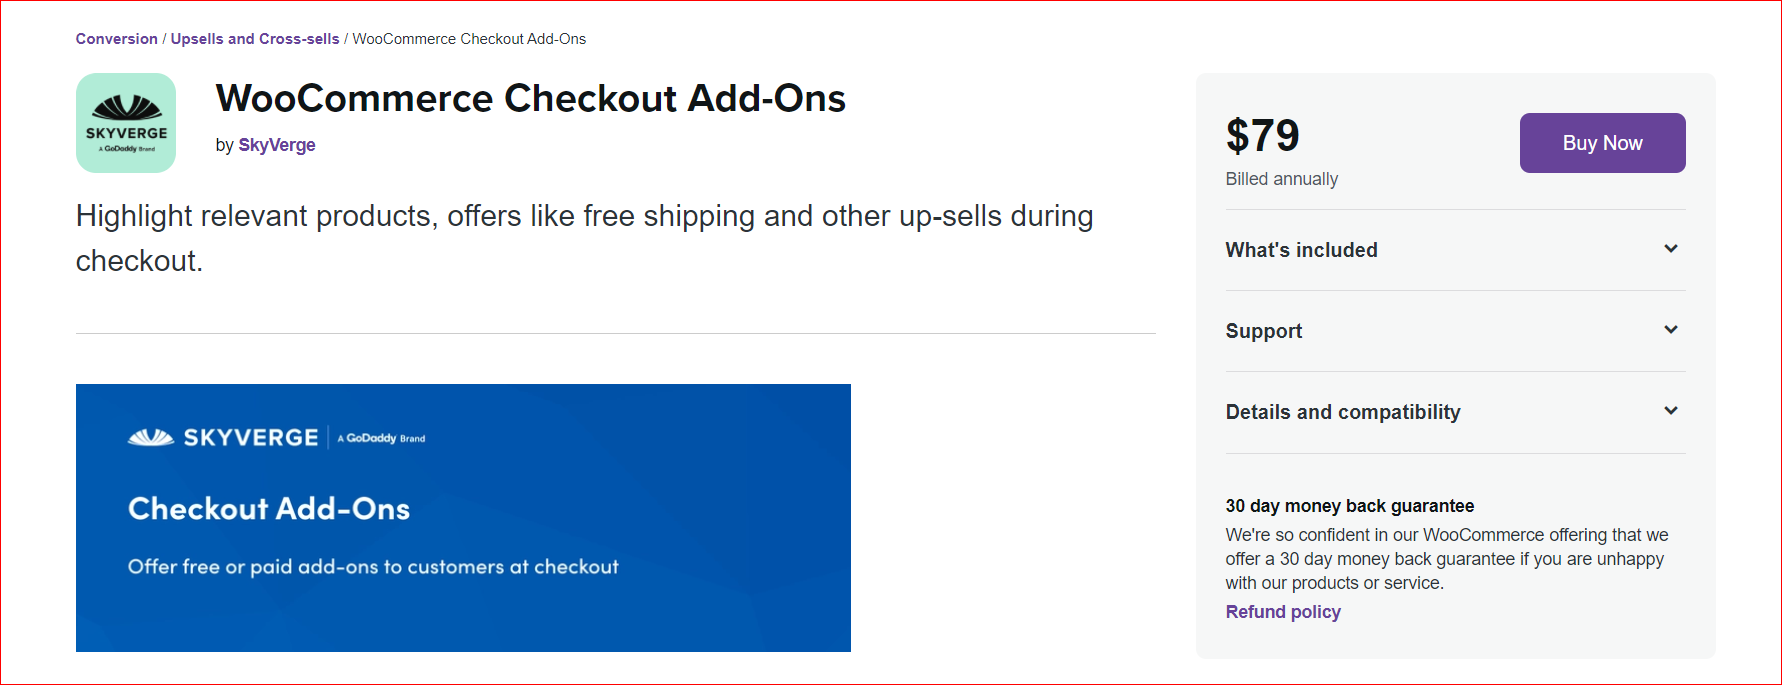
2. WooCommerce Checkout Add-Ons
Another not-to-be-missed extension in this field is WooCommerce Checkout Add-Ons. As its name indicates, it helps provide the needed basics for customers to place their orders. Now, you can change the template of your checkout page by adding more great functions like tips acceptance, gift wrapping, or gift messages.
Main features
-
Apply percentage-based fees, allow order tips
-
Let users create myriad fields such as text fields, file uploads, radio buttons, and so on
-
Come with free service or upsell such as rush handling, company swag or stickers, and shipping insurance
-
Provide gift options, including gift receipts, gift wrapping, or messages
Pricing: $79
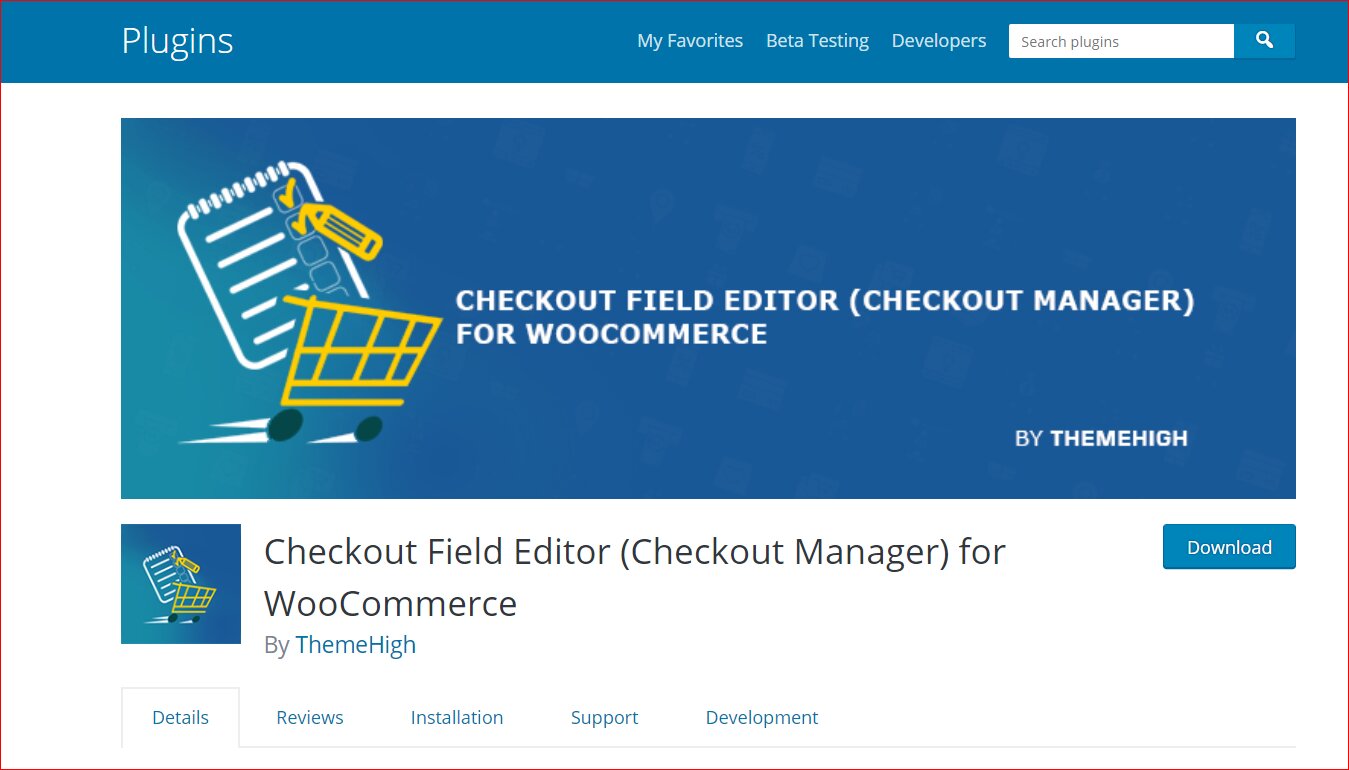
3. Checkout Field Editor
Checkout Field Editor is famous for providing various types of customized checkout fields within your WooCommerce checkout page template. Besides editing, you could even add custom fields as per your requirement. Moreover, you could rearrange or validate your checkout fields, thereby optimizing the checkout pages.
Main features
-
Be user-friendly
-
Allow users to add up to 7 types of WooCommerce checkout fields to make a nice template
-
Help to display these custom fields of your checkout page at many different locations for easy-to-use drop and drag options
-
Style the checkout temple according to your need
Pricing: Free
Conclusion
If you want to boom your online business, you should change your WooCommerce checkout page template as soon as possible. It will affect a lot of the buying decisions of consumers. So, follow our above step-by-step instructions to make some changes and enable the template to be user-friendly and awesome.


