
How To Change The Checkout Page With CSS In WooCommerce?

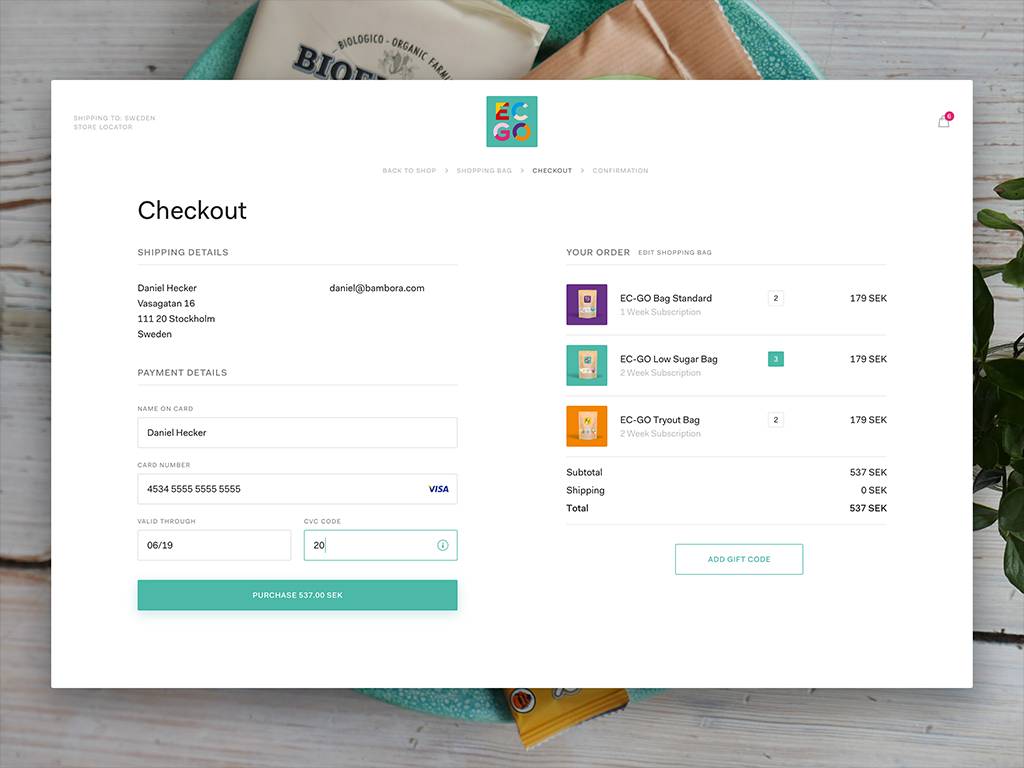
One of the most significant parts of the purchasing process is the Checkout page. There are several scenarios in which you would wish to modify the checkout page. Customizing the checkout process improves your WooCommerce store’s conversion rate. More conversions lead to more profit, which is brilliant news for everyone!
Today’s tutorial will show you how to change the Checkout page with CSS in Woocommerce. We’ll go through why it’s critical to personalize your checkout page. We’ll also go through ways to improve the overall checkout experience in your WooCommerce business. All of this is done to decrease abandoned carts and convert more people into consumers. So, let’s dive in!
The benefits of customizing the Checkout page in WooCommerce
Nearly 70% of shopping carts are abandoned. Customers make purchasing decisions but then alter their minds at the end. This is a significant issue for many retailers. We’ll go through some of the reasons why you should personalize your checkout page today. Cart abandonment can be caused by high shipping charges, compulsory account signup, and a lack of confidence. Addressing these issues can go a long way toward lowering them. The good news is that reducing cart abandonment is a simple procedure that can streamline the checkout process.
Here are some of the advantages of improving your WooCommerce checkout page:
- Increases Conversion Rate: Improving your store’s checkout procedure makes it simpler for your consumers to finish their orders. Visitors should not have to go through many stages to accomplish a transaction on your website. Every impediment to completing the checkout process is a chance for them to depart. Accelerating the checkout process guarantees that your consumers finish their orders more quickly, increasing conversions and revenues.
- Customers are persuaded to buy more products: Allowing consumers to swiftly and efficiently add products to their basket is part of optimizing the checkout process. This makes it simple for customers to select alternatives without having to return to a single product page. It can also persuade clients to buy more of your items, increasing your average order value.
- Provides a Secure Checkout Experience: You should always keep your clients’ contact and billing information secure. This builds trust with your consumer, which should lead to repeat engagement and favorable feedback. You may accomplish this by providing safe payment gateway alternatives at the checkout.
How to change the Checkout page with CSS in WooCommerce
In this part, we’ll explain how to use some codes to customize the WooCommerce checkout page. So, towards the end, you’ll be able to:
- Customize the WooCommerce checkout page with custom fields
- Create and save custom fields in the database
- Use shortcodes in mandatory field optional
- Fill in the details on the WooCommerce checkout page
- Customize the Checkout page with the fee option
- Use shortcodes in the WooCommerce checkout page
- Style the checkout page with custom CSS
All of these adjustments will be accomplished through the usage of WooCommerce checkout hooks. If you’re not acquainted with hooks, we suggest reading the beginner’s guide of using WooCommerce hooks. We recommend that you utilize a child theme since we will be making modifications to the functions.php file. You may use one of the numerous child theme plugins available or create your own by following this tutorial.
Customize the WooCommerce checkout page with custom fields
The first step will be to demonstrate how to add custom fields to the checkout page. To accomplish this, copy and paste the following script into the child theme’s functions.php file:
// checkbox field
add_action( 'woocommerce_after_order_notes', 'quadlayers_subscribe_checkout' );

function quadlayers_subscribe_checkout( $checkout ) {
woocommerce_form_field( 'subscriber', array(
'type' => 'checkbox',
//'required' => true,
'class' => array('custom-field form-row-wide'),
'label' => ' Subscribe to our newsletter.'
), $checkout->get_value( 'subscriber' ) );
}
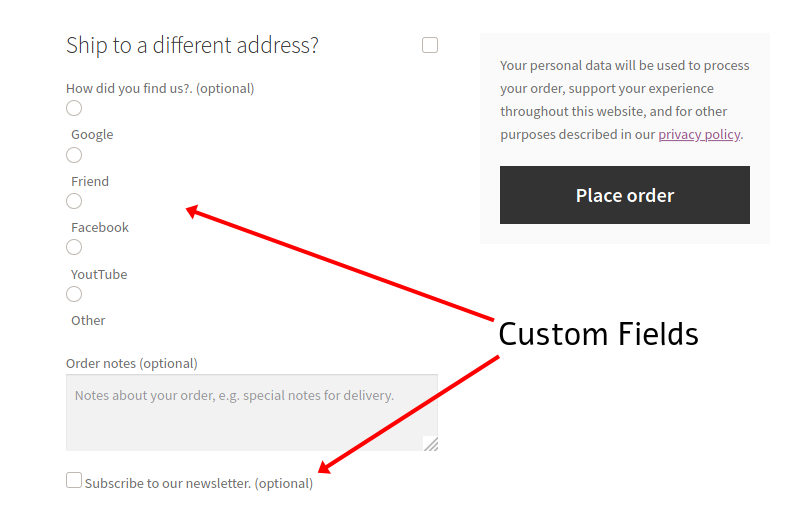
This will add a custom checkbox field at the bottom of the checkout page to allow people to subscribe to your newsletter. You may add any field type in the same way. Let’s add a radio input field type, for example, with the following script:
// Radio input field
add_action('woocommerce_before_order_notes', 'quadlayers_radio_checkout');
function quadlayers_radio_checkout($checkout3){
woocommerce_form_field( 'feed', array(
'type' => 'radio',
//'required' => true,
'class' => array('custom-field form-row-wide'),
'label' => ' How did you find us?.',
'options' => array(
'Google' => 'Google',
'Friend' => 'Friend',
'Facebook' => 'Facebook',
'Youtube' => 'YoutTube',
'Other' => 'Other'
)
));
}
This will add a radio input type, allowing you to ask your customers how they heard about you.
Create and save custom fields in the database
Now, let’s look at utilizing these custom fields to customize the checkout and receive data from WooCommerce orders. To accomplish this, you must be able to get the values of the custom fields whenever necessary. Additionally, once the consumers finish the form and click the Place Order button, you must store the importance of the custom fields in the database. It would help if you utilized the ‘woocommerce_checkout_update_order_meta’ hook to do this. Copy and paste the following code into the child theme funcitons.php file to update the two custom fields you added in the first part:
add_action( 'woocommerce_checkout_update_order_meta','quadlayers_save_function' );
function quadlayers_save_function( $order_id ){
if ( ! empty( $_POST['subscriber'] ) ) {
update_post_meta( $order_id, 'subscriber', sanitize_text_field( $_POST['subscriber'] ) );
}
if ( ! empty( $_POST['feed'] ) ) {
update_post_meta( $order_id, 'feed',sanitize_text_field( $_POST['feed'] ) );
}
}
Before adding the custom field to the database, this script uses an if() conditional to determine if it is empty or not. After you’ve added this script, you’ll be able to get the saved data from the database by utilizing a global “$post” WP object. The subscriber information of the current order is obtained in the script below. This may be used in the WooCommerce orders list’s backend.
global $post;
$order = wc_get_order( $post->ID );
$c_meta = $order->get_meta('subscriber');
It’s important to note that this is a raw script, so you’ll need to modify it to match your personal needs.
Use shortcodes in mandatory field optional
Another easy yet effective technique to modify the WooCommerce checkout page is to optional necessary or compulsory fields. This way, you allow customers to fill out only the fields required for the transaction, enhancing their purchasing experience. Assume you offer downloaded or virtual items and wish to make the Address field in the Billing section optional. Add the following code to your child theme’s functions.php file. Using this snippet as a foundation, you can quickly add more optional fields.
add_filter( 'woocommerce_billing_fields', 'wc_address_field_optional');
function wc_address_field_optional( $fields ) {
$fields['billing']['billing_address_1']['required'] = false;
return $fields;
}
If you want to go a step further, you can personalize your WooCommerce checkout page by adding conditional fields. Conditional fields use conditional logic, which means that specific fields appear or vanish depending on the values of other fields. You may, for example, employ conditional logic to ensure that the credit card fields display only if the user picks Credit Card as the payment method.

Fill in the details on the WooCommerce checkout page
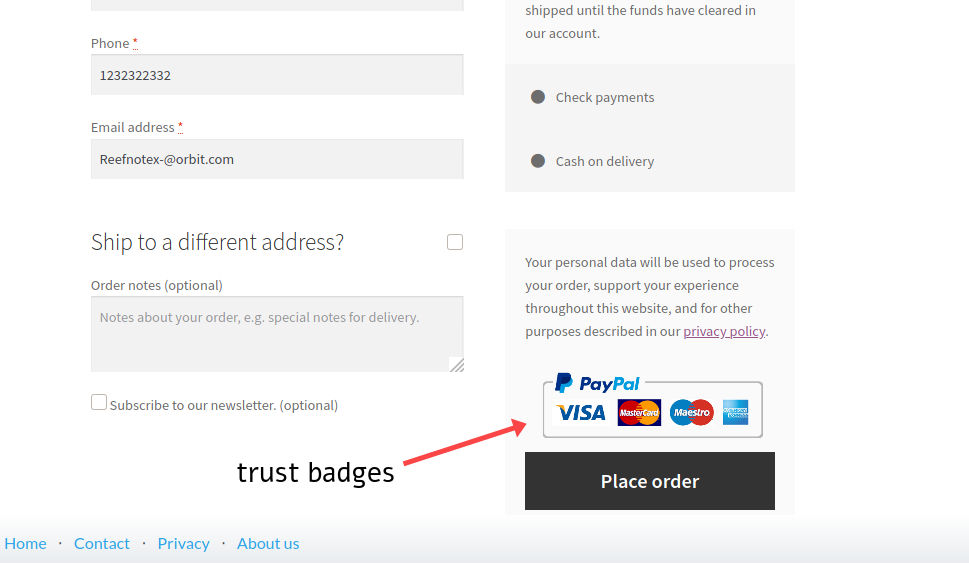
Adding content to the WooCommerce checkout page is another method to customize it. With a strong understanding of WC checkout hooks, you can quickly insert any type of information, like photos, titles, and text, anywhere you want. You may use this script, for example, to place a trust badge graphic before the Place order button on the checkout page:
add_action('woocommerce_review_order_before_submit','quadlayers_checkout_content');
function quadlayers_checkout_content(){
echo '<img src="https://www.heresylab.com/wp-content/uploads/2019/01/paypal-1.png" />;
}
In addition to photos, you can provide a primary header phrase at the top of the checkout:
add_action(woocommerce_checkout_before_customer_details
,'quadlayers_checkout_header');
function quadlayers_checkout_header(){
echo "<h2>This is a custom Header<h2>
";
}
Another intriguing option is to include a note on your checkout page. Stores usually specify items like shipping, delivery, and so on. Assume you want to notify clients that they may have to wait five business days to obtain their merchandise. Add the following to your theme’s functions.php file:
add_action( 'woocommerce_after_order_notes', 'wc_add_message' );
function wc_add_message () {
echo 'Please remember that delivery may take up to 5 business days.';
}
Customize the Checkout page with the fee option
Let’s look at how to modify the WooCommerce checkout page and add additional costs. There are two sorts of supplementary fees most of the time: fixed and percentage. Express delivery is a typical example of a set charge. Assume you wish to include a set price of $10 for express delivery. Edit the wording for the field name in the script below. In this example, we’ll label it the “Extra Charge,” which will cost $10 to add to the order. Remember that using this code will automatically add a $10 fixed charge to the customer’s order during checkout.
add_action('woocommerce_cart_calculate_fees', function() {
if (is_admin() && !defined('DOING_AJAX')) {
return;
}
WC()->cart->add_fee(__('Extra Charge', 'txtdomain'), 10);
});
Another option is to charge a percentage of the whole amount. This might be beneficial if there are additional taxes or to charge a fee for particular payment gateway costs. Assume we want to add a 3% charge to the total cost of the order (items + delivery). During checkout, this script will add a 3% charge to the shopper’s complete order.
add_action('woocommerce_cart_calculate_fees', function() {
if (is_admin() && !defined('DOING_AJAX')) {
return;
}
$percentage = 0.03;
$percentage_fee = (WC()->cart->get_cart_contents_total() + WC()->cart->get_shipping_total()) * $percentage;
 WC()->cart->add_fee(__('Tax', 'txtdomain'), $percentage_fee);
});
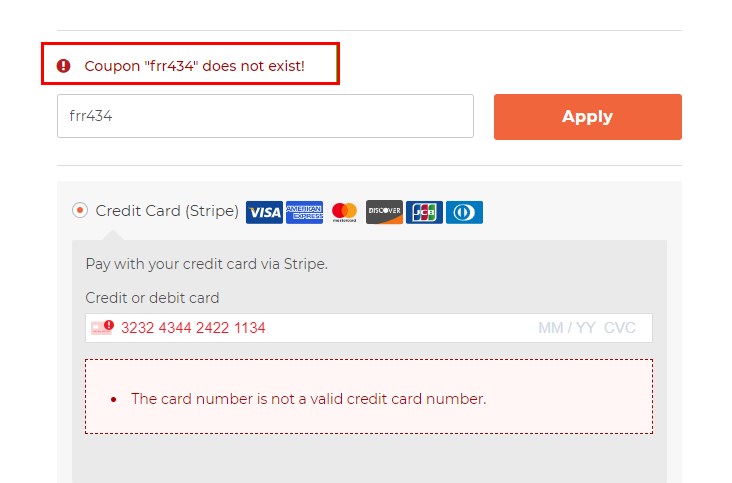
If you do not use this shortcode, your customers may face something like this when they apply for coupons or credit cards:
Use shortcodes in the WooCommerce checkout page
WooCommerce shortcodes provide a great deal of versatility, allowing you to add any form of content via checkout hooks. However, merely printing the shortcode will not work. Instead, include them in the following order:
echo do_shortcode('[woocommerce_cart]');
So, using a hook in the same way as in the previous instances, you may get something like this:
add_action('woocommerce_after_checkout_form','quadlayers_checkout_shortcode');
function quadlayers_checkout_shortcode(){
echo do_shortcode('[woocommerce_cart]'); }
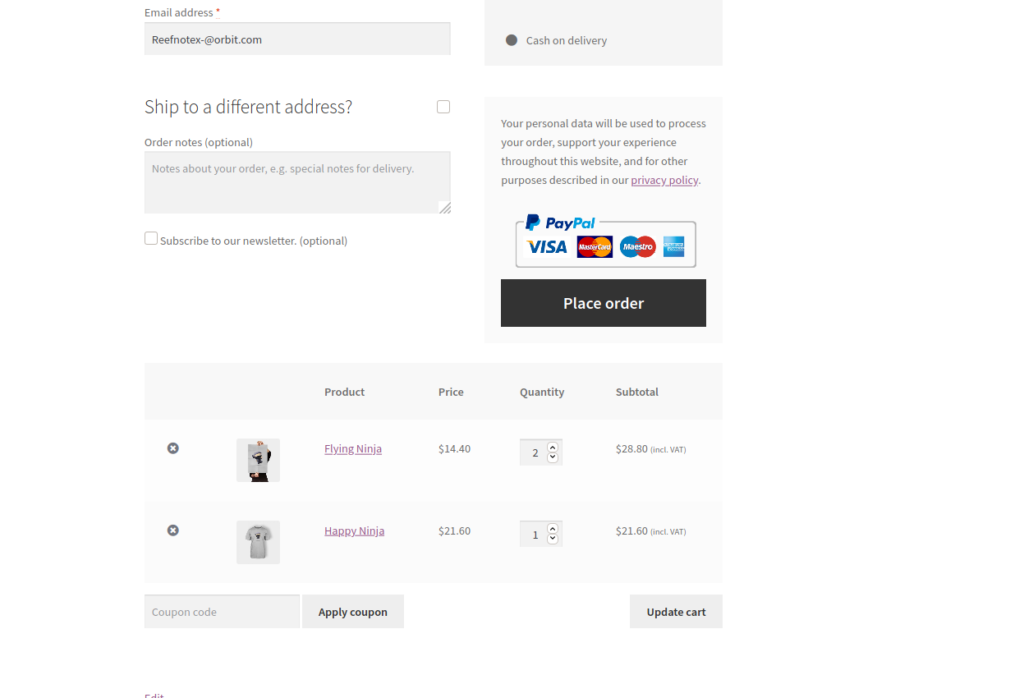
This script will activate the [woocommerce_cart] shortcode, showing the WooCommerce cart at the bottom of the checkout page.
Please keep in mind that any WordPress, WooCommerce, or custom shortcode can be used. Some shortcodes, however, may not be compatible or supported by WooCommerce, so double-check before using them.
Style the checkout page with custom CSS
Finally, you may personalize your WooCommerce store’s checkout page by altering the CSS style. This does not imply that you must spend hours reconstructing the whole checkout page. Even a few minor tweaks can help you improve the checkout process. For example, changing the colors, fonts, margins, or borders might significantly increase conversion rates. There is no secret recipe that works for every business, and you will need to test numerous approaches, but tweaking a few things can help you increase your sales. For example, you can use this simple script to apply a custom CSS style to the checkout page and change the background color:
add_action('wp_head','quadlayers_checkout_style');

function quadlayers_checkout_style(){
         if(is_checkout()==true){

                 echo '<style> body{background:#dfdfff!important;}<style>';
         }
}
Furthermore, you may use this script as a foundation and add your own CSS rules inside the HTML element to customize the appearance and feel of your site. This is a simple hack for adding CSS to the checkout page. It’s beneficial to be able to add little sections of CSS. However, if you want more complex style scripts, you need to use the wp_enqueue_style() native WP hook to enqueue the CSS style as follows:
add_action( 'wp_enqueue_scripts', 'quadlayers_enqueue_css' );

function quadlayers_enqueue_css(){
    wp_enqueue_style(  'checkout_style',
        get_stylesheet_directory_uri() . '/checkout-style.css'
    );
}
This way, you may have all of your custom CSS in a separate file (checkout-style.css in this example), which will be saved on the same level as the main style.css file in your child theme folder.
Conclusion
Overall, changing the checkout page may make a significant impact and assist you in taking your WooCommerce business to the next level. With only a few tweaks, you can raise conversion rates and sales. If you don’t want to install any plugins and design your solution, you may alter the checkout page programmatically.
We hope this tutorial will help you understand how to change the Checkout page with CSS in WooCommerce. We’ve shown you a few examples of modifying various components of the checkout, but the possibilities are limitless. Play around with the scripts and let your imagination run wild to improve your WooCommerce’s Checkout page.


