
How to Change WooCommerce Button Color

Your WooCommerce store can make money when customers hit the site’s checkout button. This is to say, there is a lot of weight placed on one single button. Hence, you should do something to optimize the buttons in WooCommerce by selecting a proper color. The reason is that changing your button color could become a quick and easy adjustment that promises to impact conversion rates drastically.
You are highly recommended to change your WooCommerce button color. If you know about that, just go ahead. If you have not known how to do it, this piece of article is for you. Now, let’s get started to explore how to change the WooCommerce button color.
Why do we need to change the button color in WooCommerce?
-
Increase the conversion rates: Colors will propagate consumers’ different feelings. Changing the color of the button will bring about more valuable clicks during the checkout process.
-
Catch consumers’ attention: Contrasting colors could enable customers to be drawn to your products quickly because these colors outstand other surrounding colors.
How to change the WooCommerce button color?
There are some different ways to do this. In fact, button colors in WooCommerce are under the control of your site’s theme. WooCommerce comes with several styles for buttons by default. In this article, we will guide you with two methods. So, you could choose to change the color of WooCommerce buttons by using CSS or a plugin.
1. Use CSS
Using CSS seems to be a popular way to do it. So, follow us strictly with some simple steps as below:
Step 1: Get the button’s CSS selector
First and foremost, it is necessary to get the button’s CSS selector. To do it, open your WooCommerce website in Chrome, then proceed to choose the button before selecting “Inspect”.
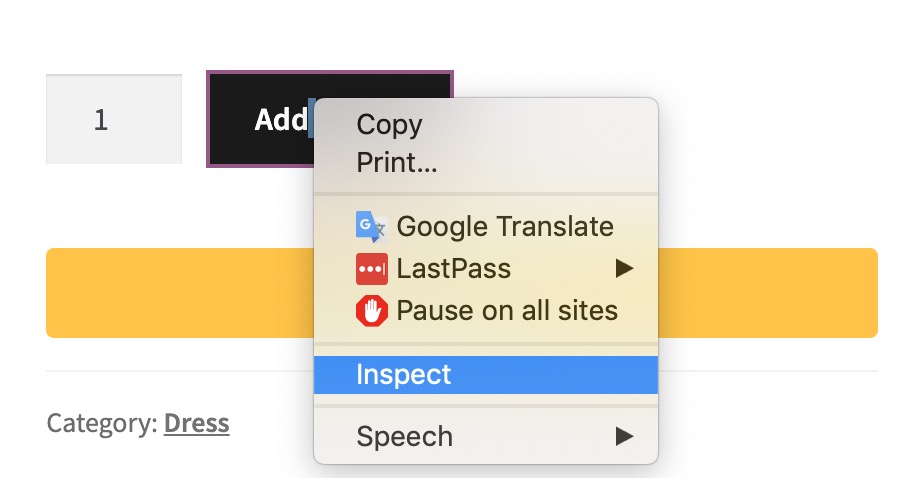
After that, you can notice that one new window will appear. And that window displays as follows:

Now, it is time to concentrate on your class part. When you are on a single WooCommerce product page, a button will come with three classes. They are “alt”, “button”, and “single_add_to_cart_button”. In case a button lies on another page, you can notice different classes.
Those who have been good at CSS, will not have any difficulty in writing the button’s CSS selector. But, if you have not known, here is what you will write this CSS selector:
button.single_add_to_cart_button.button.alt
Step 2: Write and apply CSS rules
When you have understood what the CSS selector is, it is time to use it by applying CSS rules to changing the colors of WooCommerce buttons. Now, you need to choose one color for your button. The suggestion is that you could search for the color picker on Google.
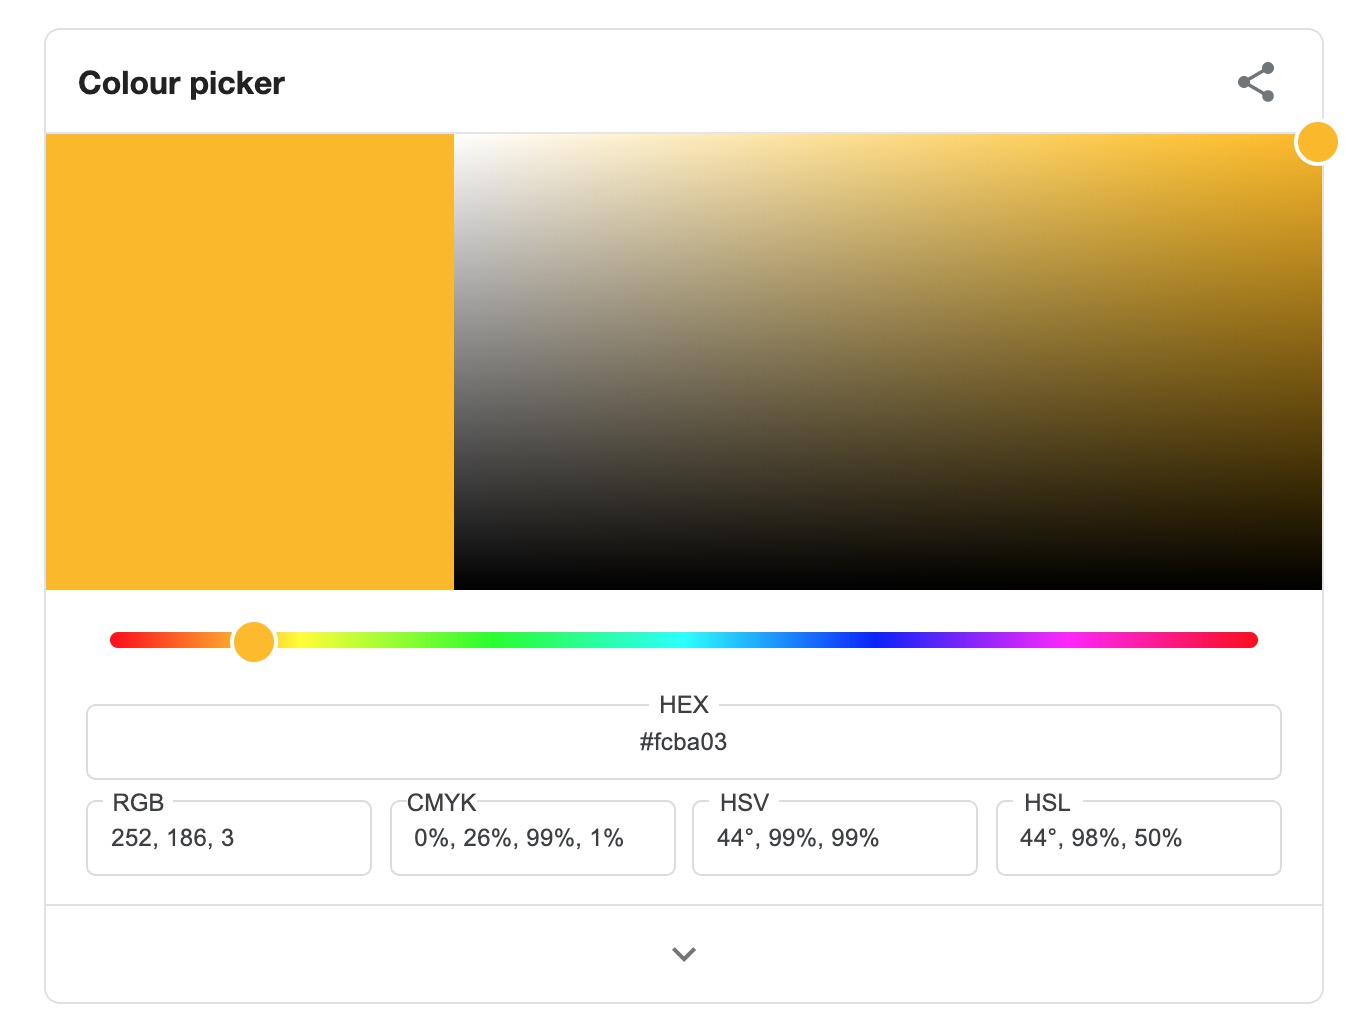
Move on to another step that involves dragging the sliders to pick up your desirable color. For instance, you are picking pink as the background color of your button. Next, you will need to copy a code starting with # that is under HEX. This is the needed color code for your CSS rule.
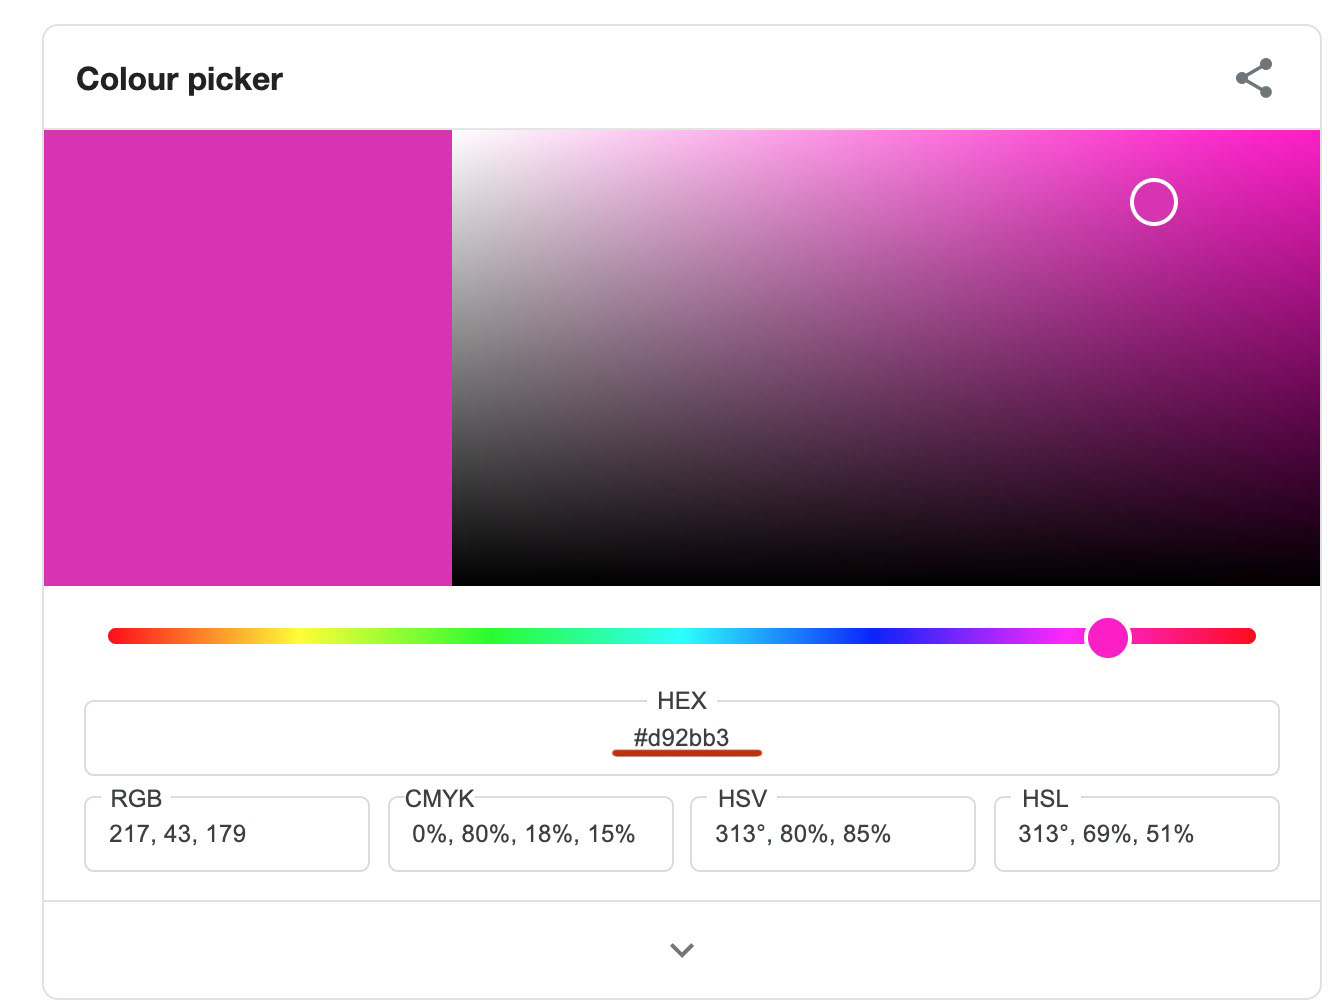
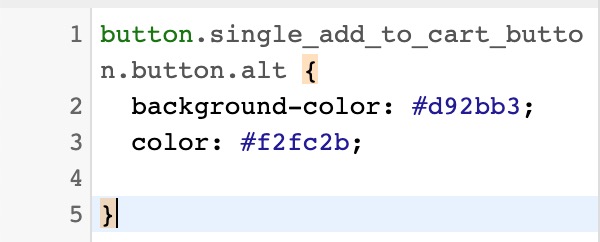
Another step to do is to penetrate the theme customizer. To do it, you will need to navigate to the section “Appearance” to select “Customize” before choosing “Additional CSS”. Here, you will insert the below code into your code box:
button.single_add_to_cart_button.button.alt {
    background-color: #d92bb3;
}
And the box looks like this:

You will publish your code one more time. Then, you can notice the expected results:

Besides changing the button color, you could also change the text color of that button. In our opinion, creating white text with a dark and pink background will look great. But, in case you prefer other colors, go to your color picker to choose the color that you want for your button text. Then, navigate to “Customize” and choose “Additional CSS” to enter “color: #f2fc2b;”. To be more specific, #f2fc2b will be the bright and yellow color. Next, the code in your CSS box will look like below:
Once again, publish that code and you can see the expected result:

Step 3: Test if the CSS works
This method seems to work on almost all of the themes. Nevertheless, there still exist several cases that might not work. The reason is that some of the themes or plugins might come with stronger rules of CSS applied to your button. And this situation is known as rules’ specificity.
In case you cope with this unexpected problem, what you need to do is to keep going with stronger rules and higher specificity. To perform this, precede the selector of your button with the parent’s selectors.
2. Use plugin
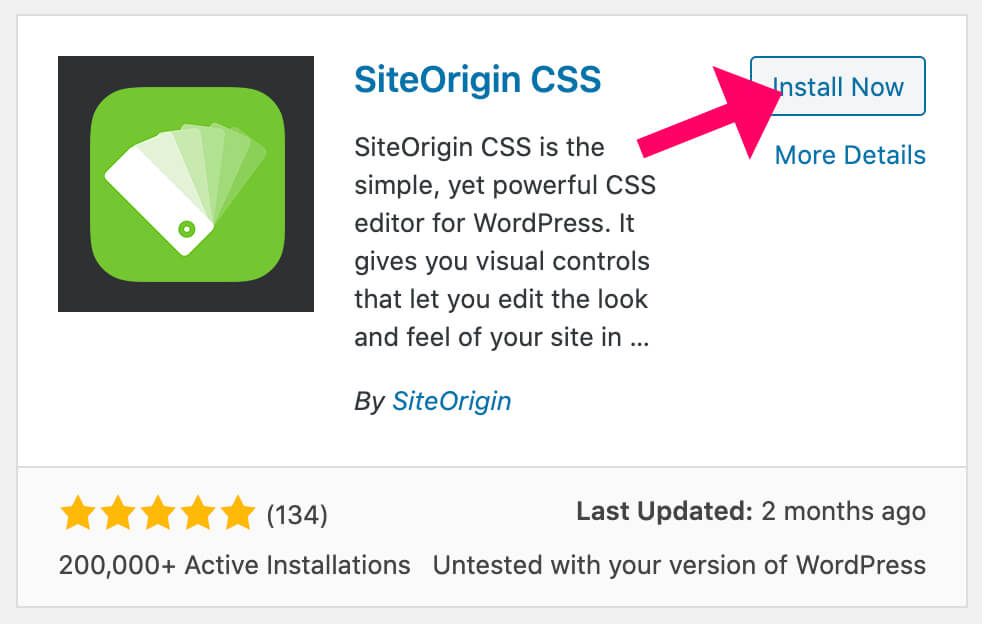
Using CSS might be a bit confusing to some people who are not good at writing CSS rules. Besides CSS, you could also use a plugin to change your WooCommerce button color. And this method appears to be much simpler. Here, the SiteOrigin CSS plugin will be used to change the button color.
Step 1: Install and activate SiteOrigin CSS plugin
Navigate to your dashboard in WordPress, go to the section “Plugins” and select “Add New”. Then, you will perform the installation of the plugin SiteOriginal CSS. After getting it installed, you are required to activate it to continue.
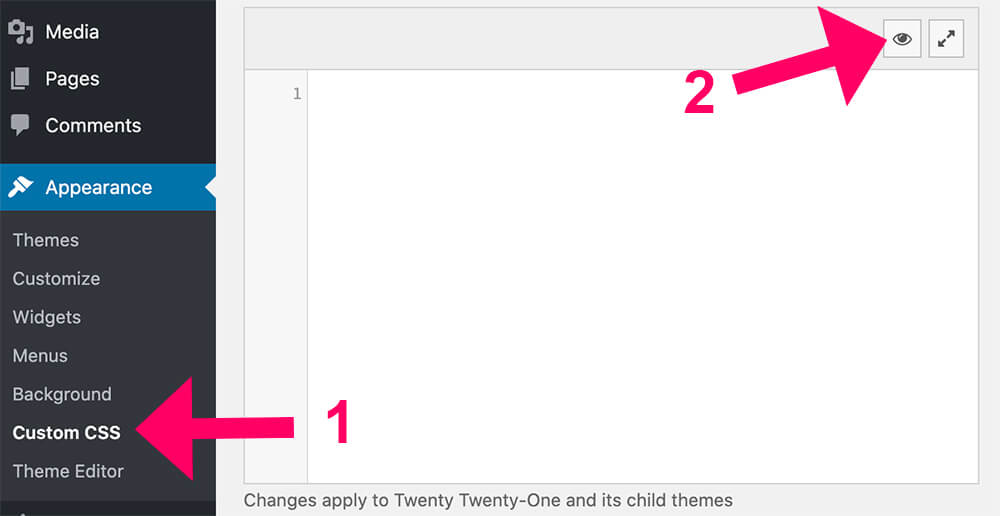
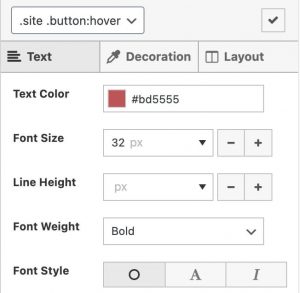
Step 2: Customize the button color
Now, go to the section “Appearance”, choose “Custom CSS”. Then, you will select an eye icon for launching your visual editor.
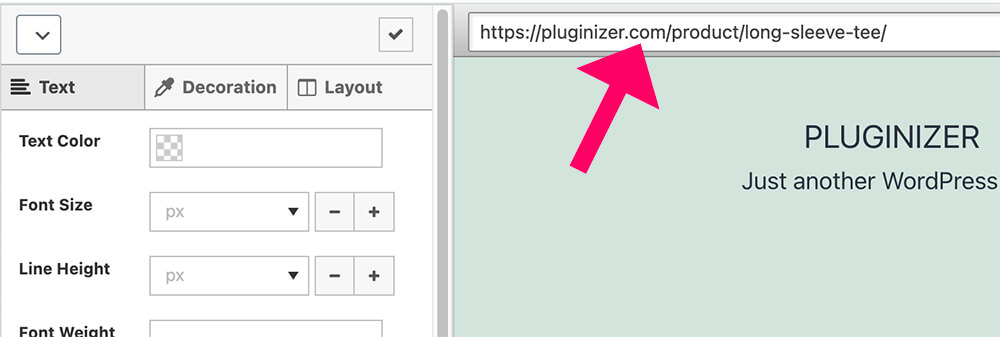
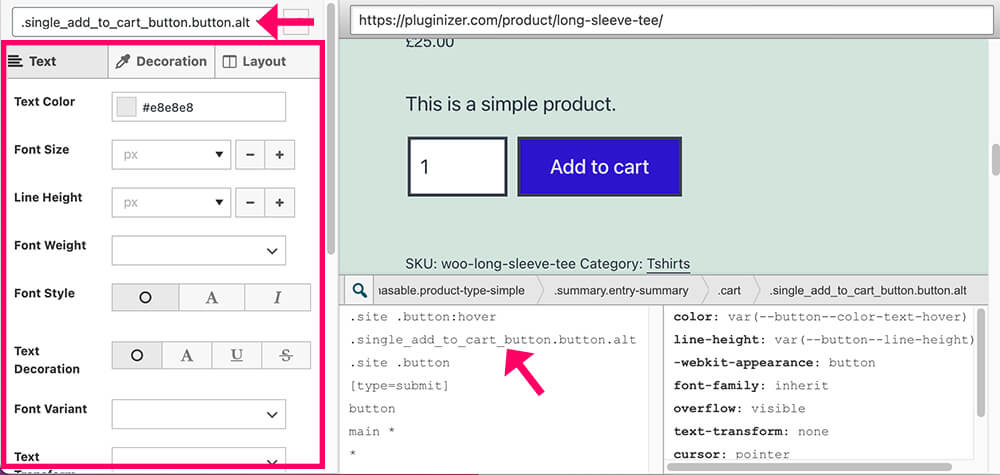
Here, you will need to modify the visual editor’s default URL. The change of this URL is for one of the product pages. Click enter to implement:
When you are here, select the button “Add to Cart” and guarantee that the selector could change accordingly.
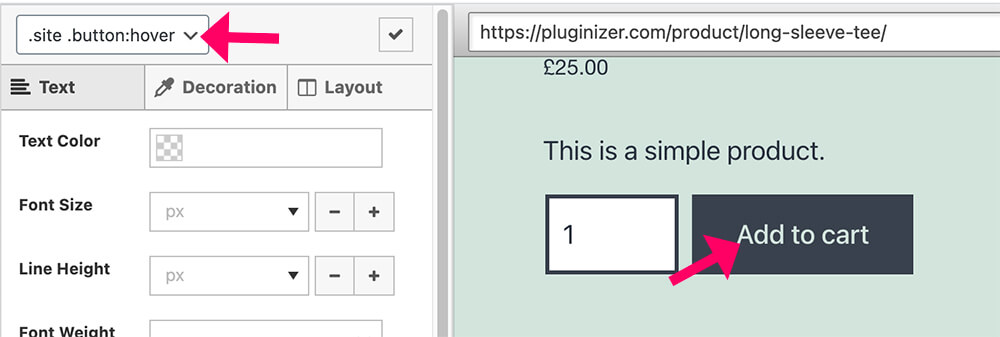
Another step is to customize your button color. If you are fond of customizing borders and sizes, you can also change this part. Look at the below screen:
There is an important note to keep in mind is that when you change the properties, and it will not impact the element. Be sure that you will select another class from your console. Try again to select your checkmark icon as soon as you are done.
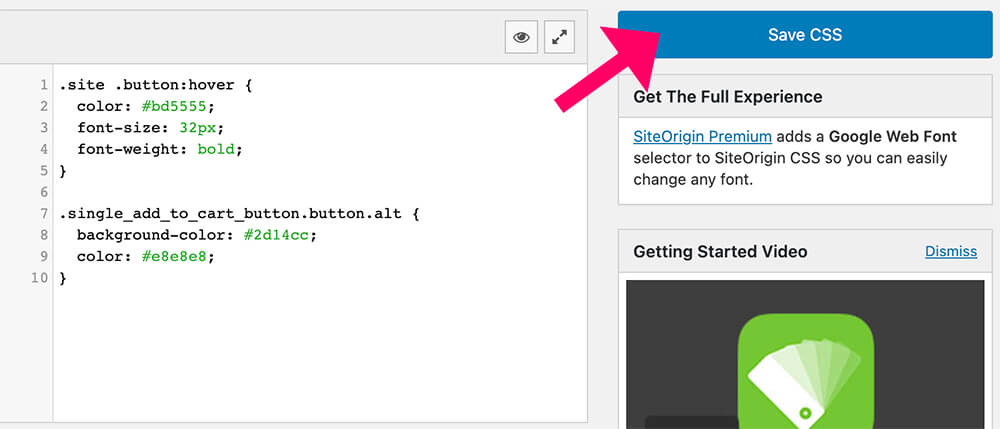
At this final step, let’s choose the button “Save CSS” before navigating to one of the product pages and be sure that the button’s color will change.
Conclusion
In short, changing the color of your WooCommerce button is straightforward. By doing so, you could boost the performance of your WooStore, thereby catching the attention of customers. So, do not hesitate to execute the above-said steps to highlight your store as well as your products. Hope you could find it useful and spread those words to others who are concerned.


