
How to Add Subscriptions to WooCommerce

Subscriptions are a frequent method used by eCommerce businesses to increase sales and sustain overall sales. Subscriptions are helpful because they can easily be incorporated into the store’s email marketing operations. Adding subscriptions to your WooCommerce store allows you to create premium content, sell memberships, and generate ongoing revenue. Over time, stores generally accumulate vast email lists that can be “harvested” for repeat sales.
We’ll show you How to Add Subscriptions to WooCommerce using a variety of techniques in this article.
Why you need to add Subscriptions to WooCommerce
Adding WooCommerce subscriptions to your WordPress site has a lot of advantages:
-
To begin with, it aids in the automation of the billing process, which saves you a significant amount of time. You don’t have to charge your consumers manually every month.
-
You’ll have more constant cash flow, fewer payment problems, and shorter payment delays if you add subscription payments to your online firm.
-
Adding Subscriptions to WooCommerce store enables you to provide a range of subscriptions for both physical and virtual goods and services which would improve your customer experience when they shop at your online store
-
It also gives you additional options when it comes to the type of eCommerce site you can build. We can mention here some illustrations of the benefits brought by Subcriptions:
-
Dollar Shave Club is an example of a recurring physical goods subscription.
-
A members-only internet retailer, similar to a virtual Costco.
-
Stitch Fix is an example of a curated membership box.
-
So, let’s have a look at how to integrate subscriptions into WooCommerce.
We’ll go over several options for adding subscriptions to WooCommerce, and you can pick the one that best suits your needs.
How to Add Subscriptions to WooCommerce
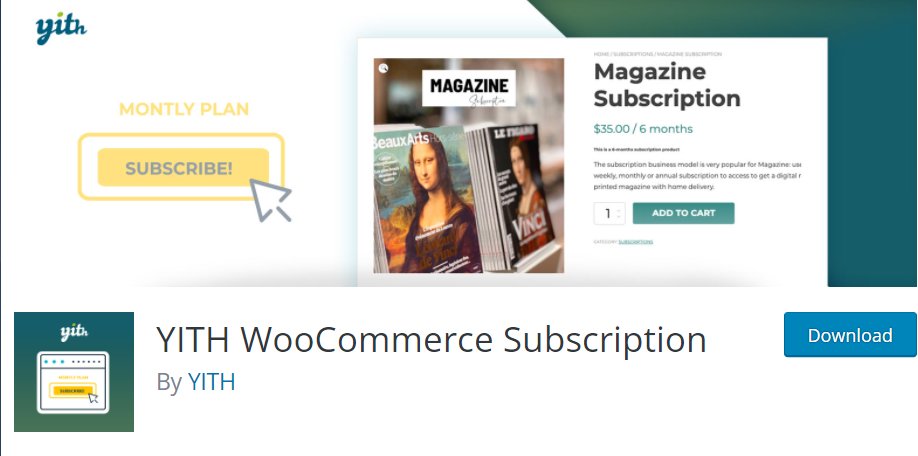
1. Using YITH WooCommerce Subscription
YITH WooCommerce Subscription is a complete solution for selling subscription-based products or services in your e-commerce, managing recurring payments, and rewarding your consumers.
Selling subscription-based items allows you to get regular payments and see your income increase month by month.
Key features:
-
Create a subscription plan for things that are basic, virtual, or downloaded.
-
Select the recurring payment option (daily, weekly, monthly, yearly, etc.)
-
Set a subscription’s optional termination date.
-
Allow subscription-based variations (to set different subscriptions plans and pricing using variations)
-
Provide subscription information on the My Account tab.
Price: Free
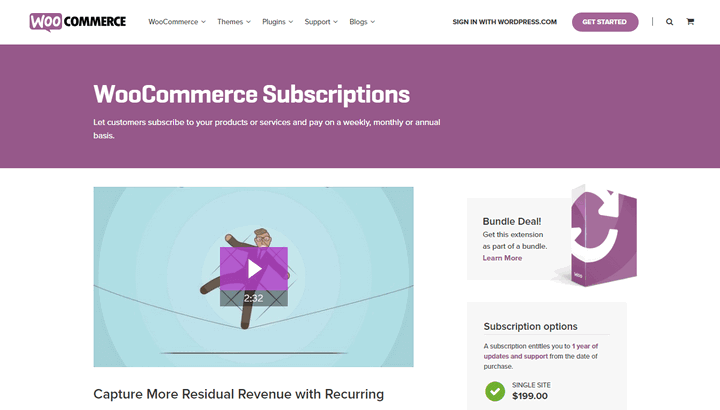
2. Using WooCommerce Subscriptions
Customers may subscribe to your products or services and pay on a weekly, monthly, or annual basis using the WooCommerce Subscriptions plugin.)
Key features:
-
Charge a one-time fee to cover customer setup fees.
-
Add sign-up fees and free trials to any subscription product to allow people to try before buying.
-
Create changeable subscription offerings and let your consumers pick the one that best fits their needs.
-
Allow you to amend the recurring total for future payments, stop or cancel a subscription, change the trial expiration, or suspend or cancel a subscription.
-
Provide your consumers with the ability to manage their own subscriptions.
-
Modify the price of converting to a new subscription product to your store’s demands.
Price: $199.00/year (30 day money back guarantee)
3. Using Subscriptions for WooCommerce by WebToffee
Another wonderful plugin for setting up and handling recurring payments and bills at your store is WebToffee for WooCommerce subscriptions. Despite the fact that it is a premium plugin, you can test it out for free before purchasing the full license.
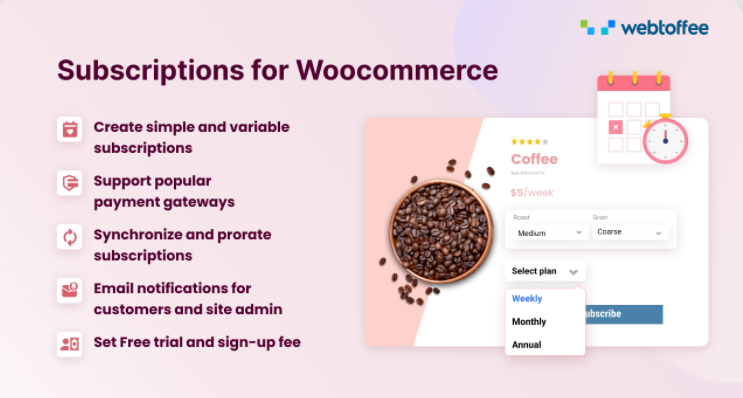
Key Features:
-
Create simple and flexible subscriptions for tangible or digital (downloadable) goods.
-
Allow for synchronized renewal with a prorated option.
-
Provide multiple billing schedules, a free trial and signup cost, a discount coupon for recurring subscriptions, and email notifications.
-
Sync the subscription goods’ expiration dates to a given month’s day.
-
Provide consistently multiple payment gateways.
Price:
-
Single Site: $89.00/Year
-
Upto 5 Sites: $129.00/Year
-
Upto 25 Sites: $199.00/Year
4. Using Subscriptio – WooCommerce Subscriptions
Subscriptio is a premium WooCommerce subscription plugin for selling things such as online memberships, e-learning packages, magazine subscriptions, and other tangible and intangible goods.

Key Features:
-
Create subscription lists and tools for customers to manage their subscriptions.
-
Sell recurring memberships online.
-
Create a subscription trial period of any length you choose.
Price: $69.00/ 6 months (Regular License)
5. Using SUMO Subscriptions
SUMO Subscriptions is a full-featured subscription management system for your WooCommerce store. Simple, variable, and grouped product subscriptions are all possible with this plugin. Additionally, you may design and sell subscription products directly from your WooCommerce store.
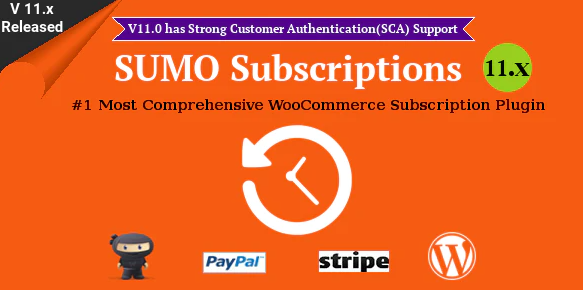
Key Features:
-
Updates to WooCommerce and WordPress are always compatible with this plugin.
-
Provide outstanding customer service with a quick response time.
-
Provide fully payment gateways such as PayPal, Stripe, and others.
Price: $49.00/6 months (Regular License)
How to add a subscription using the WooCommerce Subscription plugin
We’ll walk you through how to manually add or alter a subscription in your WooCommerce store as a store manager.
You may offer subscriptions over the phone while keeping track of them in your WooCommerce store. Alternatively, if word gets out about your store’s amazing products, you may offer a complimentary subscription to family members and friends. It’s feasible thanks to WooCommerce Subscriptions.
To manually add a subscription, follow these steps:
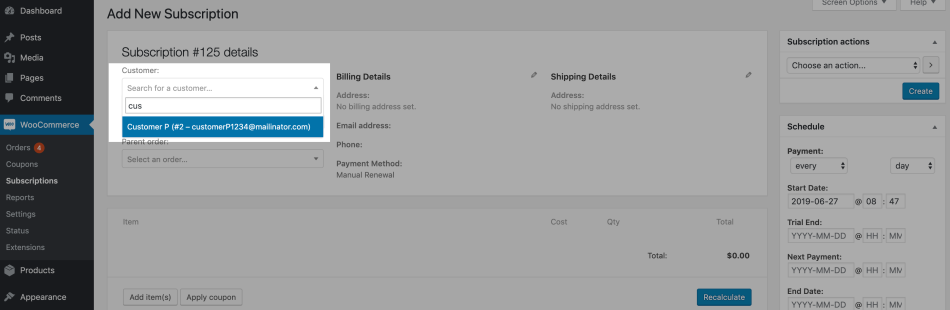
Step 1: Add a customer
-
To begin, navigate to WooCommerce > Subscriptions. Then select *Add Subscription from the drop-down menu.
-
Next, under the subscription details meta box, tap the Customer select box.
-
Type the first few letters of the customer’s name or email address.
-
Wait for WooCommerce to locate a set of accounts that match your criteria.
-
Click the customer after a set of accounts has been loaded.
-
Click the Create button to add the consumer to the subscription right away (optional).
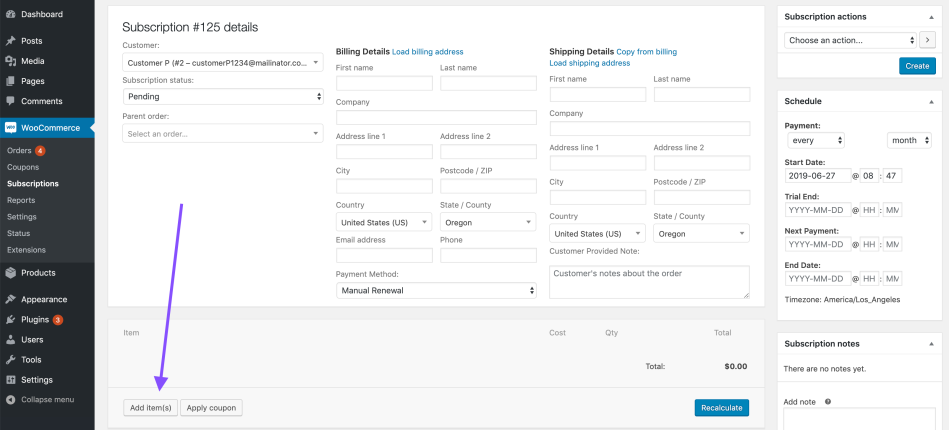
Fill in the billing and shipping addresses that will be used to manage the subscription’s periodic payments and shipments after you’ve added a customer to the subscription. Existing addresses on the customer’s account can be directly entered into the Billing Information or Shipping Details fields of the Subscription details meta box.
Step 2: Add a billing schedule
A subscription’s billing schedule is its essence. This schedule includes dates for crucial events such as:
-
The subscription’s trial term will end on this date (if any)
-
The expiration date of the subscription (if it expires automatically)
-
To gather recurrent payments and handle item delivery, renewal orders are issued on a regular interval and term.
To create a billing schedule for a subscription, follow this guide:
-
In the Recurring part of the Schedule meta box, select the first pick box to set the billing interval for the subscription. By default, this is set to every day, week, month, or year, implying that a renewal order is generated once every day, week, month, or year.
-
In the Recurring part of the Schedule meta box, click the second choose box to set the subscription’s billing term.
-
In the Start Date text box, type a date or use the calendar to select a date. The start date must be in the past.
-
In the Trial End Date text box, type a date or use the calendar to choose a date (optional).
-
In the Next Payment Date text box, type a date or use the calendar to choose a date.
-
Use the calendar or enter a date in the End Date text box.

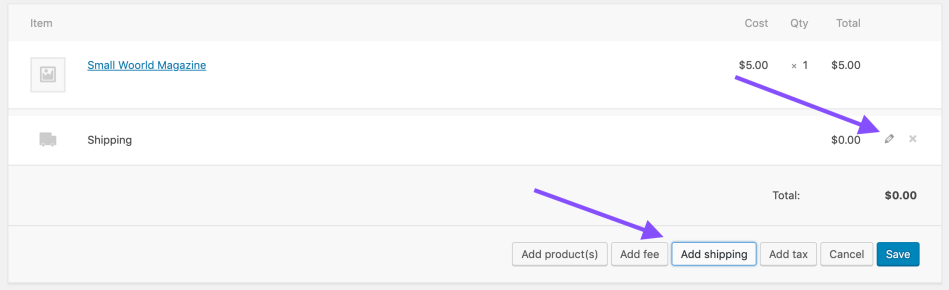
Step 3: Add line items: Products, fees and shipping
To add a product line item to a subscription:
-
Click the Add item(s) > Add product(s) in the items meta box.
-
Then, Click in the text box displaying the placeholder to search for a product by typing the first few letters of the product’s name. Choose the name of the product you wish to add when it loads.
-
Click Add, the chosen product(s) is/are displayed as line items in the items meta box and finally save changes
To add a shipping line item to a subscription:
- Click the Add item(s)> Add shipping buttons in the items meta box.
-
Then, next to the shipping line item, click the pencil icon and then the shipping name to add a label for the shipping line item to display to consumers browsing the subscription and connected orders after you’ve finished.
-
Select a Shipping Method from the drop-down menu next to the Shipping Name text field to determine the cost and taxes for this shipping line item, if any (learn more about shipping methods in the shipping methods guide).
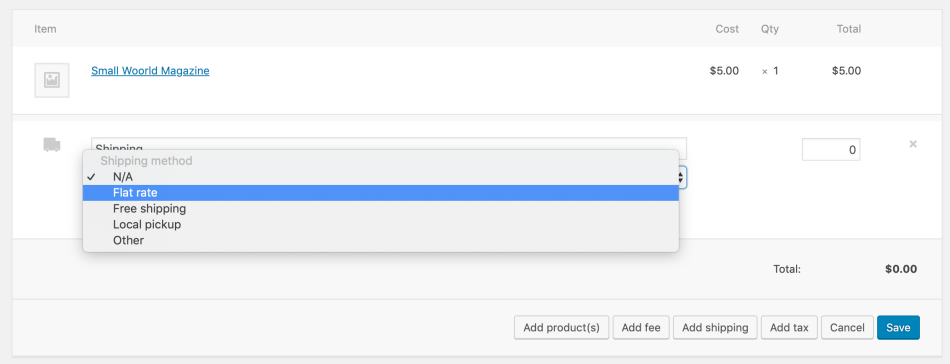
- Then, beneath the Total column, click in the text box with the placeholder: 0
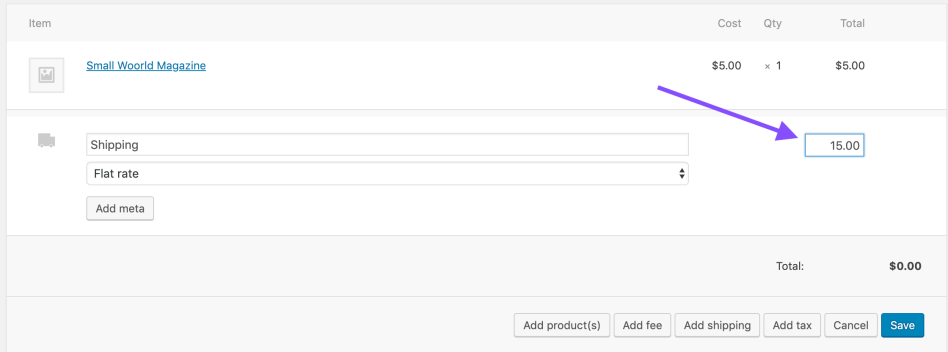
- Finally, Save the amount you wish to charge customers for shipping on each renewal.
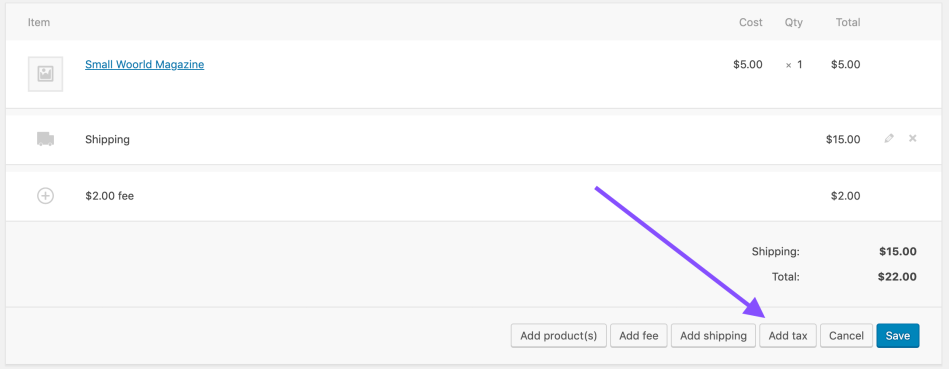
Step 4: Add Recurring Taxes
To add a tax rate to a subscription, do the following:
-
In the items meta box, click the Add item(s)> Add Tax button.
-
Next, click Add > Recalculate after selecting the radio button next to the tax rate you want to add.
-
Do this for each tax rate you’d like to apply to the subscription.
Note: You can also manually set them by modifying each line item and clicking the pencil icon on that row.
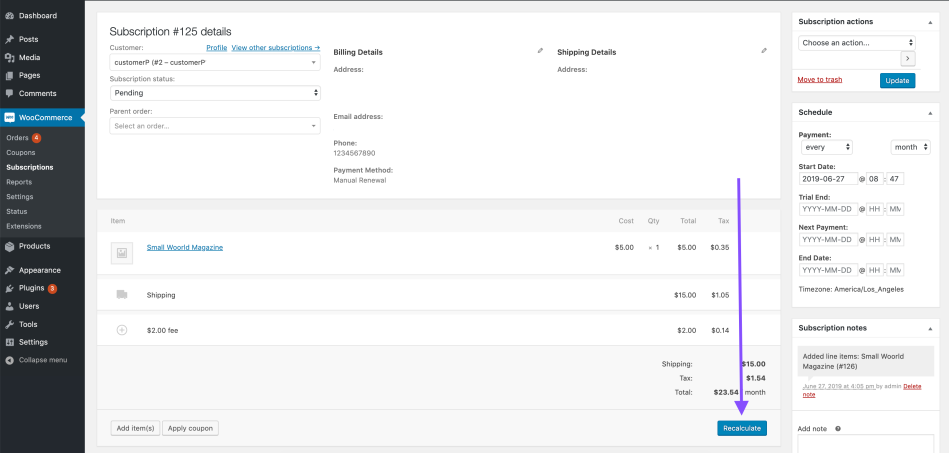
Step 5: Calculate Recurring Totals
After you’ve added line items and/or taxes to the subscription, WooCommerce can calculate taxes for each line item as well as the total amount to be paid for each subscription.
Click the Recalculate button in the items meta box to recalculate taxes and totals.
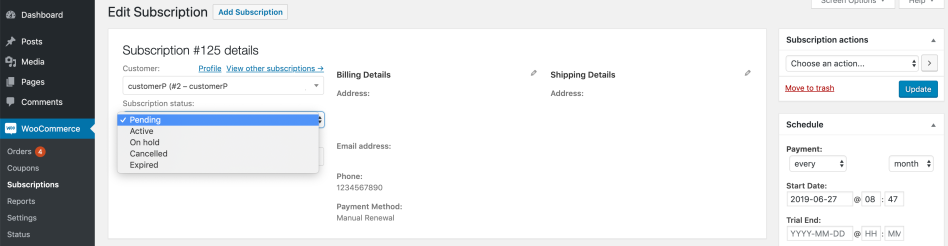
Step 6: Set the subscription status
For new subscriptions, the default status is pending. This implies that no further renewals will be processed, and the customer will lose access to any special products.
Once the subscription has a client, a billing schedule and line items, and recurring totals have been computed, you can change the subscription’s status to Active.
Follow these steps to change the status of a subscription:
-
Select the Subscription Status checkbox in the Subscription information meta box.
-
Next, choose the subscription status you’d like to give it.
Finally, click the save button to create the Subscription.
Conclusion
Hope that our information has been helpful to you in Adding a WooCommerce Subscription for your website. We’ve gone over a few of the best plugins for putting up subscription-based deals and ensuring a pleasant experience for customers.
If you want to learn more about WooCommerce or locate any useful plugin for your WooCommerce store, you can go to AVADA


