
How to Add SKU to Products in WooCommerce

If you have operated on the WooCommerce platform for a while, you will know that assigning an SKU number to a product is optional with WooCommerce. Whatever you choose to do with it is entirely your choice. But did you acknowledge how important it is to include an SKU title to an item?
If the answer is No, then this article welcomes you. We will be introducing you to the advantages of using product SKU and guide you through a tutorial on How to add WooCommerce SKU to your websites in two distinct ways. Keep reading to find out more!
The benefits of adding WooCommerce SKU to items
“Stock keeping unit” (SKU) is a range of numbers, which merchants apply to items to keep track of internal stock levels (typically eight alphanumeric digits). Each variant of a product, such as various colors or sizes, has its own SKU number.
Typically, most online store owners underrate the uses of these WooCommerce SKU, but we will prove it wrong. With the following 5 benefits of assigning SKU to products, you would be shocked of how it can impact your store’s performance:
- Easily looking for the product: Customers often copy and paste identifying information from an item into Google to make the last price check or locate a retailer they prefer after narrowing their options. Because of this, it’s essential that you have (or utilize) SKUs in order for your business to appear in the search results. Plus, knowing a product’s SKU might help shoppers compare prices and locate a better bargain elsewhere. You’ve just earned some money if your business appears in the search results with a better bargain.
- Expanding the target market: You may better plan for the future by putting SKUs in place now. You never know when you’ll be distributing your items to someone else who will absolutely need them to run their business effectively. If you comply with a vendor’s request for SKUs, you won’t go very far.
- Fasten shopping process: For example, let’s say you sell many items to a consumer and they all rave about the same item. They want to return as soon as possible to get it. They might use the search bar on your website to enter the product name or a brief description. However, copying and pasting the SKU from their email into search will get them to the item they’re looking for quicker. Actually, WooCommerce SKU is even more useful for mobile shoppers, who face the barrier of making purchases on smaller displays and entering inquiries on tiny keyboards.
How to add SKU to products in WooCommerce?
So now that you have a grasp on the importance of WooCommerce SKU in running an online business, we will show you how to add them into your products and the best ways to manage these SKUs. The tutorial has been divided into small basic steps, with clear instructions to help you successfully perform the task in the shortest amount of time possible.
No more beating around the bush, let’s get everything started!
Step 1: Enter the Products page
First of all, we will be heading to your WooCommerce Dashboard. Then, locate the “Products” tab in the left-hand sidebar, where all the goods on your website will be shown once you open it:
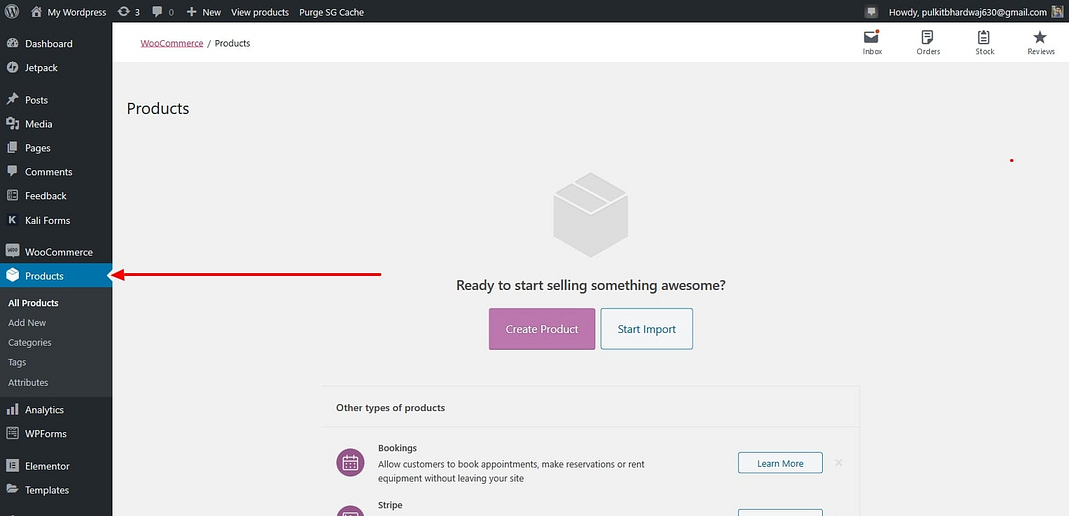
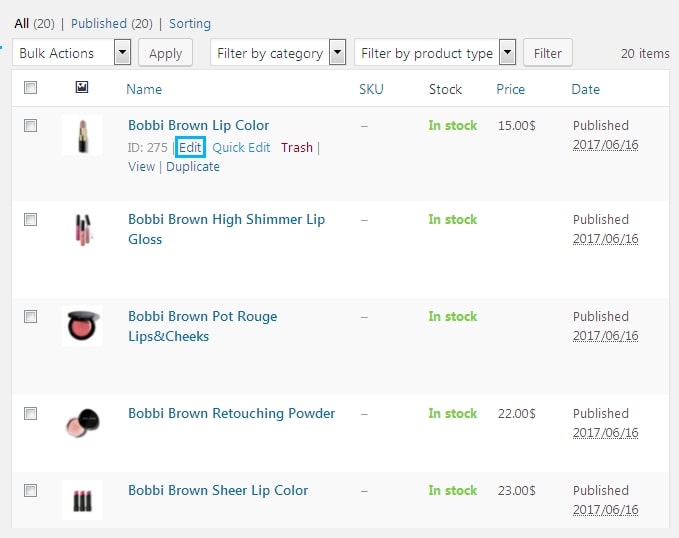
Click on the “Edit” button under any product that you wish to add WooCommerce SKU just like what we did here:
Step 2: Fill in your SKU
The SKU number may be found in the Product Data > Inventory block and should be entered in the SKU field. After that, save your work. You’ve now given a product an SKU number:

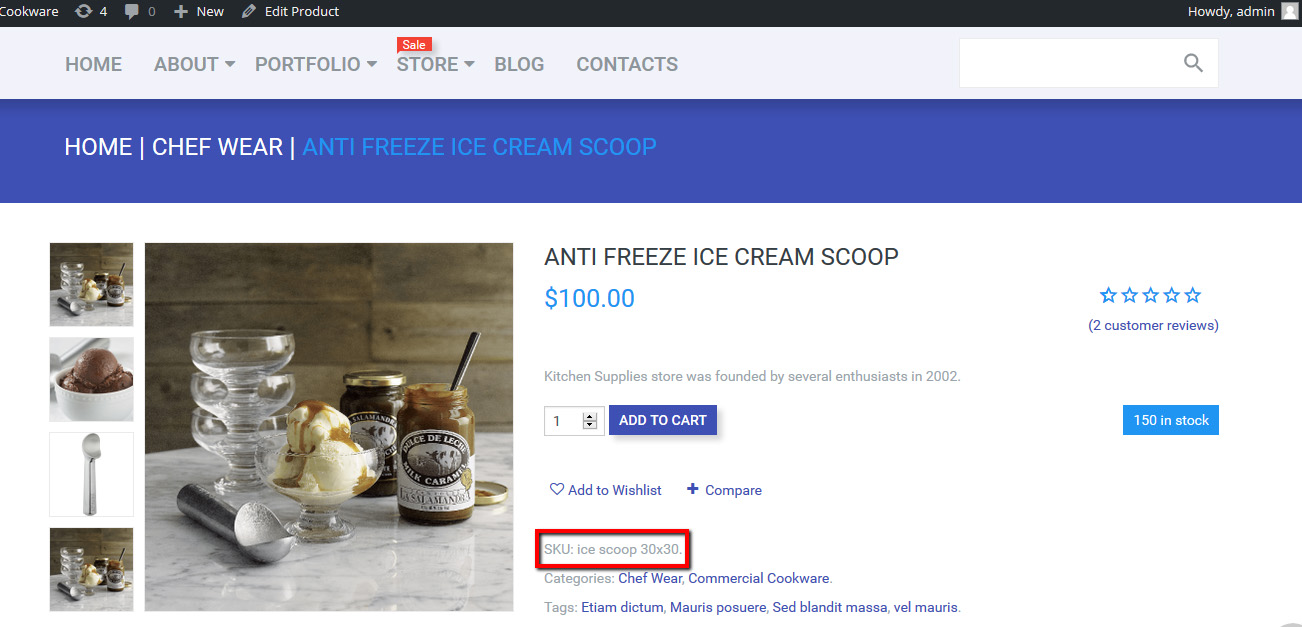
In this way, your products are now assigned to a WooCommerce SKU, which allows consumers to find the items much more easily.
Step 3: Save your changes
When you finish clicking on the “Update” or “Save changes” button, go back to your website to check out the stunning result:
How to add WooCommerce SKU to product uploading form?
For the previous tutorial, everything takes place in your WooCommerce backend of the website. However, what if you want to do it from the front end? WP User Frontend has the know-how to help with this. You will be able to add product SKUs directly from the frontend of your site using its frontend solution capabilities.
Step 1: Install the plugin
To do so, we need to install the plugin of WP User Frontend before going any further. This step is quite easy if you have operated on the WooCommerce platform for quite some time. On the other hand, if you are newcomers, navigate to this link and there will be .zip file downloaded to your device:

Moving on, go back to the WooCommerce Dashboard, you will quickly notice the Plugins > Add New section on the sidebar, where users will be able to add any plugin you need. Click on “Choose File” button in the center of the screen to upload the file. Then continue to click on “Install Now” and “Activate” to complete the installation.
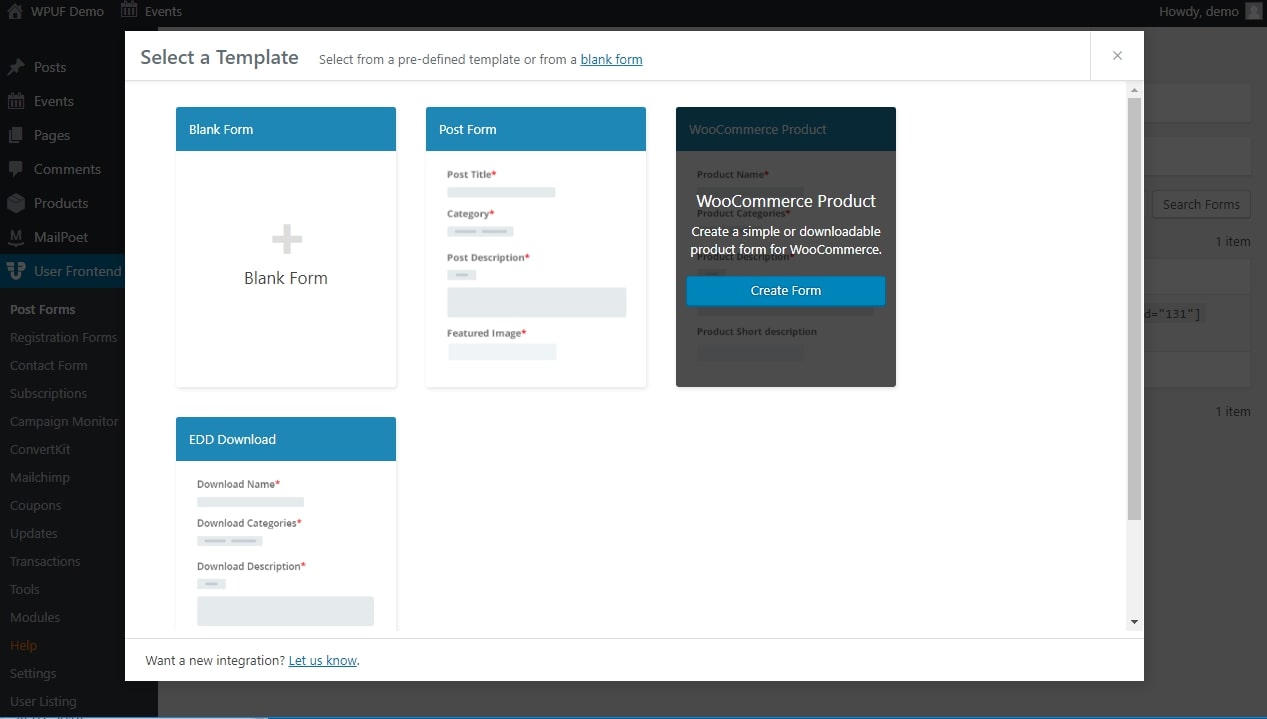
Step 2: Open the template form
Your WooCommerce store’s product data can only be uploaded through a form you design. Go to wp-admin> User Frontend > Post Forms in the WooCommerce administration area. The WooCommerce Product Upload template is pre-built into WP User Frontend.
Step 3: Add the SKU text field
After you’ve created your form, the right-hand side of the form builder will show all of the fields that are accessible. Then, on your form, type in the text area with your WooCommerce SKU:
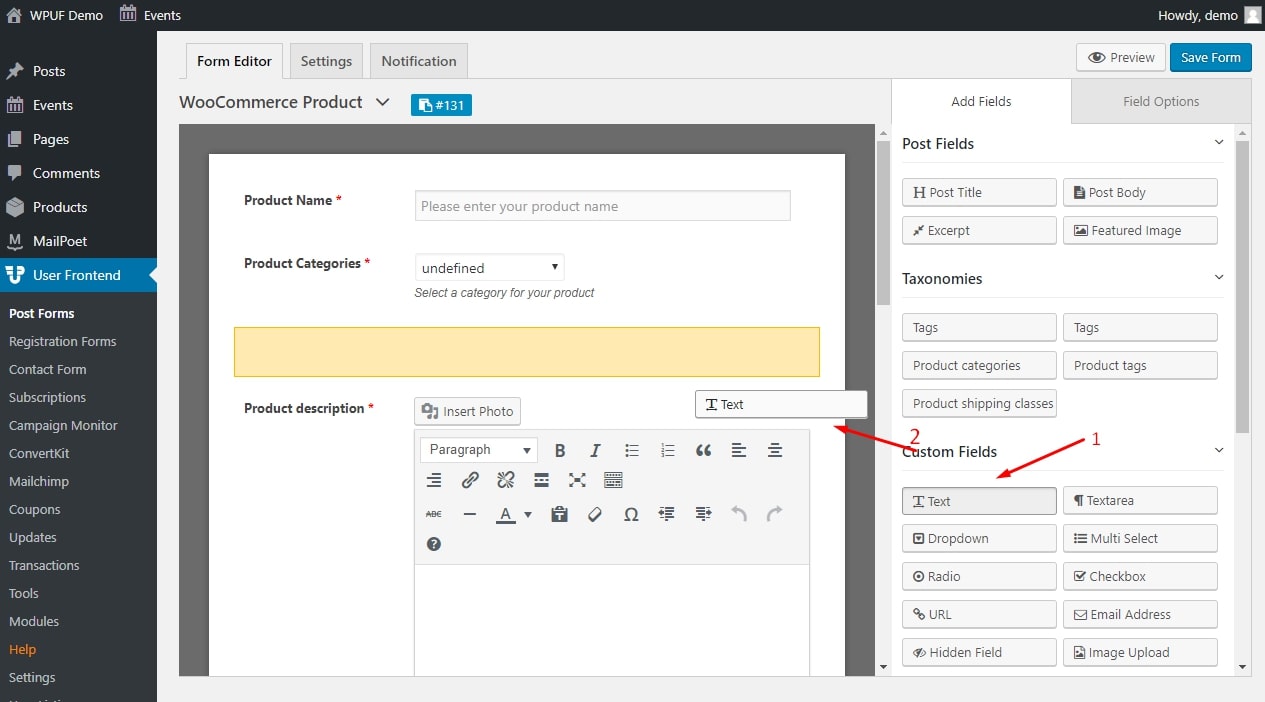
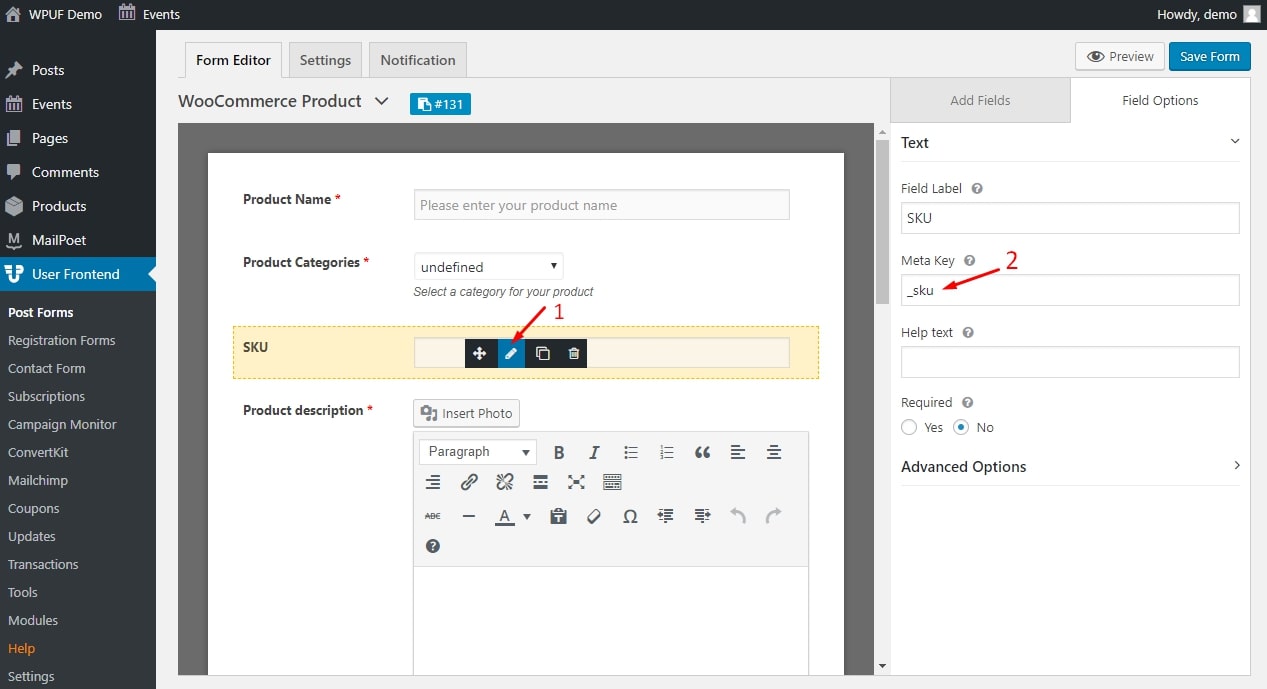
Insert the meta key _sku now in the Field settings for text. You may make the SKU field compulsory, as well as define conditional logic for certain circumstances, under the settings:
Step 4: Save and check out the results
Make a copy of the application and save it. Simply add the shortcode into your theme’s functions.php file to create a new page for uploading your WooCommerce products. The WP User Frontend plugin does all the work for you when it comes to setting the product SKU from the front end. After you’ve published your form, it should resemble the one below:
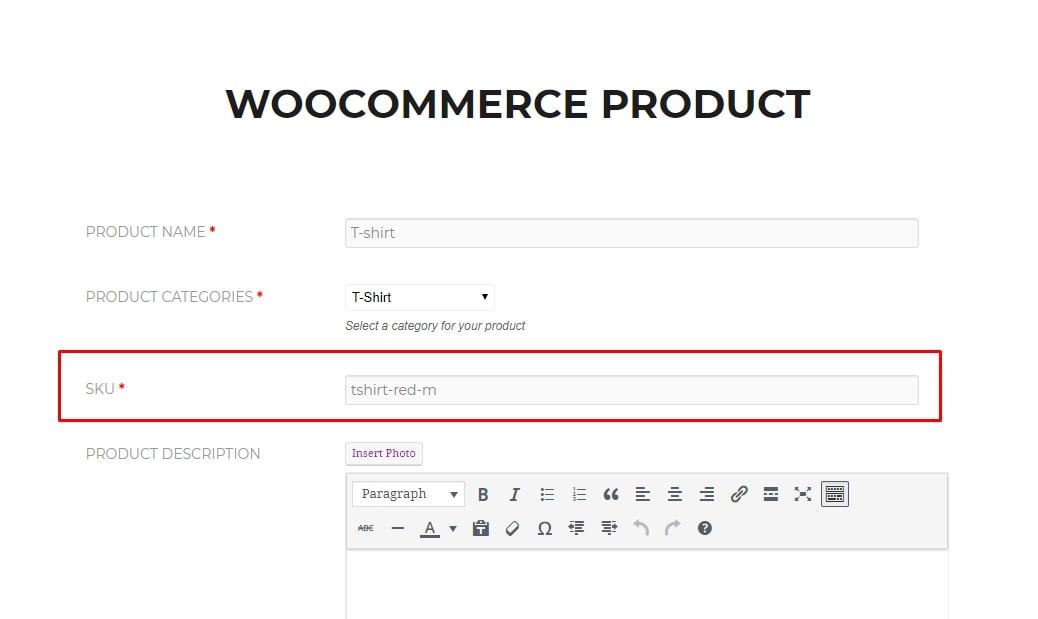
Submit the information after filling out the form with the desired SKU. When you go to the WooCommerce products area, all of your items will be generated immediately. Go to ** wp-admin> Products> All Products ** to see the most recent items you’ve added to your cart, go to wp-admin > Products > All Products. Once there, you can see the product that was entered using your frontend’s SKU.
Conclusion
To sum up, we hope that our article today on How to add WooCommerce SKU to your products has answered all of your questions related to the problem. SKUs do more than just make life simpler for retailers; they improve revenue and make it easier for consumers of all types to locate and buy your items. Let us know if it works for you and your business in the comment section!


