
How to Add a Privacy Policy in WooCommerce

The privacy policy has become the main concern for all online businesses, not except for WooCommerce. The reason is that customers who come to your store, purchase your products, and give you traffic and income. Hence, creating the privacy policy in WooCommerce will help store owners figure out how they could protect their users’ data.
If you fail to generate a WooCommerce privacy policy, you will suffer from a high risk of making your store appear amateurish. Luckily, there are multiple ways that we can utilize for adding this privacy policy to WooCommerce. So, do not hesitate to add a privacy policy to your WooCommerce to let your consumers know why and how they are required to process their personal information.
What do we include in adding a privacy policy for WooCommerce?
Before going into detailed instructions on adding a privacy policy for WooCommerce, you should equip yourself with what you need to include in implementing this critical task. The primary requirement involves how you collect and are about to collect customers’ information.
-
Data from visitors: These will be information collected from users coming to your site
-
Methods for collecting information: They can be cookies, sign-up, comment forms, registration, or web beacons.
-
3rd party advertisers: Google Adsense, for example.
-
Links of every advertising program: These links are the ones to your privacy policy related to all advertising programs that you participate in.
-
Your contact information: This helps users reach out in case of any arising questions.
How to add a privacy policy in WooCommerce
Now, it is time to add your privacy policy. Keep scrolling down to see how you could do that easily and effortlessly. We have come up with three simple and effective methods. Hence, read each one carefully and select the one that fits your store most.
1. Use the built-in policy page in WordPress
The latest version of WordPress and WooCommerce comes with a built-in privacy policy page. In the first method, you will walk through how to use the privacy policy page in WordPress for adding your own one. You need to penetrate your WordPress dashboard for executing the task. And in this section, the page will be one part-complete template.
Step 1: Go to the Privacy page
Start with navigating to the section “Settings” in your WordPress dashboard. Then, pick up the page “Privacy” within the back end of your WordPress. This will be necessarily a hub for the privacy policy. Check out the below screen and you can understand better this step to access the page of the privacy policy in the dashboard section.
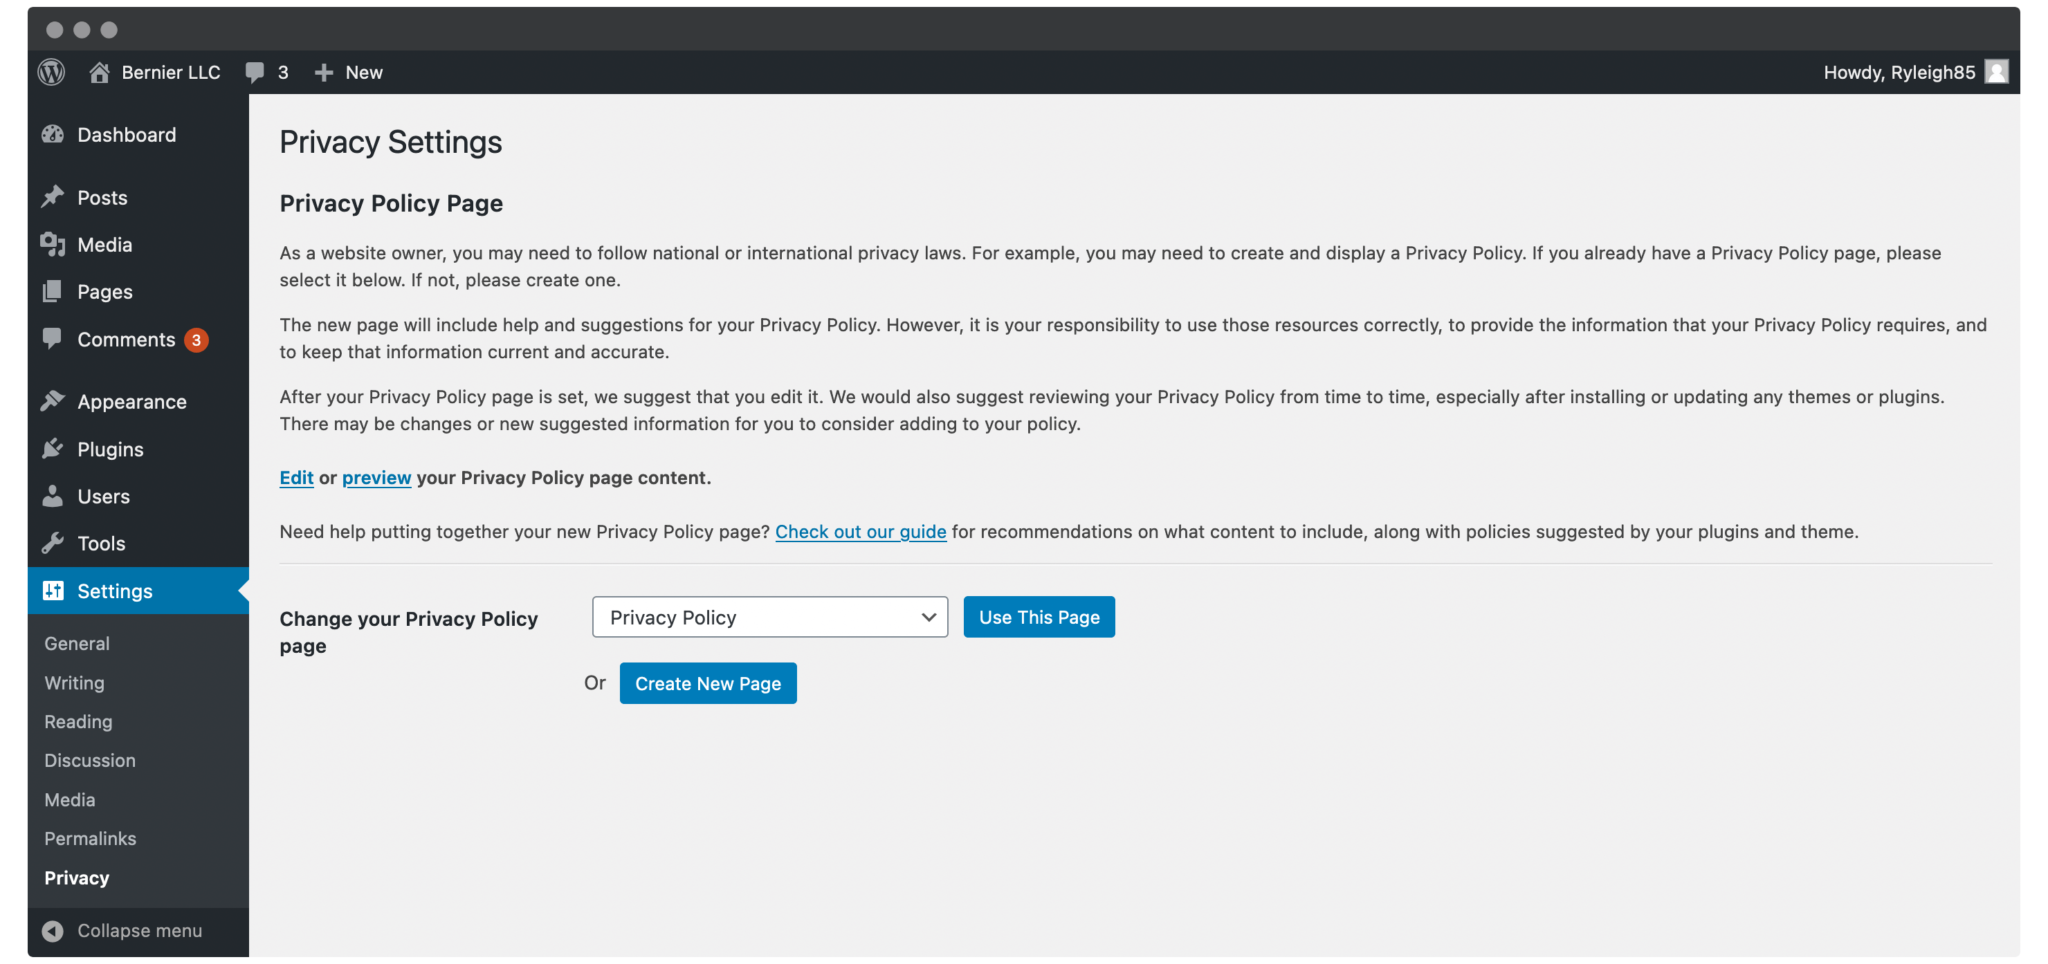
Do not forget the read carefully the information included in the above screen. The reason is that it aims to assist you in having a succinct overview of the importance of this privacy policy for you and broad and further steps you will take.
Next, move to the bottom of this page, where you can see the settings to create and customize the page of the privacy policy. Here, you could choose the desired page of the privacy policy, construct a new one, preview or edit this kind of page that you have chosen. WordPress will generate a default privacy policy page that is perfect for first-timers. If you are keen on accessing it, do not hesitate to hit on the link “Edit” within the notice “Edit/preview the Privacy Page”.
Step 2: Fulfil the template of your privacy policy
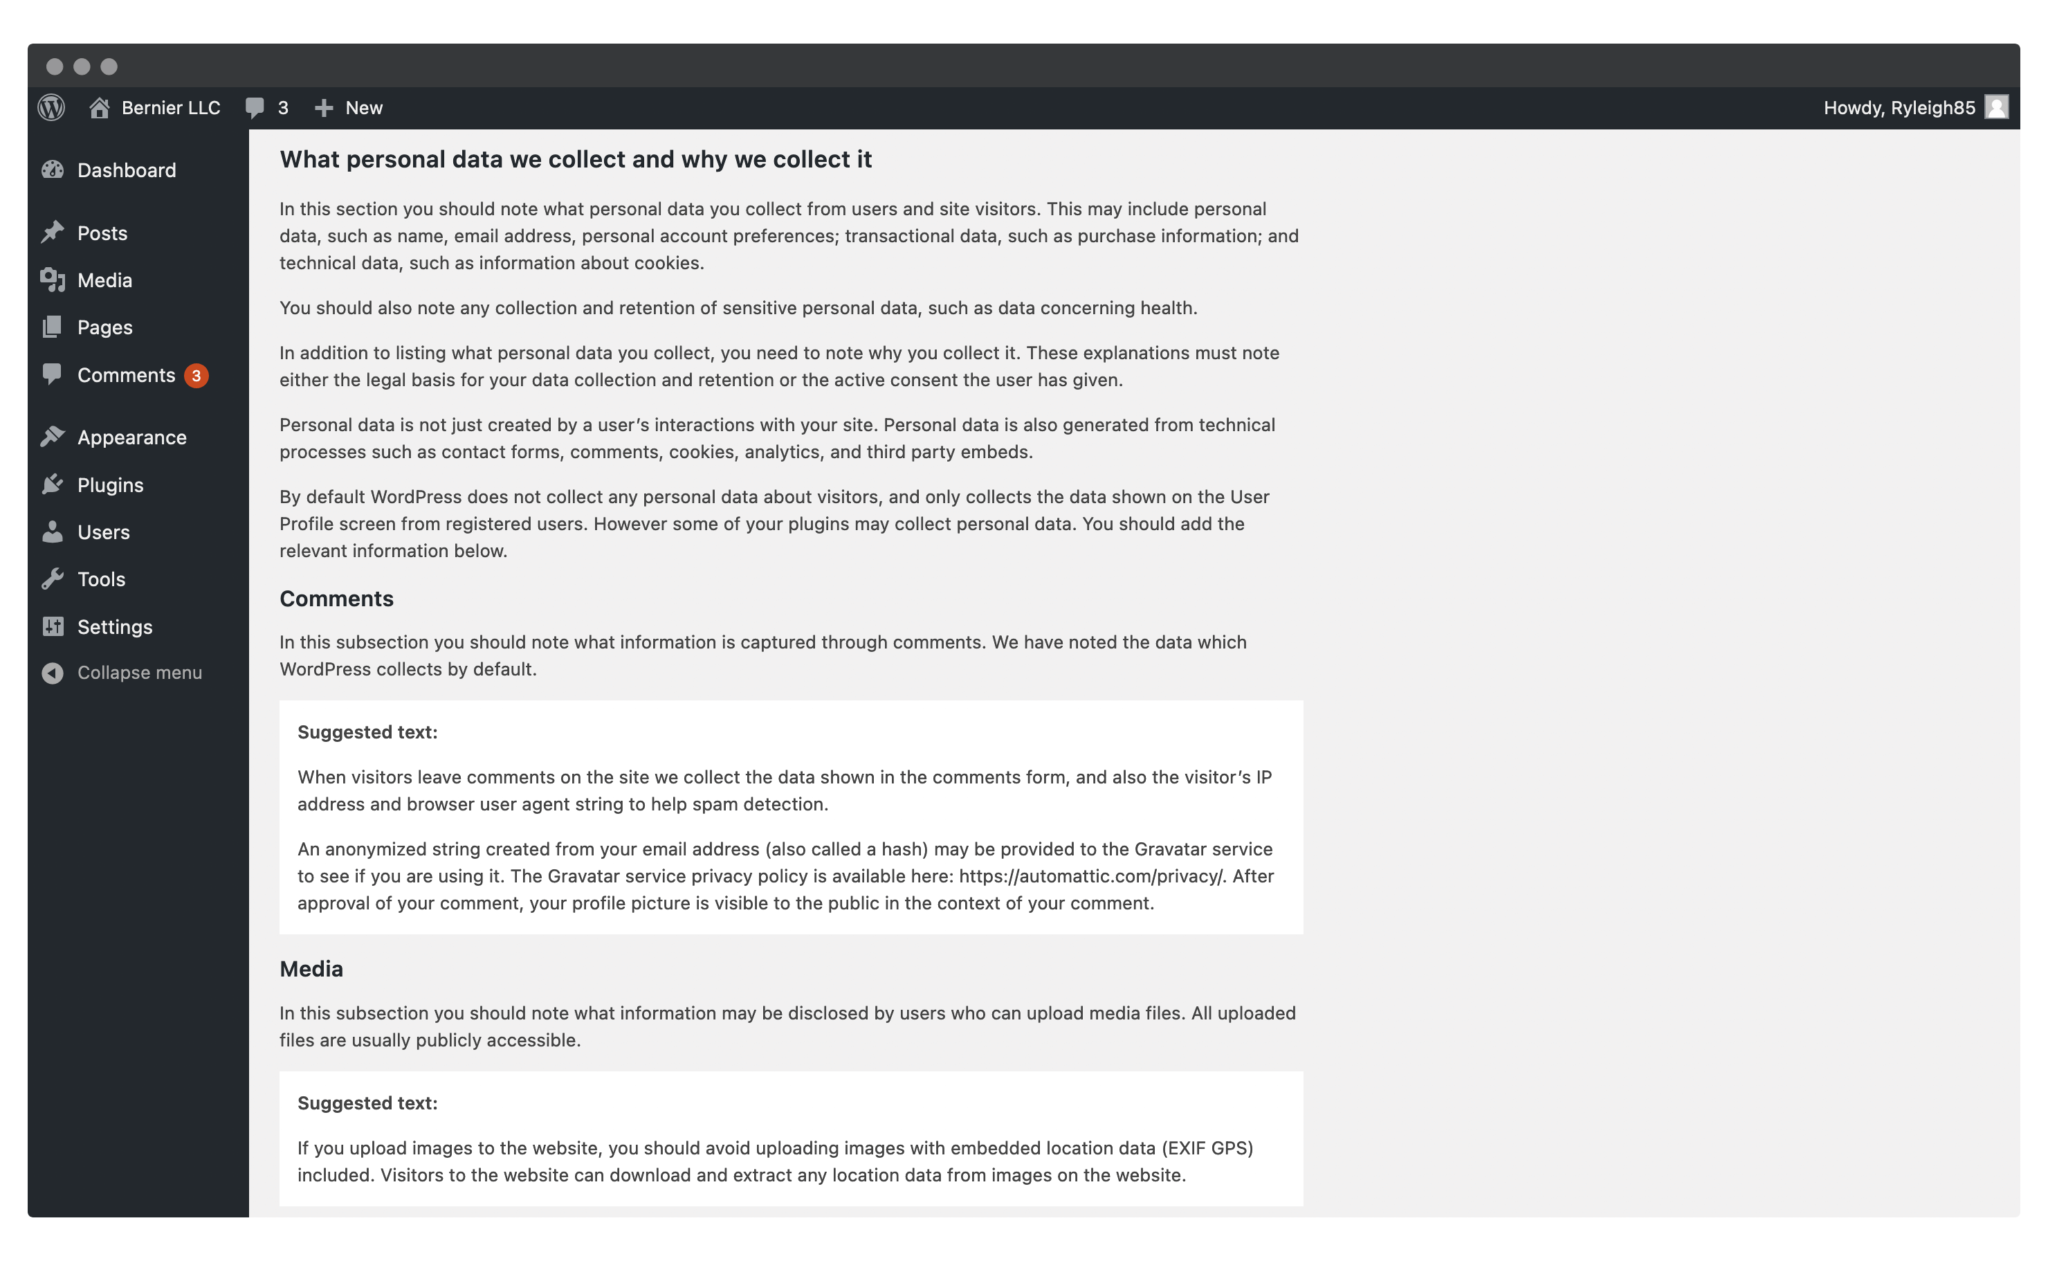
The second step requires you to fill in the template of your WooCommerce privacy policy. After clicking on the link “Edit”, you will be taken to the page Block Editor that contains the framework of your store’s privacy policy.
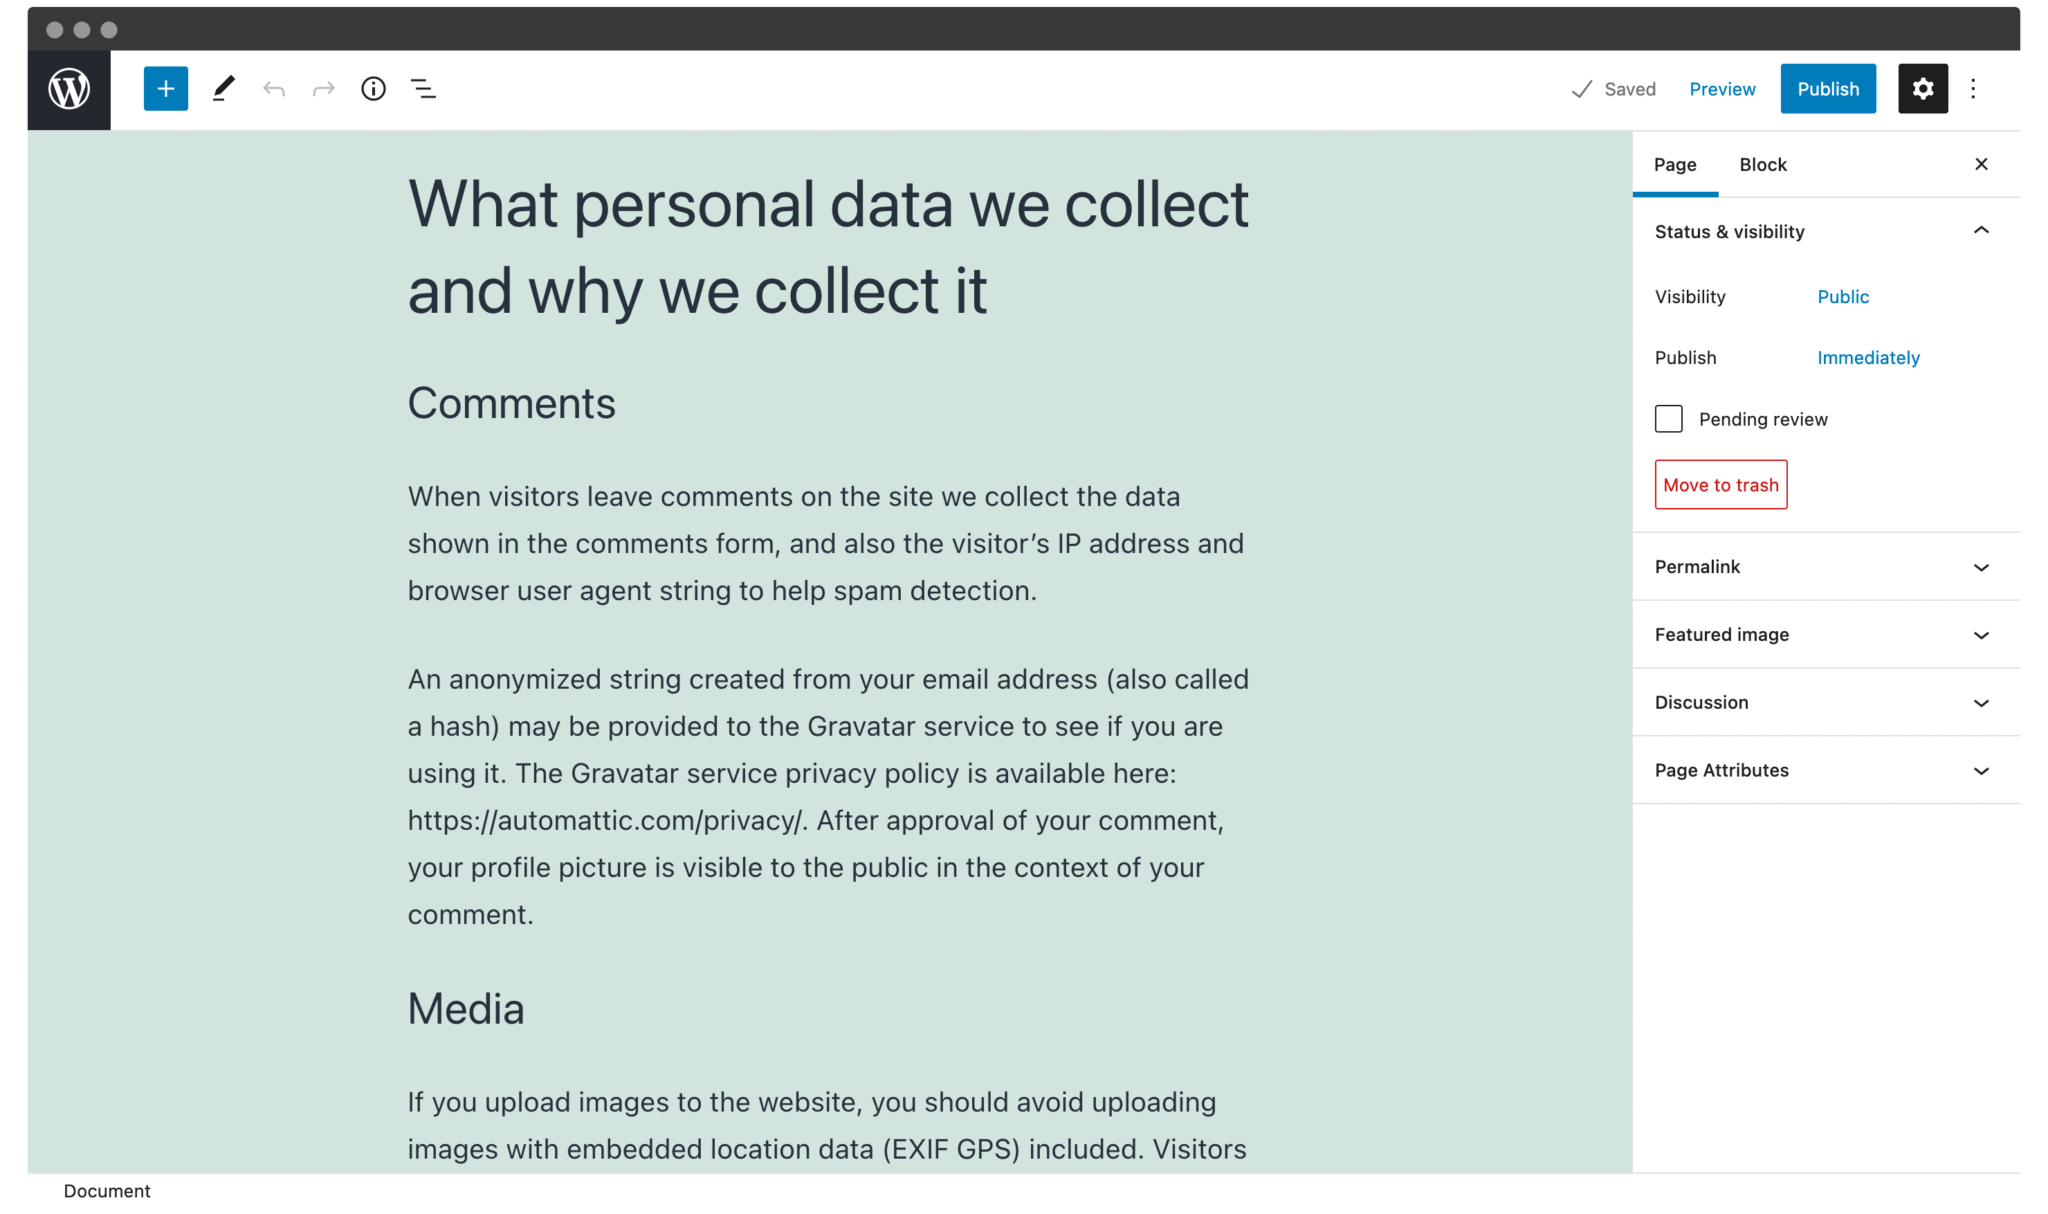
At this part, you could observe several complete sections, whereas others only come with a heading. Therefore, you are highly recommended to check these complete sections to make sure of their accuracy before you make up your mind to publish the page. Your next task is to fulfill the necessary information that your customers want to know in terms of some blank sections. Though each site will come with a detailed guide for helping you finish each section, the accurate working would be beyond the extend of this piece of article.

In case you are stuck, there is the suggested wording that you could use.
When you have completed this privacy page, you need to do now to click on “Publish” to save what you have made changes or display it in your WooCommerce.
Step 3: Enable the privacy policy
Proceed to the final step in this method to enable this privacy policy for WooCommerce to be visible. In this section, you need to consider where you are going to put the link. According to our perspective, you should place it in the privacy policy and the site area common to all pages. To be more specific, the footer could be an ideal area.
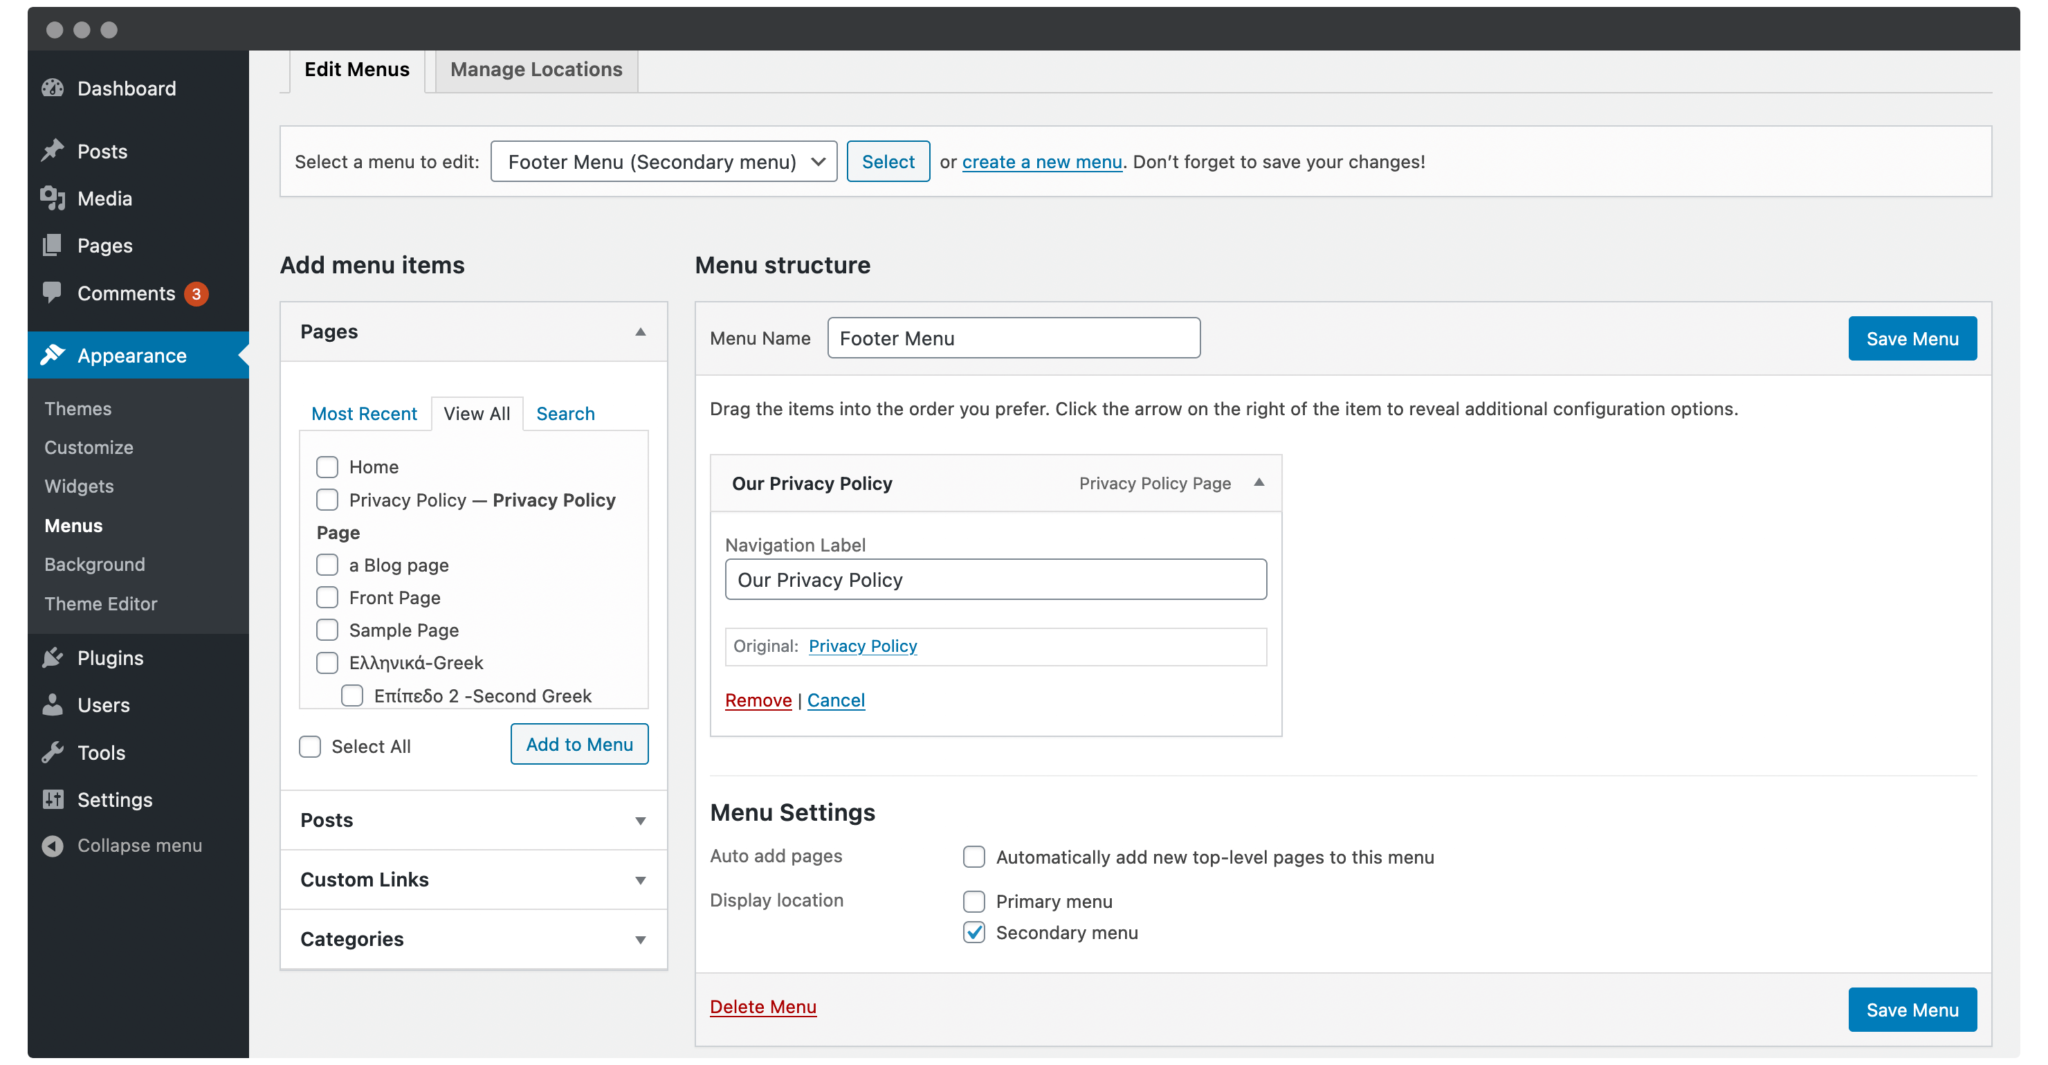
In doing so, you need to go to the section “Appearance”, then choose “Menus” in your WordPress. Here, you are supposed to choose the currently available footer menu. Alternatively, you could be able to hit on the link “Create a new menu”. See the following screen to have a deeper understanding of the detailed activity you will do.

Another must-do step is to name your menu in case of being required. What is more, it is also necessary to select a location for display. In this case, as the default theme, Twenty Twenty-One is being used. Therefore, you will select the location “Secondary menu” before you click on “Create Menu”. If you want to choose the page of your privacy policy from the section “Pages”, click the menu “View All”. If you have not seen it in your list, you might have to choose “Publish” for publishing your page.
Before finishing this final step, you need to check this link on your site’s front end to make sure of the visibility or avoid any other errors. In some cases, you could tweak the wording, settings, or placement to make your WooCommerce privacy policy perfect.

2. Use online tools
In the first method, you know how to add a privacy policy for WooCommerce manually. If you are not keen on it, you can move on to this part, where you can use online tools to proceed with the procedure. In comparison to your WordPress solution, it might be more straightforward. Especially, the great news is you can utilize plenty of free tools out there to add the privacy policy.
Step 1: Choose a tool for adding
Get started by choosing an appropriate tool to add your policy. You can search quickly for a privacy policy generator that costs you no penny at all. Some of the options are FreePrivacyPolicy or TermsFeed. Nevertheless, if you are looking for some more vital elements, including analytics usage or social media, you will need to pay a fee.
Alternatively, you could have a no-nonsense approach by using GetTerms.io for creating your privacy policy. And there will be five fields, two checkboxes, coupled with a dropdown menu for the navigation. So, you need to fill in the needed information as illustrated in the following screen.
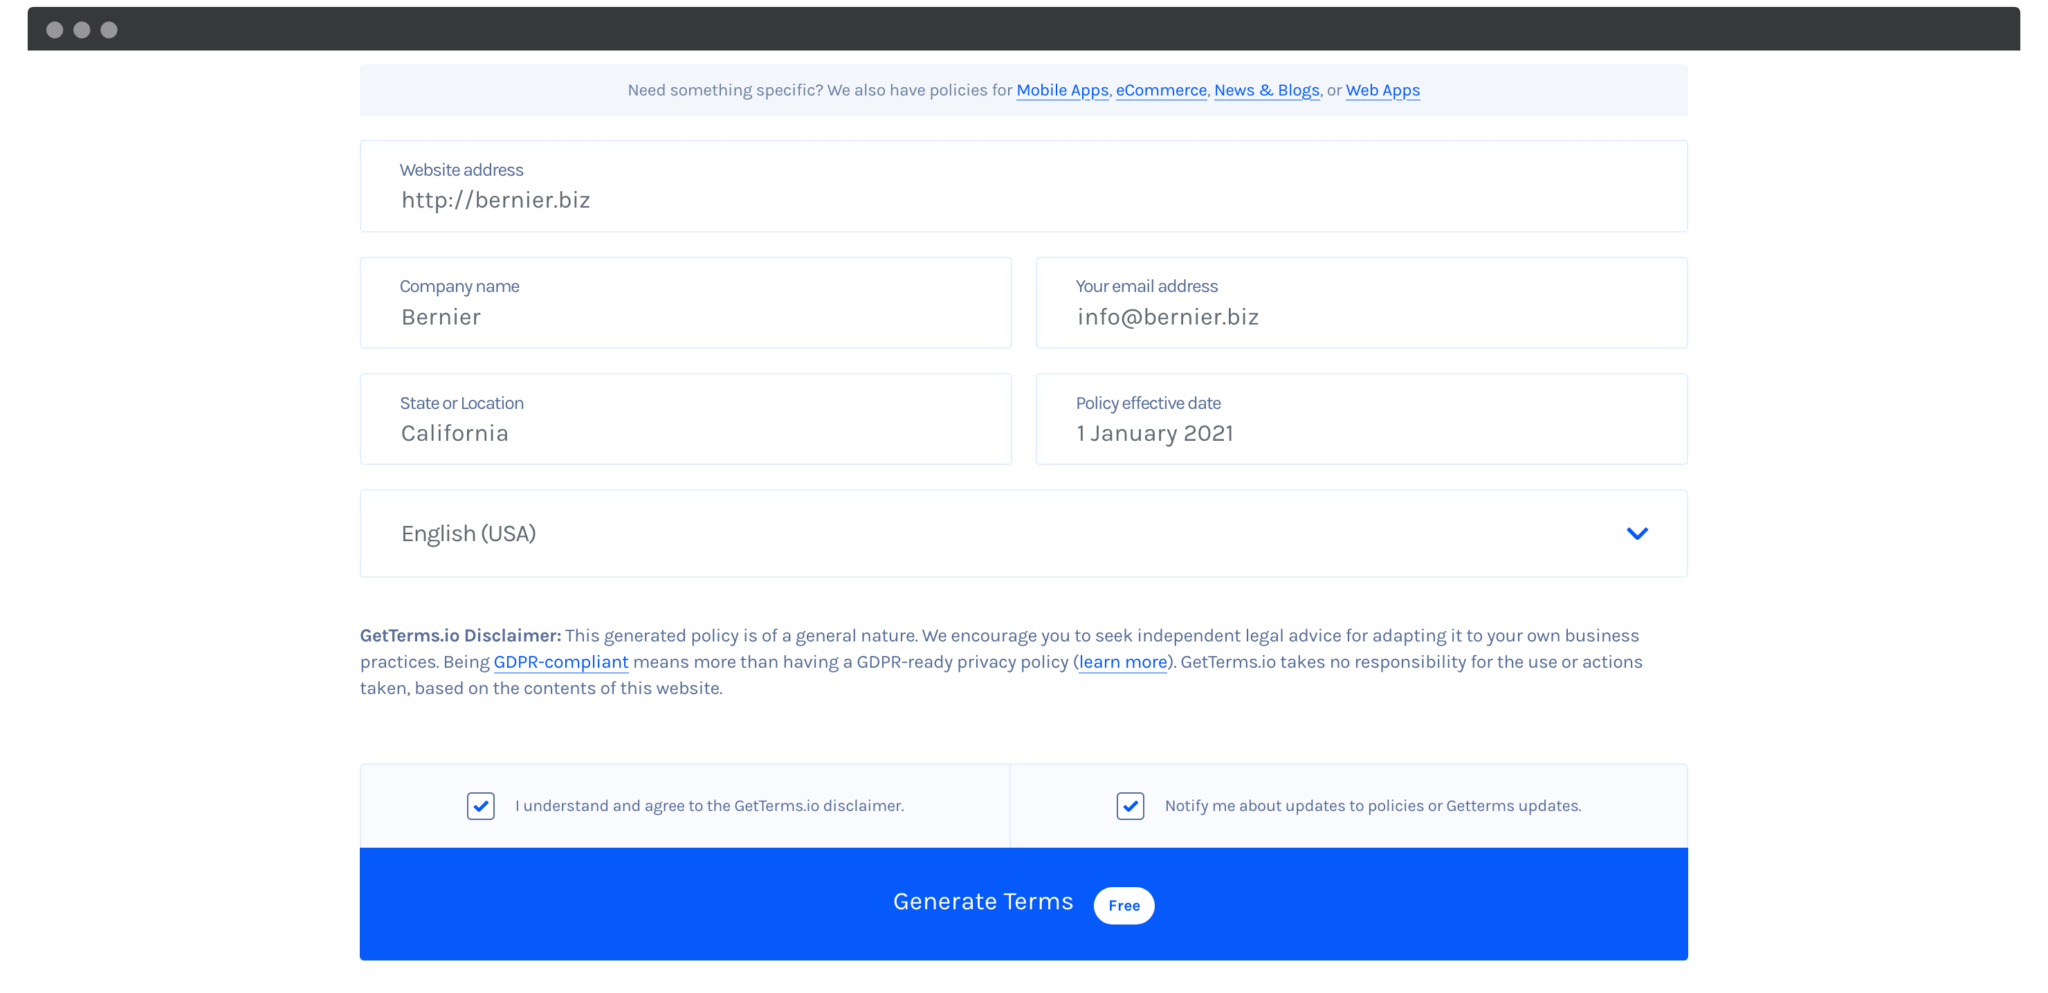
After you finish filling in the above details, your next task is to click on the “Generate Terms”. Then, the site would build a policy, along with “Terms of Service”.
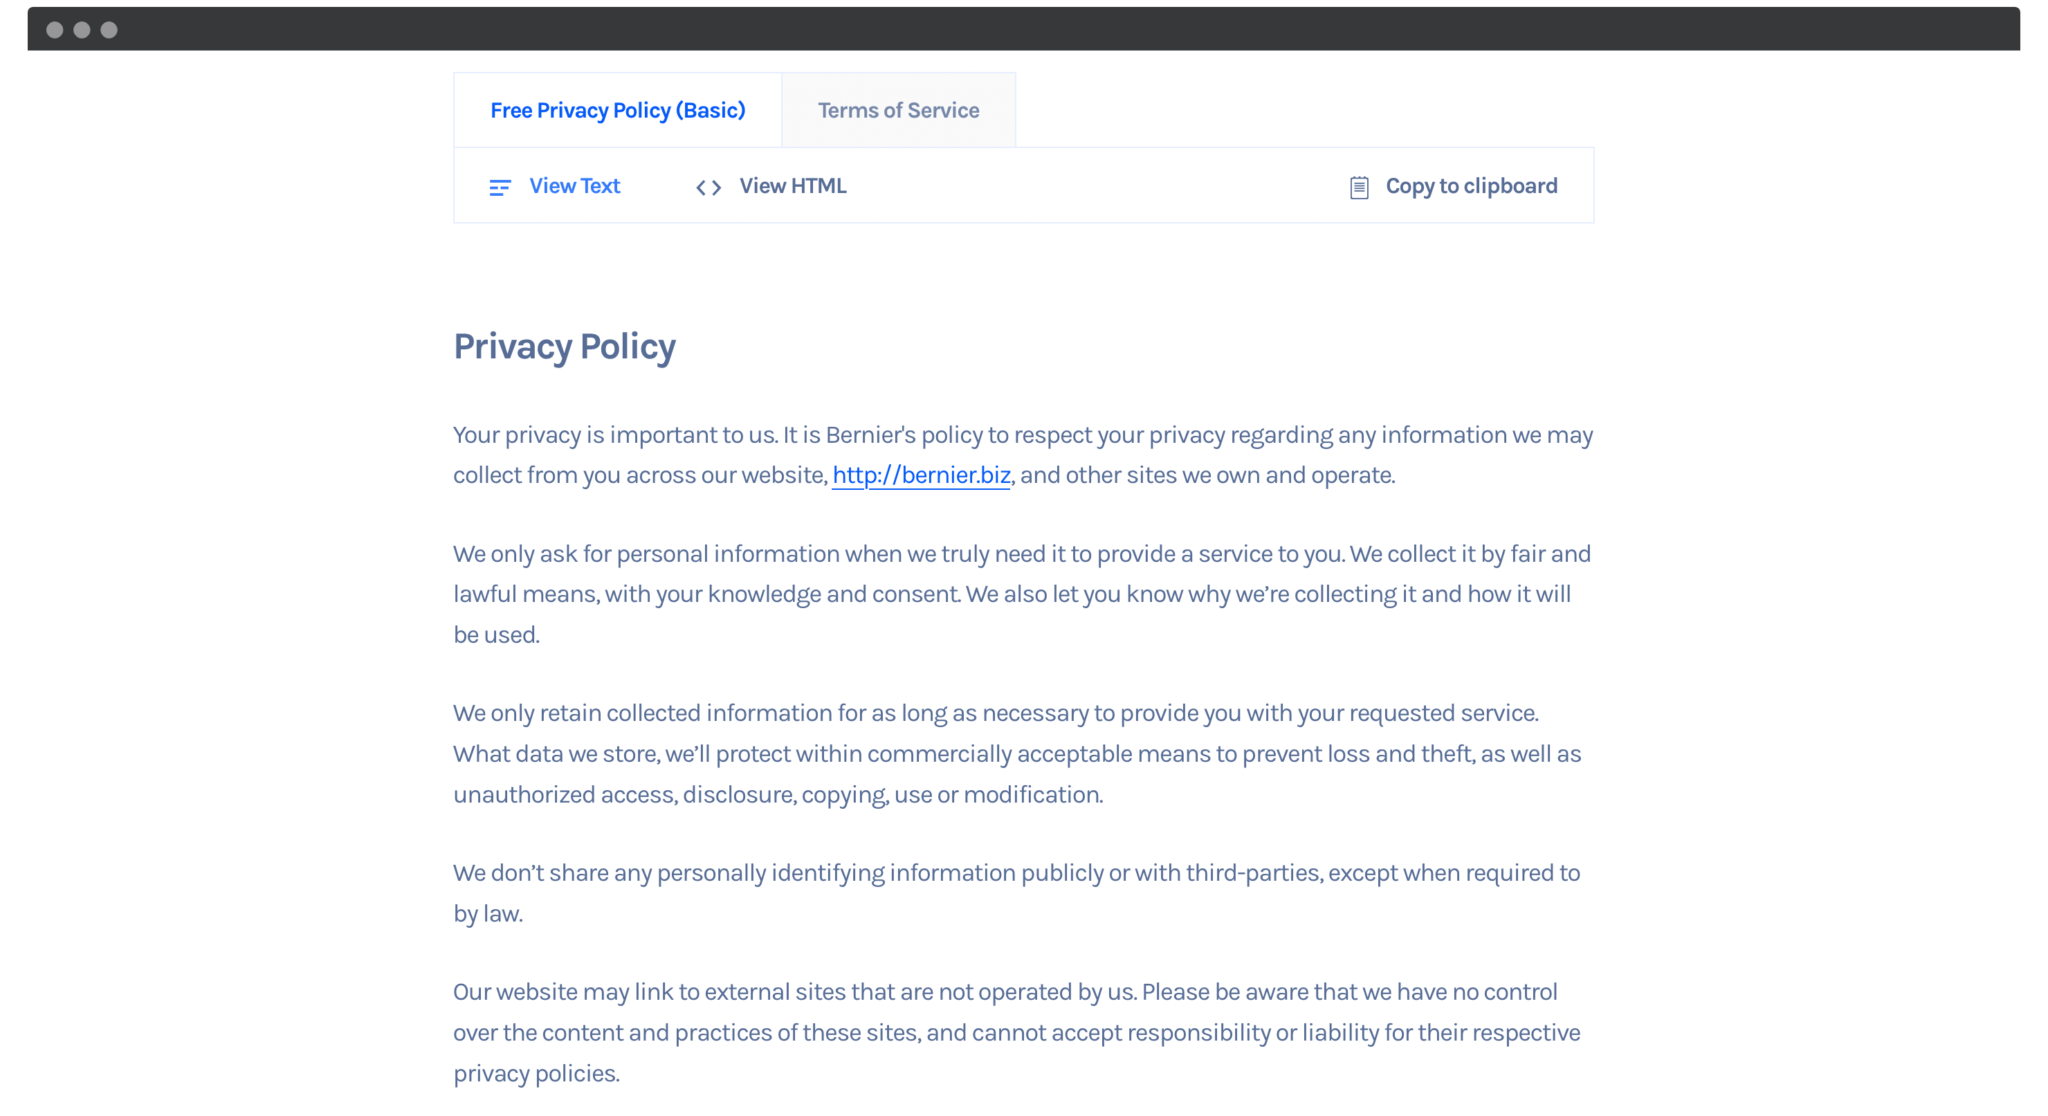
The great thing is that you could be able to pick up either an HTML version or a text oh your privacy policy. We suggest that you should switch to the section “View HTML” before hitting on “Copy to clipboard”. In this section, we would be fond of heading back into your WordPress for displaying the policy.
Step 2: Publish the added privacy policy
The second step in this method is to publish your policy on your site. This activity is similar to how and what you had done in the first solution within WordPress. Nevertheless, you are requested to create one dedicated page with the use of HTML that you have earlier copied.
To begin, your job is to click on the section “Pages”, then select “Add New” in your WordPress. Proceed to the next step by heading to the menu “Options” inside your new draft. Here, you need to choose “Code editor”.
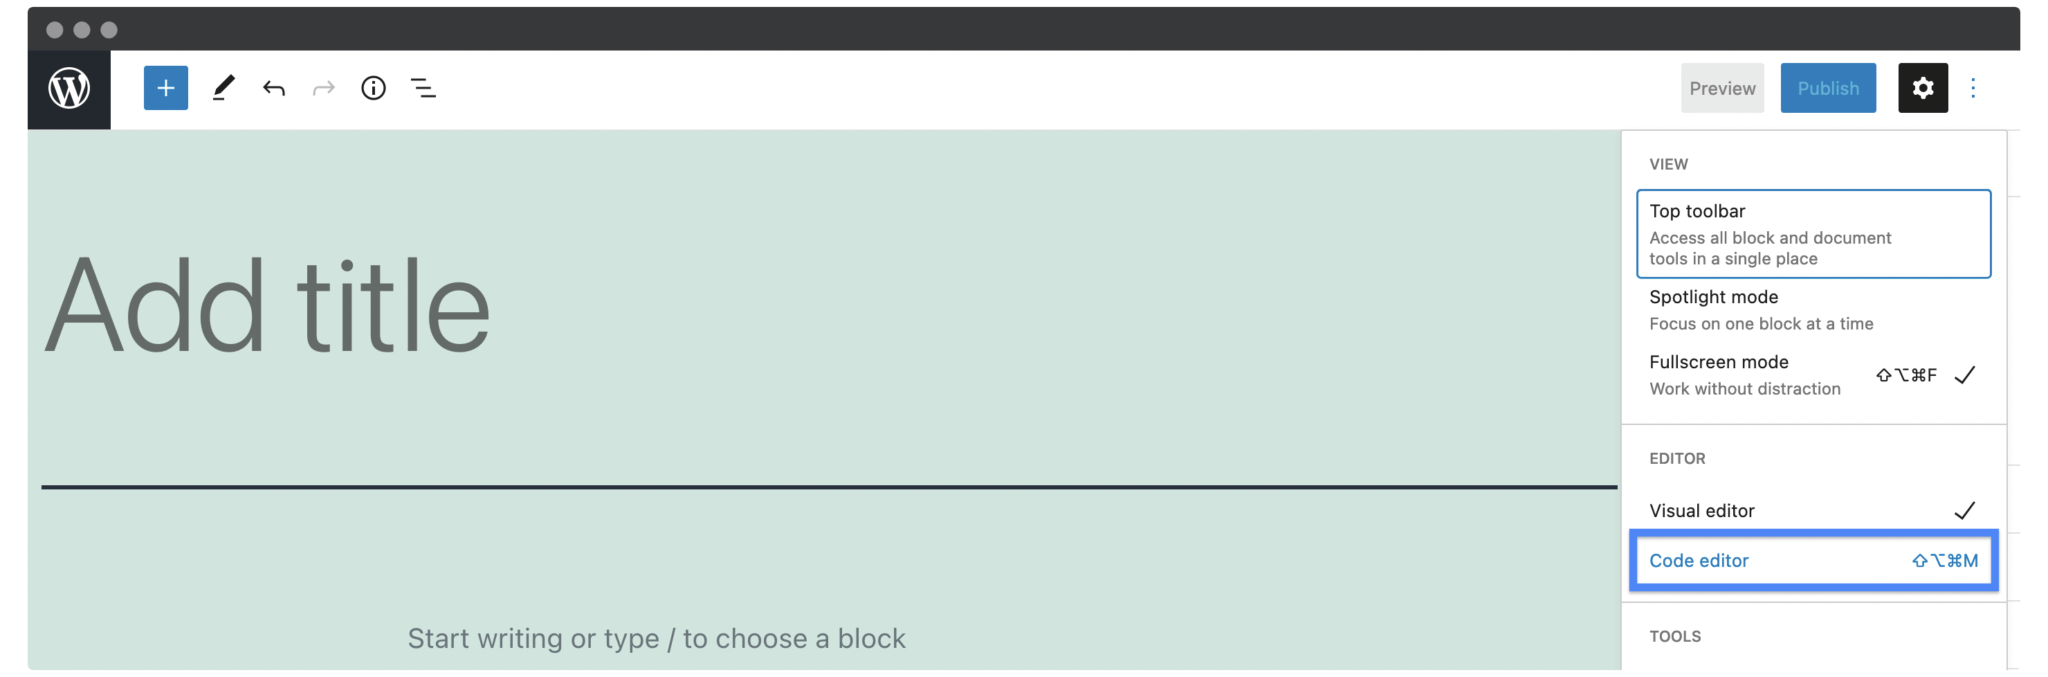
The final thing is to paste in the HTML that you have copied from the above-mentioned GetTerms.io. After that, clicking on the “Exit code editor” is a must. Keep hitting on the button “Publish” to publish your page as well as add this to the proper menu.
3. Pick up a premium solution
Unlike the two above methods, the last method in this article involves opting for one premium solution to create a privacy policy. It is as also simple as the two above methods. So, let’s get started by looking at the following quick steps.
Step 1: Select a solution
First of all, it is vital to make up your mind about which solution you will go with. In brief, there exist two solutions that you can take into consideration: iubenda and Termageddon. Both of them essentially function thing similarly. They offer the user an effective way for generating a site’s privacy policy in which any changes of the laws would be updated. In a nutshell, what you need to do is only to generate the policy one, then it stays updated.
As regards which tool that you should select, iubenda will outstand Termangeddon a bit. The reason is that while iubenda is available in most countries, Termageddon only has its presence in Canada, UK, and the US. What is more, iubenda seems to be cheaper than Termageddon. You need to pay only $29 each year to use iubenda, whereas it costs you up to $99 every year with using the other.
And in regard to support, feature set, price, and scalability, iubenda would be a great choice.
Step 2: Add the privacy policy to WooCommerce
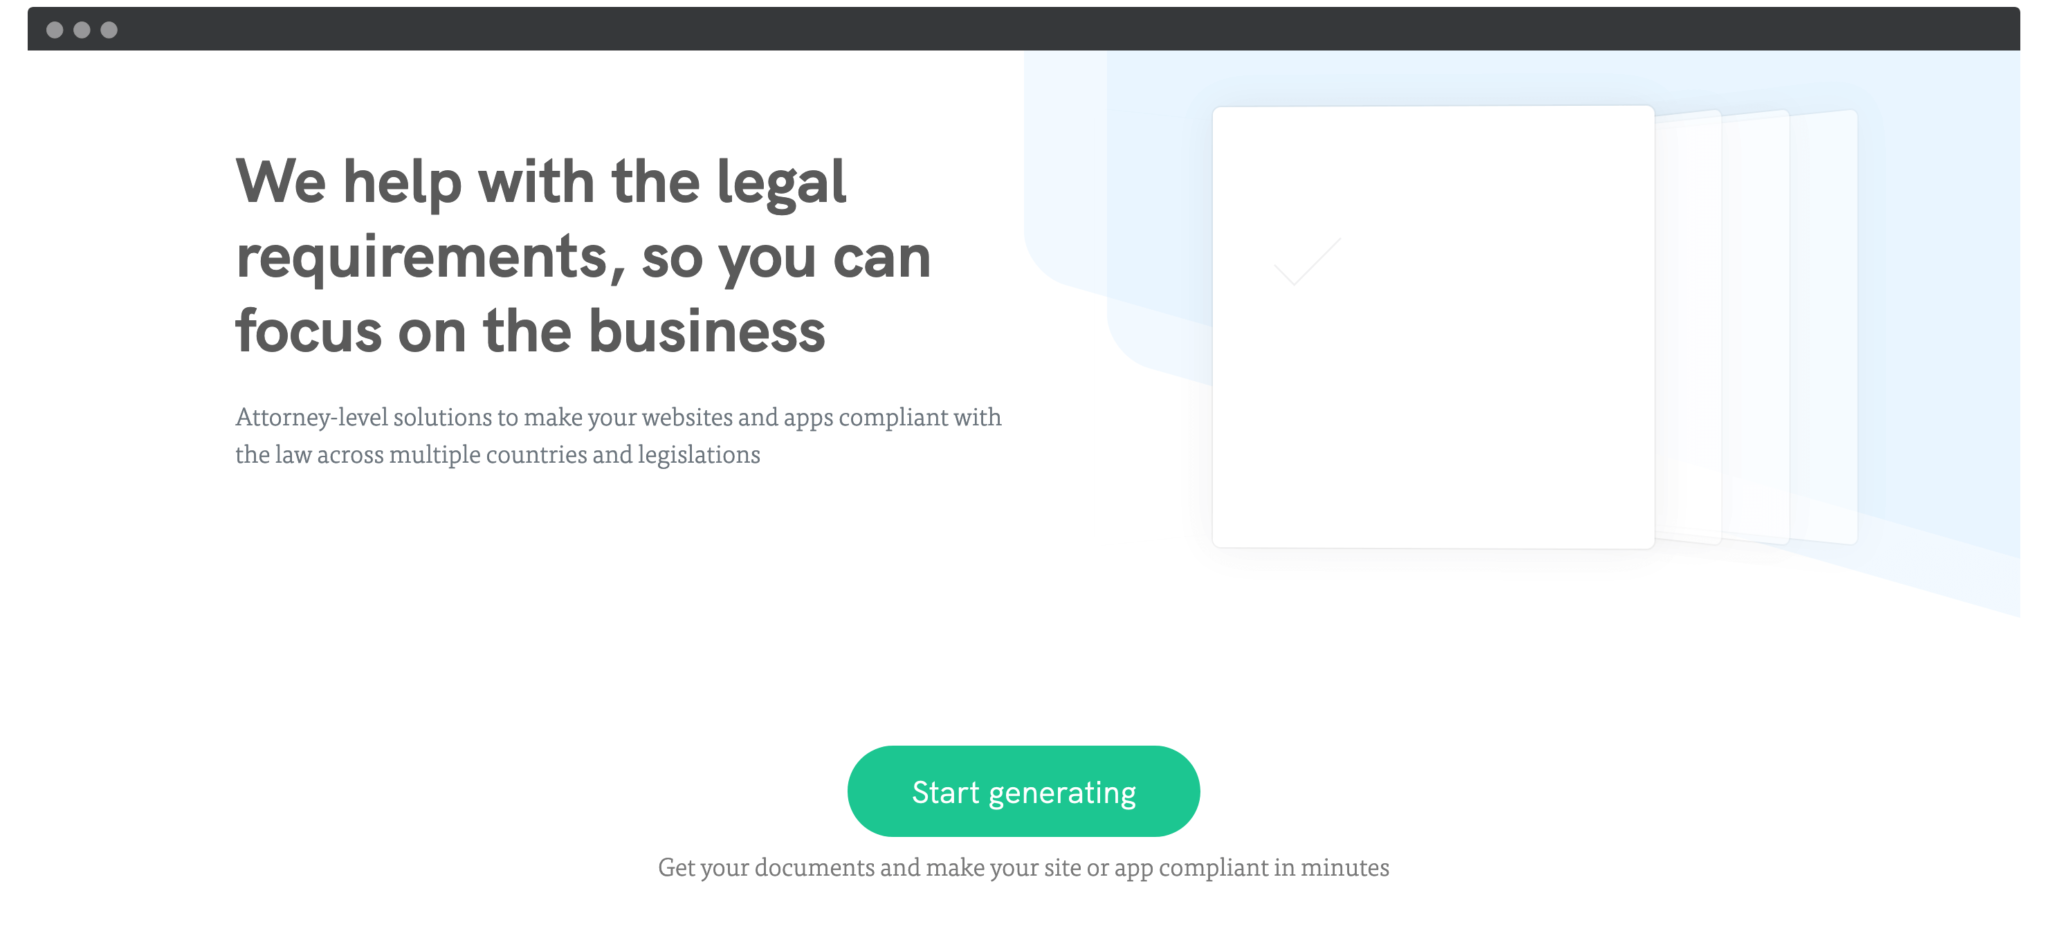
Now, it is time to add the privacy policy to WooCommerce. To start, you will go to the website of iubenda where you will click on the section “Start generating”. After that, you will need to select the business name as well as a focus for the privacy policy.

As soon as you are ready, proceed to click on the button “Start generating” and register for an account for free. After that, you will be redirected to the dashboard in which you could choose “Generate now” which is below the section “Privacy & Cookie Policy”. See the following screen and see where these sections are displayed.

The generator allows you to create modules in your privacy policy that the collected data will determine. You could be able to add elements manually while scanning your website as well as auto-populating your policy.
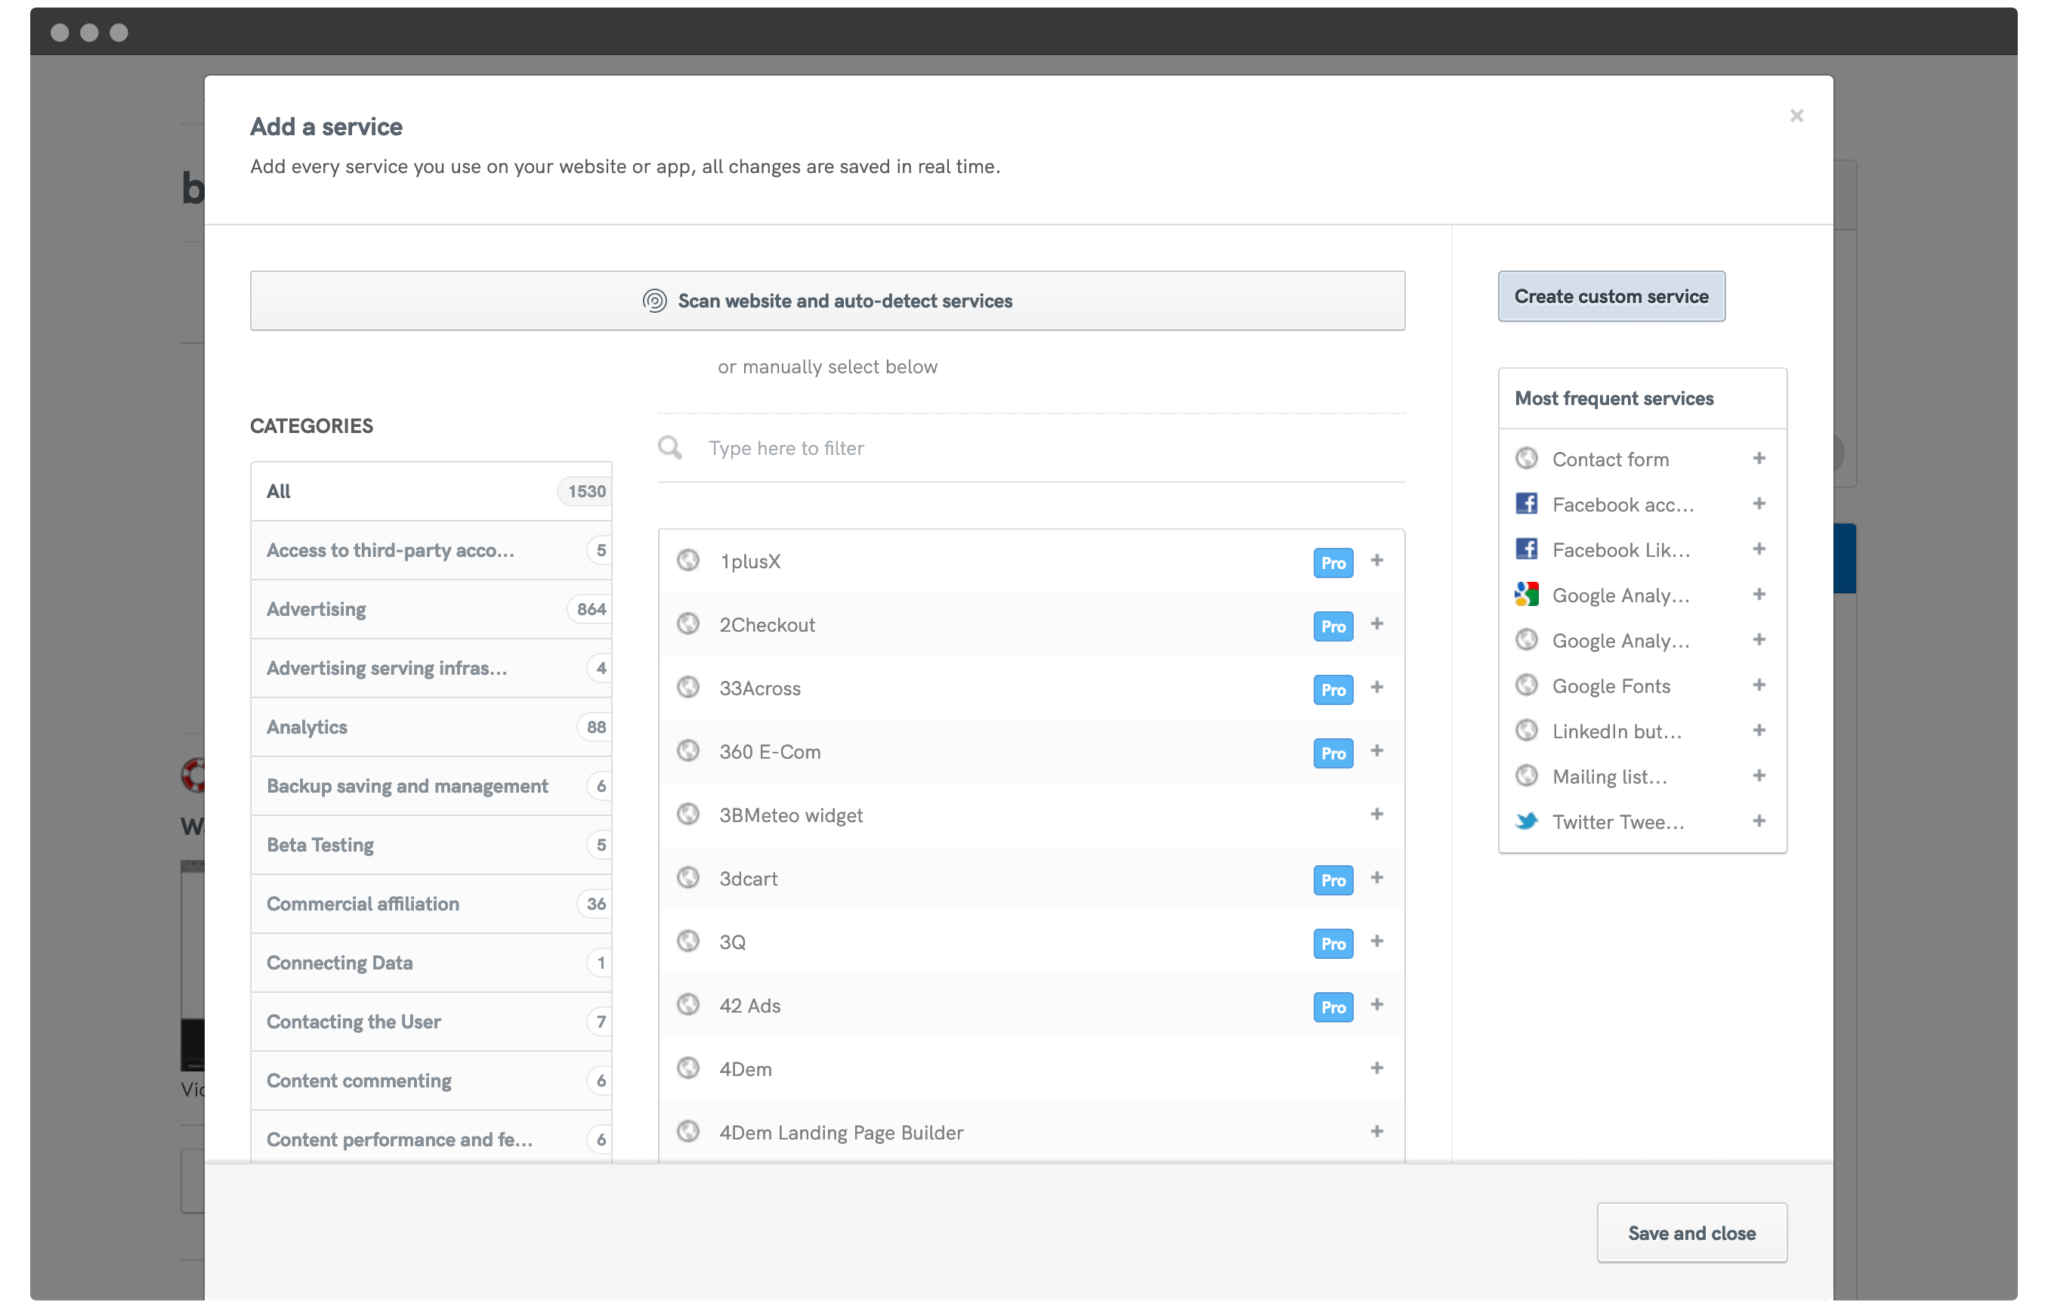
However, you are asked to choose the exact collected data for every element before you save the changes. As you are done, remember to hit on the button “Save & Close” to save what you have changed and close the section. The final thing to do in this section is to choose “Next” for filling in the name, email address, coupled with company address.
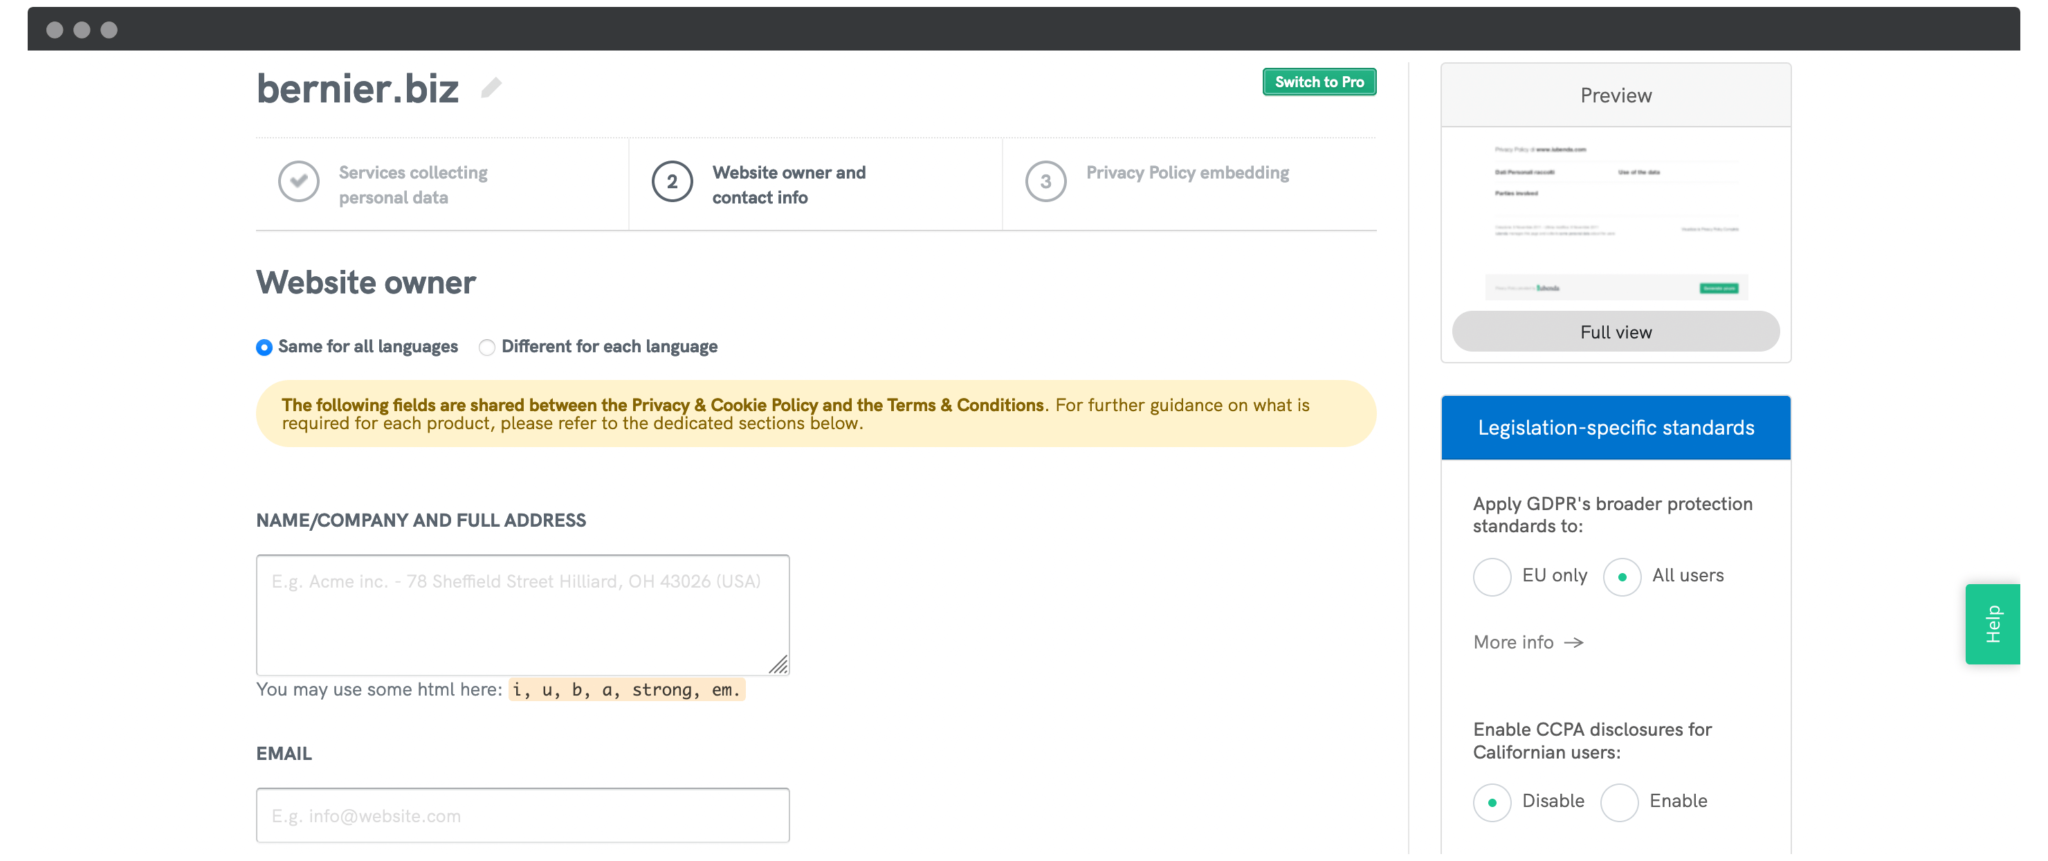
Keep choosing “Next” one more time to proceed to the next step of embedding it to your site.
Step 3: Embed it to your website
When you finish creating your own policy, it is time for your policy to be embedded into your website. Choosing the “Next” section as stated above will help you notice the completion screen, along with one link to the embedding instructions. Check out carefully the below screen to see some of the options that are dependent on the subscription. To be free users, your task is to display the footer widget.
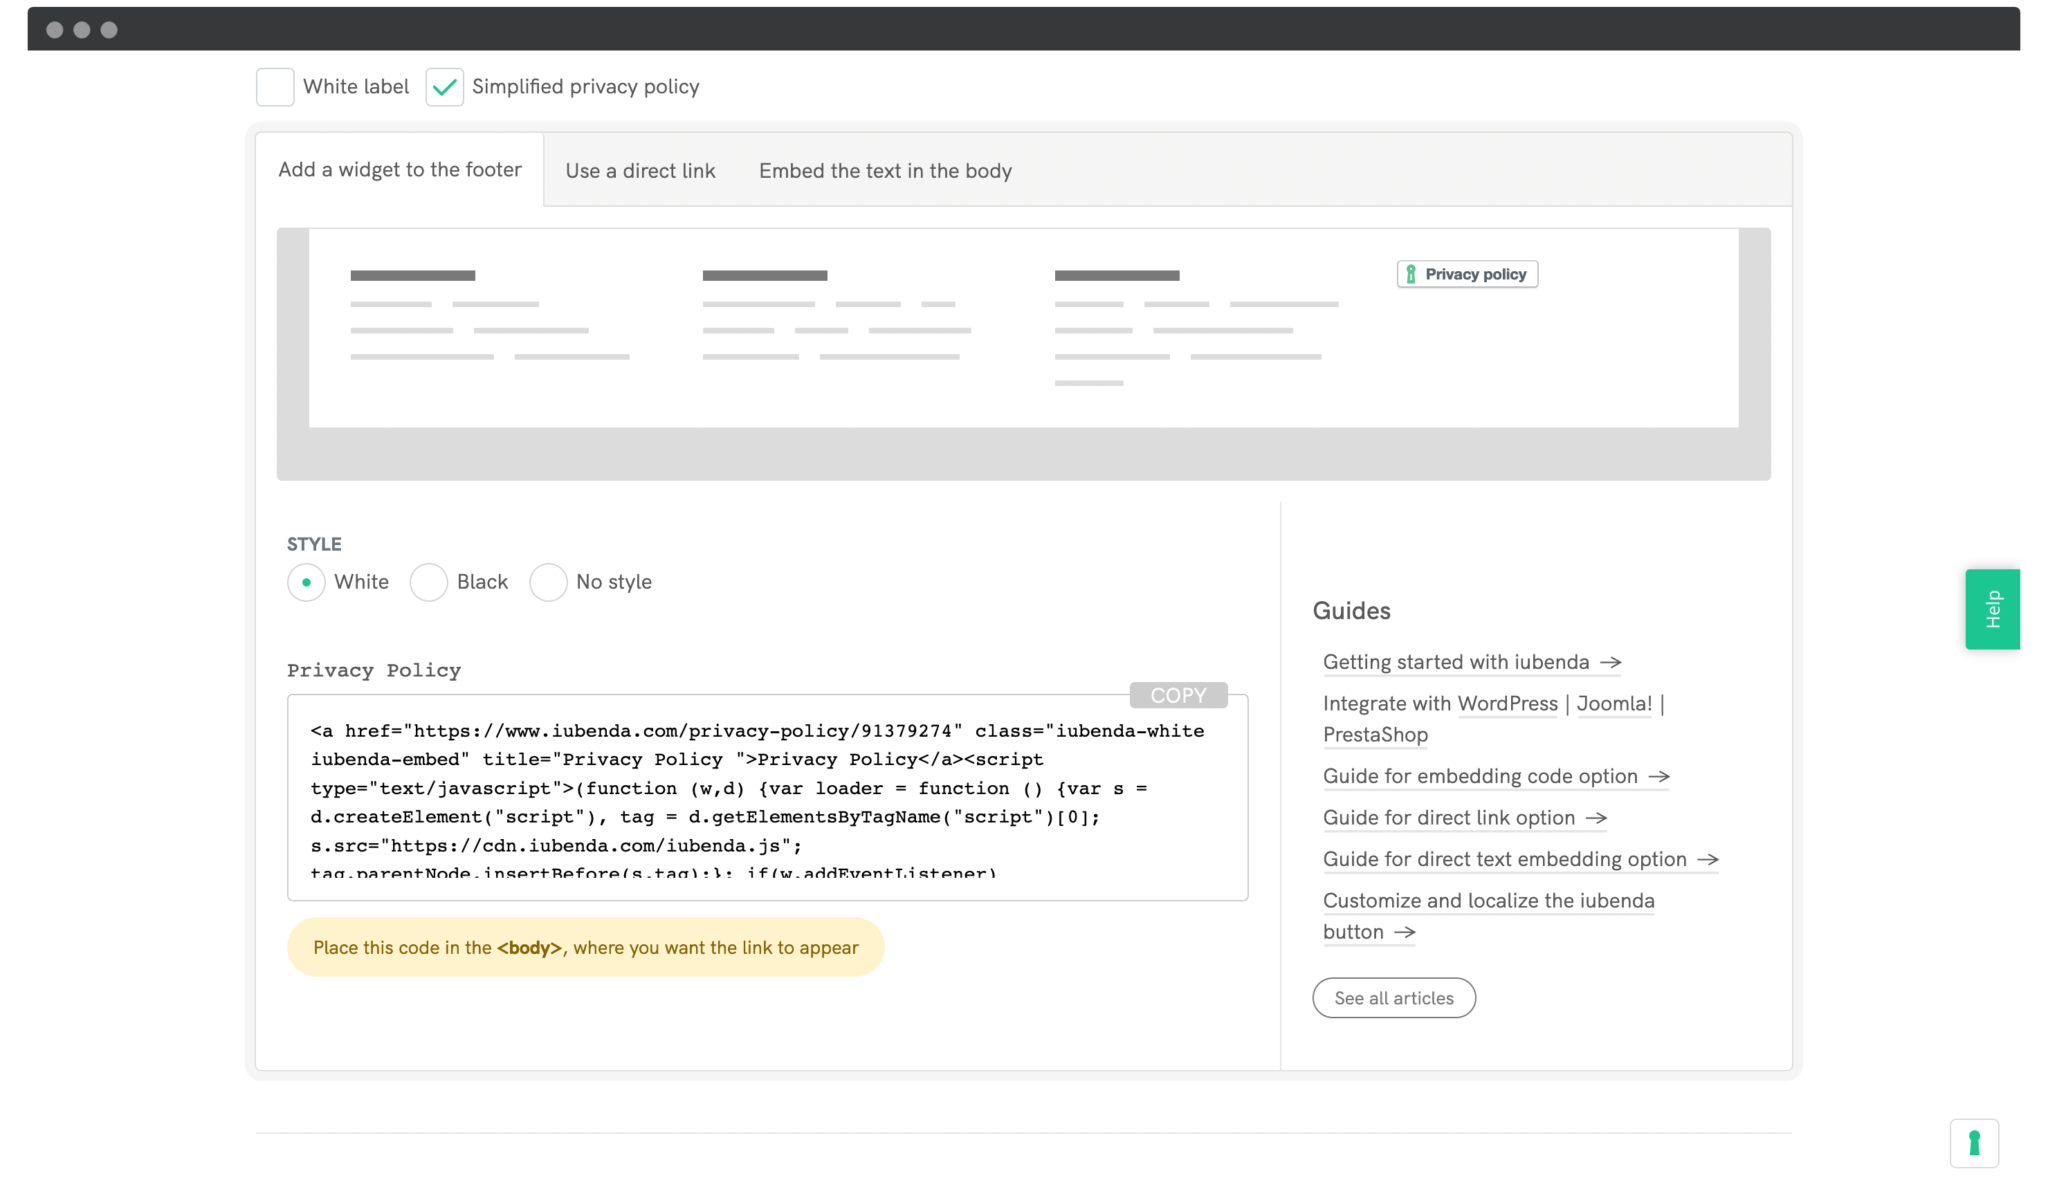
In this section, your task involves copying the illustrated code and paste to the clipboard before returning to your WordPress. Or you could navigate to the section “Appearance” to choose “Widgets”, then continue to select the widget “Custom HTML” to paste in the code. Next, save what you have made recent changes.
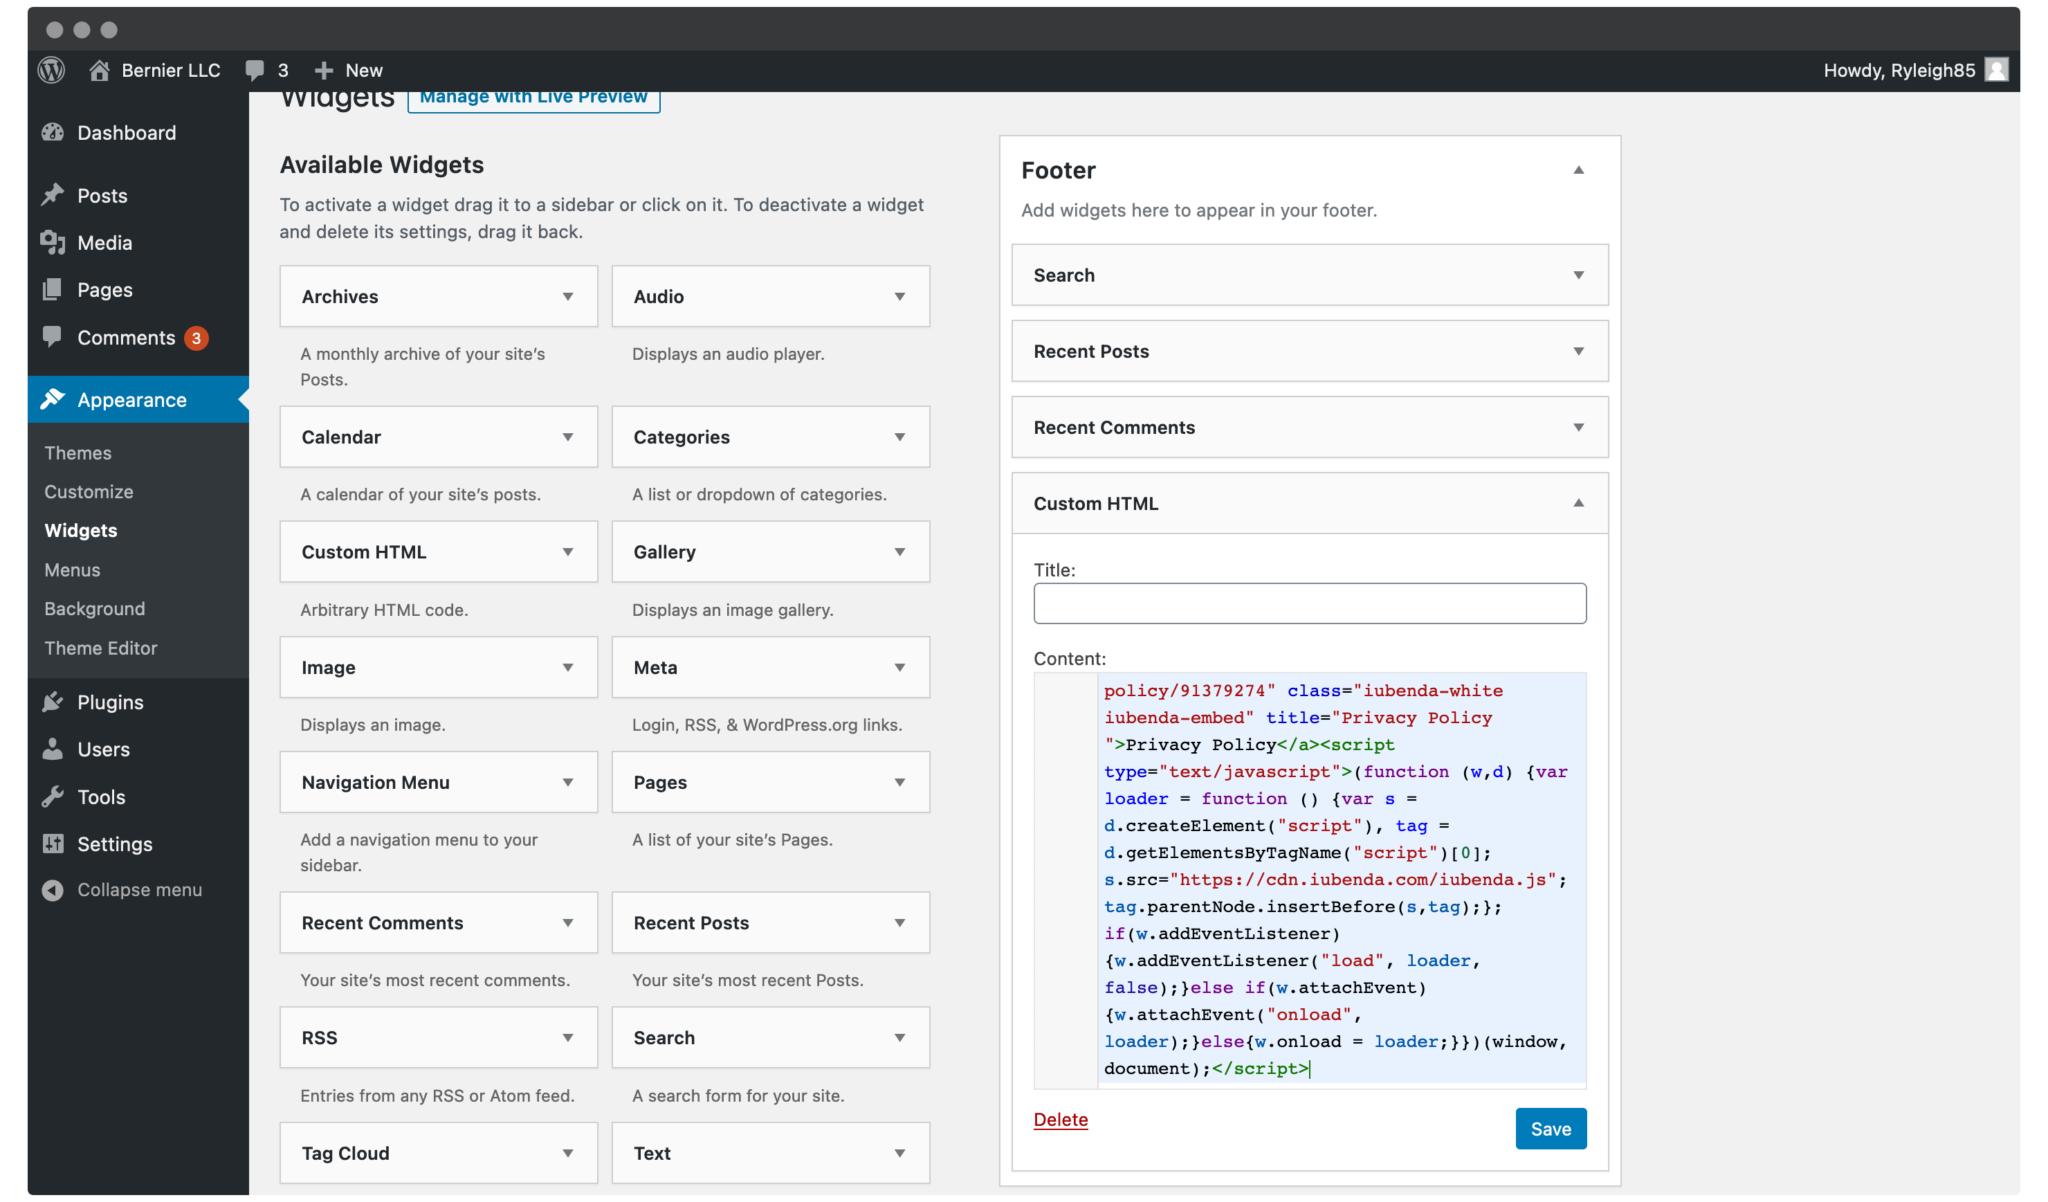
Next, you need to check your front end to see if your embedded privacy policy is displayed in your footer. At this part, you are also able to implement the further customization of that widget button.

Congratulation! You have completed adding a privacy policy to WooCommerce. Now, thanks to it, you could have your customers’ trust.
Top 3 privacy policy generator for WooCommerce
It is undeniable that you will need to equip yourself with some of the efficient privacy policy generators to add or create to your WooCommerce site. That is why we have come up with the top 3 not-to-be-missed generator tools to help you execute this task effortlessly and quickly. Now, scroll down to see what tools could help you out.
1. PrivacyPolicyOnline
As its name indicates, PrivacyPolicyOnline is one of the most popular sites to help you generate not only privacy policies but also service terms, email encryption, and disclaimer. What is more, it also includes the requirement of such affiliate companies as Google AdSense, Commission Junction, and some other well-known sites. Owing to this tool, there is nothing to worry about how you could comply with relevant regulations and additional knowledge related to privacy policies.
Main features
-
Offer the form for generating the document for privacy policies for your WooCommerce site
-
Be able to generate the document “Terms and Conditions” for your website
-
Develop the privacy policy effortlessly for complying with the Term of Service
-
Come with the legal contract all over the world
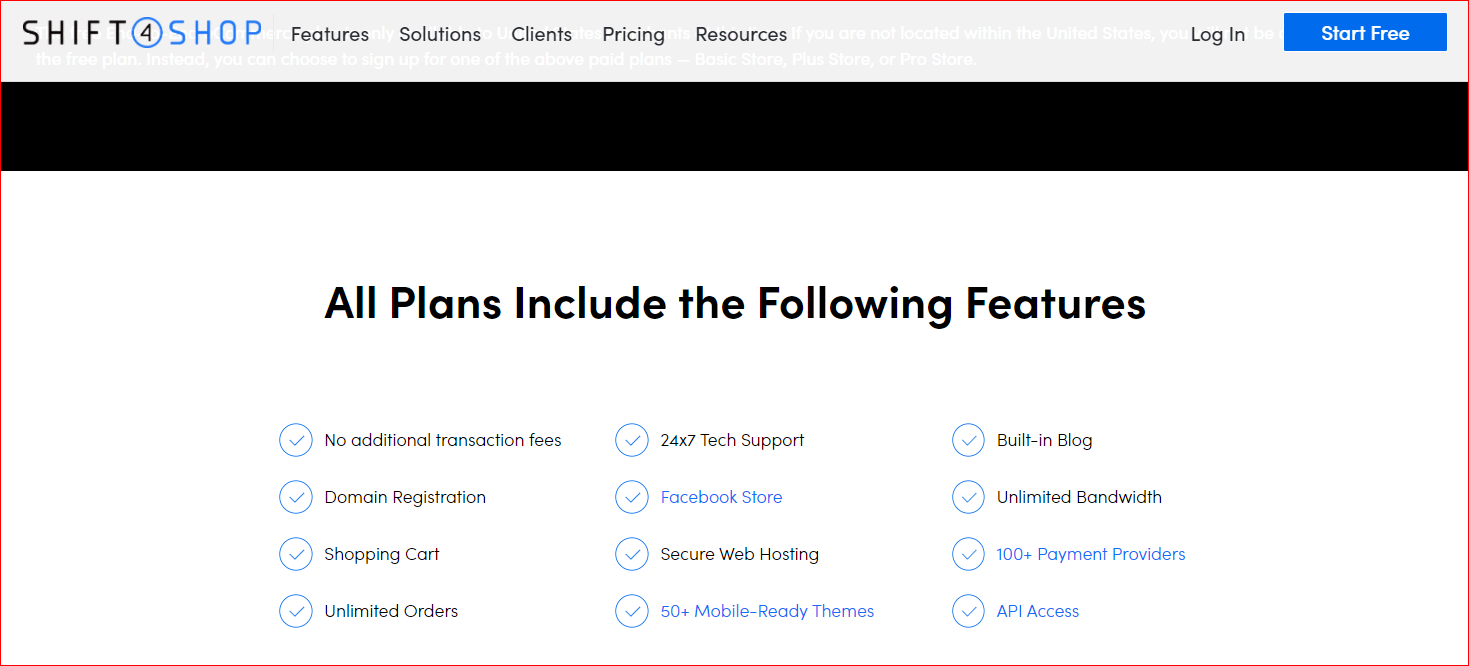
2. Shift4Shop
Another must-have generator is Shift4Shop. This tool has a reputation for offering eCommerce software for not only big businesses but also small as well as medium-sized ones. It has provided users with a handful of personalized privacy policies to help customers have the secure feeling to shop at your store. Moreover, Shift4Shop also comes with a useful blog where you can explore great tips on how to write high-quality policies.
Main features
-
Offer handy return and privacy policies
-
User-friendly
-
Have useful blogs with great tips
-
Be suitable for even small as well as medium-sized online businesses
3. Privacy Policies.com
The last generator tool to appear in this list is Privacy Policies.com. The great thing is that it costs nothing for use personally. And, if you are a business, you only need to pay a nominal fee. By using this tool, you could be able to customize templates easily with more details. As you add information, this basic template aims to be altered to reflect the particular needs, thereby making your site and store unique.
Main features
-
Be required by-laws
-
Generate good custom-made policies to make your online business secure
-
Create more than one privacy policy: Cookie Policies & Return Policies, Disclaimers, EULA, and so on
-
Mobile-friendly
Conclusion
Overall, adding a privacy policy to WooCommerce is not so complicated. It is easy to do so with instructions. Hence, you should spend time implementing this task to maintain the long-term relationship between your business and your customers. By creating a WooCommerce privacy policy, you can prevent users’ and customers’ data from falling into the wrong hands, thereby decreasing the risk of wearing away the customers’ trust.


