
How To Add Multiple Products To The Cart From One Page In WooCommerce

As a WooCommerce business owner, you may wish to allow your customers to add several things to their basket with a single click. If you want to enhance the shopping experience on your WooCommerce website and increase revenues, you should make purchasing things easier. This helpful technique has positively affected your average order value and assisted consumers in finding the relevant goods more quickly.
Today’s tutorial will show you how to add multiple products to the cart from one page in WooCommerce. We will go through two different methods using some powerful plugins like Product Add-Ons Ultimate and WooCommerce Product Table. There will also be detailed instructions come along with some samples for each approach. So, let’s dive in!
The benefits of letting customers add multiple products to the cart from one page in WooCommerce
How do you know if providing clients with speedy purchasing alternatives would assist your WooCommerce online store? The first step is to examine your clients’ purchasing behavior. Consider whether it makes sense to purchase many things from your online business at the same time. By allowing your consumers to add many goods at once, you can:
- Create more profits: Increase your profits by making it easy for your clients to buy more products. It is significantly more potent than regular WooCommerce upsells and cross-sells since the consumer can add the additional goods to the basket directly from the parent product page rather than navigate to another product page.
- Keep track of inventory for add-on items: When a consumer adds a child product to the basket as an add-on to the parent product, your stock quantities will be updated accordingly. If an item is out of stock, WooCommerce Product Add Ons Ultimate will disable it as an update, removing the need for you to manage inventory manually.
- Calculate shipping prices appropriately: Because you’re utilizing genuine items, WooCommerce can calculate the shipping correctly by using the weight and dimensions of the add-on products.
How to add multiple products to the cart from one page in WooCommerce
Your goals will determine the strategy you use. Here’s a basic rundown:
- Add more items to the basket from the single product page. Widespread use for this strategy is a ‘Complete the Look’ product. The consumer has the opportunity to add related products to their shopping basket simultaneously as they add the product they’re exploring.
- Add several goods from a product table. A typical application for this technology would be a restaurant ordering system. The customer would choose many things, such as appetizers, main meals, beverages, and desserts, and add them to their order with a single click.
Method 1: Using the custom product fields
The Products Add-Ons Ultimate plugin allows you to add more things as extra choices to your product page, allowing your customers to add numerous products to their cart with a single click. You can utilize items that are simple or variable.

A ‘Child Products’ field is included in the Pro edition of the WooCommerce Product Add Ons Ultimate plugin. This allows you to define other goods as add-ons to a product, allowing your consumers to add several things to their cart from a single product page.
Take a look at the example product screenshot above. As you can see, the primary product is a woman’s top. There is a feature on the product page called ‘Complete the Look,’ which allows shoppers to add related goods to the prior purchase.
Step 1: Get the plugin
When you get the plugin from the marketplace, you’ll get an email instantly verifying your purchase. This email also includes A URL to the plugin files as well as your license key. Click on the link to get the plugin as a zip file. You don’t need to unzip this; note where it goes on your computer, such as your Downloads folder. Go to Plugins > Add New > Upload Plugin to upload and install the plugin. Drag the product-extras-for-woocommerce.zip file into the upload file zone (see image below), or click the Choose file button and go to the file on your computer.

After you’ve submitted the file, click Install Now and then Activate (remember that you will need to have WooCommerce activated as well). Enter your license key in WooCommerce > Settings > Product Add-Ons > Licence. Click the Activate this license button.
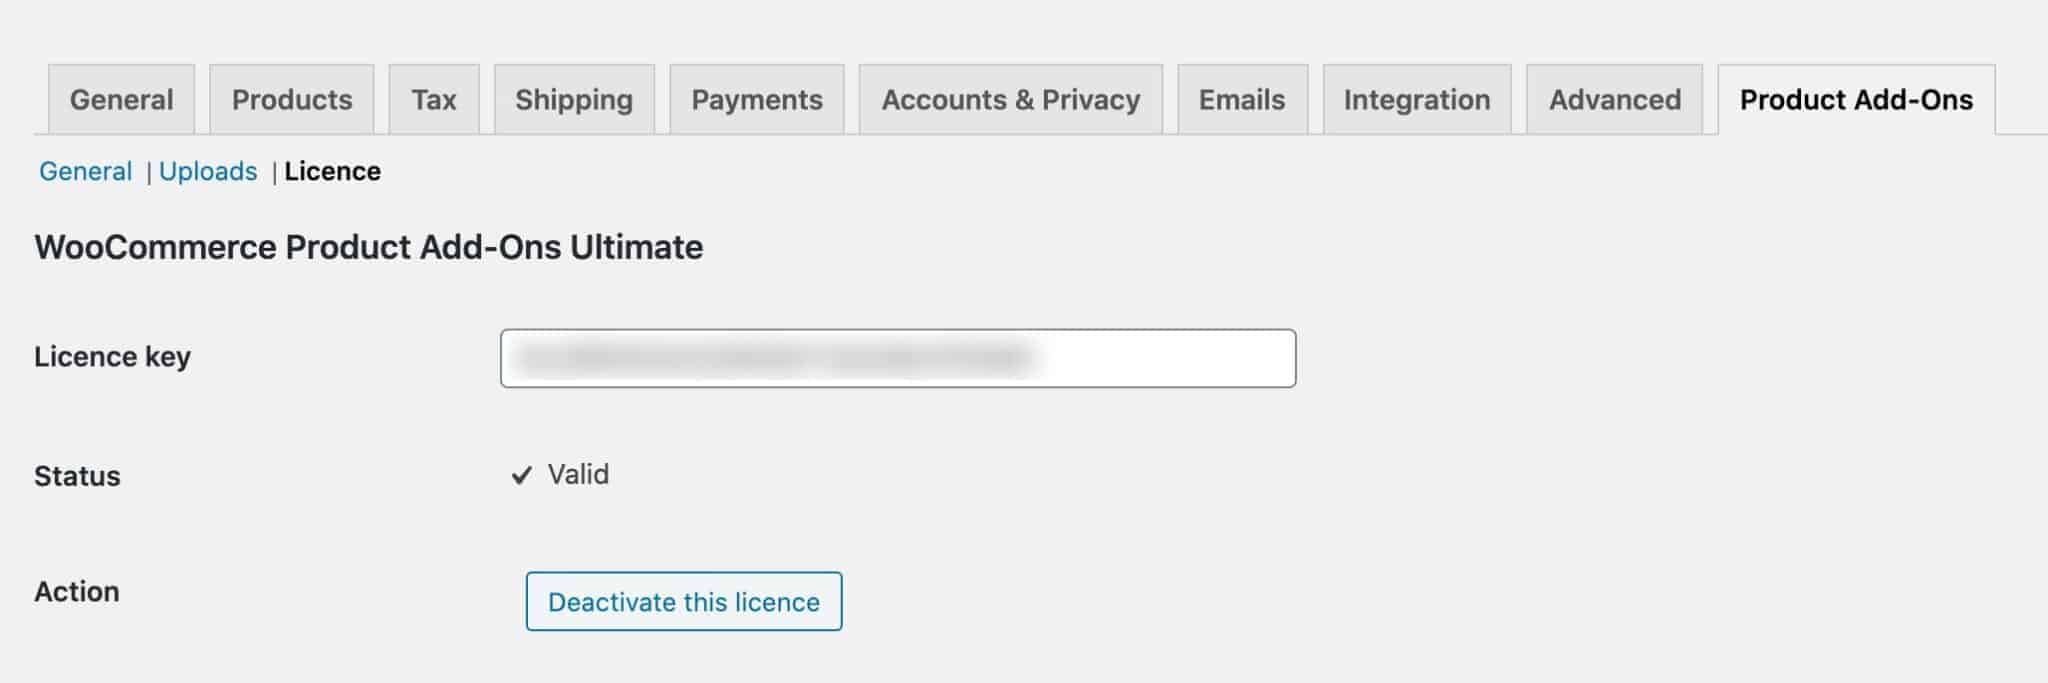
This ensures that you will receive software updates.
Step 2: Configure the basic settings
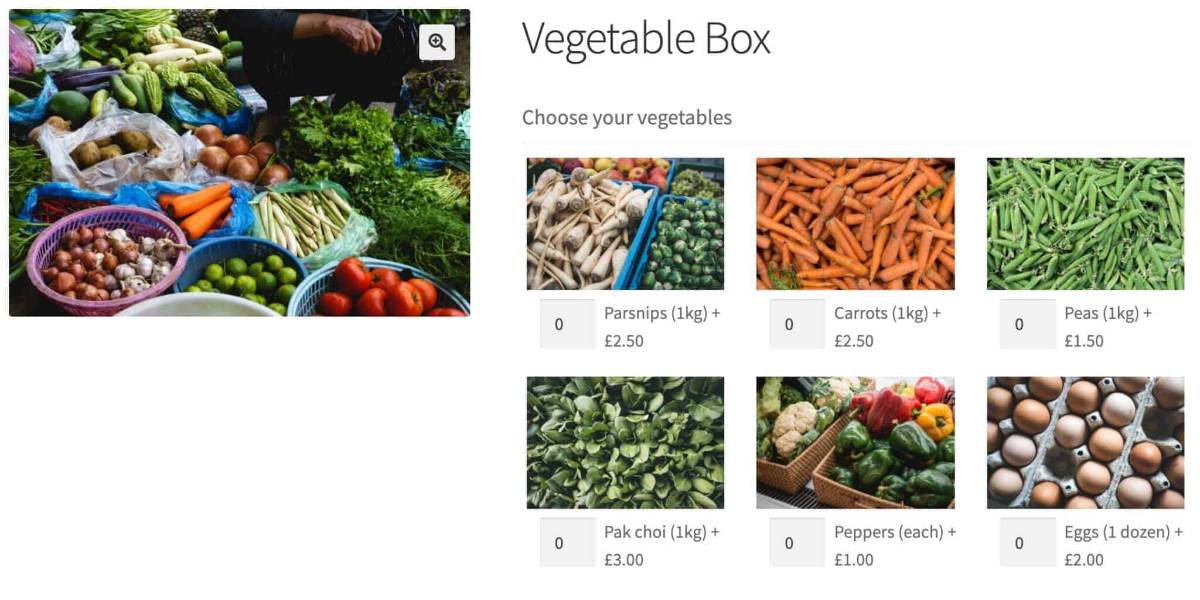
WooCommerce Product Add Ons Ultimate enables you to insert custom fields like text fields, date fields, dropdowns, checkboxes, and radio buttons in your WooCommerce items. You may also incorporate “child” items as add-ons within your “parent” product in the Pro version. Take a look at the configuration below. This demonstrates how simple it is to add new goods to the main product page.
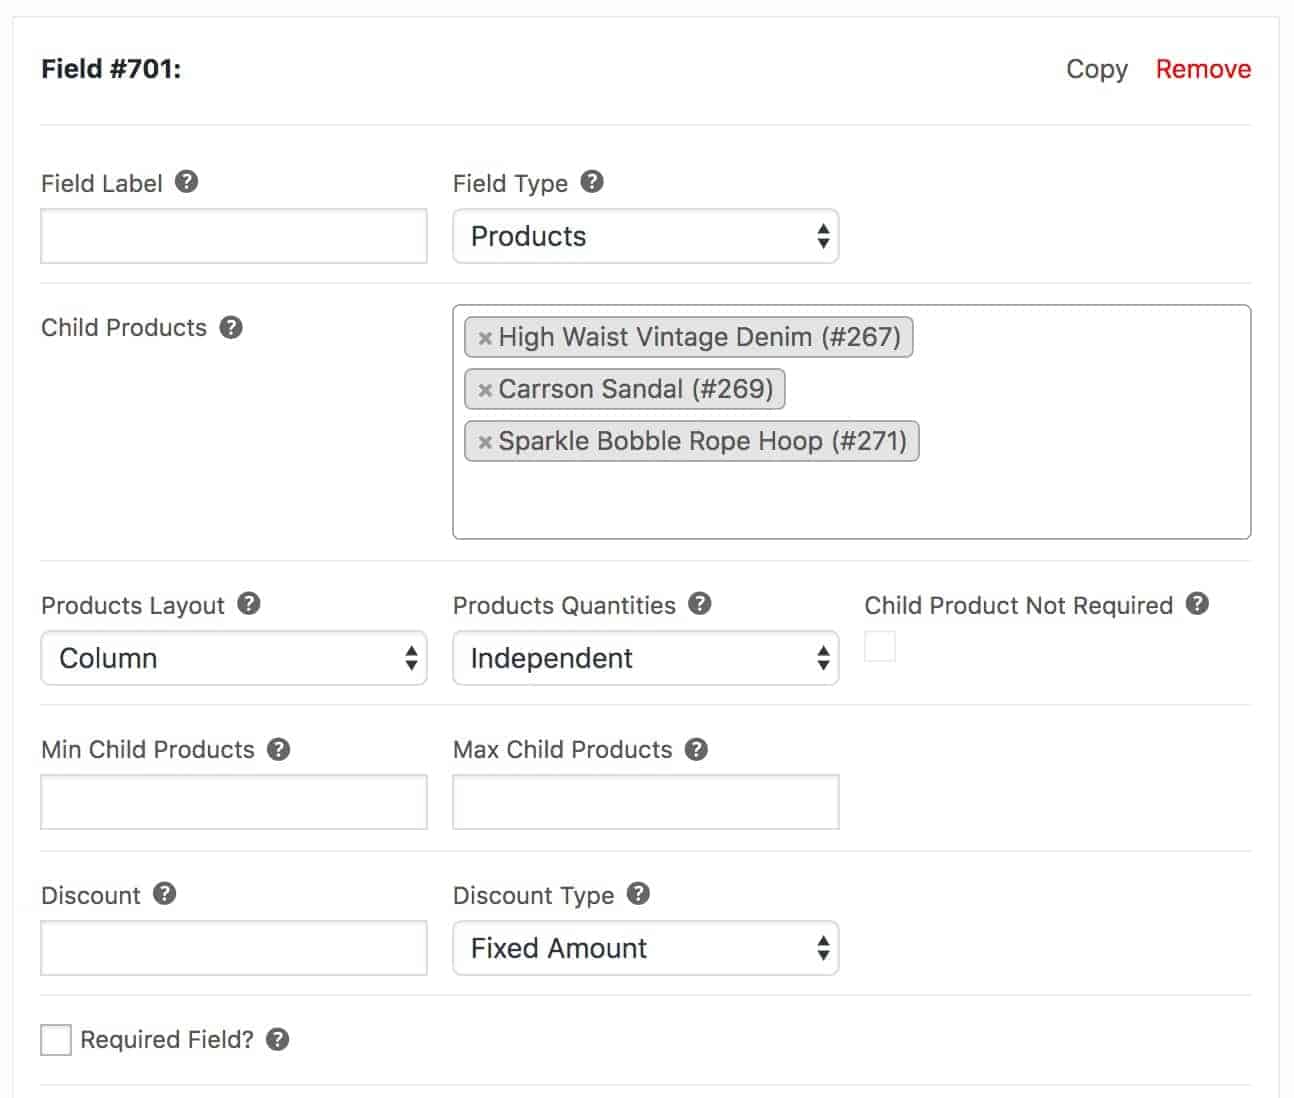
You may add the Products field to Add-Ons Ultimate, in the same manner, as any other field. In summary:
- Edit the product where you want consumers to be able to add several goods at the same time.
- Add a new Products field to the Product Add-Ons panel (as per the screenshot above)
- In the Child Items area, enter the products you want to see on the product page.
- When you publish the product, numerous goods will appear on the same page.
Step 3: Add the custom product field
Let’s have a look at some of the plugin’s other capabilities. You will find five layout possibilities on the Product Layout tab:
- Checkboxes: These allow you to add one or more child goods as an add-on field. Within the field, the consumer can pick numerous child goods to be added to the basket.
- Column: shows all of the goods in a single column. This option enables you to utilize variable interests, with all variants presented in a chosen field.
- Radio buttons: like checkboxes, radio buttons enable you to add more child items as an add-on field, but the buyer can only pick one child product from the field.
- Select: This option allows you to add your child goods as a dropdown field.
- Swatches: Variation photos are displayed as swatches.
You have three choices for defining quantities on the Product Quantities tab:
- Independent: When you set the amount of a product add-on field to independent, the consumer can buy as many child products as they like, regardless of how many of the parent products they’ve chosen.
- Linked: When the amount is set to link, the quantity of the child product added to the cart will still be the same as the amount of the parent product.
- One-only: When the quantity is set to one-only, only one child product may be added to the basket, regardless of how many parent products have been placed.
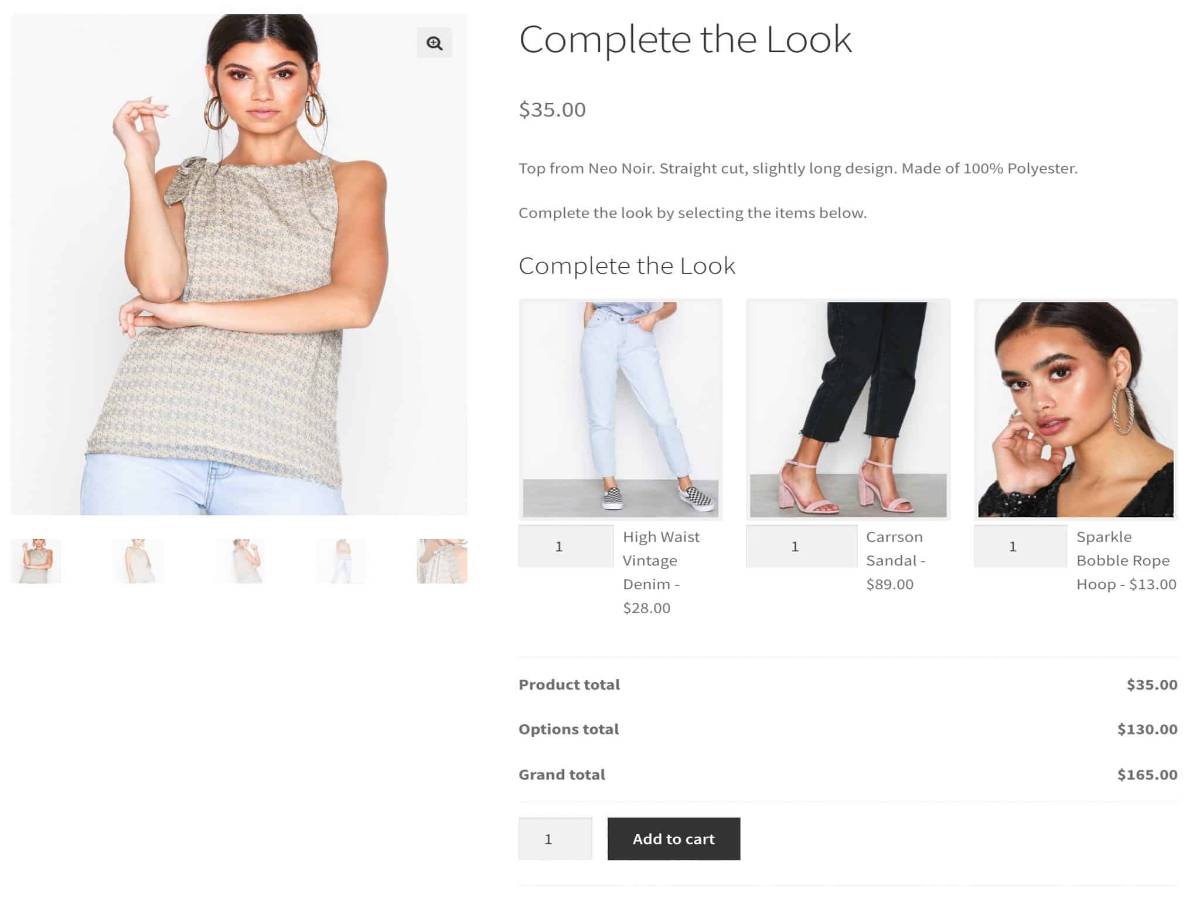
“Complete the look” is a phrase fashion and apparel companies use to entice shoppers to make further purchases. For example, in your product image for a shirt, the model may be wearing jeans, shoes, and jewelry available on your website. You may sell these different things directly from one product page by using the child products feature.
Method 2: Using the product table
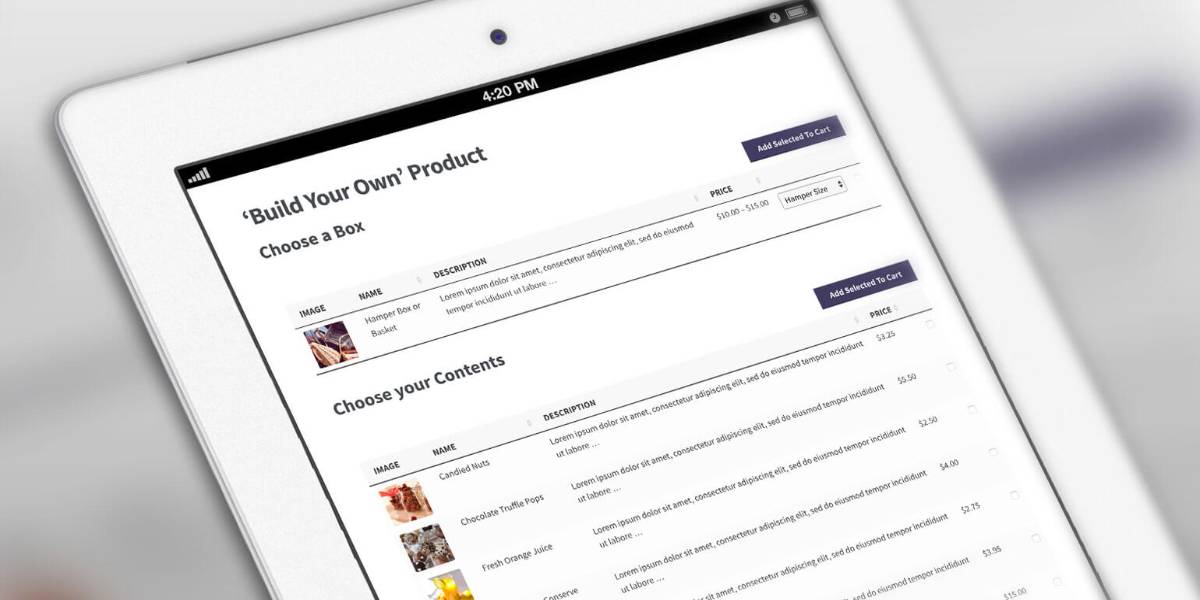
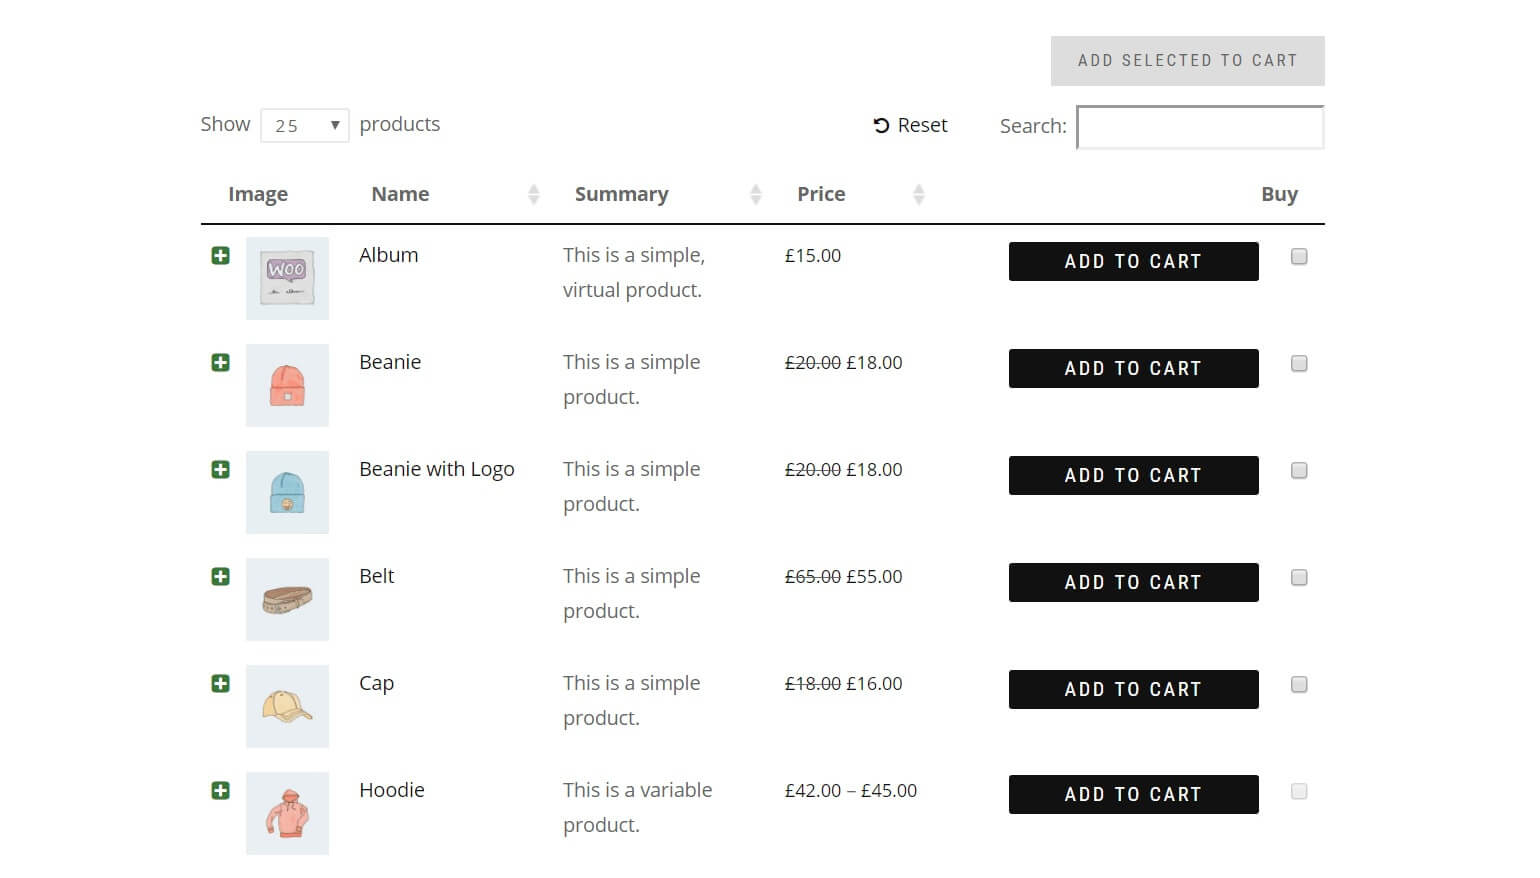
WooCommerce Product Table is a WooCommerce plugin that allows users to add several goods to their basket from a single page. It will enable you to list items in a searchable, adjustable table style with a tick next to each product. You may place an Add Selected to Cart button directly above or below the product table.
The product tables may be fully customized, searched for, and sorted. By introducing a shortcode, you may place them almost anywhere on your site (pages, articles, or digitized sections). It is the ideal WooCommerce bulk add-to-cart plugin.
Step 1: Install and activate the plugin
If you have a WooCommerce business website, you can construct a functioning product listings table with the WooCommerce Product Table plugin. Customers will add many things to their cart from a single page by using the product list table. What you must do is as follows:
- Download and install the WooCommerce Product Table plugin. A license key for utilizing the plugin will also be sent to you in a confirmation email.
- Log in to your WordPress site and navigate to Plugins > Add New. Upload the zipped plugin file and then click Activate.
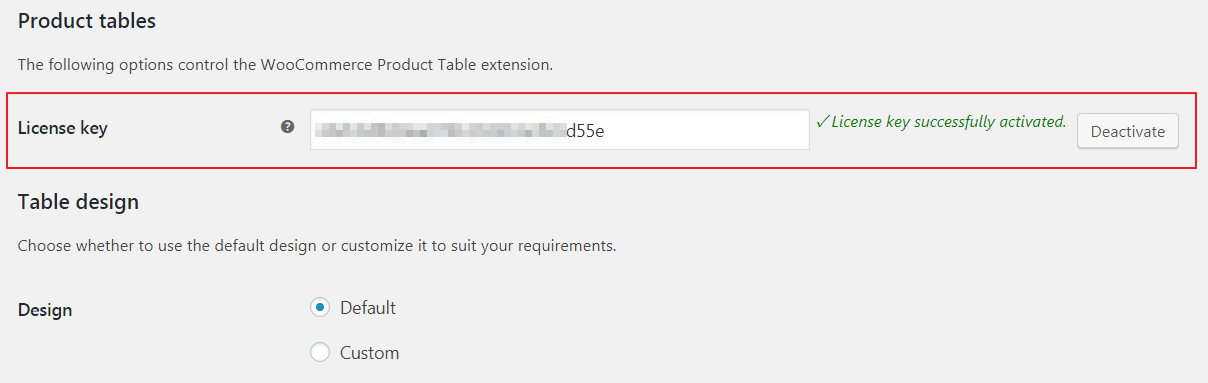
- Go to WooCommerce > Settings > Products > Product Table and enter your license key in the License Key entry field.
Step 2: Configure the Add to cart column
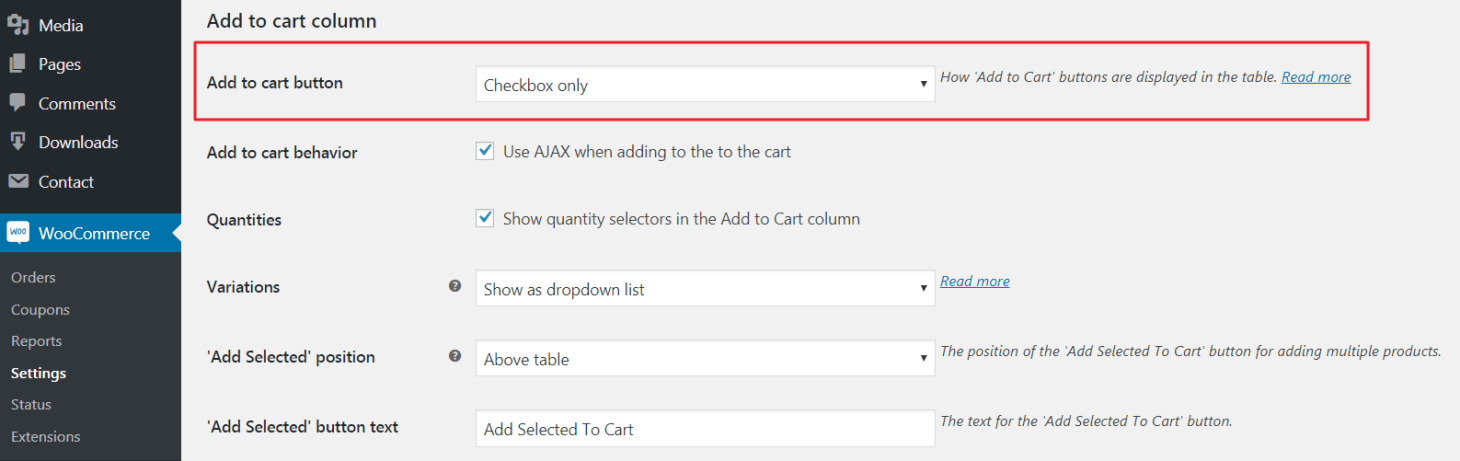
Scroll down until you find the Add to cart button and pick “Checkbox only” from the same panel. Each product item in the table layout will now have multiple add-to-cart checkboxes next to it. If you want to show individual Add to Cart buttons with the multi-choice tick boxes, pick the Button & checkbox option.
Analyze the other options and make any necessary adjustments to tailor how the product tables function. Go to Pages > Add New to create a new page to add the product listings table. (You may also add the table to an existing page, post, or widgetized section. Then, click the Insert Product Table icon in the toolbar to add the product table shortcode to your page. This will build a product listings table on the front end of your online store. To proceed, click the Publish button. Finally, test the product listings table on the front end of your website. It should include the essential options to allow clients to add numerous things to their basket from a single page.
Step 3: Set up the quantity and product variation
Customers may want to personalize their product or purchase by using a quantity selector or providing variant choices. Making these alternatives visible beside the Add Selected to Cart button can improve the user experience on your site even more. What you must do is as follows:
- Activate the amount selector: The WooCommerce Product Table plugin can include a quantity selector directly in the table layout. Enable the quantity selector option in the plugin’s settings. Customers are allowed to set a quantity before adding a product to their basket this way.
- Show product variations: Product variations can be shown as dropdown lists or as individual rows using the WooCommerce Product Table plugin.
Step 4: Add the quick view feature
The goal of adding several things to the basket is to keep the buyer on one page. So, what if you need to supply more information that does not fit on the one-page order form? You don’t want to direct clients to a different page for each product since this contradicts the purpose of the multi-add to cart capabilities.
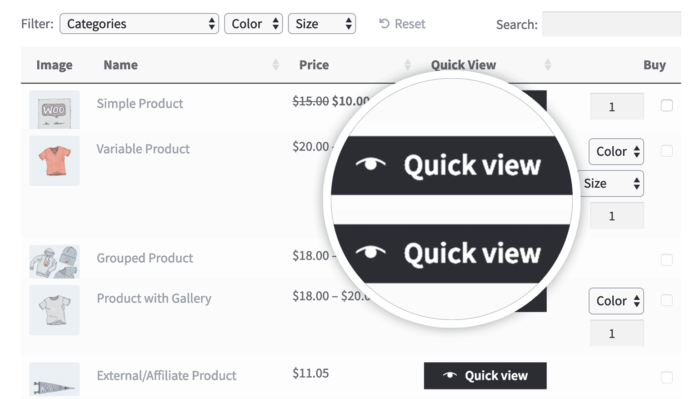
Remove the add-to-cart buttons from the quick view lightbox if you want users to add numerous things to the cart at once. Instead, utilize the plugin options page to display more information in the lightbox, such as the product’s brief description and complete image gallery. Customers will still need to utilize the multi-select checkboxes in the order form to add goods to the cart. Alternatively, you may include the checkboxes on the order form while allowing clients to purchase things separately through the lightbox.
Conclusion
Allowing your consumers to add numerous things to their cart from a single page can improve their purchasing experience. You can boost your conversion rate and raise the amount of money you make from each transaction by doing so. Do you think that allowing consumers to add numerous goods to their WooCommerce shopping cart can help you raise your sales revenue?
We hope this article will help you understand how to add multiple products to the cart from one page in WooCommerce. The first approach enables you to include “child” goods on a product page. A “finish the look” style page is a common use case. On the other hand, the second one lets you list your items in a grid or tabular format. Restaurant ordering and wholesale forms are common use cases. Take some research and find out the most appropriate method that fits your requirements and grow your sales!


