
How to Add Geolocation to Checkout on WooCommerce Store

Geolocation may be a novel concept for many store owners, and there are numerous issues about it. While enabling geolocation in your WooCommerce store is unnecessary, maximizing its potential is a significant problem.
By default, WooCommerce includes a geolocation feature. We’ll demonstrate How to Add Geolocation to Checkout on WooCommerce Store both by default and with a plugin in this tutorial.
Why Add Geolocation to Checkout on WooCommerce Store
A visitor’s or customer’s geolocation identifies the country or geographical area in which they are located. If used properly, this data can be quite valuable. Additionally, you can modify the currency, pricing, or even payment gateways based on their location.
However, it’s critical to keep in mind that WooCommerce’s built-in geolocation function does not have all of the functions. We strongly advise you to add functionality by utilizing a Geolocation plugin.
How to Add Geolocation to Checkout on WooCommerce Store by default
The process is quite simple. First, log into your WordPress site as the administrator account and navigate to the dashboard.Click WooCommerce > Settings from the dashboard menu.
Locate and click on the Default Customer Location option in the General options field. There are four alternatives available. Depending on your requirements, you can choose between Geolocate or Geolocate (with the page caching support). Your option is contingent upon whether you are utilizing a caching service.
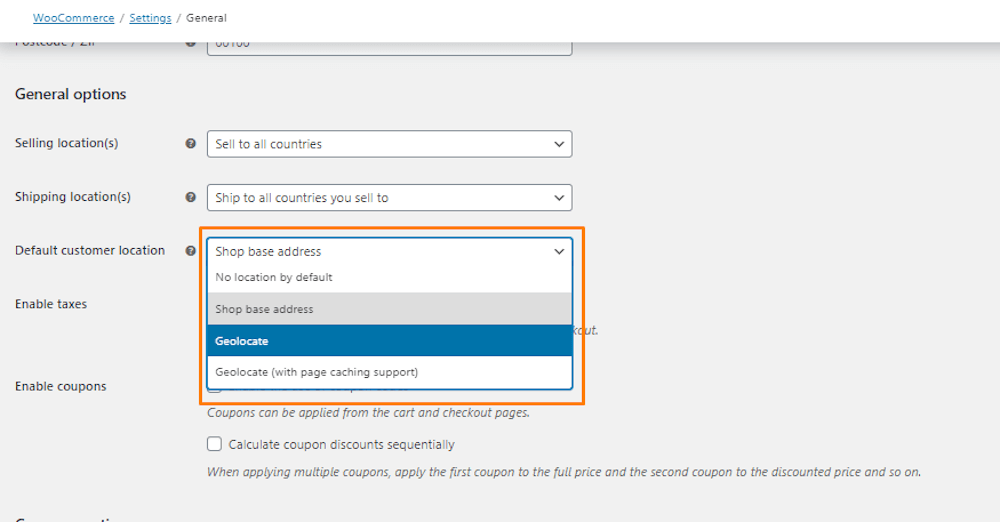
If “Geolocation” is enabled in the WooCommerce settings, shipping, taxes, currencies, and conditional content are selected based on the user’s IP address.
How to Add Geolocation to Checkout on WooCommerce Store with a plugin
Step 1: Set up Geolocate for your WooCommerce
In this step, all you have to do is to complete exactly our instruction in the How to Add Geolocation to Checkout on WooCommerce Store by default part.
Step 2: Create a MaxMind Account
For the second step, you will have to create an account with MaxMind Geolocation.
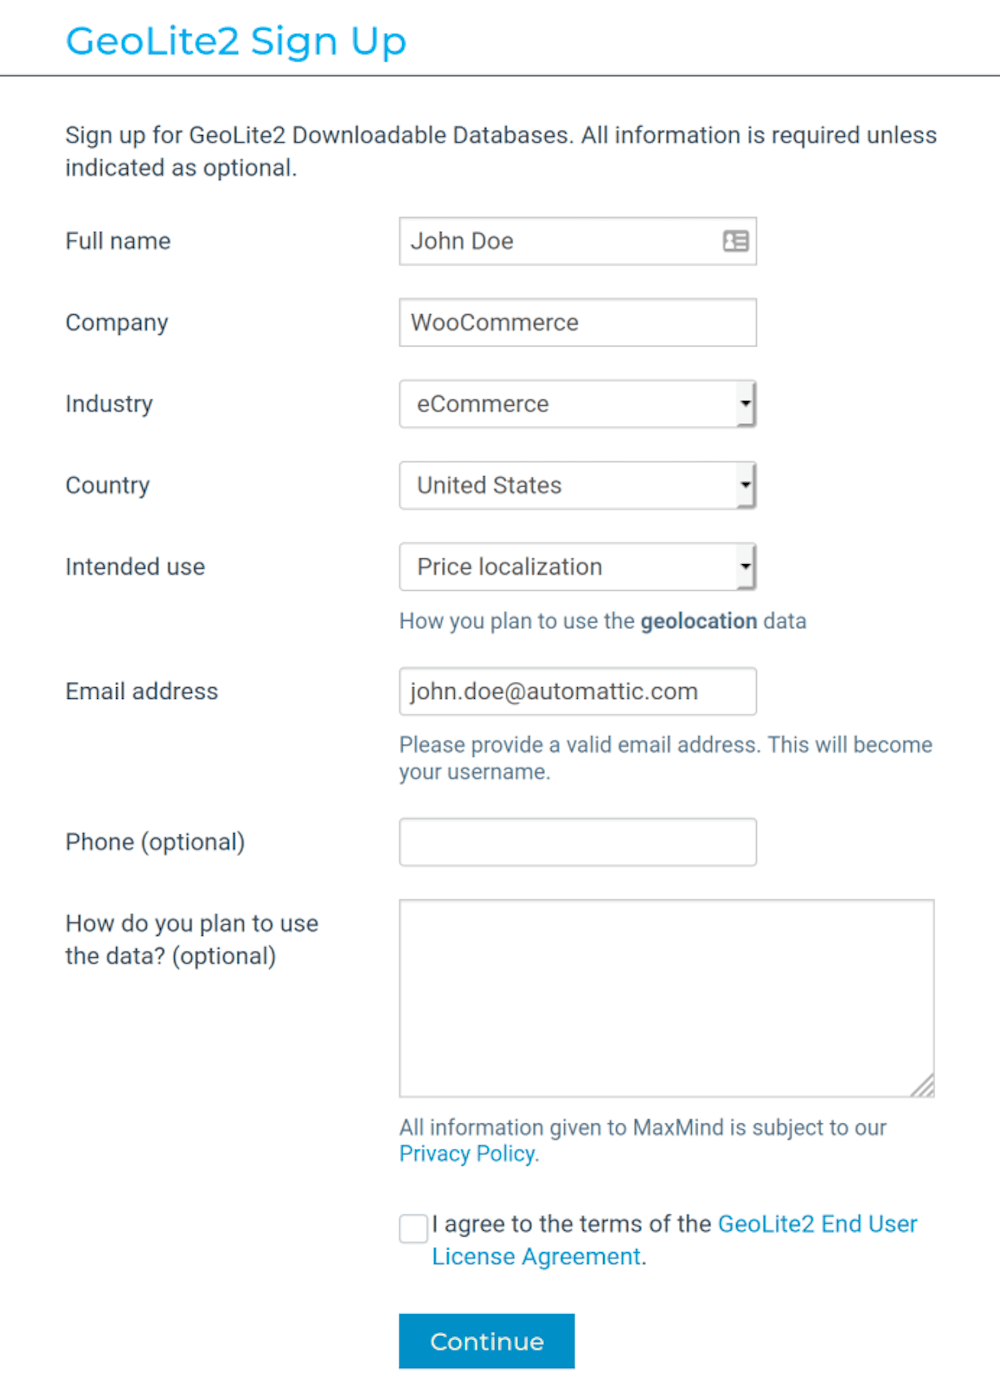
Complete the registration form on the registration page. If you’re unsure what to select for the Industry and Intended use areas, you can enter eCommerce and Price localization instead.
Following submission, you’ll receive an email with a link to reset your password. Select a password by clicking on that link.
Step 3: Create a License Key for MaxMind
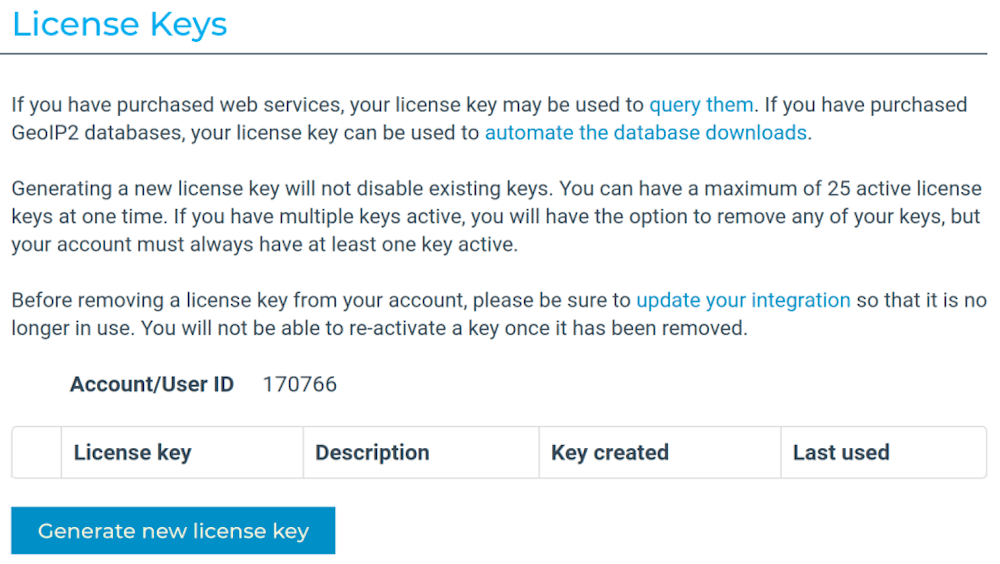
Once you have created an account on the MaxMind website, you can create a license key.
Access your account at: https://www.maxmind.com/en/account. In your user account dashboard, click the Manage License Keys tab. Then, Generate new license key should be selected.
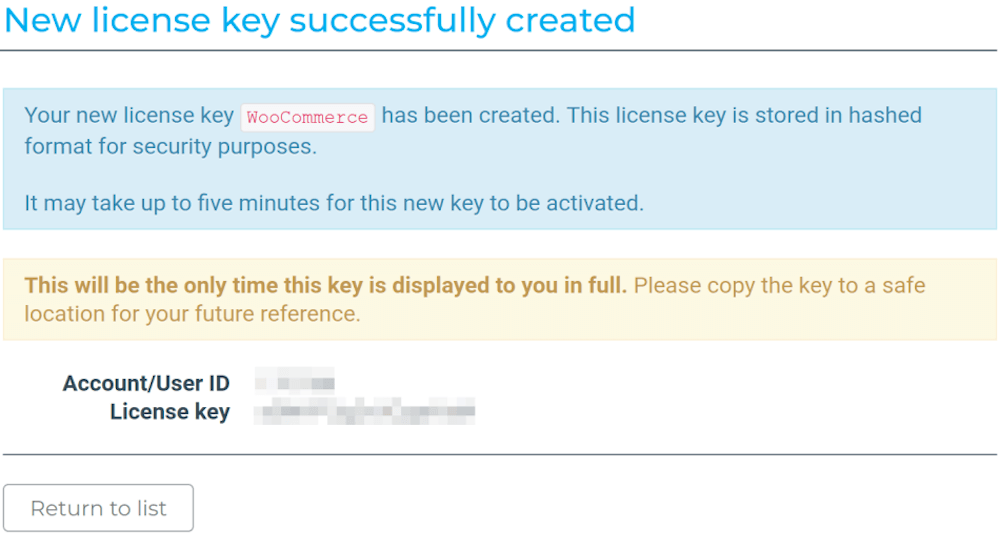
Following that, complete the form to generate a license key. You will have to include a description (just as the name of your store). Select No in response to the question Will this key be used for GeoIP Update?. Click on “Confirm” when finishing.
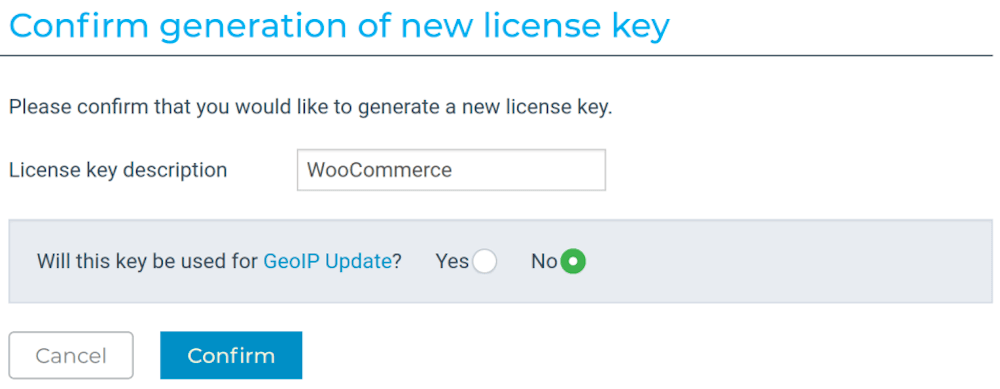
The system will provide you with a new key. All you must do is to copy it right away as it will be shown once only.
Step 4: Configure WooCommerce using the MaxMind Geolocation License Key
Finally, you must incorporate this key into your WooCommerce configuration.
Navigate to WooCommerce > Settings > Integration > MaxMind Geolocation. Paste the license key from the previous step. Choose Save changes button to save your settings.
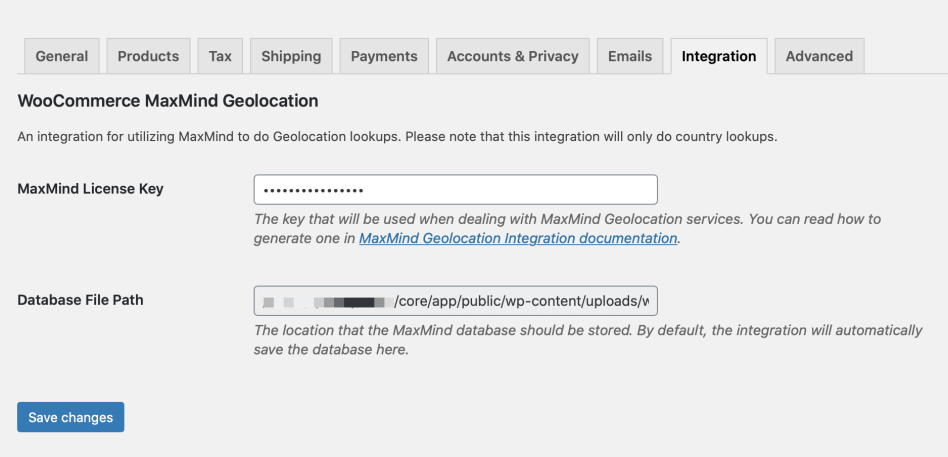
With the MaxMind Geolocation Integration, your WooCommerce store is now ready to geolocate clients.
3 other WooCommerce Geolocation Plugins
1. WooCommerce Geolocation Plugin

The WooCommerce Geolocation Plugin is ideal for limiting site access based on a visitor’s location. When a visitor comes, this plugin verifies their IP address and utilizes it to determine their geological location with confidence. This technique is well-established and operates flawlessly regardless of the country in which the visitor is located.
You can then define rules based on the visitor’s location to prohibit them from your site totally or to restrict access to specific information.
Key Features:
- Create Rules to restrict access to Users based on their country or area.
- Location-based auto-detection of users based on their IP address.
- Your entire website may be blocked in a particular country.
- Restriction of the items, categories, and CMS pages that are displayed.
- Redirect users who have been banned Display the Error Message.
- Add users’ IP addresses to the whitelisting exceptions.
Price:
The price of the plugin is $29.
2. Dokan Geolocation
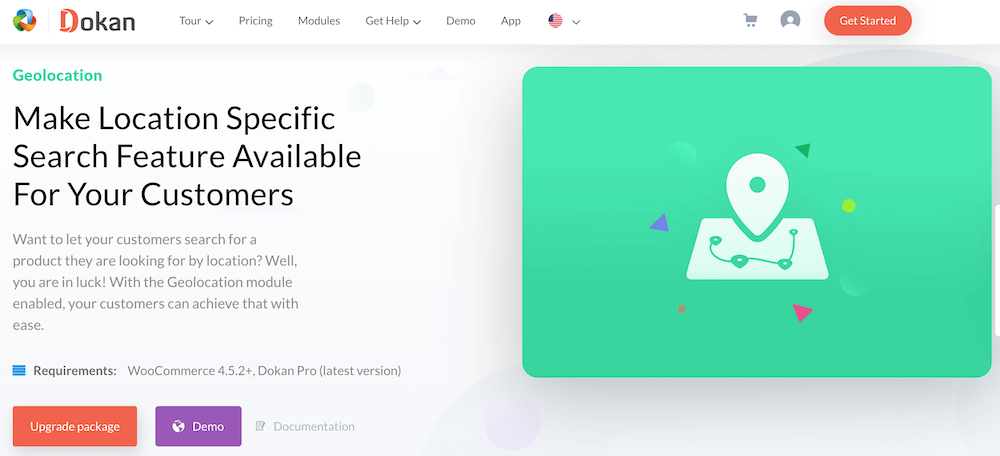
Dokan is a multi-vendor marketplace plugin for WooCommerce. With the Geolocation plugin, you may integrate a variety of location-based features into your site.
If you’re looking to create a multi-vendor website with geolocation capabilities, Dokan is your best bet. Additionally, because it is fully linked with WooCommerce, you will avoid the need to switch eCommerce vendors.
Key Features:
- Allow customers to conduct product searches in a specific area.
- The ability to customize the location’s radius.
- The Geolocation module supports both US customary and SI metric units.
- Vendors can customize their listing by selecting their location on the map.
- Set the minimum-maximum search region.
- Hiding/showing filtering options.
Price:
This plugin has a Free Version with limited functionality. If you wish to have more features, you can choose from the following price plans:
- Starter: $149/year.
- Professional: $249/year.
- Business: $499/year.
- Enterprise: $999/year.
3. WooCommerce Local Delivery Shipping

This geolocation plugin is ideal for delivering locally. You can use the WooCommerce Local Delivery plugin to create a custom map to specify where you want to deliver. You get a Google Maps embed with which you may set separate delivery borders by drawing polygons on top. Additionally, you can set different delivery zones and adjust the shipping fee based on the zone to which the item is being transported.
When consumers check out, they have the option of placing a pin on the map or entering their address directly. Once they do, the geolocation feature will locate them on the map and determine if they are within one of the delivery zones or not. It’s a very flexible plugin that works exceptionally well for restricting delivery zones and setting the pricing of each zone.
Key Features:
- Geocode placement based on an address.
- Hide the map option for alternate modes of shipment.
- Option for free shipping zones when cart total exceeds the limit.
- Numerous configuration possibilities.
- Shortcodes for delivery maps on pages.
- Billing and shipping fields should be disabled.
Price:
The plugin costs $29.
Final thoughts
You’ve seen How to Add Geolocation to Checkout on WooCommerce Store in this tutorial. Additionally, We’ve highlighted a few plugins you might use to set up your store’s geolocation. Whichever plugin you select, I hope you enjoyed this article and discovered some great new tools for your WooCommerce store.


