
How to Add Custom Fields to WooCommerce Products

WooCommerce includes numerous methods for storing product data. All of the normal product fields are available, including the name, price, categories, tags, and dimensions. Additionally, you can create product properties.
However, what if you wish to store additional product fields? What if you require a more customizable solution than product variations, such as checkboxes or text fields? Are you looking for a solution to customize WooCommerce product pages?
Whether you want to include detailed specifications on a WooCommerce product page or present different product variants with a single click, adding custom fields in WooCommerce takes only a few moments.
This is a comprehensive tutorial on How to add custom fields to WooCommerce products. You’ll discover how to display additional product information and sell additional product variants on your website.
Types of WooCommerce custom fields
When individuals discuss WooCommerce custom fields, they are frequently referring to one of two things:
1. Enhancing the product’s information fields

This is the traditional application of custom fields. Custom fields are used in WordPress to add new fields to posts, pages, or items. These are used to store and display more data, such as additional text fields, dates, and photos.
2. Custom add-ons fields

This is accomplished by including additional options such as dropdown lists, checkboxes, radio buttons, and text fields for the client to fill prior to adding the product to their cart. Technically, additional product options are not custom fields at all; they are more appropriately referred to as product add-ons! However, a significant portion of the population refers to these possibilities as custom fields.
This is the distinction between two different sorts of custom fields: Add-ons enable the user to enter details regarding the product; data fields just display the product’s information.
How to add a custom field in WooCommerce
To add custom fields to WooCommerce products, you must first install a WordPress plugin. We will use the free Advanced Custom Fields plugin in this post, and here’s how to configure it.
Step 1: Install the Advanced Custom Fields module
Log into your WordPress account, navigate to Plugins > Add New. Search for Advanced Custom Fields and download and install this free plugin.
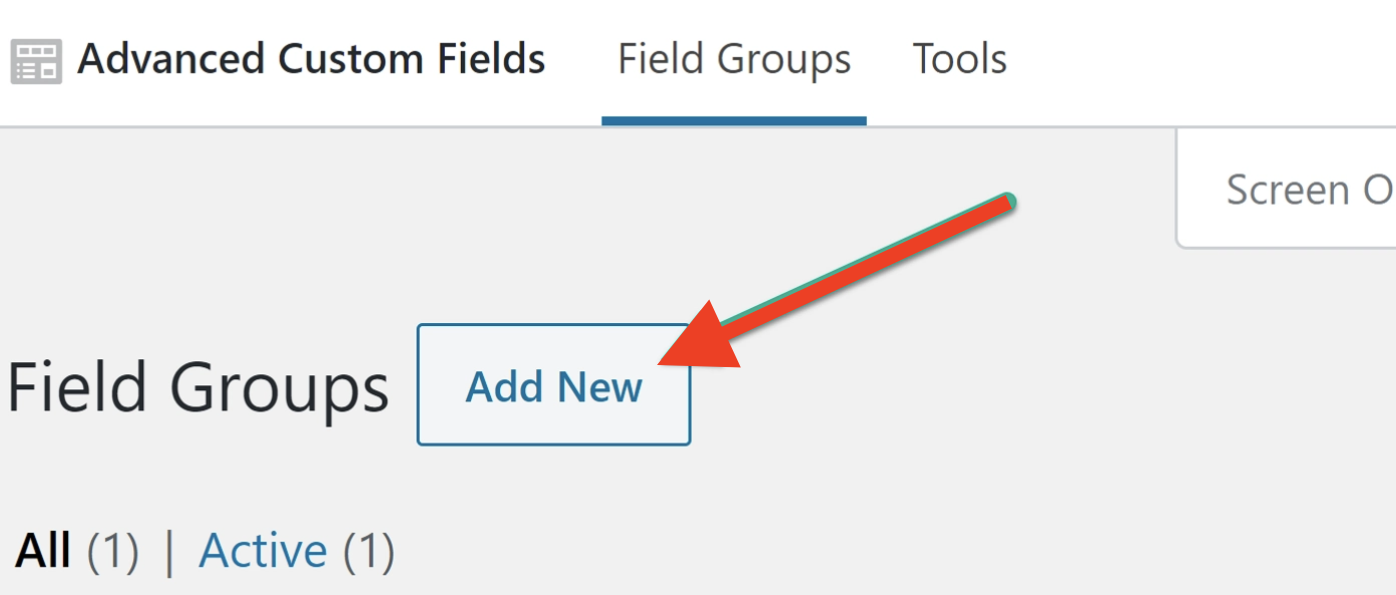
Step 2: Add a new field group
Navigate to the new Custom Fields tab on the left side of the WordPress dashboard. Next to Field Groups, click Add New.
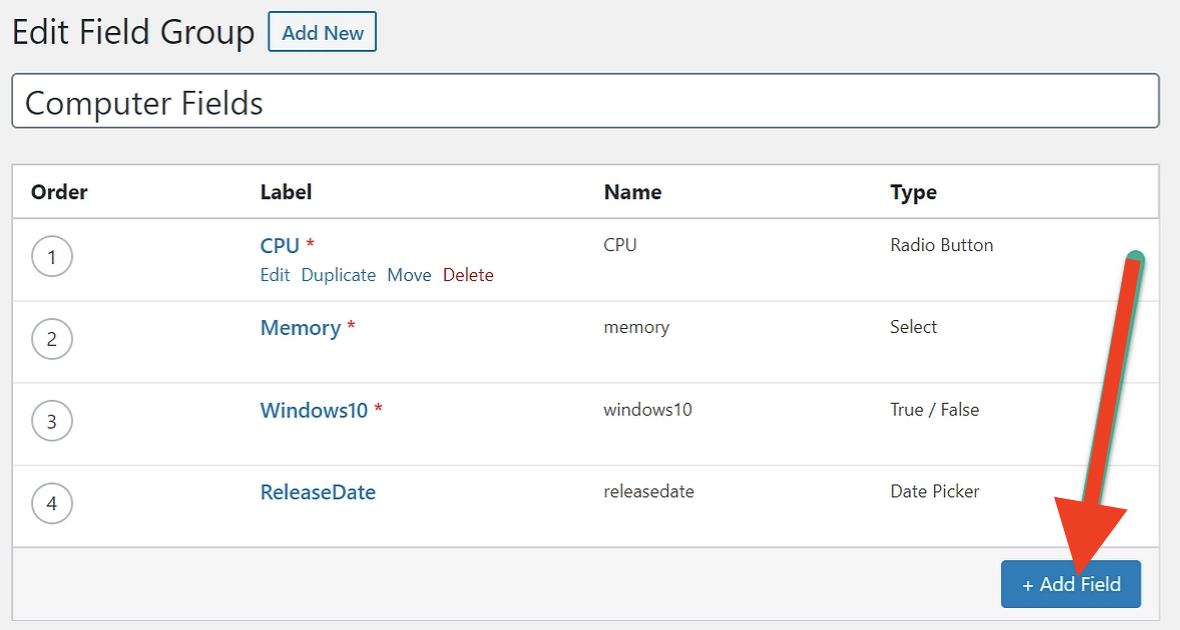
Give a field group a name. A Field Group is a group of fields that will be used to describe a single product or section of your website, such as a list of specifications that will display on all laptop product pages. For instance, “Computer Fields.” ‘
Step 3: Add the custom field(s)
Click on Add Field to add a field to your new group.
Edit these field’s details:
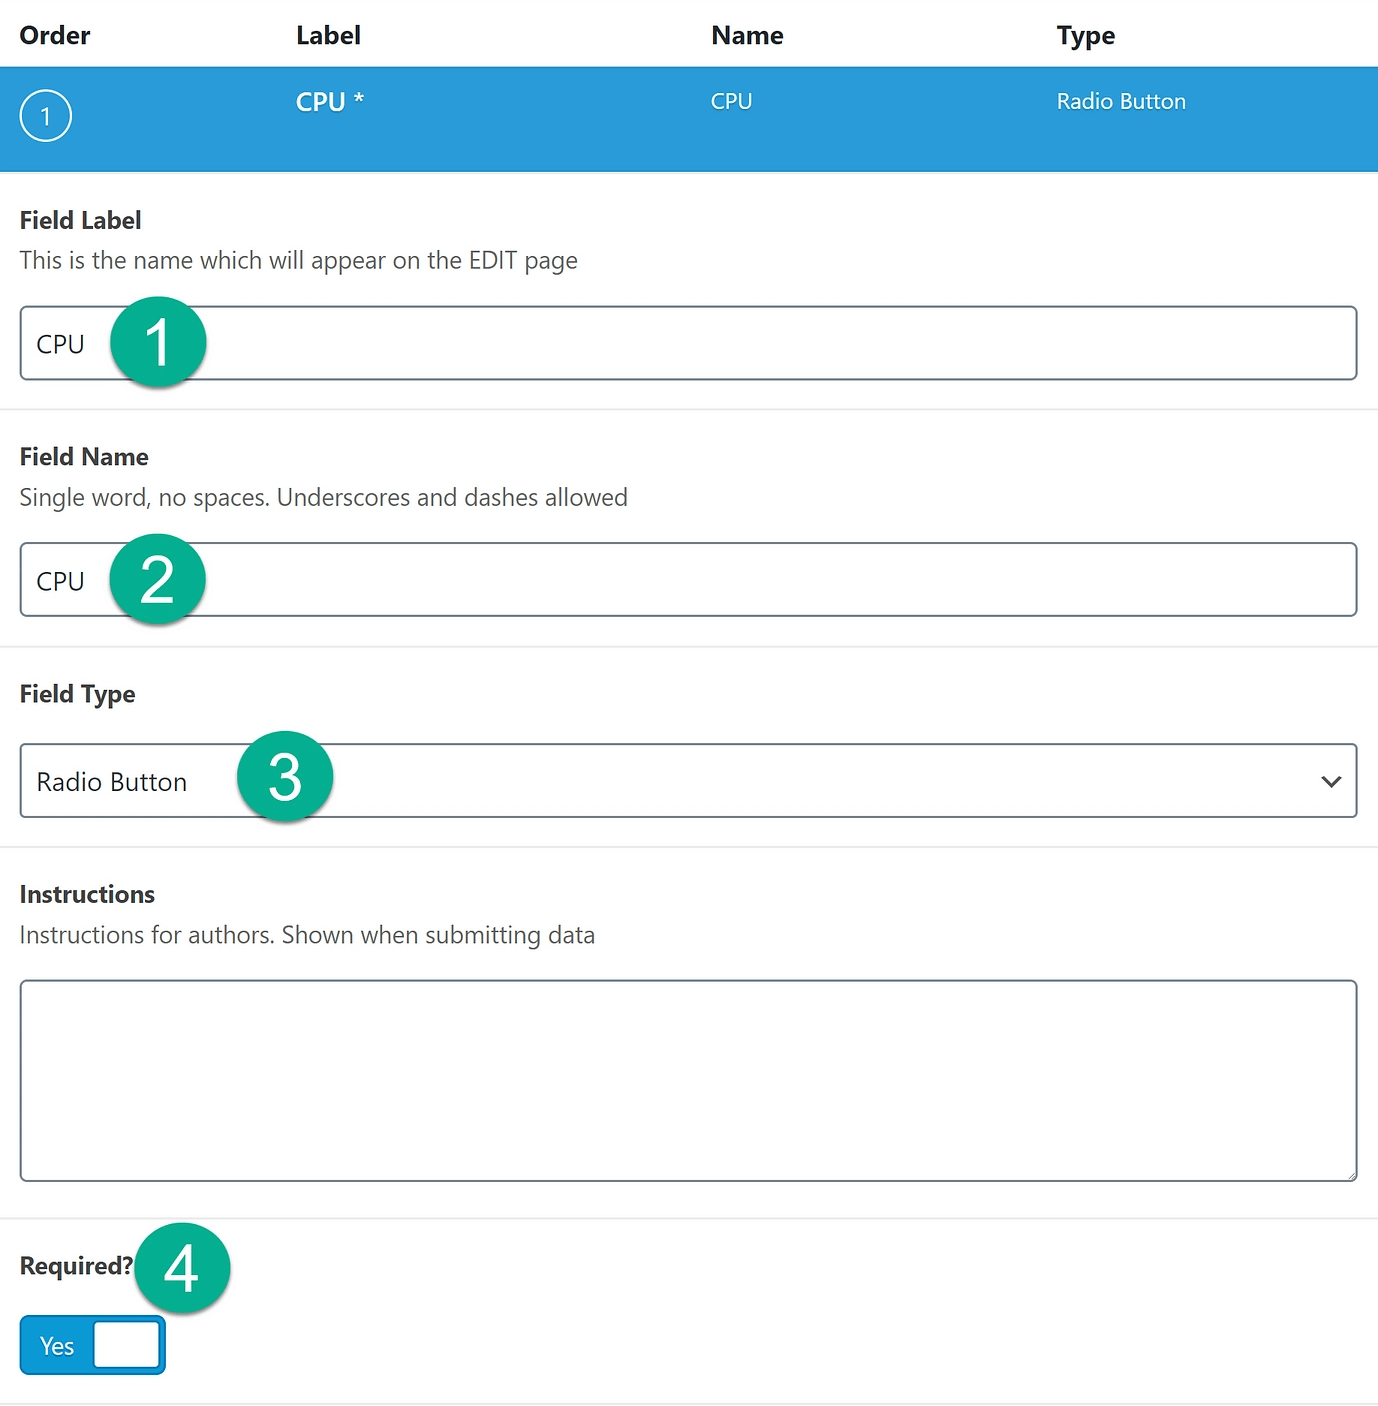
- Field Label: This is primarily for your own reference.
- Field Name: It serves as the letters that will be included in your own custom code, or shortcode in this case. You can leave this as the plugin’s default.
- Field Type: The format you’re establishing for that field. You can select from a variety of choices, including date selectors, checkboxes, dropdown menus, and radio buttons.
- Instruction: Instructions of the field for yourself or the developer.
- Required: Statement indicates whether or not this area is needed.
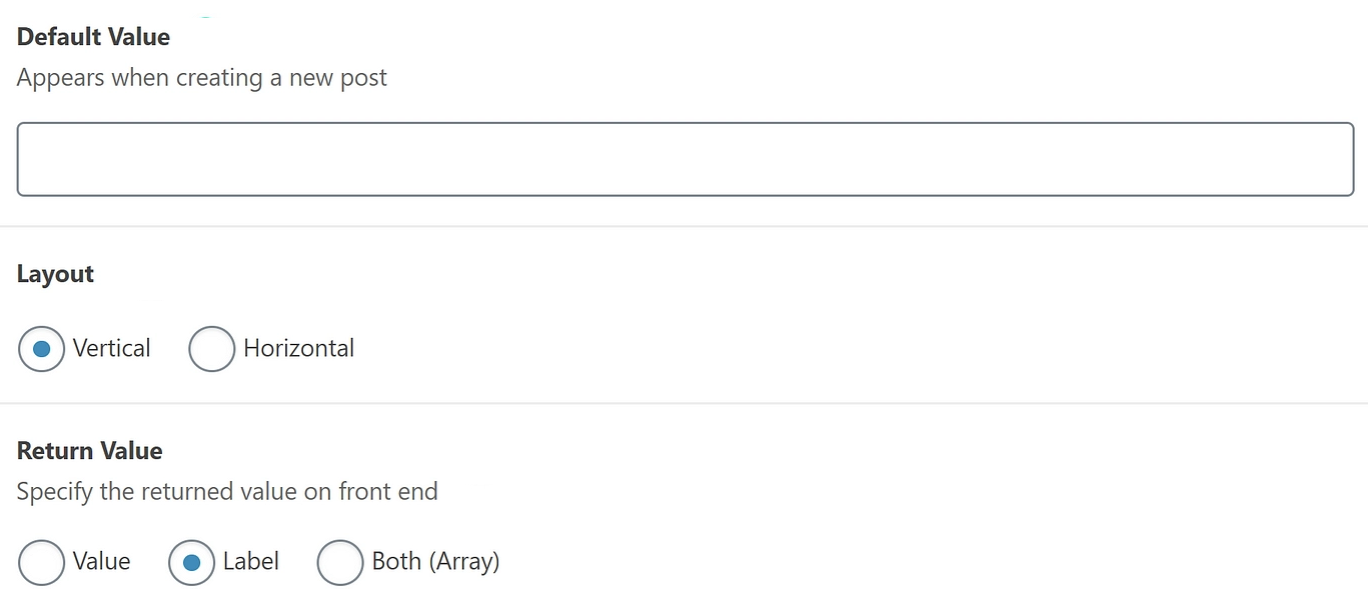
If you’re working with a field that contains many alternatives (such as radio buttons), you’ll want to create field Choices. These are the selection options you wish to present on the product page’s backend, such as different core processors.

The other parameters, such as the default value, the layout, and whether or not to display the value or label, are often optional.
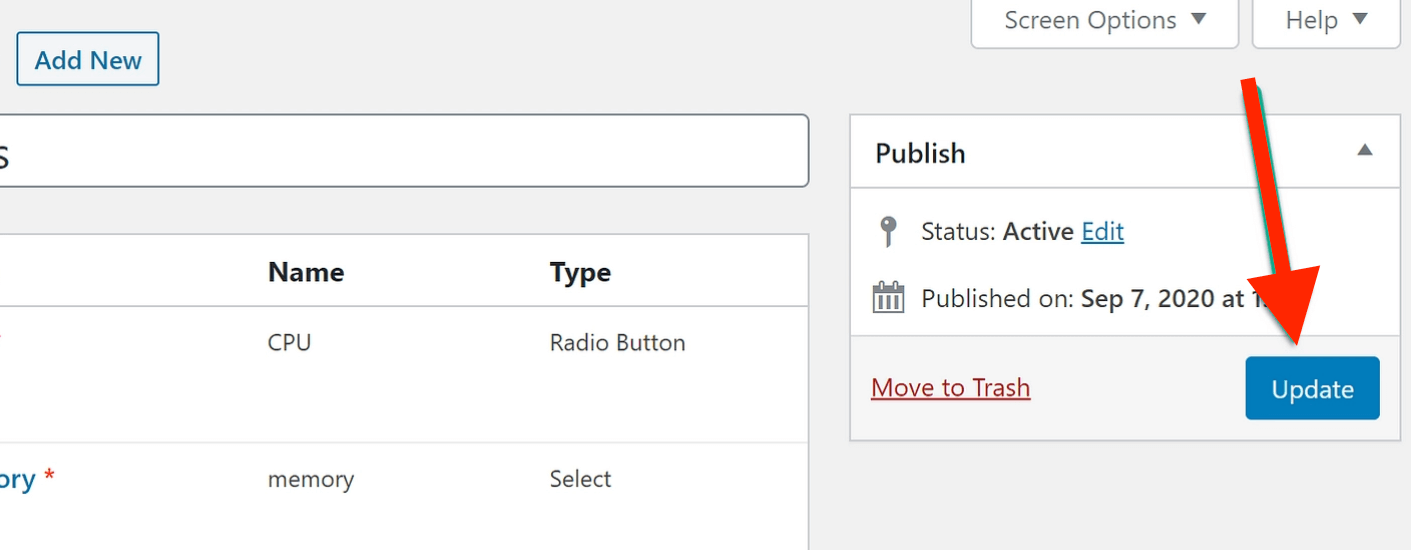
When you’re finished editing a field or group, click on the Publish or Update button to save it.
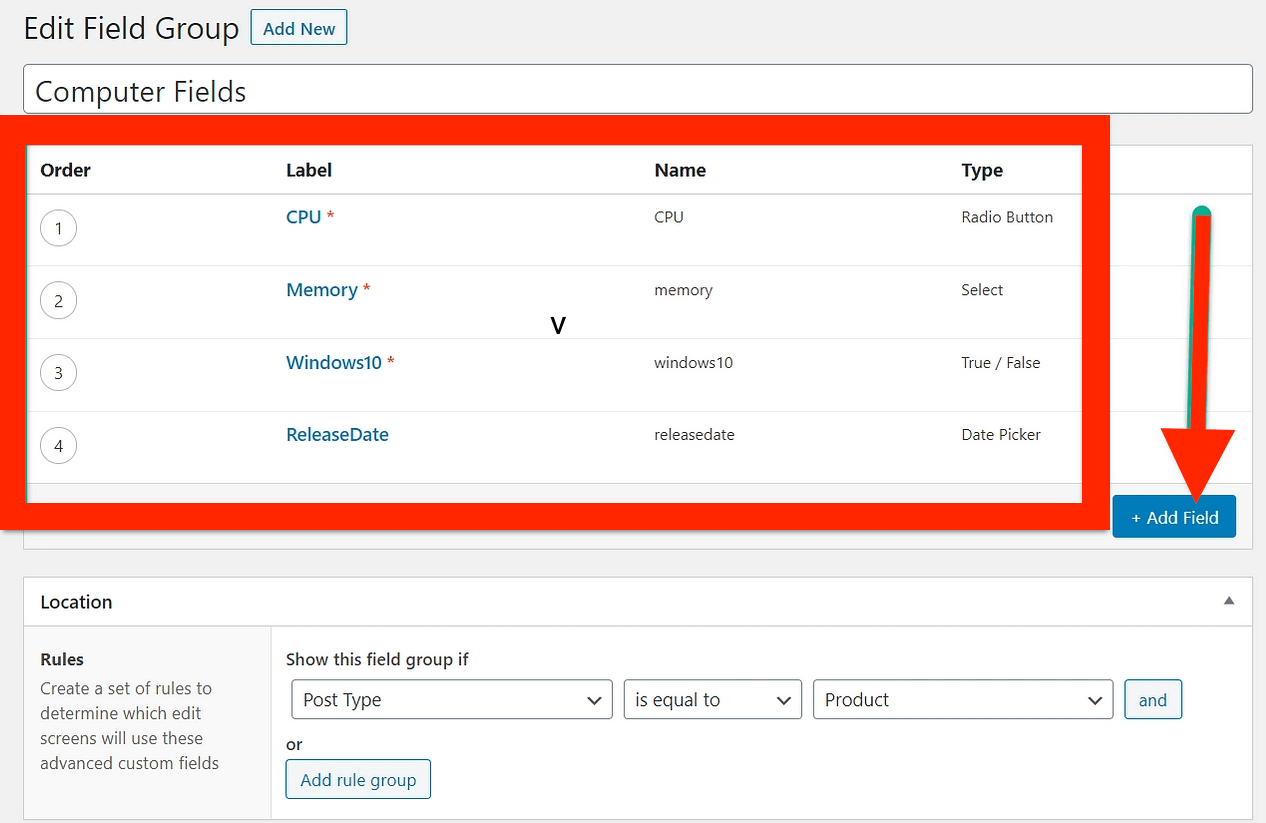
Select the Add Field button again to add more fields to your group.
This is how it appears with four fields in this group:
Step 4: Set up additional field group settings
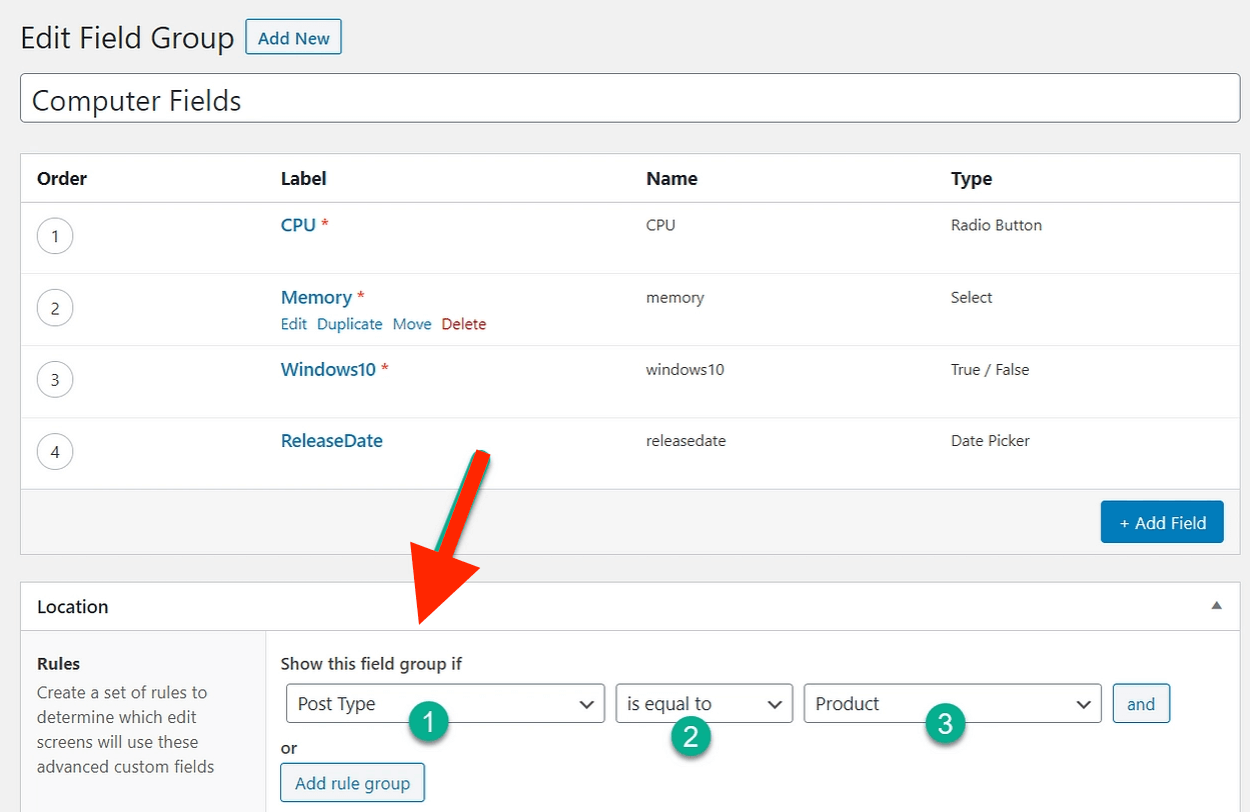
After completing the field group, navigate to the Location module. This is where you specify the location of the field group on the WordPress dashboard.
Assign the Post Type equal to Product. Alternatively, if you want to be more specific, you can select a particular category of products.
Set up these following aspects in the settings tab:
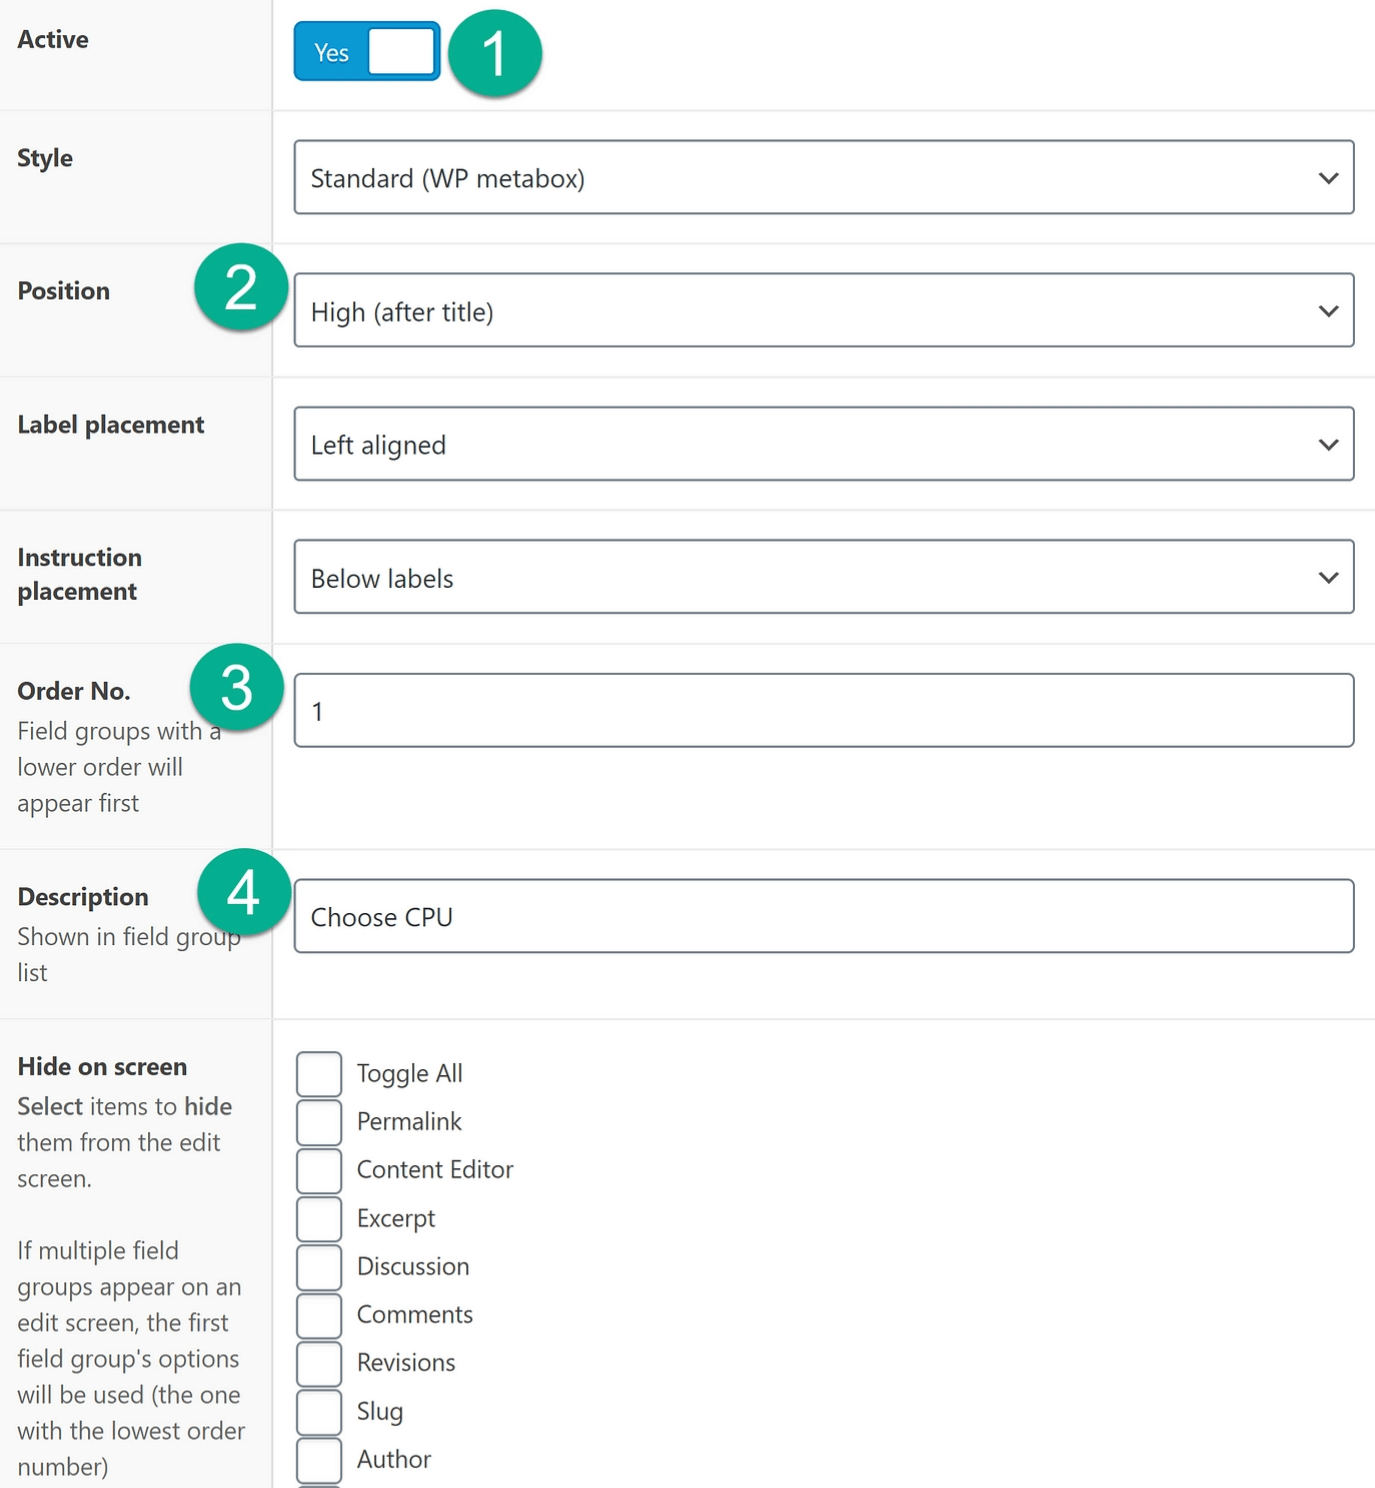
- Active: Ensure your field group is active.
- Style, Position, Label Placement, and Instruction placement: They are primarily for your own reference.
- Order No.: If multiple field groups are displayed on product pages, specify the Order Number. This determines the order in which certain field groups are shown.
- Description: Set up the description which is shown in the field group list.
- Hide on-screen: Tick on certain details you would like to hide on your screen.
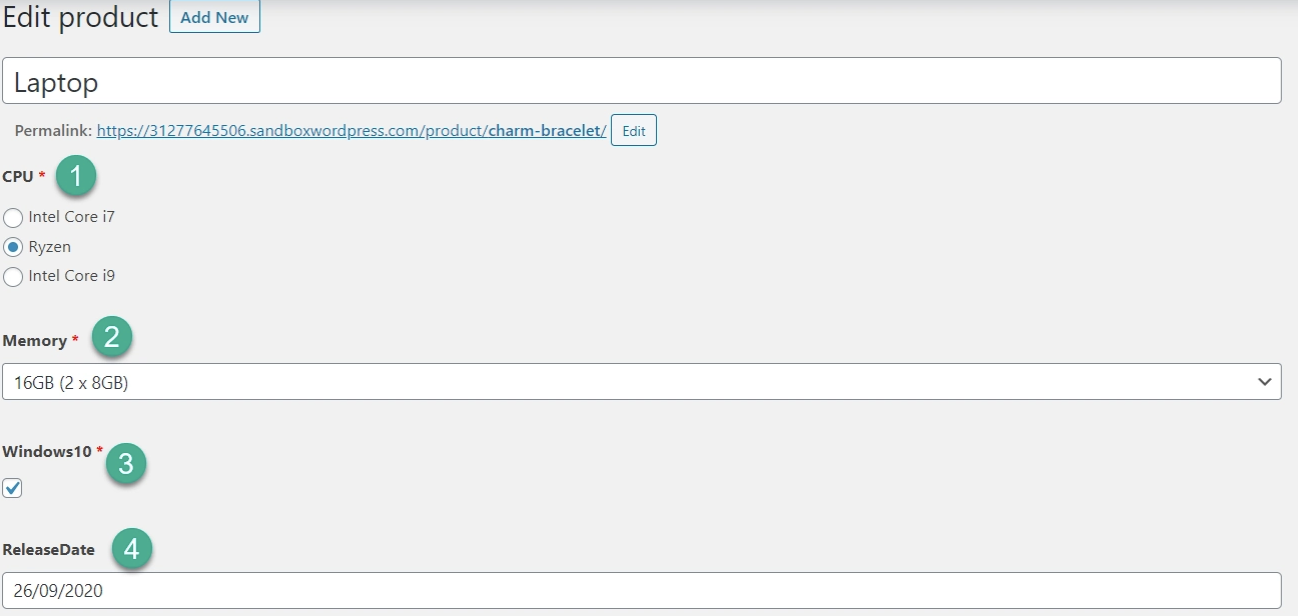
Step 5: Add product information
Following that, navigate to the editor for the product to which you’re adding custom fields. If all settings are correct, the custom fields should appear beneath the Product data box.
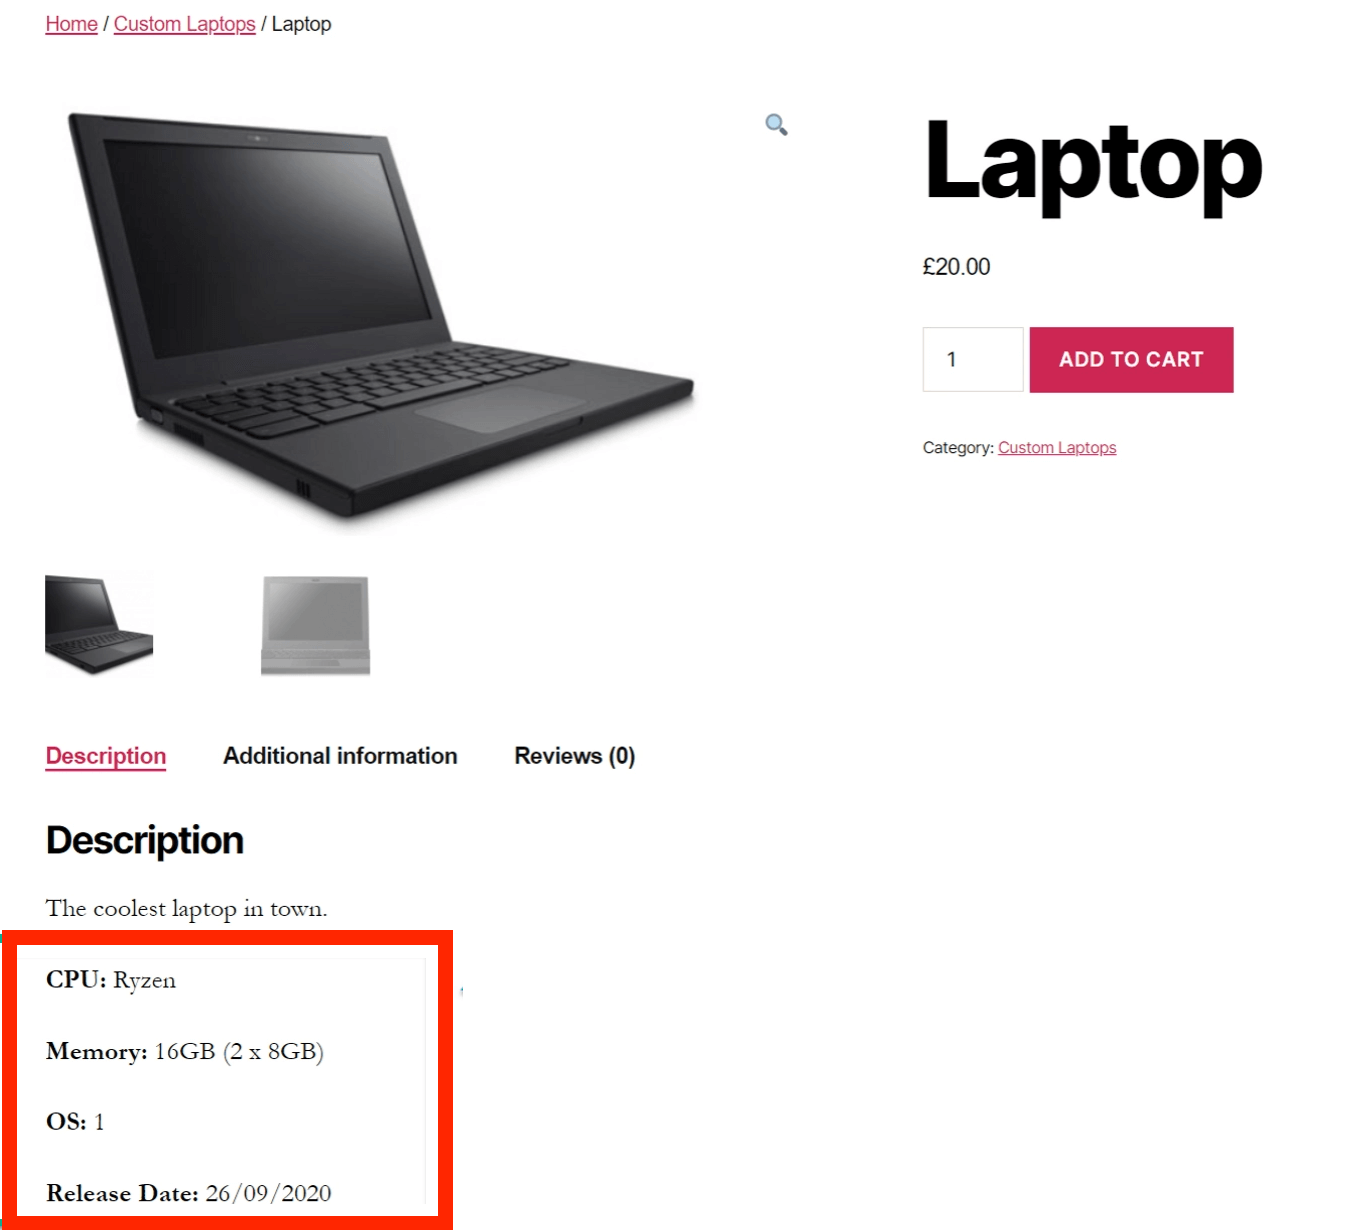
Step 6: Show custom field information on your page
You must display data from your custom fields on the front-end single product page to complete the process. This information can be included anywhere, but a smart place to start is in the product’s long or short description.
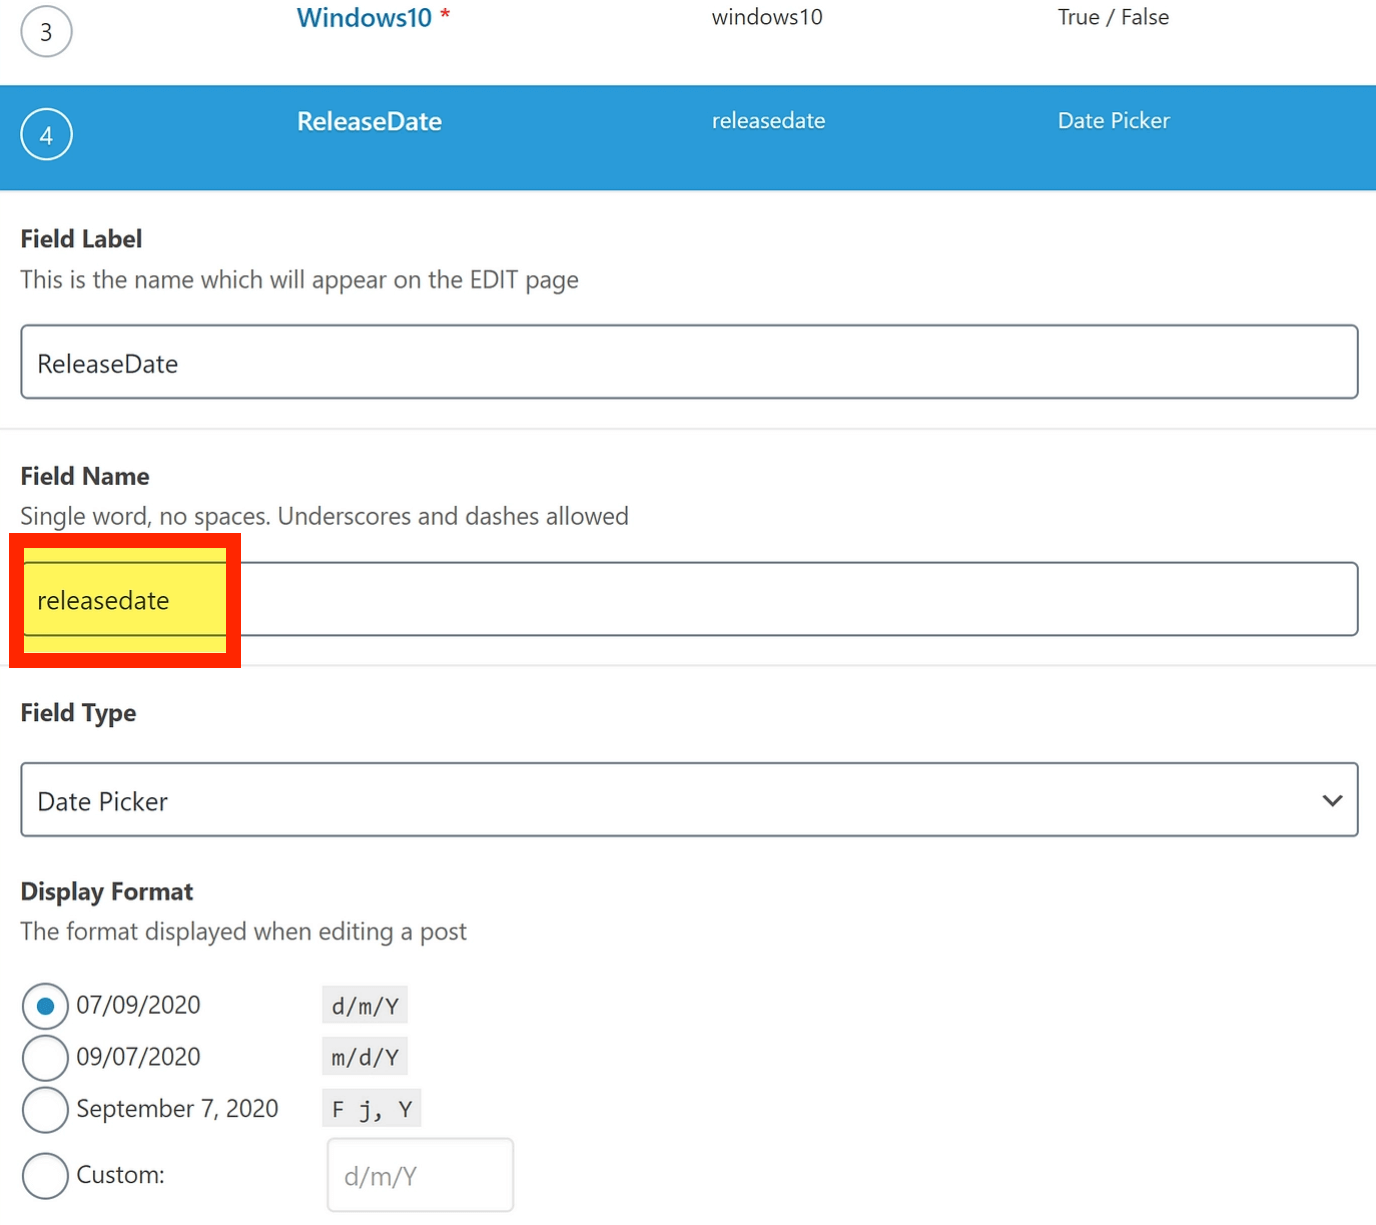
Use the [acf field=””] shortcode to display field information on the front-end. Between the quote marks, insert the Field Name.

The Field Name for each field can be found in the field group editing interface. To save your settings, click on the Publish or Update button.
When you access your product in the front-end, you will find the following custom fields where the shortcodes were added.
3 best plugins to add custom fields to WooCommerce products
1. Admin Custom Order Fields
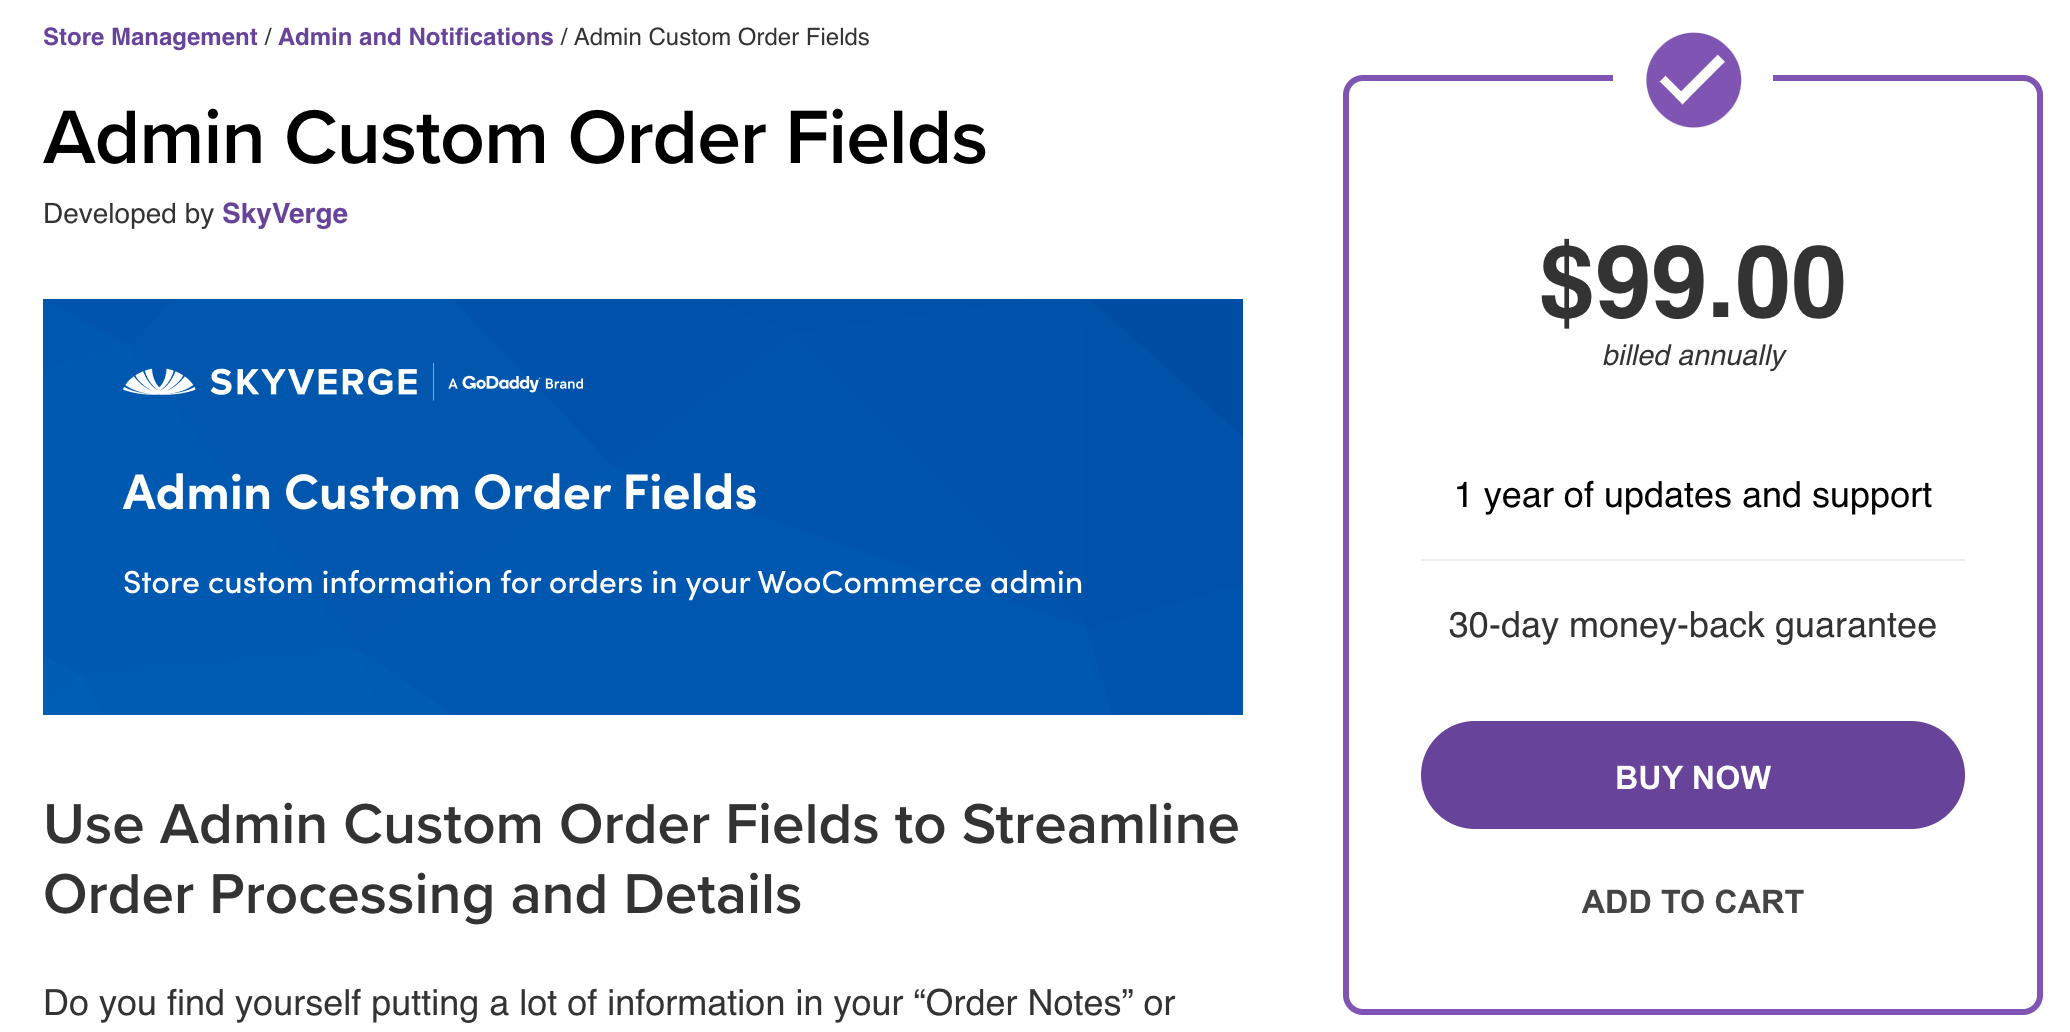
This plugin enables you to centralize your WooCommerce order information on your dashboard. Essentially, by utilizing this extension, you can tailor each order placed in your store by collecting all of the supplementary information in one location. This greatly aids in the formulation of your fulfillment methods.
Any additional information from customers, as well as any internal notes, will assist whoever is responsible for the subsequent phases of each order. Custom order fields eliminate the need to use order notes for everything. The compartmentalized nature of information will result in a more organized procedure.
Key features:
- Add and adjust order details directly from the orders page, and give all team members consolidated access.
- Orders can be sorted and filtered depending on custom fields. Additionally, you can select to display the customer’s order information.
- Select the option “Show in my orders/email” if you wish to display specific information to customers as well.
- Increase the efficiency of client relationship management.
- Enhance the overall order management process.
Price: $99.
2. Advanced Custom Fields
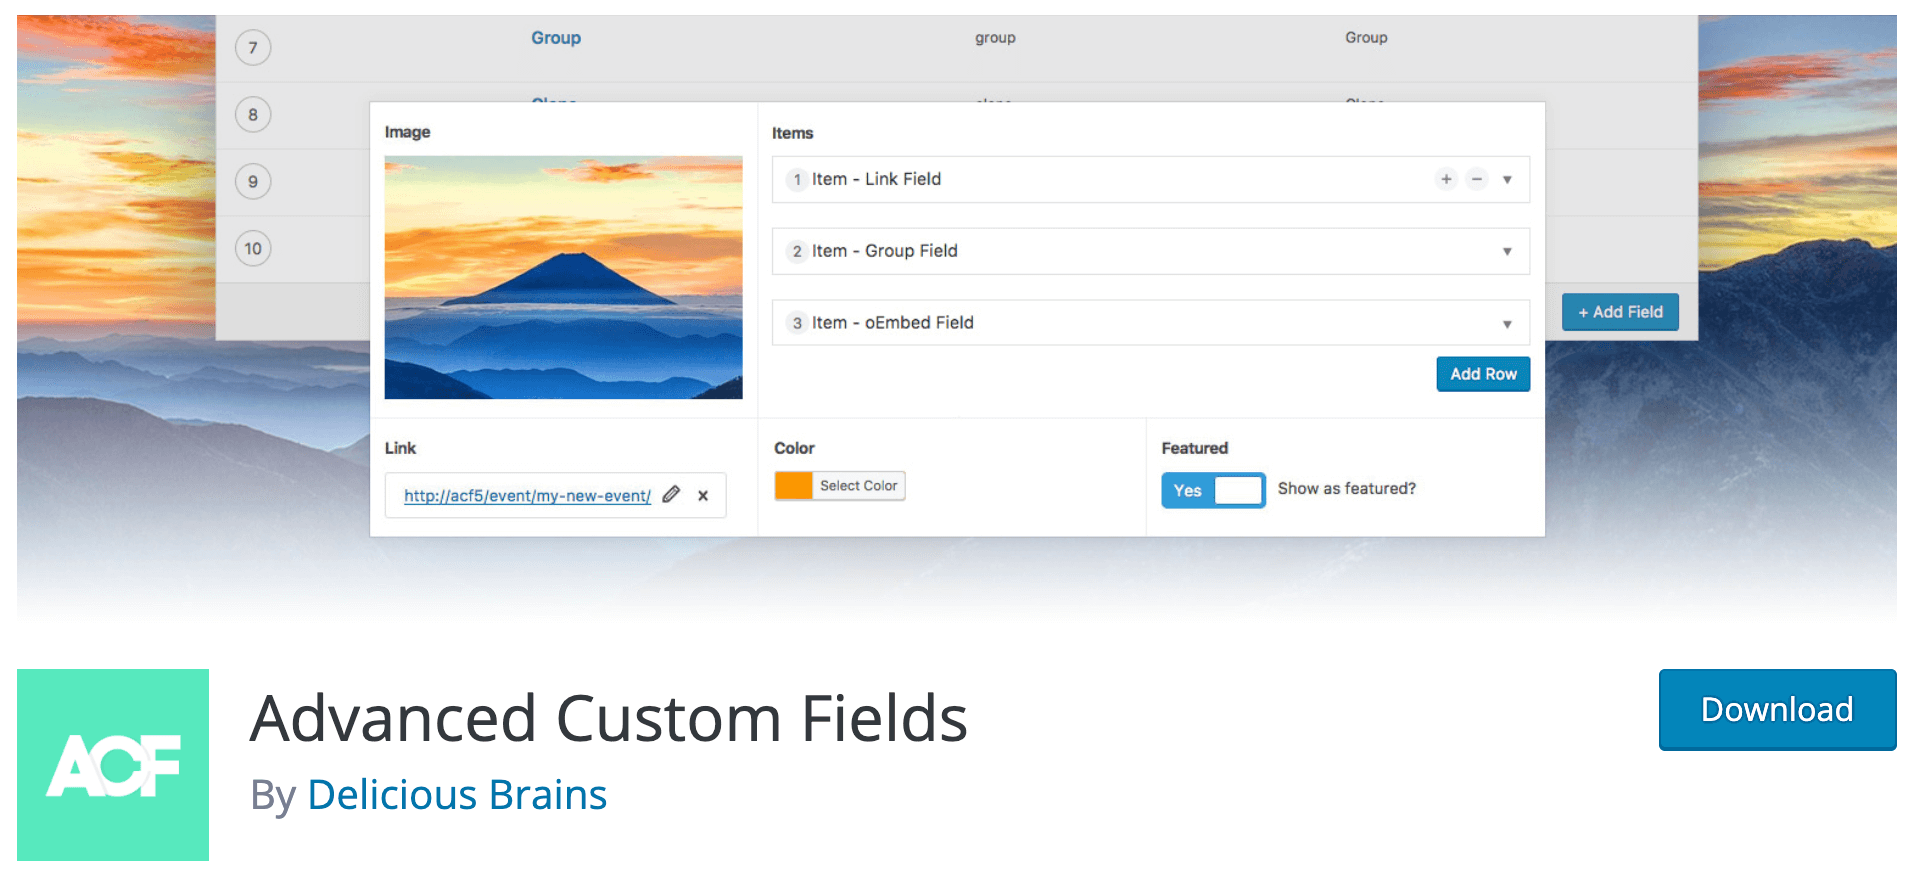
This plugin enables you to effectively manage WordPress edit screens and custom fields. Fields can be added practically anywhere on your WordPress site. These sections cover topics such as posts, users, comments, taxonomy terms, and media. Custom fields can be displayed on any theme template file. However, this requires some technical understanding. The straightforward and intuitive plugin has a plethora of useful features and over 30 field kinds. It is one of the most popular WordPress plugins in its category, with over one million active installs.
Additionally, it integrates seamlessly with WooCommerce, and you can easily add custom fields to your products. Once the plugin is installed and activated, you can quickly build field groups and individual fields to suit your needs. From the particular product page, you may enter the value for each of the custom fields.
Key features:
- Custom fields can be added in accordance with your website’s requirements.
- There are around 30 distinct field kinds to choose from.
- Fields can be added to posts, users, and taxonomies, among other locations.
- Friendly to developers.
Price: Free.
3. ACF Pro
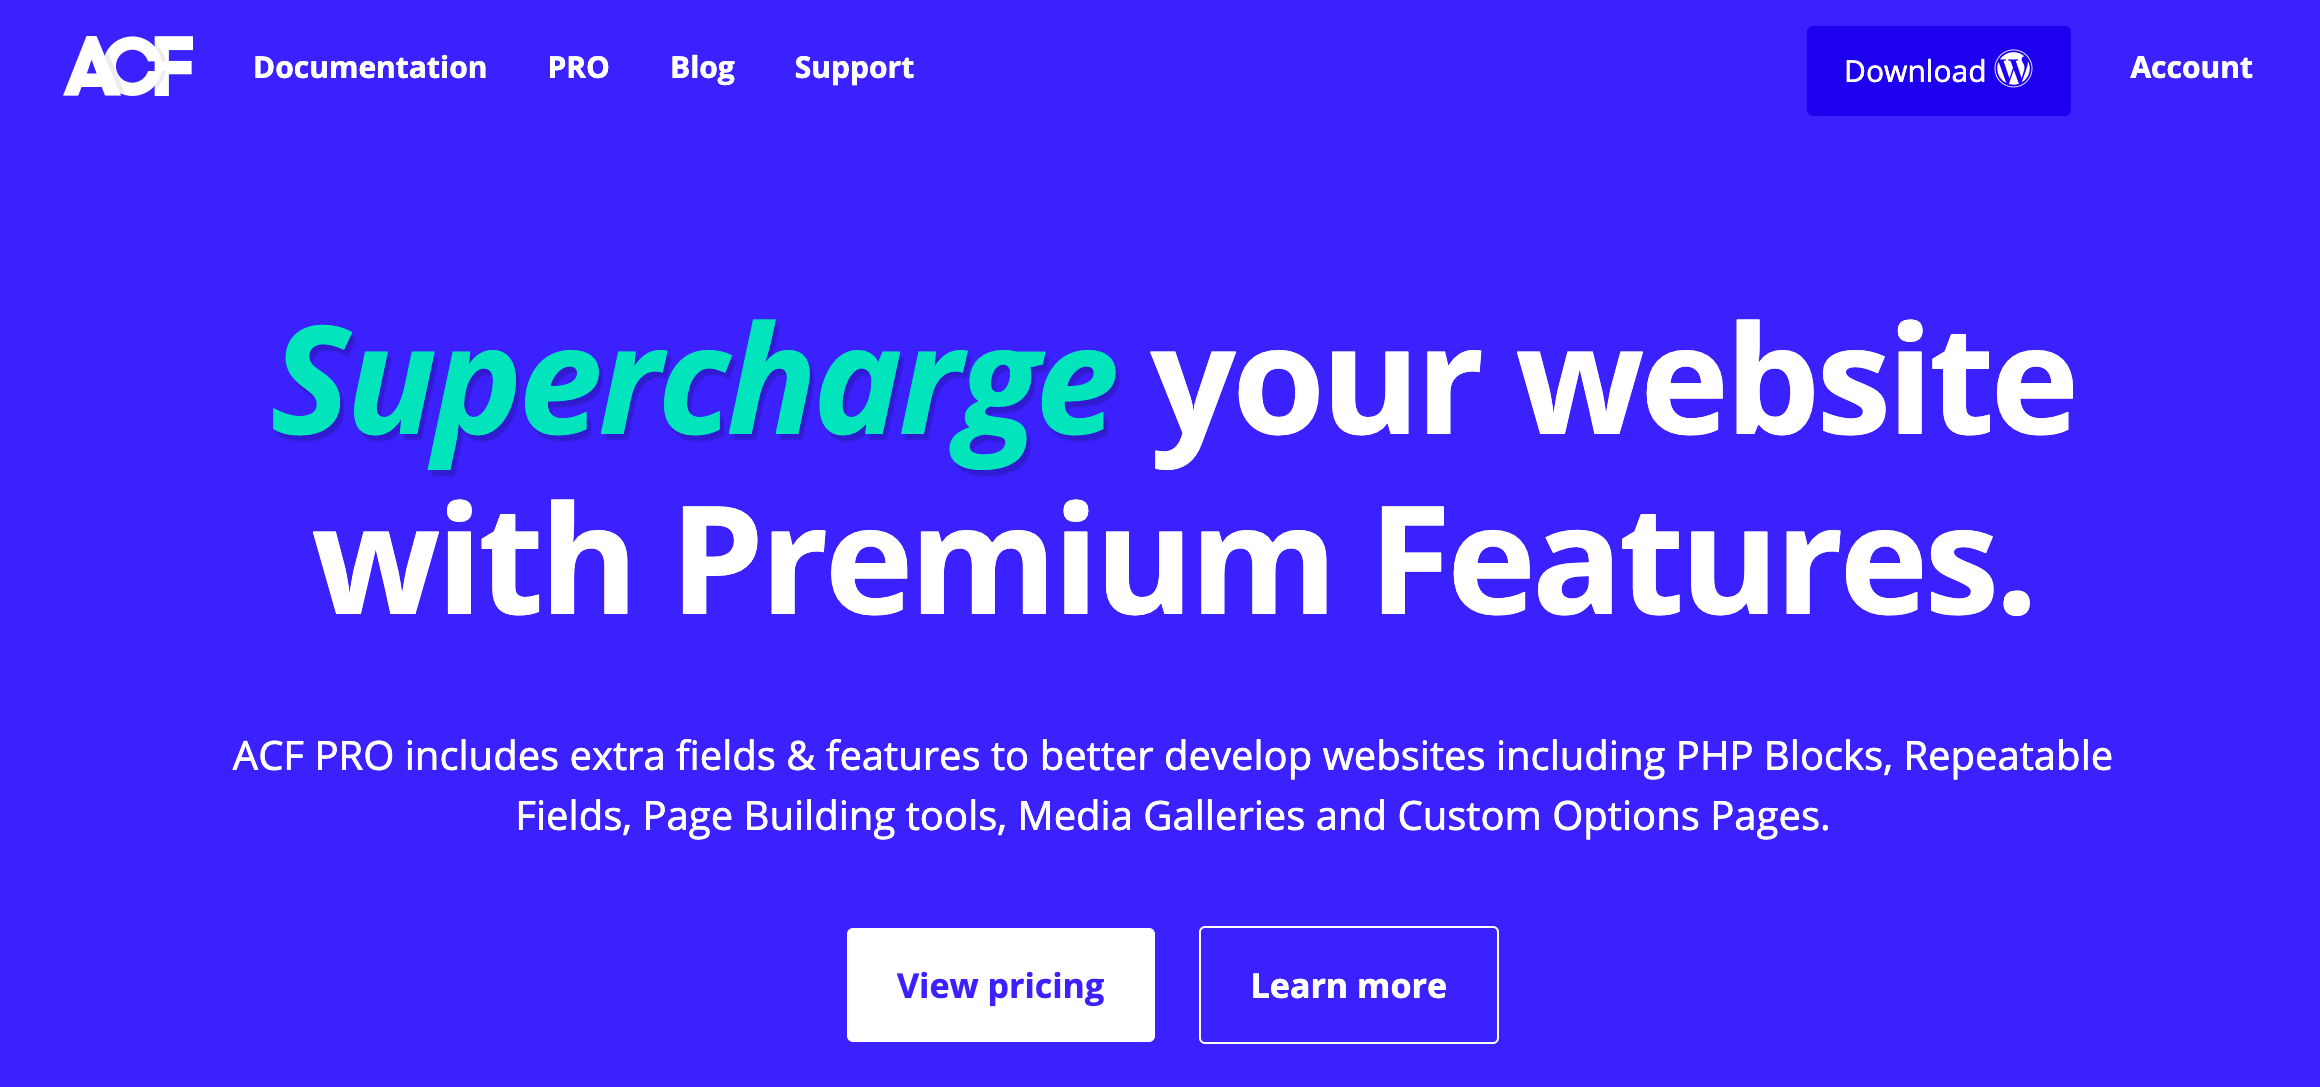
ACF Pro comes with many features that greatly assist you in customizing your website or WooCommerce store to your preference. One of the premium version’s unique features is the ability to construct subfields. These can be performed numerous times throughout the editing process. Additionally, any sort of field can be used as a subfield. In general, it significantly enhances the customization options.
Key features:
- ACF Pro makes it simple to manage an image collection.
- A gallery field is included to assist in editing and to sort multiple photos.
- Subfields can be created as layouts and reorganized to tailor the content to your exact requirements.
- Clone field is another notable feature that allows you to select specific fields that will be displayed when the plugin loads the page.
- The settings page enables you to create new admin fields only for the purpose of managing the plugin’s custom fields.
Price:
ACF Pro is offered in 3 distinct licenses. Personal membership is $49 per year, while Freelancer and Agency memberships are $149 and $249, respectively.
Final words
We’ve demonstrated how to easily add custom fields to WooCommerce products and store them in the WordPress backend without requiring any additional technical expertise (as well as a quick look at how to do it programmatically).
Would you mind adhering to the instructions outlined in this article and implementing them on your own website? It’s an excellent non-technical solution for storing and displaying additional product info in WooCommerce.
Is this post beneficial to you? If you answered yes, please share this post with your friends and coworkers to help spread the word, and stay tuned for additional AVADA instructions and recommendations.


