
How to Add a Buy It Now Button in WooCommerce

Are you in charge of a company that runs on the Internet? Are you searching for methods to get more customers, boost conversions, and get more revenue? For even more impact, you may use pop-ups to remind visitors to join your email list, exit-intent pop-ups to get email addresses, or newsletters for even more control.
What if there are other ways to improve your store’s performance within only a few clicks? Today we will be talking about How to add a WooCommerce buy now button to your website along with reasons explaining why it is so important. Keep reading to find out more! If you are curious, this article welcomes you.
Why should you use a WooCommerce buy now button?

Customers may place orders instantly with a click of a button that shows up on e-commerce sites. Instead of having to click several times and make several transitions, the user may click the WooCommerce “Buy it Now” button and be brought to the checkout page in one step. In other words, normally, this is how your customer is going to finish their add to cart phase in about 4 steps:
On the other hand, with a quick buy button, they are now capable of shortening the shopping time, and this will encourage them to complete the checkout process too:
Besides reducing the checkout time for both store owners and consumers, adding a WooCommerce buy it now button can also help:
- Increasing conversion rate and orders
- Encourages the transformation of your site visitors into paying customers.
- Website will become more intuitive and usable
- Makes everything easier with fewer clicks
How to add a Buy It Now button in WooCommerce using a plugin?
Now that you have a grasp on how a WooCommerce buy now button can be beneficial to your online business, it’s time to add an actual one to your website and make it available to visitors. If that’s the case, then this tutorial is all you need. We have divided it into small basic steps for the two methods to set up one, so make sure that you keep a close eye on each of the steps to avoid wasting precious time.
No more beating around the bush, let’s take a look at the first way of adding a WooCommerce buy now button using a plugin!
Step 1: Install the plugin
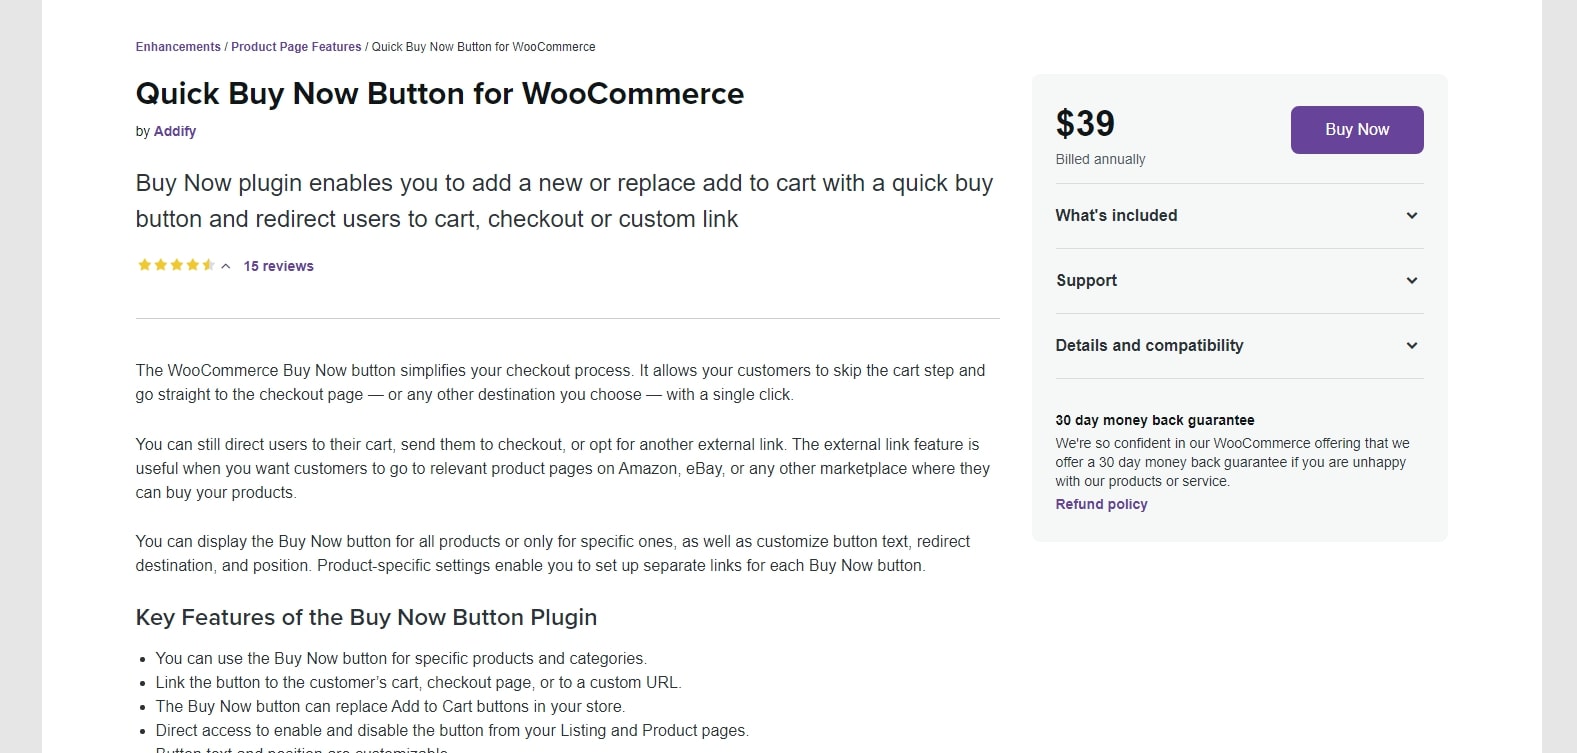
First of all, go and click on the “Buy Now” button for the plugin called “Quick Buy Now Button for WooCommerce” to download the .zip file, which we will be using later on:
After that, from your WooCommerce Dashboard, navigate to the Plugins > Add New page and click on “Choose file” in the center of the screen to start uploading the downloaded file:

Continuously choose the two buttons “Install Now” and “Activate” to move on to the next step.
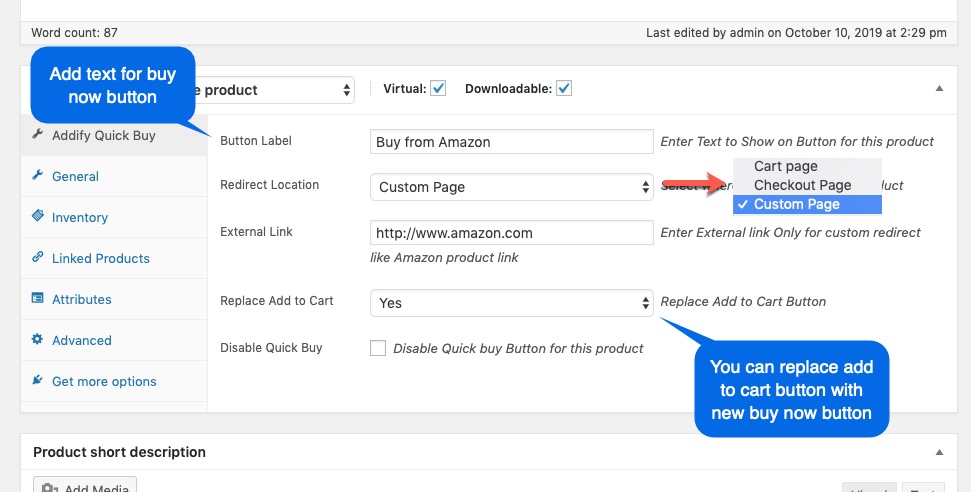
Step 2: Set up product level
Once the installation process has been completed, you can see a “Quick Buy” section when entering your Product Edit page. You may set the product level and customize it. As you can see in the image below, feel free to set up your own custom text for the button, where to show it as well as replace the “Add to cart” button or not:
Step 3: Global settings
Additionally, the Global settings part will enable you to modify many parameters simultaneously for several items. Most of the fields are similar to the Level settings previously, yet you can decide on the total number of “Quick Buy Cart” in the last box:
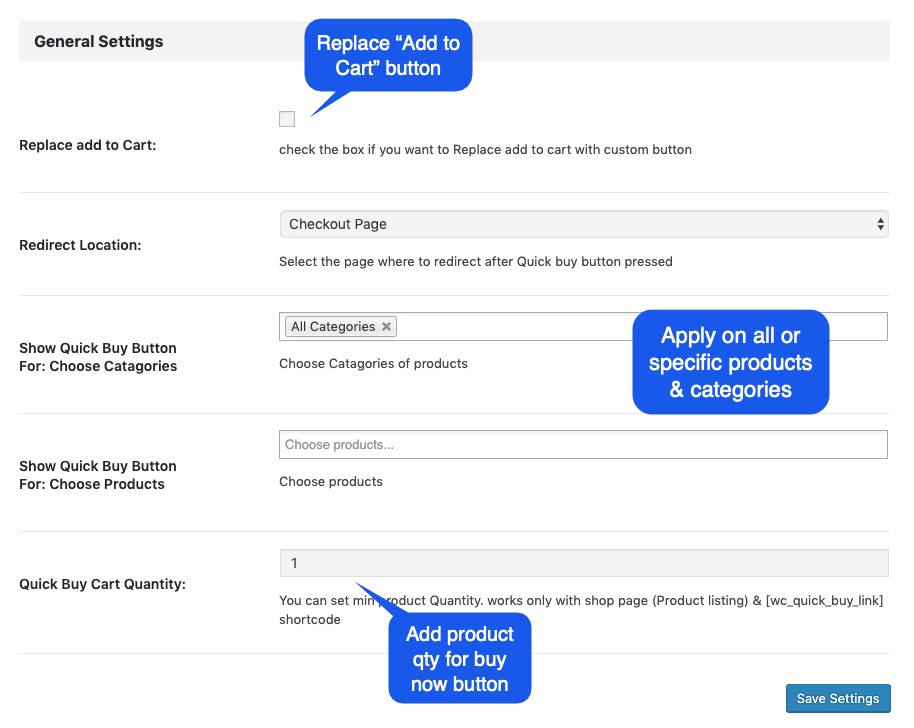
Don’t forget to “Save settings” before going on to step number four!
Step 4: Customize the button style
Last but not least is the part where you can adjust the button style in any way you want with the “Button Settings” section. From the label, theme style to the location or even its appearance configuration settings are all available in this step:
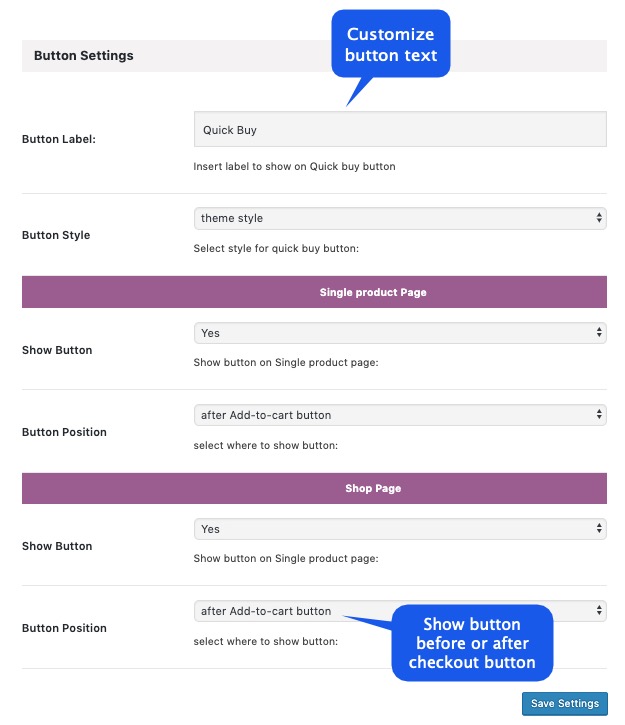
Select what fits your website the most and remember to “Save Settings”!
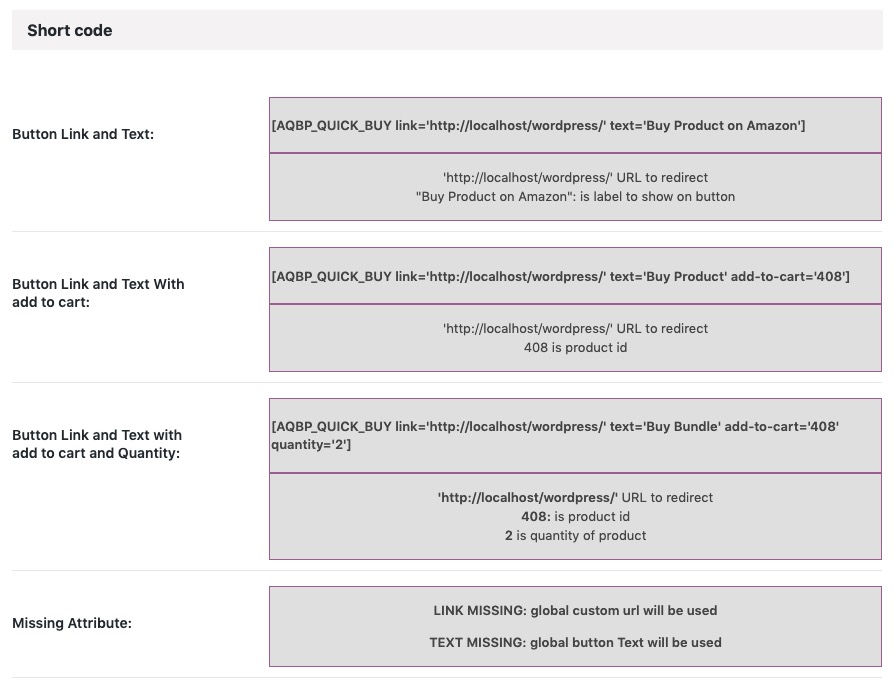
Step 5: Checkout the shortcode
The plugin offers a range of shortcode choices, which you may use according to your needs:
How to add a WooCommerce buy now button manually?
If a plugin has not fulfilled all of your requirements, then you can totally add a WooCommerce buy now button manually. However, this technique may require the admin to have decent technical knowledge related to coding as we will work on that a lot. We still recommend using a plugin to add a quick buy button.
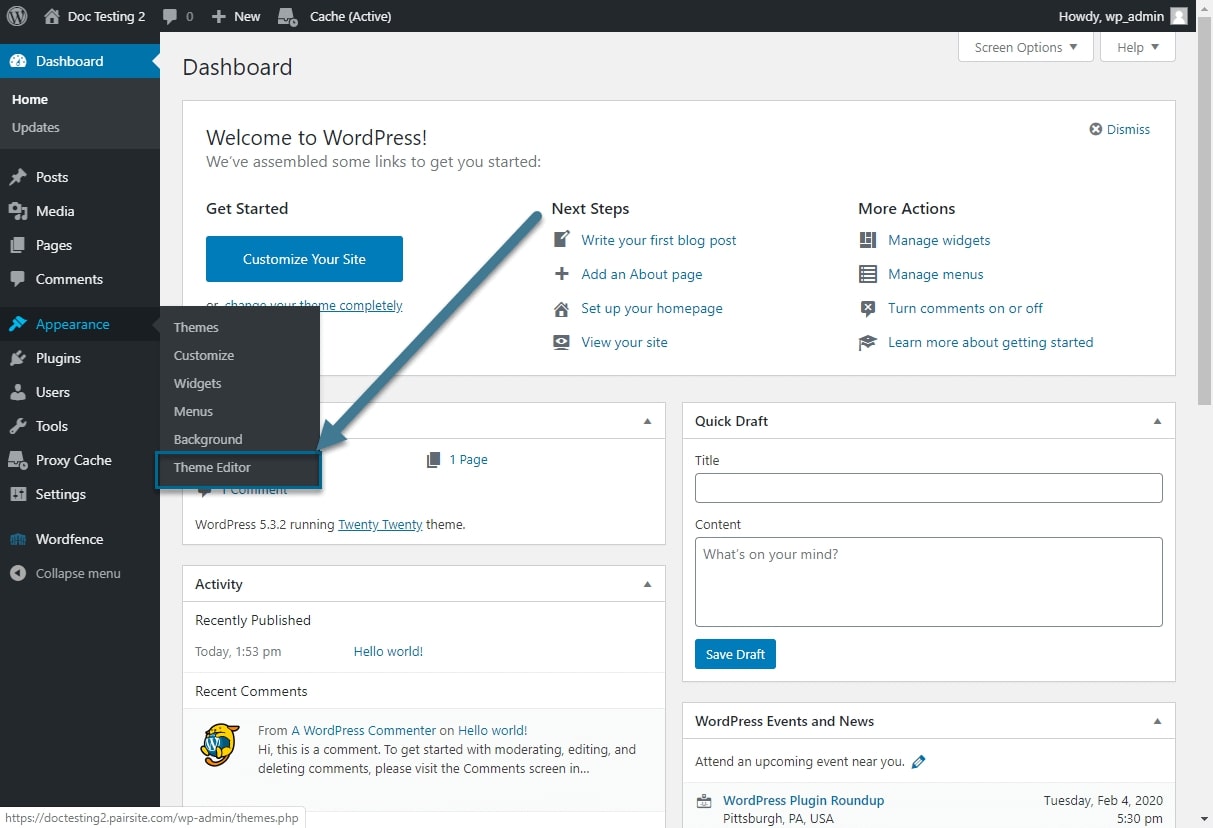
Step 1: Locate functions.php file
Also, at your WooCommerce Admin interface, locate the Appearance > Theme Editor page from the left-hand sidebar:
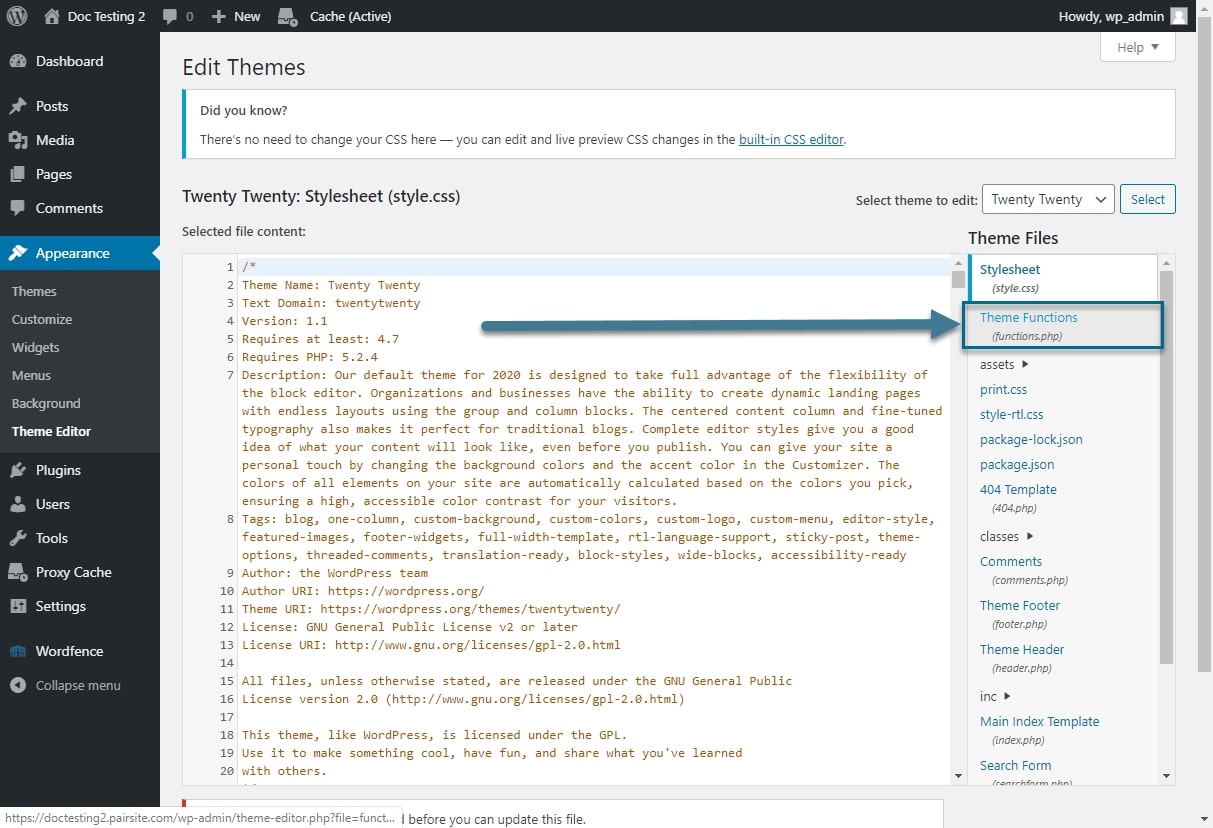
Then you can quickly notice the functions.php selection of your right hand, just like what appeared on our screen below:
Step 2: Create a link to checkout
First, you must connect the add-to-cart button to your site. To add your product’s code in the cart, you will need to change PRODUCT ID with the relevant code:
https://yourdomain.com/cart/?add-to-cart=PRODUCT_ID
To redirect our customers to the checkout page, we have to change the URL to this:
https://yourdomain.com/checkout/?add-to-cart=PRODUCT_ID
Step 3: Create product links
Then, for variable and grouped products, you must alter the URL.
Single product
With this type of item, your URL would be in the form below. Change the PRODUCT_ID into a specific ID assigned to that good:
https://yourdomain.com/checkout/?add-to-cart=PRODUCT_ID
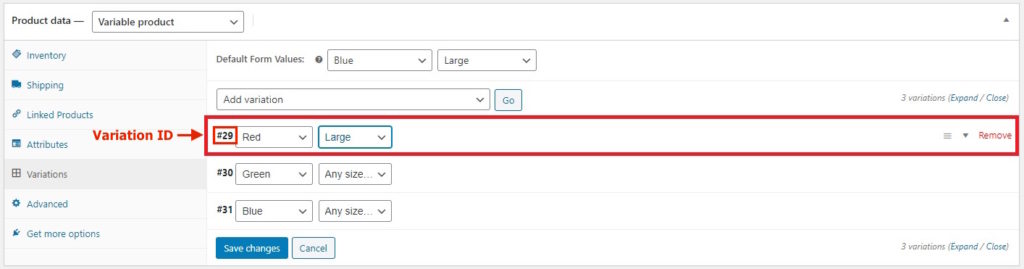
Variable product
For this one, instead of PRODUCT_ID, you will have to modify the VARIATION_ID in the following link:
https://yourdomain.com/checkout/?add-to-cart=VARIATION_ID
We have taken an ID = 29 to exemplify:
Group product
For grouped goods, instead of using variant IDs, you must use a combined ID which includes subproduct IDs and their amounts:
https://yourdomain.com/checkout/?add-to-cart=GROUPED_PRODUCT_ID&quantity[PRODUCT_ID1]=1&quantity[PRODUCT_ID2]=1
Step 4: Set up the quantity
You may also specify the total number of items to use. To do it, you need to provide an amount as a parameter. In the absence of numbers, 1 is assumed. Just like the product links, the quantity setting is also divided by the product types:
Single product
After the product id, you provide the parameter quantity:
https://yourdomain.com/checkout/?add-to-cart=PRODUCT_ID&quantity=1
Variable product
This works the same as for single items:
https://yourdomain.com/checkout/?add-to-cart=VARIATION_ID&quantity=1
Grouped products
The URL for grouped goods is:
https://yourdomain.com/checkout/?add-to-cart=GROUPED_PRODUCT_ID&quantity[PRODUCT_ID1]=1&quantity[PRODUCT_ID2]=1
Step 5: Adjust the settings
Once you make the necessary URL changes, you will need to customize the WooCommerce Buy Now button. We’re going to use the term “Purchase Now” instead of “Add to Cart” since consumers will be sent straight to the checkout. You can either use the default type of button style using the following snippet:
<a class="button alt" href="#">Purchase Now</a>
Or add any extra adjustments on your choice with this one:
<a class="button my-button" href="#">Purchase Now</a>
All you have to do is copy and paste the CSS code lines into your Appearance > Customize > Custom CSS section. This is how we created a red-colored button with white letters and blue borders:
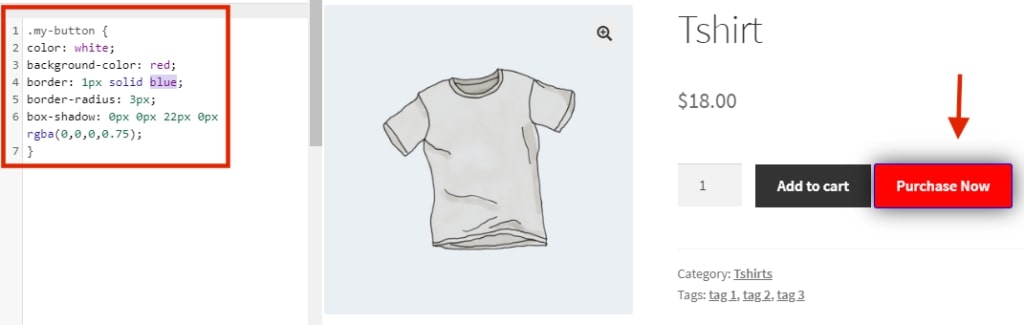
Save changes, and you are good to go!
How to add a WooCommerce buy now button using shortcodes?
Finally, we will cover shortcodes to insert a Buy Now button. Even though WooCommerce doesn’t have a built-in fast purchase button, you may use other techniques to create one. To put it plainly, this approach may be used if you need to include a product link in a blog post without interrupting the flow of information.
You may insert any of WooCommerce’s many shortcodes anywhere on your site. Shortcodes are wonderful since you don’t have to touch anything within the WordPress core. You just paste it anywhere you want to use it, and you’re done.
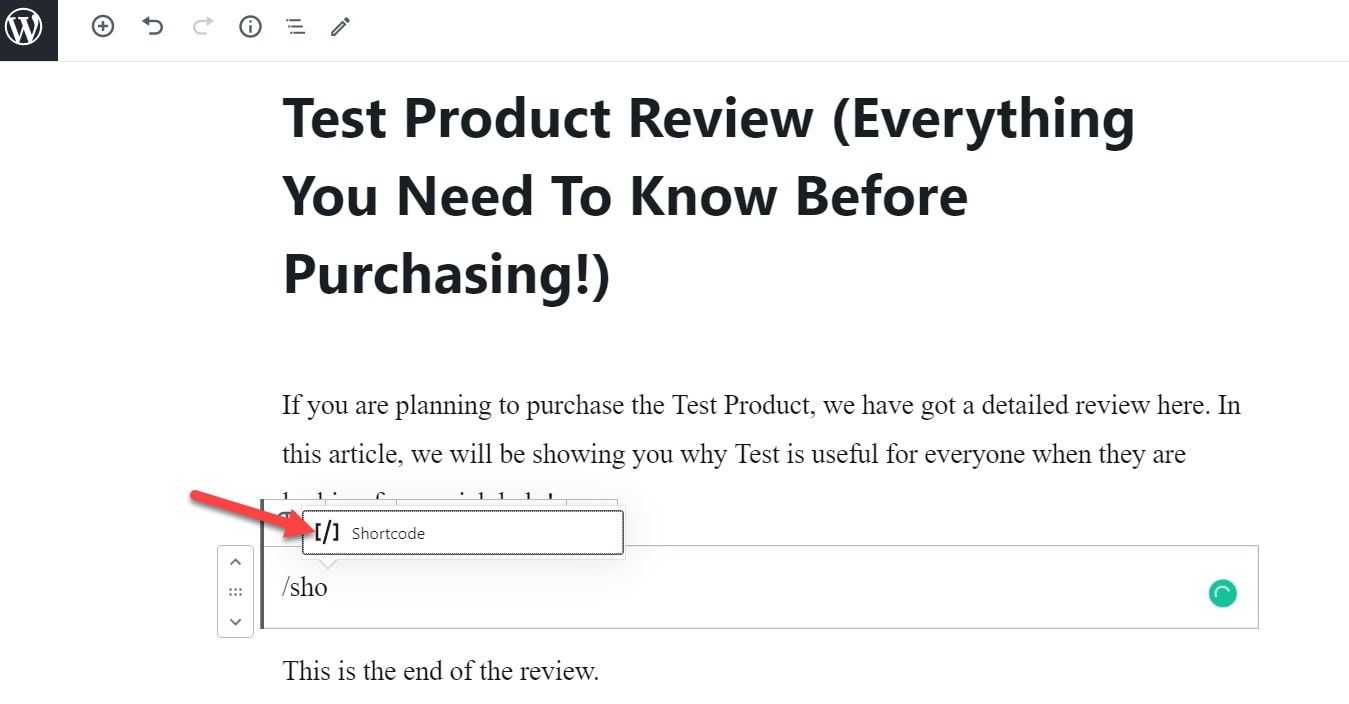
Step 1: Add a new button
Because a simple “Create to Cart” button isn’t available, we’ll have to add a new button to bring the user to the checkout. We’ll use the URL to redirect them from there. To display an add to cart button, start by logging into your WordPress site and finding the content editor where you wish to show it:
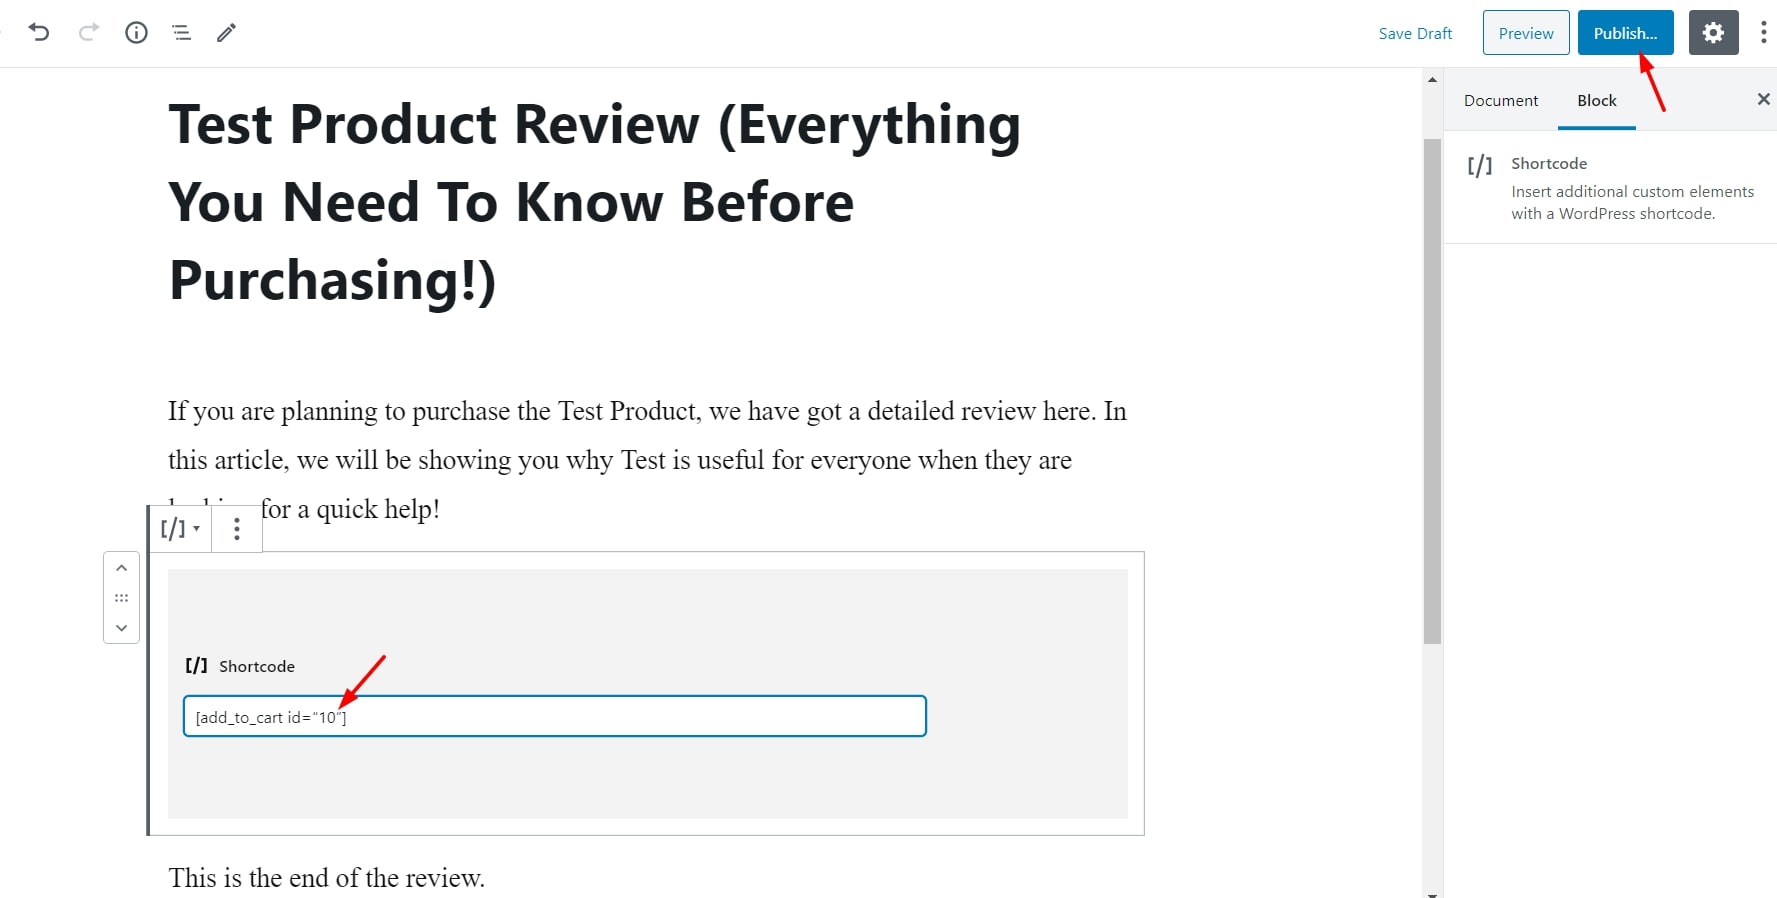
Step 2: Replace the ID
Type in the following shortcode: [add_to_cart id= "ID"] and replace the ID part with your actual product ID taken from the WooCommerce Products page:

Step 3: Paste and publish the shortcode
The moment you finish with the shortcode, click on “Publish” to make it available to your customers:
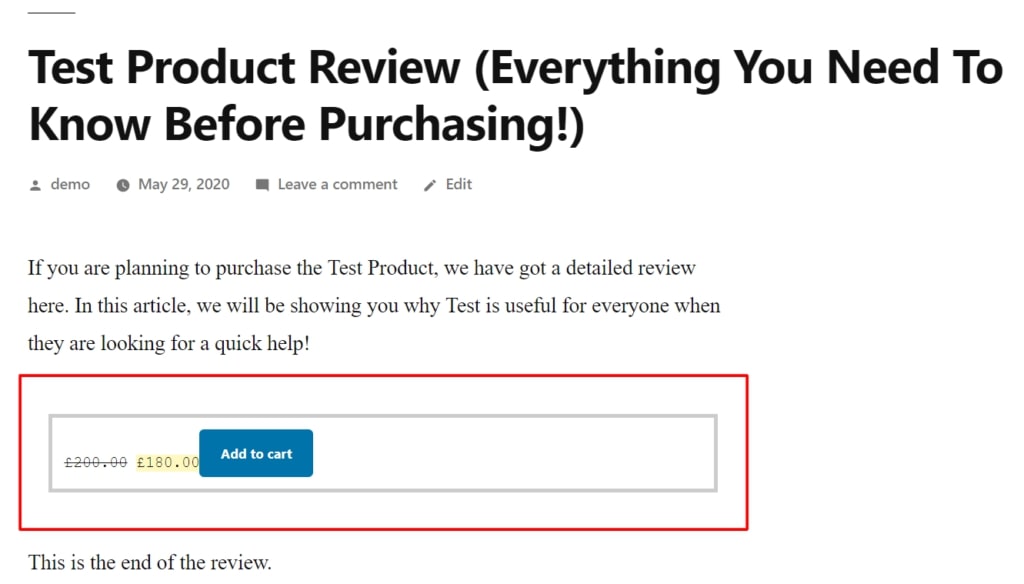
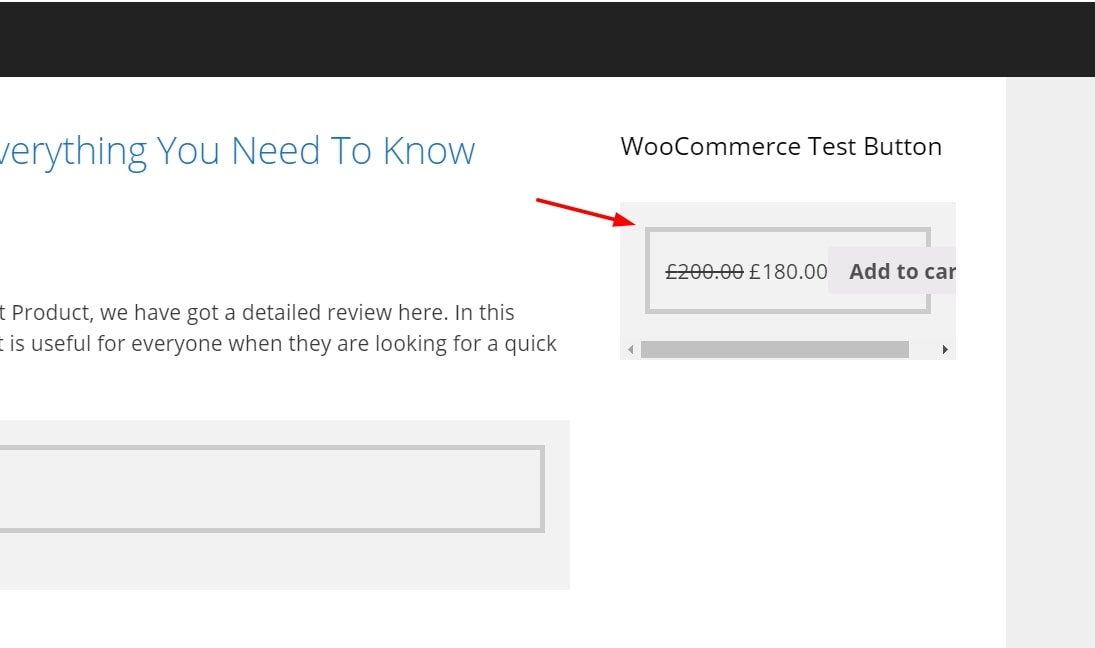
A beautiful button appears on the website when you go to check your content; consumers may use it to add products assigned with a WooCommerce buy now button to their basket:
Step 4: Advanced customizations (optional)
Shortcodes may be easily modified using characteristics as well. The shortcode, class, quantity, SKU, style, and price may be shown. For instance, you may use a shortcode to change the add to cart button, like this:
[add_to_cart id=”XXXX” class=”alt” quantity=”2” sku=”XXXX” style=”border:4px solid #ccc; padding: 12px;” show_price=”true”]
Write the proper product values in each characteristic. You may even personalize the look of the button. A benefit of this approach is that you have the option of including a “add to cart” button in a widget:
Conclusion
To sum up, we hope that our article on How to add WooCommerce buy now button will help you expand your online business’s success by bringing the best shopping experience. In this way, attracting more customers is no longer a difficult task.


