
How to Add Braintree Payments to WooCommerce

The Braintree for WooCommerce payment gateway enables you to take credit card and PayPal payments via Braintree on your WooCommerce store. Customers can save their credit card information or link their PayPal account to their WooCommerce user account to expedite the checkout process.
Braintree for WooCommerce offers tokenization, which enables your customers to keep their credit cards or connect their PayPal account for future checkouts that are faster and easier. Additionally, the gateway supports WooCommerce Subscriptions, which enables you to sell things on a recurring basis, as well as WooCommerce Pre-Orders, which enables you to receive payments for upcoming products when they ship or in advance.
This article will look at How to Add Braintree Payments to WooCommerce in just 4 simple steps.
Why should you use Braintree for your WooCommerce store?
 Many website owners choose to integrate Braintree with their WooCommerce store because it enables customers to complete a whole transaction without ever leaving the website. This is convenient for the customer and can result in increased conversion rates. In some cases, Braintree transaction costs may be less expensive than those charged by other prominent payment processors.
Now, let’s have a closer look at how Braintree can make such a great impact to your WooCommerce business:
- It provides all payment methods: You can accept payments from all major credit cards and debit cards. Due to the fact that PayPal provides the payment gateway, you may also make the payment using PayPal. Additionally, two payment methods can be combined in a single gateway.
- It is simple, quick, and secure: You can start by quickly installing the plugin on your website. From the customer’s perspective, they will now be required to select the Braintree payment option during the checkout process. When the customer selects the Braintree payment method during the checkout process, they will be prompted to submit their credit card information.
- It has Checkout Express: You may easily add the express payout via this checkout. Accepting payments via express payout is the optimal method. Many customers are unwilling to spend additional time entering their credit card information. The express checkout streamlines the payment process for customers. Additionally, this is why consumers choose to save their credit card information.
Requirements for adding Braintree for WooCommerce Plugin
We’re now going to look at the prerequisites for the Braintree payment methods. In this section, we’ll look at the items you’ll need to get started with Braintree payments. Therefore, if you wish to use this network, ensure that these items are prepared.
- To begin, you’ll need an active WordPress or WooCommerce website capable of accepting payments. Ascertain that you are using the most recent version of each of them.
- Then, you will require the SSL certificate. The SSL certificate is required because Braintree would not function without it.
- You will need to create a Braintree account. You can easily establish one by visiting the official website. The setup will take only a few minutes. Thus, this is not a difficult task and you may easily accomplish it.
- You’ll require the Braintree for the WooCommerce plugin. You can download the plugin’s zip file and keep it on hand.
- Additionally, you will need to create legal pages such as a return policy, terms, and conditions, and so on. All of these are required to use the payment gateway.
Once you’ve gathered all of these items, you can proceed to the following section. The following section will detail the plugin’s detailed settings. Assuming you’ve followed all of these steps, you can proceed to check it out.
How to Add Braintree Payments to WooCommerce
Step 1: Install and Activate the plugin
You can begin by visiting the official WooCommerce website and then searching for the plugin Braintree for WooCommerce that you wish to install.
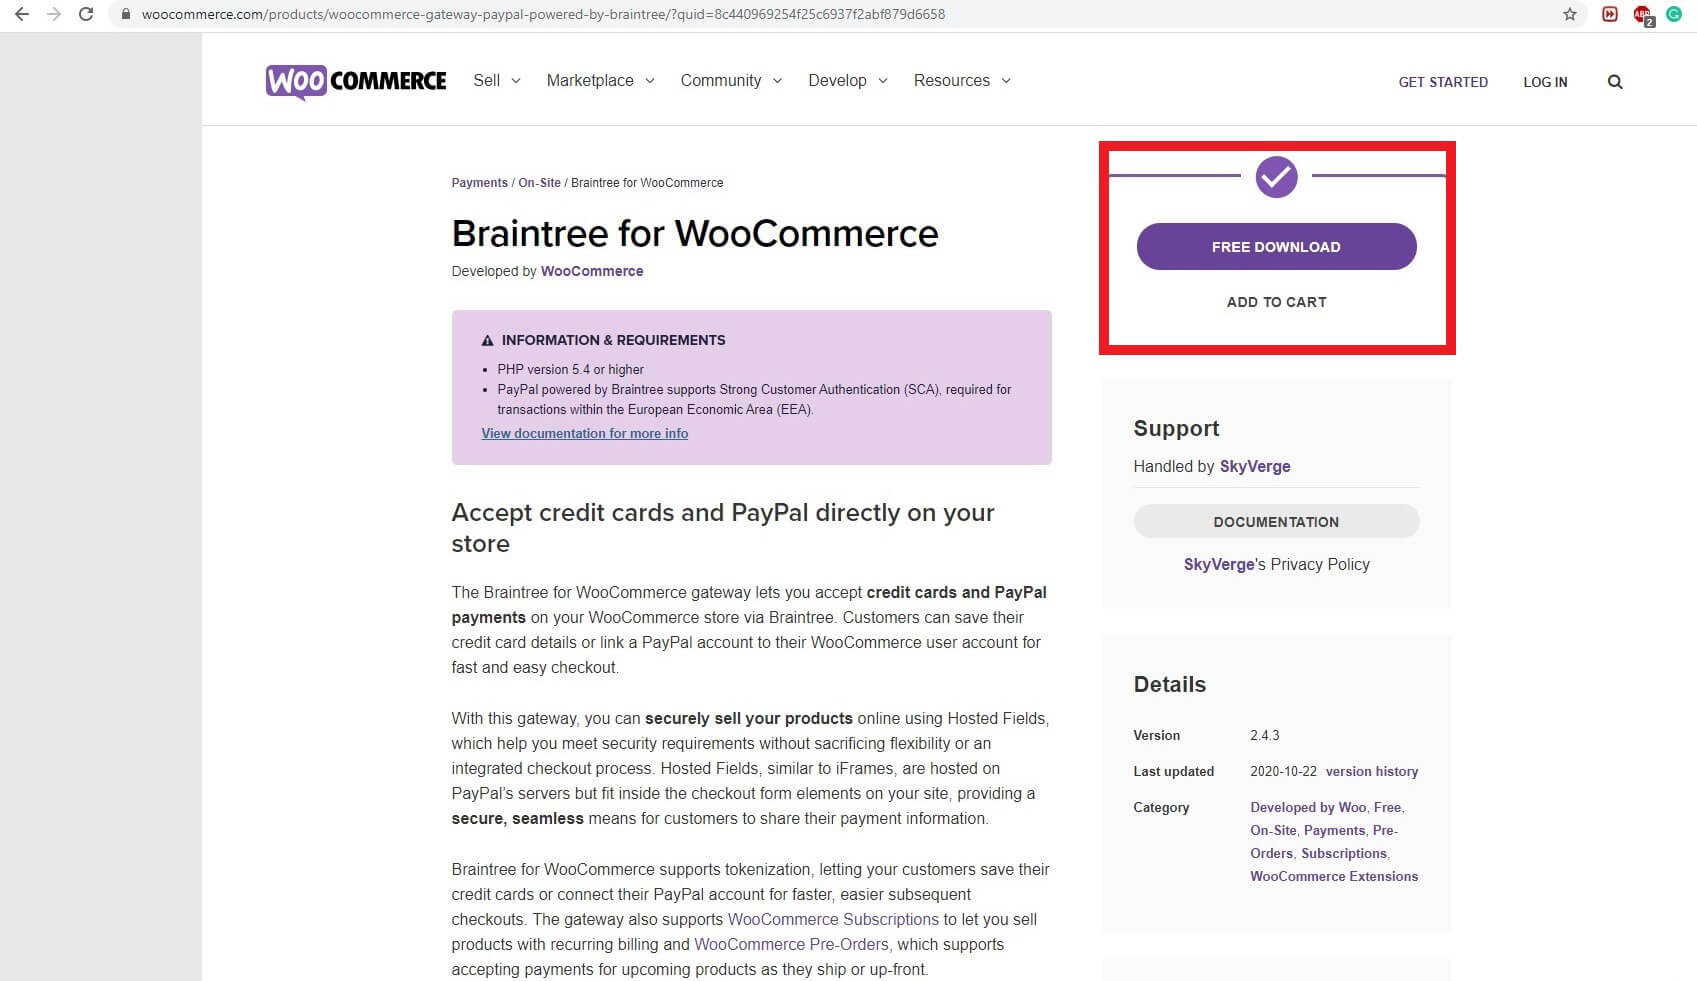
It is possible to download a zip file from the website and then upload it to your WooCommerce. Everything should be done in just a few minutes.
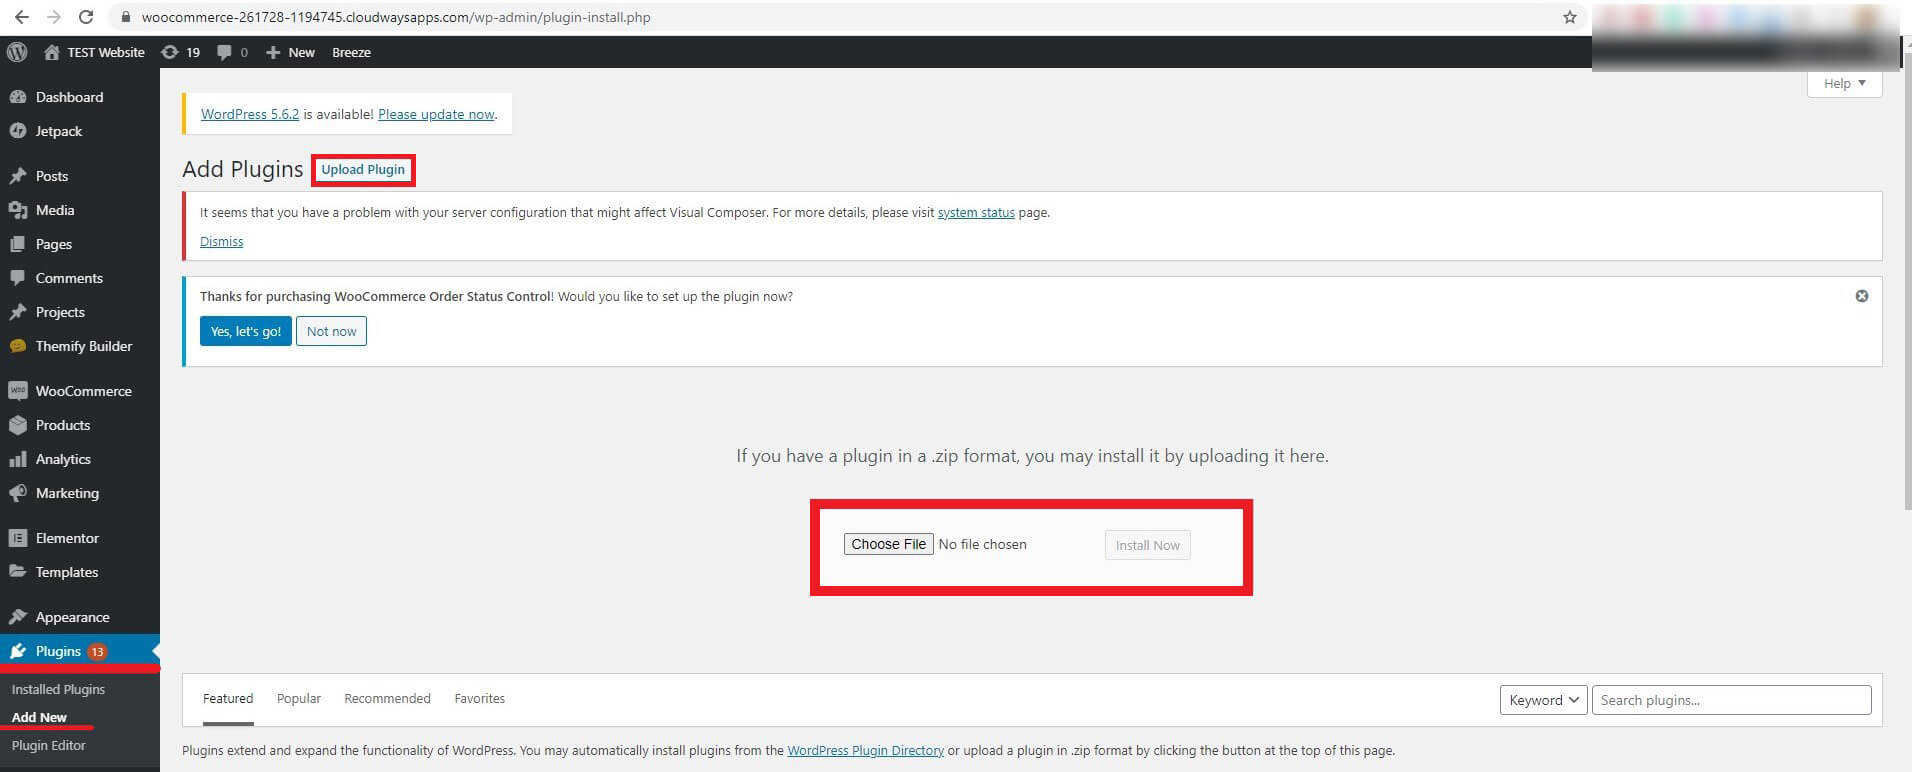
Then, it is important that you must activate it. Following that, everything will be prepared.
Step 2: Create a Braintree account
The next step is to establish an account on the website. You may easily register an account on Braintree’s official website. You’ll need to visit the website first, and then enter your information. Occasionally, it will request additional verification of your identity to ensure that you are using it appropriately. For some nations, you will also need to provide the business’s details and tax information.
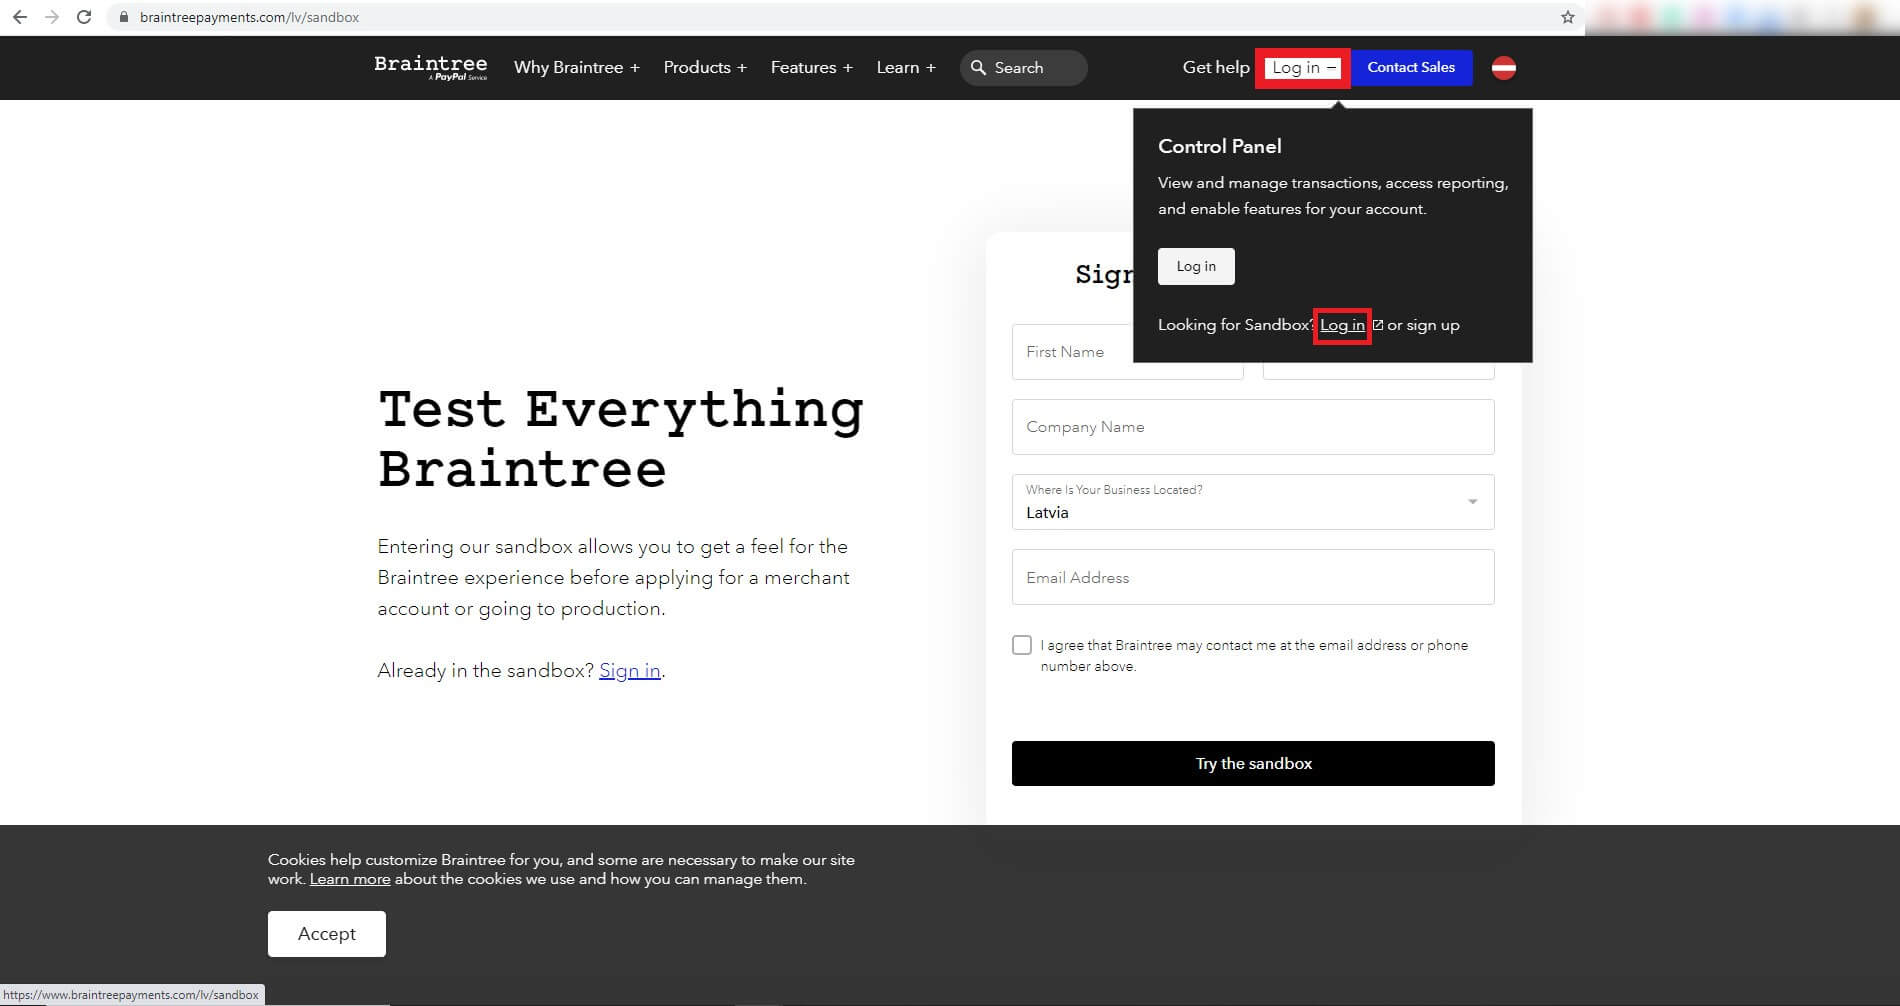
You will be guided through the account creation process if you simply follow the directions on the screen. Continue to the next step after you’ve registered.
Step 3: Configure Braintree for WooCommerce
The plugin will now need to be configured, which is the following step. Configuring a plugin is simple and quick if you understand how it will be used. Simply provide the API credentials and you’re ready to go. API credentials are nothing more than the means via which the plugin will communicate with the account.
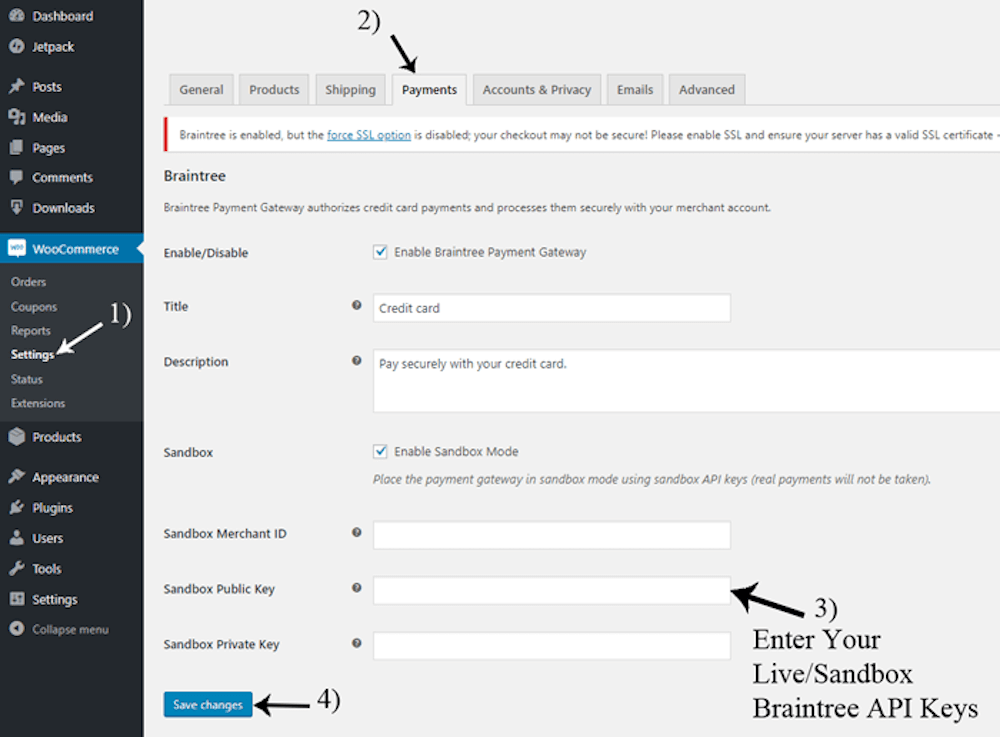
Simply enter the WordPress dashboard and navigate to WooCommerce > Settings > Payments. There, you’ll find a variety of payment methods.
Additionally, there is a Braintree by PayPal option there. Simply click on the Setup option immediately adjacent to it. When you select an option, you will be taken to the settings page. This is the configuration page, where you will enter all the necessary information.
The next step is to complete the configuration. To begin, you’ll notice the API field. This is where you will enter the API credentials. You’ll notice a link to the API documentation. Simply click on the link to obtain the API’s details. Simply copy and paste the API key from that page into the Braintree payment configuration page, and you’re nearly finished.
Step 4: Enter all information and save the configuration
The following step will require you to enter the remaining information. The remainder of the details section is where you will add the text you wish to display and comparable information. Simply replace the text with whatever you like and you’re ready to move on to the next step. This method, you can ensure that the payment gateway is configured correctly.
After completing all of the information, click on the Save changes button.
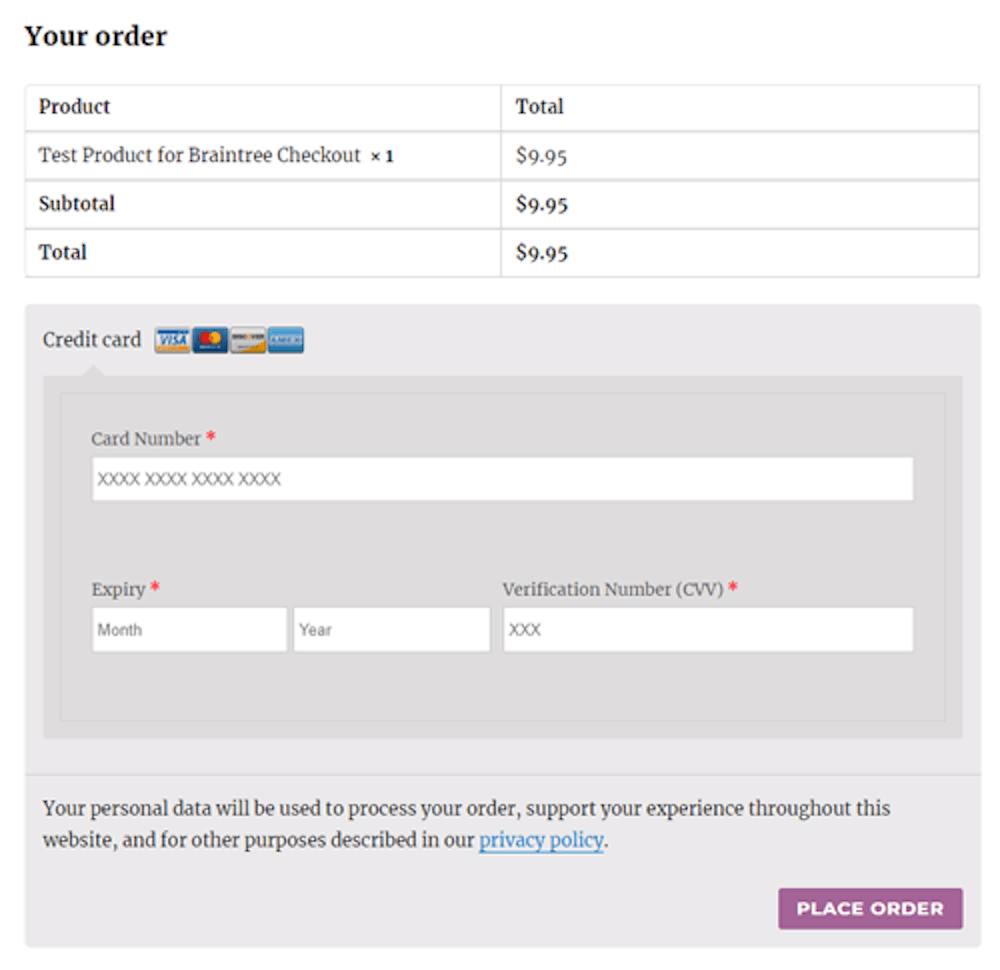
If you input your information correctly, the option to pay with a credit card (Braintree) should display when you click checkout with a product/service created using WooCommerce.
Final thoughts
To summarize, here is how you may quickly and easily configure the payment gateway. The WooCommerce Braintree payment gateway is one of the most straightforward yet most powerful payment gateways available. If you want to make payments quickly, securely, and easily, you can’t go wrong with the Braintree payment gateway.
We hope that you find this post helpful. If you feel so, please do not hesitate to share our work with your friends and colleagues, and stay tuned for more valuable articles from AVADA.


