
How to use Oberlo with Shopify?

There is an increasing trend among businessmen to do away with the traditional forms of starting a business. It’s named dropshipping. It creates a quick and approachable way for any entrepreneur to earn an income and make their dreams of setting up a prosperous business come true.
As a Shopify user, how can you start your own dropshipping business? The answer is Oberlo. This is a convenient and easy-to-use app, making it simple to work with dropshipping.
So how to use Oberlo with Shopify? The answer will be clarified right now in this post below. Keep reading and learn more about this amazing app.
What is Oberlo?
Oberlo is a marketplace that helps thousands of people like you find products to sell online. Using Oberlo, you can approach various products such as electronics, toys, and household appliances. Oberlo can assist you in looking for products from providers all over the globe and add them to your online shop.
If you’ve already made a sale, your supplier will deliver the products from their storehouse directly to your customers. There’s no need to store, package or deliver your products.
Oberlo review

Efficient product import from all over the world
Oberlo cooperates with the biggest marketplace for economical products and suppliers of dropshipping products, AliExpress, and they help product importations become rapid and simple.
You can look through a variety of products and supports on the Oberlo dashboard, and add items to your online shop easily. Moreover, your inventory will automatically update all the details, images, and pricing of your chosen products. It’s possible for you to filter products in terms of shipping methods, free shipping, reviews, rating, and how other shops have imported from that provider.
Direct import from AliExpress with Oberlo Chrome Extension
Just a few clicks, you can import products directly from the AliExpress website by using the Oberlo Chrome Extension. The extension is only available on desktop and merely with AliExpress, but it makes product search and importation fast and easy.
When you already install the Chrome browser extension, there will be a button on AliExpress, which helps you process and sync product orders quickly.
In addition, the add-on allows you to better filter your providers by enabling you to filter your search in terms of preferred shipping methods, currency, and region you are selling to.
Intuitive product management interface

The Oberlo dashboard is designed to be easy-to-use and convenient for users. On the menu bar, you can search, modify, manage products, and see import lists and sales reports.
It’s also easy for you to edit products. With a click, you’ll go to your Shopify dashboard, and here you can customize as you want.
Outstanding product customization
When you add items into your inventory, you can edit product details and post new images before it goes live on your store at any time you wish. Yet you have to do it on the dashboard of your Shopify.
It’s important that you had better customize and optimize your item descriptions and titles to meet SEO requirements, ensuring that they match your brand characteristics and tone of voice.
Auto inventory and pricing updates
That product inventory is automatically updated means you never have to worry about selling a product that’s out of stock. Store owners have no need to do inventory reports, saving much time. Besides, it can prevent sellers from bad reviews that come in as you pay for a product that’s out of stock, gradually gaining customer loyalty.
It does the same with pricing. Sellers are informed whenever suppliers edit pricing. This is critical if you want to maintain your profit margins high or deploy a special promotion on products that have been discounted.
Does Oberlo automatically fulfill orders?
Yes, it does. It’s super easy to use. With just one click, it can help you fulfill all your orders. When an order is made on your online shop, you just need to go to your inventory, locate the item and click on the Order Button. After that, Oberlo will do its job by taking care of all the packaging, storing, and delivering for you.
Order tracking
Customers require quick and simple shopping experiences, so Oberlo ensures that every order is attached to a tracking number that will enable customers and sellers to follow the status of each sale.
Set-up Oberlo account
Setting up Oberlo for Shopify store
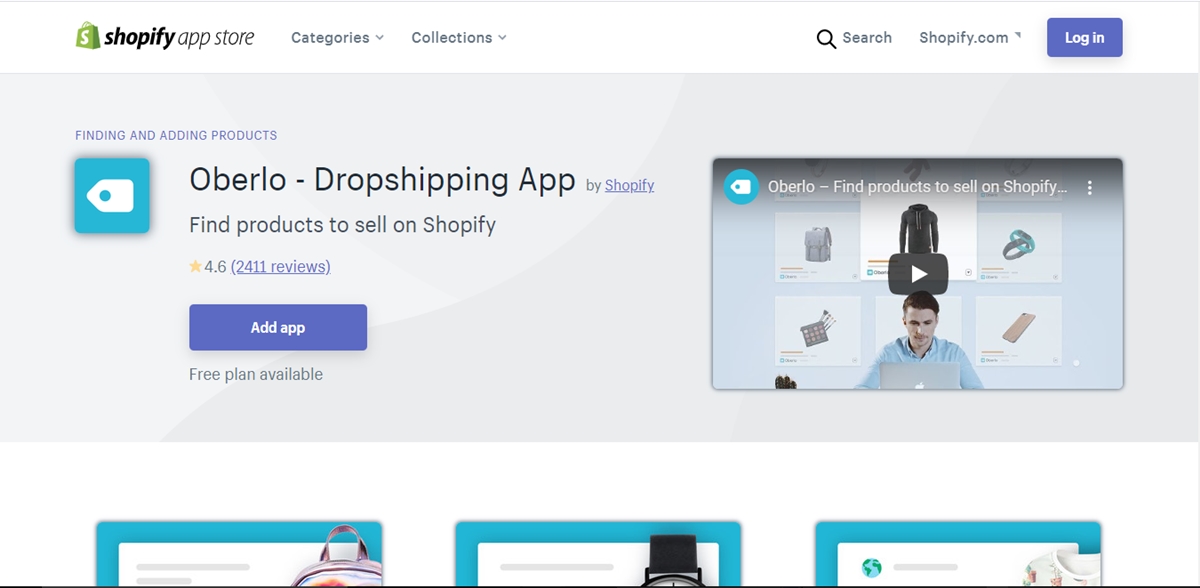
If you want to use Oberlo with Shopify, the first thing you need is a Shopify store. In case you don’t have one, visit Shopify and click Get started to sign up. If you already have a store on Shopify, go to the Shopify App Store and look for and install the Oberlo app.
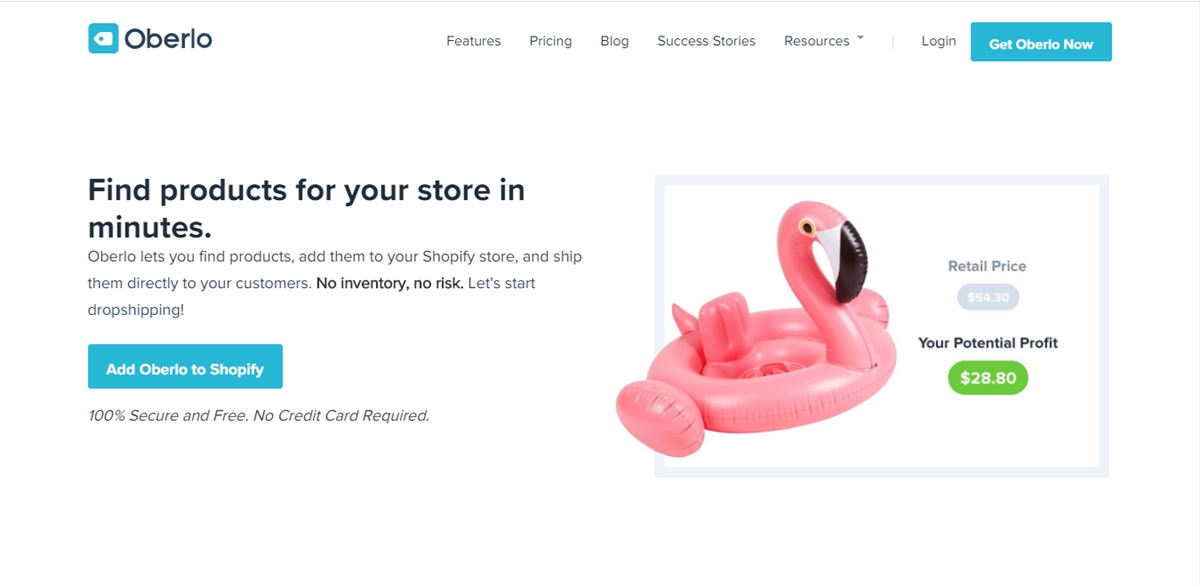
You also can get started by visiting the Oberlo website and signing up for this application. This allows you to discover products before signing up for an online shop on Shopify.
A Shopify account is only connected to one Oberlo account. If you want to link a Shopify account to another Oberlo account, you would have to set a new Shopify account.
Install Oberlo from the Shopify App Store
- Step 1. Go to Oberlo in the Shopify App Store
-
Step 2. Click on
Add app -
Step 3. Oberlo requires permission to manage your orders, items, and other data. Click on
Install appto allow Oberlo to do all functions.
Connect Oberlo to your Shopify store
-
Step 1. Go to the Oberlo website
-
Step 2. Click on
Add Oberlo to Shopifyto sign up for an Oberlo account -
Step 3. In the Oberlo dashboard, click on
Connect a store.
-
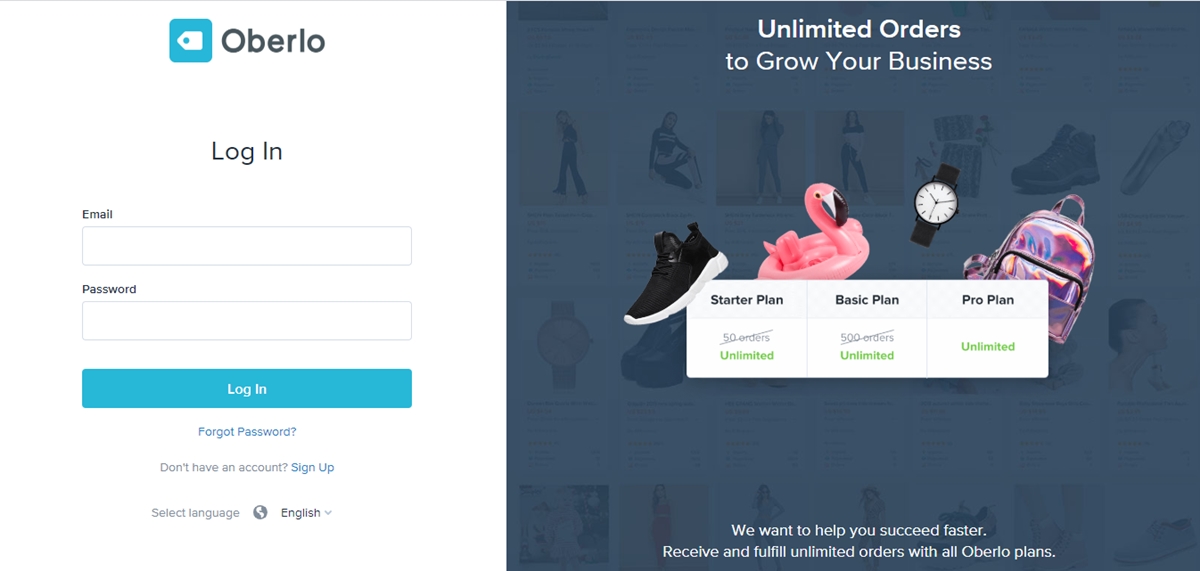
Step 4. If you have not logged in Shopify, let’s log in with your shop’s information
-
Step 5. Oberlo requires permission to manage your orders, items, and other data. Click on
Install appto allow Oberlo to do all functions.
Open Oberlo
-
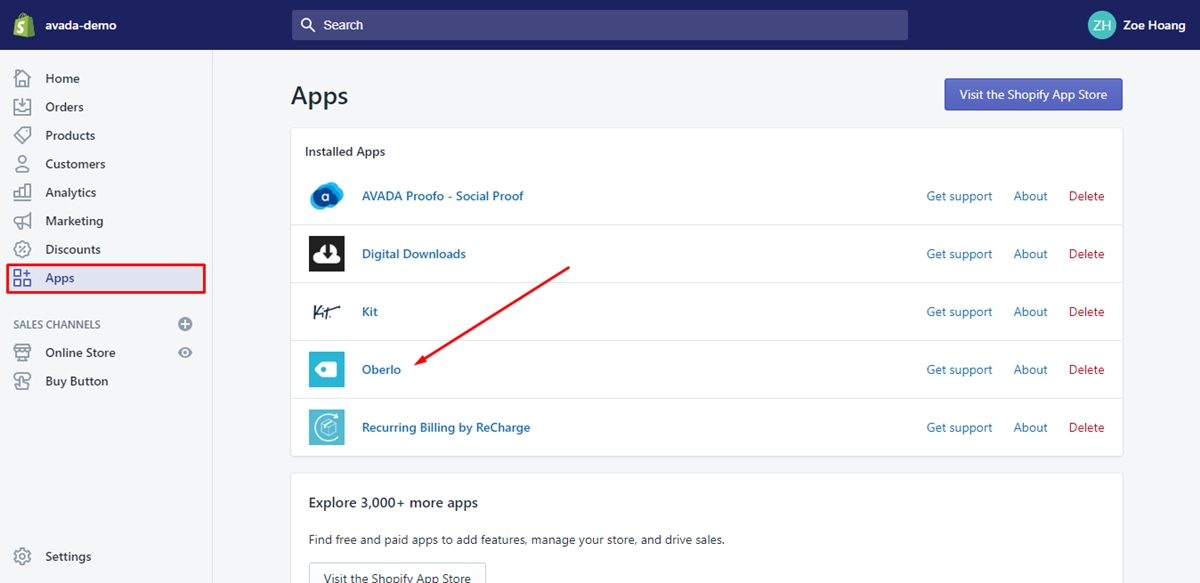
Step 1. In your Shopify admin, click on
Apps. -
Step 2. Click on
Oberlo.
Setting up Shopify store for Oberlo
Before accepting orders through Oberlo, ensure that your Shopify shop settings are right for your business.
Set up your order fulfillment settings
Notice: It’s essential to set your fulfillment settings to manual fulfillment. Or else, you won’t see the Order Products button, and you cannot buy products from a supplier.
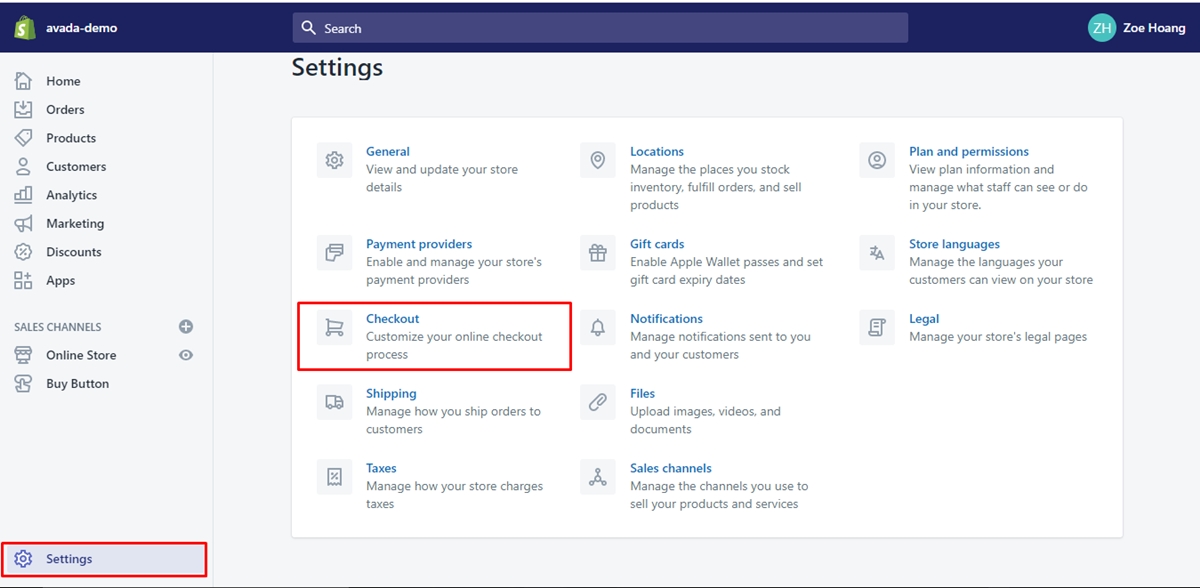
- Step 1. In your Shopify admin, go to
Settingsand then go toCheckout.
-
Step 2. In Order processing, under After an order has been paid, choose
Do not automatically fulfill any of the order's line items. -
Step 3. Click on
Save.
Set up your payment authorization settings
You can manage your payments automatically or manually. If you allow automatic capture, your orders present in Oberlo automatically. If you allow manual caption, your orders won’t appear in Oberlo until you mark the order as Paid.
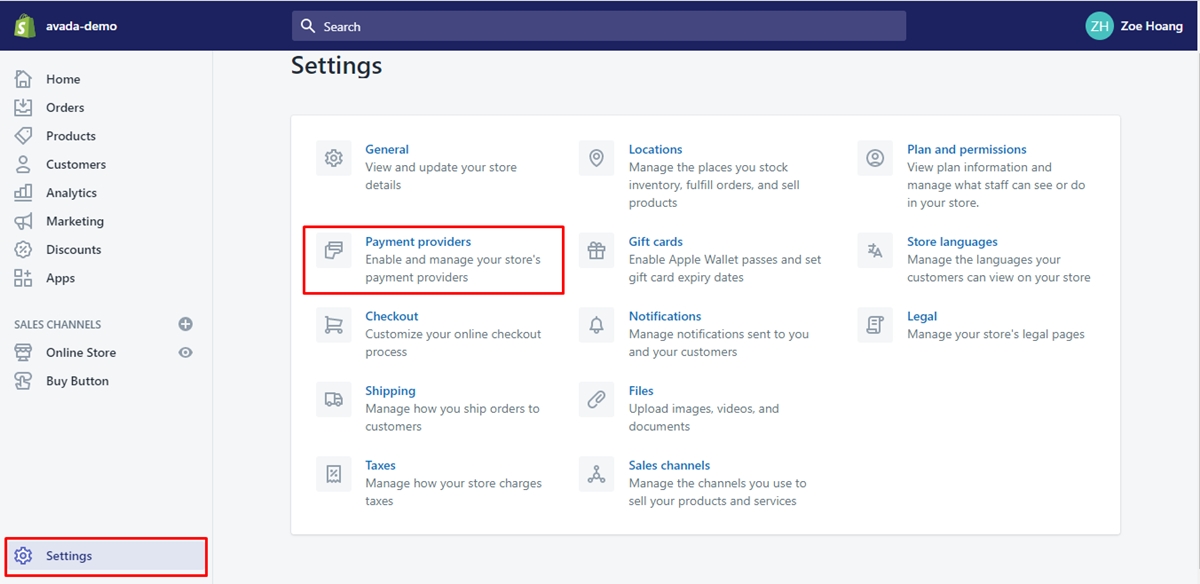
- Step 1. In your Shopify admin, go to
Settingsand thenPayment providers.
-
Step 2. In the
Payment authorizationsection, choose which payment authorization you want. -
Step 3. Click on
Save.
Configuring Oberlo settings for your Shopify store
It’s possible for you to configure your Oberlo settings directly in Oberlo.
General settings
In your Oberlo dashboard, click on Settings to access your shop and auto-update settings.
Store settings
Store name- Set the store name used in Oberlo. This store name will not be seen by customers.Set new products as published- Select if you want products to be visible to your shoppers when you import them from the import list to your shop.Set products as taxable- Choose if you want to charge tax on your products.Set the unit of measurement for product weight- Set the weight measurement that is applied when adding weights for every product or variant in the import list.Disable Shopify login (Pro subscription only)- Select whether to make it disable the possibility to log into Oberlo from the Apps page in the Shopify admin.Inform customers about delivered orders- Select whether to send an email to your buyers when their order is completed in Oberlo or if the tracking number is updated. It’s possible for you to create a custom shipping tracking URL for the fulfillment notification email.
Auto-update settings
When a provider runs out of an item, you need to set the When the product is no longer available section to select what you would like Oberlo to do:
Do Nothing- The product still stays available for sale in your Shopify shop.Unpublish Product- the product is hidden in your online shop. If the product is restocked by the provider, then Oberlo will not republish the product in your business. It’s necessary to publish the product in your Shopify admin and utilize the override function to re-sync the inventory.Set Quantity to Zero- The product presents as Out of stock in your store. If you would like Oberlo to automatically refresh the stock when a product is restocked.
When a provider runs out of an item, you need to set the When the product is no longer available section to select what you would like Oberlo to do:
Do Nothing- The product variant still stays available for sale in your Shopify shop.Remove Variant- Eliminate the variant from the product page in your shop. It will not be seen by your customers, and they no longer can order it. If the supplier restocks the product variant, Oberlo won’t insert the variant to your shop. If you would like to have that variant in your online shop again, you’ll need to override the product.Set Quantity to Zero- The product variant presents as Out of stock in your online store on Shopify.
When a supplier modifies the cost of a product, set the When the cost changes section to select what you would like Oberlo to do:
Do Nothing- The productpriceandcompared at priceare the same in your Shopify shop.Update Price and Compared At Price- The productpriceandcompared at priceupdate based on your Global Pricing Rules settingsUpdate Price Only- The productpriceupdates based on your Global Pricing Rules settings, and thecompared at priceremains the same.
When the inventory level of a product changes, you need to set the When inventory changes option to select what you would like Oberlo to do:
Do Nothing- No inventory changes are created in your Shopify shop.Update Automatically- Your online Shopify shop automatically updates the inventory level.
Suppliers settings
You can change the settings for ordering from aliexpress.com suppliers.
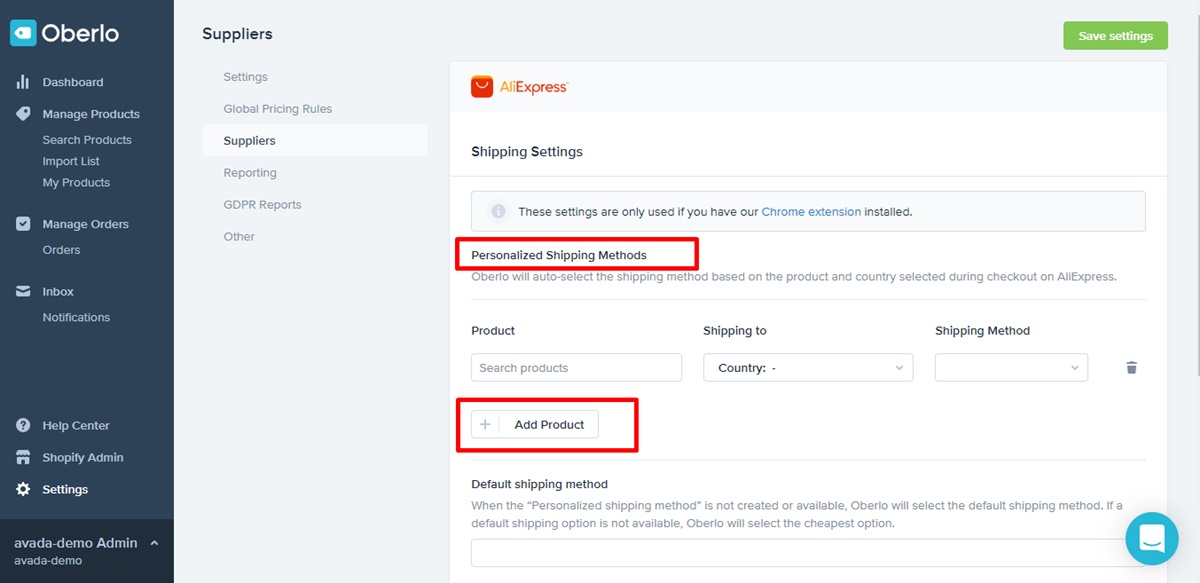
Personalized Shipping Methods
You can select the shipping method that the Oberlo Chrome extension applies to deliver your products to certain nations. For instance, it’s possible to set the extension to apply ePacket shipping for a product being delivered to the US.
As default, the Oberlo Chrome extension chooses your preferred shipping forms for your goods in the checkout of aliexpress.com. If your provider doesn’t offer your preferred shipping form, the extension will select your default one.
In case there’s no default shipping method, the extension would choose the most economical one.
- Step 1. In your Oberlo dashboard, go to Settings and then Suppliers.
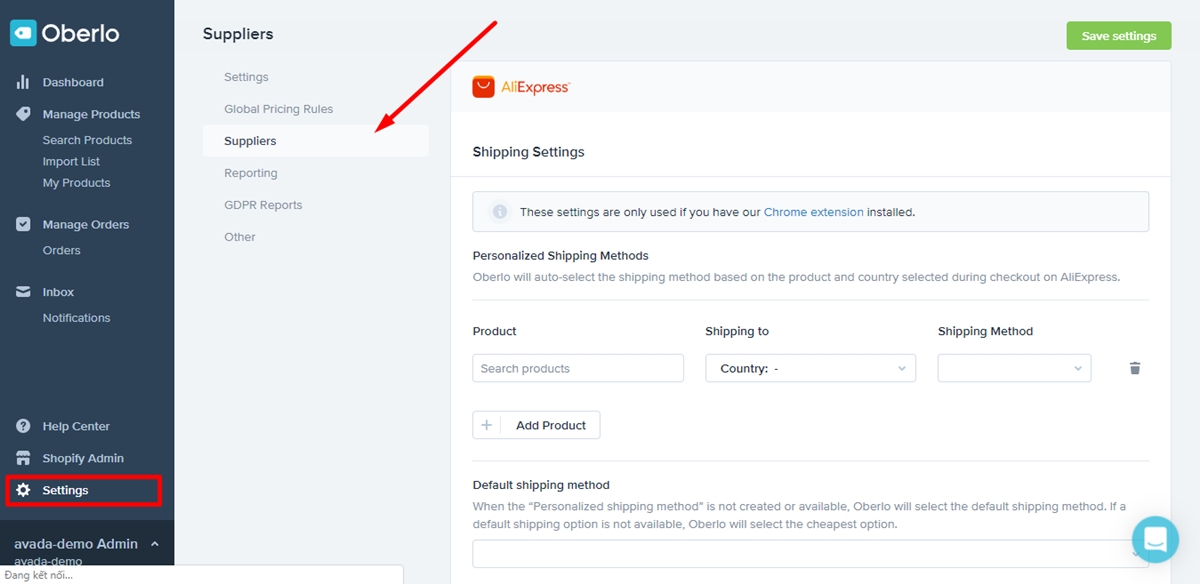
- Step 2. In Personalized Shipping Methods, click on
Add Product.
-
Step 3. Find the product that you want to set a shipping method for.
-
Step 4. Choose the nation and shipping options, and click on
Save settings.
General Shipping Settings
In your Oberlo dashboard, go to Settings, choose Suppliers, and then scroll down to AliExpress.
Default shipping method- Select the shipping option you would like to use when ordering goods from AliExpress. If your selected shipping method is unavailable for an order, the extension will choose the most economical one instead.Override phone number- You can enable this option if you want the Oberlo Chrome extension to fill out your AliExpress checkout with a phone number when you make orders. If you don’t include consumer phone numbers in your Shopify checkout, you can enable this option and add your number to this section in order to make sure that the shipping carrier can access you if there is any trouble.Custom note- this option is utilized to notify your AliExpress suppliers about any extra details they should know. Businesses often use this field to inform suppliers that they are dropshipping and that suppliers should not add any of their promotional material in the order.
By default, the custom note is: I’m dropshipping. Please DO NOT put any invoices, QR codes, promotions or your brand name logo in the shipments. Please ship as soon as possible for repeat business. Thank you!.
Affiliate Program settings
If you complete your orders via AliExpress and own an affiliate account with Admitad, you can link your Admitad to Oberlo.
Admitad is a free-cost service that offers rewards for ordering specific products from certain merchants or platforms such as AliExpress. If you own an Admitad account and order goods from AliExpress.com, Admitad would give back to you 1% of the cost of the order.

In case you’ve not have an Admitad account, you can sign up for one with some easy steps. In the process of sign-up, choose Drop Shipping in the Your ad space type field and Oberlo in the Drop Shipping App.
An affiliate account can only be linked to one Shopify shop. If you have many Shopify stores, you have to create an Admitad affiliate ID for every account.
Remember that you cannot take cash back from all products from AliExpress. Read more information on your Admitad account details.
You can see the amount of the cash back that you earn in your Admitad account.
After setting up your Admitad account, you can add your Admitad affiliate account to your Oberlo ID.
-
Step 1. In your Oberlo dashboard, go to
Settingsand thenSuppliers. -
Step 2. In the Affiliate program, choose
Admitad. -
Step 3. Add your Admitad affiliate ID in the Affiliate ID field, and then click on
Save settings.
Email and password settings
You can edit your Oberlo email address and password from the Profile page.
-
Step 1. In your Oberlo dashboard, click on your name and then click on
Profile. -
Step 2. Add a new name, email address or new password in the Profile settings section.
-
Step 3. Click on
Save profile.
Reporting Settings
You can create reports in two different ways:
- You can select to cover all sales metrics in your reports, which covers all sources of revenue (taxes, shipping, and discounts) and revenue from goods that are not connected to Oberlo.
- You can select to get reports about revenue from goods connected to Oberlo alone, which doesn’t cover tax, shipping and discounts.
You also can choose to get email reports on a daily/weekly/monthly basis.
Other Settings
You can add the email that you would like to contact with your customers in the Reply-to email address section. This email is shown when you deliver messages to your clients from the Orders page in the Oberlo dashboard. In the Time zone, choose the time zone that you would like to use for data tracking and store details.
Team settings
Your team members and their account privileges are displayed on your team settings page. It’s also possible for you to add new members, remove current ones and adjust any member’s access privileges on this page.
Add a new team member
-
Step 1. In your Oberlo dashboard, click on
Settingsand then clickTeam. -
Step 2. Click on
Invite People. -
Step 3. Add the email address of the new team member.
-
Step 4. Choose an access privilege.
-
Step 5. Click on
Send Invitation.
Edit your current team members
-
Step 1. In your Oberlo dashboard, click on
Settingsand then clickTeam. -
Step 2. Click on
Edit Privilegesnext to a team member. -
Step 3. Choose the sort of access you would like to grant to the team member, then click on
Save.
Adding or importing products from Aliexpress to Shopify using Oberlo
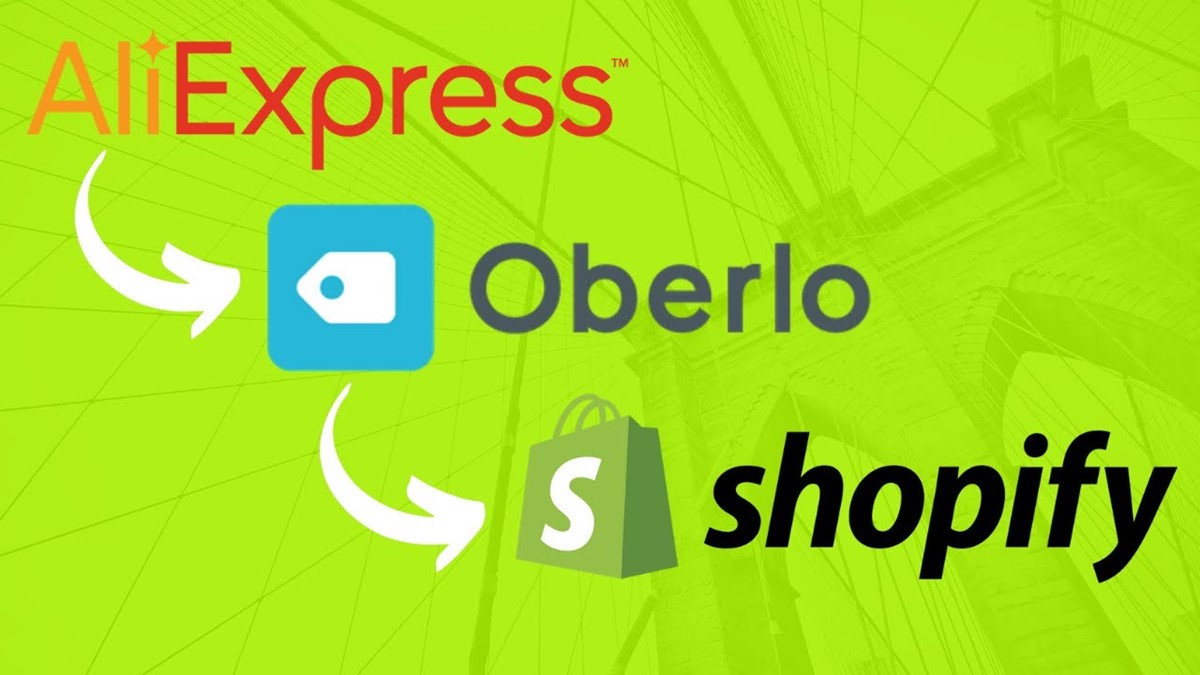
After choosing which products to sell, you can enter them to your Shopify shop. First, you have to add the items to your import list in Oberlo, and then import them into your shop.
To add products to your import list, you can search within the Oberlo dashboard or use the Oberlo Chrome extension while browsing aliexpress.com.
Add products from the Oberlo search
-
Step 1. Open your Oberlo dashboard.
-
Step 2. Find products that you would like to add to your shop by using the search bar.
-
Step 3. As you search for that product, move your cursor over the product and click on
Add to Import List.
After adding the products, you can edit the product information before importing them to your shop on Shopify.
Add products while on AliExpress
Before adding products to your online shop while browsing aliexpress.com, you need to ensure to obey the criteria below:
- You are using a desktop or a laptop.
- You are using the Google Chrome browser.
-
You have already installed the Oberlo Chrome extension on your browser.
-
Step 1. While using the Chrome browser, go to aliexpress.com
-
Step 2. Navigate to a product that you would like to enter your shop.
- Step 3. Click the Oberlo icon to add the product to your import list in Oberlo.
After adding your products and before importing them to your Shopify shop, change the product information. Editing your product information, such as product name and description, makes them outstanding and attractive to your customers than the default Oberlo details.
Setting product prices with Oberlo
When adding products from providers to your Shopify shop, you have to set your own prices for your items. To gain profit from selling these products, you’ll have to pick a price that is higher than what your supplier costs you.
The price that your provider costs you is called product cost. For instance, if you pay 10$ for a sofa pillow for a supplier, the product cost of that sofa pillow will be $10. Your profit comes from the difference between the product cost and the price you set to charge your consumers.
Strategy for pricing your product
- The extra value you provide - Growing business takes time and money. The content you build, interesting combinations of products you have, or extra customer support can promote the value of your products. The resources that you spend money on and any additional value that you offer to your consumers should be shown in the pricing of your products.
- Other expenses of business costs, such as marketing spending, your Shopify subscription and transaction fees - Evaluate these expenses as you set prices for your goods. These are essential business costs, so it’s crucial for your price to at least include these costs.
- Competitors’ prices for similar products - Watching shops that have similar products can assist you in identifying the average price of the products you’re offering.
Editing product details in Oberlo
The products that you insert from your import list have information from the supplier. Some of the details might be irrelevant and even overwhelming for your products.
It’s possible for you to change the product information either before or after importing the products. Before importing, change the information in the import list. After importing, change the information in the Shopify admin.
Change the product title and description
It’s okay to edit the title of a product on the Import List page in your Oberlo admin. If you want to edit a product description, you can click the Description tab of the product you would like to change.
Title- the name of your product when you want your shopper to see it. Edit the default titles in Oberlo because they are created for businesses, not customers. Interesting and appealing product titles will probably result in sales than the default ones.Description- The description of your product. This part utilizes the rich text editor in order to format your text. Explain your product in detail to notify your prospects. Making your own product descriptions can help your products become outstanding to search engines.
Edit product variants
You also can change a product variant in Oberlo on the Import List page by clicking the Variant tab for the item you want to edit.
Adjust product weights
If you’re defining weight-based shipping rates, you have to add weights to your goods. If your provider doesn’t give you weight for their products, you can use price-based shipping rates. It’s possible for you to add product weights while importing the products or after the products have been imported.
Add product weights during a product import
Before adding weights during a product import, you’ll have to enable the Set unit of measurement for product weight.
-
Step 1. In your Oberlo dashboard, go to the
Settingspage. -
Step 2. Enable
Set unit of measurement for product weight. -
Step 3. In the drop-down menu, choose the unit that you would like to use for product weights, then click on
Save settings.
Add product weight after a product import
After importing your products, you can change the products within your Shopify admin to add product weights.
Change product types and add tags
It’s possible to edit a type and tags on the Import List page in Oberlo.
-
Product type- A type for the product that you can utilize to organize products. You can utilize product type as a condition for an automated collection. -
Tags- Tags are searchable keywords that you can connect with your product. Tags help shoppers to search for your product through your online store search, and you can also apply them to build automated collections.
Add products to collections
You can put your products into collections to make it simple for shoppers to search for them by category. Here are some examples:
- Clothes for men, women, or children
- Seasonal items
- Sport things
When you make a collection, it is shown on your online shop as a gallery of products. Shoppers can click on a product photo on the collection page to redirect to that product’s page.
-
Step 1. In your Shopify admin, go to
Productsand thenCollections. -
Step 2. In the Collection page, click
Create collection. -
Step 3. Add the details for the collection.
-
Step 4. Click on
Save collection.
Overriding or deleting Oberlo products
Suppliers can adjust the products they sell at any time or run out of stock for a time period. When these things occur, you can override the product to complete it through another provider or delete the product from your shop.
Override a product for existing orders
It’s possible for you to change the provider for products on current orders while keeping your former provider for future orders. Only To order orders can be overridden.
For instance, given that a new supplier has a sale on a product that you often buy from a different supplier. You can override your current orders to use this new supplier and leverage the sale while keeping your former supplier for upcoming orders after the sale ends. If a new supplier offers a lower regular price, you should consider overriding the product for existing and future orders.
Overriding products for existing orders does not impact on your original products. The product URL, title, description, and images are still the same. Orders in the future that you get will use the initial supplier.
-
Step 1. Search for a product to replace the current product and add it to your shop.
-
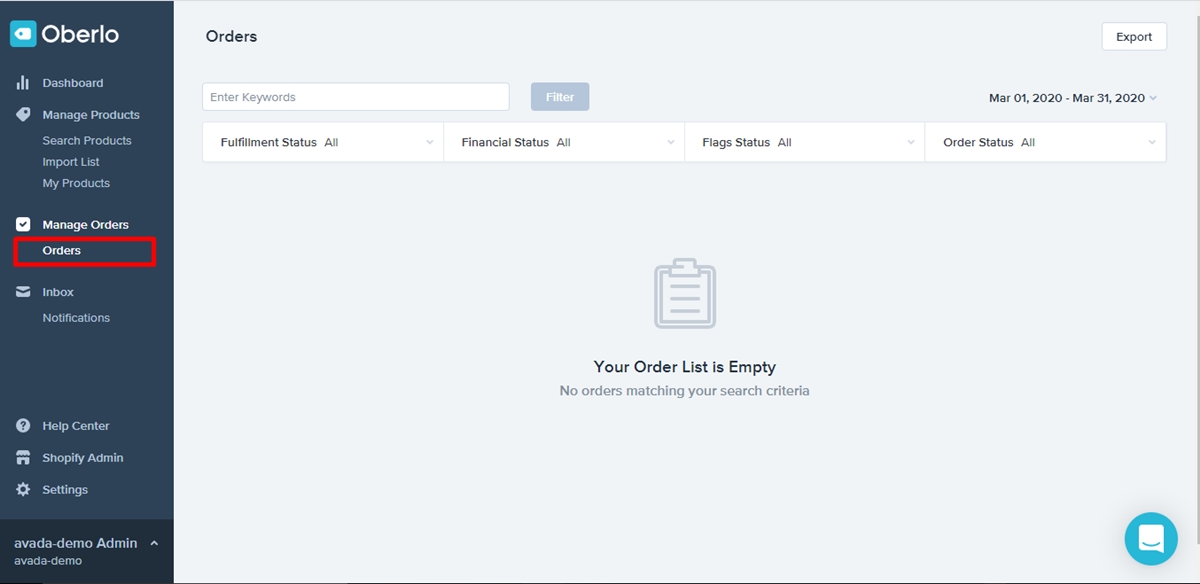
Step 2. In your Oberlo dashboard, go to
Orders.
-
Step 3. Near the product that you would like to override, click on
Override Order Product. -
Step 4. In Override with, add the new product’s title.
-
Step 5. Choose the corresponding variant.
-
Step 6. Select whether to apply this change to all uncompleted orders.
-
Step 7. Click on
Override product.
Override a product for existing and future orders
In order to replace old products with new ones while retaining the same product URL and statistics, you can utilize the override feature in Oberlo. During the override, it’s possible for you to edit the details, pricing, and photos for the product. Some reasons why you should override a product:
- You would like to connect your current AliExpress products to your Oberlo page.
- You would like to re-sync a product in Shopify that has been un-synced with Oberlo.
-
You would like to change the provider for the product.
-
Step 1. Look for a product to replace the current one and add it to your import list.
-
Step 2. On the sidebar, click on
Import List. -
Step 3. Click on the
More actions, thenSelect Product to Overridefor the product you would like to update. -
Step 4. Find the product that you would like to override in the
Existing productsection, then choose it. -
Step 5. Check whether you would like to override the title, description and photos.
-
Step 6. Click on
Override. -
Step 7. Click on
Import and Override. -
Step 8. In case you have any open orders that haven’t been delivered to a supplier, then you need to choose the new variant that fits the product.
- Step 9. Click on
Override.
Your current product variants are restored to their defaults for every item that you override. If you make changes, you need to customize your variants in the import list before you confirm the override.
How to fulfill orders on Shopify using Oberlo
As the online business develop, there are a large number of orders per day that Ecommerce merchants need to handle them. After the shoppers make an order, they will not want to wait. Hence, it is essential for the merchants to complete shipping these products to the shoppers as fast as possible. For store owners on Shopify, they can consider using Oberlo to fulfill orders in an easy and convenient way.
In order to learn more about How to Fulfill Orders on Shopify Using Oberlo, please visit our website AVADA.
Using Oberlo as a fulfillment location

When you sell or deliver products from different locations, configure locations in your Shopify admin to track stock and manage orders more effectively. If you choose Oberlo, it’s considered a unique fulfillment location, and it presents in the App locations section of the Shopify admin. If you place your Oberlo products in this location, orders are displayed as being completed by Oberlo.
Set a product’s location to Oberlo
- Step 1. In your Shopify admin, go to
Products.
-
Step 2. Click on the name of an Oberlo product.
-
Step 3. In the
FULFILLMENT SERVICEsection, chooseOberlo. -
Step 4. Click on
Save.
Viewing inventory locations in orders with Oberlo products
While setting locations for your items, you can see the location of each item on an order page. If the order includes products from more than one location, products are put into a group by location to make fulfillment more effective.
After setting Oberlo as the location of items, orders consisting of products display Oberlo next to the relevant product names in the summary of the order. You can choose Fulfill in Oberlo to fulfill them from the Oberlo orders page.
Conclusion
That’s all the detailed information about how to Use Oberlo with Shopify we can bring to you. Hope that this post can help you a little in your dropshipping business. You can leave any question or concern you have in the comment box. We’ll answer you as soon as possible.
Have a nice day. Thank you!


