
How to Set Shipping Rules for BigCommerce Store?

In order to maintain the best experience for your customers, online merchants need to prepare carefully from the pre-purchase phase to post-purchase. The latter is how your products are packaged and shipped to your end-users. Additionally, to gain benefits for both you and your customers, it is vital that you have demonstrated a thoughtful set of shipping rules.
That is also the main topic of the article. We will be informing you about the appearance of ShipperHQ and How to set BigCommerce Shipping rules for your online store. Keep reading to find out more!
Why do you need to use ShipperHQ?
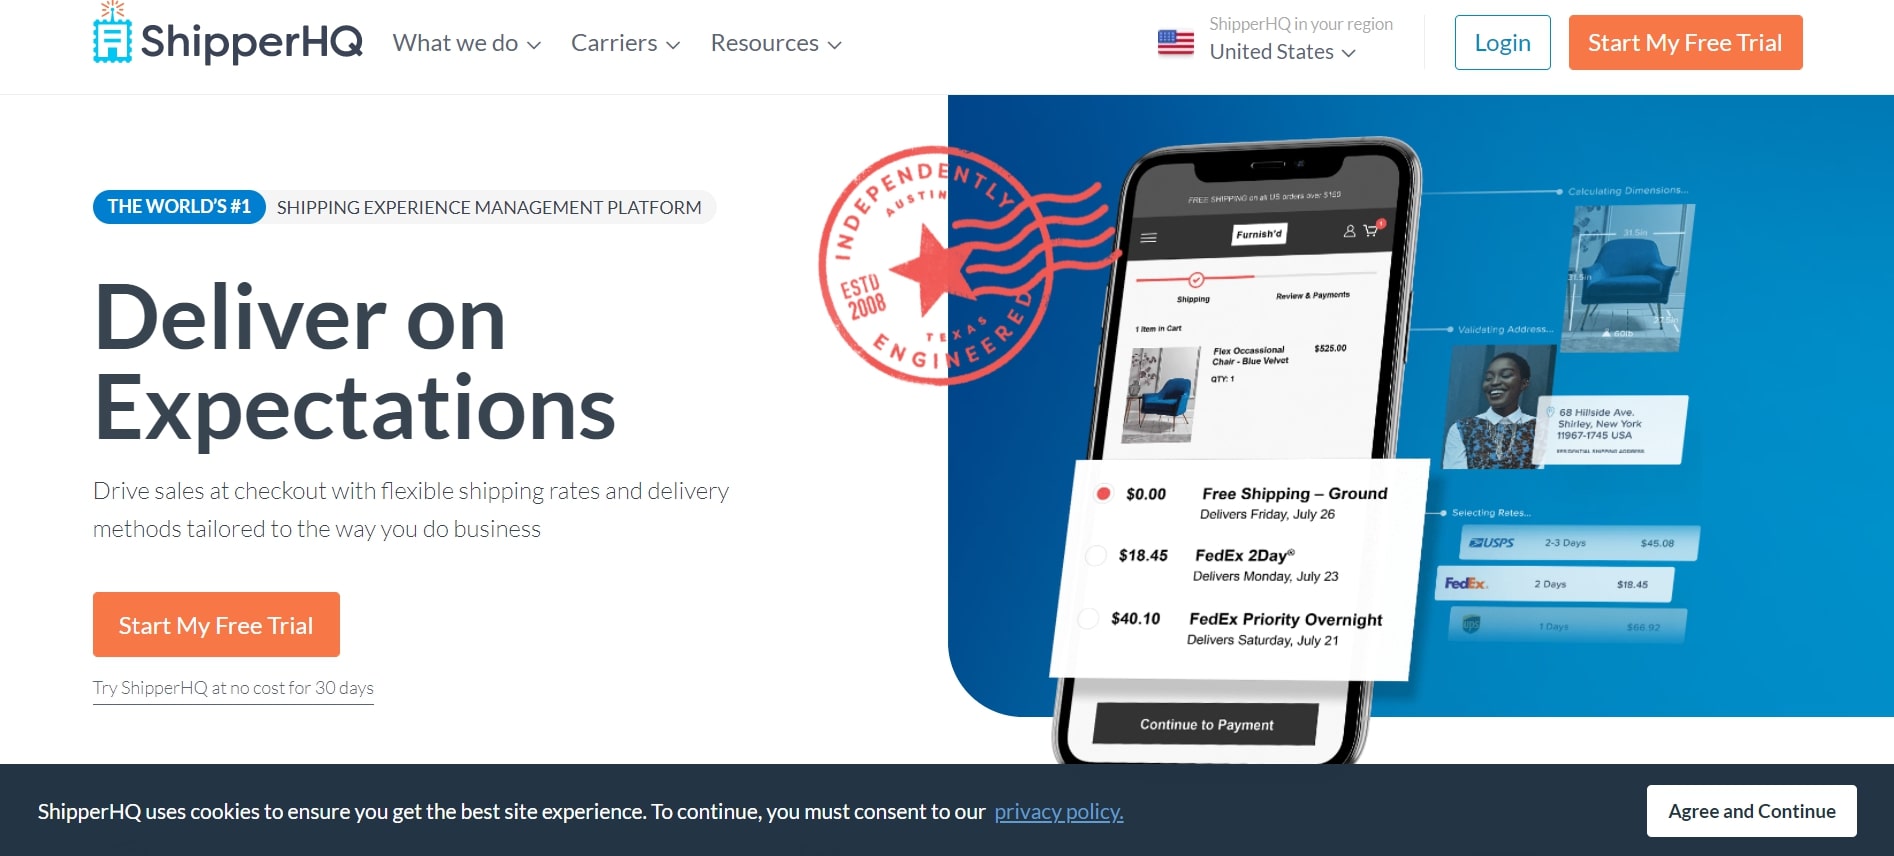
Up to the present, it is reported that BigCommerce has not included any exclusive tools for setting shipping rules. Therefore, online merchants may have to use other methods if they want to update their BigCommerce shipping rules. And ShipperHQ is the answer to this tricky question!
The great thing about BigCommerce is that even it can not provide users with a tool they need; instead, it can guide you through an extra strategy to fulfill their needs. BigCommerce will make an API call to ShipperHQ and inquire about available shipping prices for your customers while one of them is completing the checkout steps.
You can design your own set of shipping rules using ShipperHQ on the basis of weight, sizes, quantity, prices, groups of customers, or any categories. However, once you have decided to hire ShipperHQ for shipping management, incentives applied by BigCommerce Shipping function may not extend to shipping choices seen on the checkout page.
How to set BigCommerce shipping rules for your online store
Now that you have acknowledged the importance of ShipperHQ for setting BigCommerce shipping rules, below is a tutorial on How to set BigCommerce shipping rules for your online store. We have divided it into small basic steps for you to follow.
No more beating around the bush, let’s get started!
Step 1: Install and connect with ShipperHQ
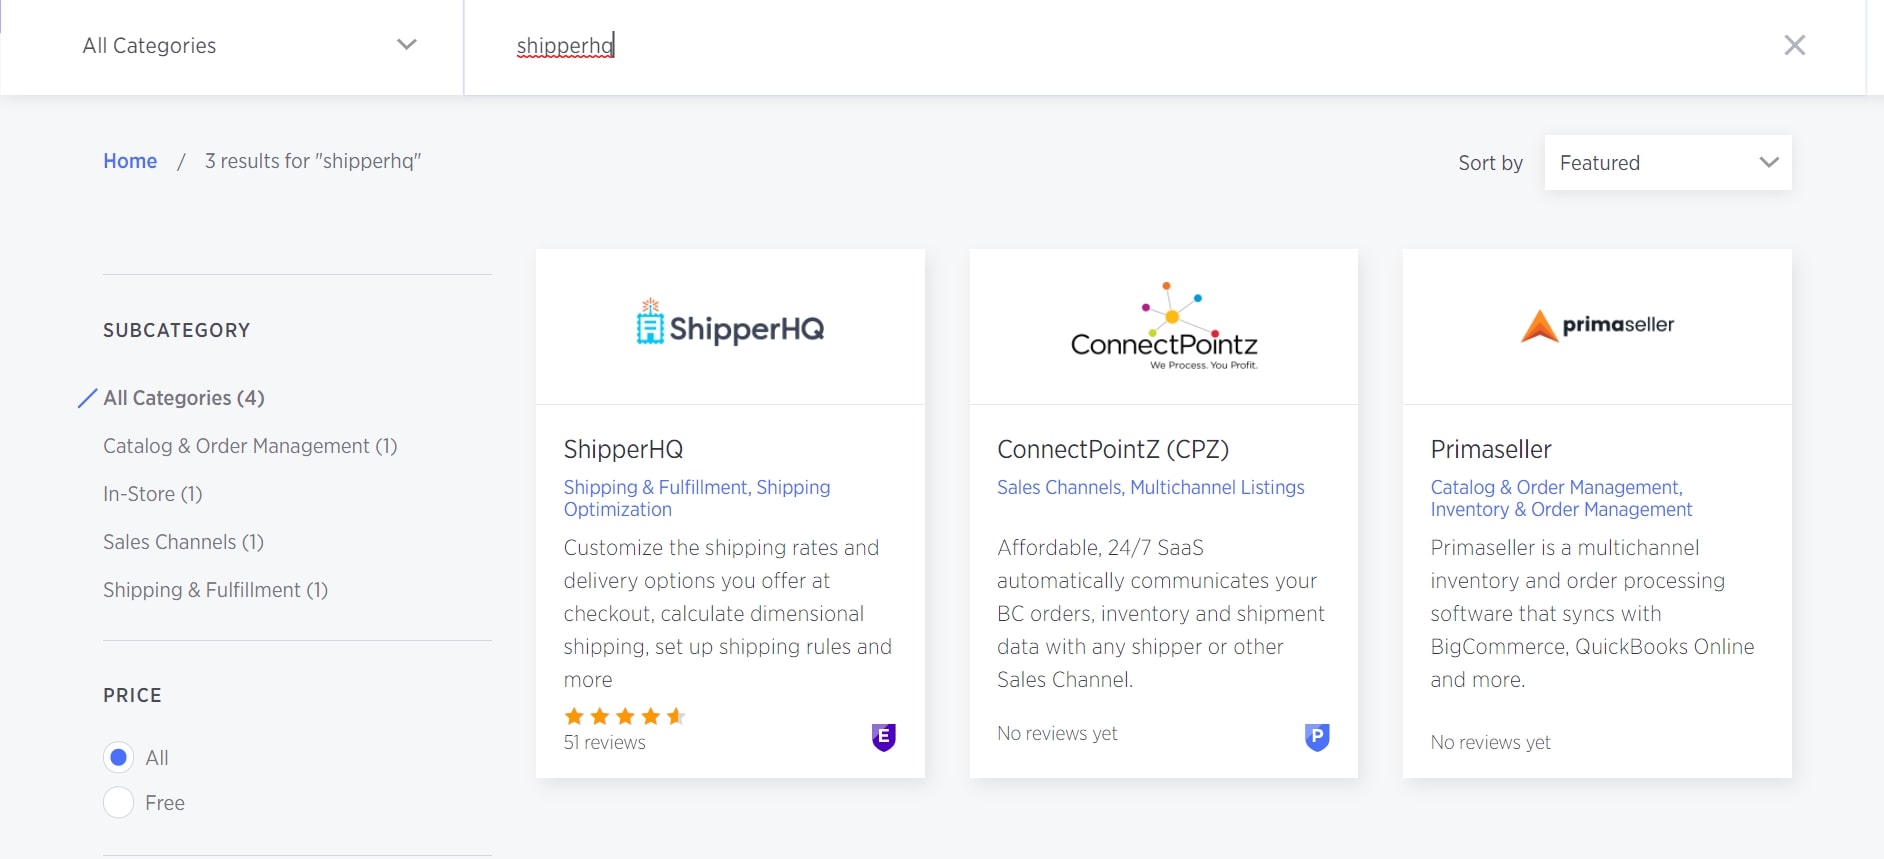
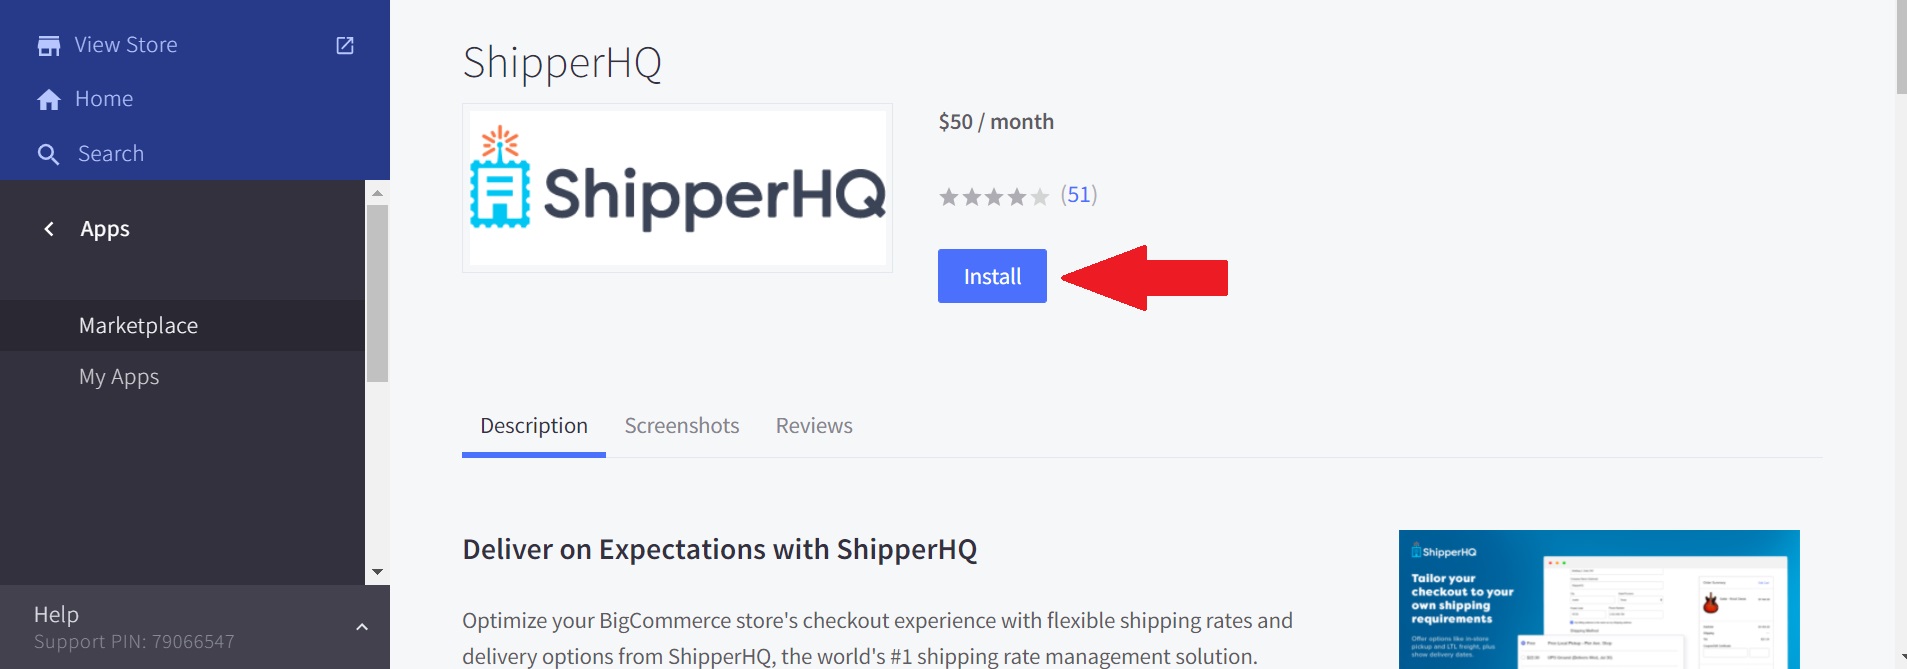
First thing first, you need to have the connection to ShipperHQ in order to activate them for further purposes. Go to BigCommerce App Marketplace and look for the ShipperHQ app in the search box:
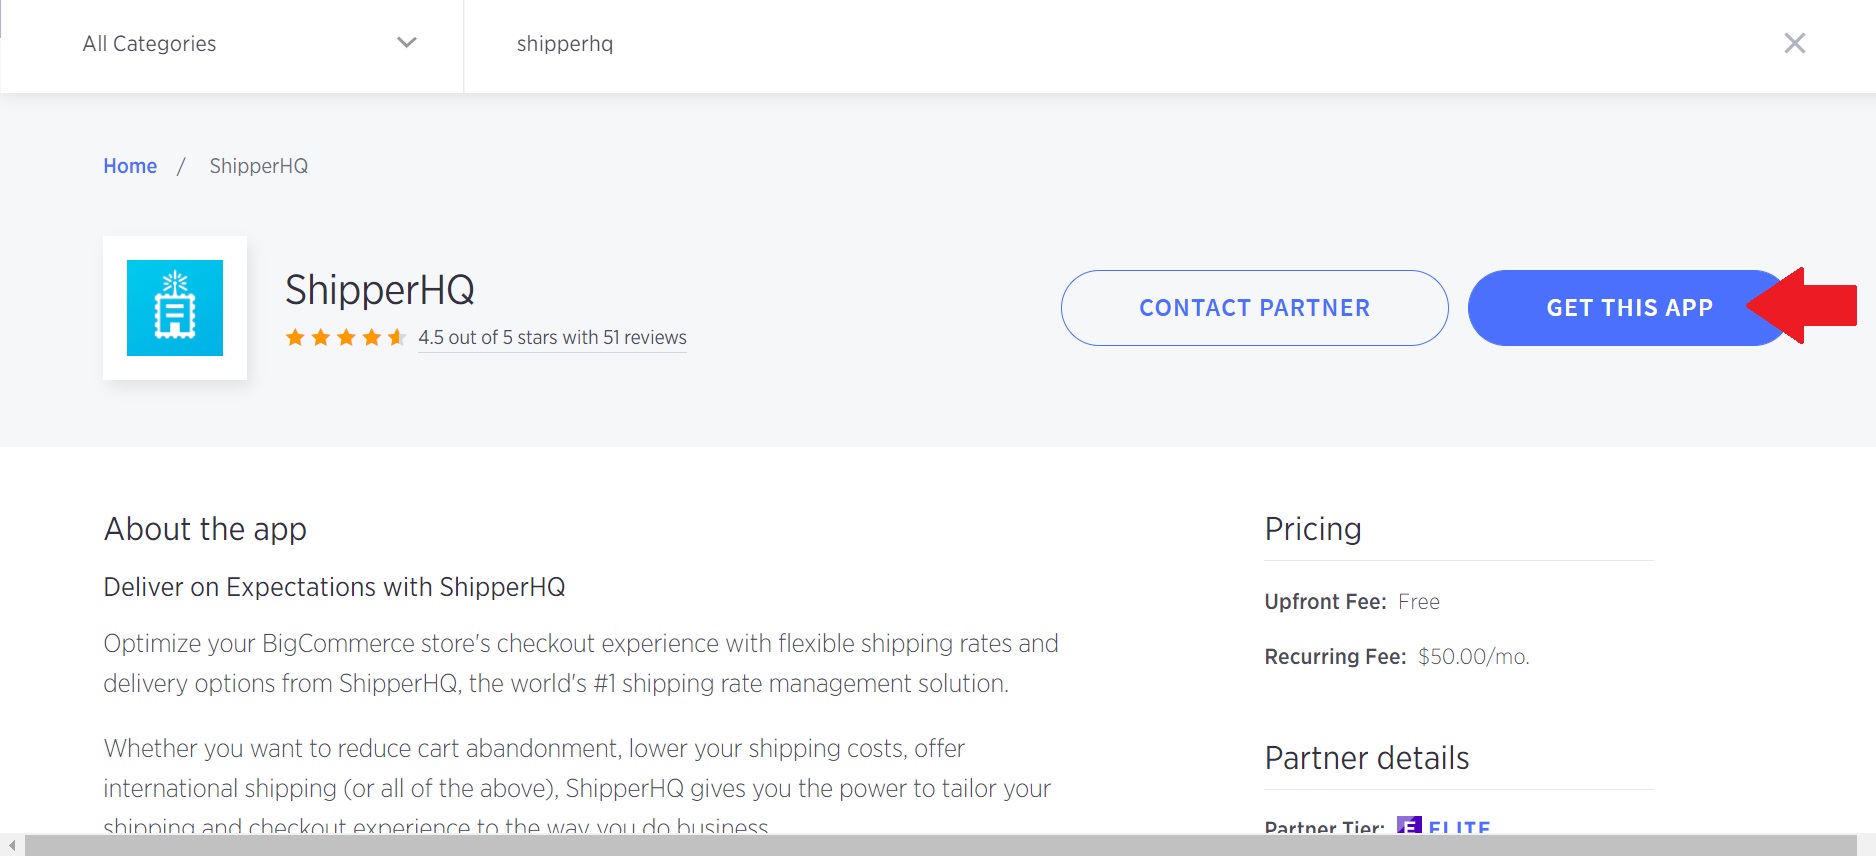
Click on the icon of the application, and choose “Get this app”:
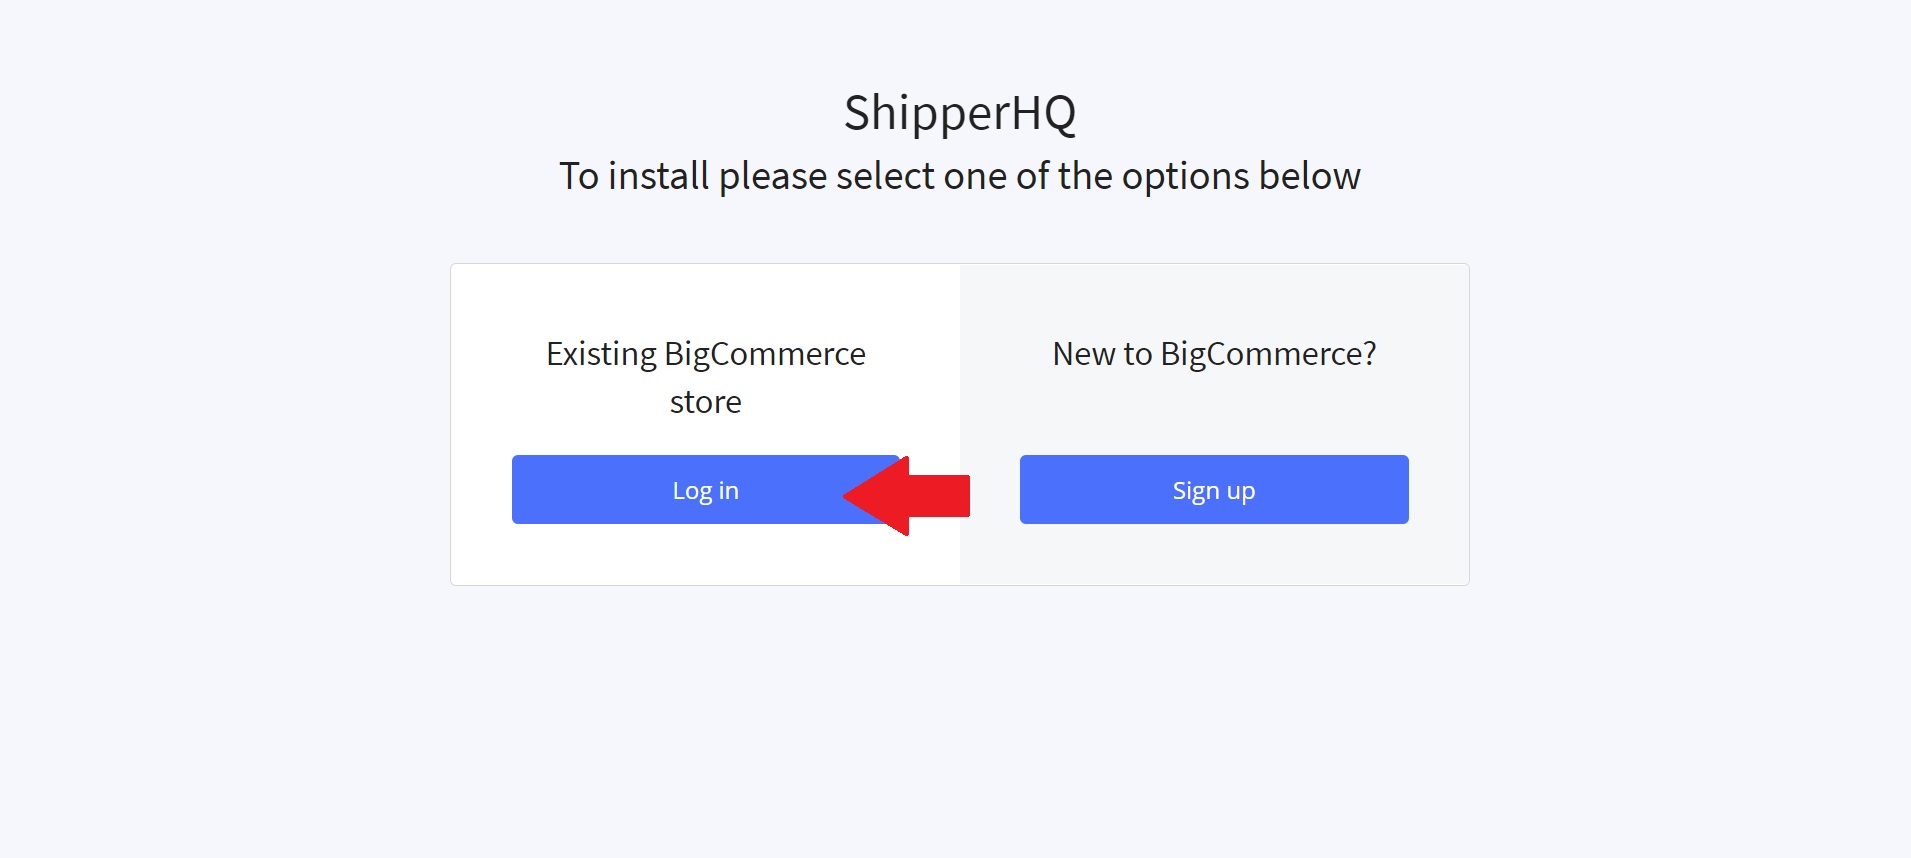
At this step, there will be a pop-up site asking you to log in or sign up for a new account. Select “Log In” on the left-hand side of the screen:
All you have to do here is to click on “Install” and wait for the process to be completed:
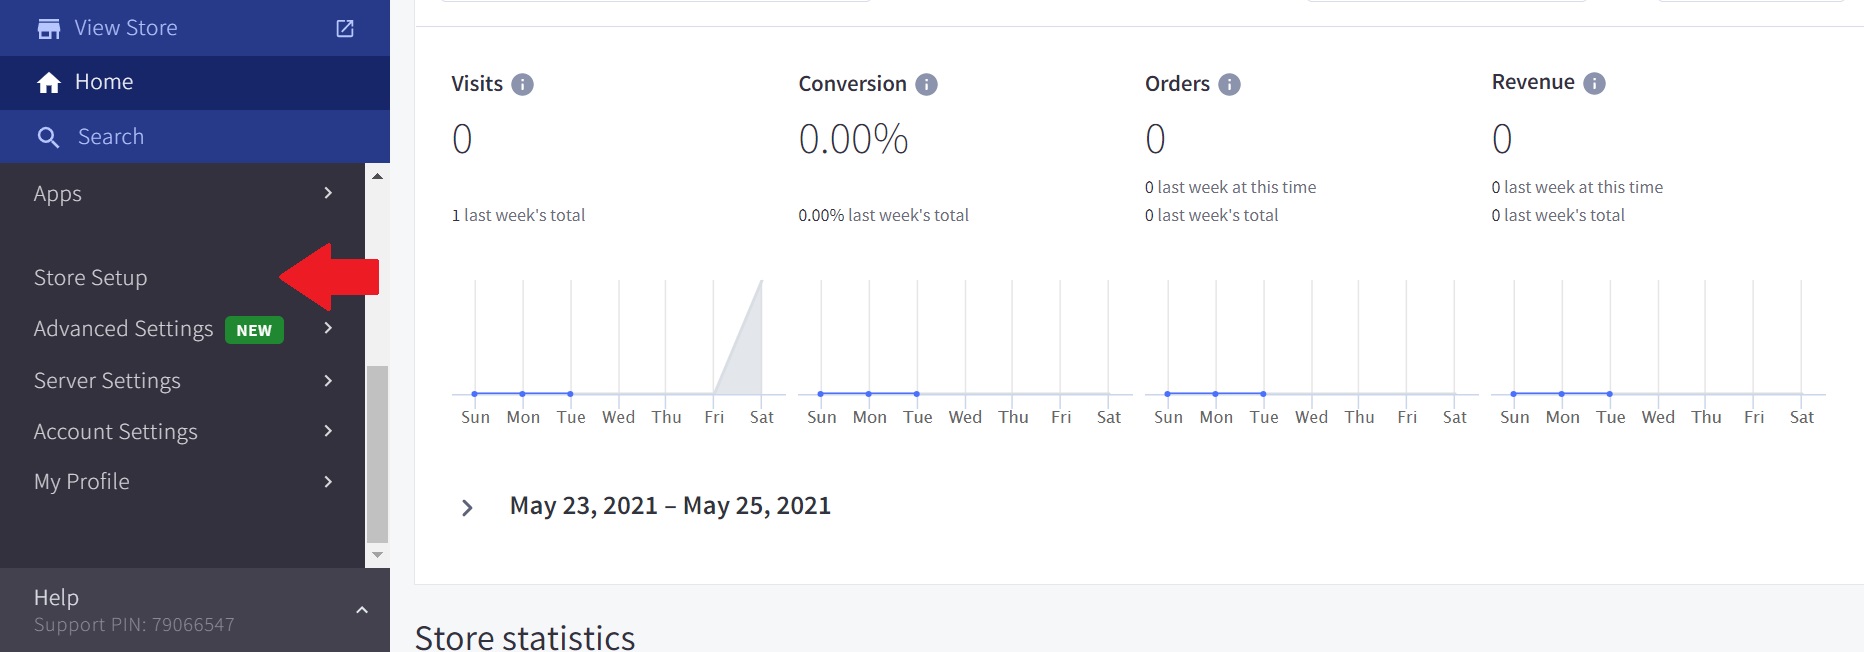
When all of your settings with ShipperHQ have been configured, it is time to switch on this app, which will then monitor types of shipping choices that are eligible to be displayed to your consumers during the checkout process. Please enter your BigCommerce Dashboard > Store Setup:
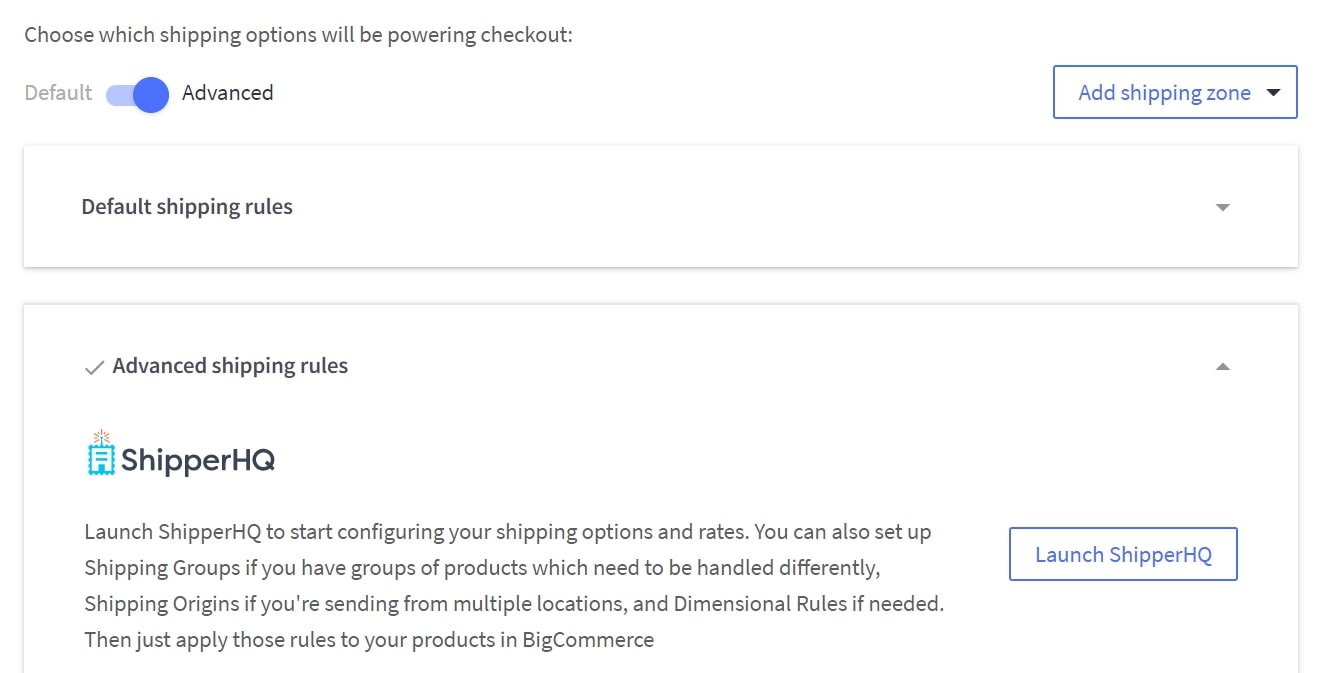
Continue choosing the “Shipping” section, scroll down to the “Checkout Shipping Options” and there is a toggle to turn on the “Advanced Shipping Rules”. Once you have turned on that, it means that you have successfully activated ShipperHQ for your BigCommerce business:
If you have finished all the steps above, you are good to move on to the next ones!
Step 2: Set up Shipping Groups
There are three product-level fields that are given by BigCommerce to ShipperHQ for calculating shipping choices:
- Shipping Groups
- Origin Locations
- Dimensional Rules
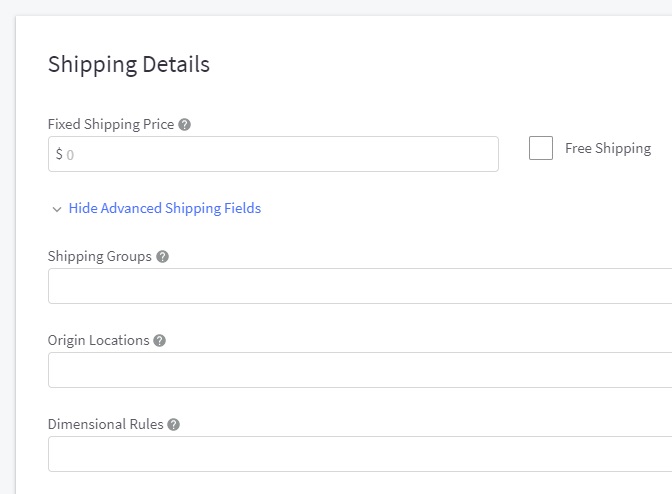
We will explain the three of them clearly to help you make better decisions for setting BigCommerce shipping rules, respectively.
The first one - Shipping Groups permits you to vary the shipping choice depending on the ordered item. More specifically, products transported via special carrier, limited travel time, or perishable goods that have restricted transit time, large must be delivered by LTL freight, and circumstances where you’re providing a shipping deal on specific items.
You must first set up your Shipping Groups in ShipperHQ, and then assign them to your products. Confirm that the Shipping Group names in ShipperHQ are entered exactly as they appear in the form, with different values entered using commas. When separating values for groups, there should be a gap after the comma.
Step 3: Set up Origin Locations
If a commodity does not have a particular Origin added to it, ShipperHQ will use the default shipping origin. Shipping sources are not needed if you ship anything from a single venue. You just need to apply an Origin Location to your BigCommerce Shipping Rules if your goods are delivered from a secondary location, such as an inventory.
If the names of your Origin Locations are not synced in ShipperHQ, please make sure that you have included all of them separately using a comma in between.
Step 4: Set up Dimensional Rules
When measuring order dimension details, ShipperHQ uses Dimensional Rules to set up another way of handling such items. This is only one case of many, where you send a subset of your products on their own as opposed to putting them in a package like the majority of your inventory.
The Rule Name that you input in the Dimensional Rules section of ShipperHQ must be entered. It is only possible to apply a single Dimensional Rule to each product. If you have a lot of variations on your goods (i.e. pallets, carts, various sizes, shapes, or packing), you would probably just need to establish Dimensional rules on a subset of your products that are different from the majority of your products.
Step 5: Set up Customer Groups
Additionally, you can also create diverse Customer Groups for your BigCommerce shipping rules. Defining this set of rules using ShipperHQ allows you to have various delivery solutions to different groups of consumers. In this way, your shopping experience might be substantially evaluated.
Bulk exporting BigCommerce shipping rules through CSV
If you are taking charge of a large number of products on a daily basis, it must be exhausting sitting in front of the computer and applying the BigCommerce shipping rules to each product. Don’t worry, you can totally bulk importing this set of rules using the CSV files of your online business.
It’s even more convenient when you are a client of ShipperHQ because you can easily import them into your store by utilizing their Import/Export function through spreadsheets.
Step 1: Create a copy of your shipping rules
In order to export and re-import the shipping attributes, you’ll need to build a custom export template. To build a personalized export prototype, the following steps should be followed:
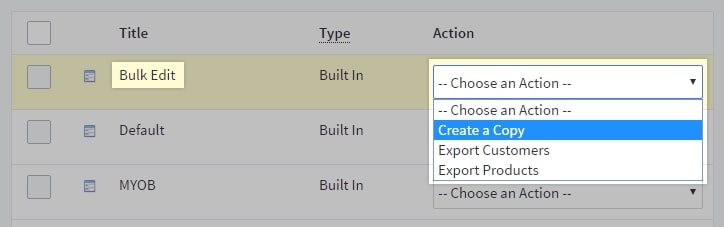
At your BigCommerce Control Panel, go to Advanced Settings > Export Templates:
You can see there is three columns, at the “Action” one next to the Bulk Edit option, please click on “Create a Copy”
You can name this copied version as “Shipping” like us, then move on to the “Products” tab
Step 2: Select wanted fields
Here, there is a list of field you can select to be exported or imported, such as:
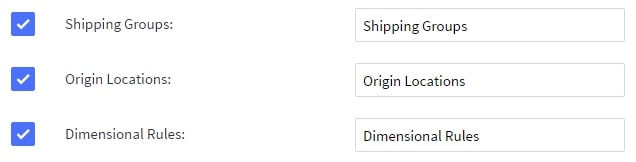
- Product Name
- Dimensional Rules
- Shipping Groups
- Origin Locations
- Category String
If you want to export all of them, just stay default or else, deselect the “Export this field” checkbox and pick the alternatives again according to your preference.
Last but not least, remember to “Save” your work!
Step 3: Look for the template you have just created
Also at your BigCommerce Control Panel, but as opposed to the “Advanced Settings”, you go to Products > Export:
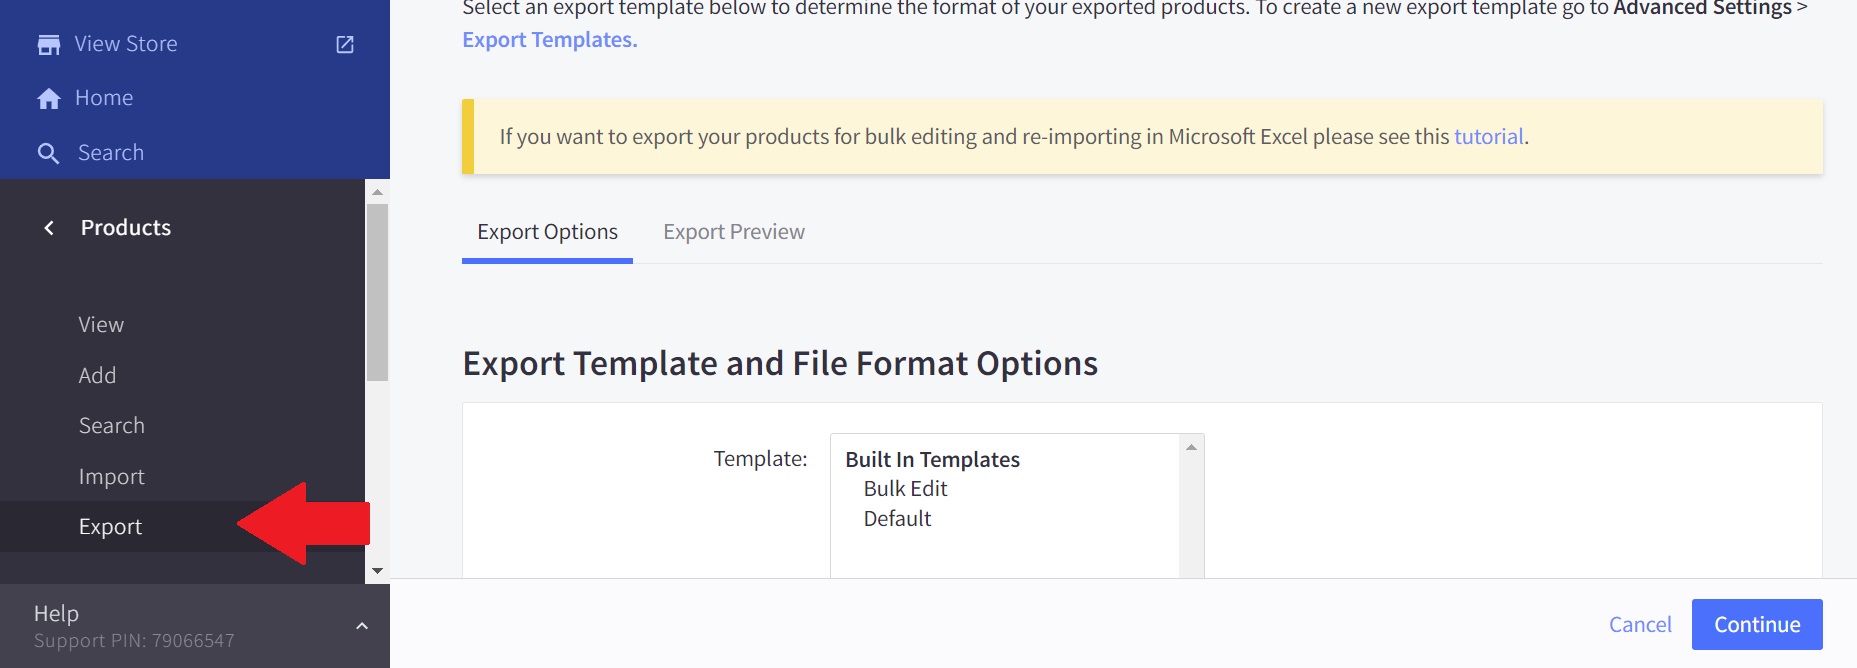
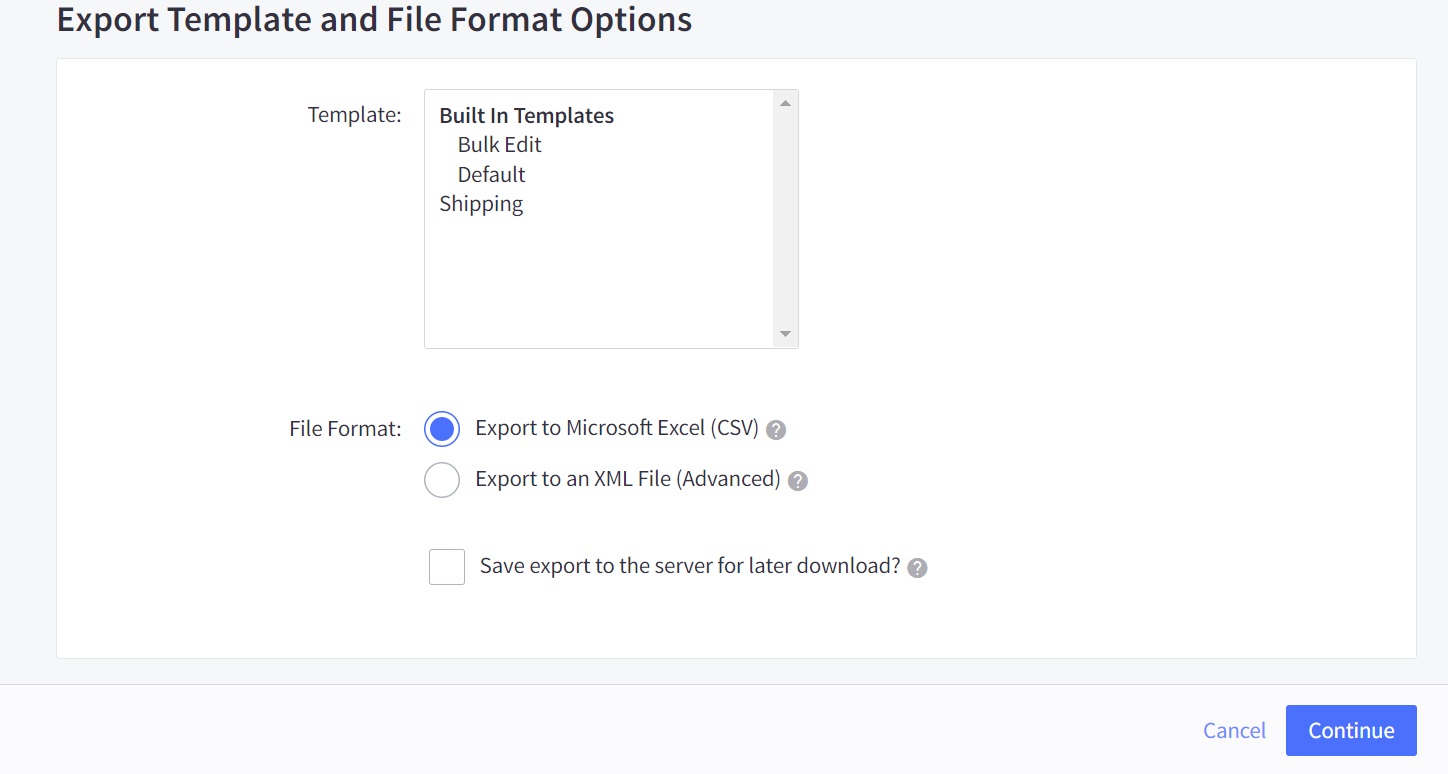
Scroll down a little bit to the “Template” section, you choose the copied file that you have just put a name for it, here we chose “Shipping”:
“Continue” and start downloading the CSV file. Once you are done, open the file and go to the next step!
Step 4: Paste it in your CSV file
At this point, add your BigCommerce shipping rules that you have designed before to the columns of Shipping Groups, Origin Locations and Dimensional Rules:

Step 5: Save your changes
The most important step, if you forget it you have to start over and no one would want that, right? So be careful!
Final thoughts
To sum up, we hope that this article would be a valuable resource on How to set BigCommerce shipping rules for your store using ShipperHQ. It might seem long and difficult, but it will only take you a few minutes to make things work.


