
How to Set up & Optimize BigCommerce One Page Checkout?

In this article, we’ll show you how to set up and optimize BigCommerce’s one-page checkout to streamline your customers’ purchasing process.
Benefits of an Optimized BigCommerce One-Page Checkout
Here are several benefits of having an optimized BigCommerce one-page checkout:
For Customers:
- Fewer steps to complete a purchase
- Easily review and edit information without navigating multiple pages
- Faster transactions
- Instant feedback on form errors
- The promotion/coupon codes are applied directly in the checkout process
- Automatically updates shipping rates based on address
- Better mobile shopping experience
For Store Owners:
- Increased customers’ trust and confidence in the brand
- Reduced cart abandonment, potentially leading to higher conversion rates
- Easier to analyze where customers might be dropping off to make necessary adjustments
- Better integration with payment options
How To Switch To Optimized BigCommerce One-Page Checkout
Step 1: From your BigCommerce store control panel, go to Settings › Checkout.
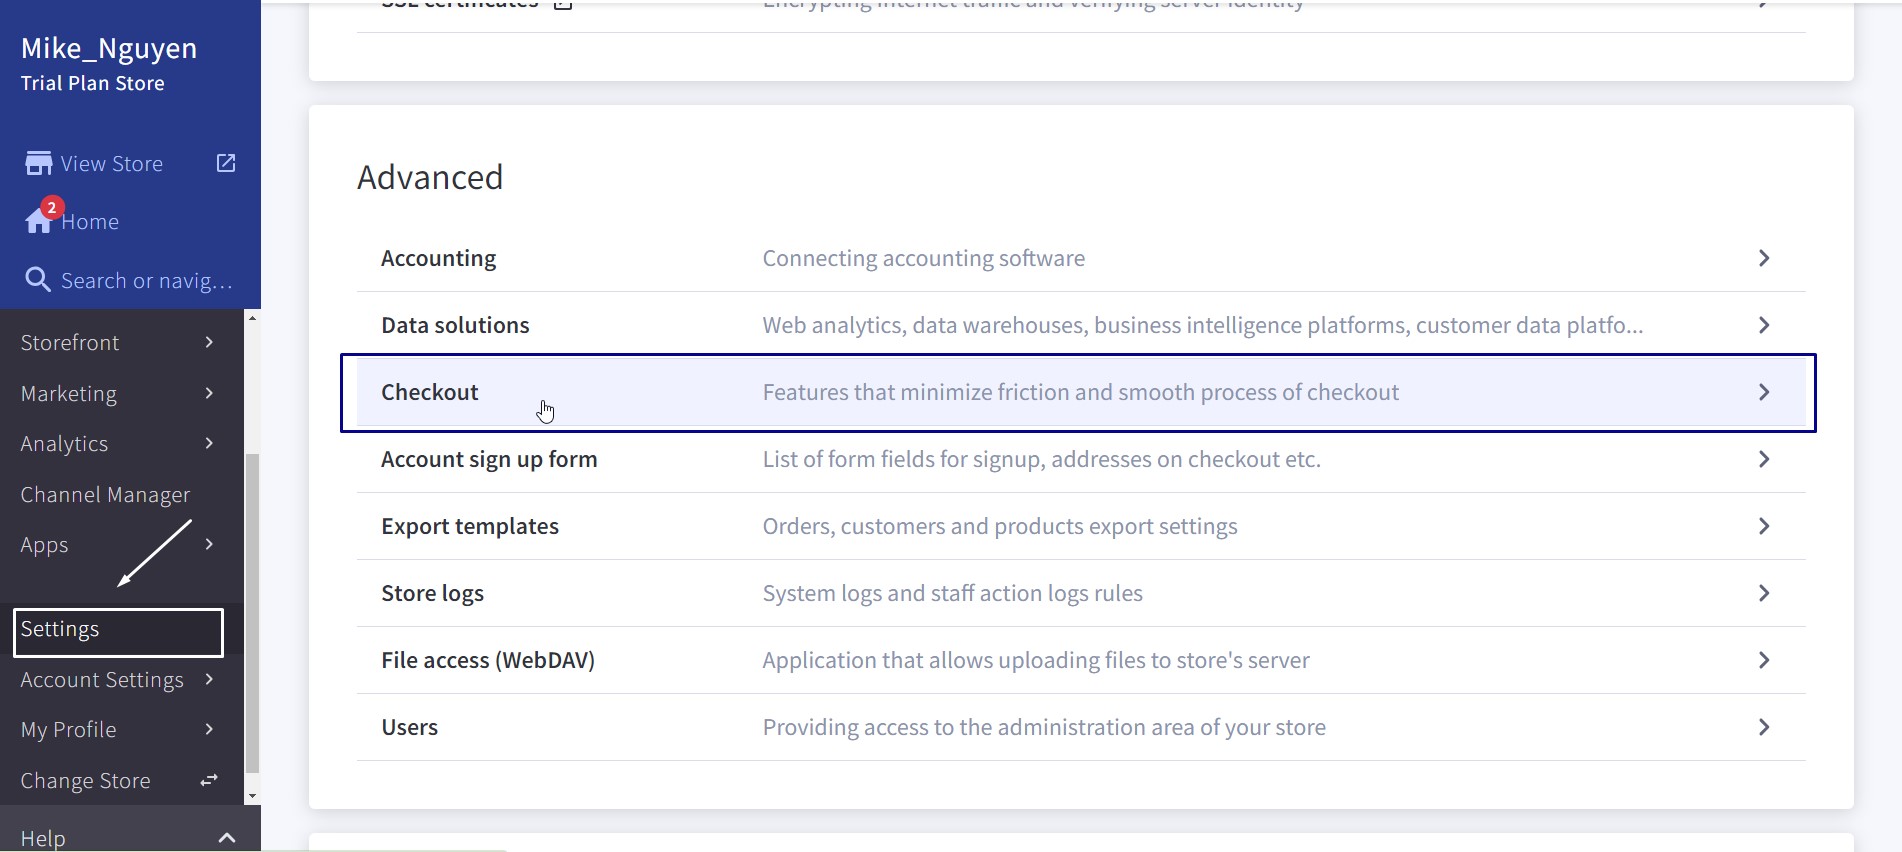
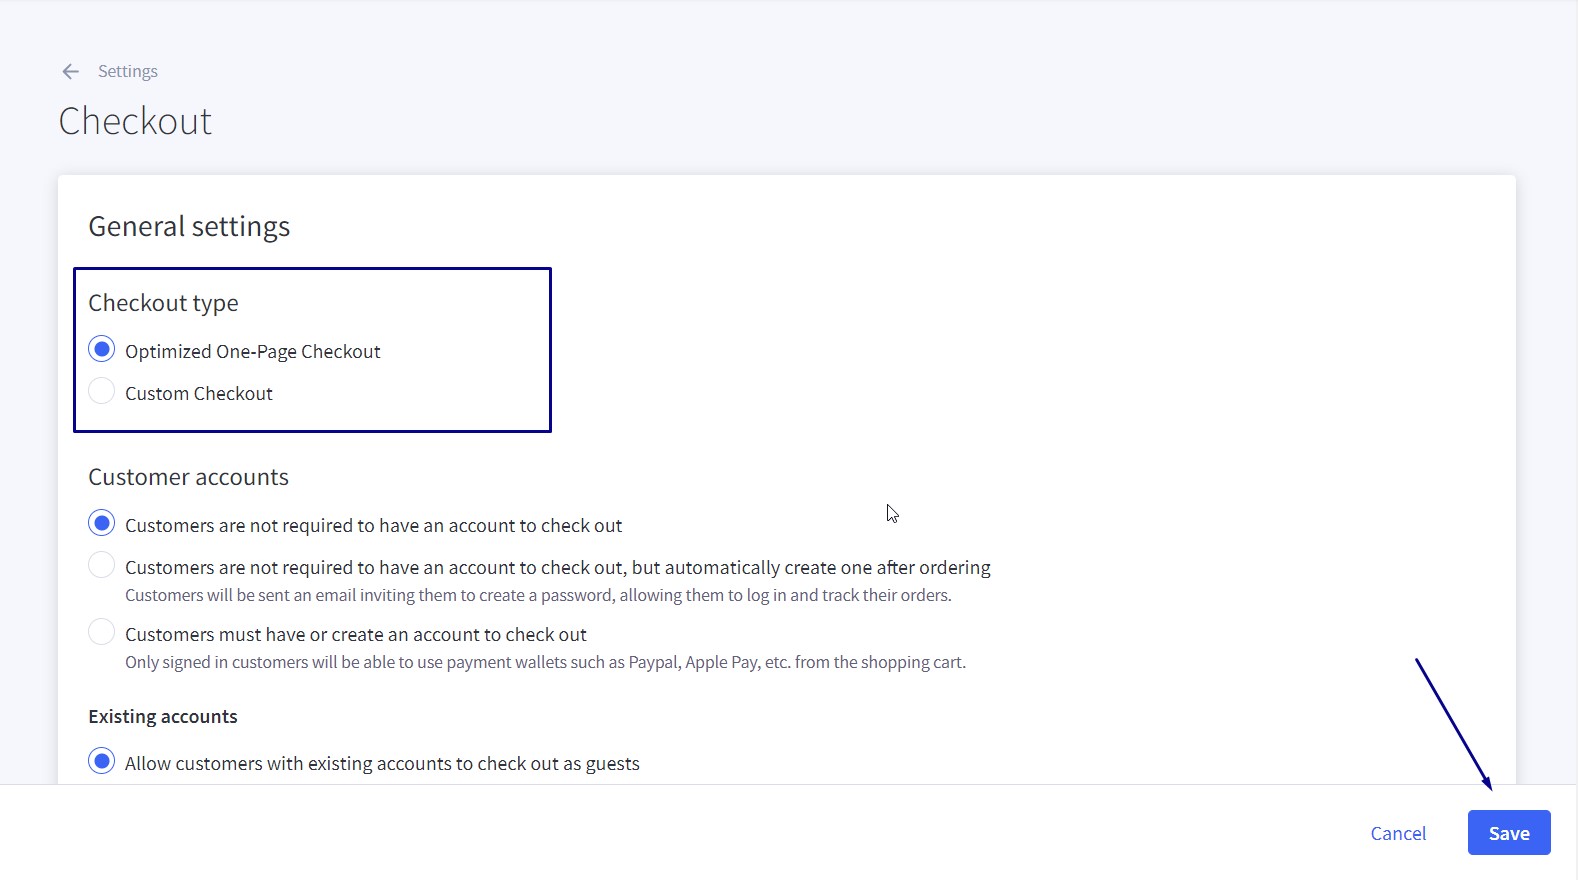
Step 2: Select Optimized one-page checkout. Step 3: Click Save
How To Customize Your BigCommerce One-page Checkout: Our Detailed Guide
From the checkout setting, you can choose the checkout type for your store, define the checkout process for shoppers, and activate various cart and security functionalities.
Customer
Select how you would like shoppers to check out:
- Allow shoppers to check out without an account as a guest.
- Allow shoppers to check out without an account but automatically create one after ordering.
- Require shoppers to sign in or create an account before checking out.
You can also select how you would like shoppers with existing accounts to check out:
- Allow existing customers to check out as guests or sign in.
- Prompt existing customers to sign in but allow them to check out as guests.
- Require existing customers to sign in. (Customers with existing accounts cannot check out as a guest.)

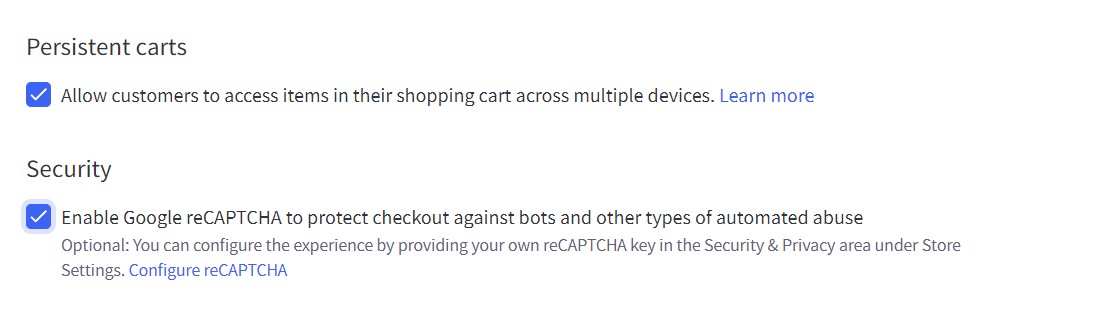
Cart
Tick the box to enable a “persistent cart,” which lets your customers view items in their cart across multiple devices when logged in.
Security
You can enable Google reCAPTCHA to safeguard your store from bots and other forms of abuse. For a smoother user experience, the reCAPTCHA on the checkout page is designed to be invisible.
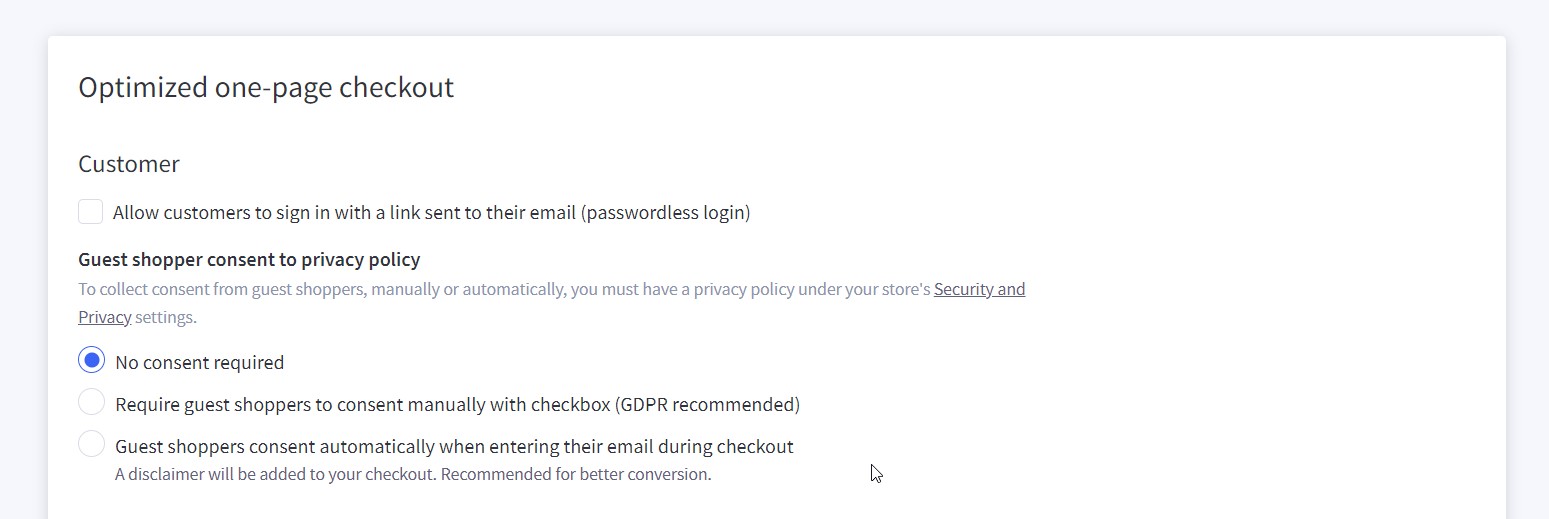
When you select Optimized One-Page Checkout as your checkout type, you will see the settings listed below.
Customer
By activating the checkbox for passwordless login, you can enable existing customers to log in on the checkout page without a password. This feature will send a one-time password link to the customer’s email. Customers can log in effortlessly by clicking on this link, simplifying the checkout process.
Next, choose how guest customers will engage with your privacy policy during checkout:
- No consent is required: The link to the privacy policy won’t be shown at checkout.
- Require guest shoppers to consent manually with a checkbox: Guests must explicitly consent to the privacy policy by checking a box before proceeding with checkout. This option is advisable for GDPR compliance.
- State that guest shoppers consent automatically when entering their email during checkout: Consent to the privacy policy is assumed automatically when guests proceed by clicking Continue. This option is suggested for a quicker checkout process.
Shipping
Setting a default shipping option can streamline the checkout process. You have the option to configure your checkout to automatically select from the following:
- Least expensive, excluding pickup in-store: Automatically choose the least costly shipping option but not the Pickup in-store static shipping quote.
- Least expensive: Automatically selects the most affordable shipping method, including in-store pickup.
- Most expensive: Automatically choose the most costly shipping option, including in-store pickup.
- None: Leave shipping options unselected, requiring customers to make a choice.
To allow customers to ship products in an order to different addresses, tick the checkbox
Activating Google Address Autocomplete offers a list of potential matching addresses as soon as they start typing their billing or shipping address, enabling a quicker checkout. Then, insert your Google Maps API Key
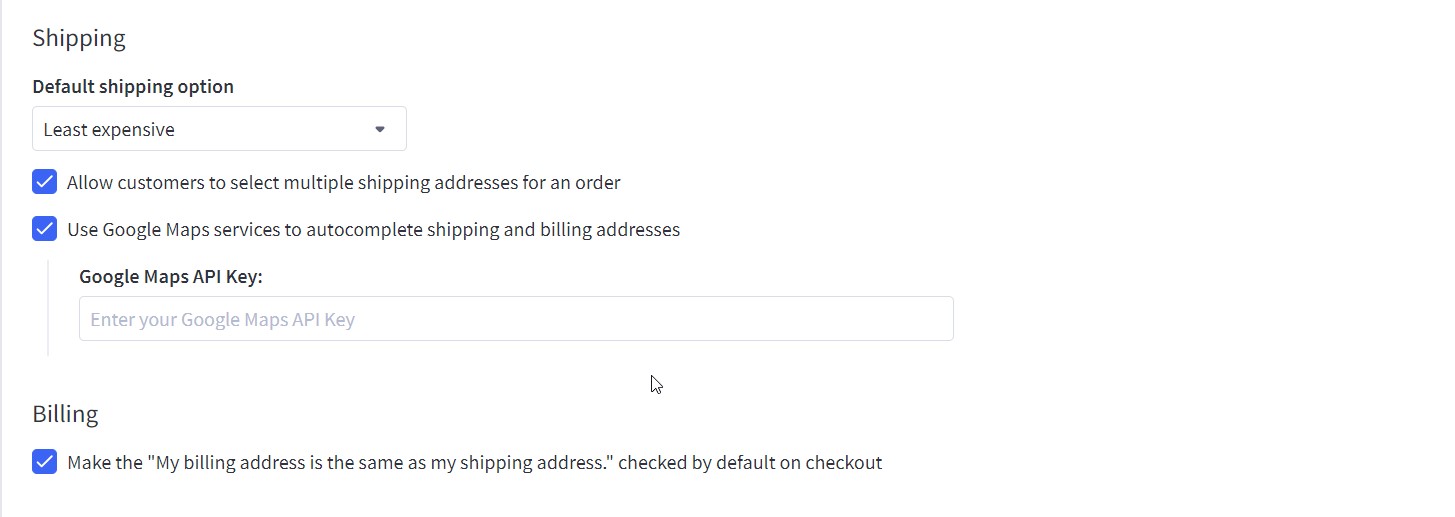
Promotion
Select whether to display the Coupon/Gift Certificate field or to hide it behind a link.
Order
You can allow customers to comment on their orders by ticking the check box. These comments can be accessed on the Orders › View page by choosing “View notes” from the action menu next to an order.
You can also set up a requirement for customers to agree to your terms and conditions by checking a box labeled “Yes, I agree with the terms and conditions.” This text can be linked to a pop-up displaying the terms and conditions or to a dedicated Terms of Service webpage.

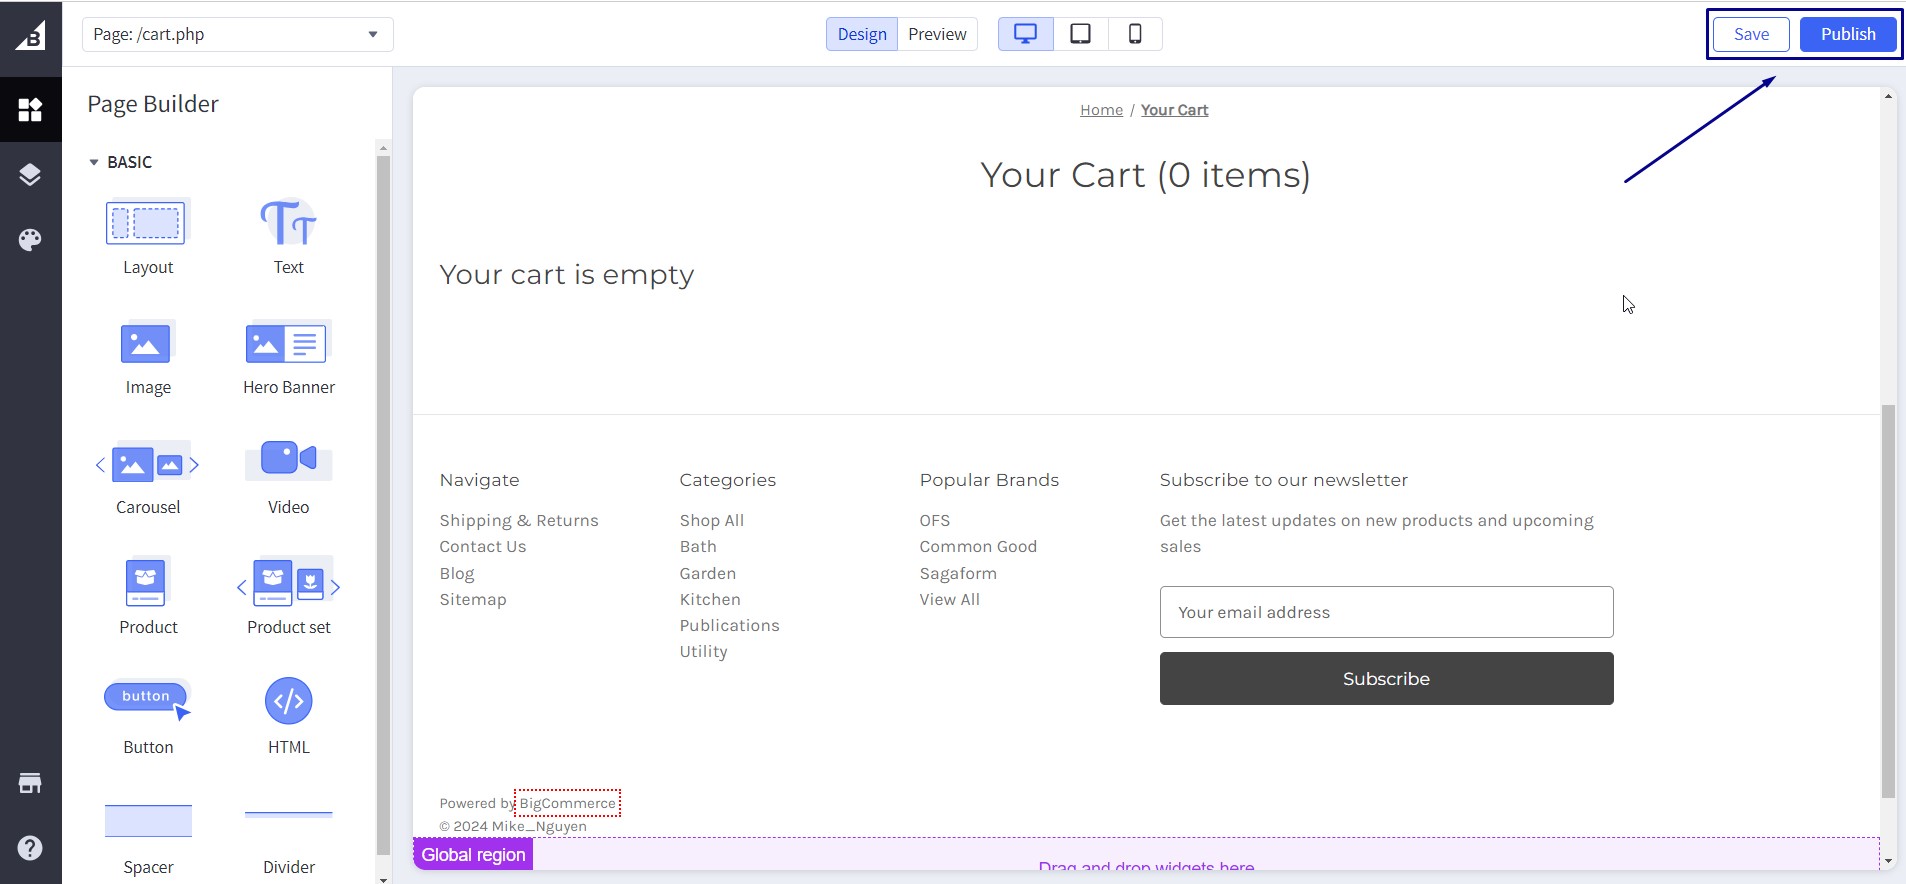
Checkout styling
All themes offered in the Theme Marketplace provide the flexibility to make minor styling customizations to checkout. Click Open Page Builder and select Check out to customize your checkout page
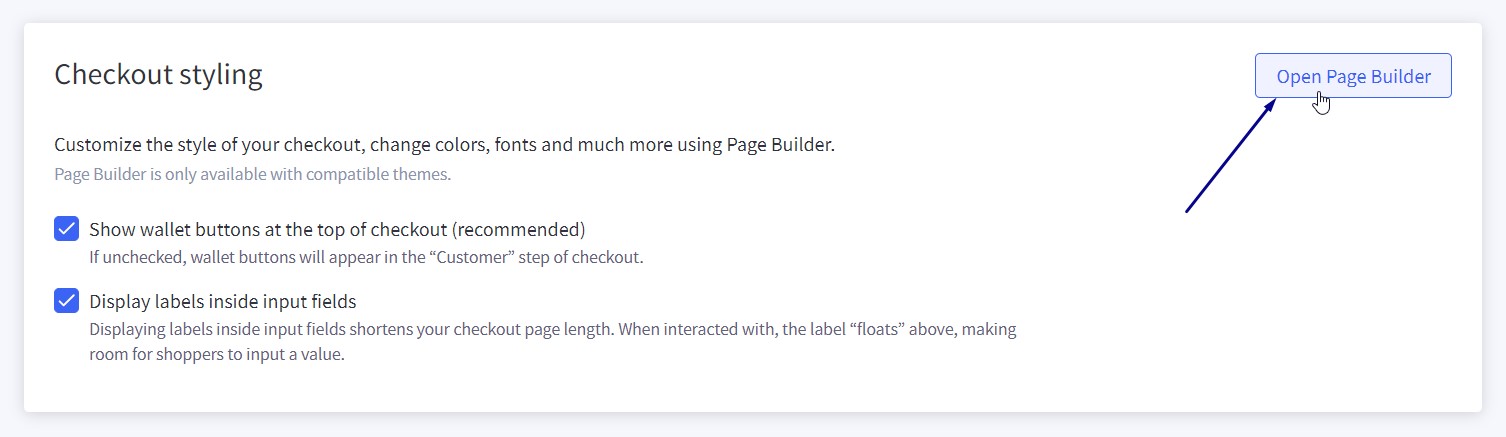
In the “Checkout Page” tab, you can customize various elements, including:
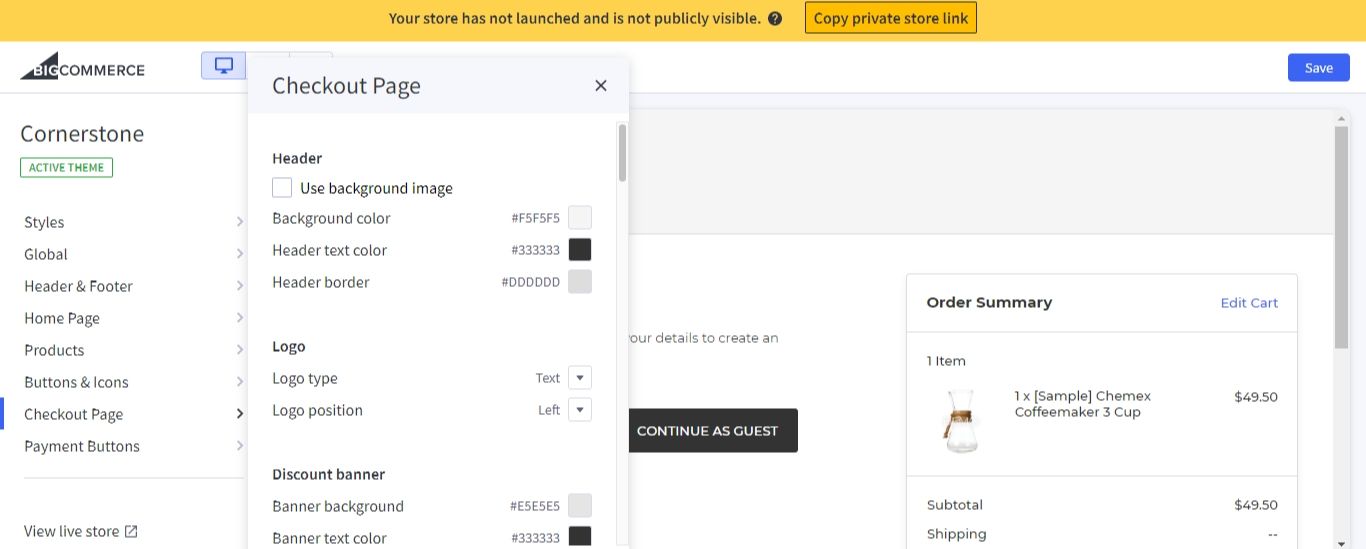
- Header: Upload an image, and adjust the background, text, and border colors.
- Logo: Choose between text or image type and set its position (left, center, right).
- Discount Banner: Customize the background, text, and icon colors.
- Order Summary Box: Modify the background and border colors.
- Checkout Steps Icon: Change the background, text, and border colors.
- Headings (H1 & H2): Select font family and text color for both heading types.
- Body Page: Edit the background and focus colors.
- Text Styles (Body, Secondary, Link): Adjust the font family, text color, and hover text color for links.
- Buttons (Primary and Secondary Action Buttons): Customize font family, text and background colors (normal, hover, active, disabled), and border colors.
- Form Input Fields: Tailor label text color, field text and placeholder colors, error text color, background color, inner shadow color, and border color, including the checkbox button background color.
- Form Checklist: Set the background color, header text color, and border color.
Ideally, the color scheme of your checkout page should align with your logo and existing marketing materials to enhance brand recognition. When you’re done customizing your checkout page, select “Save” to finalize the changes and Publish to make it visible on your store.
Final Thought
After reading our article thoroughly, we hope you will better understand BigCommerce one-page checkout and how to customize it to serve your brand needs.
Read more:


