
How to Create & Setup Google Shopping Feed for BigCommerce?

Google has been encouraging us to make the shopping process for consumers more simplified. What was the reason for this?
As we all know, Google Search is where you type in a query and you will get a Text Ad that takes you to a landing page. On the other hand, Google Shopping is where you type in something you want to buy, and Google will show you a product with a price and a link straight to the item. In order to be featured on the Shopping Feed, you have to pay Google. This convenience is why Google has been promoting the use of Shopping advertisements more and more.
It is so interesting that so many online stores have yet to take advantage of these industry-specific advertisements. So, today, let’s take a peek at how to create & set up a Google Shopping feed for BigCommerce.
What is Google Shopping?
As Google explained, “Google Shopping is
- Powerful because the system will do research products find you your items from thousands of online stores across the web and then leads you straight to the store.
- Comprehensive because the system can find basically everything.
- Fast because right after you click “enter”, you can see thousands of items.
Okay, but what does all of this mean?
Let’s take a peek at an iPhone 12 pro search:
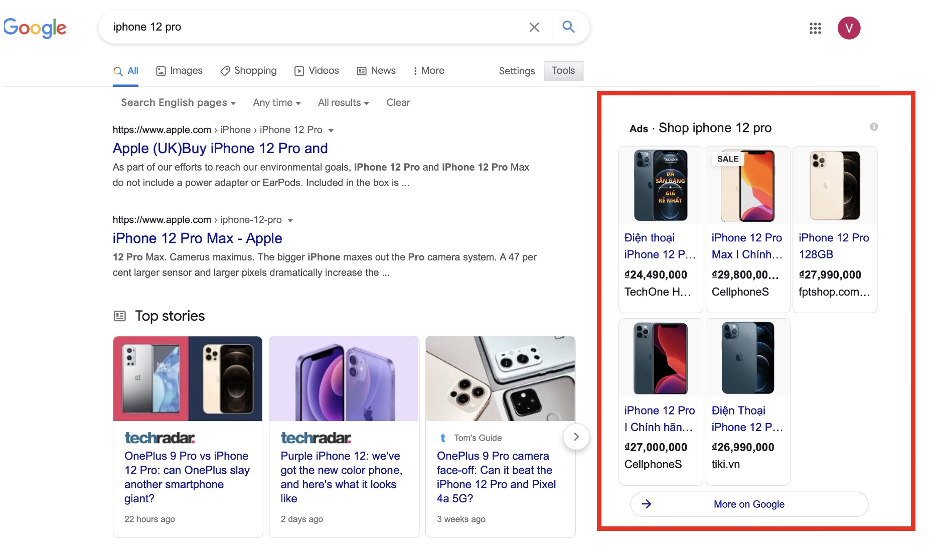
As you can see, Shopping Ads allow you to place your brands on the right panel of the search results, along with normal results.
Sometimes, the Shopping Ads are placed at the top of the results, far above normal results, as in the case of my Nike Air Max search here.
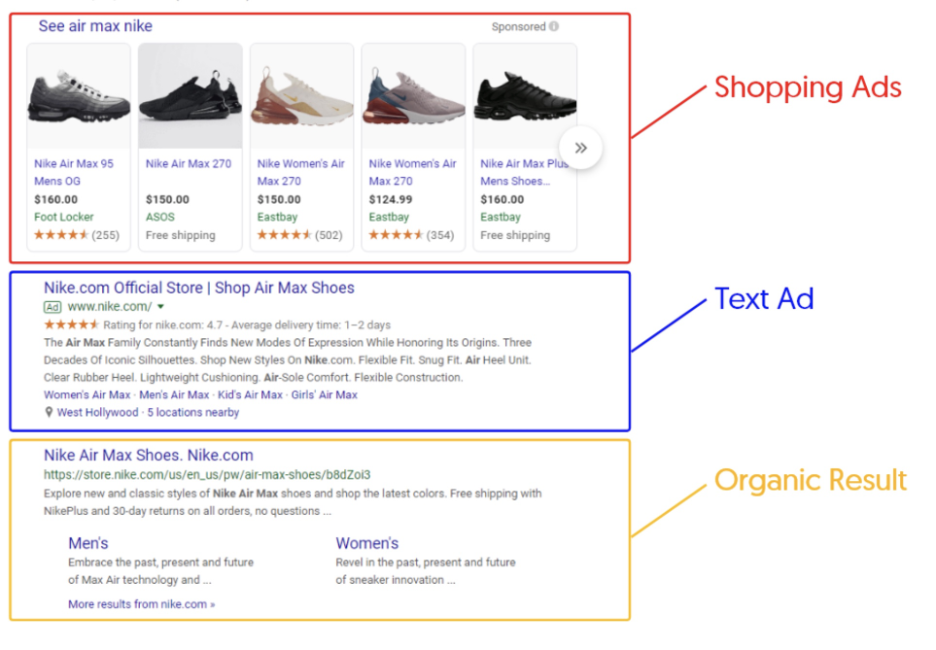
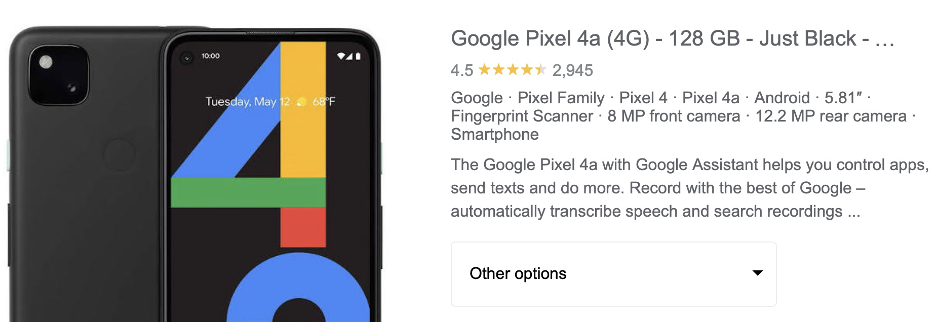
In a nutshell, Google Shopping Ads allow you to view your products right on the search results page, together with a picture and price.
As a retailer, this is a fantastic way to reach out to consumers who are interested in what you have to offer. After all, why would you click on a product ad if you weren’t already interested in that particular item?
How to create Google Shopping Feed for BigCommerce?
There are a few things you’ll need to do to get Google Shopping up and running:
- Create an account with Google Merchant Center.
- Upload your product lines with a feed. You can use Channel Managerto get and connect an app to use with Google Shopping.
- Create a Shopping campaign in Google Ads to start promoting your products. You can change settings like Bid and Budget to improve your campaigns.
*A word of caution
- To upload your product information to Google, you’ll need a Google account to register for Google Ads.
- In order for your items to feature on Google Shopping, you’ll need to verify and claim your store’s website URL
Step 1: Claim your site.
In order for your products to show on Google Shopping, you’ll need to verify and claim your store’s website URL
When you claim your site, your verified website URL is linked to your Google Merchant Center account. But first, you’ll need to verify your site with Google.
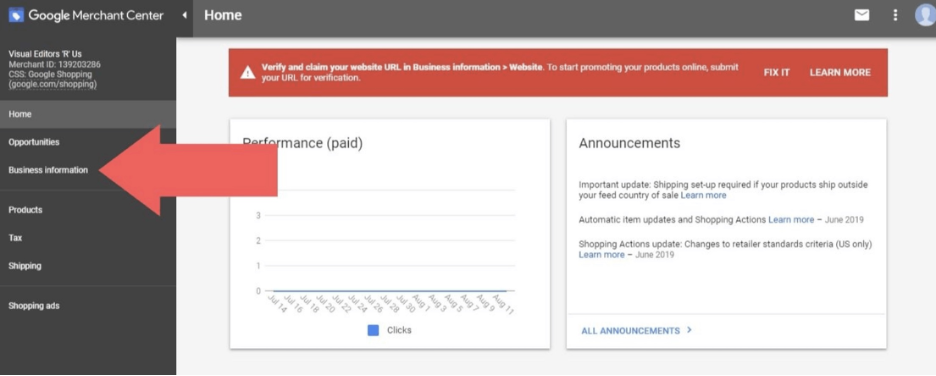
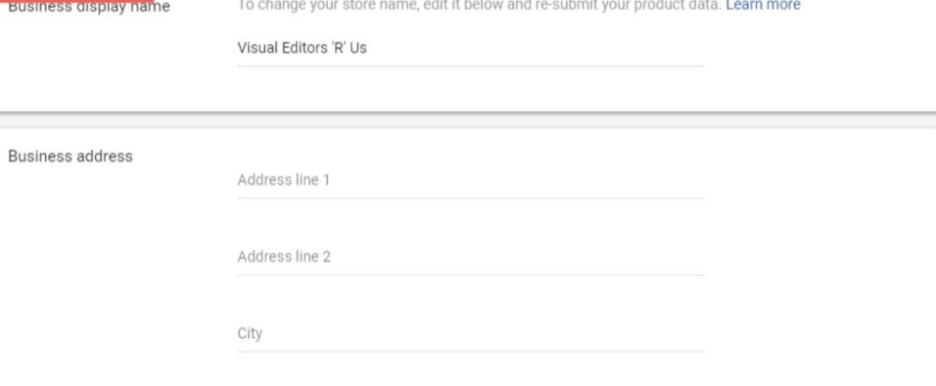
Step 1.1. Log in to your Merchant Center account and select Business Information from the drop-down menu. Under “About your business,” fill in the required fields, then press Save.
Step 1.2. Choose the Website option from the drop-down menu.

Step 1.3. You’ll see alerts telling you that your store is “Unverified,” “Unclaimed.”

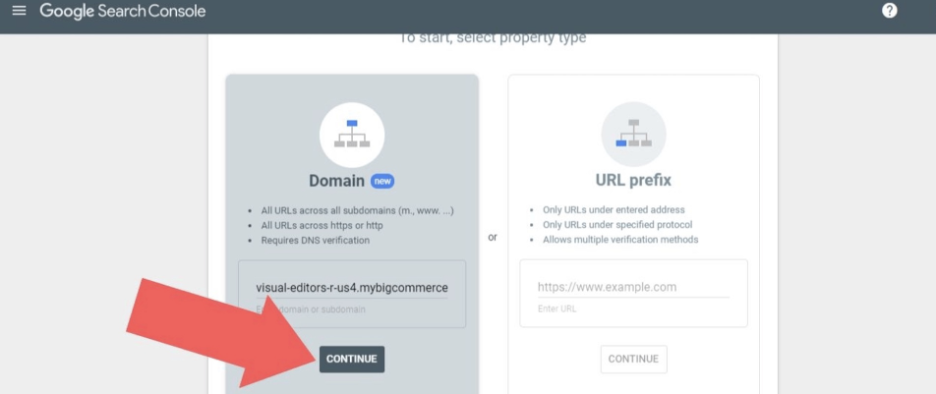
Step 1.4. Go to Google Search Console and type your URL (including the https:// prefix) in the “Domain” section to verify your shop. Then choose “Continue.”
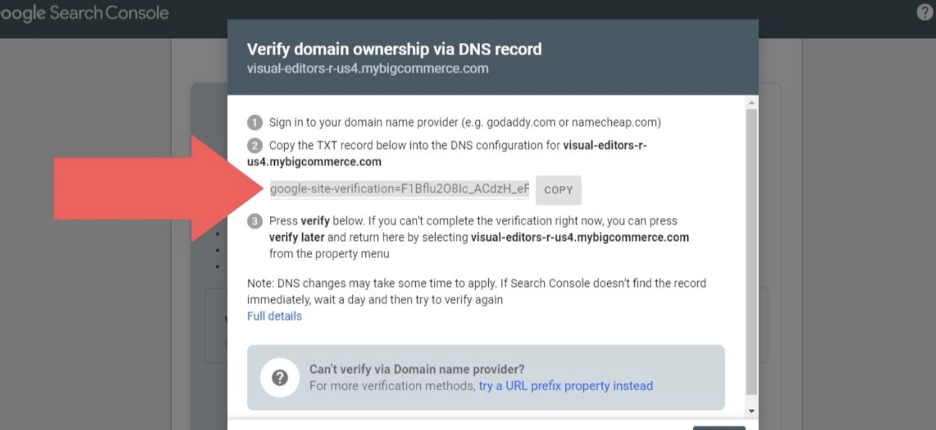
Step 1.5. Copy the TXT record.
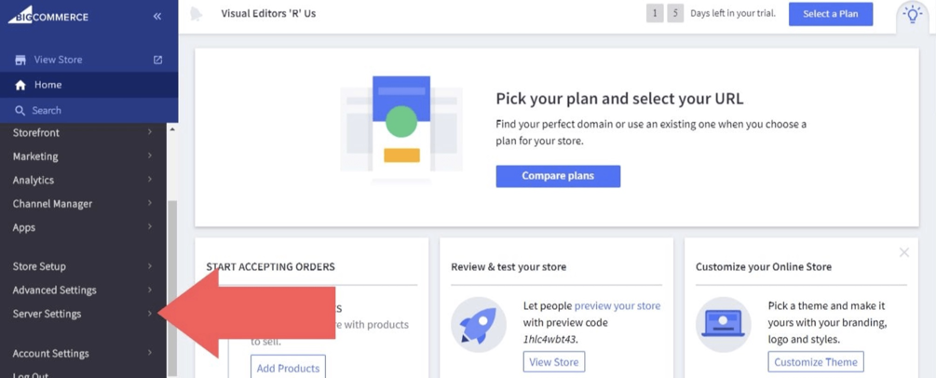
Step 1.6. Log in to your BigCommerce store, then choose “Server Settings.”
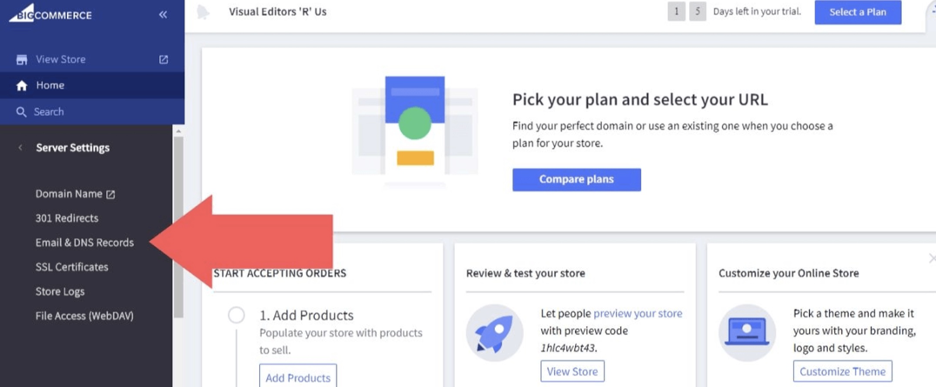
Step 1.7. Select “Email & DNS Records” from the drop-down menu.
Step 1.8. Select “Web Hosts,” next to the Mail Servers

Step 1.9. Choose “Add another.” For the new entry, use these words:
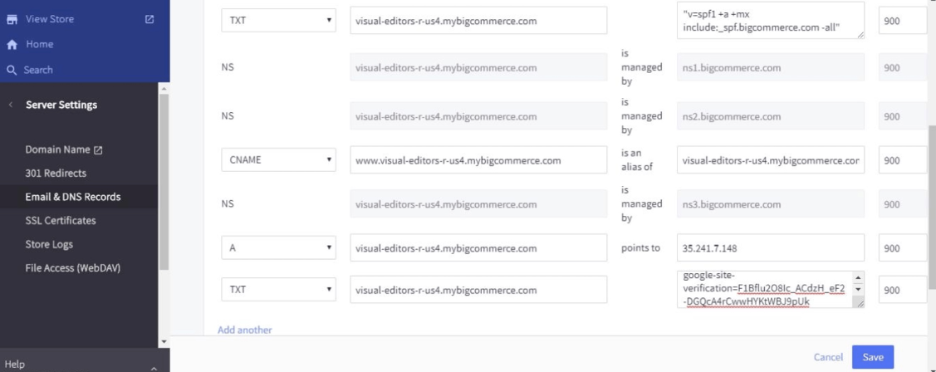
- In the “Type” column, choose “TXT.”
- In the “Fully Qualified Host” tab, type the URL of your shop.
- In the “Value” tab, paste the TXT record you copied from Google Search Console.
- In the “Time to Live” tab, type “900.”
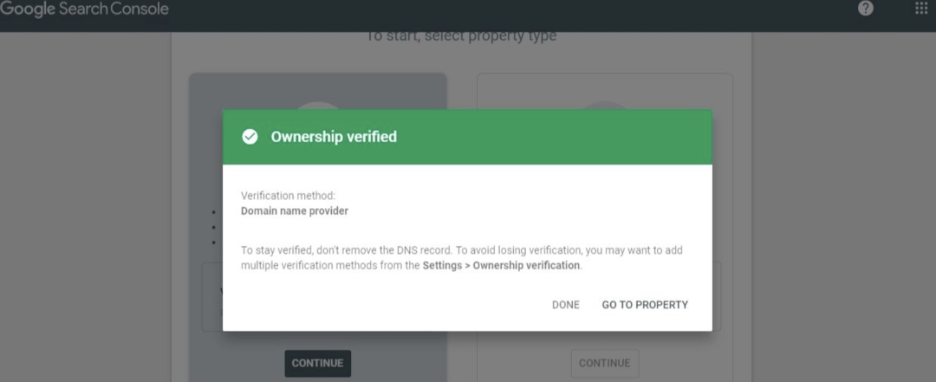
Step 1.10. Return to Google Search Console and click “Verify.” You can see an alert telling that the ownership has been verified.
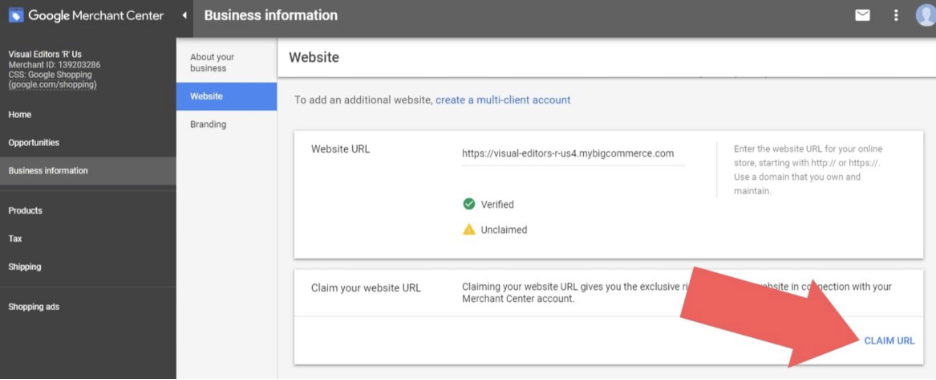
Step 1.11. Return to Google Merchant Center and choose “Claim URL.”
Step 2: Connect to Google Shopping with your BigCommerce Store.
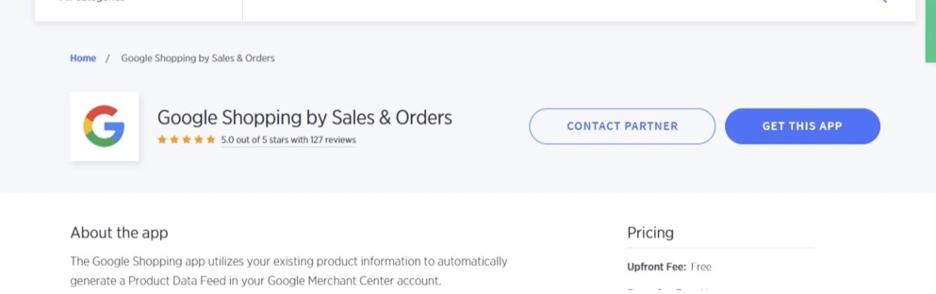
Step 2.1. You now have to a BigCommerce Google Shopping feed. Use a BigCommerce Google Shopping app, such as Google Shopping by Sales & Orders, to do this.
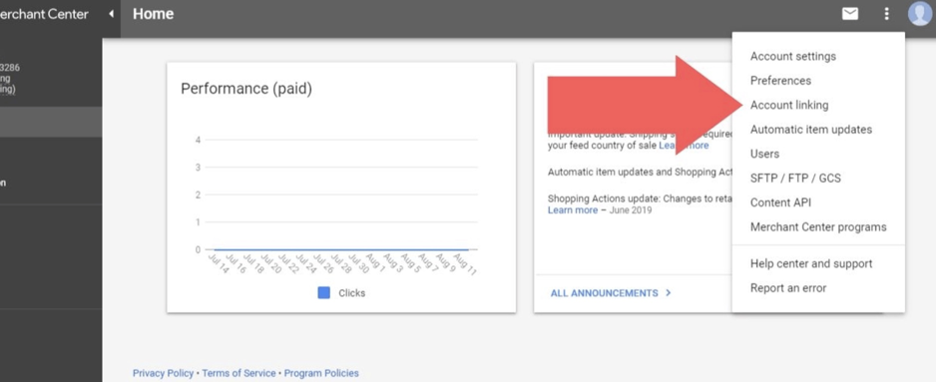
Step 2.2. The final step in this process is to merge your Google Ads and Google Merchant Center accounts. Return to the Google Merchant Center page. Pick “Account linking” from the three vertical dots icon in the top-right corner of the page.
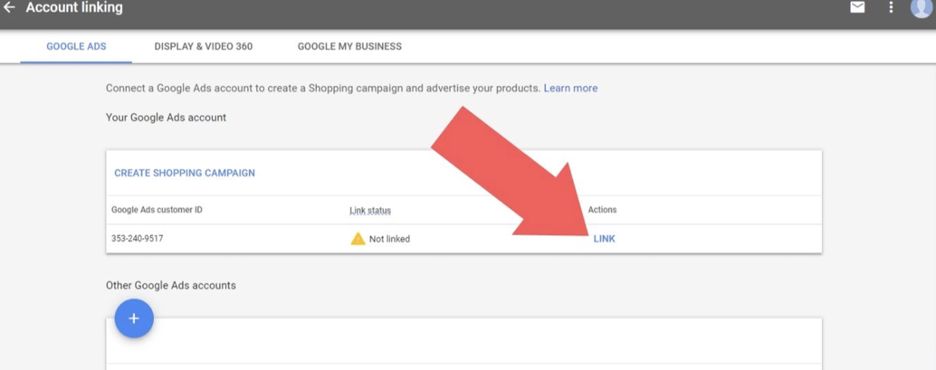
Step 2.3. If your Google Ads account and your Google Merchant Center account have the same Gmail address, you can see it is already listed “Your Google Ads account”. Go to the “Actions” column, scroll down to the “Create Shopping Campaign” section, choose the “Link” option.
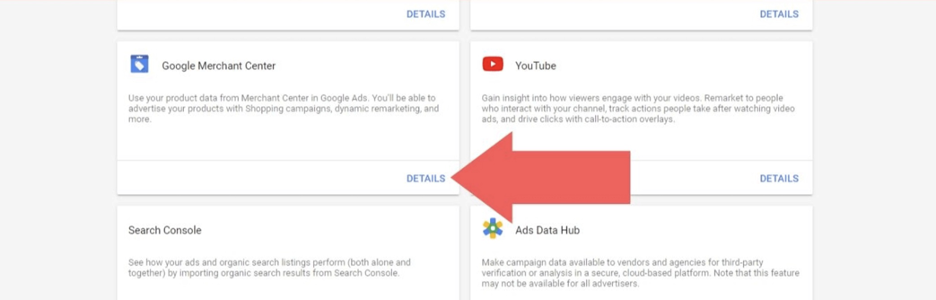
Step 2.4. You’ll need to validate the link in your Google Ads profile. Log in to Google Ads, go to the “Tools & Settings” tab, and in the “Setup” column, choose “Linked Accounts.”

Step 2.5. Select “Details” from the “Google Merchant Center” drop-down menu.
Step 2.6. Select “View Details” from the “Actions” column for the pending request.
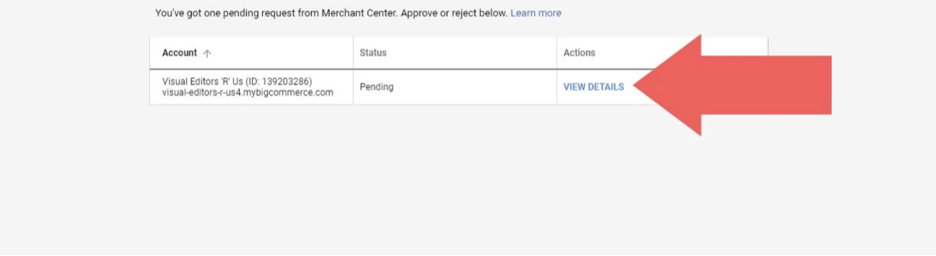
Step 2.7. Choose “Approve.”
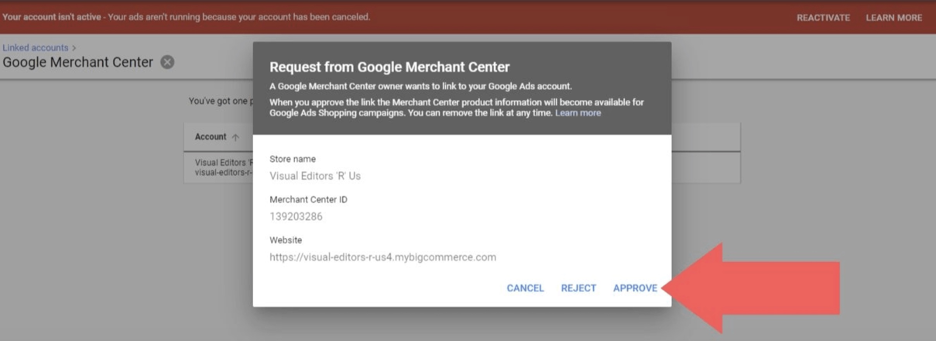
Congratulations. You’ve successfully merged Google Shopping with your BigCommerce store. Now, your BigCommerce, Google Merchant Center, and Google Ads accounts are connected.
How to set up Google Shopping Feed for BigCommerce?
Let’s go over how to launch a Google Shopping ad campaign now that your integration is done
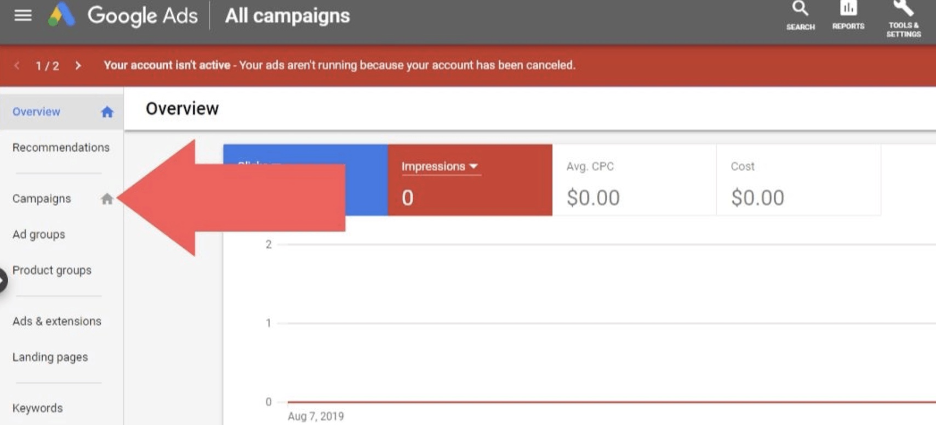
Step 1. Sign in to your Google Ads account and choose “Campaigns” from the drop-down menu.
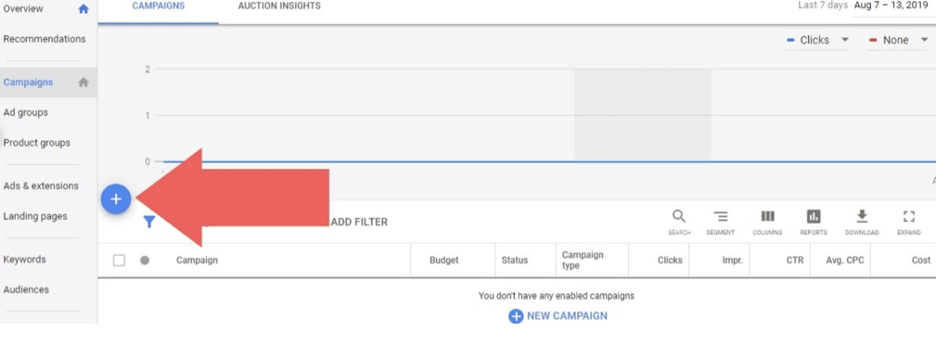
Step 2. Simply click the blue plus sign icon to make a new campaign.
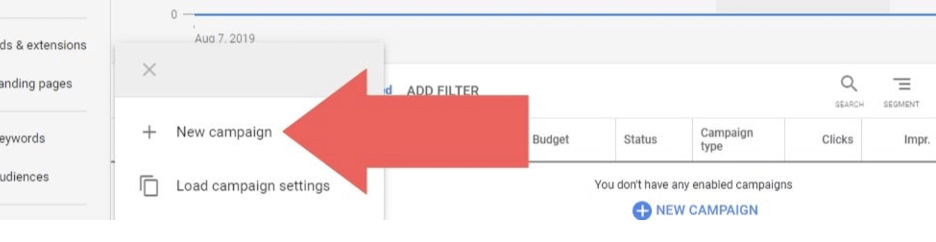
Step 3. Choose “New Campaign” from the drop-down menu.
Step 4. The following settings must be configured on this page:
- Goal: Determine the goal of your ad campaign.
- Campaign Type: Choose “Shopping.”
- Merchant: Since you’ve connected your Google Merchant Center account to your Google Ads account, your Google Merchant Center account will appear here automatically.
- Country: The location where your products are marketed and delivered. Note that the items in Google Merchant Center must be available in the market you choose for them to be in your ad campaign.
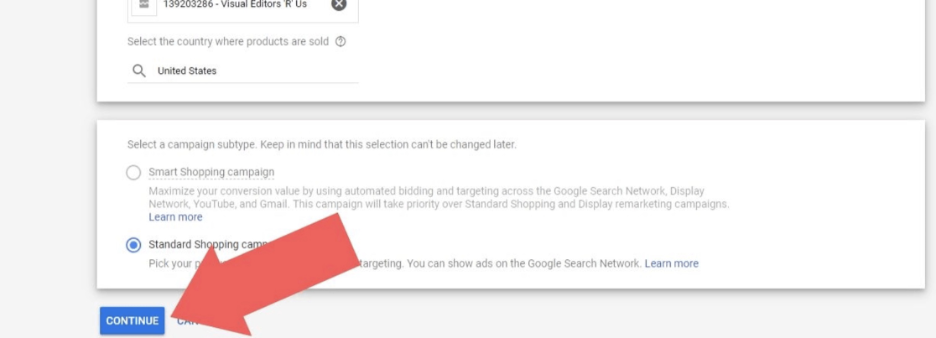
- Campaign Subtype: You have two choices. The first one is “Smart Shopping campaign,” which will automate your bidding and targeting. The second one is the “Standard Shopping campaign,” in which you will have to manually set the bidding and targeting. In this case, we used the “Standard Shopping campaign” option.
Click “Continue” when you’re done.
Step 5. You’ll need to customize the following settings on the next page:
-
Name of your campaign: This is the name of your campaign. Don’t panic if you’re having difficulty coming up with a name right now; you can always change it later.
-
Bidding: Choose “Manual CPC” or one of the three automatic bid methods from the drop-down menu.
-
Budget: Determine how much money you plan to spend on your campaign on a daily basis.
-
Campaign priority: This functionality is for when you have different campaigns in the same country that feature some of the same products. Under both cases, the “Campaign priority” would decide which campaign’s budget is used.
-
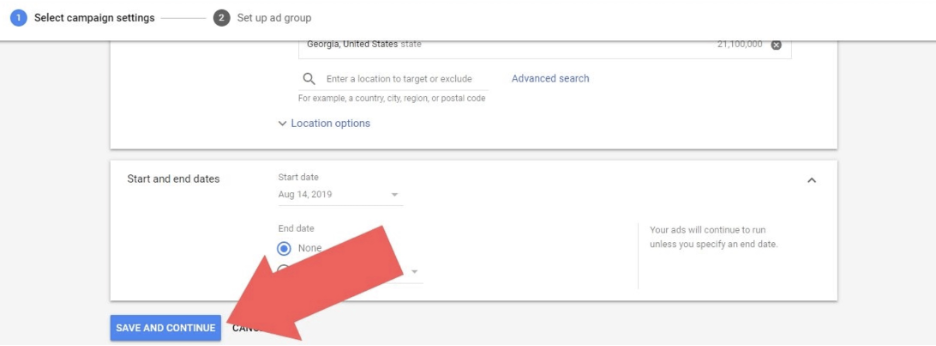
Location: Instead of targeting a whole country, you can focus your campaign on a tiny place (you can also add multiple specific areas, such as Florida and Georgia).
-
Dates of start and end: Choose the start and end dates for your campaign (setting an end date is optional).
Click “Save and Continue” when you’re done.
Step 6. You’ll need to customize these settings on the next page to set up your ad group:
- Ad group type: Your choices are “Product Shopping” and “Showcase Shopping.” “Product Shopping” shows specific products for specific searches (such as “Nike sneakers”), while “Showcase Shopping” shows a product collection for broad searches (such as “shoes”).
- Ad group name: Give the ad category a name (again, you can change later).
- Bid: This is where you set the ad group’s bid. If you choose the “Showcase Shopping” group kind, your bid will be based on cost-per-engagement (CPE) rather than cost-per-click (CPC). That means you’ll be charged if someone adds to your collection and stays in the ad for 10 seconds or more, even if they don’t click on it (you’ll be charged extra if they do click ).
When you’re done, click “Save” to complete your Google Shopping ad campaign setup.
How does Google Shopping work?
In a nutshell, Google Shopping collects feeds featuring product details from online retailers. Since this product information comes straight from the supplier, we, as buyers, are able to see the current prices, best deals, and product line availability
A shopping advertisement has three parts: The Image of the product, the title of the product, and the price.
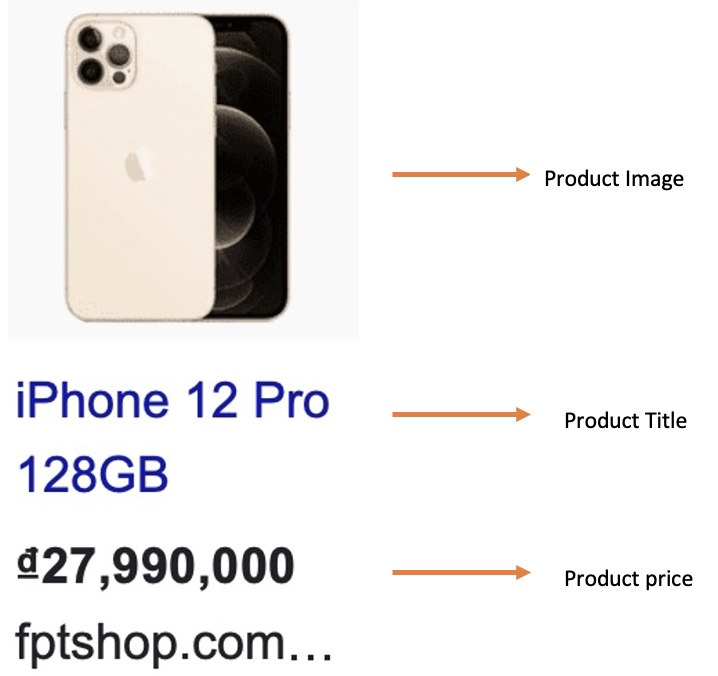
All of these materials are sourced from a product feed. This product feed is a sheet that you set up with product details.
Product Feeds.
You have three choices for managing your multichannel product feeds, and it’s critical to consider each one before making a choice:
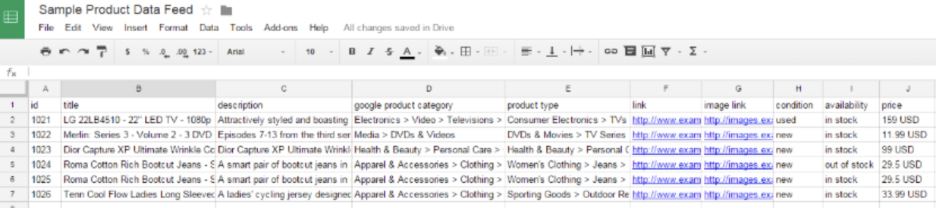
- Using a spreadsheet to manually feed products:
This is precisely as the name suggests. You keep track of inventory information in a spreadsheet that you edit manually in Excel, Google Sheets, OpenOffice Calc, and other similar programs. You must re-upload the file in CSV or TXT format to each channel each time you make a move.
Only sellers with a limited catalog and a lot of free time should consider this option.
- Using the content API to get product feeds straight from your store.
Shopify, Bigcommerce, 3dcart, and Volusion all have a version of this available for download straight from their app stores. These content API product feeds allow you to connect to multiple channels easily.
The disadvantage of this choice is that it does not have room for customization or optimization; your data will be sent out exactly as it is in your shop. Therefore, newer sellers who aren’t prepared to make a move into product feed optimization should consider this option.
- Using an app to automate product feeds.
For some retailers, these tools could be excessive; for others, however, an automated feed will save them a ton of time, increase their productivity, and make their work a lot easier.
When selecting a product feed automation tool, you should choose one that is “scalable” so you don’t overpay for functionality or allotments you won’t use.
You should consider an Automated product feed if you fall into one of these 3 types of merchants.
- Merchants with a Larger Number of Stock-keeping Units (SKUs), or in simple terms, stock items
- Merchants of Complex or Fluctuating Catalogs
- Merchants who want to sell on multiple platforms
Keywords.
If you have ever set up a Google Search campaign, you probably know that searching and checking appropriate keywords for your brands takes a lot of time.
With Google Shopping, none of this is necessary. Google finds the most appropriate search keywords to display your ads based on the details in your feed after it is correctly submitted.
Data from consumers
Offers on Google Shopping are rated based on relevance, which includes the critical search terms and other Google activity. Google also uses the ad data to boost the accuracy of the results.
Offers that have the “Sponsored” label mean that the advertising company’s payment to Google may also affect how items are ranked and categorized. Google gets paid as people click on these advertisements.
Information on the product.
Sellers and marketers who use Google Shopping to promote their brands are engaging in commercial practice. They must adhere to Google Shopping policies, which outline what can and cannot be listed on the platform.
Reviews.
Google Shopping collects feedback through the Google Customer Reviews program to facilitate product testing. These reviews are entirely voluntary, and reviewers are not paid for sharing their thoughts.
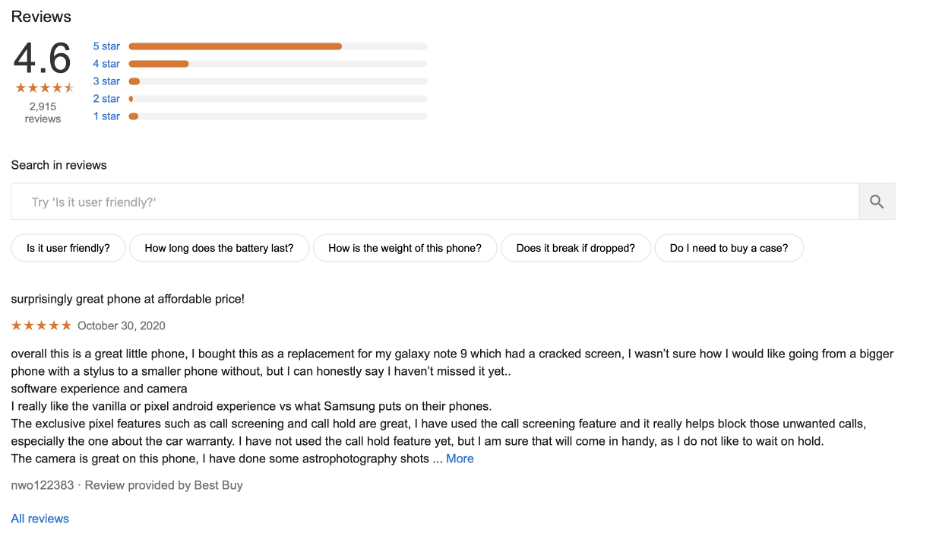
Advertisers, sellers, and third-party rating companies are also asked for feedback. They would have both positive and negative feedback on your products. Google Shopping may have paid the reviewers for their contributions.
How to make an amazing Google Shopping Feed?
People speak of “product listing optimization” as if it were a magic wand that could solve all of their promotional campaign’s issues. While optimizing isn’t magic, the effects can be.
Capitalized Required Fields.
The first step is to secure your required fields. These fields may differ from channel to channel, but assuming you are beginning with Google, here’s a short checklist.
- ID
- Name
- Description
- Image_Link
- Availability
- Cost
- Brand name
- GTIN/MPN
- Condition
- Multipack
- Bundle
- Age_Group
- Gender
- Color
- Material
- Pattern
- Size
- Shipping
- Tax
- Item_Group_ID
You can see more here: Product data specification
Title
We suggest concatenating your product title from numerous key attributes. You can increase the likelihood of matching search requests by increasing the relevance of your titles for several searches.
The below are some of the most widely used templates, organized by product type.
- For Clothes: Brand + Gender + Product Type + Attributes (size, material, color, etc.)
- For Books: Title + Type + Format (paperback / digtial eBook) + Author name.
- For Electronic Appliances: Brand name + Attributes + Product Type + Model version.
- For Hard Items: Brand Name+ Product Type + Attributes (weight, size, etc.)
- For Seasonal: Season/Occasion + Product Type + Attributes (weight, size, color, material, etc.)
Description
Here are some ways you can use to increase your keyword relevance.
- Have synonyms for the keywords you’ve already mentioned.
- Apply common terms and/or popular phrases for the areas you sell in.
Colors
Google, as with most shopping platforms, has a limited selection of color options. As a result, when it comes to maximizing your product’s color field, you should just stick to “common” colors. You should list the traditional relatives of your actual color, even though your items are built to feature exotic colors like emerald, maroon, coral, or burlywood.
- Emerald: Just go with Green
- Maroon: Choose Red / Brown
- Coral: Orange is a better option
- Burleywood: Go with Brown / Grey.
Conclusion
Every day, Google processes billions of searches. There isn’t a single advertisement platform that can attract more users than Google, regardless of what you’re selling.
So, don’t miss out on this chance. You will increase traffic to your BigCommerce store and increase revenue by using Google Shopping advertising.


