
How to create custom fields in BigCommerce

Are you attempting to offer your customer more information about your products but the number of available fields are limited? Don’t worry, you have come to the right place.
This article is all about the definition and a tutorial of How to create BigCommerce custom fields for your online store along with other related functions. These will ensure the reliability of your store in the consumers’ eyes and finally gain higher profits sooner or later.
What are BigCommerce custom fields?
BigCommerce custom fields give you the permission to create as many information tabs as possible on your product page. This means that, not only the price, name or weight can be included but also ISBN code of a book, release date or materials. Depending on the theme, the placement of these fields can vary.
When a custom field is updated for a commodity, it will be added to the product’s information page. The highest number of fields that an item may have is 200. As well as via CSV import and the API, you can even build your own fields on the control panel.
In this way, you will be able to provide your customers with a wider understanding of your products, then help them to make better decisions.
How to create BigCommerce custom fields for your store
Fortunately, you do not have to hire any third party to set up BigCommerce custom fields for your online business. The most outstanding point about BigCommerce is that it has turned this feature into a tool so that every retailer can make use of it.
We will be dividing the tutorials of Creating BigCommerce custom fields into small simple steps for you to follow. No more beating around the bust, let’s get started!
Step 1: Go to the BigCommerce Product page
First thing first, at your BigCommerce Control Panel, please look for the “Products” page on the left side of your screen:

Once you have found out that page, click on it and move to the next step.
Step 2: Add a new BigCommerce custom field
These are the fields that have already been inserted in so you do not need to add in the BigCommerce custom fields section anymore:
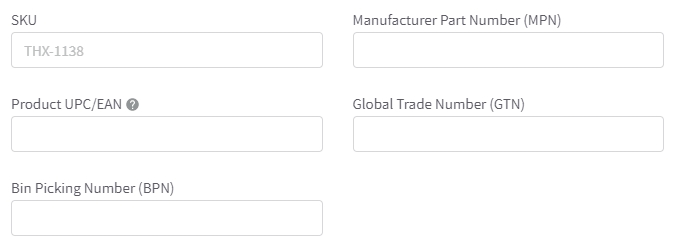
You can find them in the “Product identifiers” category.
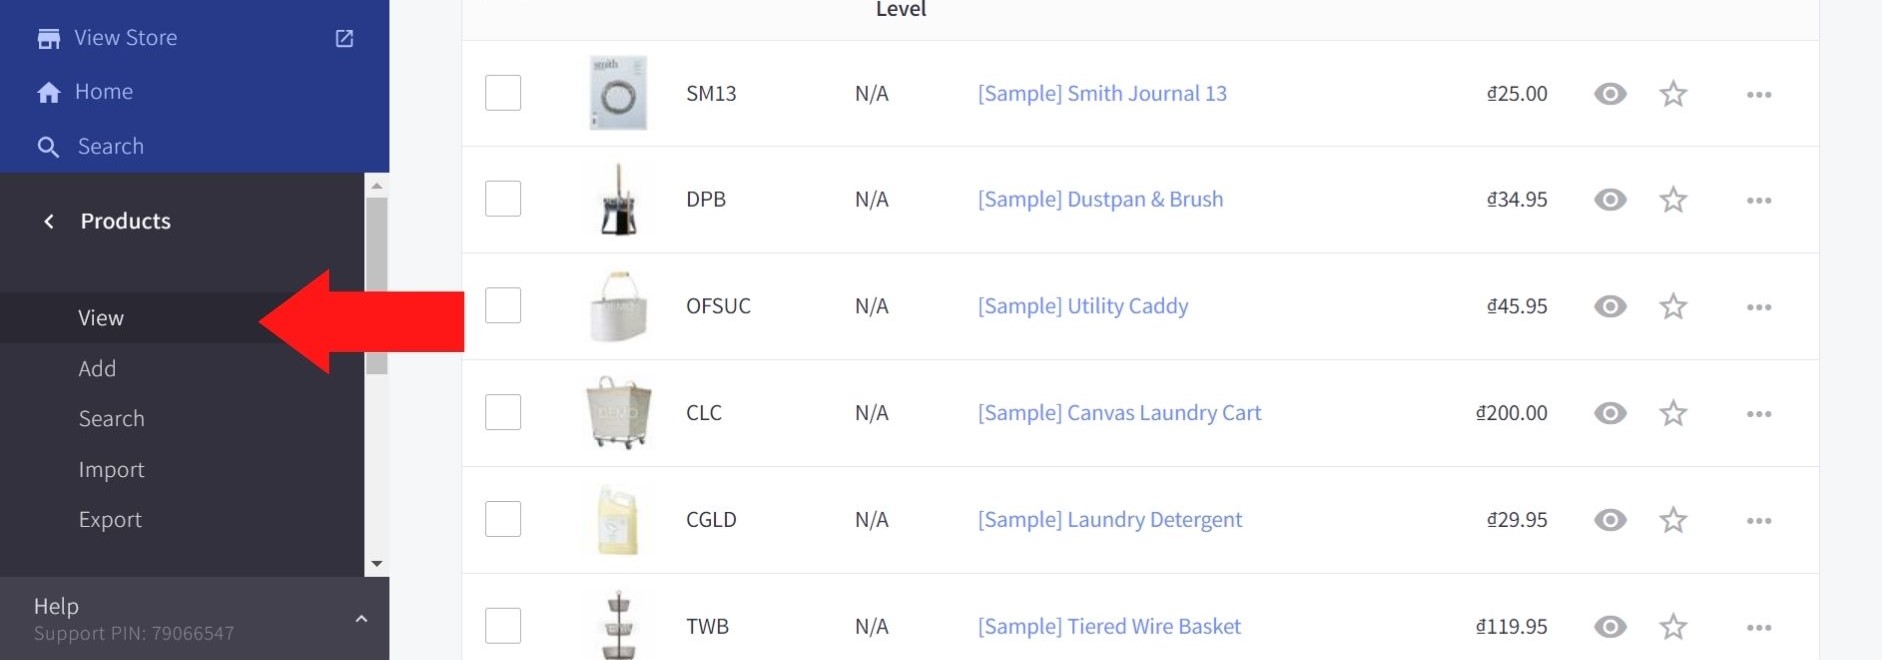
Moving on, in case you wish to adjust the custom fields of available items, go to “View” then click on the name of the wanted product:
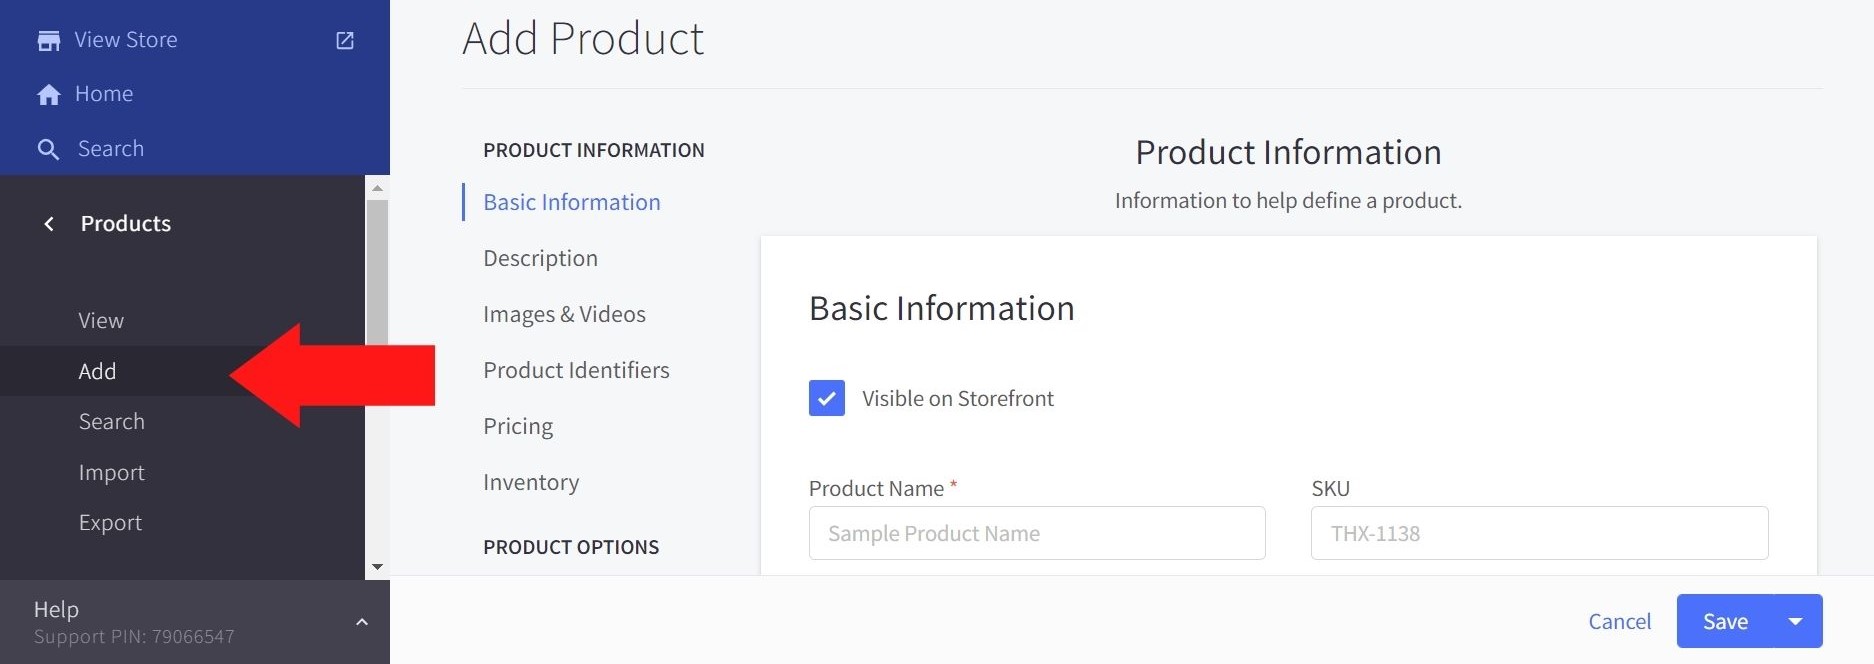
On the other hand, you are creating BigCommerce custom fields for a brand new product, go to “Add” and here is how your screen will look like:
For both options, scroll down then you can see a button saying “+ Add Custom Fields”, select it:

BigCommerce will ask you to fill in the name and value for this new custom field, which has a maximum of 250 characters for each entry. You may use these fields to supplement the product description.

Additionally, you can choose “+Add Custom Fields” under these two boxes to create new ones based on your preferences. Conversely, you can select the area to delete by clicking the “-” to the right of each field.
Last but not least, do not forget to “Save” your work, or you have to start over!
Step 3: Importing product custom fields
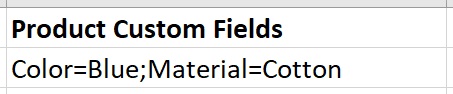
To do this, the first thing you need to do is to open your CSV files for the product. After that, add another column under the name “Product Custom Fields” with the input values in this format:
- Format: [Name of custom field]=[Name of value];[Name of custom field #2]=[Name of value #2]
- Example: Color=Blue;Material=Cotton
Custom fields can be written as a semicolon-separated list if you have to upload a plethora of custom fields at once.
This is how your column in the CSV file for BigCommerce custom fields will be presented:
Step 4: Applying and Deleting custom fields to multiple products (if necessary)
There is no button to do such a thing at your BigCommerce Dashboard, if you want to bulk import the custom fields to a wide range of products simultaneously, you need to change the settings in your original CSV file.
Within your already existing column of “Product Custom Fields”, you have to type in the content all by yourself one to another. If they all share the same characteristics for BigCommerce custom fields, then you only need to Copy and Paste them into the column.
Furthermore, deleting a custom field for multiple products works the same way. To find a specific area in your spreadsheet, just scan and replace it. This will get rid of the custom area but will not apply spaces to it.
An additional strategy to erase BigCommerce custom fields is using the API because it adapts well, too.
Conclusion
Creating BigCommerce Custom Fields is not only easy to do but also can result in positive effects for your business in the future. We hope that this article has successfully helped you to add, edit BigCommerce custom fields plus how to bulk import and delete them.


