
How to Upload images in bulk for BigCommerce?

In the world of eCommerce, image is regarded as one of the most crucial points for each product since it is impossible for people to touch and feel the goods via the laptop or mobile phone screen. Therefore, image is an indispensable element for every online store.
With BigCommerce, users will be given the drag-and-drop tools to upload their images for the products. However, this platform only allows users to upload images one by one. That will be fine with small shops selling several products but in the shop selling dozens, hundreds or even thousands of products, it will be a problem: people will have to spend lots of time just to upload photos.
So, are there any ways to upload images in bulk for BigCommerce? Fortunately, although directly importing multiple images at the same time on BigCommerce is impossible, it can be done via the help of third-party platforms - They are WebDAV clients.
In this post, we would like to introduce to you the instruction to upload images in bulk via Cyberduck - a WebDAV client.
What is WebDAV?
WebDAV is an extension of the Hypertext Transfer Protocol (HTTP), enabling clients to create Web content remotely. In BigCommerce, this application gives users the ability to import files to their store’s server. Via WebDAV, you can upload and edit products and images, fonts, and content like PDF, audio, etc. More than that, it is considered a reliable source for backing up important files, such as products, images, customer lists, and so on.
How to upload images in bulk in BigCommerce?
Step 1: seek for WebDav information
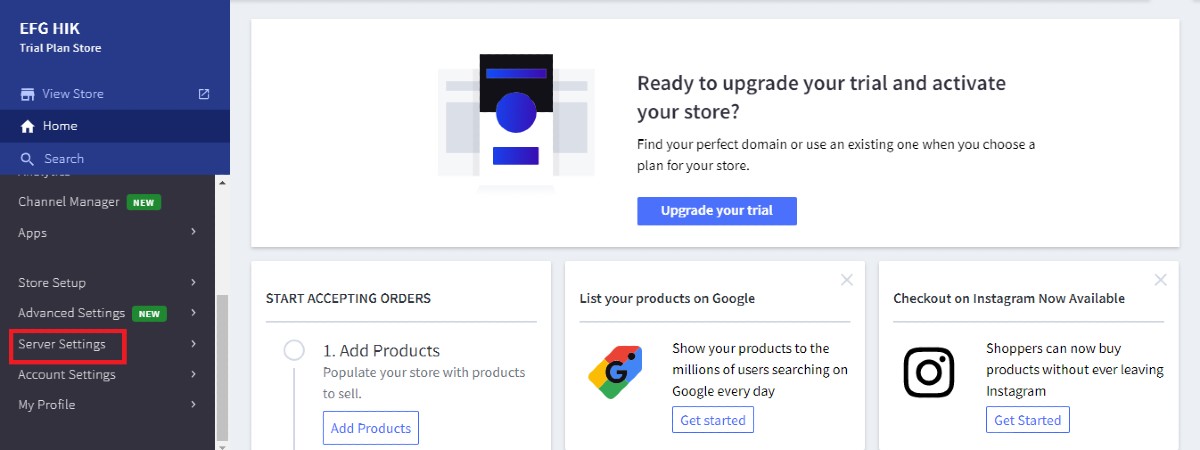
Login your BigCommerce account and open its control panel. There, scroll down and select Server Settings.
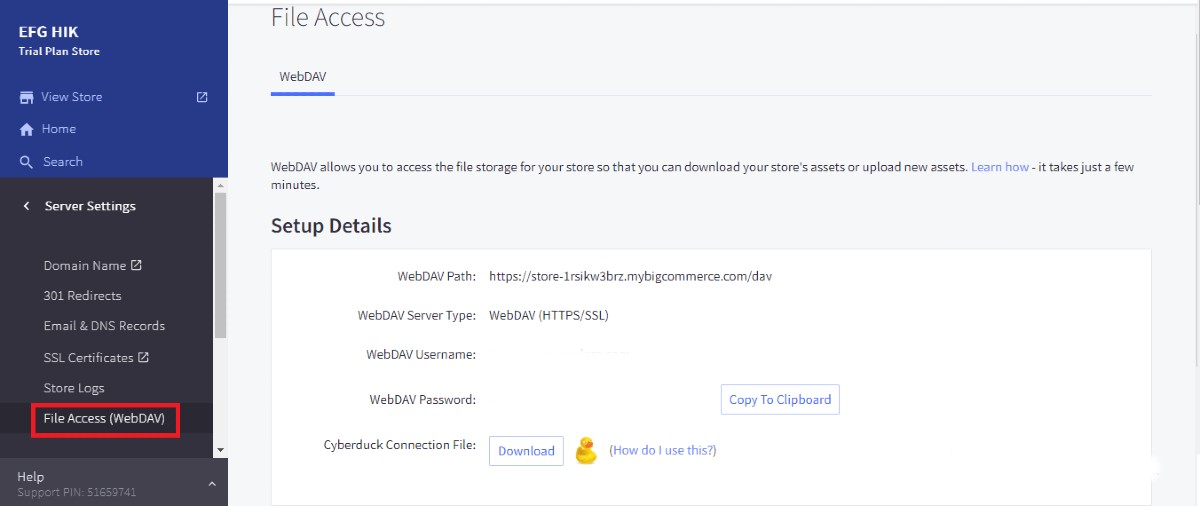
In Server Settings, click on File Access (WebDAV) and you will see your store’s WebDAV information. It includes 4 contents which are WebDAV path, server type, username, and password.
Step 2: Connect WebDAV with Cyberduck
There are two ways for you to connect WebDAV in BigCommerce with Cyberduck. The first one is connecting each other in BigCommerce, and the second one is in Cyberduck. With the first option, you don’t need to open more tabs but have to download files. Meanwhile, the second one requires you to log in to your Cyberduck account, but you don’t need to download the connection file.
Besides, remember to download Cyberduck from Cyberduck
Connect WebDAV with Cyberduck via BigCommerce
Still in File Access, choose Download button to download Cyberduck.

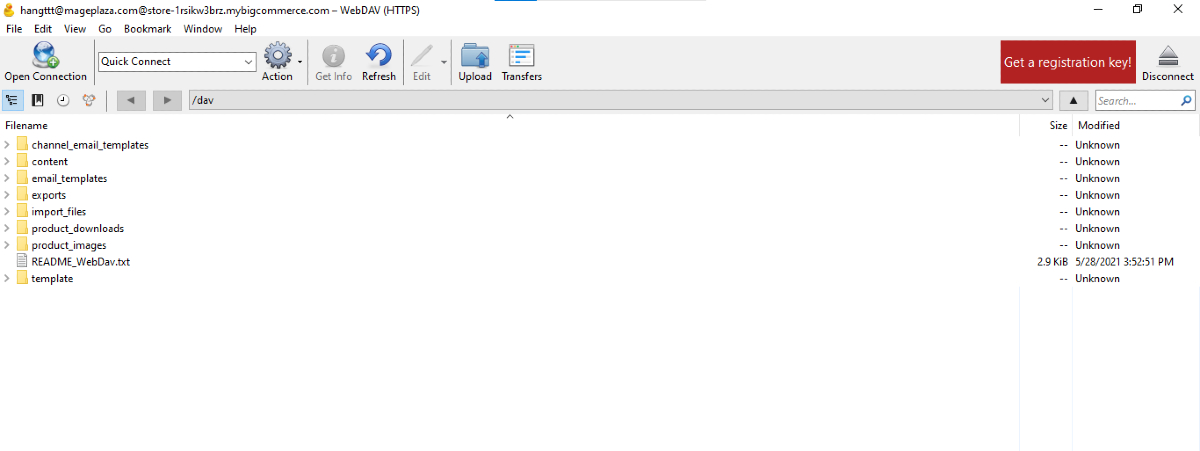
Double click on the connection file you have just downloaded, you will have to log in Cyberduck by the username and password from your BigCommerce WebDAV details.
Then you will see these folders:
Connect WebDAV with Cyberduck via Cyberduck
After the installation, open Cyberduck on your device. Then, use the username and password you see in step 1 to log in Cyberduck.
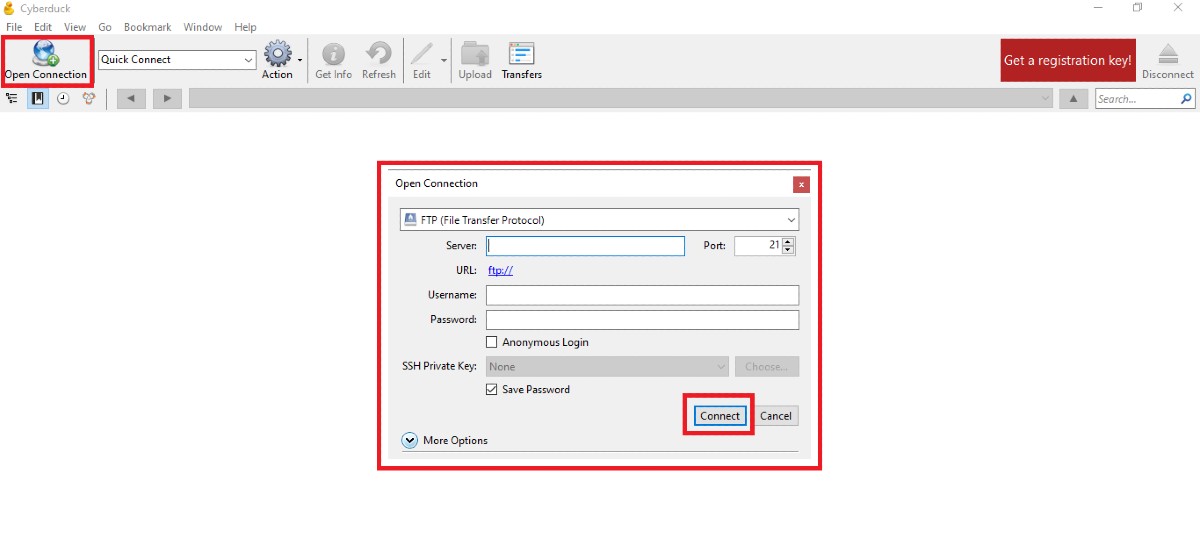
Afterwards, choose Open Connection and copy the data from File Access to connect:
- Sever is WebDAV path
- Username is WebDAV username
- Password is WebDAV password
Click on Connect to open connection. Now, your BigCommerce WebDAV is connecting with Cyberduck, and the screen will be like this:
However, you also need to follow these steps to use Cyberduck smoothly.
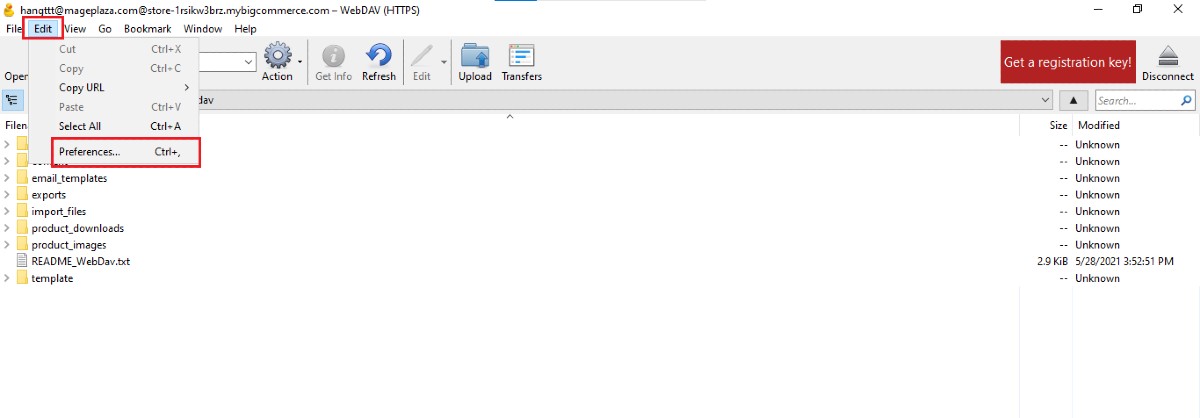
On the top bar, click on Edit and open Preferences. Otherwise, you can use Ctrl+, to open Preferences
There, remove the tick on Save workspace.
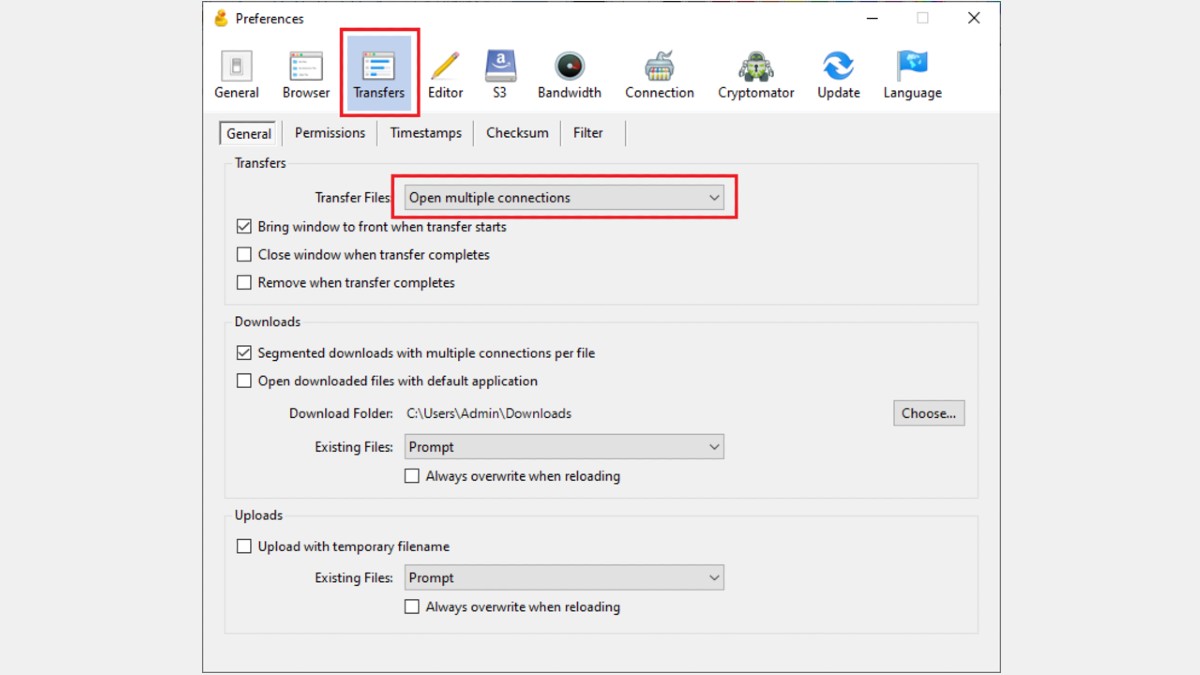
Then, open Transfer and in the field of Transfer File, choose One Multiple Connection.
Step 3: Upload images in bulk
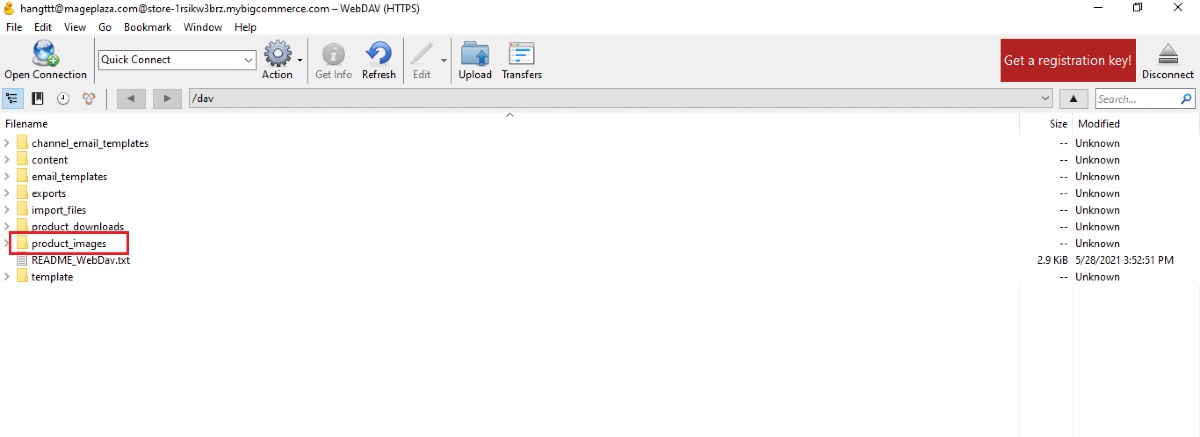
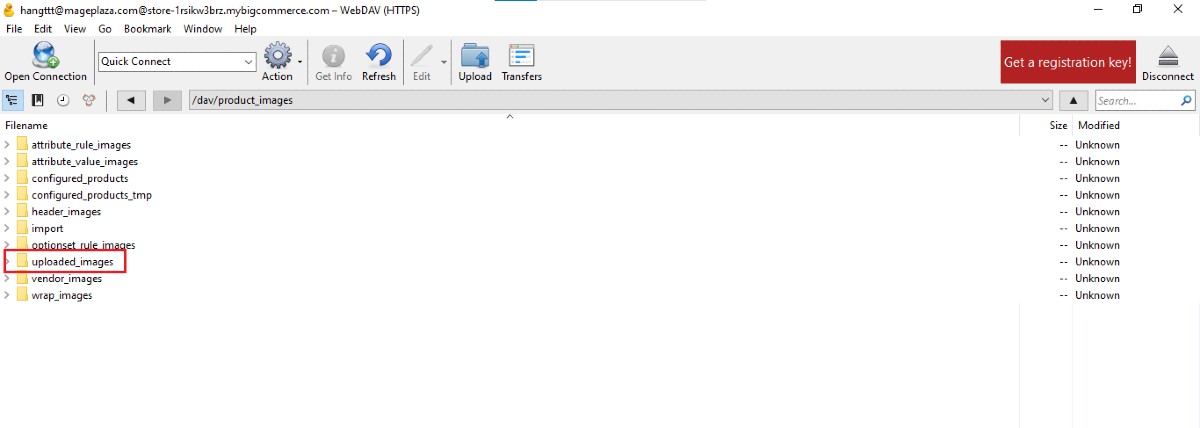
In Cyberduck, open the file named product_images.
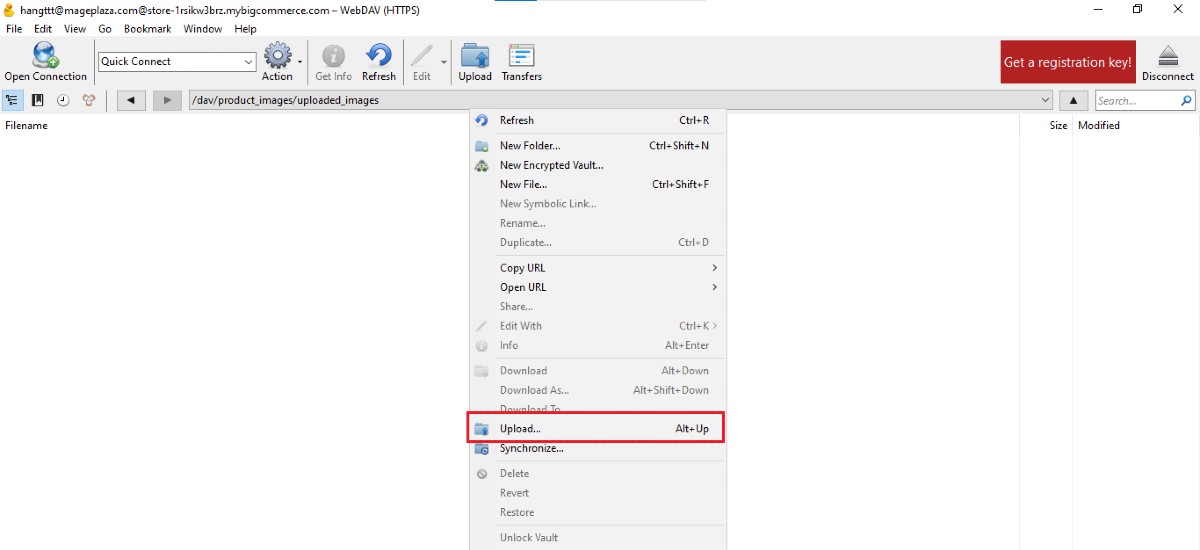
There, click on uploaded_images folder to upload photos.
Click on the right mouse button and choose Upload
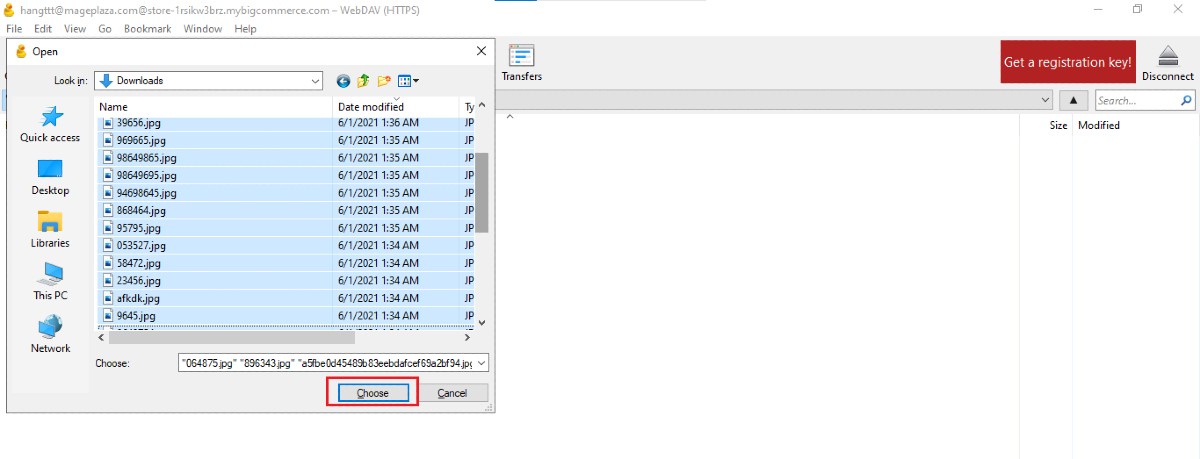
Open the file consists of the images you want to upload and select them. After that, click on choose button or press Enter to upload these images.
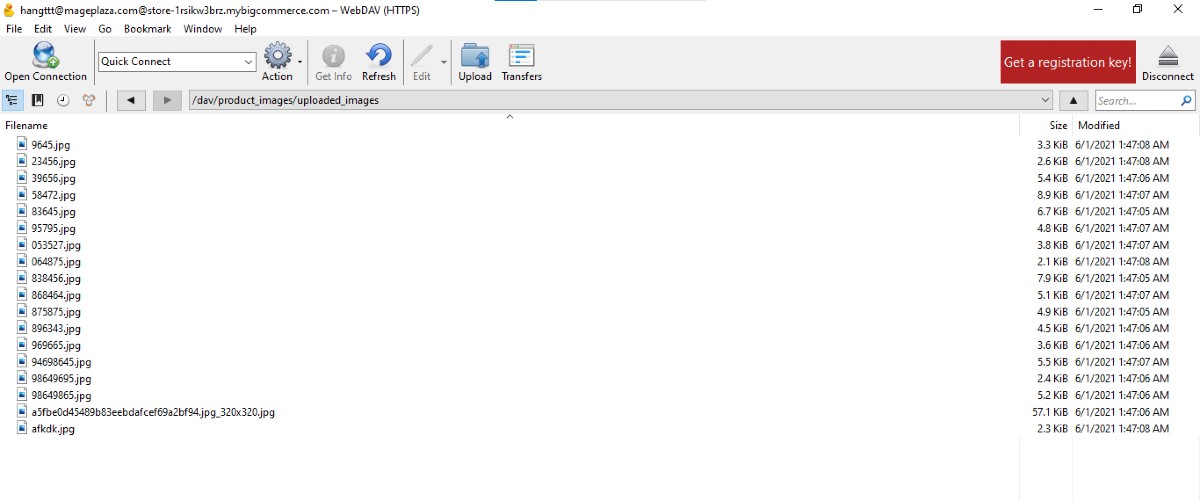
When the uploading process is complete, all the images will be displayed in Cyberduck files.
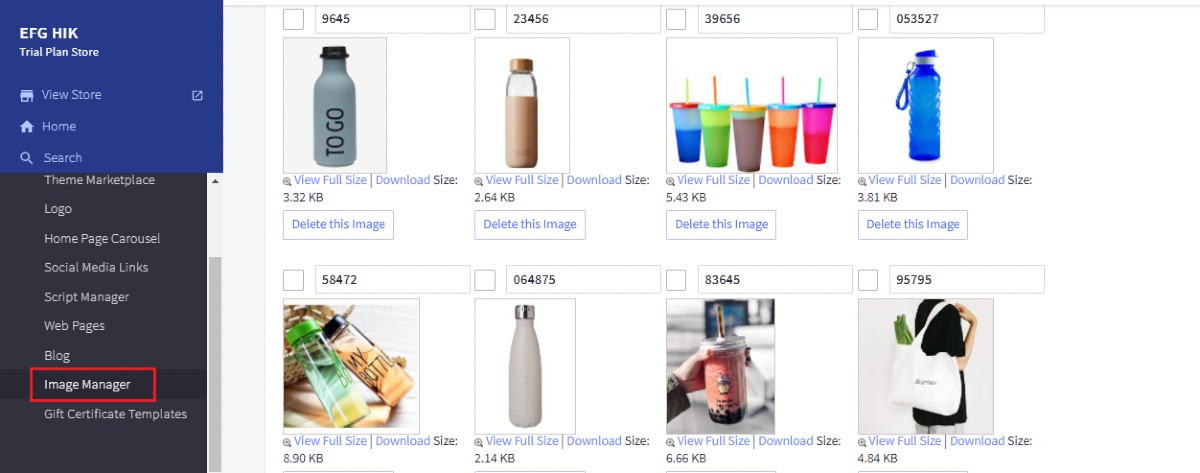
And, you can open Storefront then scroll down and select Image Manager to check whether they are all uploaded.
Final thoughts
In conclusion, it can’t be denied that uploading dozens of images simultaneously is the best way to help employees save time and improve job performance. By using the WebDAV client - Cyberduck, you can upload all the necessary images in seconds. Follow these above steps, and you can upload images in bulk for BigCommerce.


