
How to Migrate from Magento to WooCommerce
By Sam Nguyen

WooCommerce and Magento are two of the most popular content management systems (CMSs) in the retail ecosystem. Magento is a more comprehensive option than WooCommerce. Still, it is more difficult to configure and administer, and you will almost certainly require the assistance of a professional developer for your Magento business. WooCommerce is a sophisticated eCommerce platform that is very simple to use and configure, making it perhaps the best eCommerce platform. According to BuiltWith data, WooCommerce operates 30% of the top million eCommerce sites, whereas Magento operates just 9%. So, moving from Magento to WooCommerce is unquestionably a worthwhile effort.
That is why today’s tutorial will show you how to migrate from Magento to WooCommerce. Whether you’re a long-time Magento client or a new shop owner, you could be thinking about switching to a more user-friendly and cost-effective platform — and with the Magento migration looming, now is a great moment to investigate WooCommerce. A complete eCommerce shop transfer is a significant task. It would be best if you guaranteed that you transfer all of your data without losing anything. The more you can migrate over, the less you’ll have to rebuild.
Why should you migrate from Magento to WooCommerce?
Ease of use
Before we begin migrating from the Magento shop to WooCommerce, it is crucial to understand why you need to move in the first place. Magento is a fantastic eCommerce platform, and thousands of online shop owners entrust it with their multi-million dollar businesses. However, operating a Magento site may be daunting, and unless you are a web developer yourself, customizing your Magento store will be difficult.
WooCommerce first appeared in the eCommerce market in 2011 and has grown in popularity ever since due to how simple it is to set up, configure, administer, and customize. WooCommerce developed to become the most popular eCommerce platform in just nine years, and it now powers 30% of the top 1 million online shops.
Price
Even though Magento is free to begin with, the cost generally rises considerably in the future. It anticipates a lot of the expenses for Magento hosting, themes, extensions, and so on, but it may fit better within the budgets of large and medium-sized stores. The typical cost of a standard Magento website is between $22,000 and $50,000. However, depending on different aspects such as the amount of customization, platform version, theme, and so on, it can be both cheaper and considerably more expensive.
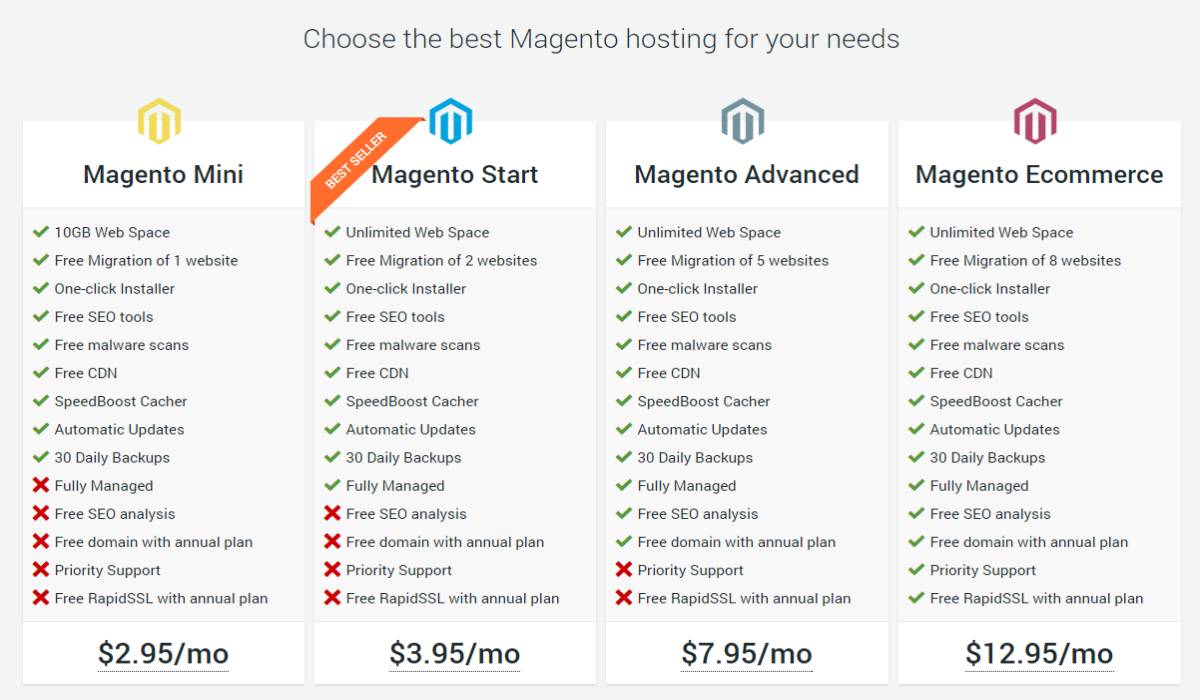
WooCommerce, on the other hand, is a free WordPress plugin. Not only that, but the WordPress CMS software is also free. However, expect to pay approximately $12 for a domain name and $5 to $25 for hosting. You’ll also need to account for extra expenditures like themes and plugins, which may run from $25 to $150. Obviously, WooCommerce pricing is lower.
The preparation of migrating from Magento to WooCommerce
Before we get into the migration stages, you should do a few things before you migrate to make the process smoother, assure accuracy, and assist you in making an appropriate choice.
Backup and export your Magento’s data
Backup data is an important step to guarantee that your data is not threatened if the transfer does not go as smoothly as you would want. You may backup your Adobe Commerce store data by following the steps described below:
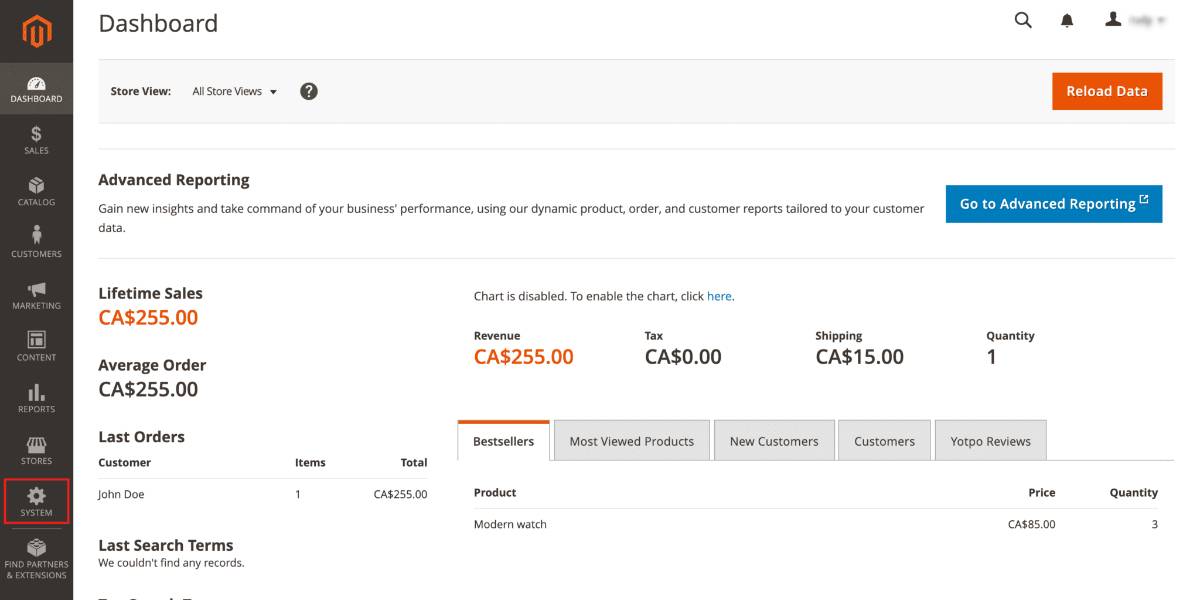
Sign in to your Adobe Commerce admin dashboard and navigate to the Systems section on the left sidebar.
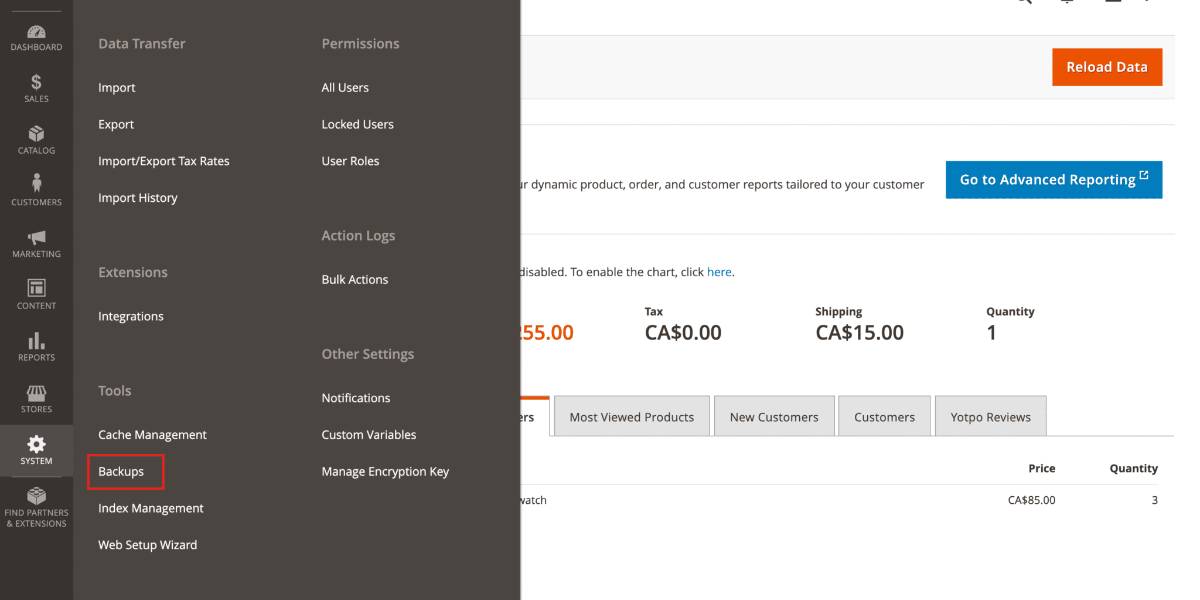
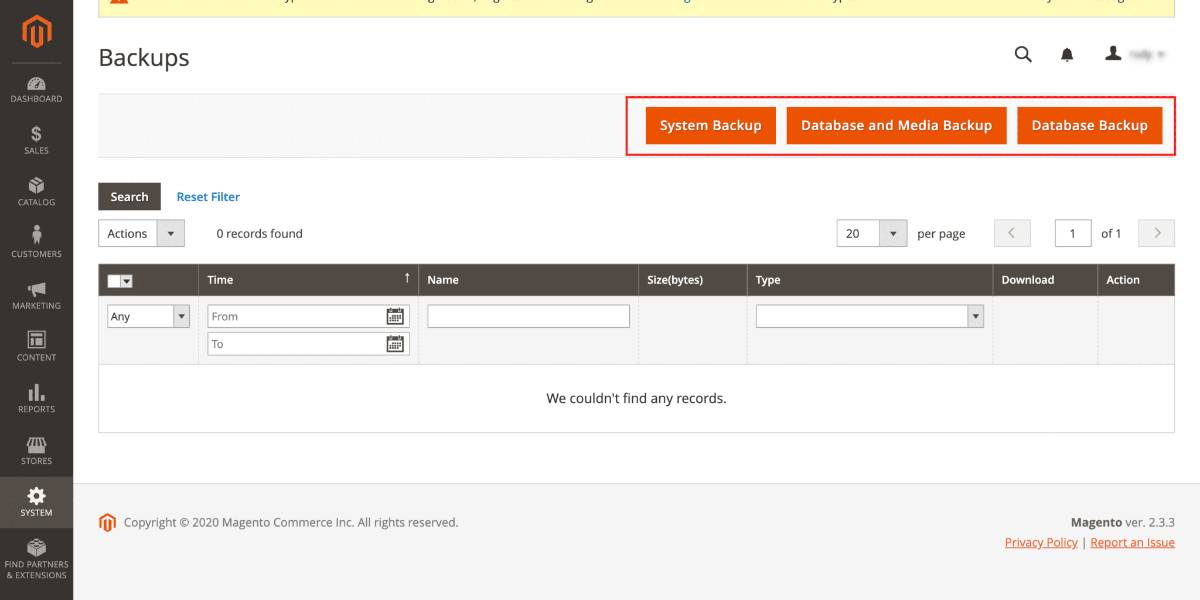
Under the Tools menu, select Backups. This will lead you to the Backups page, where you may examine backup records.
Then you have three alternatives to select from, depending on the sort of data you wish to backup. Select one of the buttons below.
- System Backup: Generates a backup of the database and file systems. You can include or exclude the media file from the backup as you see necessary.
- Database and Media Backup: Makes a backup of the database and media folders exclusively.
- Database Backup: This function creates a backup of only the database.
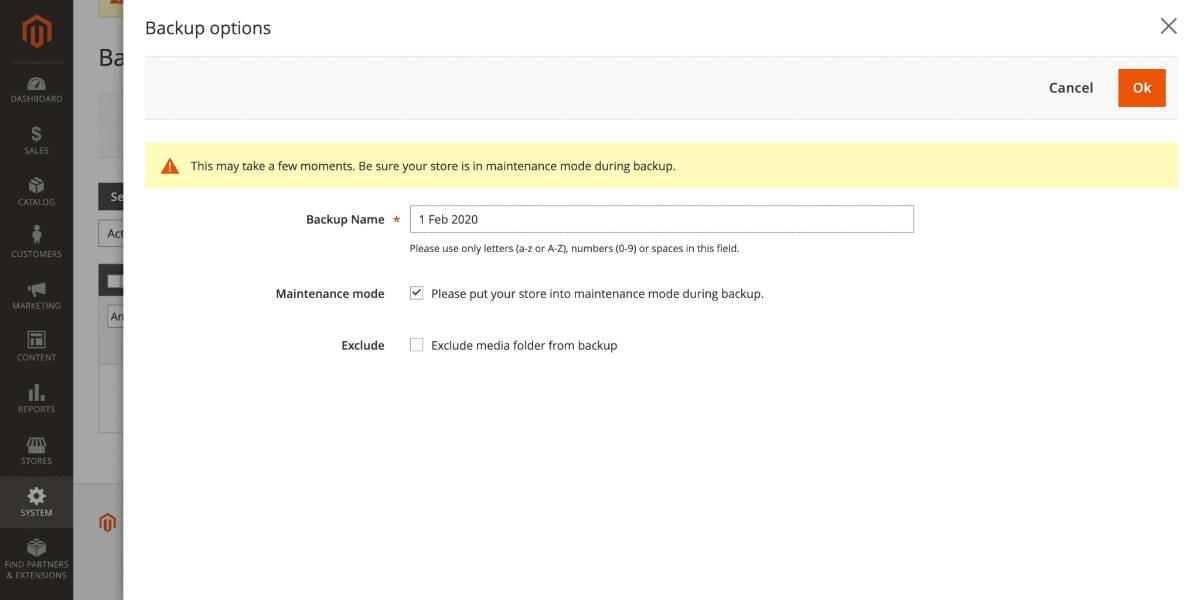
While backing up your store, ensure that it is in maintenance mode. When the backup begins, select the box to enable Maintenance mode. During the backup process, all clients will get a brief error message alerting them that it is currently unable to make an order. When the backup is finished, the maintenance mode is immediately switched off.
Identify your backup with a Backup Name, which will assist you in organizing and retrieving your backups. This is certainly relevant if you have a large number of backups and data. To make it simpler to discover backups when you need them, we recommend putting a date in the name (in whichever style you feel is suitable). By using the Exclude option, you can exclude the media folder from the backup. After you’ve made your choice, click Ok in the top right corner to proceed.
After you receive updates that the archive is complete, the backup list will display in the table. Backups may be accessed via the Backups page, which lists all previous backups. Before discarding backups, remember that removing an item from the list will also remove the archive file.
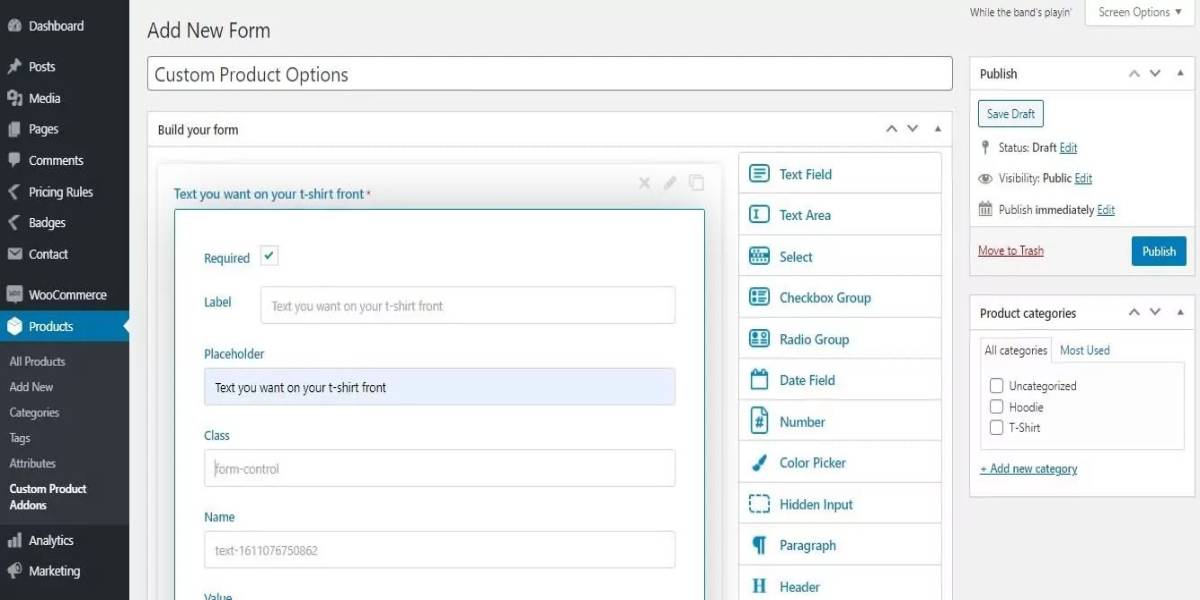
Install and set up WooCommerce
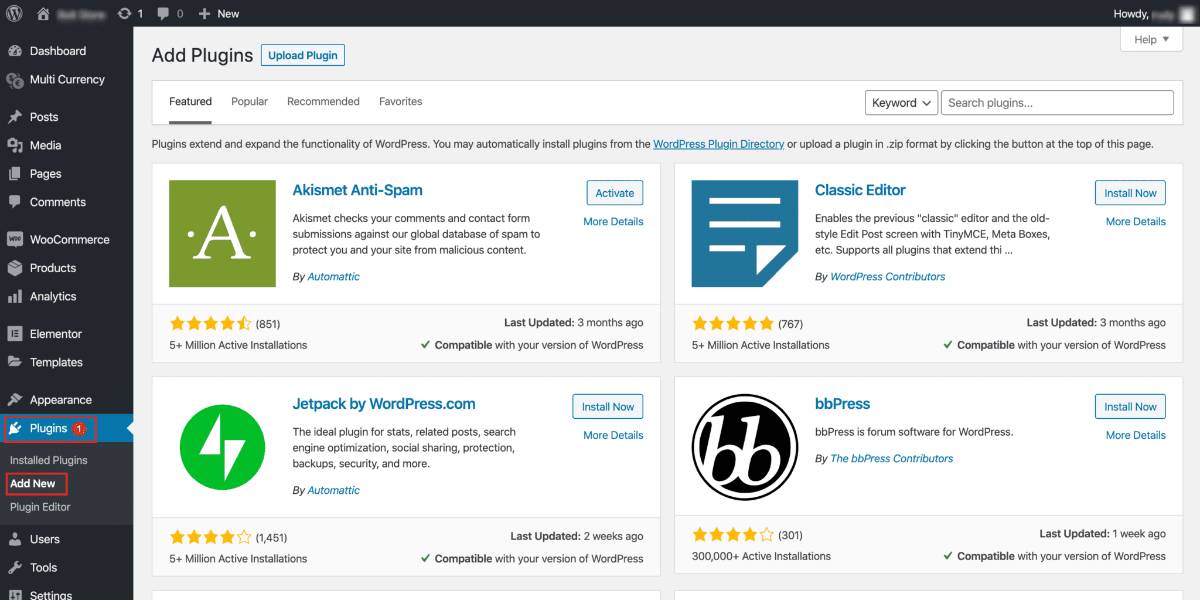
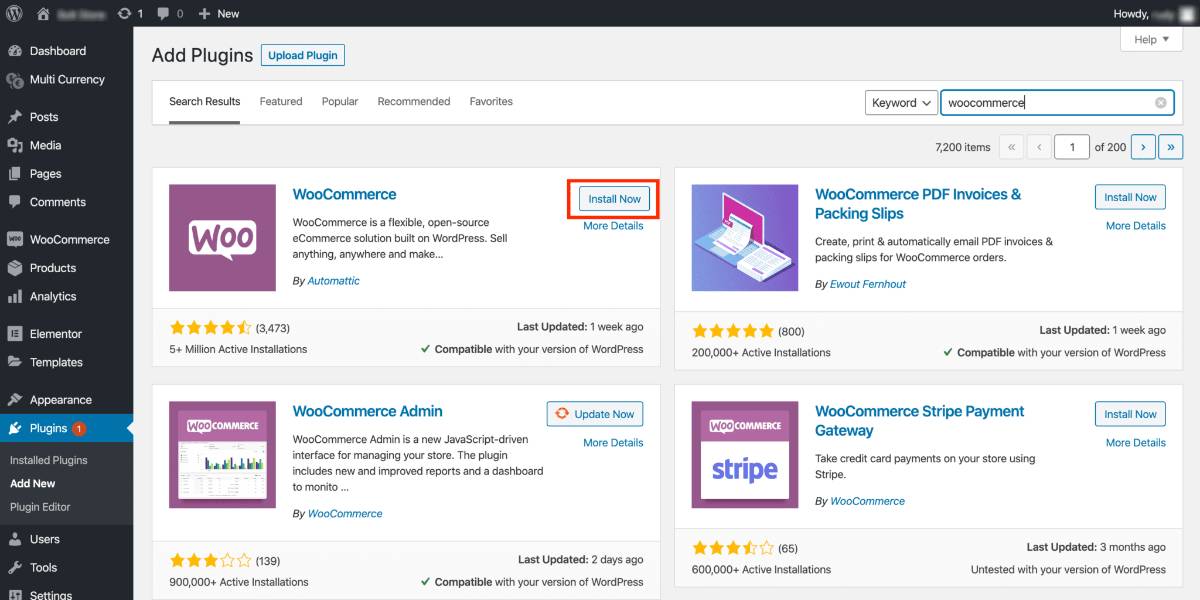
You must first set up your WooCommerce shop before beginning the Magento to WooCommerce migration process. Installing WooCommerce on WordPress is simple and takes relatively little time. Select Plugins in the left column of the WordPress admin panel. Choose the Add New button.
Start a search for “WooCommerce” in the Search box at the top right.
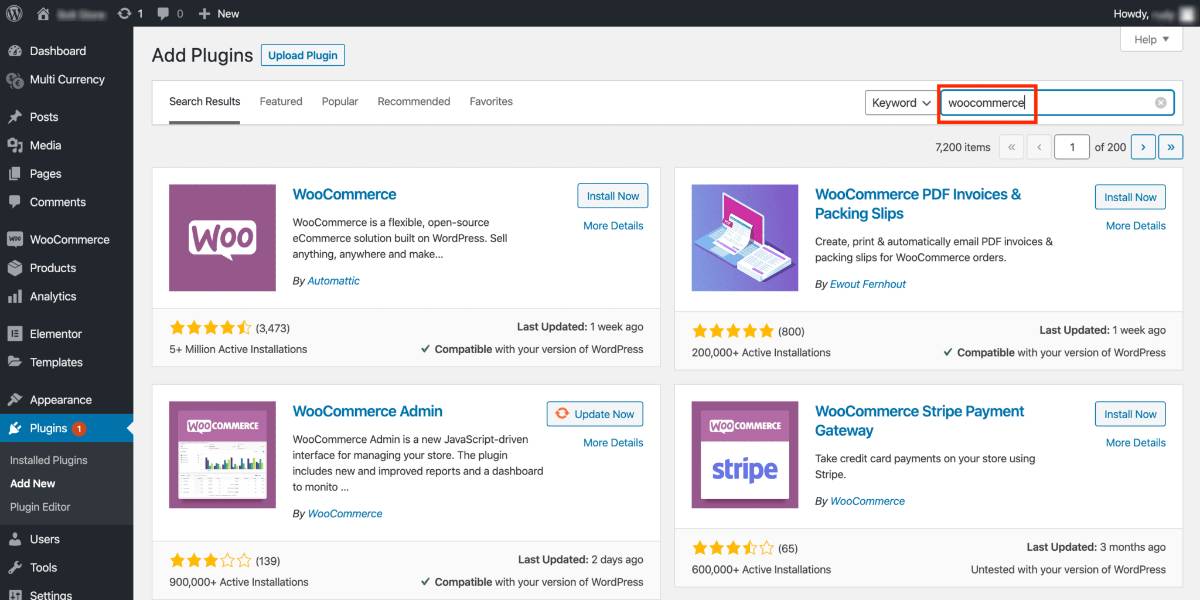
The plugin should be available on the plugins marketplace. Then, click the Install Now button to download and install the WooCommerce plugin.
The plugin will be installed, which will take some time. When the installation is finished, click Activate to activate the plugin.

This will send you to another setup page where you may customize your store’s settings. To correctly set up your store, follow the given steps. After that, you may transfer your Magento data to your WooCommerce store and resume selling on your new site.
How to migrate from Magento to WooCommerce
Now that we’ve set up accounts on both systems and backed up our Adobe Commerce store data, we can decide how to import store data. There are several methods for transferring data from Magento to WooCommerce:
- Migrate store data manually
- Take advantage of a data migration extension.
Method 1: Using the default method supported by WooCommerce
Step 1: Export data from Magento
Magento offers its User Guide for data migration. We’ve gathered the instructions below so you can get started right away and proceed with the rest of the migration. Navigate to the Adobe Commerce admin dashboard. Select System from the sidebar. Click Export under the Data Transfer header.
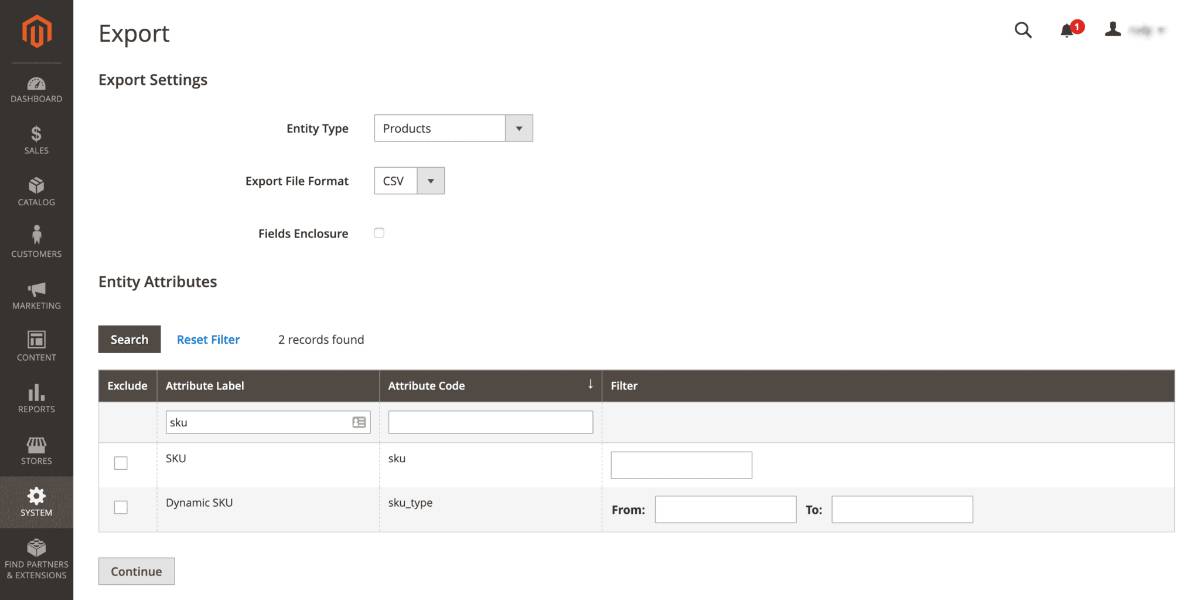
After that, you’ll be sent to the Export Settings area. Set the Entity Type by selecting one of the options from the drop-down menu:
- “Products”
- “Customers Main File”
- “Customer Addresses”
Choose the default Export File Format for the CSV file. To encapsulate special characters encountered in the data as an escape sequence, click the Fields Enclosure checkbox (so the box is checked).

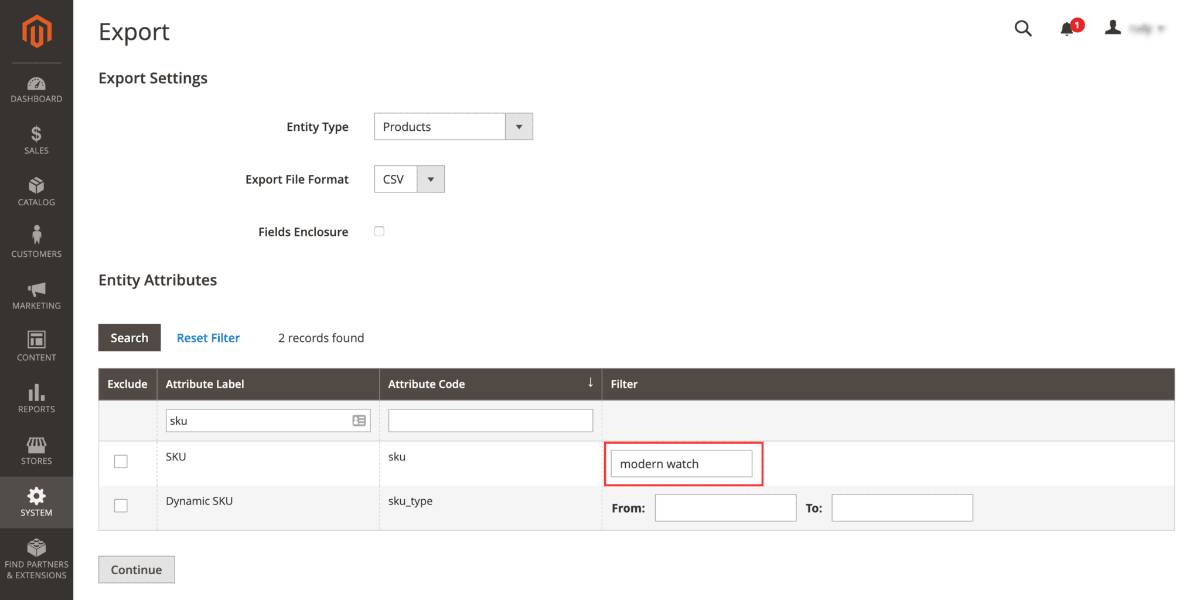
On the Entity Attributes settings panel, you can also change how the entity attributes are displayed. The entity characteristics are sorted alphabetically by default, although they can be reordered. You may sort the list using normal grid controls, or you can manually search for a particular property. It is important to note that the Search and Reset filter choices only affect how the list is displayed and affect the characteristics produced in the file.
Attribution values can also be used to filter exported data. You may export records with particular attribute values by putting the value in the Filter column. Then you may export data that match that attribute value.
Delete variables from the export by selecting the Exclude option at the top of the row you want to remove. Removing the checkbox does not entirely delete that property from the export file since the columns will keep filling. The attribute values in such columns, however, will be empty.
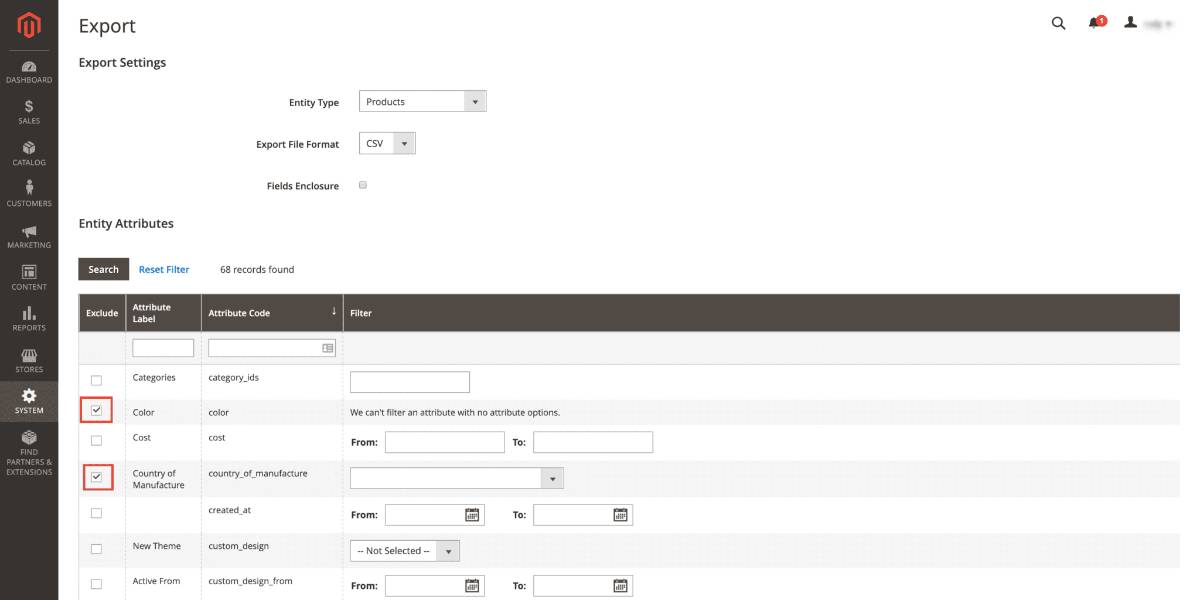
After you’ve made your filtration and exclusion selections, you may proceed by scrolling to the bottom and clicking Continue.
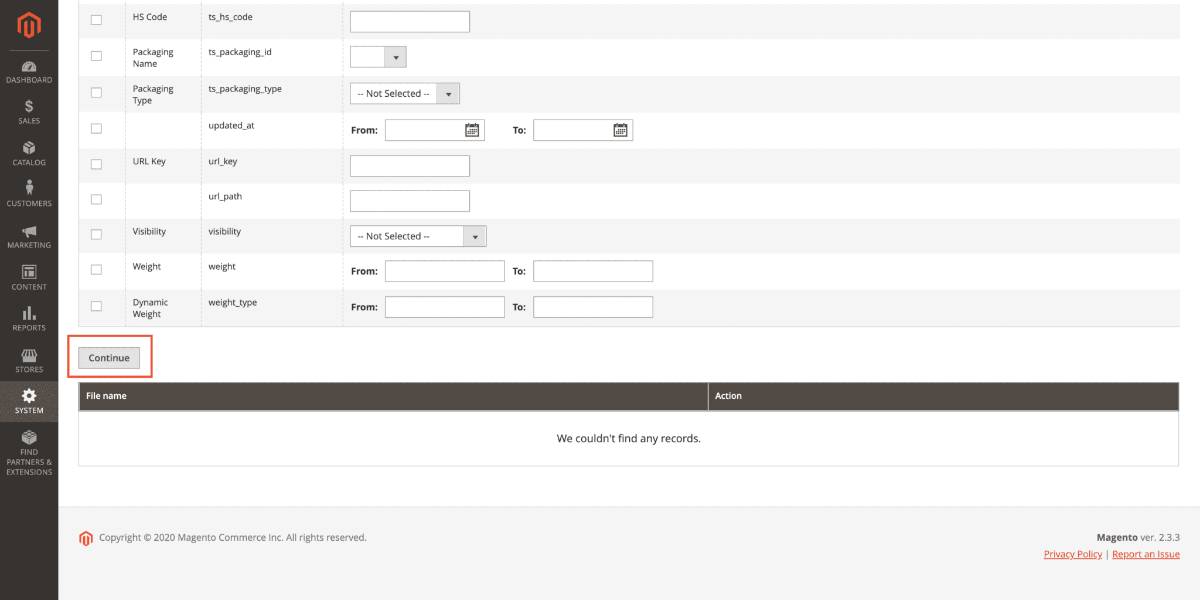
The exported file will be saved in your file explorer’s download folder. To keep it as a spreadsheet, navigate to it in your file explorer. This will allow you to modify the data so that it can be appropriately imported into your shop. Depending on your preferences, the file may be delivered to the email address connected with your Magento account.
Step 2: Import data to WooCommerce
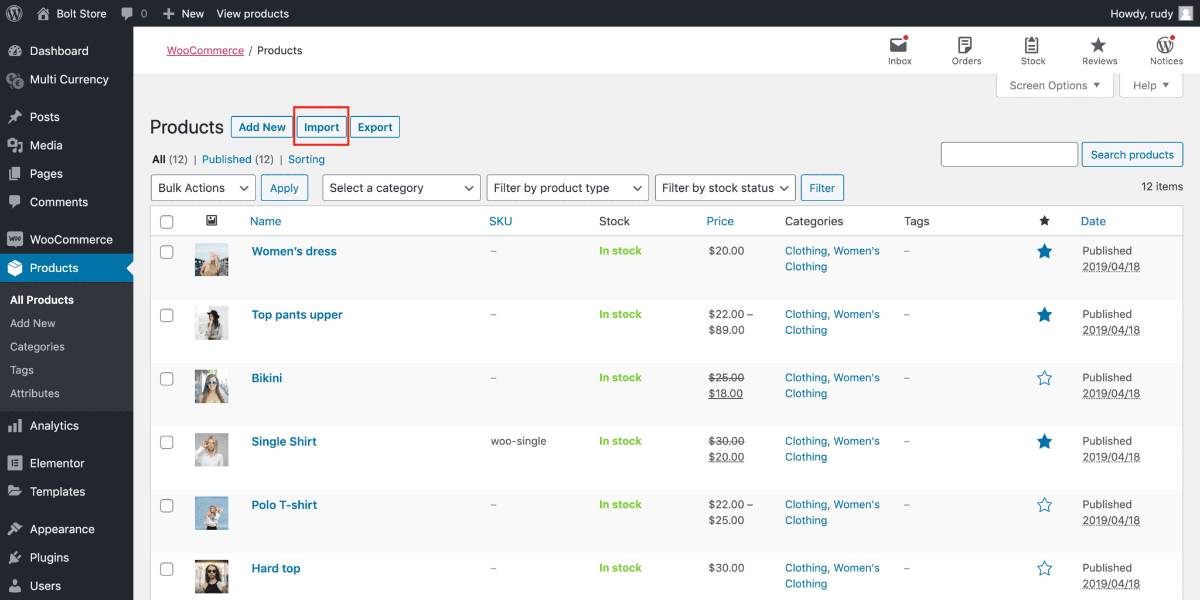
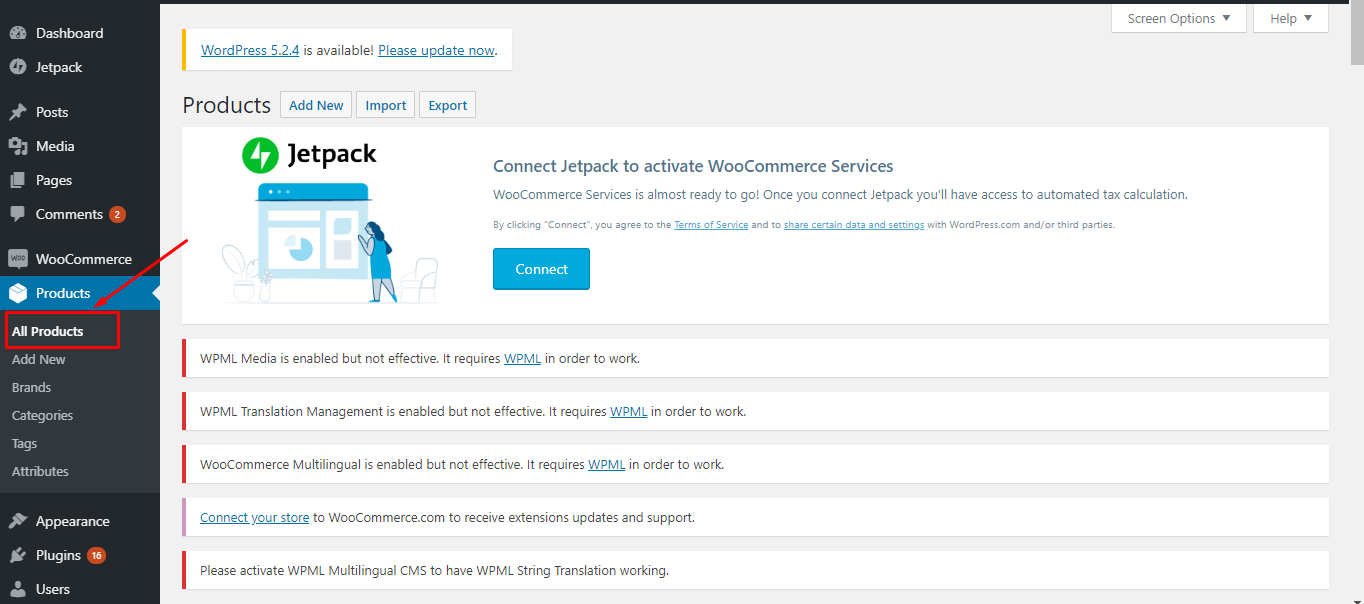
Access your WooCommerce store from the WordPress admin area by clicking WooCommerce on the left panel. Next, select the categories of content you want to import. We will utilize goods to demonstrate the process. To import items, click Products. You must repeat the steps below for each type of material you are importing, such as orders, goods, and customers. Choose the entity type you wish to import and repeat the process for each. Select Import from the top menu. The built-in product CSV importer would then be used to assist you in performing the import efficiently.
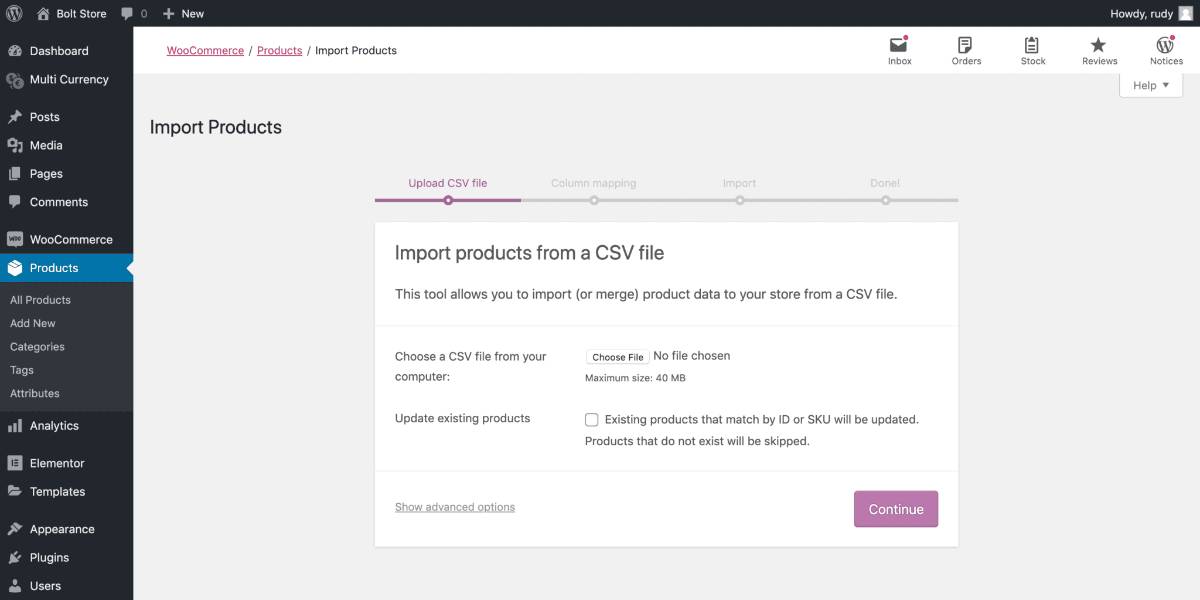
Then, in the window that appears, select Choose File. Choose the CSV file you want to import (in this example, the product CSV file) and continue by clicking Continue.
This takes you to the Column Mapping page. WooCommerce matches the column names based on the CSV file you exported from Adobe Commerce. It would be best to double-check that these columns were successfully loaded and that the data were moved to the correct columns. To manually modify the columns, use the drop-down options to the right of the rows.
Finally, select Run the Importer to begin the import procedure. The import will begin, which may take some time. After the import is complete, you may repeat the process for each data type to be migrated to your new store.

Duplicate the preceding stages for clients and orders.
Method 2: Using the third-party extension
Manually importing and exporting data is a time-consuming, complicated, and difficult procedure at times. Fortunately, there are migration tools that can help you to simplify and speed the conversion process. Often, the entire process may be completed in a few simple stages that are easier to follow than the manual transfer method. Later on, we’ll cover some of the finest Magento to WooCommerce migration applications accessible, so you can compare tools and select an appropriate option.
The automatic shopping cart transfer tool is presently the most advanced way for moving your store from one platform to another. Enter the information from two stores, pick what you want to migrate, and let the program handle the rest. That is how simple it is to transmit data using LitExtension. It allows you to migrate virtually all of your critical data from Magento to Woocommerce, including items, customers, orders, reviews, CMS pages, different languages, and so on. Furthermore, LitExtension provides other migration options, such as transferring client passwords or SEO URLs. Now, let us guide you through the process of migrating with LitExtension!

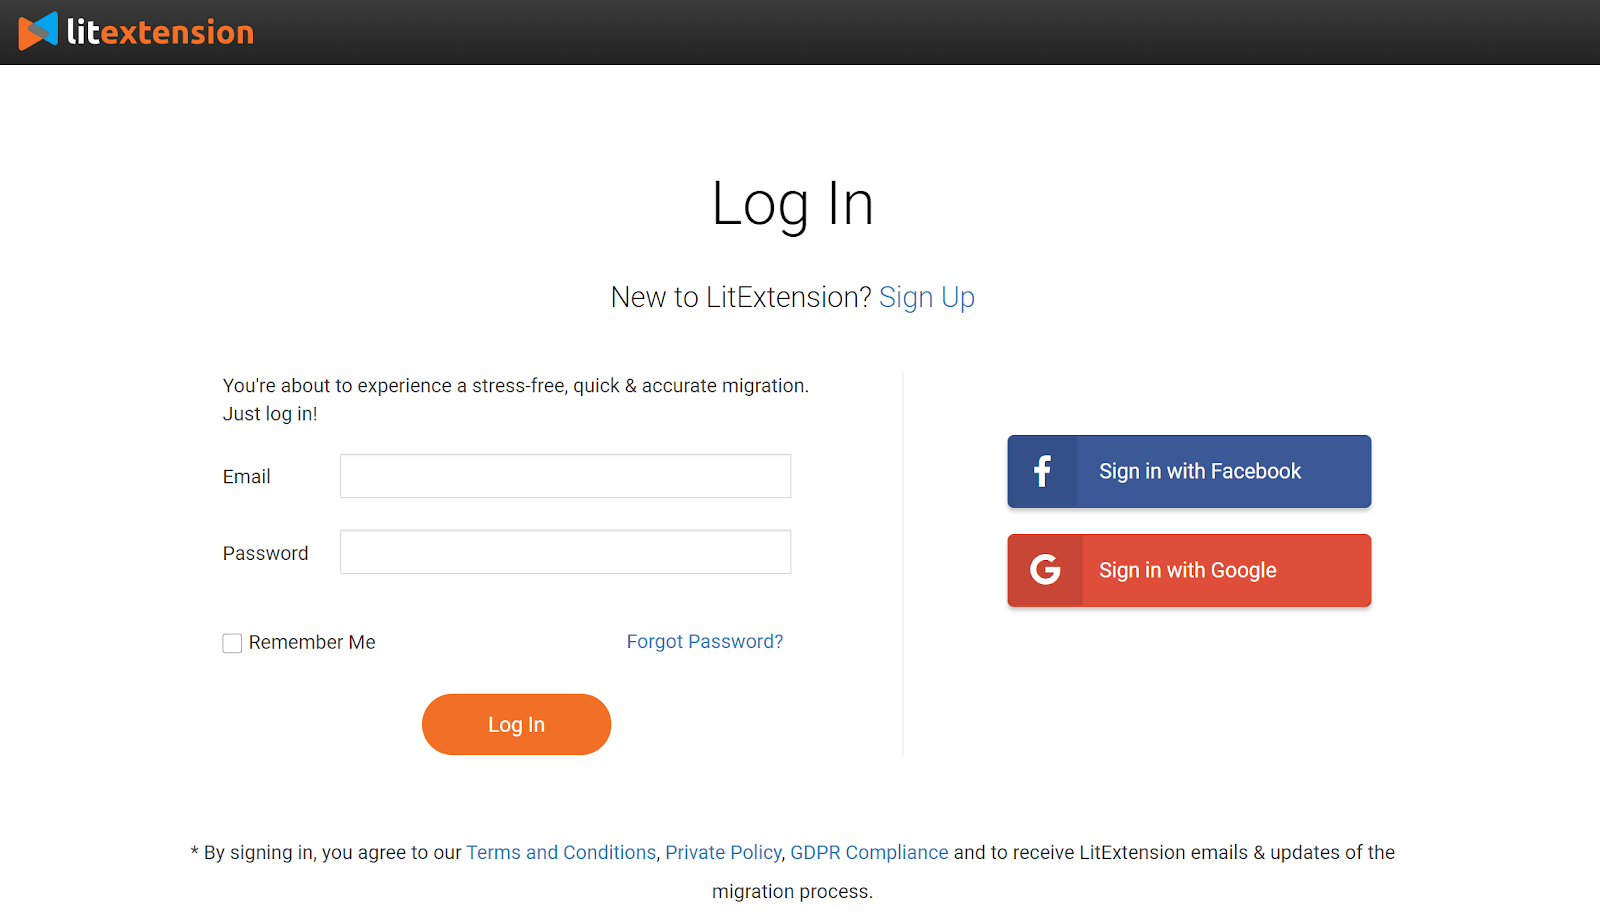
To begin, create an account on the LitExtension website. You may also quickly log in using your current Google or Facebook account.
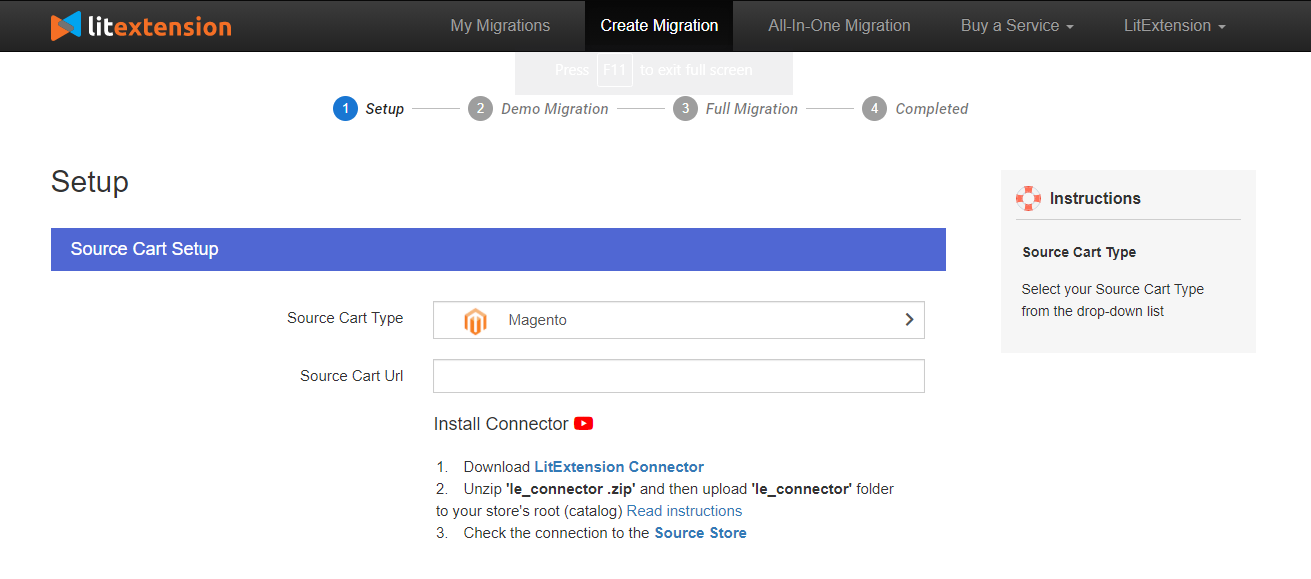
Second, on the Migration Page, click the Create New Migration button in the upper right corner of the page. Select Magento as the Source Cart Type and enter the URL of the source shop into the blank box. Then, select LitExtension Connector to download the connector, compress the zip file, and upload it to the root folder of Source Store.
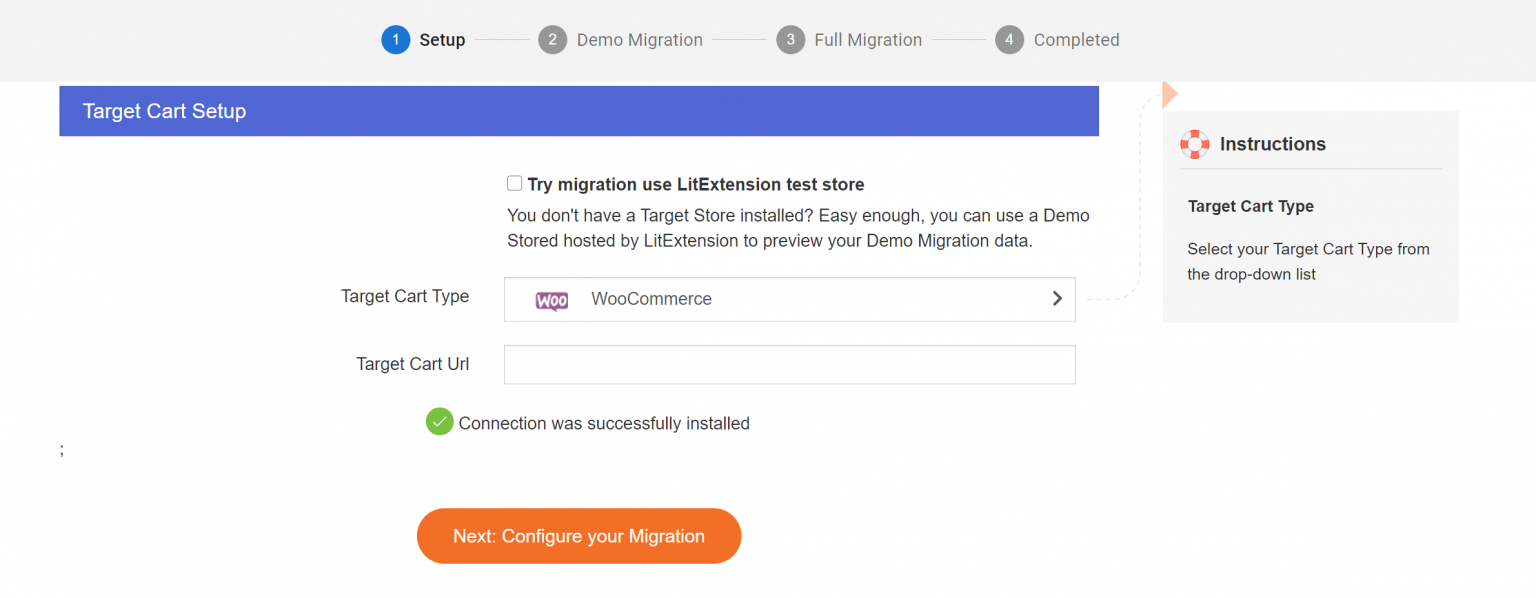
The Connector Installation will also be automatically verified and informed on the screen without user intervention. Repeat the procedure to set up your target store!
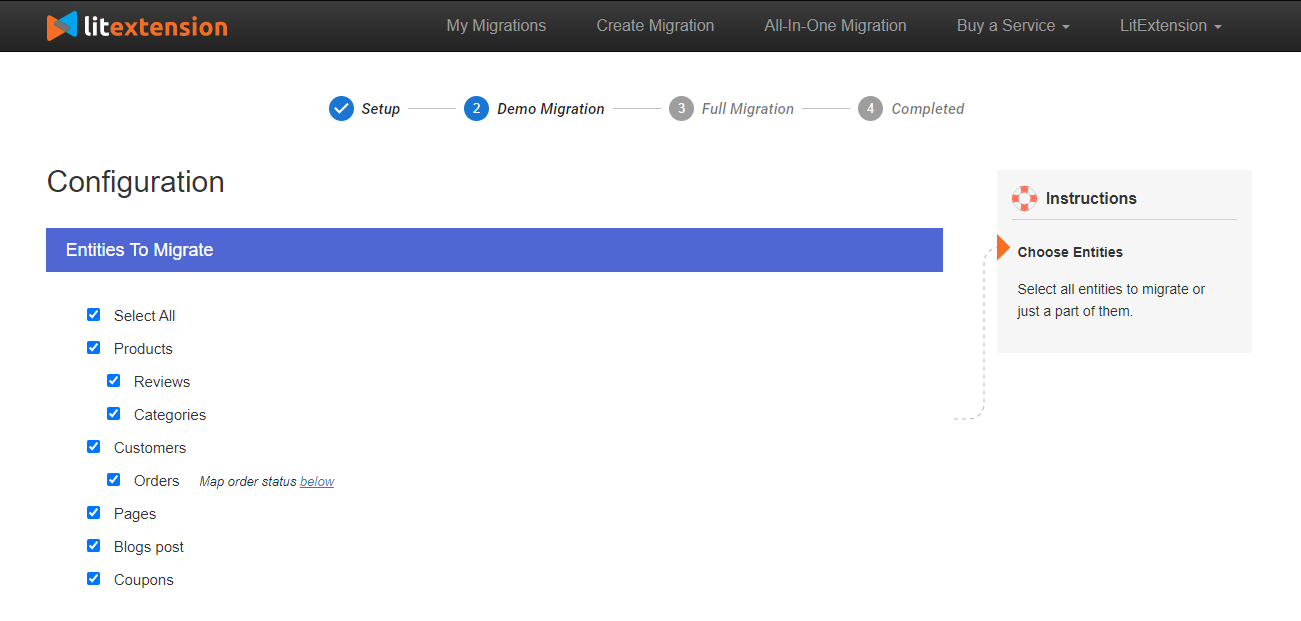
Next, decide which entities you wish to move to. You have the option of selecting all of them at once or specific data. Only Products, Customers, and Orders, for example.
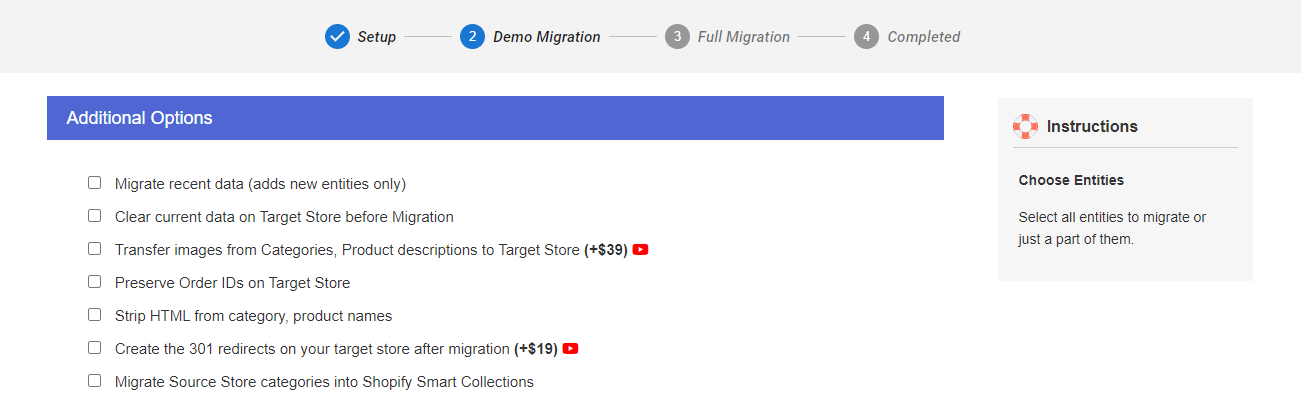
LitExtension additionally contains Additional Options to broaden your migration options. For example, suppose your Magento shop is multilingual, and you wish to move it to your WooCommerce store. LitExtension will take care of it for you.
Finally, you have the option of running a demo first or performing a complete migration right away.
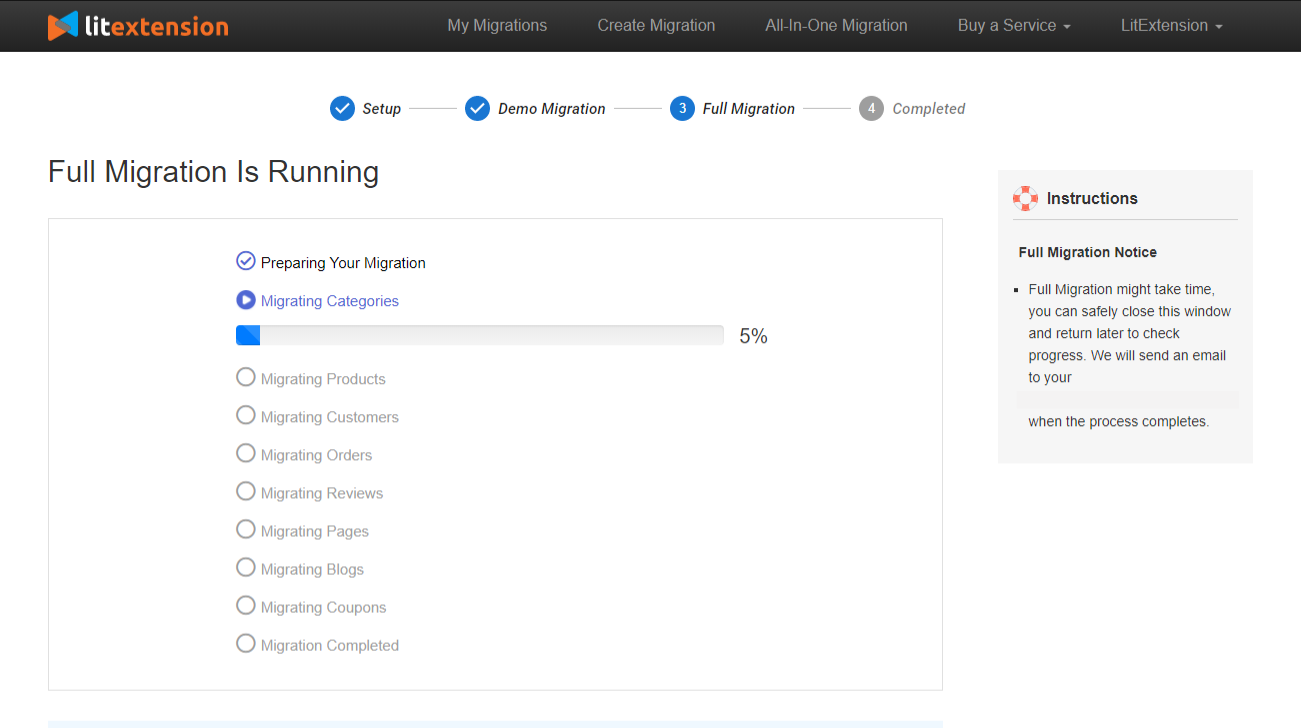
- To Try Demo: Begin your demo migration with a set number of entities. You will witness similar activities as if you were in the middle of a migration.
- To Perform Full Migration: Click the Skip Demo Migration option to complete full migration instantly. Please wait for the migration procedure to complete; you will receive an email from the LitExtension system once the migration is done.
Things to do after the migration
Once again, congratulations! Your migration has been completed successfully. First and foremost, you may want to examine how your new e-store appears right away, followed by a thorough examination of all the goods in both the storefront and the back-end. That is, you should examine the appearance of entities in the catalog, categories, and onsite search. In addition, you must check every link in the menus, header, footer, and inside the pages to ensure that it is operating correctly. Don’t forget to try purchasing your new platform.
However, one of the most common issues that e-store owners have is why their items do not display on the front-end of their new store. Furthermore, due to the differences in the interface and settings of each platform, you must reindex or adjust themes, products, etc., in the back-end to ensure that your store is user-friendly and provides the best experience to clients when they purchase your e-shop. Therefore, follow these particular guidelines below to ensure your online store operates smoothly.
Check data after migration
Once the migration is complete, you must verify that all of the data has been correctly transferred to your WooCommerce shop. Remember to double-check your data in both the WooCommerce backend and the front-end. This shopping cart displays the results of your automatic migration on the storefront without additional intervention. To visit the shop site, simply input the URL of your new store or click the confirmation link in your email.
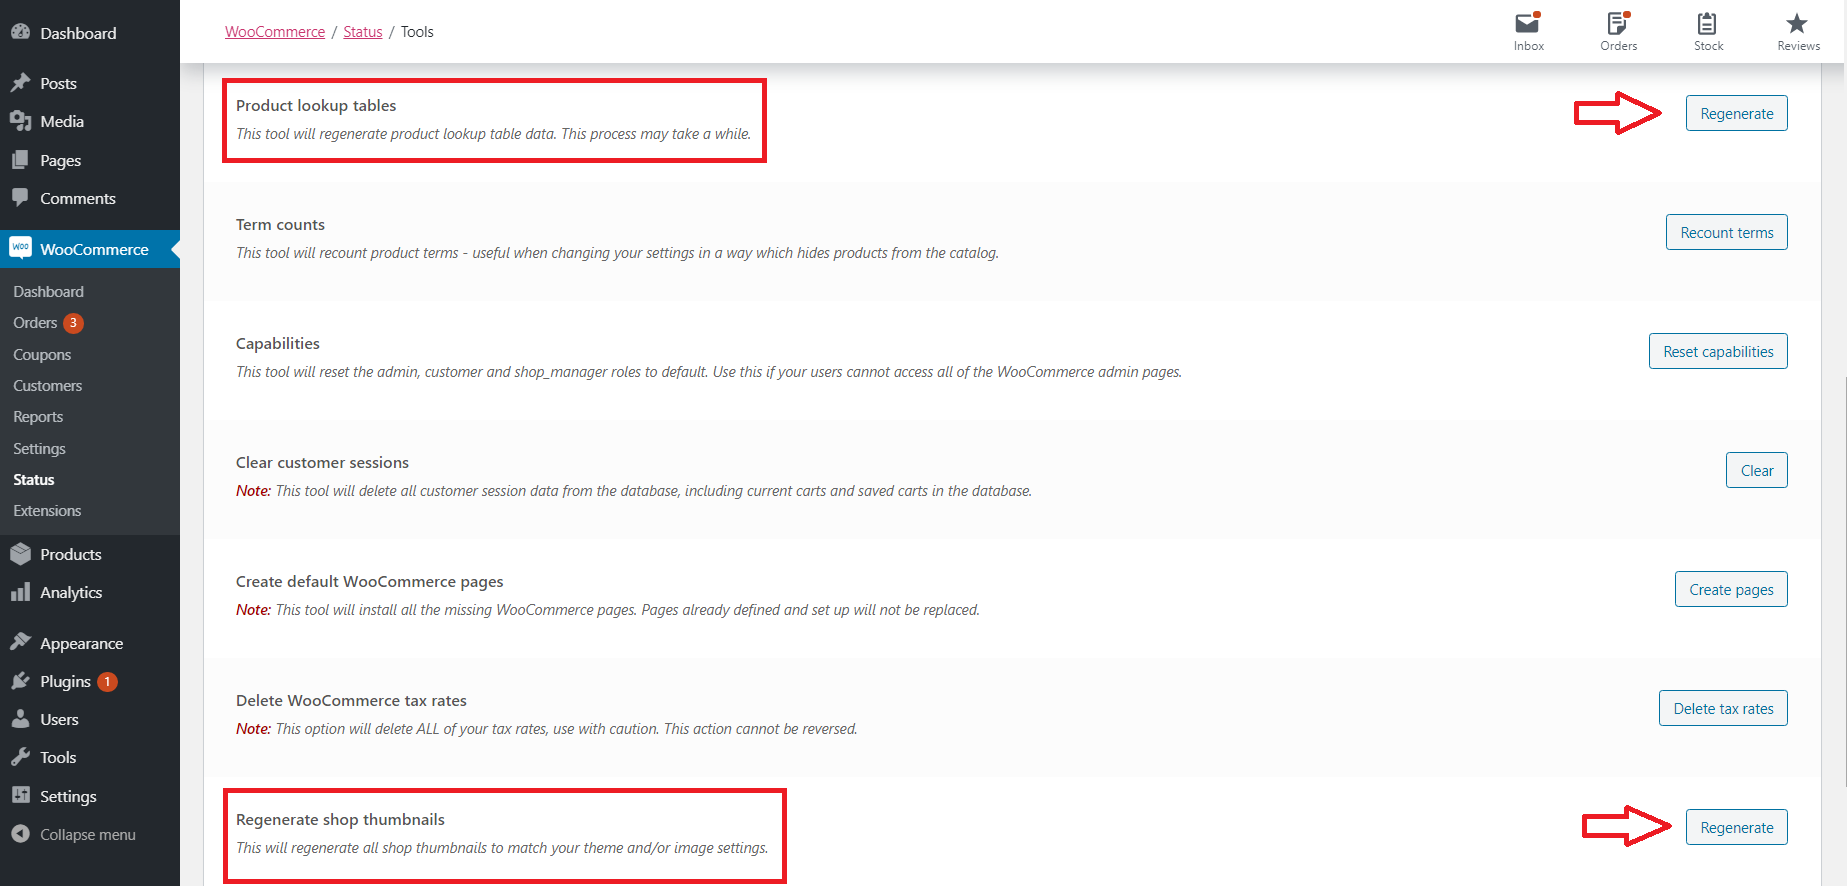
If you’re using a WooCommerce-specific template, the products catalog can serve as your homepage, displaying the imported entities. Then, log in to your WordPress admin dashboard and navigate to the WooCommerce tab to review your data in the back office. To display images on the front-end, you must also enable Generate Thumbnail:
- Log in to your WooCommerce online store.
- Navigate to WooCommerce > Status > Tools > Regenerate.
- Choose the Product lookup tables section > Select Regenerate.
Select theme and additional plugins
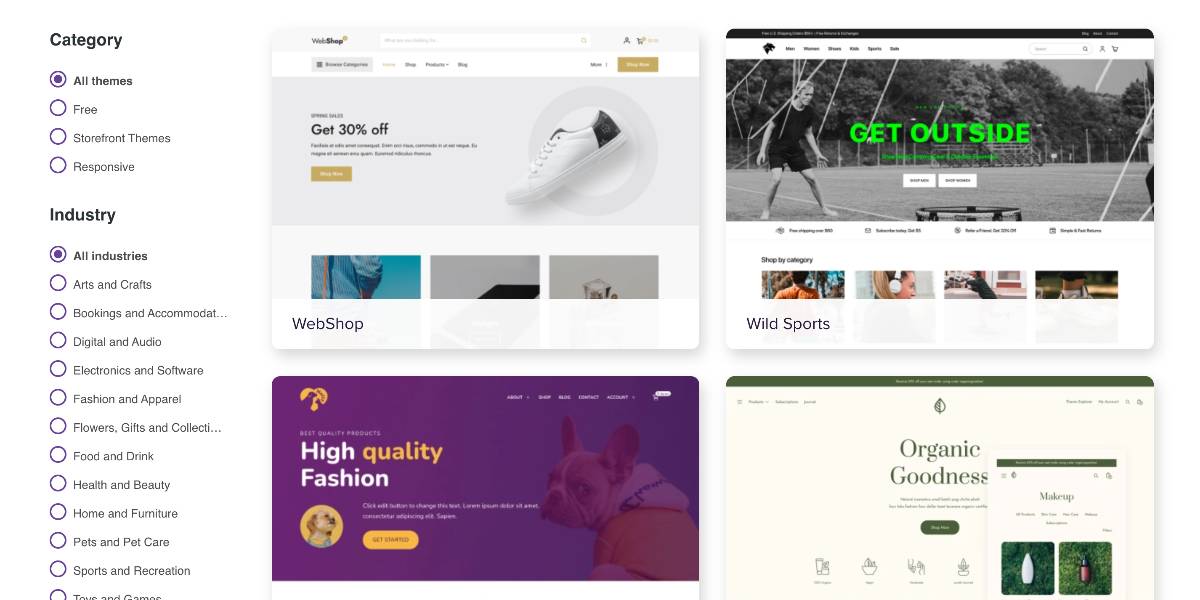
There is currently no effective method to migrate themes from Magento to WooCommerce. You can use a free theme or purchase a new theme from a third party. Fortunately, WooCommerce is compatible with all WordPress themes. This is fantastic news, especially if you’ve already decided on a design and want to stick with it. Then you may go to Themeforest, which is the largest directory of premium WordPress themes on the web, with 48,308 themes and website templates.
The next stage is to add extensions to assist you in improving performance. WordPress is a fantastic eCommerce platform with over 55,000 plugins that enable extensive interaction with WooCommerce. These extensions are simple to install, and there are many more integrations and add-ons available for WooCommerce. Furthermore, you may significantly alter the WordPress core to build new extensions.
Switch domain and change DNS
After a successful Magento to WooCommerce transfer, the next critical step is changing DNS and swapping domains. The Domain Name System (DNS) converts domain names to IP addresses, allowing browsers to access Internet resources. Why do you need to modify your DNS settings? Because your DNS settings function as a link between your custom domain name and the network’s IP address. When you create a custom domain or when the Server’s IP address changes, you must update your DNS settings to refer to the new IP address. Some of these concepts and functionalities may be unfamiliar to you if you are new to eCommerce.
Conclusion
eCommerce is a thriving industry all over the world. eCommerce is dominating the internet business sector, and business owners are reaping the benefits. The eCommerce platform is essential in creating a presence in the digital world. Woocommerce is a powerful eCommerce platform that provides customizable solutions with simple management and many additional helpful variants.
We hope this tutorial will help you understand how to migrate from Magento to WooCommerce. It will be a challenging and time-consuming task. However, keeping in mind that this transformation would be a new peak of your online business!


