How to Set Up Tax Rates Manually on Shopify
Other than the way set up automatic tax rates, you can also use the feature to set up tax rates manually in the United States. Thanks to this, you would be more proactive with Shopify’s tax rates setting. What’s more, you can do things to suit your needs on your own.
Related Posts:
- How to set up tax rates in countries other than the United States on Shopify
- 5 Steps to Set Up Tax-Exempt Customers on Shopify
- How to Set Up Automatic Tax Rates on Shopify
- How to Include Taxes in Product Prices on Shopify
From Shopify, you can take actions to set up tax rates manually easily with the below transparent tutorial.
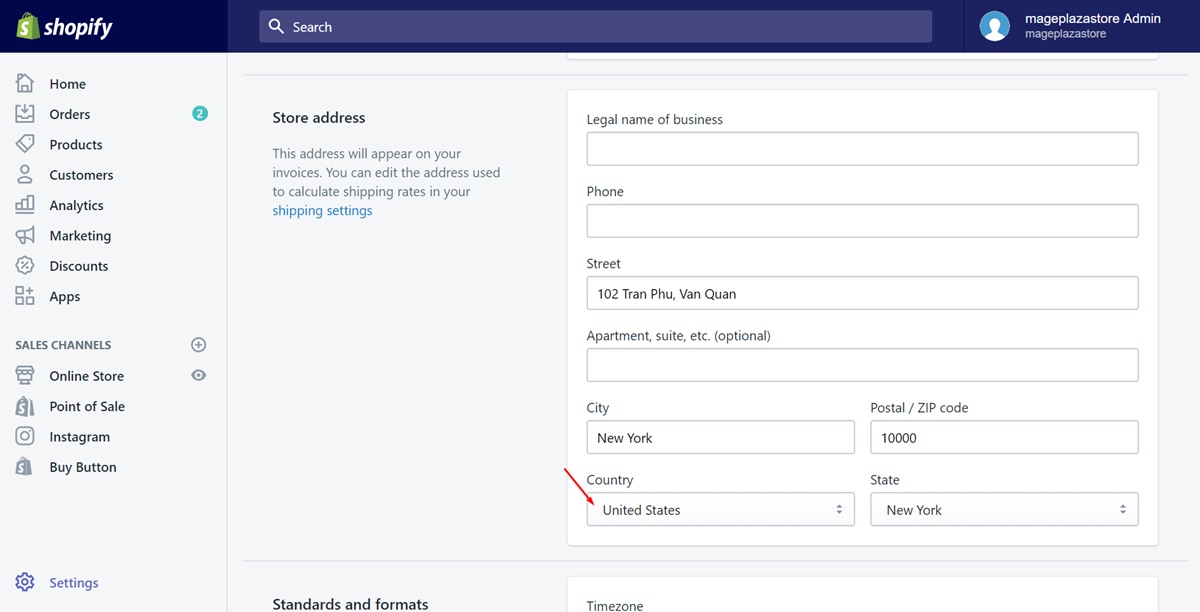
Step 1: Your store address must be in the United States
First and foremost, to set up the tax rates in the United States, you need to make sure your store is based there also. After signing in your Shopify account, go to the Settings button on the admin page and click on General to take a view. If your address is in the United State and you’ve already had a United States shipping zone, keep going to the next step.
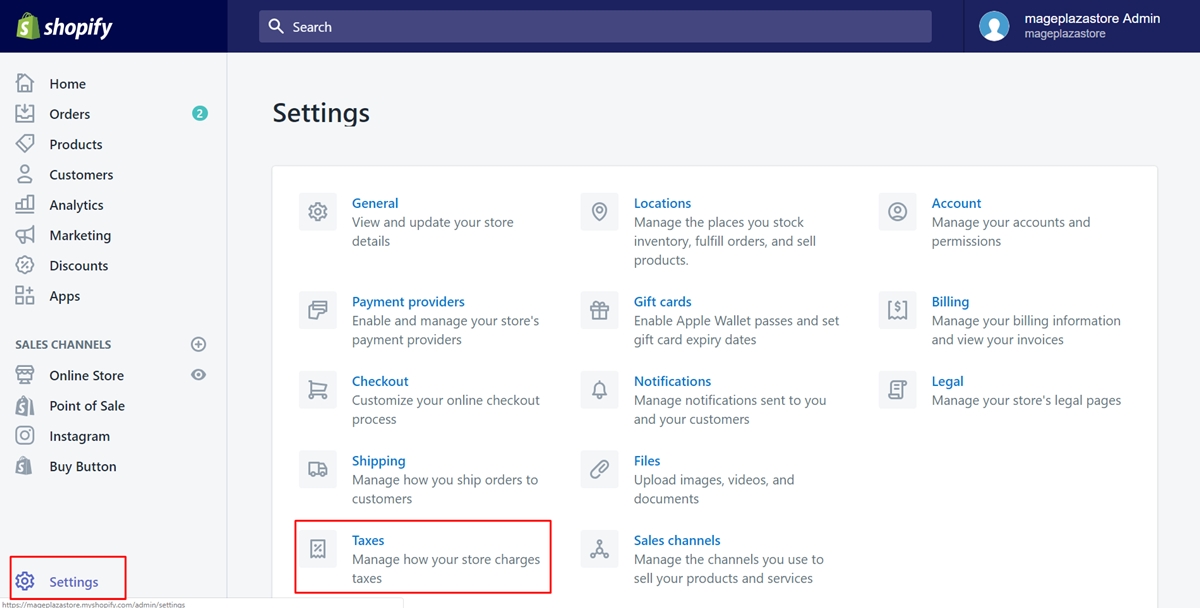
Step 2: Tap on Settings and Taxes
Go back to the admin page and press on Settings again. Then, choose Taxes.
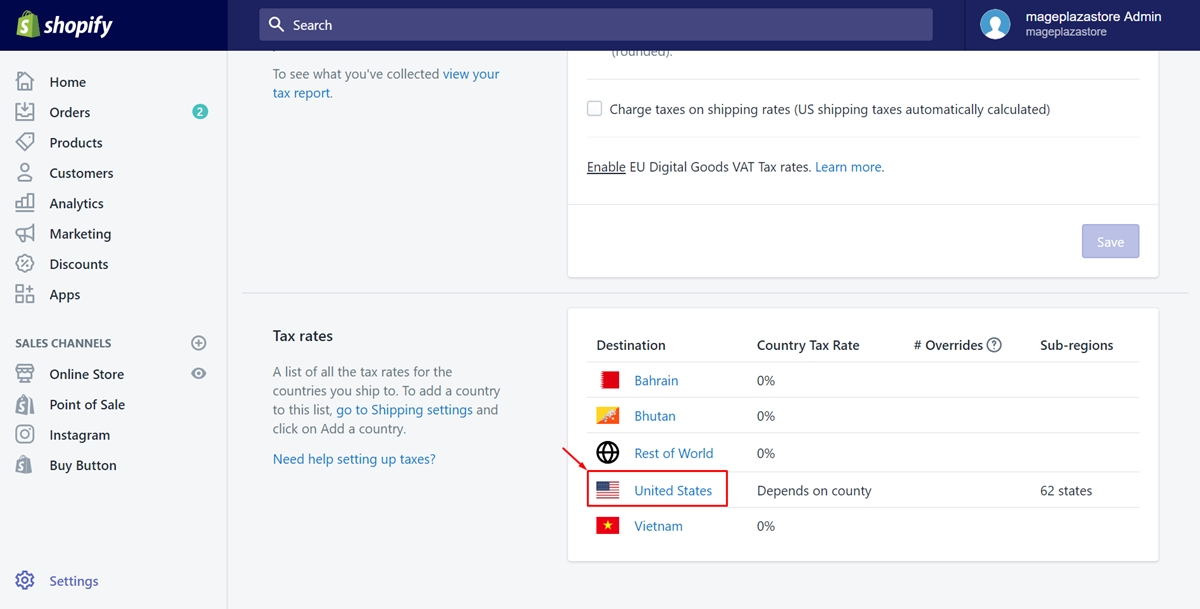
Step 3: Choose United States
The Tax rates field is what you need to look for. After you’ve found it, look at the destination list and click on United States definitely.
Step 4: Uncheck Calculates taxes automatically
You will see the first section coming out is called Calculating taxes. In this step, make sure to uncheck the checkbox Calculates taxes automatically so that the automatic tax rates will be turn off.
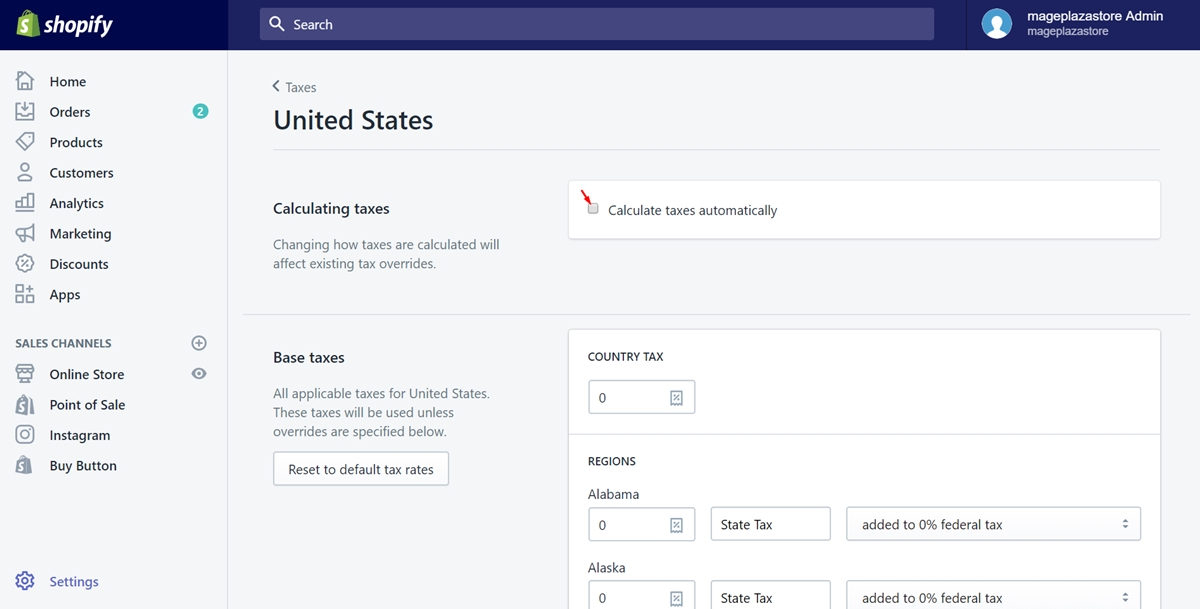
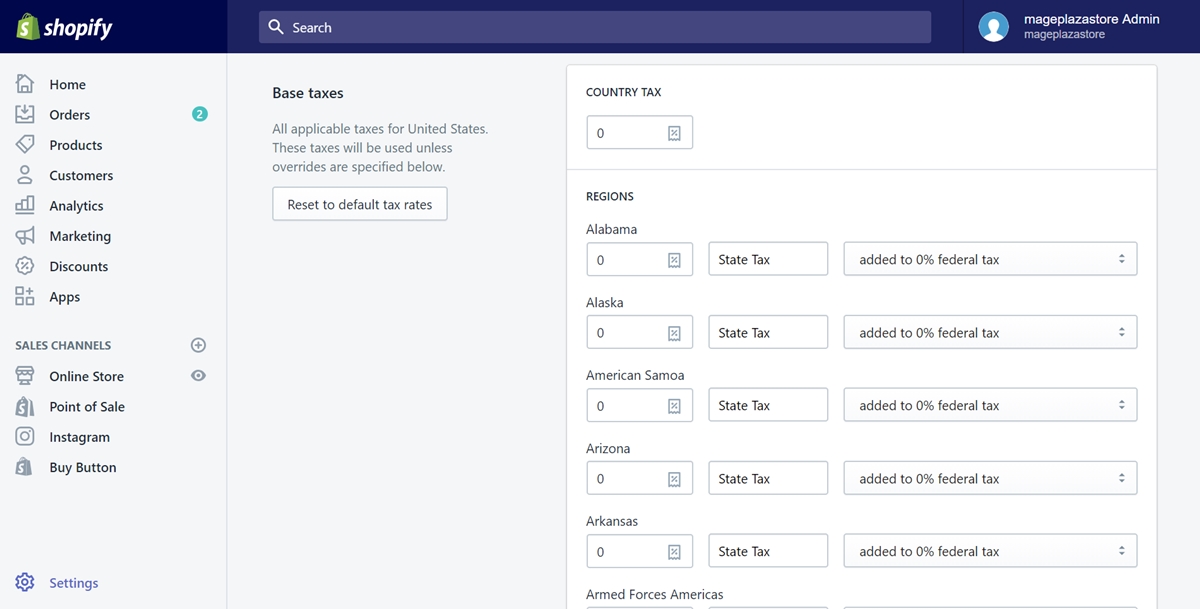
Step 5: Customize the Base taxes section
After you’ve unchecked the Calculates taxes automatically, a section named Base taxes will appear. It allows you to customize all the tax rates of each state in the United States in a manual way. Work with your mind to set the tax rates in the most suitable number.
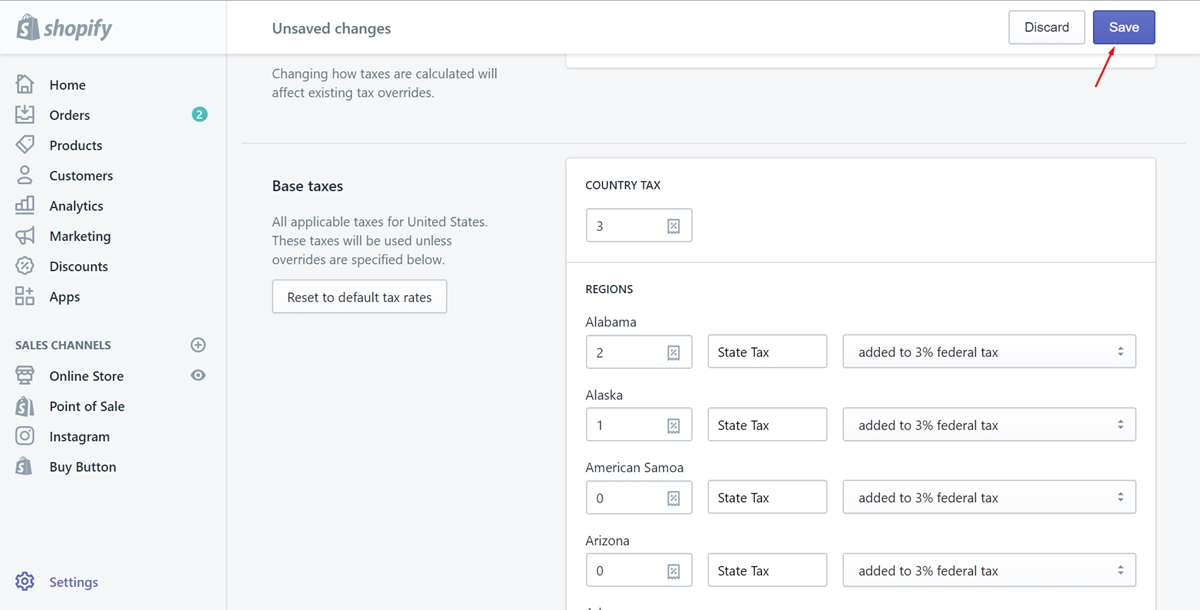
Step 6: Save
When you’ve complete the tax rates you expected, remember to choose Save in the final step,
To set up tax rates manually on iPhone (Click here)
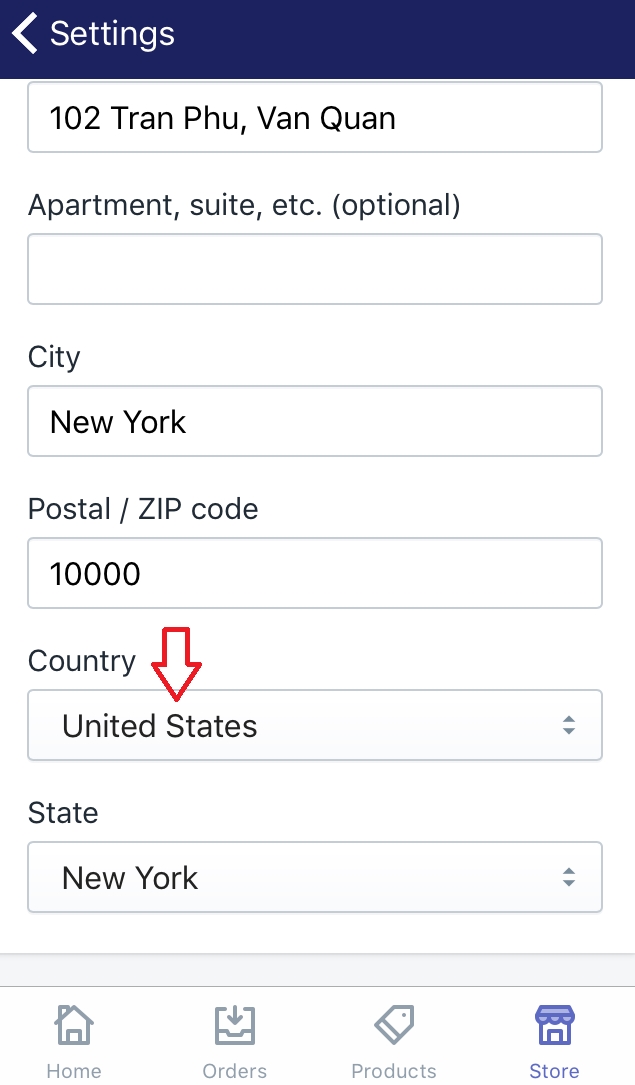
- Step 1: Your store address must be in the United States
First and foremost, to set up the tax rates in the United States, you need to make sure your store is based there also. After signing in your Shopify account, go to theSettingsbutton on the admin page and click onGeneralto take a view. If your address is in the United State and you’ve already had a United States shipping zone, keep going to the next step.
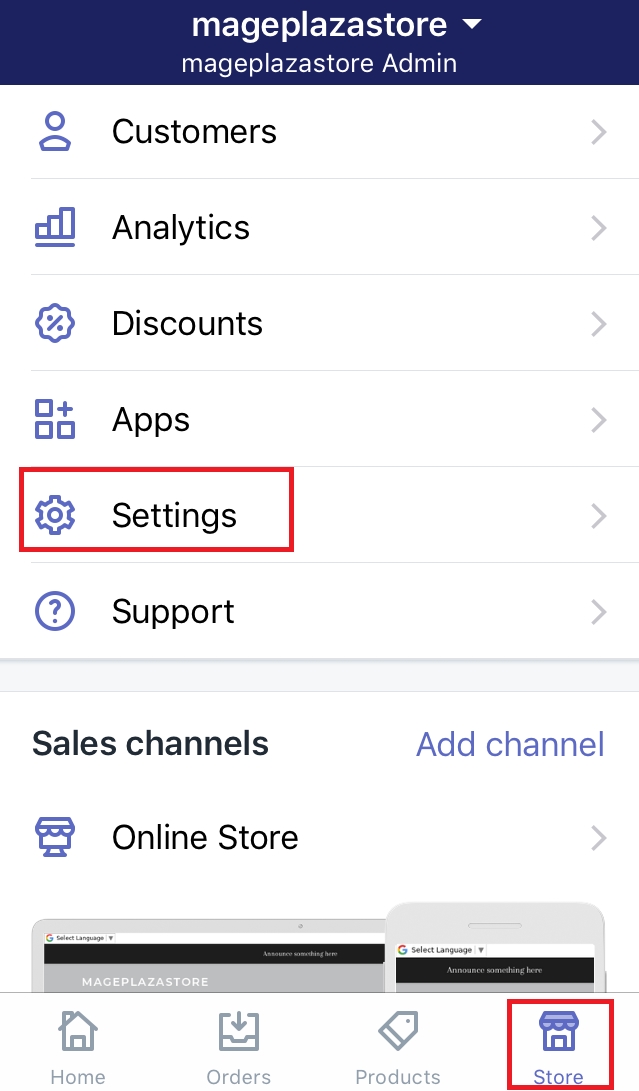
- Step 2: Select Store and Settings
Go back and press on theStoresection in the admin page. Then, go to theSettingsbutton along with a sergeant icon.
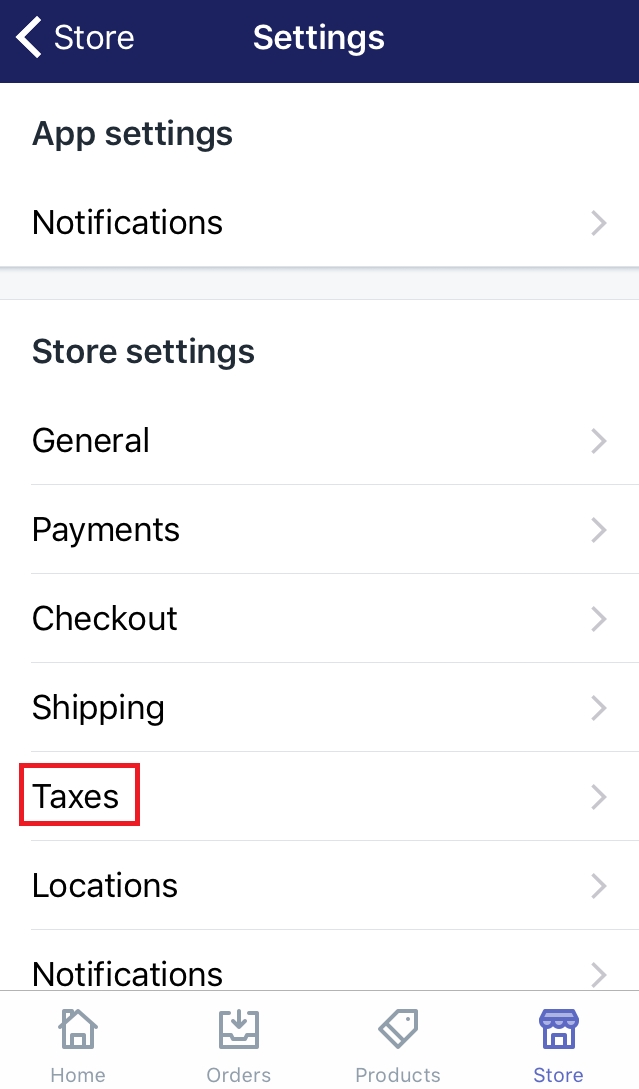
- Step 3: Click Taxes
Take a view ofStore settingsand chooseTaxesunder it.
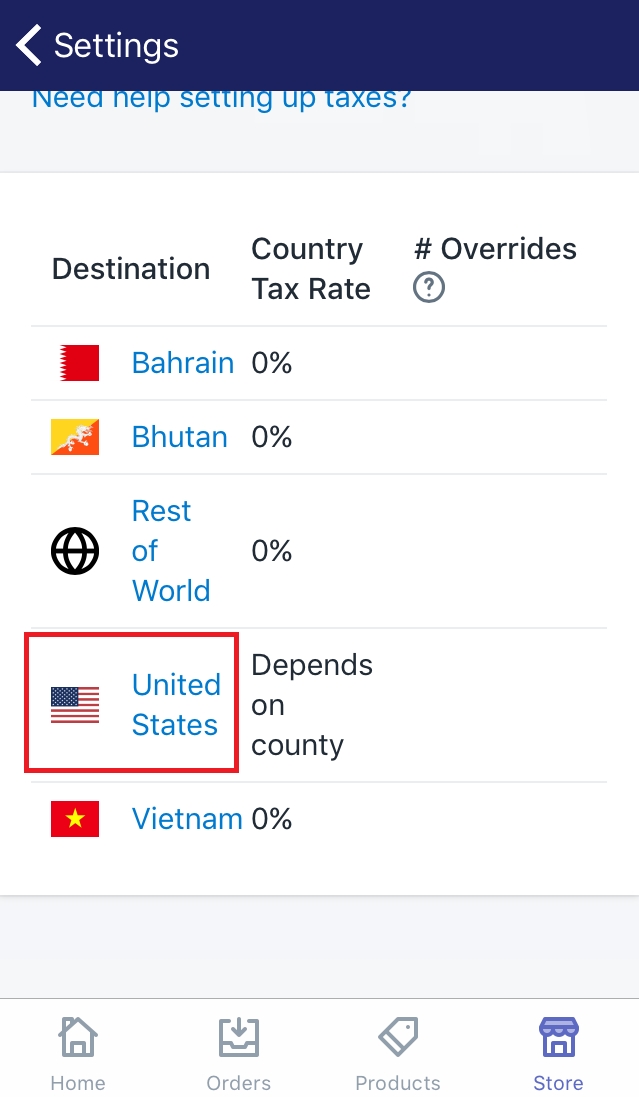
- Step 4: Choose United States
Scroll down to view theTax ratessection. Afterward, a list of all the destinations will show up. Press onUnited Statesin that list.
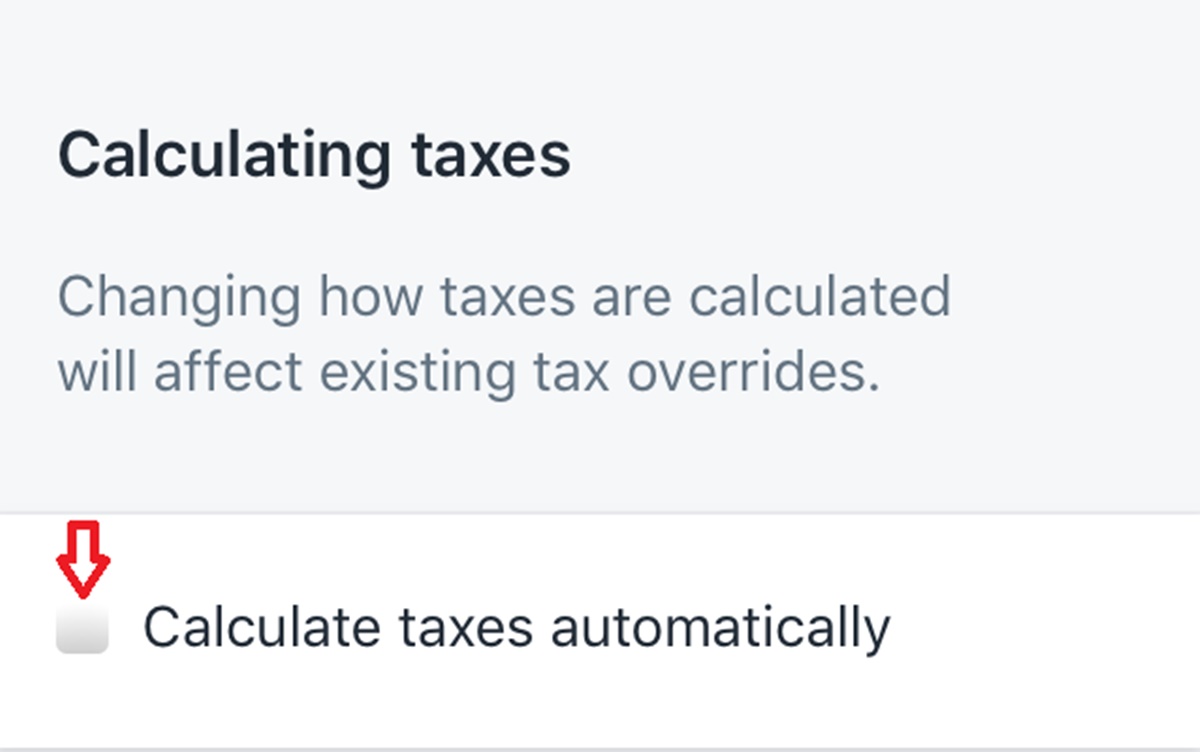
- Step 5: Uncheck the checkbox
In this step, you need to uncheck theCalculate taxes automaticallycheckbox in theCalculating taxessection. It is to dismiss the automatic tax rates.
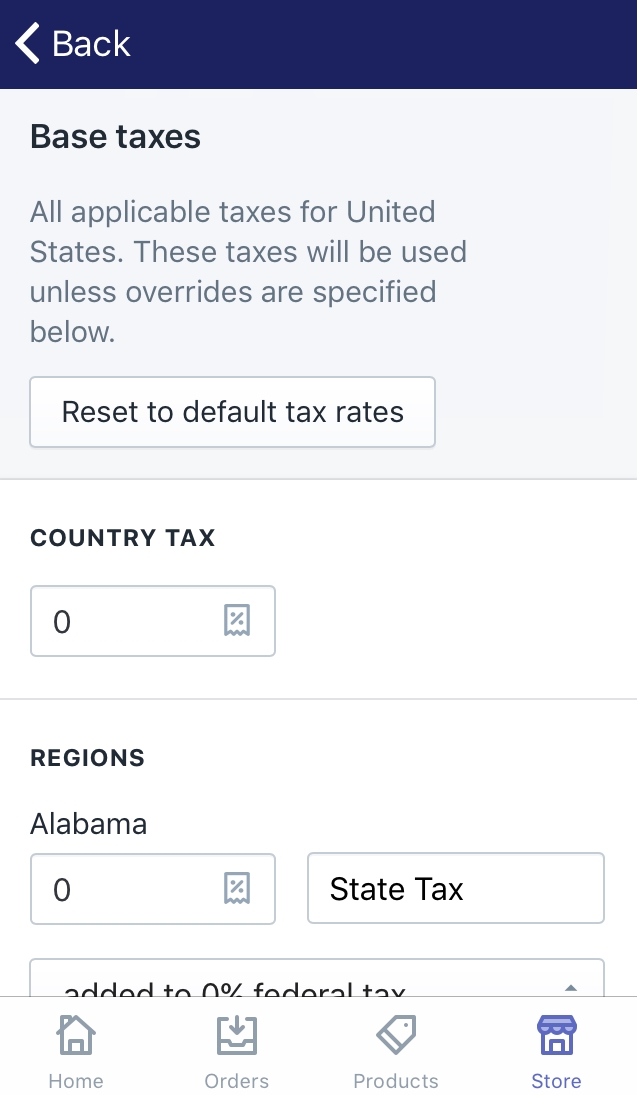
- Step 6: Customize the Base taxes section
After you’ve unchecked theCalculates taxes automatically, a section namedBase taxeswill appear. It allows you to customize all the tax rates of each state in the United States in a manual way. Work with your mind to set the tax rates in the most suitable number.
- Step 7: Save
When you’ve complete the tax rates you expected, remember to scroll down and chooseSaveat the bottom of the page.
To set up tax rates manually on Android (Click here)
-
Step 1: Your store address must be in the United States
First and foremost, to set up the tax rates in the United States, you need to make sure your store is based there also. After signing in your Shopify account, go to theSettingsbutton on the admin page and click onGeneralto take a view. If your address is in the United State and you’ve already had a United States shipping zone, keep going to the next step. -
Step 2: Select Store and Settings
Go back and press on theStoresection in the admin page. Then, go to theSettingsbutton along with a sergeant icon. -
Step 3: Click Taxes
Take a view ofStore settingsand chooseTaxesunder it. -
Step 4: Choose United States
Scroll down to view theTax ratessection. Afterward, a list of all the destinations will show up. Press onUnited Statesin that list. -
Step 5: Uncheck the checkbox
In this step, you need to uncheck theCalculate taxes automaticallycheckbox in theCalculating taxessection. It is to dismiss the automatic tax rates. -
Step 6: Customize the Base taxes section
After you’ve unchecked theCalculates taxes automatically, a section namedBase taxeswill appear. It allows you to customize all the tax rates of each state in the United States in a manual way. Work with your mind to set the tax rates in the most suitable number. -
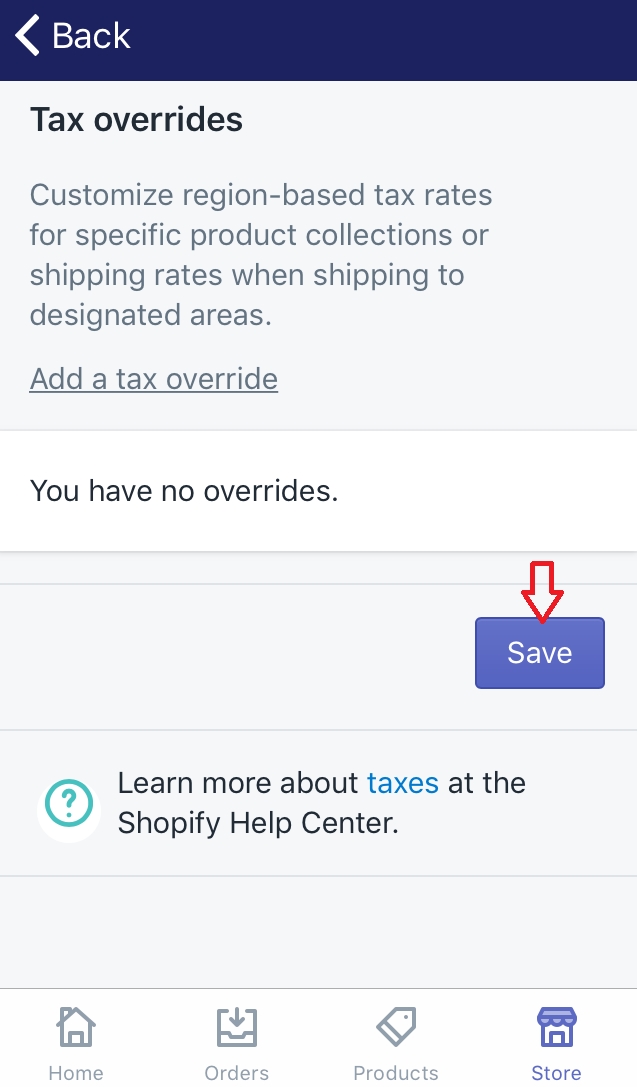
Step 7: Save
Don’t forget to tap onSavewhen you’ve set the tax rates as you expected.
Summary
Above are a few simple steps which you can do on a desktop, iPhone or Android. I’ve made this article more clearly with the images below each step. Hope you find it useful and easy to follow. Read more posts about the tax affairs to know the Shopify better and to avoid some tax setting problem.


