
How to Change Image based on Variant on Shopify

Every shop’s owner wants his customers to have the best buying experience. Selecting variants of items is no exception. You might want your website to show the variant of the product image for the customer to be easy to choose from and consider buying. With this article, we will give you detailed instructions to change images based on Variant on Shopify.
Let’s get started!
Why do you need to change images based on Variant on Shopify?
It is said that the more variation the product has, the longer the buyer will stay. And it seems true. If you are keen on a certain product because of its style, it will be more attractive if the shop’s owner has more options such as size, color, pattern,… for this product. When having more options to consider, the buyer will want to stick to your website longer.
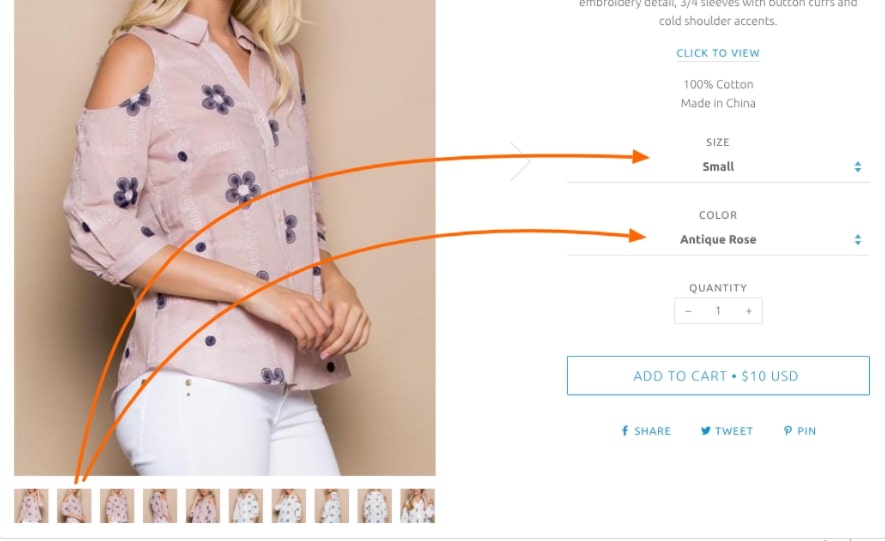
So here it goes. This customization allows your customers to click on product thumbnails to change your variant options. For example, ticking the second thumbnail has adjusted both the size and color variants:
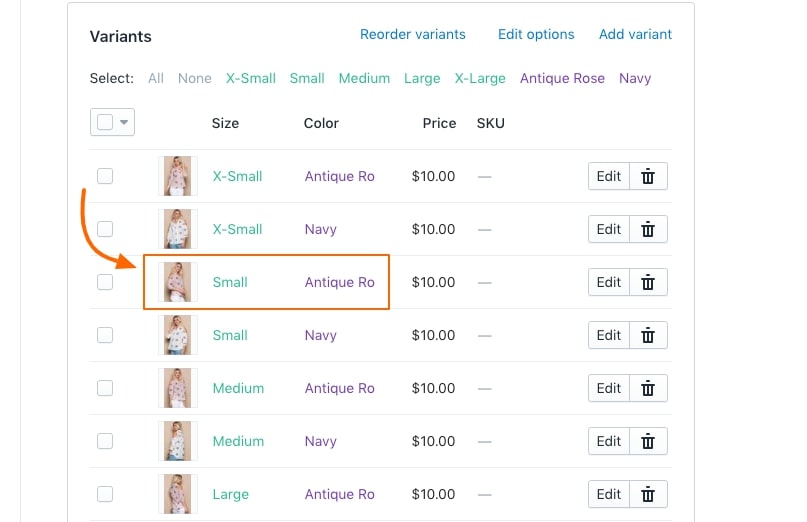
For that to work, you must have an image assigned to all variant options in the product setup. Every option needs to have its unique images for this approach to function. For instance, this offering has 7 images, each unique - One per size and one per color option:
How to change images based on Variant on Shopify
Before beginning, you have to create a duplicate of the theme that you want to choose. This is important and needs such deep focus as we will be adding Javascript to your theme. If there’s an error, your shop will not function correctly. A duplicate/backup is necessary when performing code modifications like this.
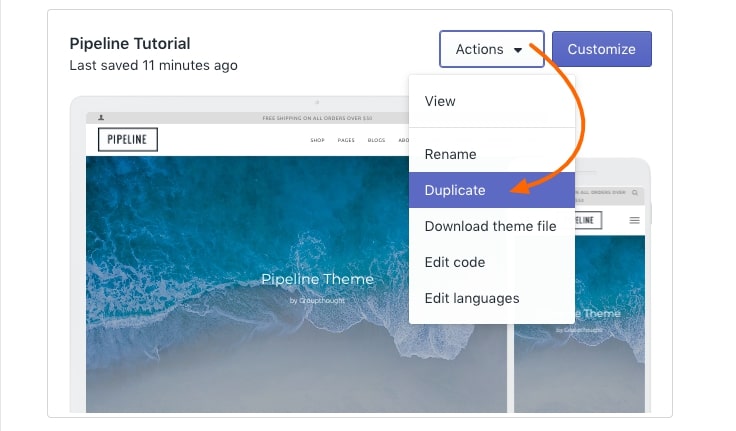
After duplication, it will be easier for you to recognize the backup theme if you rename it. If you’re working on a draft theme, you can use the Actions menu for that theme in your list.
Now, we will move into significant steps.
Step 1: Go to Online Store
First of all, from your Shopify admin panel, you might choose Online Store.
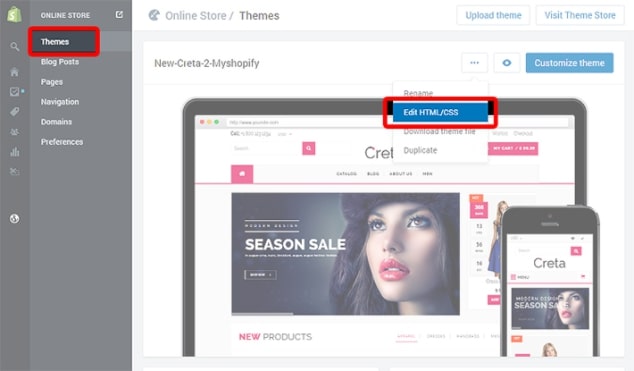
Step 2: Click on Themes
Next step, you find the Themes and click them (or you can press G W T)
Step 3: Click on Edit HTML/CSS
Your screen now will look like this. Then, you choose the “…” button and tick Edit HTML/CSS
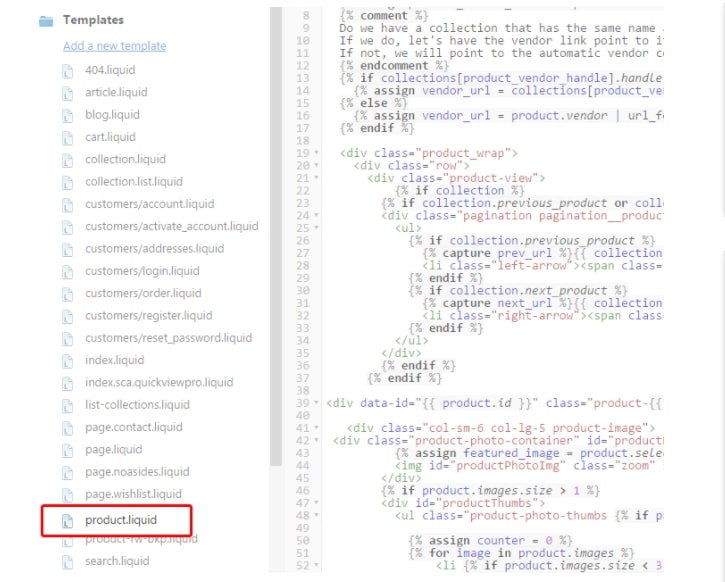
Step 4: Click on product.liquid
Coming to Templates, you might click product.liquid.
Step 5: Copy and paste the code
At this step, you just have to copy and paste the code that you have duplicated at the very end of the product.liquid template.
Step 6: Save the change
Finally, you can click Save, and all the changes you have done will be saved.
Final thought
With all the information above, we have shown you step by step how to change the image based on Variant on Shopify. We hope that you will find it easy to change your product picture variant with this content, hence giving your customer the best buying experience!
Thank you for enjoying this blog!


