
Wix to Shopify Migration: A Comprehensive Guide
By Sam Nguyen

Wix to Shopify Migration: What Data Can You Transfer?
When migrating from Wix to Shopify, knowing which data can be transferred to the new platform is important.
Here are the types of data that you can migrate from Wix to Shopify:
Products:
- Name, SKU, full description
- Meta title, meta description
- Product images
- Quantity, weight
- Product variants (SKU, Weight, Quantity)
Customers:
- First name, Last name, email
- Customer billing address
- Customer shipping address
Domain:
Wix domain name
What Data You Cannot Transfer Directly from Wix to Shopify?
While most of the data can be transferred from Wix to Shopify, there are still a few limitations on what you can migrate directly to Shopify from Wix.
Here are some of the data that cannot be transferred directly from Wix to Shopify:
- Custom code and scripts
- Wix apps
- Wix SEO settings
- Customer reviews
- Product Categories:
- Name
- Status
- Orders
- Order data, order status
- Order products (Tax value, Final Price, Name, and SKU).
- SubTotal Price, discount price, tax price, shipping price, total price.
- Coupons
- Name
- Coupon/discount codes
- Coupon from date
- Uses per customer
- Blogs
- Blog posts, Pages
- Title, SEO URLs
- Images
- Comments
Migrating from Wix to Shopify: Step-by-Step Guide
Now that you have identified which data can and cannot be transferred from Wix to Shopify, move on to the step-by-step tutorial for migrating your online store.
Step 1: Back Up Your Wix Store
Before moving your online store to the new platform, it’s essential to back up your Wix online store. This ensures you have all the necessary information if anything goes wrong during the migration process.
Wix has the Site History feature, which automatically creates site revisions every time someone saves or publishes within your Wix store. Here are the steps to follow:
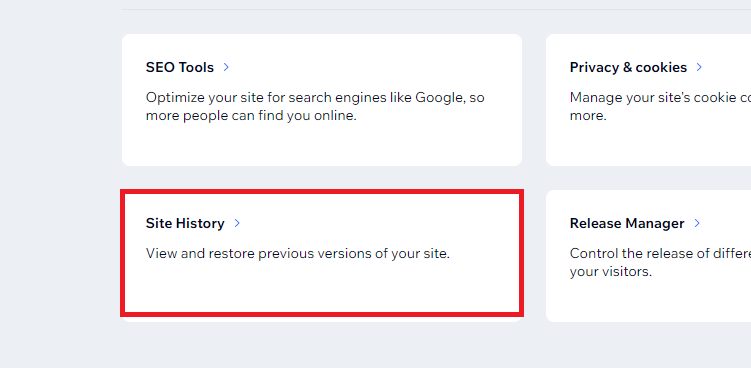
- From your Wix site’s dashboard, scroll down and click Site History.
- Once there, you can browse through your site’s revision history and choose the version you want to download as a backup.
You can also duplicate your site at any time to create a manual backup directly in your Wix account. Here are the steps to follow:
- From your Wix admin dashboard, choose the desired site you want to create a copy for.
- Click Site Actions and select Duplicate Site from the drop-down menu.
- Choose a name for the duplicate site and select Duplicate.
It’s worth noting that the duplicated site is only a snapshot of your store at the time it was created and will not reflect any changes made afterward.
Exclusive Offer: Get Shopify 33 days for just $1 + The Online Store Starter Kit
Start your 3-day free trial, and enjoy your first month of Shopify for 1$ plus the premium package designed especially for new Shopify merchants!
Step 2: Set Up Your Shopify Store
Setting up a Shopify store is crucial in migrating from Wix to Shopify. If you’re new to Shopify, you should first read our comprehensive guide on how to start an online Shopify store here.
If you prefer a shortened version, check out the steps below:
Sign up for a Shopify free trial
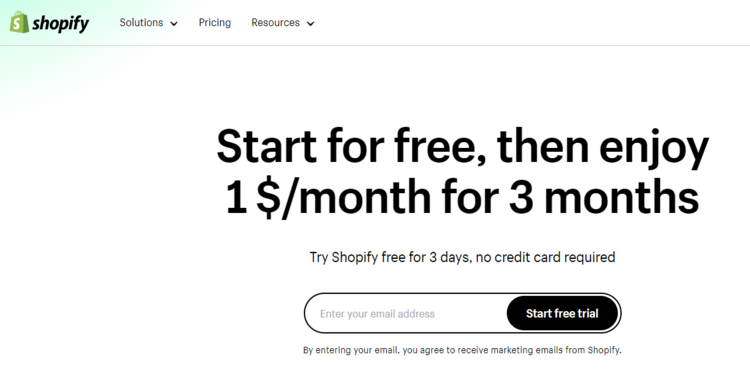
One of the initial steps in setting up a Shopify store is to sign up for a Shopify free trial, which gives you access to all of the premium features available in a paid Shopify plan.
Shopify also offers a 3-month trial period for $1/month after the initial 3-day trial.
Choose a Shopify pricing plan
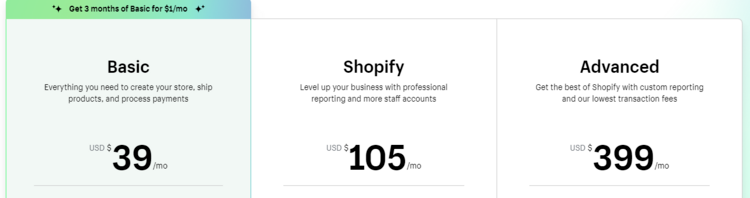
After signing up for the free trial, the next step in setting up a Shopify store is to choose a pricing plan that fits your business needs. Shopify offers five monthly subscription plans, with each tailored to serve specific types of businesses.
Customize Your Shopify Store
Once you have selected a Shopify plan, it’s time to customize your online store. The process involves adding products, creating collections, and selecting a theme. You can also set up your payment options, shipping rules, tax rates, and checkout preferences.
Install Apps
As you cannot migrate your Wix apps directly to Shopify, you will need to find equivalent apps on the Shopify App Store that can provide similar functionalities for your online store.
Step 3: Export Your Wix Data
With your Shopify ready, it’s time to export data from your Wix store. You can export your Wix data to a CSV file, which can be imported into your Shopify store.
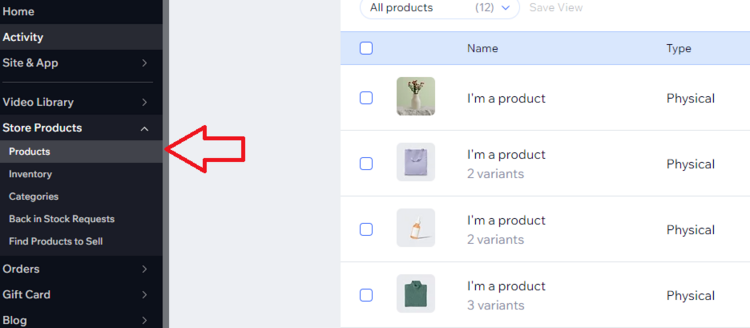
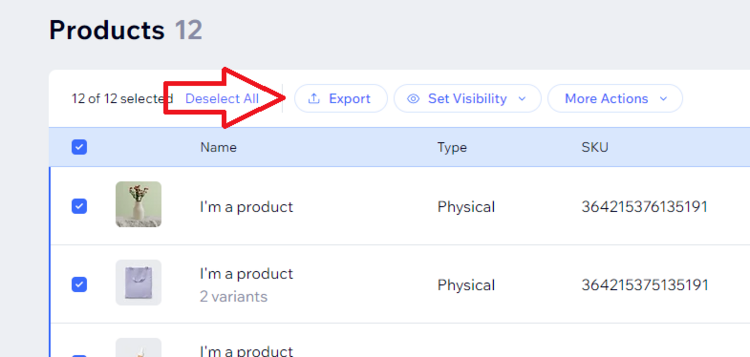
Exporting Product Lists from Wix
You can export your store products and all their data to a CSV file. Here’s how to do it:
From your Wix store’s admin, click Store Products from the left-side menu and select Products from the pull-down menu.
Select what you want to export:
- Export all products: Tick the box at the top left
- Export a category or other filtered products: Hit Filter, select the type of products you wish to export, and click Done.
- Export selected products: Tick the boxes next to the products you want to export.
- Click Export.
Note:
- The above steps only work for exporting physical products from your Wix store.
- You can export up to 5,000 products.
Exporting Orders from Wix
You can export all of your orders to a CSV file directly from your admin dashboard. Here are the steps:
- Select the Orders tab from your Wix admin.
- Select the orders you want to export from the list of all available orders by checking the boxes next to them. You can also choose to export all orders by selecting the box next to Order.
- Click on the Export button
- Now, choose how you want your exported orders to be displayed:
- Item purchased: Each item is displayed in its own row.
- Orders: Each order is displayed in one row, even if multiple items were purchased.

- Uncheck the columns you do not want to include and save the CSV file to your computer.
Exporting Images from Wix
To transfer your Wix store images to your Shopify store, you can download them from the Wix Media Manager to your computer and then upload them to your Shopify store. Here are the detailed steps:
- You can access the Wix Media Manager from your dashboard by typing Media Manager into the search bar.
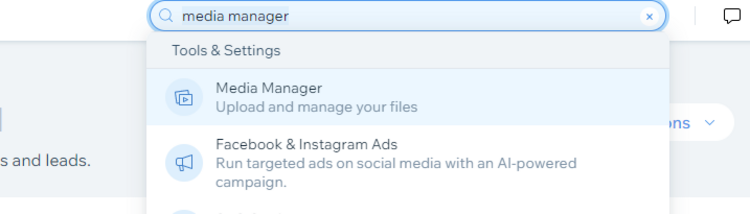
- From here, you should see a list of all media files you have uploaded to your Wix store
- Select the one you want to download to your computer by clicking on the More Actions icon
- Click Download.
- To download multiple media files at once, hold the Command/Control key on your keyboard, select the files, and hit Download.
Exporting Blog Posts from Wix
Wix does not provide a direct export option for blog posts. However, you can save your blog content to Google Drive or any other cloud-based storage service and then upload the content to Shopify.
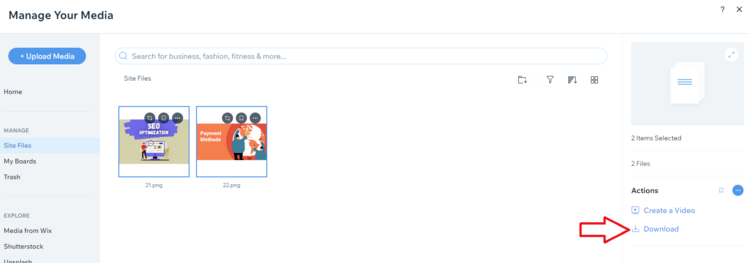
Exporting Contacts from Wix
If you have site contacts in your Wix store, you can export them to a CSV file for use in your Shopify store. Wix allows you to export up to 50,000 contacts, which can be exported individually or as the entire list. Here’s how to do it:
- Select Contacts from your Wix admin.
- Select the checkbox next to the contacts you want to export or select All Contacts.
- Click More Actions, and select Export Contacts
- Select the relevant file format (Regular CSV, Google CSV, and Outlook CSV).
- Click Export and save the file to your computer.
Step 4: Import Data to Shopify
With your Wix data exported and ready, it’s time to move on to the next step of the migration process: importing the data into your new Shopify store.
This process will involve uploading the CSV files you extracted earlier, containing your products, orders, and contacts, into your new store using Shopify’s built-in CSV import feature.
When importing data to your Shopify store, it’s important to remember that Shopify has its own templates for CSV files. Therefore, ensure that your Wix CSV files follow the same format.
It’s also worth noting that the maximum file size for a CSV file is 15 MB. If your file exceeds the size limit, you will need to split it into smaller files before uploading it into Shopify.
Importing Products using a CVS file
- From your Shopify admin, select Products from the left-side menu and click Import.

- Click Add file, then select the CSV file containing the product lists you extracted earlier.
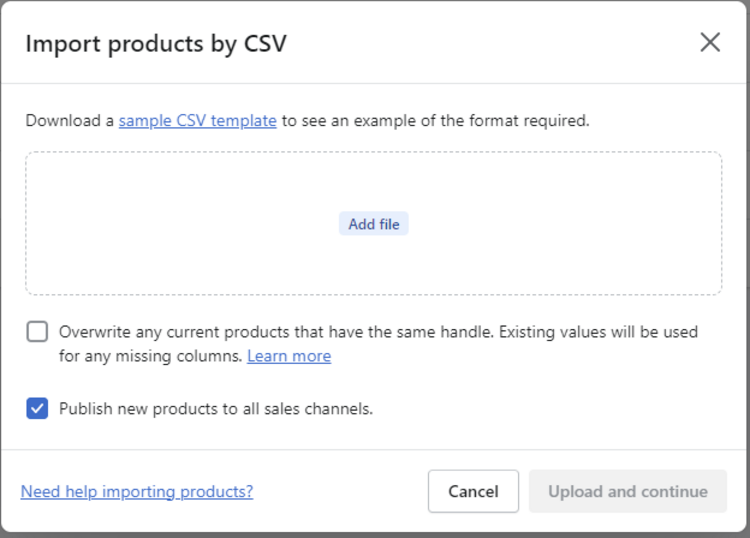
- From here, you will have two options:
- Publish new products to all sales channels.
- Overwrite any current products that have the same handle. Existing values will be used for any missing columns.
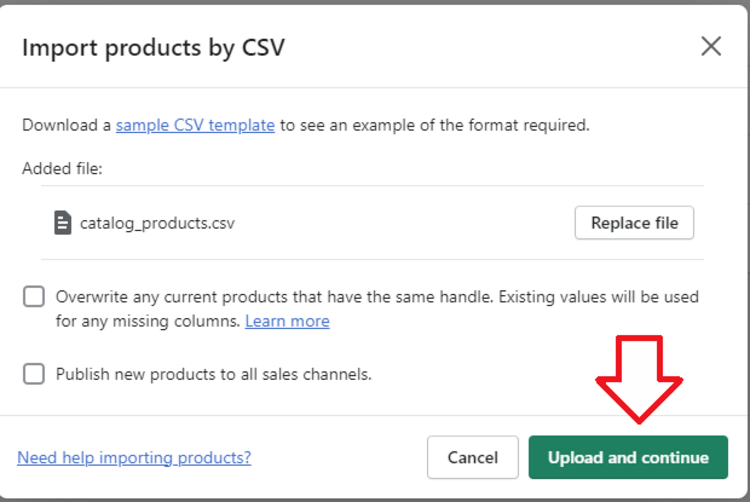
- Click Upload and continue.
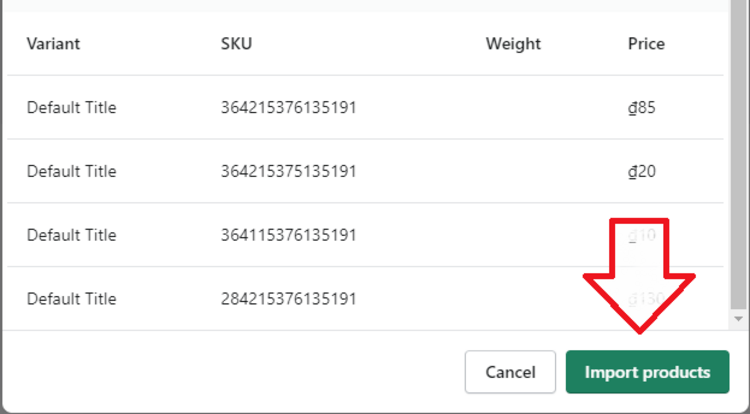
- Click Import products.
Once you have uploaded your CSV file, Shopify will send a confirmation email to the email address associated with your Shopify store.
Importing Customers using a CSV file
You can transfer customer information from Wix to Shopify using a CSV file. Here are the steps:
- From your Shopify admin, go to Customers and click Import.

- Click Add file and select the CSV file (contacts) containing your customers’ information.
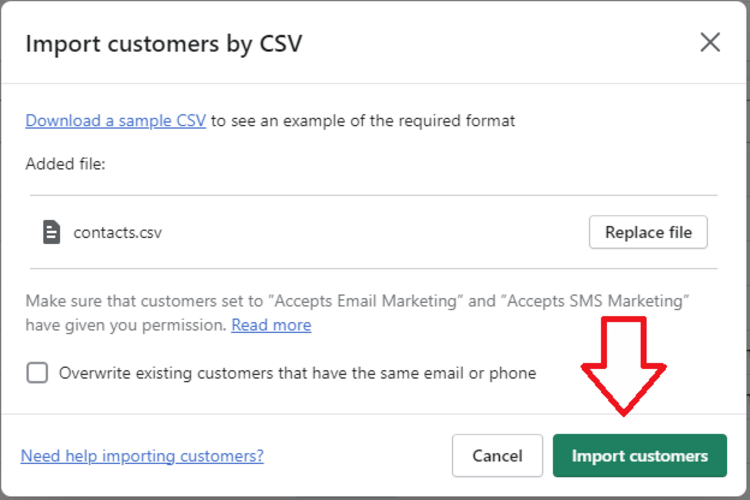
- You can choose to overwrite existing customers that have the same email or phone and then hit Import customers.
Uploading Images to Shopify
With your products and customers in place, it’s time to transfer your product images to your Shopify site. Here are the steps:
- Select Content from your Shopify admin and hit Upload files
- Select all the images you want to upload to Shopify
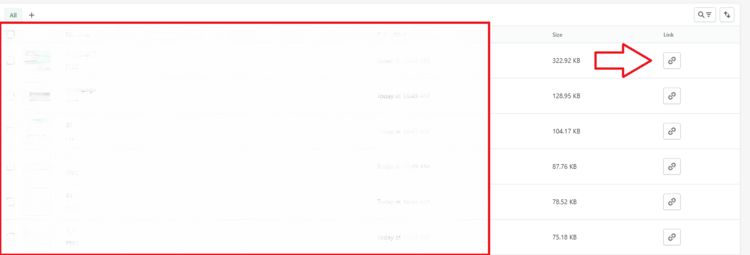
- Click the Copy link icon for one image at a time
- Open the CSV file that contains your products and insert a new column called “image Src.”
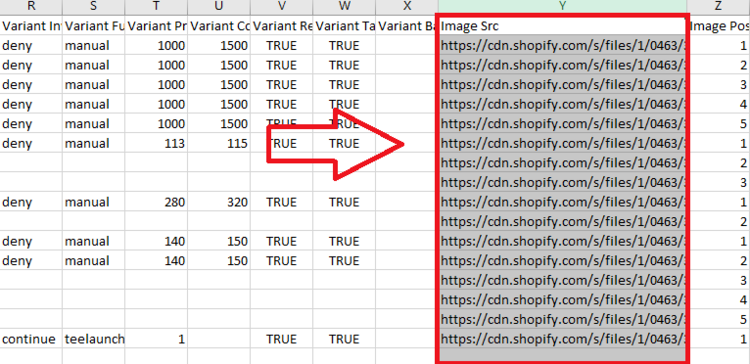
- Paste the image URL into each line and import the CSV file to your Shopify
Another option is using a third-party application available on the Shopify App Store to upload product images in bulk to your Shopify store.
Some of the best Shopify apps for bulk uploading product images include:
Step 5: Transfer Wix Domain to Shopify
Now that you have successfully migrated your Wix data to your new Shopify store, the next step is to transfer your Wix domain to Shopify.
If you have purchased your domain from Wix, you can easily connect it to your Shopify site using a method called domain pointing. The process involves editing the DNS records in your Wix account to redirect traffic to your Shopify store, meaning customers will no longer be able to access your Wix store through your store URL.
Once your domain is connected, you can transfer it away from Wix over to Shopify and manage it through your Shopify admin.
To transfer your domain:
- Go to the Domain page from your Wix dashboard.
- Find the domain you want to transfer away from Wix and click the “More Actions” button next to it.
![]()
- From the pull-down menu, select “Transfer Away from Wix.”
- Click “Transfer Domain” and confirm your action by clicking “I Still Want to Transfer.”
- Wix will send you a transfer authorization code (EPP code) to the email address linked with your domain.
- Now, go to your Shopify admin and select Settings > Domains > Connect existing domain.
![]()
- Enter your Wix store domain and hit Next.
- A pop-up will take you to your domain provider account (Wix)
- Sign in to your Wix account (if you still need to do so) and click Connect.
- It can take up to 48 hours for your domain to be verified and listed.
Step 6: Set Up Redirects
With your data and domain in place, it’s essential to set up redirects from your old Wix URLs to your new Shopify URLs. This ensures that visitors can find your new Shopify store without encountering 404 errors or broken links from your old Wix website.
To create a 301 redirect:
- Go to your SEO dashboard in your Wix account
- Select Go to URL Redirect Manager under Tools and settings
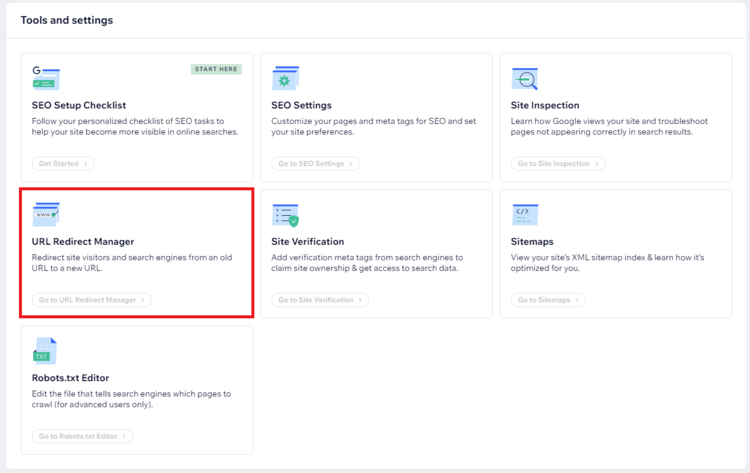
- Click + New Redirect > Single redirect
- Right there, enter the old URL path you want to redirect from under the Old URL section
- Enter the new Shopify URL you want to redirect to
- Hit Save.
Step 7: Train your Staff
When migrating from Wix to Shopify, you will need to add your staff members to your new Shopify account. You can create accounts for each staff member and assign them different levels of access and permissions based on their roles and responsibilities.
You can also train your staff on using the new Shopify platform. This will help them better navigate the new system and understand its features and functionality.
Step 8: Tell Your Customers about Replatforming
Now that you’ve successfully migrated your Wix data to Shopify, the next step is to inform your loyal customers about the re-platforming process.
By letting your customers know about your move, you can ensure a smooth transition and maintain their trust in your ecommerce business.
Shopify has a built-in email marketing tool, allowing you to send thousands of emails to customers for free. When drafting your email, be sure to include the reasons for the re-platforming, highlight the benefits of the Shopify platform, and provide clear instructions on how they can access their data on your new store.
Step 9: Test & Launch Your Shopify Store
After informing your customers about the platform change from Wix to Shopify, it’s time to run a test of your new Shopify store, ensuring everything is ready for launch. Here are some steps to follow:
- Check your data: Ensure that your essential Wix data, such as products, images, or customer data, has been correctly migrated to Shopify.
- Test your payment gateway: Conduct test transactions to ensure your payment gateway works properly.
- Check your shipping settings: Ensure your shipping rates are accurately set up. Try placing test orders with different shipping methods to see if they work correctly.
- Check your site’s loading speed: Ensure that your site loads quickly and efficiently. You can use tools such as Google PageSpeed to analyze your web pages and get detailed insights into their speed and overall performance.
- Launch your Shopify store: Once you have thoroughly tested your new site, it’s time to launch it to the public.
Migrating from Wix to Shopify: Using a 3rd Party Tool
If you’re considering third-party tools to help you migrate from Wix to Shopify, there are several options available, such as Cart2Cart and LitExtension.
All you need to do is select all the entities you want to migrate to Shopify and let these tools handle the heavy lifting. You can contact their support for help with the migration process or sign up to run the migration demo to get a glimpse of how the process works.
Wix to Shopify Migration: Which Migration Method is Best for You?
You have two main methods for re-platforming from Wix to Shopify: CSV migration and 3rd party migration tool. Deciding on which one is best for you depends on your business scale and your budget.
- If you are running a small business with a limited product range, the CSV migration method is the ideal choice.
- If you are running a larger business with a significant number of products and complex product data, and seek a quick and seamless migration process, a 3rd party migration tool is a better fit.
Migrating from Wix to Shopify: 5 Common Problems and Solutions
You may encounter a few problems when migrating from Wix to Shopify. Here are some of the most common problems and their solutions:
Data loss or corruption: There is a risk of losing or corrupting your data during migration. To avoid this, ensure to back up your data before migrating.
Design issues: Wix and Shopify use different coding languages, which can result in design inconsistencies. To avoid this, it’s highly recommended that you manually adjust your website design on Shopify.
SEO issues: You may face SEO issues due to the difference in SEO and URL structures between the two platforms. To fix these, ensure to adjust the SEO settings in your new Shopify store manually and set up proper redirects.
CSV import problems: Several common problems can arise during the import process, such as missing or incorrect data, formatting errors, or file size limits. Fortunately, Shopify has a dedicated page here where you can find a list of these common CSV import problems and their corresponding solutions.
Broken links: Some links may need fixing after migrating your site, resulting in a 404 error page. To fix these, set up 301 redirects correctly on your new site.
Wix to Shopify Migration: FAQs
Can I Transfer My Blog Posts from Wix to Shopify?
No, there is no direct way to migrate your blog content from Wix to Shopify. However, you can save your blog posts to Google Drive and re-upload them to Shopify.
Can I Migrate My Wix Store’s Design to Shopify?
No, there is no direct way to transfer your website’s design from Wix to Shopify. However, you can manually customize your Shopify store using its built-in tools to create a similar design.
How long does it take to migrate from Wix to Shopify?
The time it takes to migrate from Wix to Shopify depends on the size of your store, the complexity of your data, and the method you choose. It can range from a few hours to several days.
How Much Does It Cost To Migrate from Wix to Shopify?
The cost of migrating from Wix to Shopify varies depending on factors such as the chosen migration method, the business size, and the available budget.
Bottom Line
That’s how to migrate from Wix to Shopify. Hopefully, our detailed guide on the steps to transfer from Wix to Shopify has been helpful and enjoyable for you.


