
How To Use Squarespace In 8 Steps
By Sam Nguyen

In this article, we will show you how to use Squarespace in 8 simple steps, from choosing templates to adding pages, customizing design, and integrating ecommerce features to master Squarespace effortlessly.
8 Steps To Build A Website With Squarespace
Step 1: Sign Up
Welcome to the first exciting step on your Squarespace journey! The best part? With Squarespace’s free trial, you get 14 days to explore and build without spending a dime.
Here’s how you can sign up and dive right in:
- Visit Squarespace
- Get Started: Click the inviting “Get Started” button. No need to worry about payments now – it’s all about exploring.
- Quick Setup: You’ll be asked simple questions about your business type. Are you into fashion, travel, art, or something else? Let Squarespace know.
- Your Goals: Share your website goals. Are you selling products, showcasing your brand, or creating something unique?
- Template: Choose a Squarespace template that suits you. Modify a pre-made one or craft your own masterpiece from scratch.
After these initial steps, you can start building your online presence. As part of the sign-up process, create a distinctive store name that encapsulates your brand identity and sets the tone for your website’s content and offerings. Your Squarespace journey begins here!

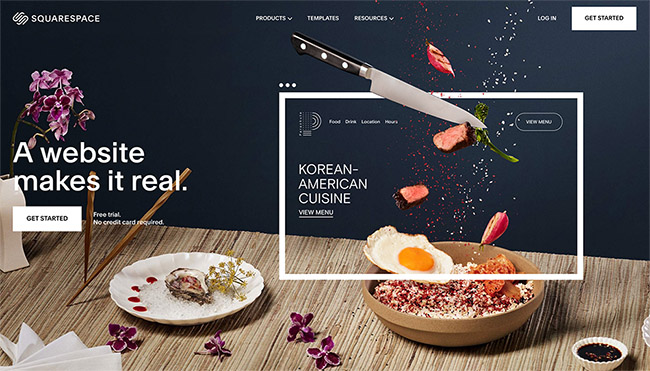
Step 2: Choose A Template
Now that you’ve set up the basics, it’s time to add style to your website, with over 100 on Squarespace! Here’s how to find the perfect match for your business:

After entering your business details, Squarespace offers you two options: start from scratch using Squarespace Blueprint or pick from their library of professionally designed templates.
Squarespace is known for its top-notch design quality. You can make both regular and Blueprint templates uniquely yours by customizing them.
If you’re new to designing websites, you can create a tailor-made template in five simple steps with Squarespace Blueprint. It’s a fantastic option for those who want a unique look without the fuss of designing from scratch.
You’ve got more than 100 templates to explore! You can filter them by industry – from ‘Online Stores’ and ‘Fashion’ to ‘Tech gadgets’ and ‘Restaurants.’ Plus, there are ‘Popular designs’ to consider.
Hover over a template and hit ‘Preview’ to see how it feels. This is the design foundation for your website, so take your time and explore a few options to find the one that resonates with you.
Smart Selection Tips For You:
- Consider Your Brand Identity: Your website should reflect your brand’s identity and personality. Look for templates that match your brand’s colors, fonts, and overall aesthetics.
- Prioritize Responsiveness: Choose a mobile-responsive template, ensuring your website looks and functions well on different devices, including smartphones and tablets.
- Consider Features: Think about the features you need for your website. Whether it’s an e-commerce store, a blog, a portfolio, or a contact form, make sure the template supports the functionalities you require. Some templates are better suited for specific purposes, so choose accordingly.
- Read Reviews and Recommendations: Search for user reviews and recommendations about specific templates.
- Don’t Overcomplicate: While choosing the flashiest template is tempting, simplicity often wins in terms of user experience. Choose a template that’s clean, organized, and easy to navigate.
- Test and Iterate: After selecting a template, don’t be afraid to test it with your actual content. You can always make adjustments and iterate as you go. Squarespace makes it relatively easy to switch templates if needed.
Step 3: Customize Your Website
You’re ready to make your website truly yours! Here’s how to personalize and fine-tune every aspect:
Add/Remove Pages
Think of your website’s structure like a house renovation – focus on the big stuff before getting into the details. Navigate to the ‘Pages‘ section and start building the foundation of your site structure.
Squarespace makes it simple to arrange elements on your pages. Grid display makes moving elements easy, and navigating the backend is a breeze.
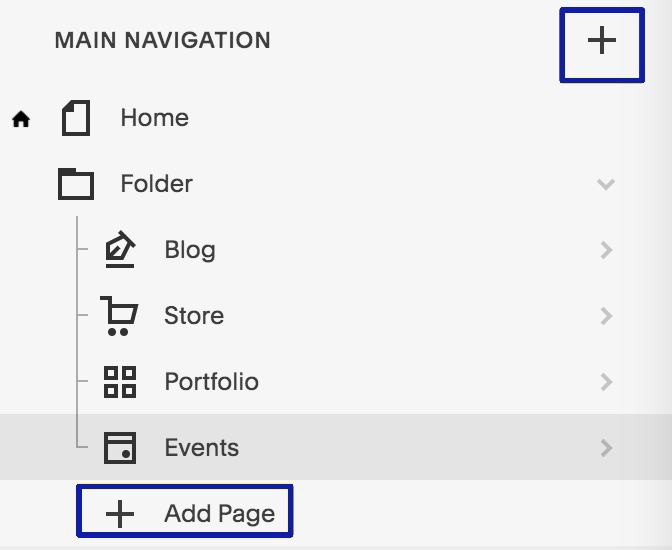
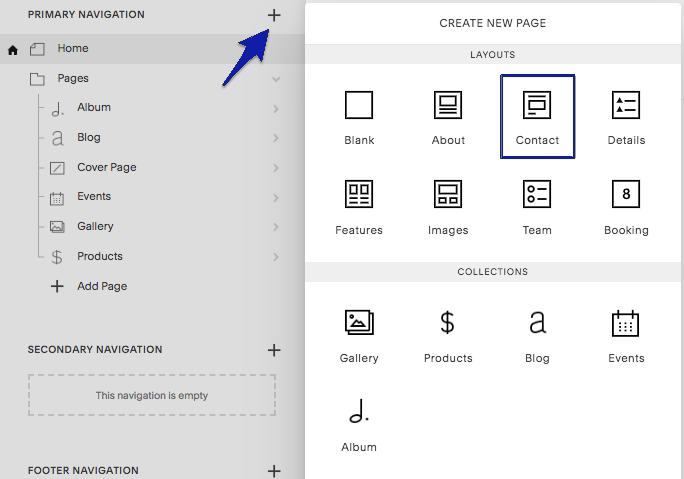
To add pages on your site, click the plus icon to add a new page, such as a Blog, Store, Portfolio, etc. Squarespace excels in blogging with a 5 out of 5 score, offering awesome features like quotes, comments, and great image options. Select the layout for your blog, and you’re on your way to sharing your content.
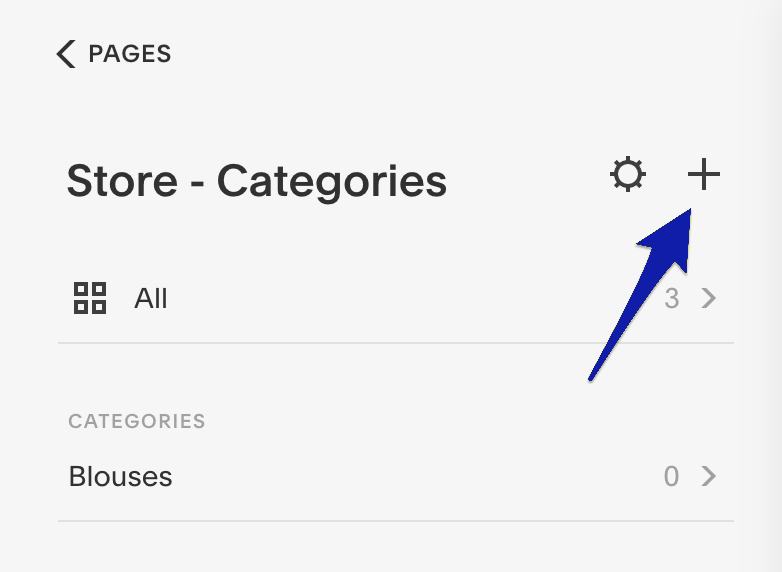
If you want to group related pages in a submenu for easy navigation. Just click the cross above the list of pages, then select ‘Folder‘ to create a submenu.
To remove pages, hover over the pages you want to remove and click the garbage icon.
Edit Pages
Now that you’ve got your pages set up, it’s time to make them uniquely yours. This means changing the default text, moving sections around, and adding new content. If this seems overwhelming, don’t worry – it’s not as tough as it sounds. Here’s what you can do:

Adding Images:
- If you want to add new images, simply click on an image section.
- Choose “Background,” and you can either upload your own images or pick from the images Squarespace provides.
- A quick tip: If you use Squarespace’s images, ensure they match your offering. Otherwise, people might get disappointed if the pictures look better than your actual products.
Squarespace is user-friendly. You can easily move things around, change the font, and pick colors to match your style. Their contact form templates match your site’s design, so you don’t have to stress about it looking out of place.

To start editing, click “Edit” in the top left corner of the page you want to change.
If you want to edit a specific page, go to ‘Pages,’ click on the page you want to work on, and hit the ‘Edit‘ button on the top left.
Hover your mouse over the section you want to edit and click on the pen icon. Want to add something new? Hover between two sections and click the blue ‘+’ icon in the middle.
Hover over the area where you want to add something new and click “Add Section.”
You’ll get a bunch of options to choose from.
On the right side, you might see a virtual assistant pop-up with helpful tips on how to edit your site. This is super useful, especially if you’re new to editing websites. They even have video tutorials to guide you through.
After adding a new section, if you want to change the order of your pages, just click and hold the section, then move it up or down the page.
Once you’re done with all your changes, click ‘Save‘ in the top right corner.
Adjust the design to your brand identity
Now that your pages are set up, let’s adjust your site’s appearance and add your unique touch.
Changing the Look:
- Head to the main menu.
- Find and click on ‘Design.‘
- Tweaking Fonts and Colors:
Inside ‘Design,’ you’ll find ‘Site Styles.’ This is where you can change things like fonts and colors. If you want to change how your text looks, click ‘Fonts.’ You can choose a set of fonts that go together well and decide on the font size.
If you’re into details, click on ‘Global Text Styles.’ This lets you adjust how your text looks by changing spacing and thickness. You can also use ‘Assign Styles‘ (inside Fonts) to give different parts of your site different fonts.
Just so you know, the latest Squarespace version, 7.1, doesn’t support custom Adobe fonts. Also, it’s a good idea to look at different website color combinations before you choose your colors.
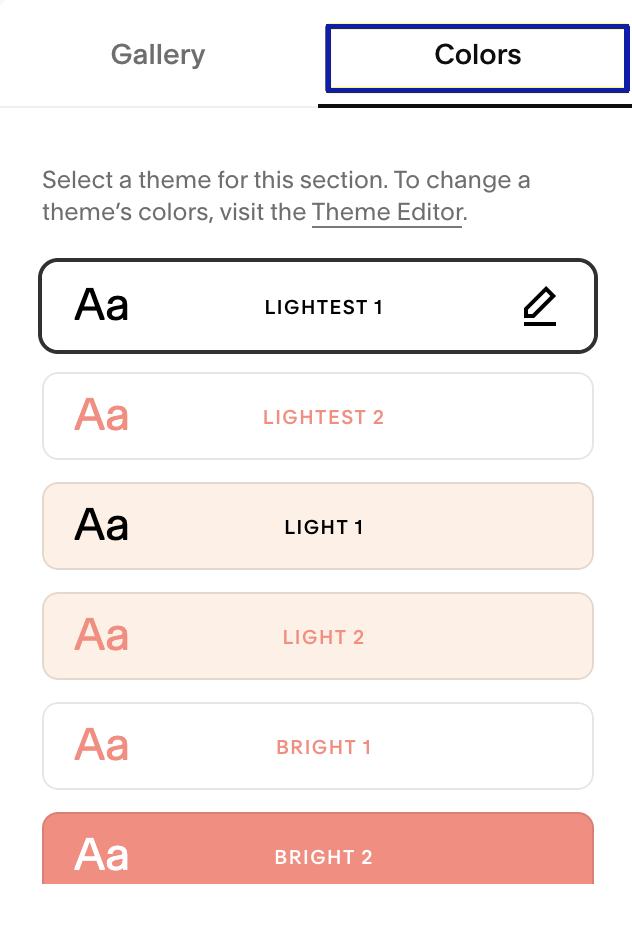
Inside ‘Site Styles,’ there are many options to choose from. Let’s start with colors.
Squarespace has ready-made color palettes you can choose from. You can also upload a color you like (using a special code) or even use color codes to get exactly the shades you want for your site. It’s smart to use a website color tool to help you pick the right color codes.
Animations and Styling
Animations are like little tricks that make stuff on your site pop, fade, or even fall into place. They’re a cool way to make your site more interesting but remember not to go overboard, or your visitors might feel overwhelmed.
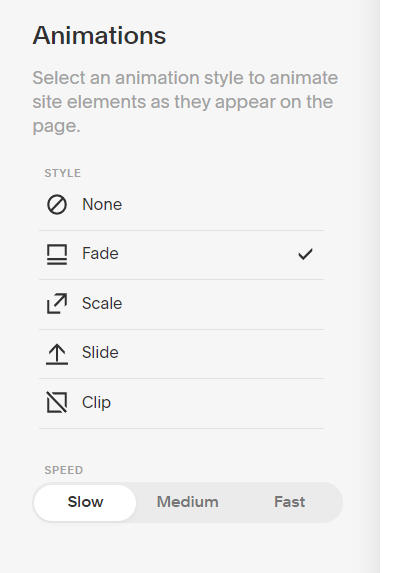
Look for ‘Animations‘ in your settings. This is where you can choose how things move around on your site. Want your site to have some fancy moves? No worries, it’s easy to do!
In ‘Spacing and Image Blocks,’ you can make small changes to how things are placed on your site.
If you need to fix how things line up or spaced out, this is the place to do it.
Under ‘Buttons,’ you can change how your buttons look. Buttons are things like “Click here” or “Buy now.” You can make them match your style.
In 2022, over half of all internet users came from mobile devices. It’s a smart move to switch to the mobile view of your site sometimes. This helps you ensure your site looks good on big and small screens, like phones or tablets.
Adding A Store
If you’re ready to sell things on your website, these sections are where the magic happens. But don’t worry if you’re not there yet – if you don’t have anything to sell, you can skip these parts for now.
You can add a store to your website like you added a blog. Find ‘Store‘ right under ‘Blog‘ in the main menu. Click on it. Squarespace will give you a special template to make your store look awesome.
Once you pick the store template, you can make it your own. Change the background, text, and colors as you did with other pages.
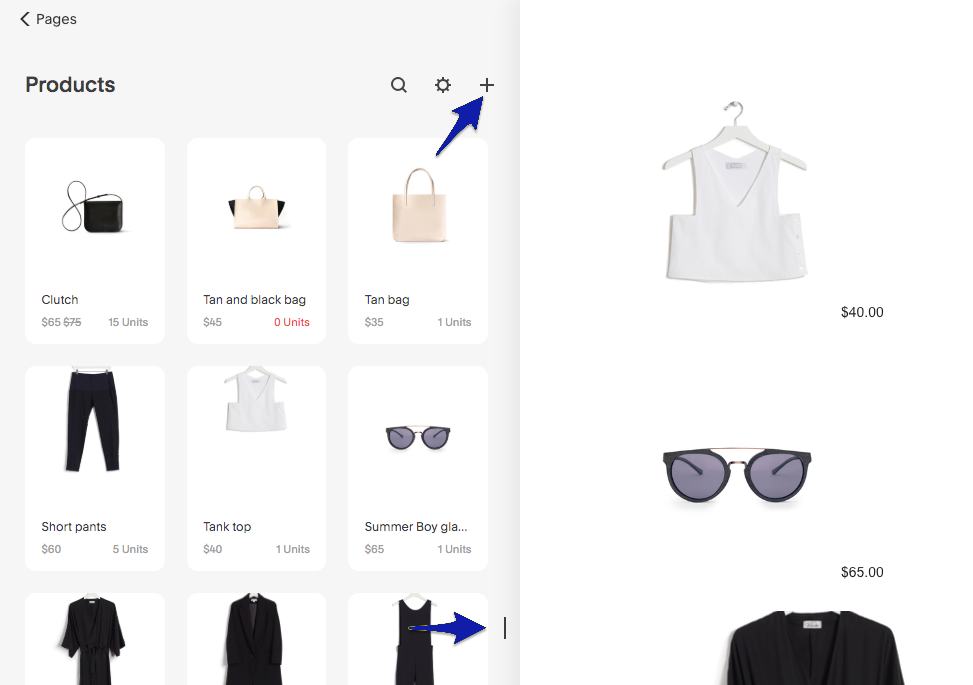
After you’ve made your store look good, it’s time to add things to sell. Scroll down until you see pre-selected products. These are just examples. Squarespace puts some general things there, but you’ll want to change them to what you’re really selling. For now, you can add any item you want to sell, like clothes or gadgets.
To manage items, go to the top right corner of the section and click ‘Manage Items.‘ You’ll find a list of items – some are just templates. Click the three dots next to a template item to change it. You can add a title, a description, a price, and even pictures of your items.
Simply click the three dots beside the template item, which will guide you to the product details section. Here, you can input a title, description, price, and photos of the items you intend to sell online.
Once people want to buy your stuff, they’ll go to the checkout. You can make the checkout process special by creating custom forms. You can make one form and use it for all your products or make different ones for each thing you sell.
Add Site Information
If you want to add information about location, contact information, and social media to help customers reach you better, follow these steps:
- Go back to ‘Edit‘ mode on your homepage.
- Put your mouse over the header area.
- Click ‘Edit Site Header‘ or ‘Edit Site Footer‘ and then ‘Site Title and Logo,’ Contact information, etc.
- There, you can upload your logo and information to show up on your website.
Another way to add location information for your site:
- To choose a location and time zone, navigate to Settings and select Regional Settings.
- Under Settings, select Business Information and enter your contact details, store location, and opening hours (if applicable).
Or you can go to Page menu -> Page Layouts -> Contact -> Select a layout option.
Step 4: Optimize Your Website
Integrate Marketing Tools
To access extra marketing tools like pop-ups and banners, you must be on at least the ‘Business’ plan. Upgrading is easy – just click the ‘Upgrade Now’ button at the bottom of any page during your free trial.
You’ll find banners like this one throughout Squarespace that allow you to upgrade and activate marketing options.
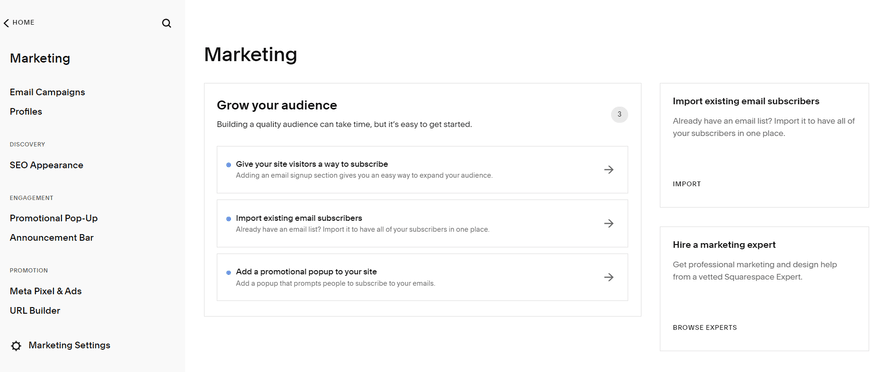
To start marketing, click ‘Marketing‘ in the main menu. You’ll discover a range of options to promote your Squarespace site. Take a look at the image below to see the choices available.
The marketing menu provides ways to grow your audience and promote your site.
From here, you can easily add pop-ups, display social media buttons, connect your Facebook page, link your Instagram feed, and more – all with just a few clicks. Squarespace even offers the ability to create email campaigns using Squarespace Email Campaigns. Despite being known for its creative design, Squarespace doesn’t skimp on business.
You can also keep track of your site’s performance through the ‘Analytics‘ option on the home panel. This feature allows you to monitor traffic, search for keywords, and get insights into how well your Squarespace website is doing.
SEO Optimization
To optimize SEO on your Squarespace website, you need to optimize both before and after publishing your site.

Before Publishing:
- Site Information: Add a concise site title and description to make your site’s purpose clear. Also, create unique SEO descriptions for each page, blog post, product, and event. These descriptions help search engines understand your content.
- Site Design: Add a browser icon and social sharing images to enhance your site’s appeal. Create a custom 404 page to guide visitors when they encounter broken links.
- Domain and URL Setup: Use a custom domain instead of the Squarespace URL. Connect your site to social media and enable SSL for security. Ensure URL slugs reflect your content and choose a blog post URL format.
- Location Information: If you have a physical business, include your location and create a “Contact Us” page. Link your site to Google Business Profile to improve local visibility.
After Publishing:
- Verify with Google Search Console: Manage your site’s appearance in Google search results.
- Request Google to Index Your Site: Ask Google to review your site and update search results with new content.
- Verify with Bing Webmaster Tools: Manage your site’s presence in Bing and Yahoo search results.
- Connect to Google Analytics: Keep track of visits and other data using Google Analytics.
- Enable AMP: For a blog, use AMP to make your site load faster on mobile devices.
As Your Site Grows: Keep your site search-engine friendly as you add more content.
- Optimize New Content: Make sure new content follows best practices.
- Update Strategically: Keep optimizing your site by updating content thoughtfully.
- Redirect Broken Links: If URLs change, create redirects to the correct pages.
- Keep Updating: Regularly update your site to show it’s active and relevant.
Content Best Practices: Remember these tips for creating good content
- Use Keywords: Include keywords people use to find sites like yours.
- Structure Text: Use headings and organize text for easy reading.
- Add Alt Text to Images: Describe images for screen readers and search engines.
- Readable Image Names: Give your images clear file names.
- Keep Pages Light: Make sure images and pages load quickly.
- Add Social Sharing Images: Create logos for sharing on social media.
- Use Tags and Categories: Organize content with tags and categories.
- Link Pages: Connect pages with relevant links.
- Customize URL Slugs: Make sure URLs reflect the page content.
If your ranking drops after optimizing, don’t worry. It’s normal as search engines adjust. Check analytics for trends, update keywords, and give it time to stabilize.
Mobile Responsiveness
Squarespace sites are made to look good on mobile devices, but some things you add can affect how they work on phones. Here are tips for keeping your site mobile-friendly:

Check how your site looks on mobile devices. Use the device view to see how it appears on smaller screens. Arrange content for mobile layout if you use Fluid Engine.
Use Google’s tool to check your site’s mobile compatibility quickly. Follow the suggestions in this guide if your site isn’t mobile-friendly. Different mobile devices handle sites differently. Newer phones handle large sites better, and wireless networks are faster than cellular connections.
Keep pages under 5 MB. Large pages take longer to load on mobile devices. Minimize content to avoid overwhelming visitors’ devices. Set letter spacing to 0px or higher to prevent overlapping letters on mobile devices. Avoid relying on spacer blocks. They might look different on mobile. Instead, adjust the padding for white space.
If you blog on Squarespace, enable Accelerated Mobile Pages (AMP) to speed up loading. Ensure mobile styles are enabled in your design settings. This ensures a stacked layout for better mobile navigation.
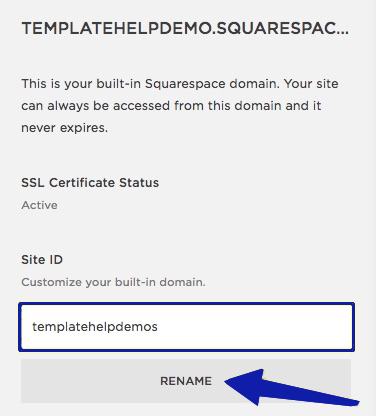
Step 5: Set Your Domain Name
First, you need to buy a domain name from another domain register and transfer it to the Squarespace domain, Just head to Settings > Domains > Use a Domain I Own, and Squarespace will guide you through the process.
You can get a domain name directly through Squarespace if you’re looking for convenience. This option might cost a bit more, around $20 per year, compared to buying from other places.
Go to Settings > Domains > Get a Domain, and find an available one.
If you plan to commit to a yearly Squarespace plan, you can snag a free domain for the first year. This is a great deal and also saves you on the core cost of your plan. To do this, sign up for a paid plan, then go to Settings > Domains > Get a Domain.
A “dot com” domain is usually a bit pricier, but it’s worth it because visitors and Google tend to like it more. If you’re a government site, “.org” is better, and for UK businesses, “.co” or “.uk” is the way to go. Choose what fits your site’s purpose!
Step 6: Preview Your Site
Once your Squarespace website is ready, you can preview it before making it live. Click the arrow in the top right corner to switch between preview and editing modes. You can do this whenever you want.

After making changes to our original Squarespace template for about an hour, here’s what our site looks like now with edited images, pages, and text.
During your two-week trial on Squarespace, your site is private. That means people can’t find it by searching online, even if you have a domain name. Even if you give someone a link, they’ll only see a login page.
However, it’s a good idea to let friends and family see your website before it’s live to find any issues. To do this, set a sitewide password. People with this password can see your latest changes. It’s also helpful to see how your site looks on different devices.
Step 7: Publish Your Site
- Select a Billing Plan: You must select a suitable one before publishing your site.
- Turn on Site Availability: Once your billing plan is set up, you need to turn on Site Availability.
- Choose Your Domain Connectivity: You can use a Squarespace domain or connect a third-party domain to your site.

Step 8: Choose A Subscription Plan
When picking a Squarespace plan, you have options for different needs and budgets. There are four plans:

- Personal: $16/month (billed yearly)
- Business: $23/month (billed yearly)
- Ecommerce Basic: $27/month (billed yearly)
- Ecommerce Advanced: $49/month (billed yearly)
Each plan offers different features. You can save 25% to 30% with an annual plan.
For ecommerce, you need at least the ‘Business’ plan. Ecommerce plans add features like selling on Instagram and recovering abandoned carts. The Business plan has the following:
- Online orders
- Inventory management
- Customer view
- Discounts
- Unlimited products
- Donations
- Gift cards
Commerce plans offer more. To sell offline, integrate with Square. You’ll need the Square Commerce app and a card reader. Fees depend on location.
Once you’ve chosen and paid for a plan, your site is live. Some extra steps are available for Business, and the above plans, are covered below.
Squarespace is great for online selling. To start, choose the ‘Business’ plan or higher. ‘Commerce’ plans offer advanced options like Instagram selling and cart recovery. To sell offline, use Square integration. You’ll need the app and a card reader. Fees vary but are separate from Squarespace.
Remember, your plan affects what you can do on your site. Choose the best one for your needs and budget to get your site up and running!
Final Thought
Setting up a website with Squarespace is an easy process, which can be done within 8 steps. We commend sign up and take advantage of the 14-day free trial to explore the platform and create your demo store before committing to a paid plan.
FAQs


