
How To Add Products To Your Shopify Store: An Ultimate Guide
By Sam Nguyen

This article will walk you through how to add products to your Shopify Store, as well as managing and deleting them.
Key Takeaways
- Learning to add products is fundamental for setting up a Shopify store.
- Adding products to Shopify is designed to be user-friendly, catering to those without any coding expertise.
Adding Products to Shopify: A Step-by-Step Tutorial
Now, we will give you a detailed guide on how to add products to the Shopify store.
Step 1: Log Into Your Shopify Account
In the first step of adding products to Shopify, click the “Log in” option on the Shopify store, and then enter your Shopify account information and store domain. For convenience, you can also click the “Remember Me” button to expedite future log-ins.

After that, you look for the “Products” tab underneath the Search option on your Shopify account. Click on this tab and choose “Add a Product” or “Import Products” to add products to Shopify.
Note: If you have not had a Shopify store, go to the Shopify homepage and sign up for a Shopify free trial.
Step 2: Write the Product Details
It is essential to follow the “Add the product to Shopify” steps. You will enter the product details such as title, description, product type, etc.
Title
The product title is essentially the name of the product. It should be brief and easy to remember for both you and your customers. The title doesn’t have to include all the product details since those details will be elaborated upon in the Description section.
Nonetheless, maintaining consistency in your product titles is crucial. If you start with the product’s color in one title, it’s advisable to follow that same pattern across other product pages for a cohesive shopping experience.
Description

This section is where you provide a comprehensive product description that highlights both emotional and rational reasons for customers to add the item to their cart.
However, It’s vital to craft unique content for these descriptions, as duplicating or copying from other websites can harm your Google search ranking
Product type

On the screen now, you tick the box next to “This product has options, like size or color”. Doing so will prompt Shopify to reveal blank fields where you can input product options.
You can select various options like “Color,” “Size,” “Material,” and “Size” under “Option Name,” then click “Add Values” for each. Once finished, simply click “Done.”
Vendor
Here, you enter the product’s brand name if you are selling a self-made product. Alternatively, if you sell another brand’s product, use the Vendor section to edit the manufacturer or supplier.
Step 3: Inventory, Price, and Extra Information
Once you have completed the product description step, proceed to the next step of completing the remaining details. In the Inventory section on Shopify, you can enter details such as your product SKU, price, or barcode.
Price
Setting a price that aligns with your brand’s positioning is crucial. You can also offer product discounts using Shopify’s discount code feature.
For instance, if a customer purchases a specific quantity of products, the discount code can be applied automatically.
SKU
SKU, which stands for Stock Keeping Units, are unique codes used to identify the product within your company. Each product in your store has its own SKU number.
Barcodes
Barcodes serve as unique identifiers, consisting of a mix of lines, spaces, characters, and numbers. They play a critical role in tracking products at various supply chain stages. For example, they’re used in fulfillment centers for inventory management, on invoices for accounting purposes, and at the point of sale in retail environments.
Step 4: Add Shipping Details
In the “Adding shipping details” step, you tick the box next to the “This product requires shipping” option. Then, fill in specifics like weight, Country/Region of origin, HS (Harmonized System) code, and Fulfillment Service.
- Weight: Enter the product weight in pounds (Ib), ounces (oz), kilograms (kg), or grams (g).
- Country/Region of origin: Indicate the manufacturing country.
- HS (Harmonized System) code: Required for international sales.
- Fulfillment Service: Select “Custom Order Fulfillment” and click “Add Fulfillment Service.”

Step 5: Add the Images for Each Product
Once you’ve entered the descriptions and shipping details, scroll down to the “Image” section and click “Upload Images.” It’s recommended to upload at least 3 – 4 product images capturing all angles, providing customers with a comprehensive view.
However, ensure the chosen image aligns with your brand and makes an impressive visual impact.

Furthermore, store owners need to maintain consistency in naming their images, using dashes between words. This enhances user experience by making it easier to locate specific images and positively impacts SEO rankings.
Step 6: Create a Collection on Shopify.
Creating a collection is an important step in adding products to Shopify, and enables customers to quickly find desired items upon arriving at your store’s site.
- Step 1: Go to Products > Collections and click “Create collection”

- Step 2: Add collection title, description, and image. You need to choose manual and automated collection.

Step 7: Optimize Search Engines
Optimizing your online store for search engines enables store owners to more effectively direct potential customers to their online shops. Therefore, once you’ve completed all the product details, you should also enter relevant keywords for search engine optimization.

Click “Edit website SEO” to edit the title, description, and URL slug.
- Title: Up to 55 characters
- Meta description: Up to 320 characters, including keywords
- URL: Use relevant keywords without spaces.

Step 8: Publish Products and View on Store
Before clicking “Save Product,” double-check all the details and information you’ve entered, perform a quick review, and thoroughly scroll through the pages from top to bottom.

The “View on your website” feature lets you preview your products. If you identify any issues, you can easily edit the products by returning to the first step.
How to List Products on Shopify
Discover four methods for listing products on Shopify, gaining insights into improving your online store’s visibility and enhancing customer experience.
Duplicate a Product on Shopify
Duplicating products saves a considerable amount of your time when listing products in Shopify. Here is a step-by-step guide to create a duplicate:
- Step 1: Go to the “Products” section => All Products from your Shopify admin
- Step 2: Click on the product name you want to duplicate in the Shopify app
- Step 3: Click the Duplicate checkbox

- Step 4: Enter a name different to the existing product
- Step 5: Click “Duplicate” again
- Step 6: Change the product details

Add New Products with Shopify POS
From the Products screen within the Shopify POS menu, you can easily add new products. Shopify POS streamlines device integration, enabling Shopify store owners to manage their stores across multiple devices even when not physically present in the store.
Here is how to add new products with Shopify POS
- Step 1: Click the “+” button on the Shopify POS checkout screen
- Step 2: Selec “Add new product”
- Step 3: Add product details such as title, description, and price
- Step 4: Add product images by clicking on “Image” button
- Step 5: Click “Save”
Import Products via CSV files
Importing products through CSV files is a valuable option, especially for adding multiple products at once or bringing products from another platform to your Shopify store.
If you’re uncertain about formatting the document, Shopify offers a downloadable sample CSV template for your convenience.
Here is a step-by-step tutorial to import products:
- Step 1: Go to “Products” in your Shopify admin and then click “Import”

- Step 2: Click on the “Add file” button and choose your CSV file

- Step 3: Click “Upload and continue”

- Step 4: Check all details and then click “Import products”. You wait a few minutes to complete the import.

Scan Products with Shopify App
You can also scan a barcode for products with your mobile device’s camera and enter it via the Shopify app.
Here’s how to do that:
- Step 1: Go to “Products” from your Shopify App
- Step 2: Click on “Inventory scanner”
- Step 3: Click on the barcode icon to open your device’s camera.
- Step 4: Scan your product’s barcode
- Step 5: Tap on “Add” and then select the product you want to change
- Step 6: If the product had a barcode, select “Replace barcode”
- Step 7: Choose “Save” twice to save all changes
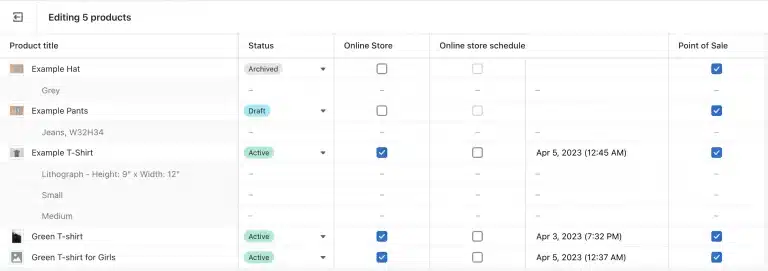
How to Manage Shopify Products
To keep your inventory or product availability up to date, you need to manage your products. Within your Shopify admin panel, you can easily edit, archive, and delete products.
- To manage products, go to the Shopify admin panel => and choose “Products.”
- To manage the inventory, go to the Shopify admin panel => and choose “Inventory”
Archive Products on Shopify
To archive the products, follow these steps:
- Step 1: Go to “Products” in your Shopify admin panel
- Step 2: Select the product you want to get rid of

- Step 3: Click “Archive product” on the details page

Delete Products on Shopify
To delete any products in your Shopify store, follow these steps:
- Step 1: Go to “Products” in your Shopify admin panel
- Step 2: Select any products you want to delete

- Step 3: Click the “Delete” button.

How to Optimize Your Product Pages for Conversion
Here are some tips to create captivating product pages on the Shopify store:
1. Write Compelling Product Descriptions
While descriptions seem straightforward, they significantly impact vital metrics and customer experience.

Here are some tips when writing the product description:
- Creating a short and descriptive paragraph: Explain what problems your product helps to solve and what customers gain from your products.
- Adding some fun and creativity to your description
- Using a bulleted list of features and specifics
- Adding customer reviews
- Increasing your font size to improve readability
2. Bring Your Product to Life with Pixel-perfect Visuals
High-quality product images and videos facilitate visual storytelling, improve customer experiences, enhance conversions, and build strong brand identities. These captivating visuals inspire exploration and also provide long-term value as product catalogs expand.
3. Create Persuasive Calls-to-action

A CTA button is crucial in guiding customers towards checkout, swiftly turning visitors into customers. Therefore, you should place CTA prominently on the page for easy visibility and clicking.
Here are some tips for creating CTAs:
- Position your CTAs above the fold, near the top of the page: Usually, they’re situated next to product images or under product details.
- Opt for a bright or contrasting color: This catches attention and guides customer focus towards the button.
- Ensure your CTA button is adequately large: Whether on a computer or mobile device, it should be easy to click right away.
4. Use SEO practices
SEO improves product visibility on Shopify by attracting valuable traffic, thus increasing conversions and customer value. Additionally, it provides a cost-effective alternative to paid advertising.
How to Add Products in Shopify: FAQs
- Step 1: From your Shopify admin dashboard, choose ‘Product‘ and click ‘Collections‘.
- Step 2: Select the collection you want to add products.
- Step 3: Use the search bar to locate specific products or click ‘Browse‘ to explore the complete product list. After finding the desired products, simply click on them to select.
- Step 4: Click the ‘Add to collection’ button to add the selected product.
Final Thoughts
We’ve just walked you through a detailed guide on how to add products to your Shopify. Adding new products is straightforward – everything is accessible through the Shopify admin panel after creating a Shopify account.


