
Design A Website With WordPress | Detailed Instructions
By Sam Nguyen

Meta Description: Unlock your site’s potential with WordPress! Efficiently design a professional, responsive website that aligns with your brand by using WordPress.
Key Takeaways
- Building a WordPress website involves several critical steps, including securing a domain name and hosting provider, installing WordPress, choosing a theme, adding content, customizing the site, installing plugins, and regularly updating the site for optimal performance.
- While website-building requires lots of effort, tools like WordPress and hosting providers like Bluehost ensure individuals can help create unique, functional, and successful websites.
In this article, we will explore the website creation process with WordPress to help you design a website that stands out in the digital landscape.
8 steps of starting a website with WordPress
Here are the 8 main steps to comprehend if you want to create a brand new website using WordPress:
Step 1: Acquire the domain name
The first step involves purchasing a domain name, your unique web address that internet users can use to locate you. Visit a domain name registrar like Domain.com and search for your desired address to purchase a domain name.
A desirable domain name should closely match your website or business name, be easily memorable or guessable, and be concise. When choosing the best domain name extension (i.e., the suffix of your domain name), .com is the most prevalent and recommended option if it’s available.
However, if .com isn’t available, there are other excellent alternatives:
- .net – open to all but commonly linked with tech corporations
- .org – open to all but particularly favored by NGOs and charities
- .co – open to all but typically associated with hip, new companies
Step 2: Sign up for web hosting
Securing an address is just the beginning – now you need web hosting to operate your website! You need hosting space for your website – a virtual plot of internet land – to make your WordPress site available online.
Remember, your WordPress hosting provider should satisfy these requirements:
- PHP version 7.2 or higher
- MySQL version 5.6 or higher, OR MariaDB version 10.0 or higher
- HTTPS support
Bluehost, as recommended by WordPress itself, emerged as the top choice in terms of hosting providers.
The type of hosting you opt for, shared or managed WordPress, depends on your needs. In real cases, your website shares a server and its resources with other sites. This includes bandwidth (traffic capacity) and storage space (for website content and media). It’s cost-effective and suitable for smaller sites.
Alternatively, managed WordPress hosting, which can be VPS or dedicated hosting, is more suitable for larger websites requiring more resources. It’s a little more expensive, with Bluehost’s managed WordPress packages starting at $19.95/month.
Pro tip: Begin with a shared hosting plan and upgrade to a higher plan as your traffic increases and you outgrow your current package.
Below is a general outline of the registration process with a hosting provider, using Bluehost as an example:
Select a plan
Navigate to the Bluehost homepage and choose shared VPS or dedicated hosting from the ‘Hosting‘ dropdown menu. You’ll have several options if you’ve chosen a shared hosting plan. We suggest you opt for the Choice Plus plan, which includes free backups – a lifesaver if your website encounters hiccups!
Connect your domain name
The next screen will allow you to input your domain name:
Finalize billing details
After linking your domain, you must set up an account and enter your billing details. You’ll also be asked to choose your subscription length at this stage. Signing up for a longer duration is typically more cost-effective than a monthly subscription. Additionally, Bluehost provides a 30-day money-back guarantee, allowing you to switch later if necessary. With your domain name and hosting plan secured, you can install WordPress!
Step 3: Install WordPress software
Once the administrative tasks are out, we can move on to the exciting part – installing WordPress! You can do this directly via your hosting dashboard. Depending on your hosting provider, you will either have a one-click or manual WordPress installation:
One-Click WordPress Installation
As the name implies, with a one-click WordPress installation, setting up WordPress is incredibly simple and straightforward. Bluehost, among other hosts, provides one-click WordPress installations. Most hosting providers use the industry benchmark ‘cPanel’ dashboard, meaning the process should be similar even if you’re not a Bluehost user.
Immediately after you register with Bluehost, an email from the Bluehost team containing details on accessing your customer profile and building your site should have hit your inbox. Once logged in, Bluehost presents an intuitive wizard to guide you through the WordPress installation on your hosting setup.
Here is the sample one-click WordPress Installation process for reference:
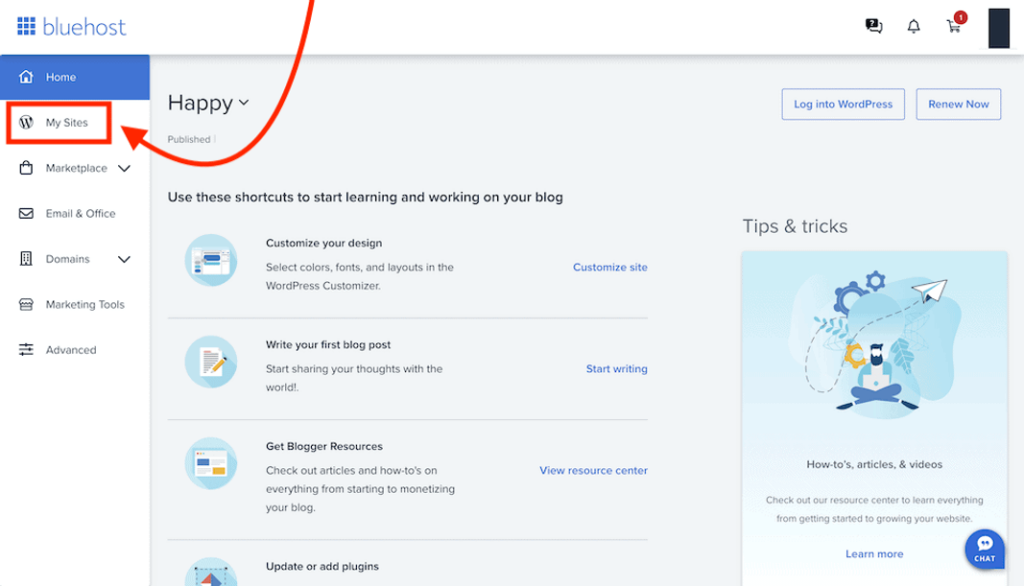
- To kick things off, navigate to ‘My Sites:
- Next, just hit ‘Add site‘ and then ‘Create new site‘
All Bluehost requires to install WordPress for you is your new site’s name and the username/password you wish to use for managing WordPress. After completing the wizard, your site is ready for action!
- Let’s access the main dashboard:
You can access your WordPress interface by navigating this address. Now is an excellent time to adjust some fundamental WordPress settings to streamline your experience going forward. Here’s what you need to do:
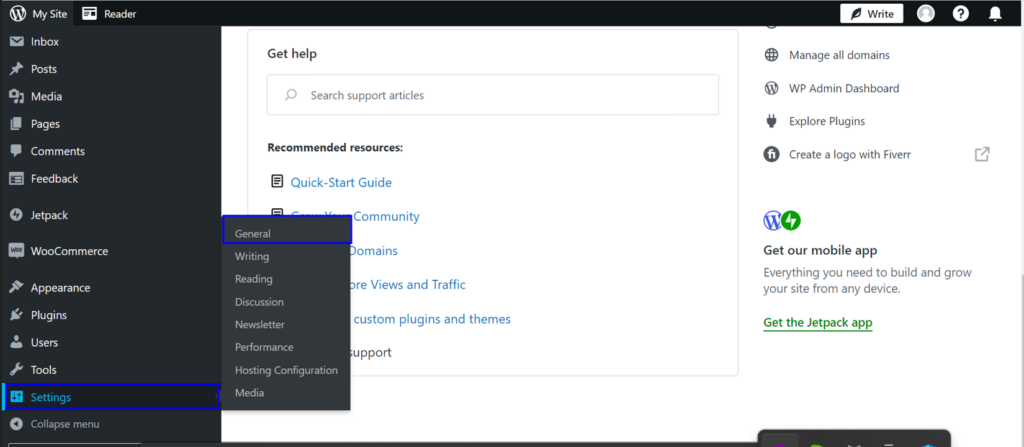
- Adjust your website title and tagline: Settings → General and input your desired Site Title and Tagline.
Specific WordPress themes showcase these on the homepage and in the SEO description – which Google utilizes when listing your website on search results pages.
Taglines are optional – if you don’t have one for the site, please leave it blank. Nevertheless, it often plays a role in the web design process, so it can be beneficial to create a suitable one.
- Make your site visible to the public: Settings → Reading
Presumably, you want Google to index your website. Uncheck the box labeled “Discourage search engines …”
- Configure your time zone: Settings → General.
A correct time zone setting ensures the predictable publication of new pages and posts. Generally, you should set the time zone based on your current or target audience’s location.
- Configure permalinks: Settings → Permalinks from the primary sidebar in your WP dashboard.
Permalinks determine how your site’s individual web page addresses – or URLs – are structured. It’s best to have the page title in the URL for optimization purposes.
- Decide on comment settings: Settings → Discussion.
The decision to allow comments on your website is entirely up to you. On one side, enabling readers to comment on your articles/pages helps create a sense of community around the website. However, it also means managing spam and maintaining a troll-free environment.
Manual WordPress Installation
Manual installation is slightly more involved and less direct than the one-click method. It mainly involves downloading WordPress to your computer first, then re-uploading it to your hosting provider. We recommend a hosting provider offering one-click installs to ensure a smooth, hassle-free setup.
Step 4: Choose the WordPress theme
WordPress offers a vast scope for customization, especially if you’re familiar with coding or willing to learn. The starting point for any website is its theme, which serves as a pre-designed template that you can fill with your content and adjust as per your needs.
A theme can be described as a pre-built example site. WordPress offers its own set of themes that you can try out or ‘demo’ to see which one best fits the character and purpose of your website. Installing a free WordPress theme involves:
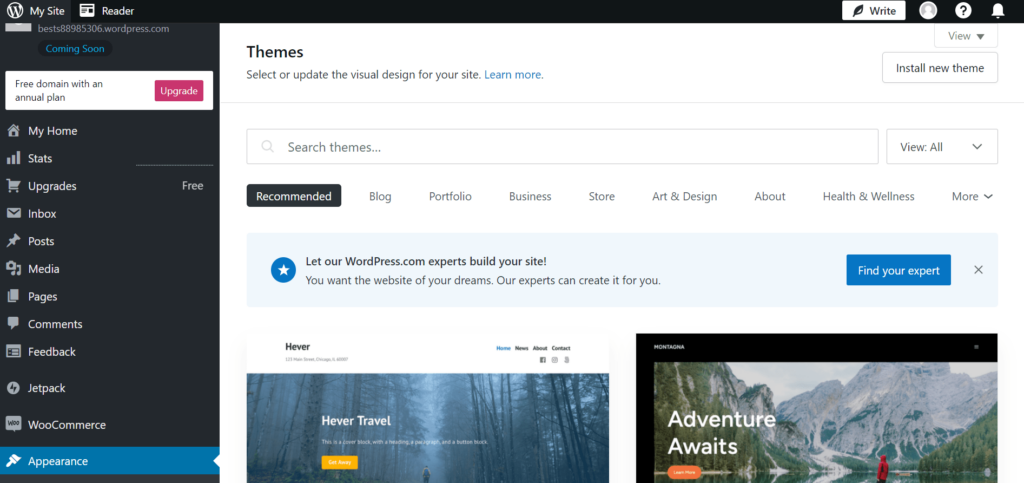
- Log into the WordPress dashboard
- Select ‘Appearance’, and choose ‘Themes’ to navigate the theme dashboard
- Click on ‘Add New’. You can explore themes categorized under ‘Featured’, ‘Popular’, etc., or search for themes for specific sectors.
- After demoing a few, you can install the one you prefer. Once downloaded, an ‘Activate’ button will appear under the theme. Click on it, and the theme is all set to be used!
If you want something more unique and advanced, you can purchase a theme from a reliable third-party website, ThemeForest. However, remember that excess special extra features could slow down your site. Hence, go for only what you require – simplicity is key!
To install a premium theme, you need to:
- Download the .zip file of the theme
- Log into the WordPress Dashboard
- Head over to ‘Appearance,’ and then click ‘Themes.’
- After reaching the theme dashboard, click ‘Add New,’ then the blue ‘Upload Theme’ button at the top.
- Select your new theme file from your computer.
- After a success message, you’ll be prompted to activate your theme. Now, your website is ready to go!
Prices for premium themes vary, typically from $10 to $200, with the average price around $55 as a one-time cost. Whether you pick a free or premium theme, you can modify it later.
Note: WordPress updates regularly, and your theme needs to update to remain compatible. WordPress and responsible developers usually create theme updates ahead of a WordPress update. You’ll need to install these updates manually to ensure compatibility with the new version of WordPress.
Step 5: Create new content
After installing your chosen WordPress theme, the next step is populating your site with unique content! The content on your site primarily comprises two elements:
Pages
Pages are static in nature, meaning they remain unchanged until you choose to edit them. A typical example of a page is the “About Us” section. Many themes display pages on a navigation bar at the top, or alternatively, you can use the ‘Pages‘ widget to list them on the side.
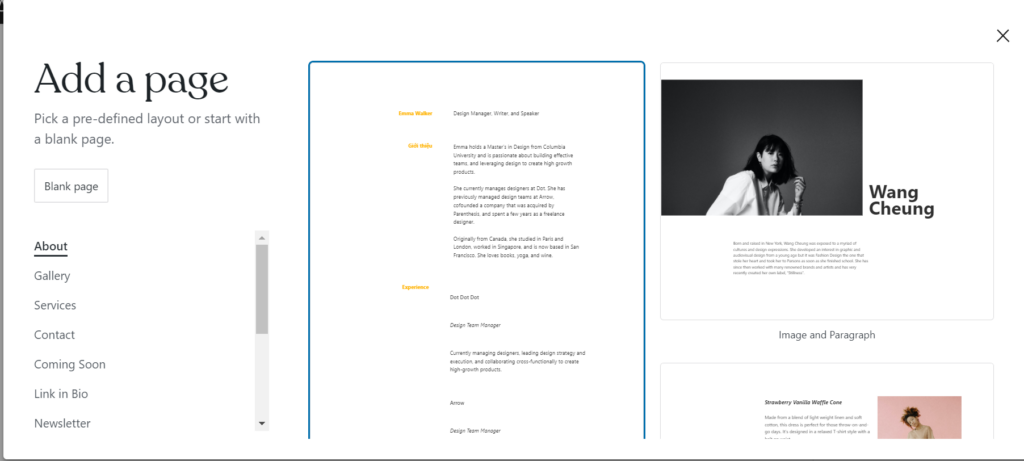
To create a new page, navigate to Pages > Add New. Select the types of pages you want to create, add new content, add necessary supplementary components, etc. to fulfill your page(s).
Here are some pages worth considering for your site:
- About – This page lets you share your website’s purpose and story. It’s an essential page for anyone learning how to create a website.
- Contact – Here, you can provide your contact information and a user-friendly contact form (which can be added via the WPForms plugin) for visitors to get in touch.
- Privacy Policy – A privacy policy page has become increasingly important in today’s digital age. You can learn more about creating a privacy policy in WordPress here.
- Portfolio – This page lets you showcase your previous work.
- Store – This page is vital if you plan to sell products or services. To set this up, you’ll need the WooCommerce plugin, which is highly recommended for e-commerce on WordPress.
- FAQs – Depending on your website’s scope, an FAQ page may be beneficial in providing additional information to potential users.
Posts
Posts are entries listed in reverse chronological order on your homepage or in a specified ‘blog’ section. You can mark posts as ‘sticky’ to keep them at the top. To create a new post, navigate to Posts > Add New > Paste the new content > Editing & Finalizing > Publish the content.
You can manage all the posts on the central dashboard, where you can edit, publish, eliminate, schedule, etc., the available content.
Step 6: Customize the site
After you’ve built some pages and posts, your website truly begins to take on your unique persona. The next step is to tailor your website further to match the requirements of your content. There are numerous options for customizing your site, and we’ll concentrate on 4 main areas:
Change the Site Title and Tagline
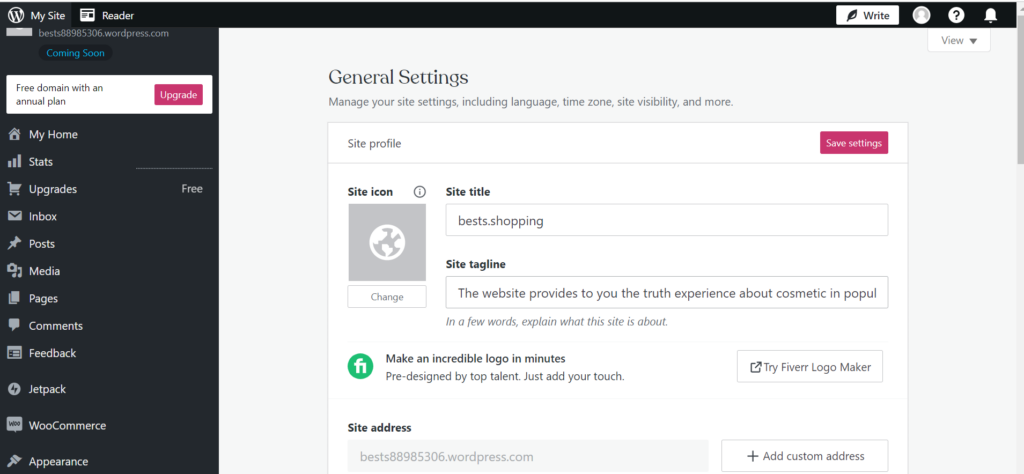
By default, WordPress labels your site as ‘Just another WordPress site‘. This doesn’t reflect your unique content and should be changed immediately. Follow these steps:
- Access your WordPress dashboard
- Navigate to ‘Settings‘ and then ‘General‘
- Assign your website’s ‘title’ next to ‘Site Title’
- Add a brief description of your site next to the ‘Tagline’
- Click ‘Save Changes’
Add a navigational menu
This step is crucial to ensure your content can be easily found. Here’s how to do it:
- Access your WordPress dashboard
- Hover over ‘Appearance’, then click ‘Menus’
- Name your menu next to ‘Menu Name’, then select the pages you’d like to include from the list on the left
- If your theme has multiple menu options, select the appropriate one under ‘Menu Settings‘
- Click ‘Save Menu‘ to activate your new menu
Set a homepage
You have two main options for your homepage: a dynamic page that updates with all your latest posts or a static page that maintains the same content. Here’s how to set it up:
- Access your WordPress dashboard
- Click ‘Settings’, then navigate to ‘Reading’
- You’ll see ‘Reading Settings’. The first option is ‘Front Page Displays‘
- Choose between ‘Your latest posts’ or ‘A static page’
- Click ‘Save Changes’ to activate your homepage
If you choose ‘A static page‘, ensure you’ve created a ‘Blog’ page (or similar) to display your latest posts.
Change Comments Settings
WordPress includes a comment feature, which is automatically turned on. Comments can be a valuable tool for enhancing user engagement. However, you may wish to modify the comment settings:
- Access your WordPress dashboard
- Click ‘Settings’, then head to ‘Discussion’
- We recommend enabling ‘Comment must be manually approved’ to avoid spam
- Click ‘Save Changes’ to update your comment settings
Step 7: Install essential plugins

Here are some superb plugins for you to consider – even better, they’re all free of charge:
- Yoast SEO – A tool to assist in optimizing your site for search engines and improving overall accessibility.
- Google Analytics for WordPress – Seamlessly integrates your site with Google Analytics, the top traffic analysis tool on the web.
- Wordfence Security – Enhances WordPress site security.
- UpdraftPlus – Facilitates automatic backups for your site.
- Optimole – Optimizes your site’s images.
- WPForms – Allows you to add interactive contact forms to your site, a much safer way to communicate with visitors than displaying your email address.
You may find something interesting in this list of the most popular WordPress plugins. Some of the highly rated WordPress plugins include:
- Contact Form by WP Forms – A user-friendly drag-and-drop plugin for creating customizable forms for your site.
- Yoast SEO – A plugin to enhance your content’s visibility on search engine rankings.
- WooCommerce – An add-on to provide ecommerce features (i.e. online selling capabilities) to your site.
Here are the required steps to add a plugin to your site:
- Log into your WordPress dashboard.
- Navigate to ‘Plugins’, then select ‘Add New’.
- Use the top-right search bar for specific plugins or features you need.
- After finding a suitable plugin, check its reviews and ratings to ensure reliability.
- If you’re satisfied with your selection, click the ‘Install Now’ button.
After WordPress is done downloading the plugin, you’ll receive a completion message prompting you to ‘Activate Plugin’. Finally, head to settings to set up your plugin (each plugin will have a unique configuration process).
Step 8: Update the site regularly

To look for available updates:
- Access your WordPress administrative panel.
- Proceed to the ‘Options for Update’.
- Look for potential updates under diverse tabs (like plugins, themes, and so on), or view a summarised list in the ‘General’ section.
Making WordPress Website: FAQs
Bottom line
In essence, creating a successful WordPress site involves eight essential steps. After having your own WordPress website, remember to update your site for optimal functionality & quality enhancement continually.


