
How to Set up Google Analytics for WooCommerce stores

Have you ever considered setting up WooCommerce Google Analytics to monitor your online store? With simple integration between WooCommerce and Google Analytics, you will have all the data you need to make sensible decisions for your online business.
This article will give you detailed instructions on how to set up Google Analytics for WooCommerce stores.
Let’s get started!
Benefits of WooCommerce Google Analytics Integration
-
Through its extensive reports, Google Analytics offers your business a massive quantity of relevant data for deep insights.
-
Integrating Google Analytics with WooCommerce is an excellent method to monitor the growth of your online business.
-
WooCommerce Google Analytics allows you to better understand your customers and make necessary changes to drive profits.
-
WooCommerce Google Analytics assists you in optimizing your online store, resulting in increased efficiency and revenues.
How to set up Google Analytics for WooCommerce stores?
In this part, we’ll show you how to set up Google Analytics for your WooCommerce store using the free plugin WooCommerce Google Analytics .
It’s important to note that you need to have a Google Analytics account before taking any of the following steps.
Now let’s get started with our three major steps!
Step 1: Install the free WooCommerce Google Analytics plugin
The first step is to purchase the WooCommerce Google Analytics (Free) plugin from the WooCommerce homepage.
On the checkout page, after you have downloaded the plugin for $0, you will be provided a link to download the plugin zip file.
After you’ve downloaded the zip file, it’s time to start putting the plugin into action on your WooCommerce store.
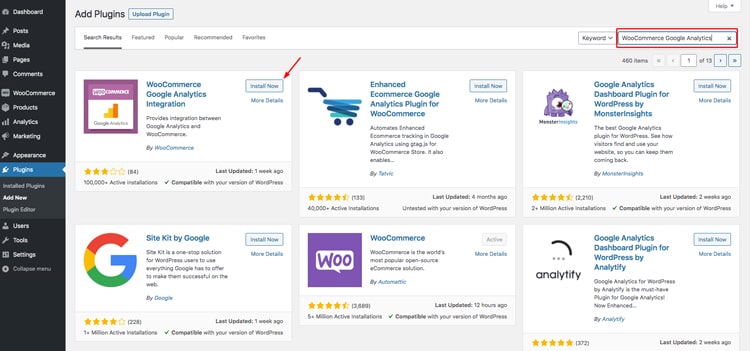
Click Plugins and then Add New from your WooCommerce Dashboard.
Then, click Upload Plugin and then Choose File, where you’ll be able to open your WooCommerce Google Analytics (Free) zip file.
Click Install Now and then Activate Plugin to finish.
Step 2: Add your Google Analytics ID
Once you’ve completed the preceding steps, navigate to the plugin settings by clicking Connect WooCommerce to Google Analytics.
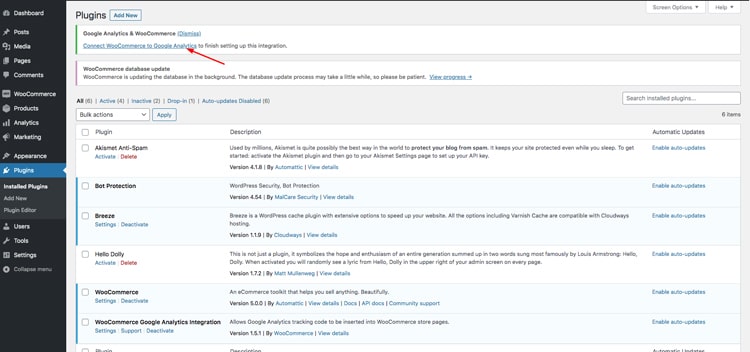
You must now enter your Google Analytics ID. To do so, exit your WordPress admin panel, open a new tab in your web browser, and navigate to your Google Analytics account page.
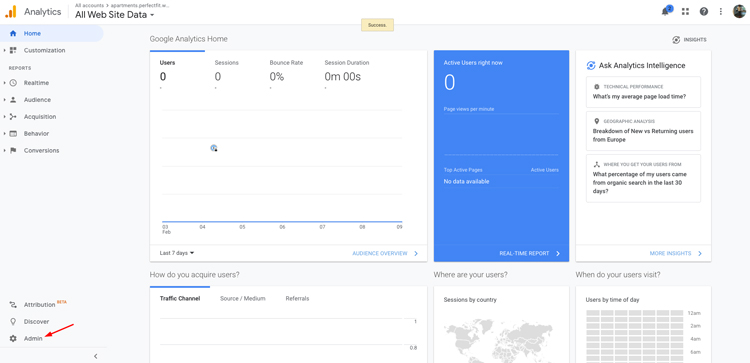
When you arrive at your GA Home Dashboard, select Admin in the bottom left-hand corner.
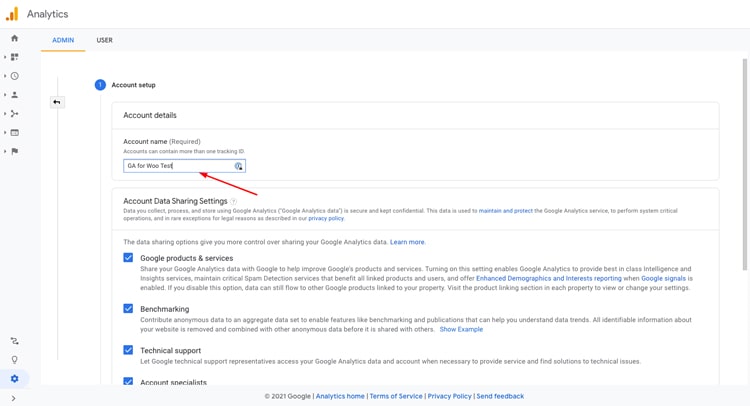
Next, depending on your GA structure, you must add a new account or property. Click the Create Account button under Account.
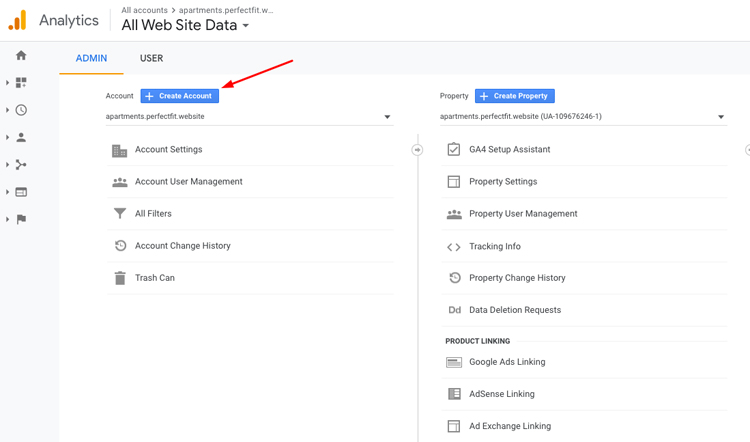
After you’ve given your new account a name, you’ll be prompted to establish a new property.
In this example, because you are running it against WooCommerce, which is a web app, you will have to select Web. Other possibilities for app development include iOS and Android.
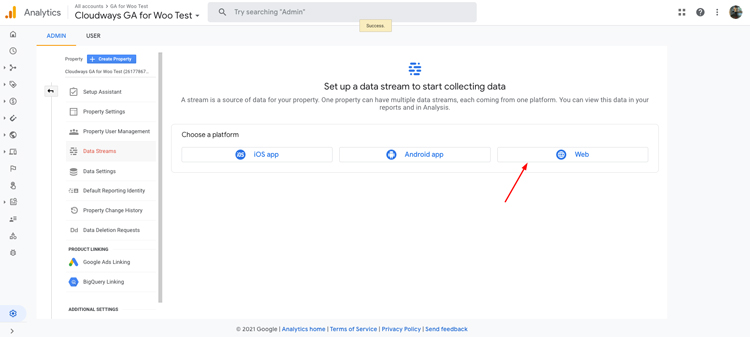
After you’ve finished adding Web and entering your website URL, you’ll need to link the WooCommerce store to GA. Simply copy and paste the tracking ID given by GA into the plugin settings in your WordPress admin dashboard that you left open a few minutes ago.

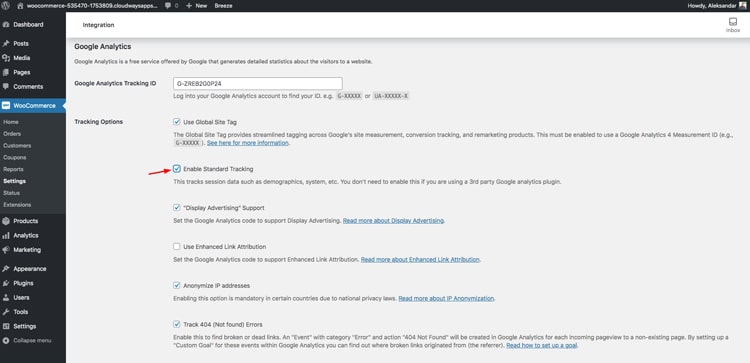
After inserting your GA tracking ID, check the Enable Standard Tracking box to avoid having to set up GA for additional analytics behaviors (blog visits, search traffic, other user behaviors, etc.) across the rest of your site.
Don’t forget to enable Enhanced Ecommerce if you want more detailed reporting and statistics.
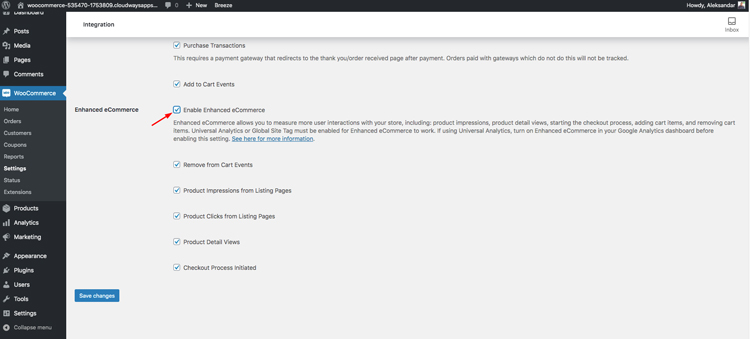
When you’re done, click the Save Settings button.
So by doing all of the above steps, you have just connected the store to GA in a matter of minutes. Conversions, user behavior, returning visitors and customers, retention, and many other critical data can now be tracked to help you operate your business successfully.
Step 3: Configure the WooCommerce Google Analytics plugin
Now, from your WooCommerce Dashboard, navigate to WooCommerce > Settings > Integration to return to the WooCommerce Google Analytics Plugin Settings page.
This plugin’s settings are very easy and simple. It’s a single page with a few options to choose from.
Let’s go through it together.
- Enable Standard Tracking

Check this box only if you aren’t already integrating the standard GA with other plugins.
- Display Advertising Network

Leave this option checked if you want to run Google ads and want to track the results not just through the Google advertising dashboard but also through analytics.
- Use Enhanced Link Attribution

This should be kept unchecked for a novice. Your In-Page Analytics report will be more accurate with Enhanced Link Attribution. With link element IDs, it automatically differentiates between numerous links to the same URL on a single page.
Remember that this is not a beginner-friendly solution, and it will require a better grasp of GA to utilize.
- Anonymize IP Addresses

When a consumer requests an IP address anonymization, Analytics will anonymize the address.
This will be done at the earliest possible stage of the collection network. The IP anonymization feature in Analytics converts the final octet of IPv4 user IP addresses and the last 80 bits of IPv6 addresses to zeros in memory shortly after they are transmitted to the Analytics Collection Network.
- Track 404 Page Not Found Errors

This option should be checked since it allows you to trace the error pages where your visitors have arrived. For example, you may have removed a product from your shop and will not restock it in the future. However, leaving the website online with the Out of Stock option is not acceptable since people would expect you to bring it back as long as it is available.
So even though you have already deleted the product, people can still see it on Google search, and when they click on the link, they get a 404 Page Not Found, which is problematic since you are unable to benefit from that traffic, and it results in a negative user experience.
Therefore, you should check for all 404 problems and 301 redirect visitors to a similar product or a shop/catalog page.
- Purchase Transactions

To monitor purchases, you’ll need some of the most popular WooCommerce payment gateway add-ons, such as Stripe, Braintree for WooCommerce, PayPal Checkout, and Square.
You will be able to track transactions, refunds, revenue, taxation, shipping, and other critical financial metrics.
- Add to Cart Events

By checking this option, you can track when your visitors add products to the cart, evaluate their behavior, and determine where they abandon the cart.
Once you’ve got the settings configured the way you want, click Save Changes and you’re done.
Your website now has WooCommerce Google Analytics enabled. You can access your Google Analytics account at any moment to track all eCommerce data from your online business.
Apart from the free plugin WooCommerce Google Analytics, you can also use Google Analytics Dashboard plugin by MonsterInsights to add Google Analytics to WooCommerce.
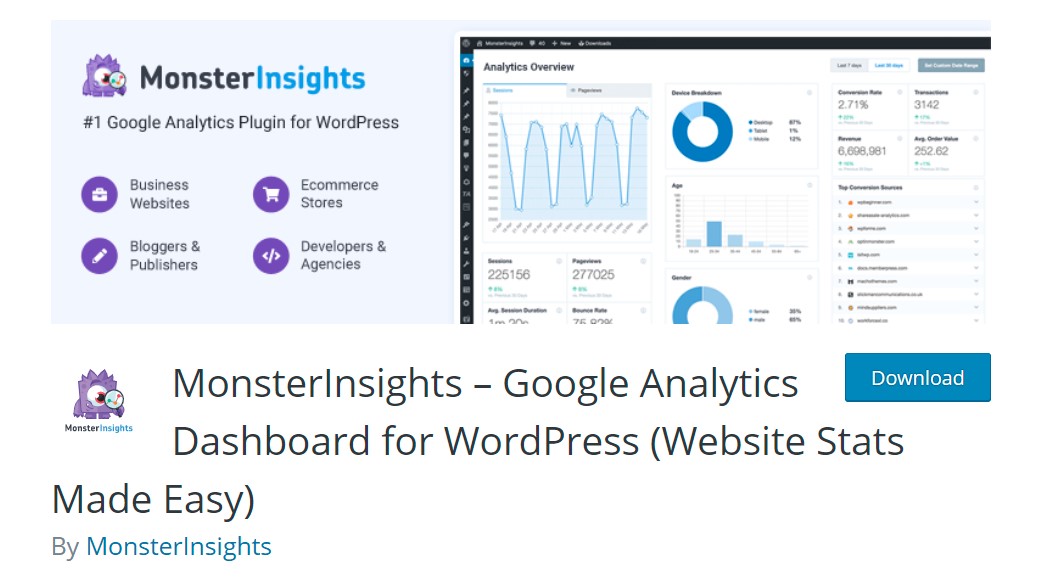
This plugin is a popular and appealing method of adding and tracking WooCommerce analytics. The plugin has a plethora of parameters for a robust analytics integration setup. One of its key features is the ability to connect neatly and easily with WooCommerce, allowing you to track your e-commerce data.
The primary disadvantage of this method is that it is not free to use. You must purchase the pro edition of WooCommerce in order to integrate it with Google Analytics. However, it is a solid alternative to the free plugin mentioned above.
3 Recommended WooCommerce Analytics Plugins
In this part, we’ll show you the three best WooCommerce Analytics plugins that help you track your customers’ activity.
1. WooCommerce Customer History
WooCommerce Customer History assists you in increasing your conversion rate by allowing you to observe how your customers browse your WooCommerce store. The plugin preserves a complete purchase history record and calculates the overall customer lifetime value.
Key Features
- Observe how your consumers navigate your store and which screens they view before making a purchase.
- Keep track of each customer’s entire customer lifetime value.
- View insights about your customers’ browsing patterns on your website to determine which screens are most effective for targeted conversions.
Price: $49 per year
2. WooCommerce Cart Reports
WooCommerce Cart Reports provides data and graphs on cart abandonment from your WooCommerce dashboard. The plugin delivers real-time analytics on open and abandoned shopping carts for your consumers. As a result, you can keep track of your clients’ shopping carts and run your online store more effectively.
Key Features
- Simple to set up and manage
- Dashboard Widgets for Quick Access
- Extensive customized date-range reports
- “Cart Detail” view displays cart products, time-last-updated, and other information.
- Contact customers when they have logged in but have abandoned their shopping carts.
Price: $79 annually
3. Recommendation Engine for WooCommerce
WooCommerce Recommendation Engine enables you to configure Netflix and Amazon-style product suggestions for your shoppers. The plugin recommends items to users based on their viewing and purchasing history, as well as products that are commonly purchased together. It’s a wonderful method to give automated cross and upsells while also allowing visitors to browse and buy additional products from your store.
Key Features
- Recommending Related Products by the view, purchase history, and products purchased together
- Widgets: WooCommerce recommended products; WooCommerce purchased products
Price: $79 per year
Final words
Setting up Google Analytics for WooCommerce stores is obviously useful in a variety of ways, as we highlighted in our post. Furthermore, you can set up WooCommerce Google Analytics in a matter of minutes.
Therefore, we believe you will be able to effectively set it up and begin utilizing the incredible amount of data it offers to better operate your business.
If you have any questions regarding this, do not hesitate to reach out to us via the comments section below.
Thank you for reading and we’ll see you in the next post.


