
WooCommerce Redirect After Checkout: How To Set It Up

If you operate an eCommerce business, you’ve probably tried various methods to get clients to finish the order transaction. Due to a lengthy Checkout procedure, a high proportion of such buyers drop out or do not finish the transaction. In such a circumstance, you lose a portion of people who could have been prospective clients if your Checkout page had been designed for higher customer satisfaction. Only a few clients who are interested in the product make a purchase.
That is why today’s tutorial will show you the importance of WooCommerce redirect after checkout and how to set it up. When it comes to your WooCommerce store, you’ve probably wished to make the Checkout process satisfy your customers to increase conversion. The most common technique is to create a custom “thank you” page and direct your consumers to it after finishing their orders. So, let’s dive in to find out about that method.
Why do you need to set up a redirect after checkout?
There are several reasons why you would need to redirect the WooCommerce checkout page to a personalized Thank You page. One reason is to develop an upsell offer for a particular product, while another is to conduct an A/B test between various templates or designs. For example, you might design a Thank You page with an upsell offer for consumers who bought a skateboard to buy skateboard wheels, while another Thank You page would present socks to customers who bought shoes. As a result, you may personalize the customer experience and offer related items to maximize income.
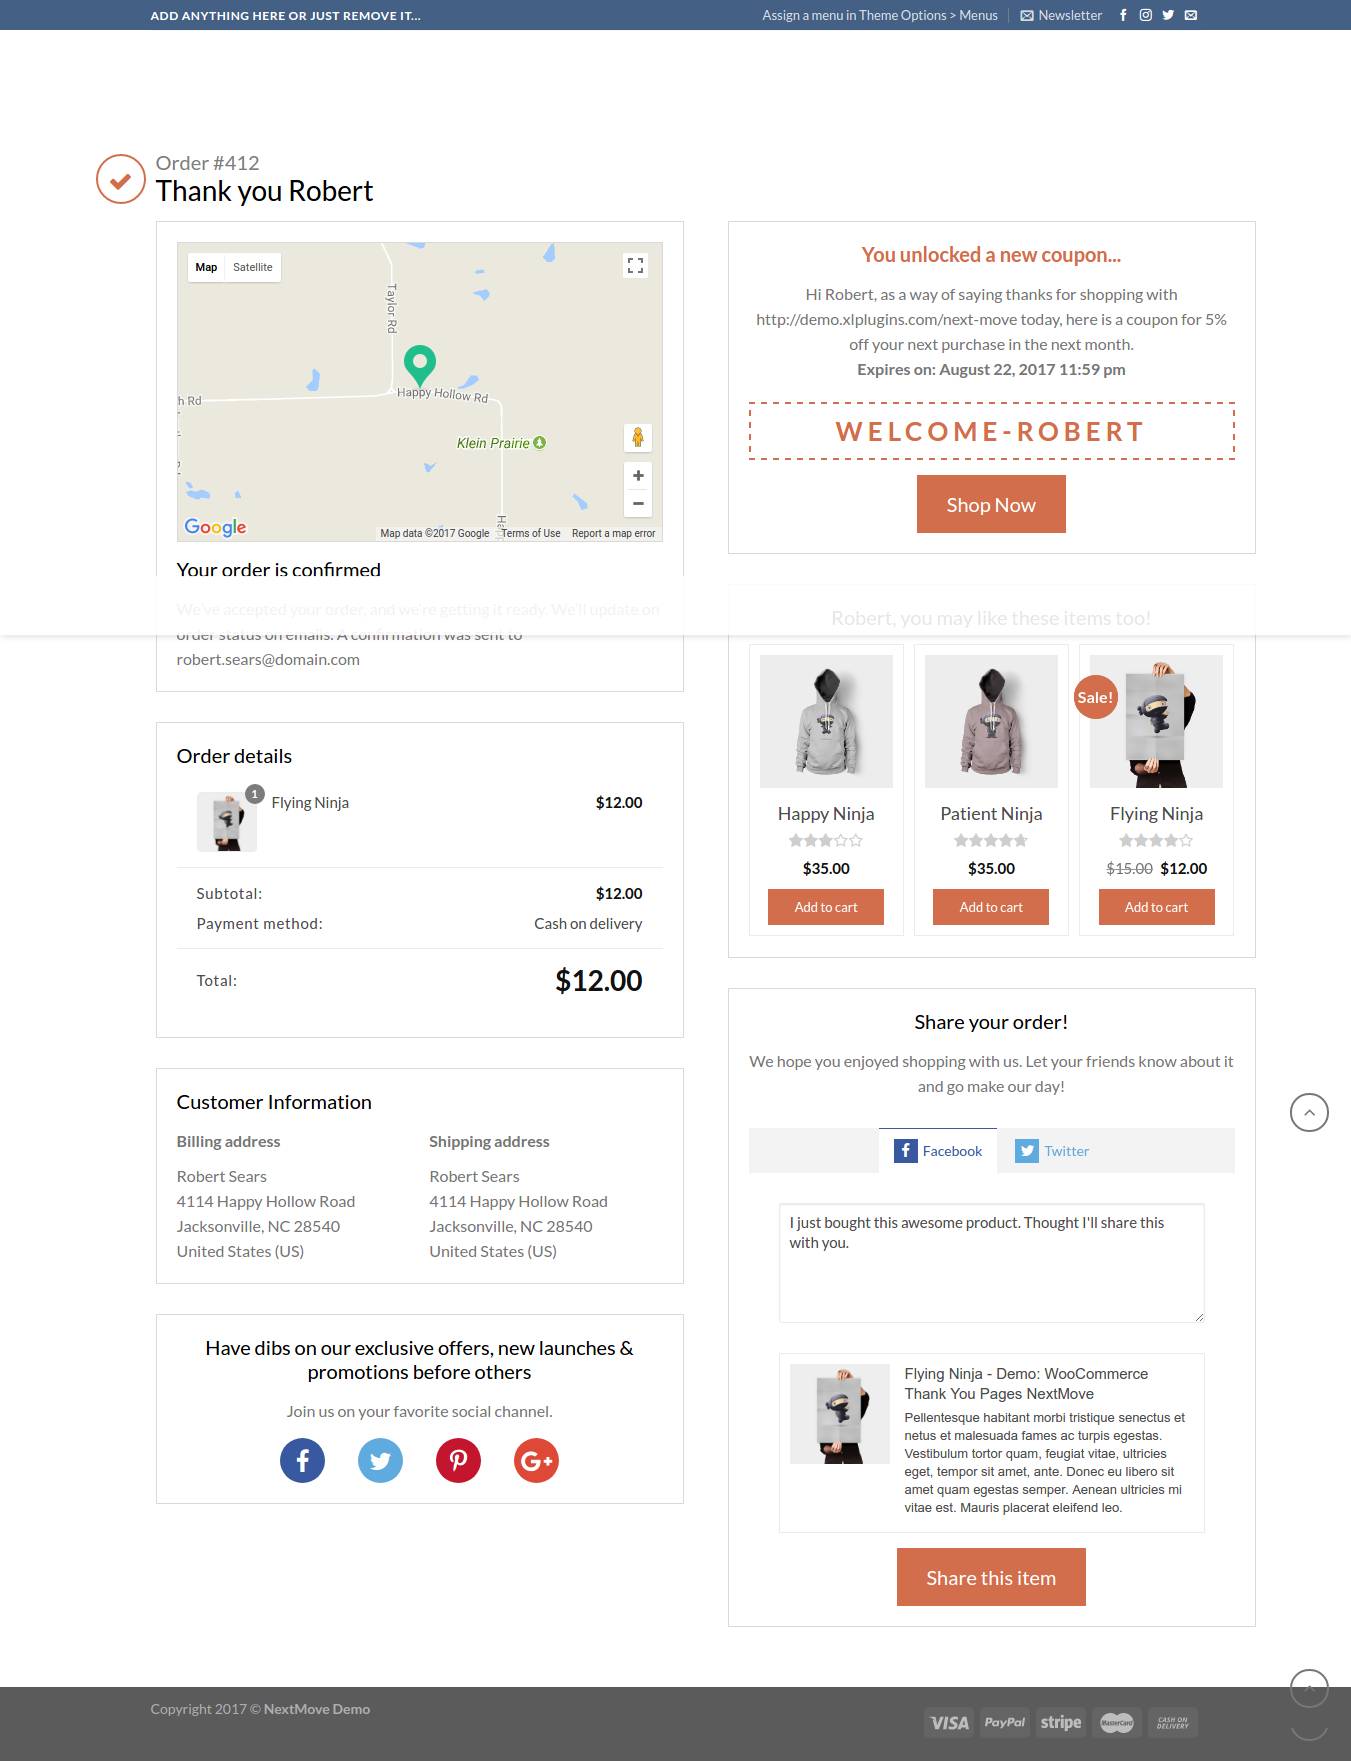
Customizing the thank you page gives your consumers a one-of-a-kind purchase experience. This is why having a nicely designed thank you page tailored to your product is essential. It also contributes significantly to making your shop stand out from the crowd. On this page, you can also manage after-sales service and support data. This is critical if you want to increase sales and traffic to your online business! By the conclusion of this brief article, you can dynamically redirect users to a custom page. We’ll also include code snippets for generating a new thank you page and overwriting an old one.
How to set up a redirect after the checkout
WooCommerce defaults to redirecting consumers to a default page after checkout. However, we have two options for redirecting the WooCommerce checkout page:
- Make use of a code snippet.
- Make use of a plugin.
Method 1: Coding
You also need to build a child theme before proceeding. This ensures that your modifications aren’t lost during an update. It is vital to note that in this guide, we will be using custom PHP code snippets. We have detailed all of the actions you must do, which will make your job easier. This guide also assumes that you already have a functional WordPress installation, on top of which WooCommerce is installed. Let us see how you can do this.
The basic code snippet
In this part, we will utilize a custom PHP code snippet to redirect consumers to a welcome page once their transaction is complete. Welcome pages are excellent for upselling a product, including referrals, or informing people about your offering. To lure new and loyal consumers, you might also put discounts or coupons on this page.
Here are some steps you must take to redirect customers to a custom page:
- Log in as the admin account to your WordPress site and go to the Dashboard.
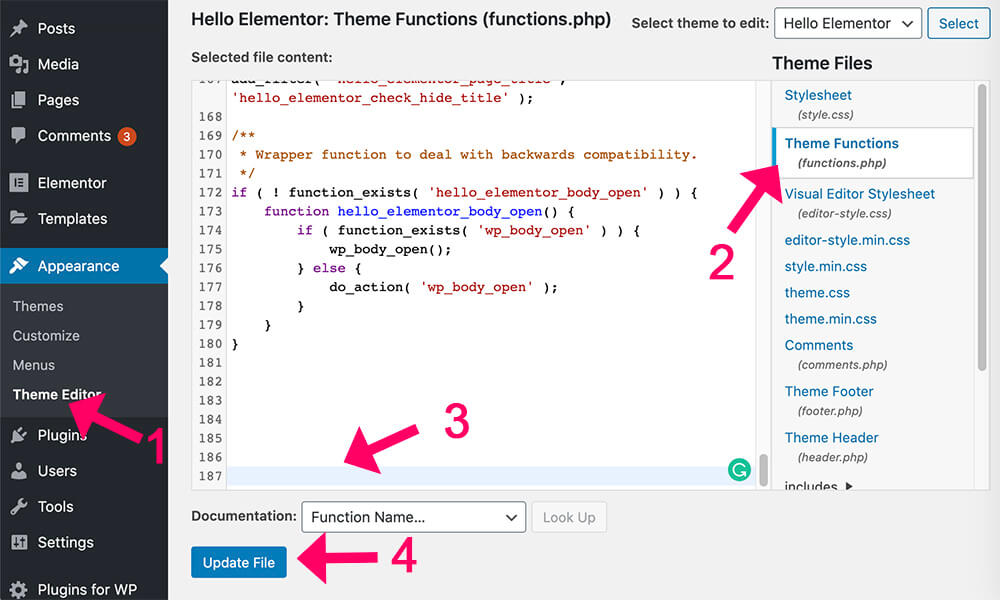
- Select Appearance Menu > Theme Editor Menu from the Dashboard menu. When you open the Theme Editor tab, please search for the theme functions file, where we will add the function redirect buyers when they have completed their purchases.
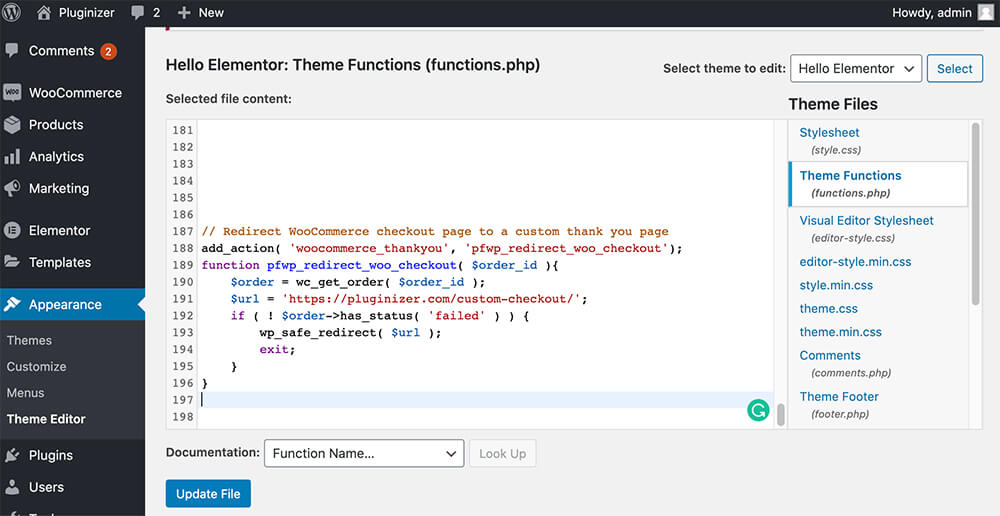
- In the PHP file, paste the following code:
// Redirect WooCommerce checkout page to a custom thank you page
add_action( 'woocommerce_thankyou', 'avada_redirect_woo_checkout');
function pfwp_redirect_woo_checkout( $order_id ){
    $order = wc_get_order( $order_id );
    $url = 'CUSTOM THANK YOU PAGE URL';
    if ( ! $order->has_status( 'failed' ) ) {
        wp_safe_redirect( $url );
        exit;
    }
}
After the user completes a purchase, the code snippet redirects the user to a custom page. It determines whether or not the user has finished their transaction and redirects them to the URL. To make this code function, remember to replace the CUSTOM THANK YOU PAGE URL with the actual URL of the desired page before clicking Update. To increase the user experience on your site, your custom page should be elegantly designed.
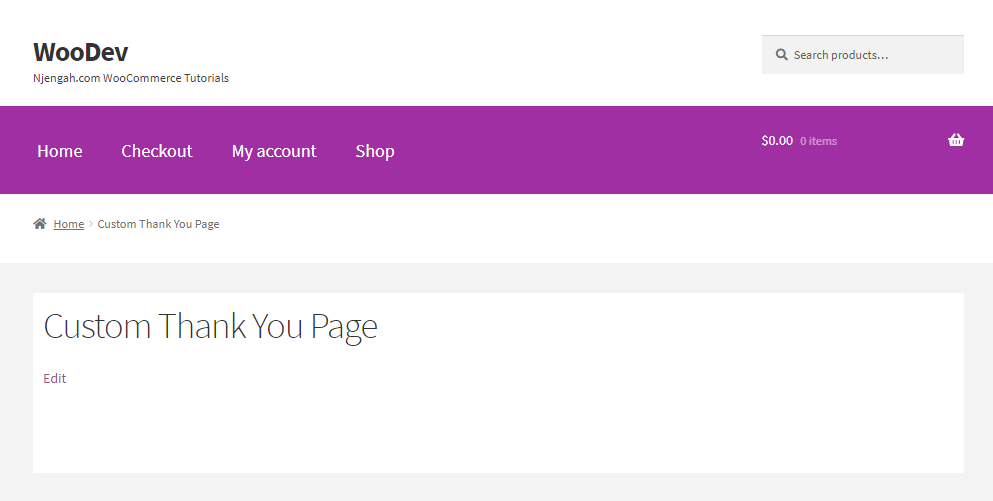
After you’ve updated the file, go to your store and buy a new product to ensure you’ve been redirected to the desired page.

Instead of establishing a new Thank You page, you can modify an existing one. We will use filters and action hooks to do this. Custom code may be inserted at various locations using action hooks. Filter hooks, on the other hand, let you alter and return a variable that passes through. In the next part, we will utilize filters to modify the title, customize the title, and edit the text before the order information. We’ll also guide you on how to create a survey form to capture more details from your consumers. We’ll also demonstrate how to submit and execute an AJAX request for the form.
Overwriting WooCommerce Templates to setup a WooCommerce Thank You Page
Here’s a short rundown of the actions you’ll need to take. Before creating the custom redirect after checkout, check if the user is on the checkout page, order page, or order received page. The template_redirect() method is required to automatically redirect consumers to a custom page once they place an order. You must use the template redirect hook and a callback function with the redirect URL to redirect the user once an order has been placed. For example, add the template_redirect action hook:
add_action('template_redirect', 'your_callback_function');
Create the callback function you mentioned in the template redirect hook above, keeping in mind that the names in the callback function and the hook must be the same. Use the wp_redirect() method in the callback function to provide the page to which the user should be routed after successful checkout. To avoid redirect issues, always include an exit after the wp_redirect operation. This code is uploaded to your theme’s functions.php file. Find that file and access it in the editor to add the WooCommerce redirect after the checkout action hook.
To input the code, navigate to Appearance > Theme Editor Menu. Look for the theme functions file to add the function when the Theme Editor page is launched. Save your edits or update your theme’s functions.php or plugin file, and you’ll have successfully generated the redirect to the desired page after WooCommerce checkout.
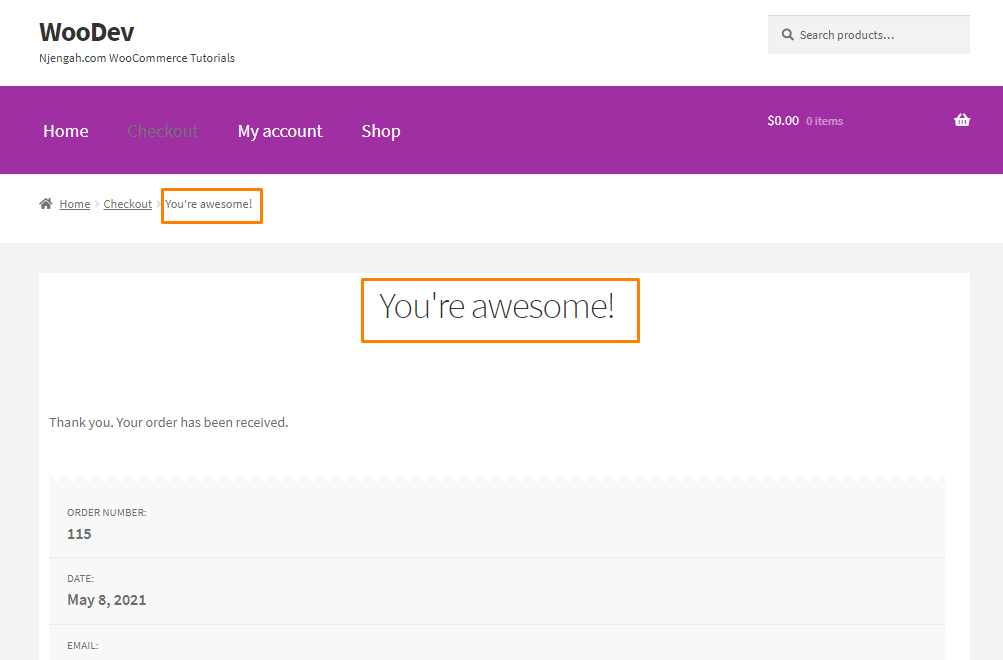
Change the Thank You Page Title
Instead of building a new Thank You page, you could alter the page’s title. Log in to your WordPress site as the admin user and navigate to the Dashboard. Click Appearance Menu > Theme Editor Menu from the Dashboard menu. When you enter the Theme Editor tab, please search for the theme functions file, where we will add the function to modify the headline of the thank you page. You can include the following code in a plugin or the theme’s functions.php file:
add_filter( 'woocommerce_endpoint_order-received_title', 'avada_thank_you_title' );

function njengah_thank_you_title( $old_title ){

return 'You\'re awesome!';

}
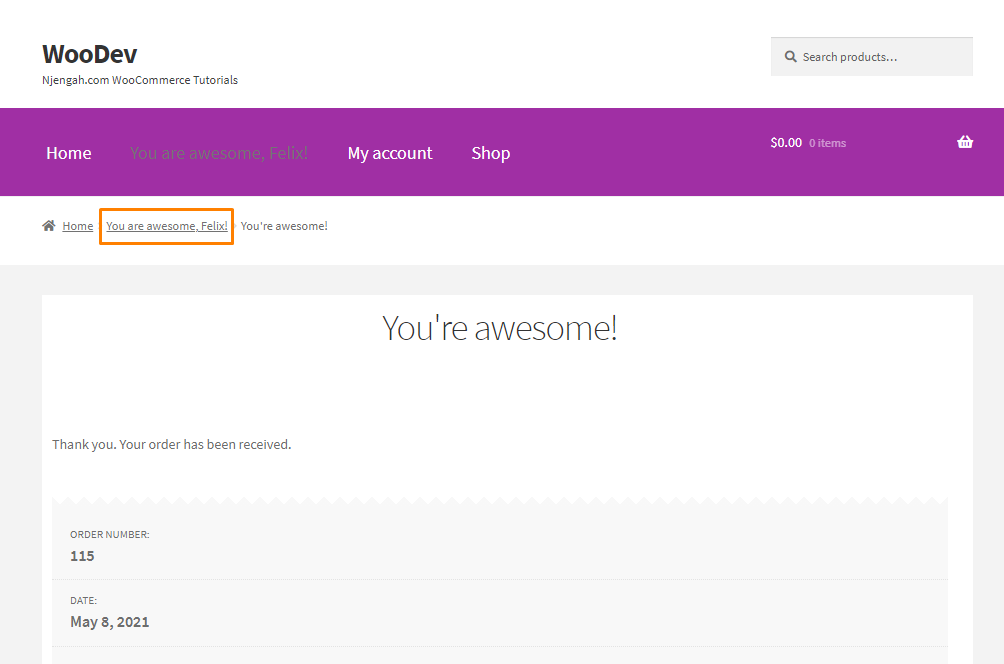
Personalize the Title
You may improve your website by customizing the Thank You page title with specifics such as the customer’s name or greeting them in their local language. You may include the following code in a plugin or the functions.php file of your theme:
<?php
 add_filter( 'the_title', 'woo_personalize_order_received_title', 10, 2 );
function woo_personalize_order_received_title( $title, $id ) {
    if ( is_order_received_page() && get_the_ID() === $id ) {
                global $wp;
         // Get the order. Line 9 to 17 are present in order_received() in includes/shortcodes/class-wc-shortcode-checkout.php file
        $order_id  = apply_filters( 'woocommerce_thankyou_order_id', absint( $wp->query_vars['order-received'] ) );
        $order_key = apply_filters( 'woocommerce_thankyou_order_key', empty( $_GET['key'] ) ? '' : wc_clean( $_GET['key'] ) );
        if ( $order_id > 0 ) {
            $order = wc_get_order( $order_id );
            if ( $order->get_order_key() != $order_key ) {
                $order = false;
            }
        }

        if ( isset ( $order ) ) {
            //$title = sprintf( "You are awesome, %s!", esc_html( $order->billing_first_name ) ); // use this for WooCommerce versions older then v2.7
                $title = sprintf( "You are awesome, %s!", esc_html( $order->get_billing_first_name() ) );
        }
    }
    return $title;
}
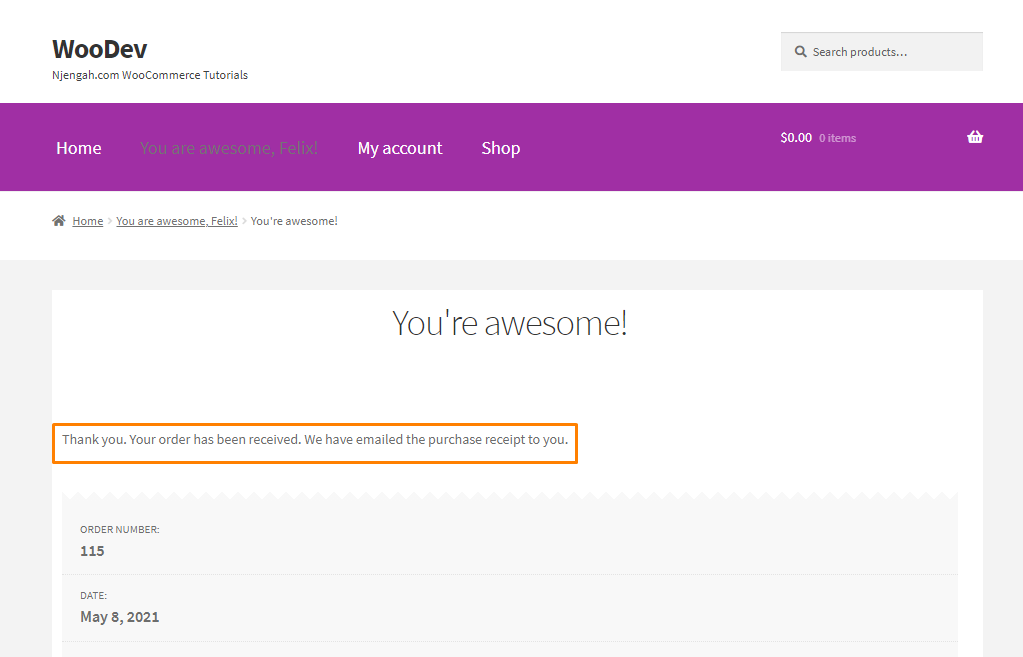
Changing the Text Before Order Information
The WooCommerce filters allow you to customize the wording displayed on Thank You page. “Thank you - Your order has been received” is the default wording that appears before the order information. It is contained in the file templates/checkout/thankyou.php. WooCommerce has a filter that allows you to edit this text: woocommerce_thankyou_order_received_text. Here are the actions you must take to modify it:
<?php

add_filter('woocommerce_thankyou_order_received_text', 'woo_change_order_received_text', 10, 2 );
function woo_change_order_received_text( $str, $order ) {
    $new_str = $str . ' We have emailed the purchase receipt to you.';
    return $new_str;
}
Log in as the admin account to your WordPress site and go to the Dashboard. Choose Appearance Menu > Theme Editor Menu from the Dashboard menu. When you access the Theme Editor page, please search for the theme functions file, where we will add the function tailor the headline of the thank you page. In the PHP file, paste the following code:
<?php

 add_filter('woocommerce_thankyou_order_received_text', 'woo_change_order_received_text', 10, 2 );
function woo_change_order_received_text( $str, $order ) {
    $new_str = 'We have emailed the purchase receipt to you. Please make sure to fill <a href="http://localhost:8888/some-form.pdf">this form</a> before attending the event';
    return $new_str;
}

The code above will attach “We have emailed you the purchase receipt.” to the current content. If you wish to replace the content, skip chaining the $str variable to your message variable $new str. To be clear, the $new = ‘We have emailed the purchase receipt to you.’; If you want the consumer to download a form, include instructions here:
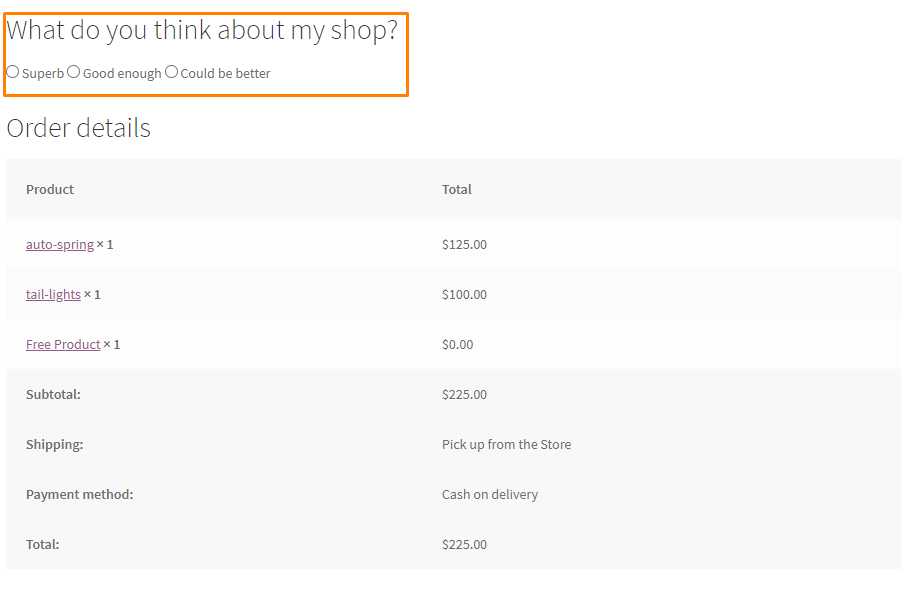
Collect Additional Details
Additional information can be gathered from the user. You may, for example, ask them to assess your user experience. To accomplish this, you must first build a form. For an AJAX request to be recorded in the back end, it must also be sent and processed. Let’s go over the actions you’ll need to take:
- Log in as the admin account to your WordPress site and go to the Dashboard.
- Head to Appearance Menu > Theme Editor Menu from the Dashboard menu. When you access the Theme Editor page, search for the theme functions file/.
- First and foremost, we must include a form. You must use the woocommerce_thankyou_order_received_text hook if you want it to show immediately after the headline. To add a survey form, add the following code snippet:
add_action( 'woocommerce_thankyou', 'avada_poll_form', 4 );
function avada_poll_form( $order_id ) {
echo '<h2>What do you think about my shop?</h2>;
<form id="thankyou_form">
<label><input type="radio" name="like" value="superb"> Superb</label>
<label><input type="radio" name="like" value="good enough"> Good enough</label>
<label><input type="radio" name="like" value="could be better"> Could be better</label>;
<input type="hidden" name="action" value="collect_feedback" />
<input type="hidden" name="order_id" value="' . $order_id . '" />
' . wp_nonce_field( 'thankyou'.$order_id, 'thankyou_nonce', true, false ) . '
</form>';
}
- Next, continue to add this code:
add_action( 'wp_footer', 'avadd_send_thankyou_ajax' );

function avada_send_thankyou_ajax(){

// exit if we are not on the Thank You page

if( !is_wc_endpoint_url( 'order-received' ) ) return;

echo "<script>

jQuery( function( $ ) {

$('input[type=radio][name=like]').change(function() {

$.ajax({

url: '" . admin_url('admin-ajax.php') . "',

type: 'POST',

data: $('#thankyou_form').serialize(),

beforeSend : function( xhr ){

$('#thankyou_form').html('Thank you! You feedback has been send!');

},

success : function( data ){

console.log( data );

}

});

});

});

</script>";

}
- The result is as follows:
- Following that, we must execute the AJAX request by including the following code in the same file:
add_action( ‘wp_ajax_collect_feedback’, ‘avada_thankyou_ajax’ ); // wp_ajax_{ACTION}
add_action( ‘wp_ajax_nopriv_collect_feedback’, ‘avada_thankyou_ajax’ );
function njengah_thankyou_ajax(){
// security check
check_ajax_referer( ‘thankyou’.$_POST[‘order_id’], ‘thankyou_nonce’ );
if( $order = wc_get_order( $_POST[‘order_id’] ) ) {
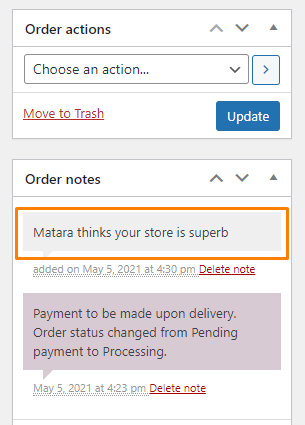
$note = $order->get_formatted_billing_full_name() . ‘ thinks that the shop is ‘ . $_POST[‘like’] . ‘.’;
$order->add_order_note( $note, 0, true );
}
die();
}
- The ultimate result is as follows:
Method 2: Using a third-party plugin
Writing code seems to be complicated for new users, but these plugins can accomplish the same thing. This is an example of the WooCommerce Redirect Thank You plugin in redirecting after the checkout.
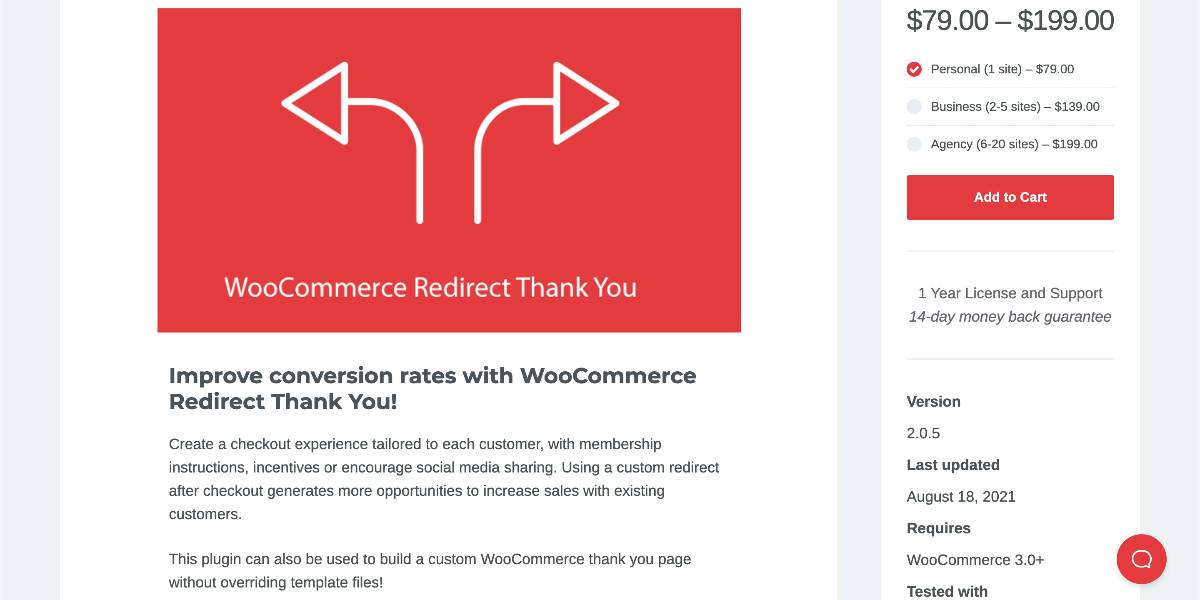
You may design your Thank You pages after installing the WooCommerce Redirect Thank You plugin. You may wish to create a basic thank you page for worldwide use, or you may want to develop sites to highlight specific items.
This enables cross-selling, up-selling, discounts, or coupons, all of which might increase potential purchases. An up-sell with a coupon offer has been built utilizing a WooCommerce block in the ‘Thank You’ coding sample shown above.

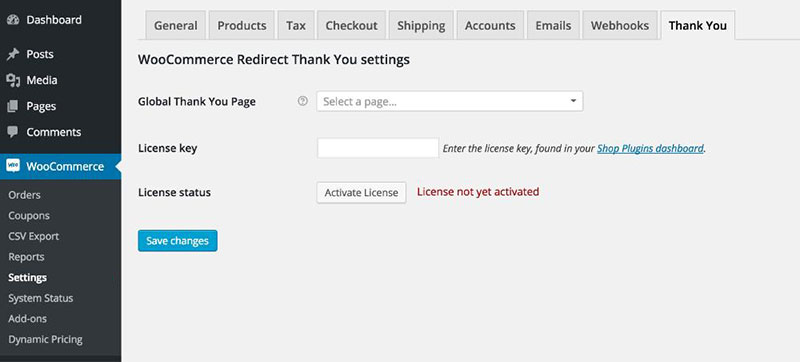
Navigate over WooCommerce in the WordPress dashboard, click Settings, and then pick the Thank You option. This feature allows you to choose a global Thank You page to which consumers will be sent upon order completion. This option takes precedence over the WooCommerce order finished page setting.
Insert the license key from the order confirmation email into the licensing key area. This will enable alerts of new plugin versions as well as automatic updates from your WordPress dashboard.
Three other best plugins to set up a redirect after checkout
WooCommerce Redirect After Checkout
WooCommerce Redirect After Checkout (WRAC) is the greatest WooCommerce redirect after checkout plugin that allows you to construct your thank you page and redirect it. You can arrange any page on your site as a WooCommerce custom thank you page in less than a minute. With this plugin, you can improve your customer’s experience after they’ve made a purchase. It is user-friendly and allows users who are not developers or programmers to configure any page on their shop as a personalized thank you page without any technical support.
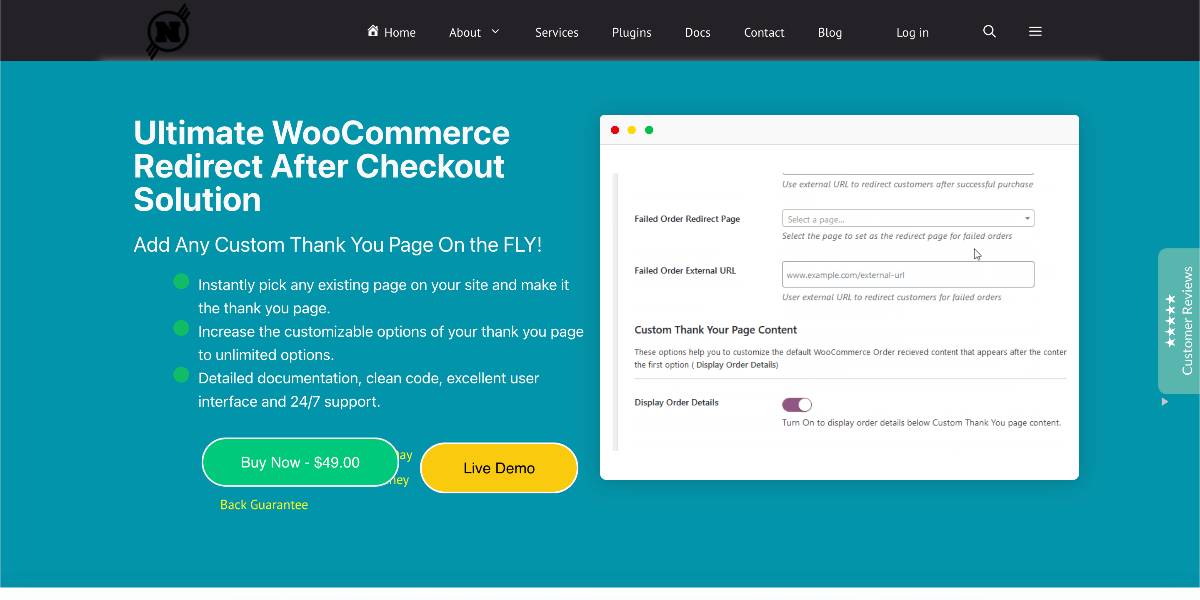
Outstanding features:
- You may use any page on your site as the custom Thank You Page and customize it in any way you like.
- This plugin’s new functionality allows users to make similar redirects based on the product instead of the global redirect to any page on your site.
- Choose one of your site’s published pages as the redirect page for rejected orders.
- Allows you to use an external URL, such as http://example.com, as your redirect page after checkout rather than a page within your site.
Price: You can get a single subscription at the cost of $49.
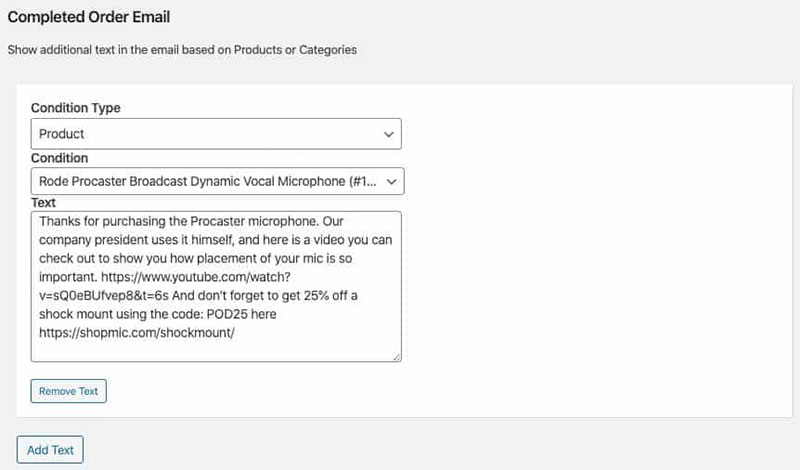
YITH CUSTOM THANK YOU PAGE
The YITH team built the YITH CUSTOM THANK YOU PAGE to address a little gap in the purchase process, which will be beneficial if utilized appropriately. In a matter of seconds, you can create a thank you page for your whole business or even one for each product. You can use the thank you page to upsell or share information with your consumers immediately following their purchase. Using this plugin, you can provide additional information following a specific transaction.
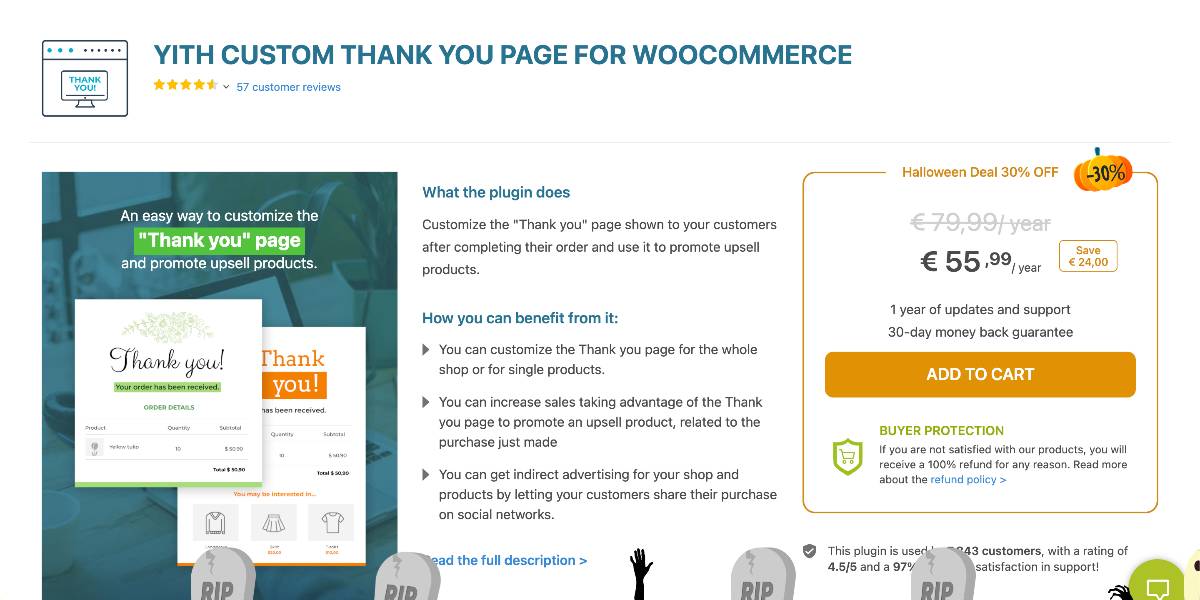
Outstanding features:
- Display a standard Thank You page that applies to all of your store’s products.
- Choose a unique Thank You page for each product.
- Set a priority for the display of your Thank You pages.
- Create a Thank You page for each product category.
- Use Google and Bitly URL shortening services to optimize your product sharing URL.
Price: You can get this plugin at the cost of €55.99 for a year of subscription.
WooCommerce Thank You Page Customizer
The WooCommerce Thank You Page Customizer lets you configure your “Thank You” page to give consumers discounts and display up-sell goods after a successful order. The plugin lets you drag and drop pieces to create your Thank You page in customize mode, so any changes you make are immediately visible for you to see, potentially saving you a lot of time. The plugin also includes shortcodes for displaying order details in Thank You page components.
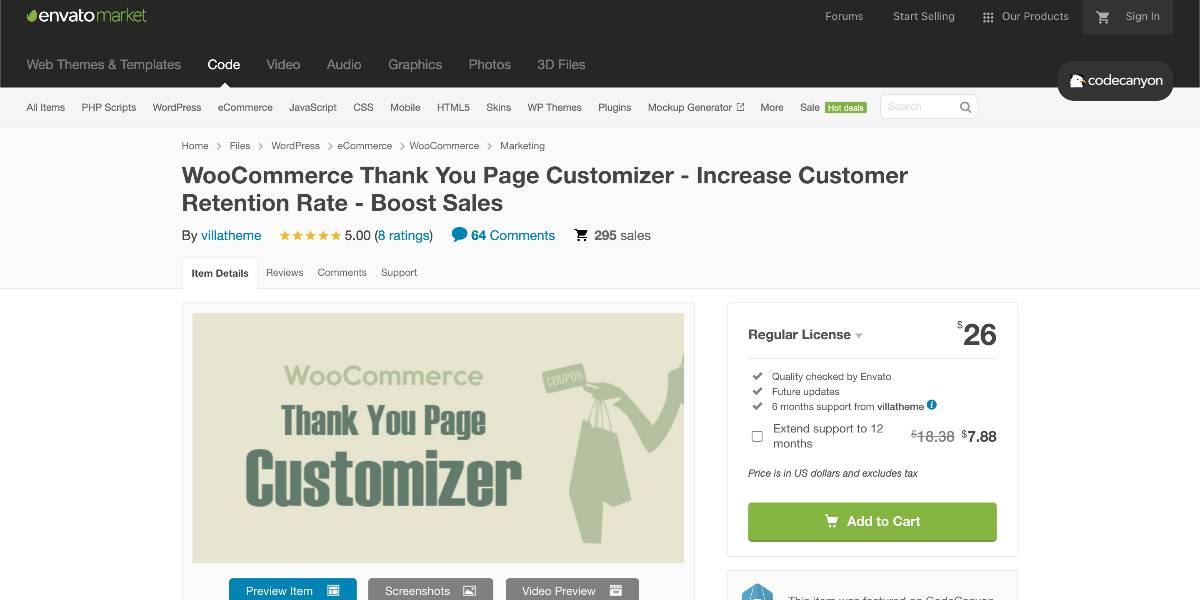
Outstanding features:
- Choose whether to use an existing coupon or allow the plugin to generate unique coupons after checkout.
- Create one-of-a-kind coupons for each order and show them on the thank-you page.
- Drag and drop components to customize the Thank you page.
- Display a thank you message and indicate that the order was received.
- Compatible with WooCommerce Email Template Customization: This enables you to build and customize the discount email for the WooCommerce Thank You Page.
Price: The regular license price of this plugin is $26.
Conclusion
You should now be able to redirect consumers to a custom page when they complete their purchase. We’ve also shown you how to modify the template to include other components on the thank you page. To increase your retention rate, you must be highly creative when changing this page. When modifying the functions.php file, however, you should always proceed with caution. If you make a mistake, an error message will appear.
We hope this tutorial will help you understand the importance of WooCommerce redirect after checkout and how to set it up. You may also utilize one of the page builder plugins suggested above to modify your thank you page. Keep it current by attaching a video of the store owner promoting a product. This will engage your users and inspire them to buy different things from your store.


