
What is the best image size for WooCommerce products? How to Manage & Customize

Product images play an indispensable part in any WooCommerce store. The reason is that these images let customers know a lot of things about your online products. And shoppers can also get plenty of subtexts thanks to your site’s visual communication. Product images could help change customers’ thoughts, determining if they buy your products or not.
As we know the importance of image to your online store, we will help you understand how you could manage your image well to attract clients. However, getting a perfect image is relatively complicated, especially getting the right and suitable image size. Follow us on an interesting guide on What is the best image size for WooCommerce products? How to Manage & Customize.
What can we get from setting the best image size for WooCommerce products?
By customizing the best image size for your WooCommerce products, you could get several benefits:
- Deal with blurriness of the image
You can notice a lot of burying images when surfing websites. This results from an image with an unsuitable size. It is a fact that if you add a product image in size not compatible with what the design theme of your WooStore allows, it will cause blurriness. In case, there is no solution to deal with blurring images, it might make your shoppers leave your Woocommerce store without buying your products.
- Increase the speed as well as the performance of your website
There is no denying that image size on any website is a crucial element to determine the performance as well as the speed of that site. If that image comes with a larger size, it is likely to take more time to load. This often results in the dissatisfaction of customers, thus reducing your store’s revenue.
With these two benefits, do not hesitate to spend time setting and customizing your product image at its most perfect size.
What is the best image size for WooCommerce products?
As we mentioned above, the blurriness is caused by the incompatibility between your theme and your product image. This is to say, it would be vital to understand this clearly so that you could answer what the best image size for the WooCommerce product is.
In short, the best image size of your products on WooStore is based on the theme that you are applying for your online store. Furthermore, it also depends on if you are using a plugin for image zoom or not.
To be more specific, if your store is selling T-shirts, you are recommended to set your WooCommerce product image at its minimum resolution is 800 px x 800 px. We also suggest you set a higher pixel than that. The reason is that your higher-quality images enable themselves to be better perceived.

In case, your products are complicated and detailed items, it would be better for you to upload larger images 2000px wide. With this size, your potential consumers could zoon in to observe all the details of your product. But a very important note is that you should avoid uploading images that are too large. Any oversized image increases the risk of slowing down your site. This is why sales will also be affected.
In the mind of customers, the quality of product images obviously reflects if the quality of your store’s products is good or bad. So, keep accompanying us to discover some tips to create a perfect image size for your products on WooCommerce.
How to customize image size for WooCommerce products?
Since there exist plenty of image sizes for WooCommerce products, it is complicated to understand how to customize them to fulfill the specific needs of any business. Doing it is extremely crucial, so we have come up with two ways to customize the size for your online products, including setting sizes within your WooCommerce store and using plugins to customize your image sizes.
1. Set sizes within your WooCommerce
Step 1: Set sizes for WooCommerce product images
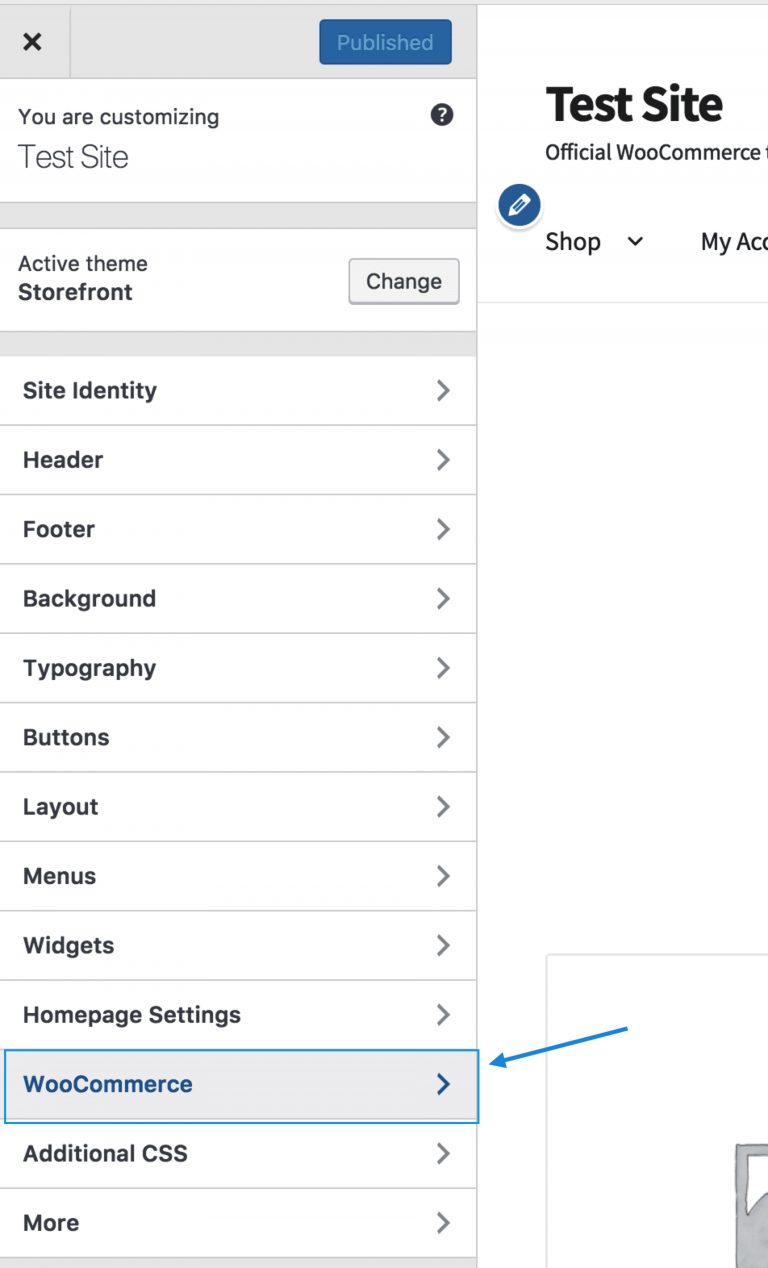
With the first method, you can configure your image size under your Customizer. What you need to do is to approach Appearance, choose Customize, then click WooCommerce before clicking Product Images. See the below screen:
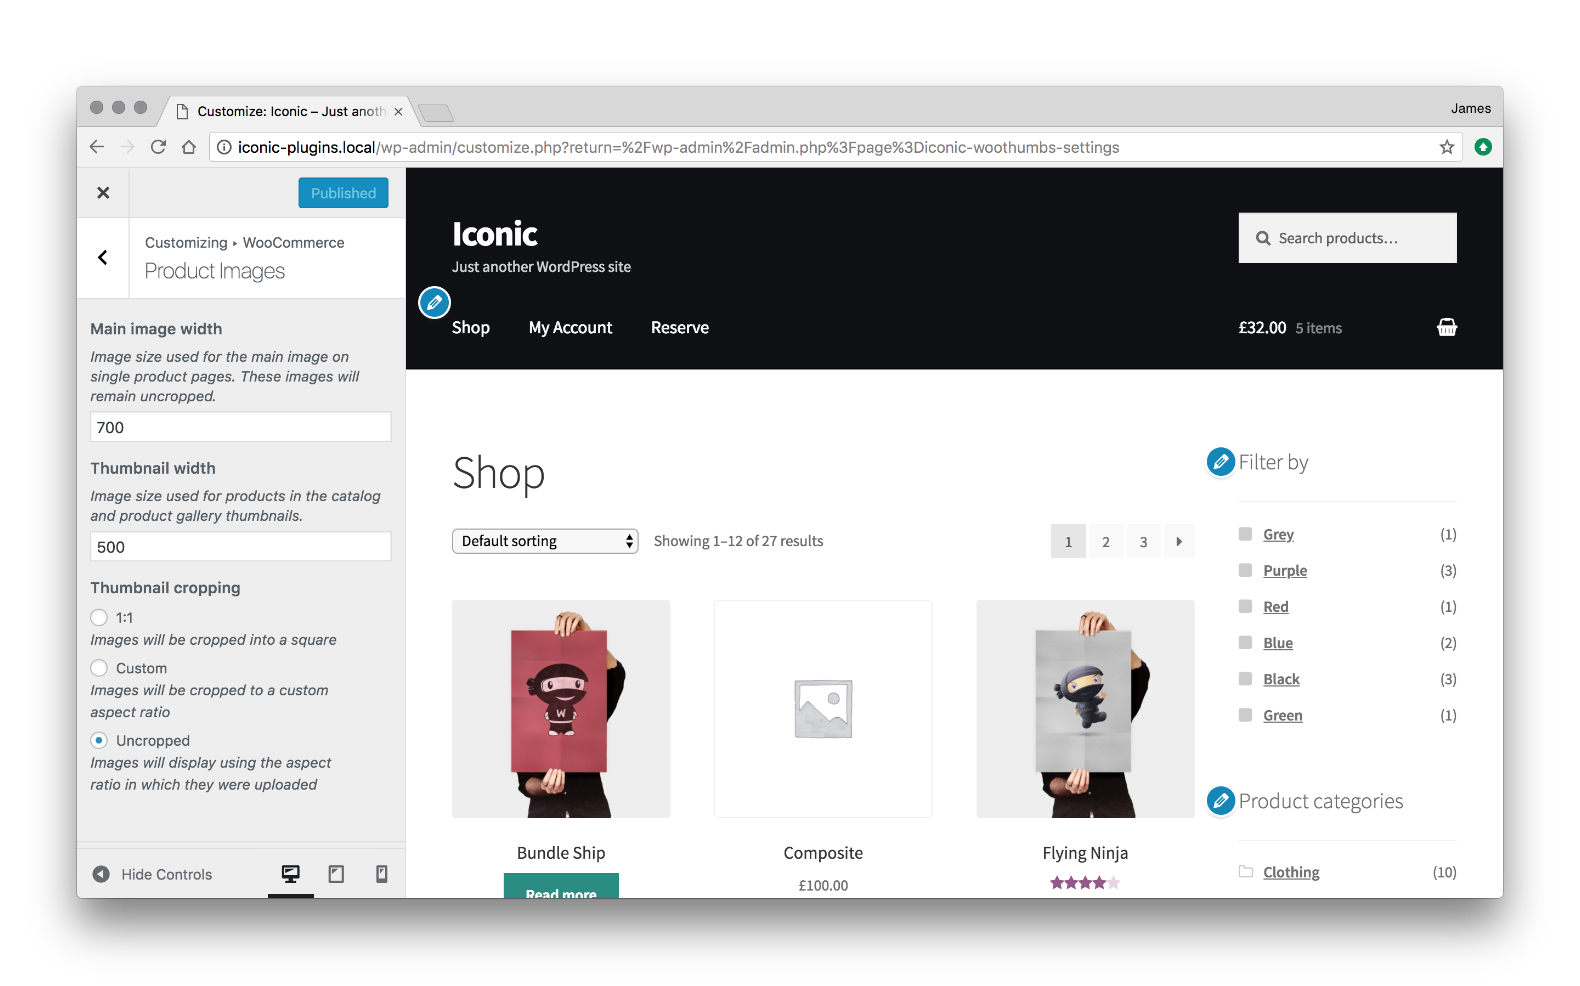
Here, what you can do is to set the Thumbnail Cropping, Thumbnail Width, or Main Image Width. You are able to resize, crop, or even generate images by following the below steps:
From your online store’s WordPress dashboard, penetrate Appearance, then choose Customize. After that, you will select WooCommerce and pick up Product Images. Here, you can see the field Main Image Width. It is time to enter your desired width for a certain image.
As regards image heights, they are automatically calculated based on the settings of your WooStore. Hence, they will be removed intentionally. A worthy note is that crop settings are now not available for your simple or main product image. As a result, they always display uncropped.
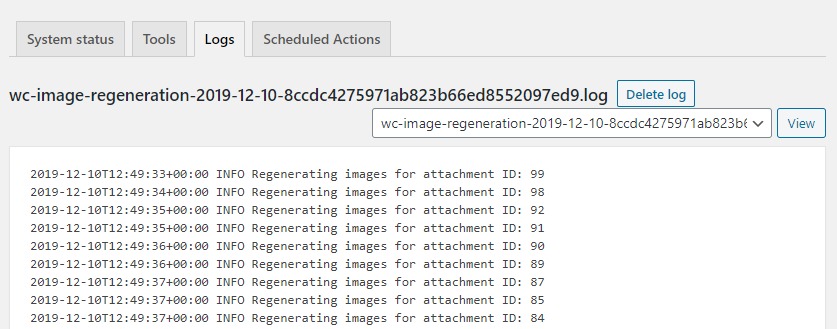
In case you want to modify those settings, WooCommerce generates new sizes for images. This process might take a significant amount of time, but not terribly long. However, it will run in its background.
In the situation that you are keen on looking at your background regeneration’s status, you could navigate to section WooCommerce, select menu Status and click Logs. Then, you are supposed to choose any log from any dropdown which starts with “wc-image-regeneration”.
Step 2: Set size for WooCommerce category image
In the version of WooCommerce 3.3+, the removal of the image size catalog is active. On the other hand, the catalog will apply similar settings to the thumbnail ones. To make changes, approach Appearance, and select Customize. Next, proceed to the menu WooCommerce to choose Product Images before clicking Thumbnails With. When you are here, take some seconds to enter your desired width for your thumbnails. After you are done, click Finish.

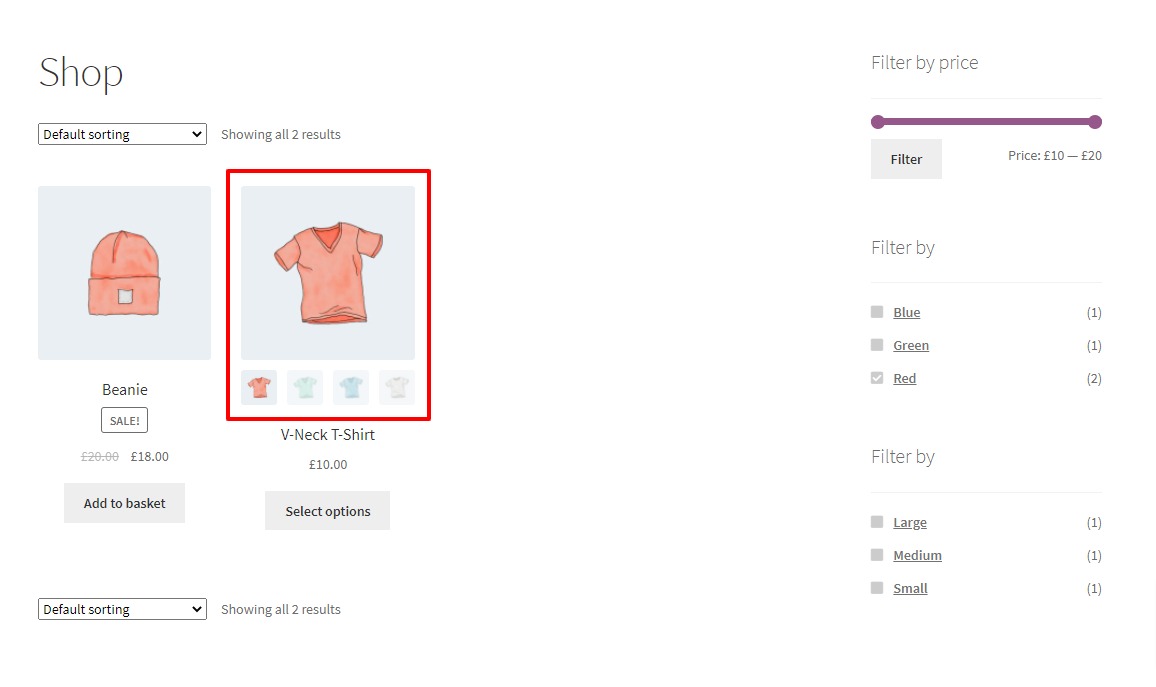
Once you get the image products to be sized on your category page, you are suggested to know how you could make the most of them to increase your sales. What you could do is to add the hover effects to product images in category pages. This function lets customers hover over. Additionally, they can also click the images of your products. Especially, adding zoom effects to those images is what you could do. From this, you could see your products in detail prior to clicking through.
To add these hover effects, you could rely on Image Swap for WooCommerce. Install it and you could save time for customers by reducing frustration and unnecessary clicks.
In case your settings of Thumbnail width and Main image width could be missing from the Customizer screen. There is no need to worry. If your theme gets a WooCommerce support declaration and pre-defines those settings, they will then be subjected to removal from Customizer.
2. Use plugin to customize the image size
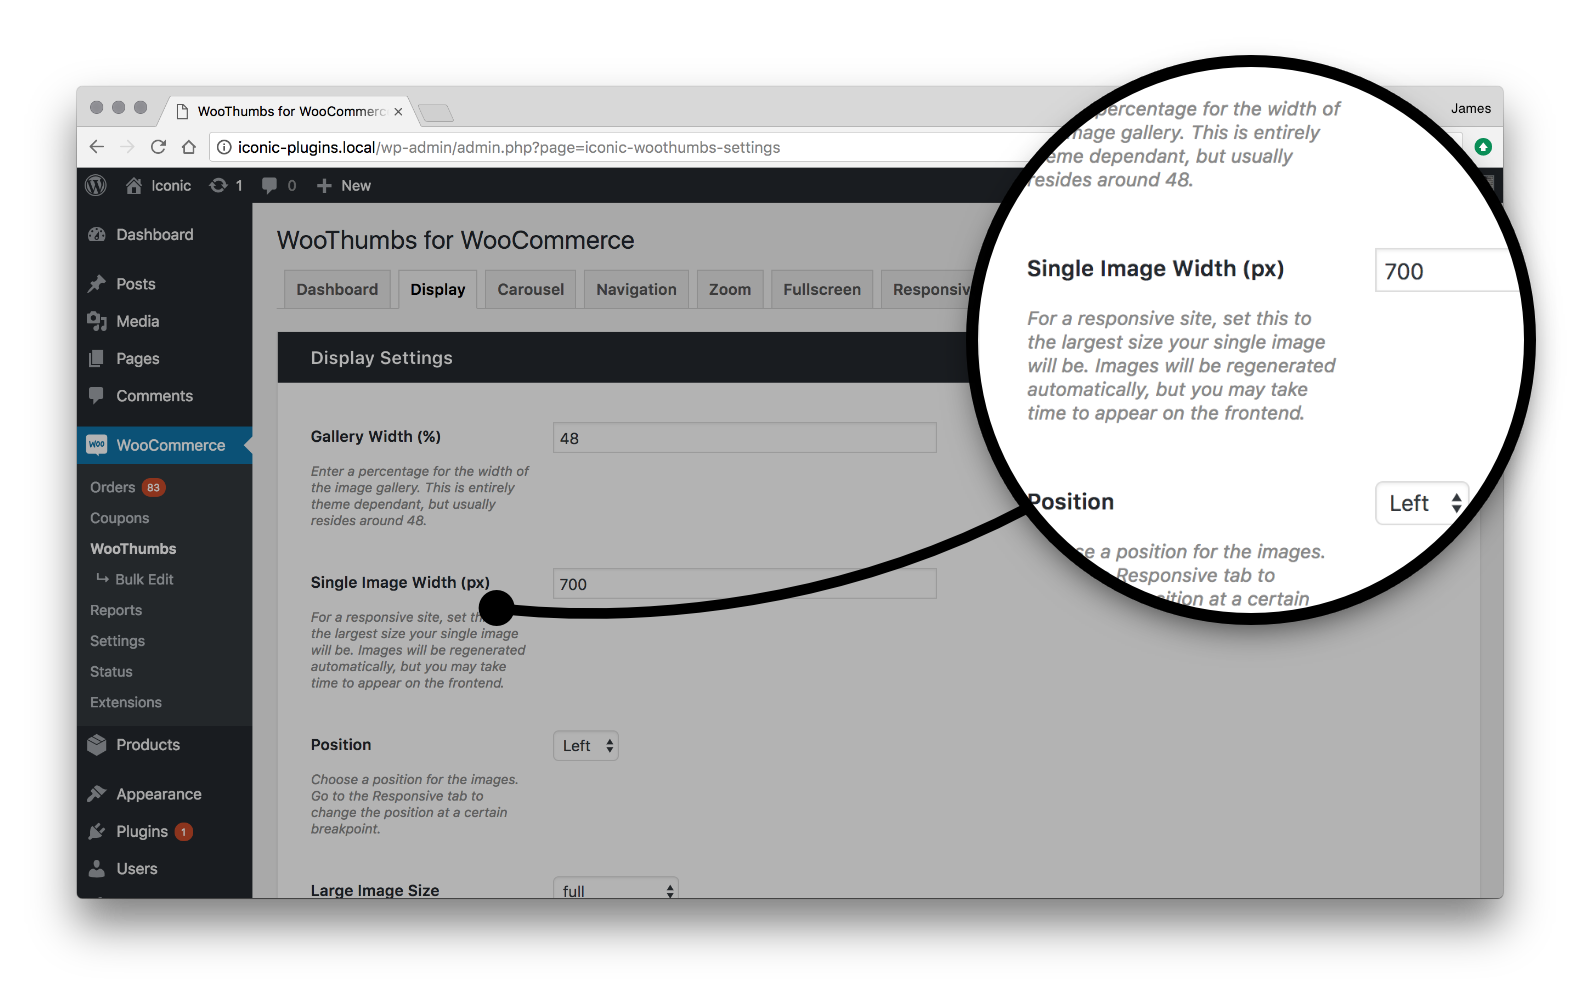
Another way to create the best image size for your WooCommerce products is to use a plugin. Here, we will take you on how to customize your image size with the assistance of WooThumbs. Thanks to this plugin, you can control your image sizes better. In particular, it lets you modify the size of your product images on a single page of products with several easy settings.
What is more, you can have an opportunity to have myriad images for every product variation. Adding image zoom function to your images or customizing your product gallery in WooCommerce are additional advantages. If you are fond of conveying visual communication to customers, WooThumbs is here to help you add great videos.
Step 1: Install WooThumbs
Starting with a free trial for 14 days is highly suggested to see if you make up your mind to go with us for a longer time. To install WooThumbs , follow our below steps:
First, you need to go to section Plugins, choose Add New, and select Upload Plugin. When you are here, choose the downloaded zip file and upload it. Then, select “Activate”. Next, you are supposed to enter the license key once activated.
Now, you have successfully installed your plugin, it is time to proceed to the next steps involving customizing the size of your product images.
Step 2: Customize image sizes for WooCommerce products
If you are looking for the perfect image size and want to change it, you will navigate to WooCommerce, select WooThumbs and click Display. The next thing to do is to choose the section Image Sizes. This is where you will enter the desired size for your product image. Here, you can notice the field Single Image Width, enter the size that you want in this field.
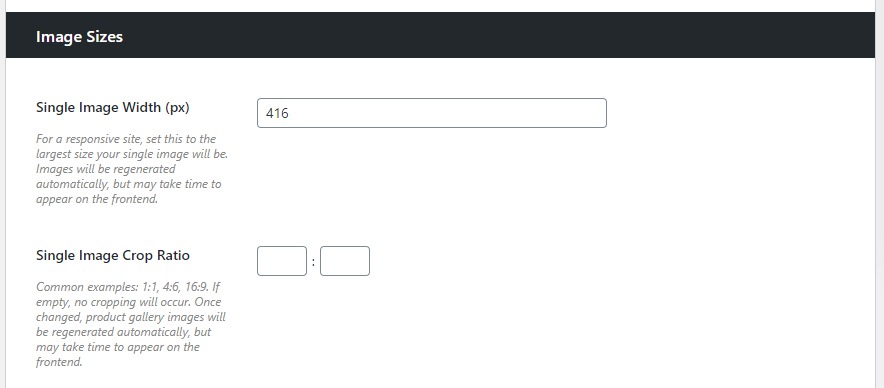
After that select Save to trigger the regeneration process of your background image for single thumbnails of images. Moreover, the image cache in WooThumbs is also automatically cleared when complete.
It is also possible to determine your “Single Image Crop Ratio”. Let’s take an example. You can enter 16:9, 4:6, or 1:1 to crop the image in many different ways.
Step 3: Customize image sizes for your product gallery in WooCommerce
Besides customizing the sizes for product images, WooThumbs also allows you to customize the product gallery’s image sizes.
To do this, keep going to the section “WooCommerce” and choose WooThumbs before clicking Display. Next, navigate below to choose the field “Images Sizes. Here, you could discover different settings where you could modify the sizes in the product gallery:
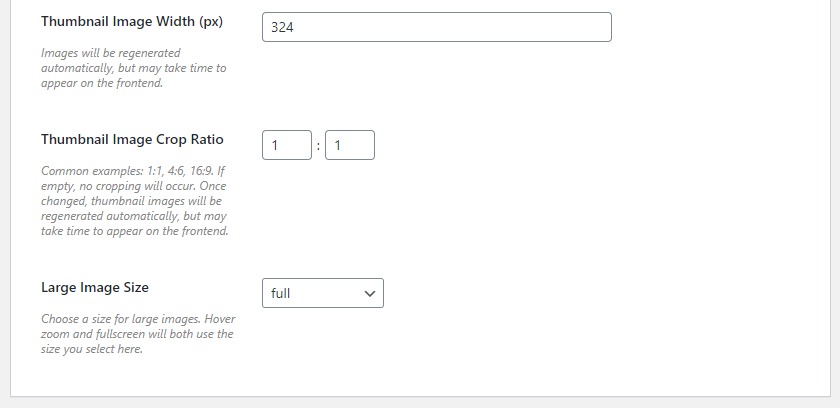
- Thumbnail Image Width (px): In this first section, it is the width of your gallery thumbnails. And this does not exert any impact on other sizes of your site’s product images.
Thumbnail Image Crop Ratio: This second section shows how the product gallery’s thumbnails are cropped. For instance, 16:9, 4:6, or 1:1.
- Large image size: This part is where you can select the size for large images. Zoom, hover as well as the full screen will apply the size that you choose here.
Step 4: Set hard crop or thumbnail cropping for WooCommerce products
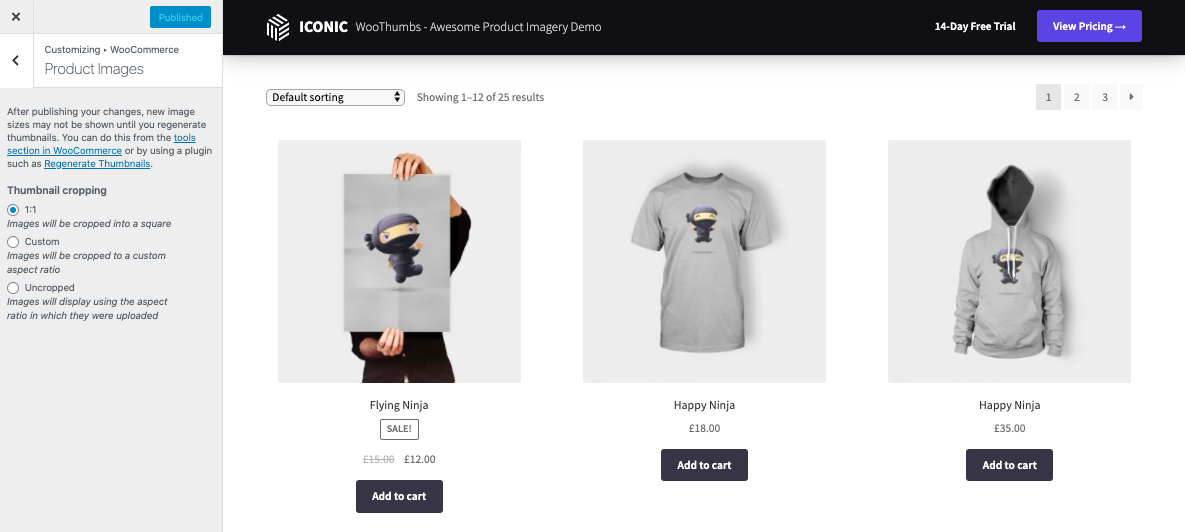
In case you need to set hard crop or thumbnail cropping for WooCommerce products, here is a quick guide for you. Penetrate to menu Appearance then click Customize. After that, you will approach WooCommerce to select Product Images.
The next step is to choose the setting of your desired cropping in section Thumbnail cropping. Once you feel satisfied with the size you select, choose Publish to make your changes live.
How to manage WooCommerce product image?
Now, you could know how to customize your image sizes, right? But we think that it’s not enough if you want to have more control over your product images. Furthermore, you also need to know how you could manage them effectively and quickly. We have come up with some of the steps to keep your WooStore’s product images in control. Let’s get started:
Step 1: Edit product images in WooCommerce
Sometimes, you will need to edit your product images. Hence, to do that, you go to your WordPress Dashboard, then use your navigation menu in order to transfer to Products, then click All Products. Here, you will choose any product that you are going to edit. Look at your right sidebar’s bottom, you could notice the areas name “Product Image” & “Product Gallery”.

Step 2: Optimize your product images
You know that large sizes of images require time-consuming loadings. So, to have the best image for your WooCommerce products, it is a need to optimize them. This aims at reducing the size of your image file while still maintaining the quality of your image.
One recommendation is that you can take advantage of a plugin to do this and WP Smush. It is a good one. This tool is not only great but also free. It helps to process the image files by eliminating redundant and excessive image data. Therefore, it will resize to a more proper size as well as compress the final size before keeping a saved file in your store’s media library.
Step 3: Fix WooCommerce’s blurry images
To ensure that all of your images are amazingly displayed, you should check again and fix any blurry images. However, the first thing you need to bear in mind is that you should avoid uploading images with bad quality. Your products’ image quality decides how it could appear at your site’s front-end. If you upload a low-quality product image, the high chance is that it will never appear as crisp and clear as you wish.
Additionally, stay away from inappropriate settings of the thumbnail. The reason is that it does not provide a proper image as regards dimensions to the website. For example, the image size of your WooStore shop page is 150x150 px, but you upload a product image with 100x100 px. The result, in this case, is that the system enlarges your uploaded image automatically. As a result, that image will look blurry.
To fix these problems, follow some easy steps as below:
You need to go to your WordPress Customizer by approaching Appearance, choose Customizer, then click WooCommerce. Next, you will choose the section Product Images. There, you are required to enter the correct values in two fields Thumbnail Width and Main Image Width. You could test applying different sizes. Apart from that, you should also inspect your theme images to get the proper sizes. Consider if required to make use of thumbnail cropping. After all, click Publish.
Conclusion
Overall, the importance of product images is obvious. Hope through our guide, you can have learned about what the best image size for WooCommerce products is and how to manage or customize it. By doing so, we could make sure that your sales and revenue will increase significantly. Do not hesitate to share the words with anyone who might be interested.


