
WooCommerce product category shortcode tutorials: Everything you need to know

You probably knew them before and somehow regard them as a difficult part relating to Programming when coming to shortcodes. Actually, it is a fact that shortcodes are not such a hard game for you to handle. With all the beneficial features of shortcodes to your online business, it is a great idea that you as an owner know WooCommerce product category shortcode tutorials to customize your store.
So without further ado, let’s jump right into this article!
The benefits of shortcode
For someone who does not know what a shortcode is, in a word, it is basically short pieces of code that help you perform dynamic interactions with content on a website.
Here are some benefits of using shortcodes if you decide to use it:
-
Keep the content clean and semantic
-
Display information in new and interesting ways
-
Offer great control to store owners to display products or checkout process
-
Display related products whenever a customer expresses an interest in a product
-
Have more freedom to alter the style of the page
-
Offer the flexibility to work differently, based on the parameters set by the user - helps users to employ the same shortcode in different situations
-
Experiment with different strategies to drive conversions
It is such a place that you’re looking to simplify the shopping experience using WooCommerce shortcodes. Since WooCommerce comes pre-built with shortcodes, you are able to install plugins to implement more amazing functions. As a result, they can improve purchasing user flows and optimize your online store for sales.
How to display product category by using shortcodes
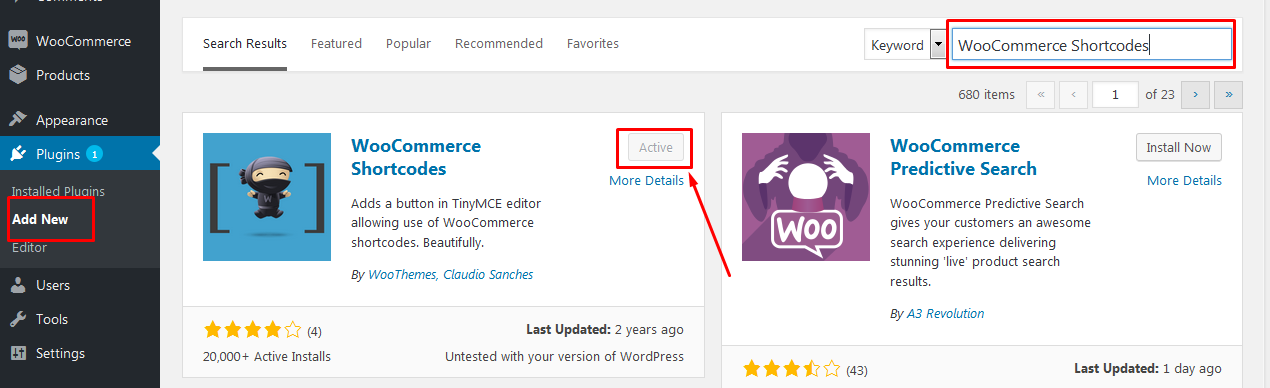
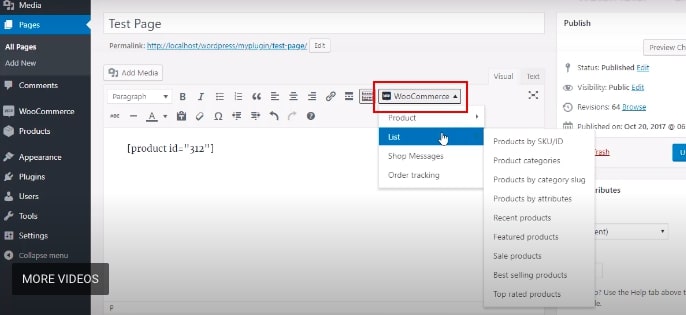
At the very first stage, install WooCommerce shortcodes in your WooCommerce store. Follow this direction:
-
Go to
Plugins > Add New -
Heading to
“WooCommerce shortcodes”plugin and click on“Install now” -
Activate the plugin and start the
“Test page”
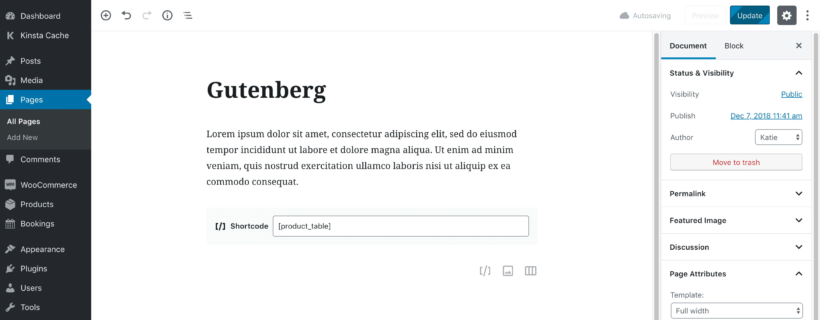
Once you install the plugin, the plugin will be installed in the “Web page” section and you need to leave the shortcodes there. After completing filling the shortcode, you publish it and have a review of how it looks like in the “Test page” like below:
The method of using shortcodes in product categories is divided into specific sections according to the product category types. It will be much easier for you to follow and apply.
Display product category (using Slug)
In order to display product categories, you have to add product categories loop as well as output with this default shortcode:
[product_category category=“category name”]
You can use it anywhere on your site, but remember to use an existing category name that you have in your store.
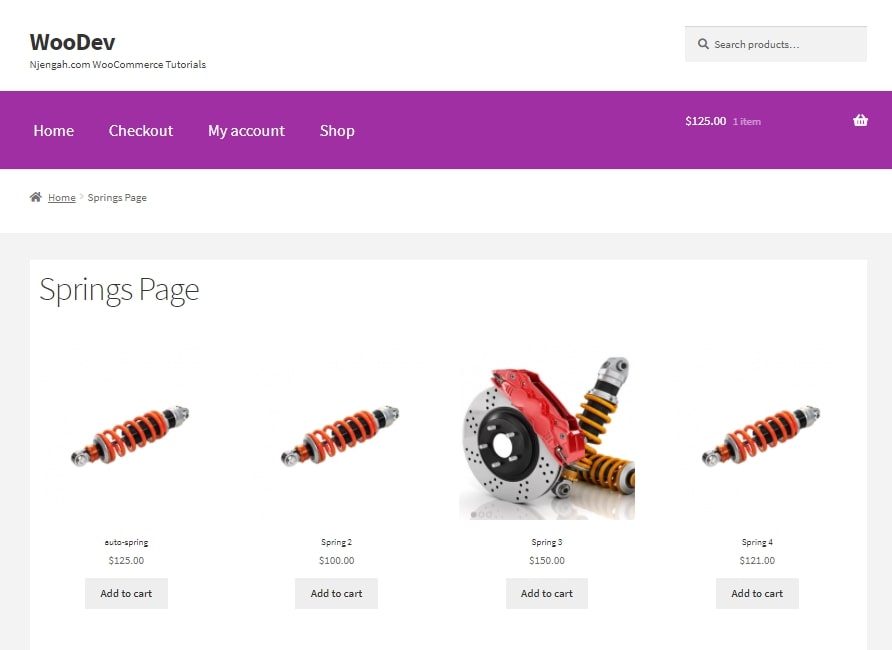
For a better understanding, we will display the ‘springs’ category on a page called ‘Springs Page’ like below:
In terms of the categories section, there are seven more attributes you can paste on the above shortcode which we just showed you earlier:
-
‘number’ => ‘null’, – This shortcode is the number of categories
-
‘orderby’ => ‘name’, – This shortcode represents the order of items according to valid “name” and “date” options
-
‘order’ => ‘ASC’, – This shortcode shows how product categories are ordered, either “ASC” or “DESC“
-
‘columns’ => ‘4’, – This shortcode represents the number of column categories being organized into
-
‘hide_empty’ => ‘1’, – This shortcode means “Set to 1” to hide categories with no products and 0 to show them
-
‘parent’ => ”, – This shortcode represents “Set to 0” to only showcase top-level categories on a page
-
‘ids’ => ” – This shortcode represents that IDs can be set to only specified products that have that ID number
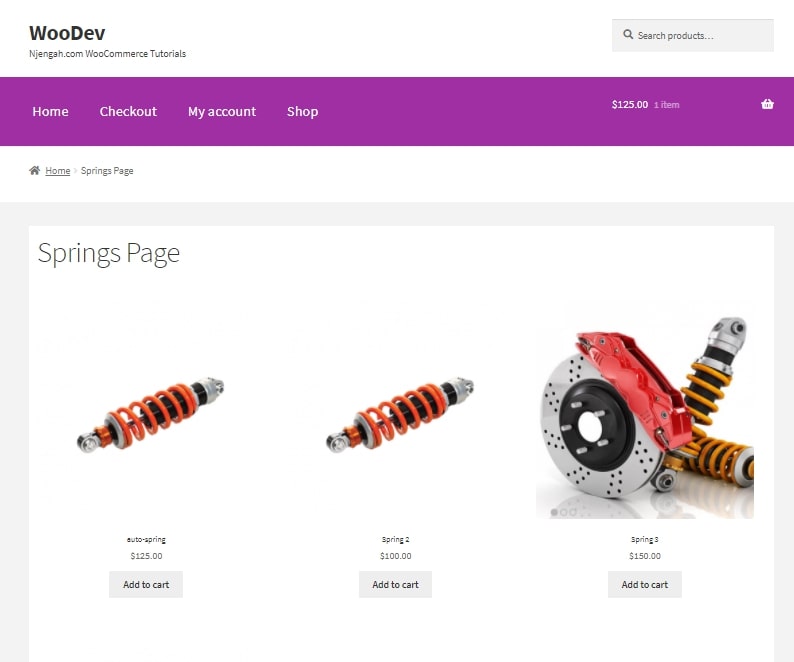
Coming to the second part, we come to the product category using Slug. It is relatively similar to the above shortcodes, but requires you to add all your products within the defined category and can be adjusted with the per_page=“” and columns=“” parameters.
Here is the shortcode: [product_category category=“” per_page=“16″ columns=“3″ orderby= “date” order=“desc”]
That’s all you need to do when you want to display products by category using a shortcode. You can modify the shortcode using attributes and paste them anywhere on your site.
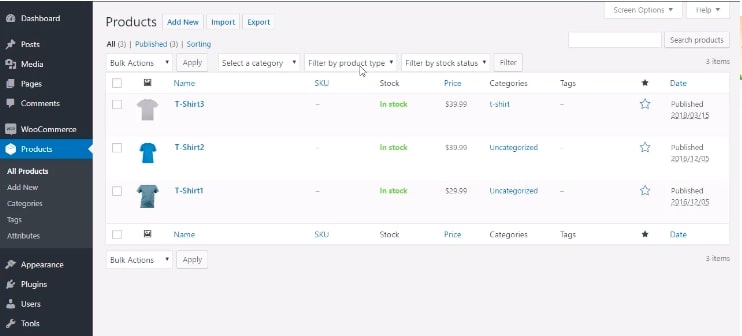
In Particular, you can find the slug of a particular category under WooCommerce > Products > Categories.
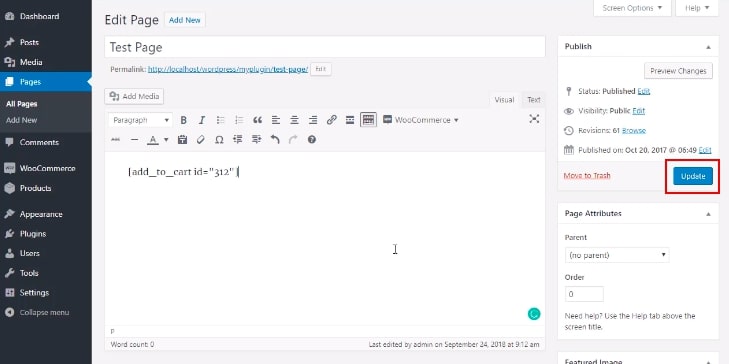
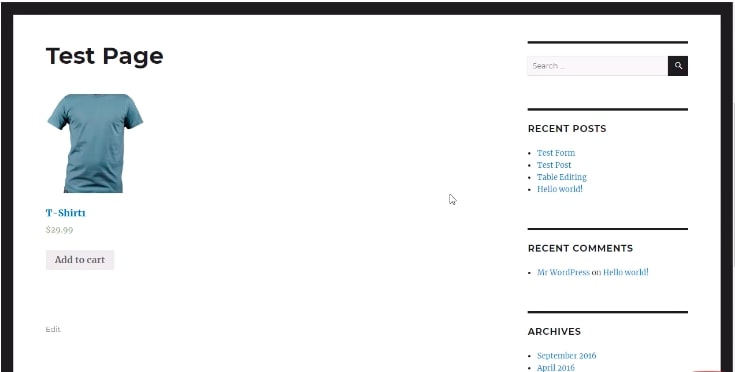
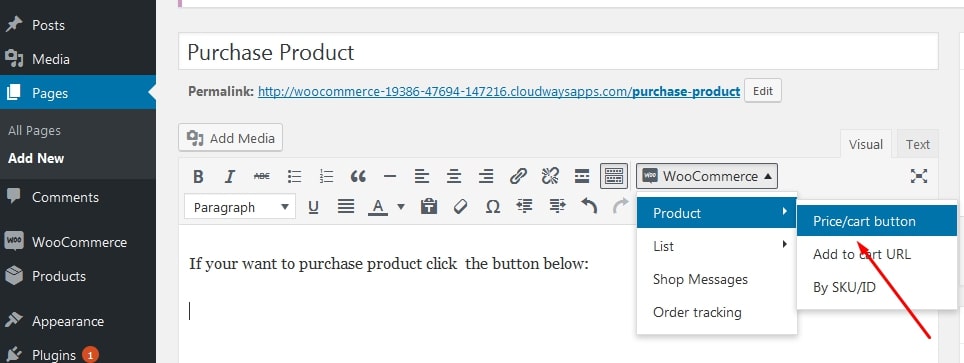
Product price and cart button
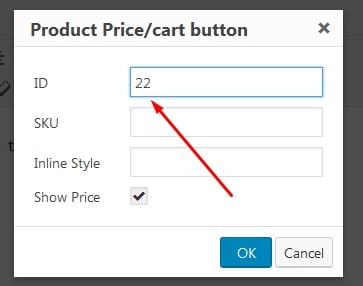
Product price and cart button is a must-have under any product images. The Page section of your WooCommerce dashboard will require the product ID and SKU as you click on the Price/Cart button. Then you just need to fill the instructions, it will generate the following shortcode:
[add_to_cart id=”number″ sku=”number″]
This shortcode is used to show the price and Add to cart button for a singular product via an ID or SKU.
Here is our typical example showing how to add this kind of shortcode. The example below represents a method of using a plugin in a convenient way. Or else it doesn’t matter if you add code directly in the Web page section.
Go to the Page button, then add a new page and paste the shortcode for the price/cart button.
After selecting this, the table will appear on your screen, now add the ID or SKU - whatever you want to display on the product page.
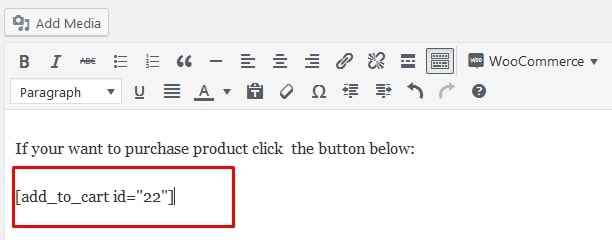
Clicking the Ok button to generate a shortcode like in the screenshot below:
Once choosing the Publish button and you’ll see that the shortcode is created successfully, as shown in this screenshot:
The same as the previous example, now it is up to you to add multiple products while using this shortcode:
[products ids=”number″]
You can also use the following arguments: order=” “, columns=” “, orderby=” “ to alter the ids attribute above depending on your desire. We will give you an example using all arguments:
[products ids=”1, 2, 3″ orderby=”date” columns=”3″ order=”desc”]
The output will be three products organized in 3 columns which are placed by date in descending order. You may also use “ASC” for ascending and title for ordering.
Recent products
The recent product will display you the products that you may have added recently.

You can use this WooCommerce shortcode to list a set of recent products.
[recent_products per_page=”12″ columns=”4″ orderby=”date” order=”ASC”]
By that way, you figure out how many products to show on the page with the “per_page” attribute. The “columns” attribute can be used to control how many columns wide the products should be before wrapping. As for “orderby” and “order” attributes, we guess that it is not necessary to explain to you how to use them clearly.
Featured products
In terms of featured products, the shortcode can be used to display products that have been set as “featured” in your store.
[featured_products per_page=”12″ columns=”4″ orderby=”date” order=”ASC”]
Here’s a result of how it will look like on your product page:
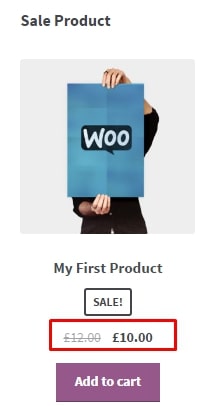
Sale products
In a sale season, clearly, you have to take advantage of this occasion to sell your product at discount prices. So as to display which products are on sale, you need to add this shortcode:
[sale_products per_page=”12″ columns=”4″ orderby=”date” order=”ASC”]
After you have added this shortcode, you can see the result as demonstrated below:
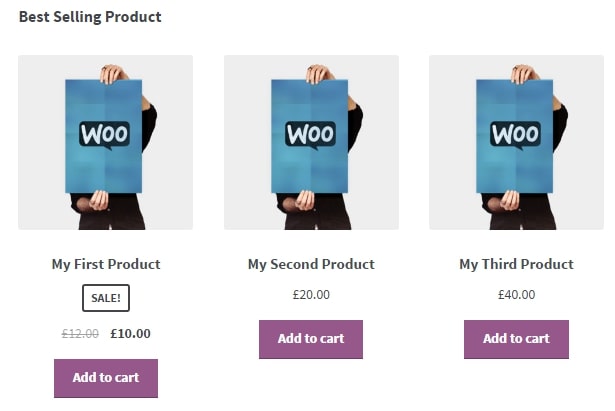
Best selling products (top-rated products)
In terms of the best selling products, this shortcode which we will show represents all your best favorite products; you need to use this shortcode:
[best_selling_products per_page=”12″ columns=”4″ orderby=”date” order=”ASC”]
For an advanced feature, you use this shortcode below in an attempt to filter the top-rated products on a product page:
[top_rated_products per_page=”12″ columns=”4″ orderby=”date” order=”ASC”]
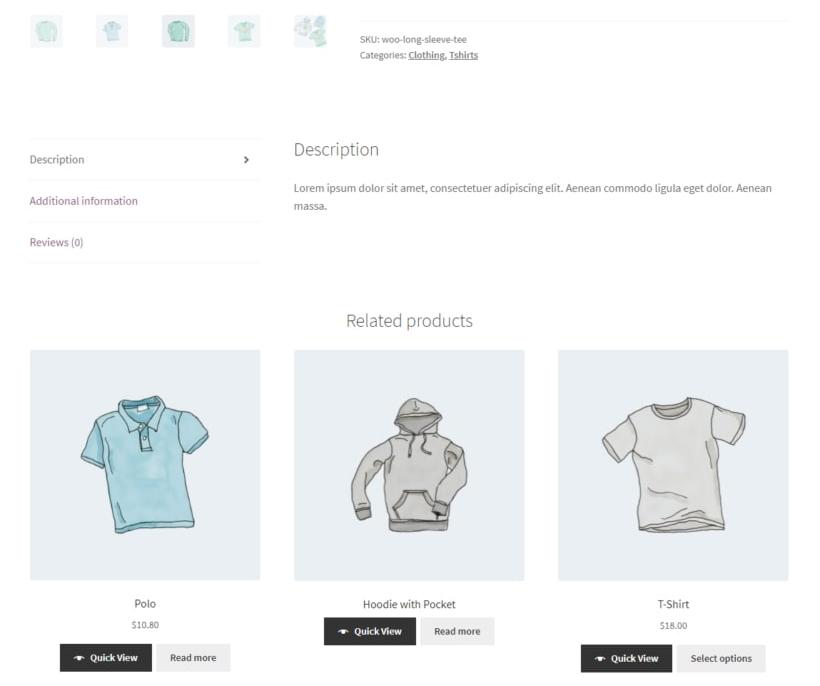
Related products
The related products shortcode represents the similar products that relate to the product that customers are viewing. Of course, the shortcode you use for this purpose:
[related_products per_page=”12″]
Consequently, customers don’t have to click through to each product page to see or add the related products to the cart, which leads to a bad user experience.
Product attributes
Last but not least, we will go to product attributes which are the characteristics of each product. Using this WooCommerce shortcode, it lists products by attributes when customers click on the products to view.
[product_attribute attribute=”color” filter=”black”]
Wrapping up
So that is all there is in this article. We really hope that the post about WooCommerce product category shortcodes is proved to be useful for your practice. It would be much better if you do not encounter any problems with these shortcodes on your website.
In case you have any questions about this tutorial, feel free to comment in the question box at the bottom of the page. We will be pleased to help you out as soon as possible!


