
How to Print A WooCommerce Order?

The ability to print anything related to your purchases, such as a packing slip or invoice, is a very fundamental functionality that WooCommerce lacks as a standard feature. A simple approach to print shipping documentation (invoice, packing list, delivery note, shipping label, etc.) would relieve business owners of a significant load.
In today’s tutorial, we will show you how to print a WooCommerce order efficiently. Moreover, we are also attempting to introduce the accessible extensions that assist WooCommerce owners in printing primary shipping forms.
How to print a custom order in WooCommerce
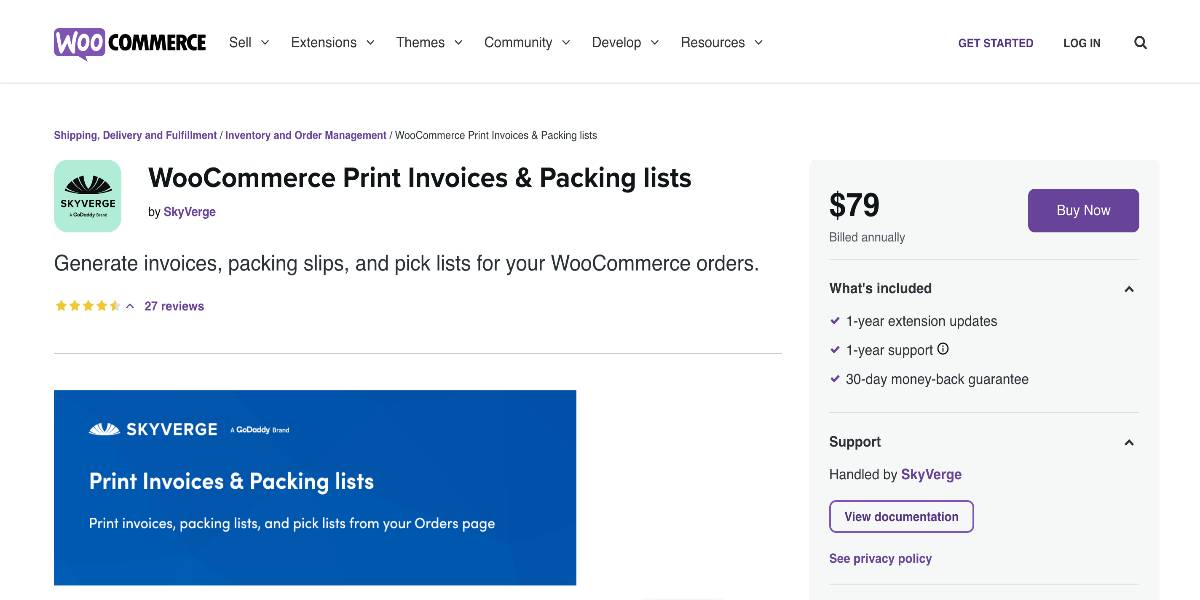
This tutorial will inform you of the full guidelines for printing custom orders in WooCommerce by using the plugin WooCommerce Print Invoices & Packing Lists. This plugin lets you print invoices, single order packing lists, and multi-order pick lists directly from the orders page. With a few clicks, you can print individual orders or bulk print invoices, packing lists, or pick lists, saving you time while packing and delivering goods.
You can also use this plugin to edit the material printed on these documents to include specific company details such as your return policy, making it simple to communicate this information with your consumers.
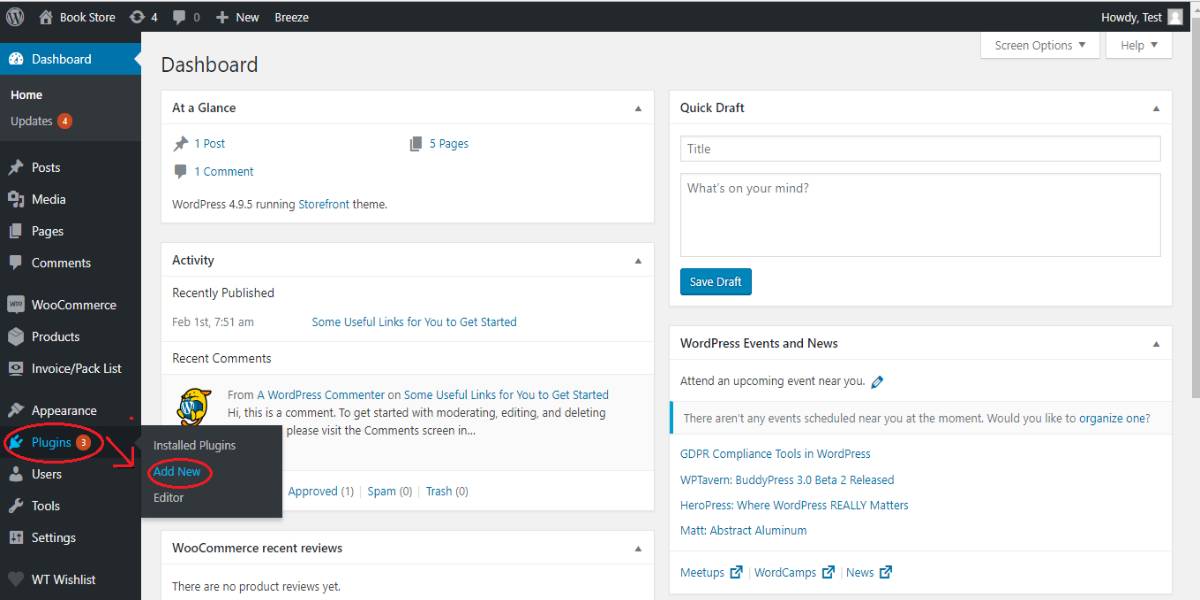
Step 1: Install the plugin
There are several plugins available that allow you to print orders, but in our experience, this is the best and easiest to use, plus it has the highest rate in the WooCommerce extension store. Before installing the plugin, you must consider reaching the download requirements from the developer:
- WooCommerce version 3.5 or higher.
- WordPress version 5.2 or higher
- PHP version 7.0 or higher (you can find the details of this part by heading to WooCommerce > Status).

After that, go to your WooCommerce dashboard and search for the plugin on the Add New page. You will need to download the zip file of the latest version. Then, go back to the Plugins section and navigate to the Add New tab. Finally, on the Upload box, upload the zip file you just downloaded. Once the upload is complete, select Install and Activate to start configuring your plugin.
This plugin does not require any setup, but you may change the document design, select what information will show on each type of document (i.e., invoices, packing lists, and pick lists), and handle email notifications connected to these documents.
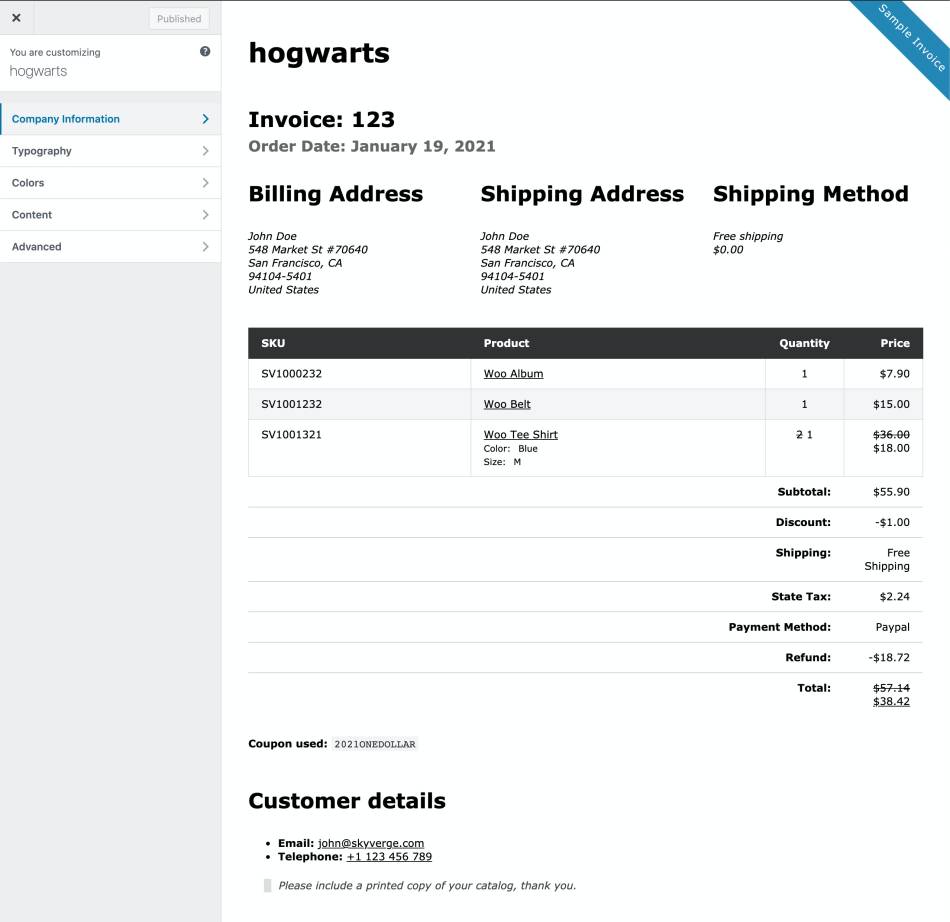
Step 2: Create and customize your template
Now, it is time to create and customize your WooCommerce order template. By navigating to WooCommerce > Settings > Invoices/Packing Lists > General and choosing Modify, you can modify and edit the template for your invoices, packing lists, and pick lists. This will launch the visual editor, where you may alter the document’s template and see your changes live in a template preview.
You may change the appearance of your template by updating the following sections:
- Company information: General document options, such as your store’s logo, name, location, and VAT number. You may also provide extra information that will be shown at the top of the page, such as a customer service phone number, which might be handy for communicating corporate information.
- Typography: Set the size of the header and body fonts in the template.
- Colors: Set the text and background colors of the template.
- Content: Enter the document header/footer and shop policies with optional content (e.g., returns policy, terms, and conditions, etc.).
- Advanced: Fill in the blanks with different CSS styles to customize the document template. You may use the CSS class that covers each page if you want your CSS to be document-specific (for example, distinct styles for invoices, packing lists, and pick lists).
Step 3: Configure the document settings
Coming next is configuring the document settings. You have complete control over which order and product information appears on invoices, packing lists, and pick lists.
Invoice settings
To decide which fields display on the invoice, go to WooCommerce > Settings > Invoices/Packing Lists > Invoice and customize the following settings:
- Show shipping method: Choose whether or not to display the shipping method next to the customer addresses.
- Show customer details: Choose whether to display the customer’s basic WooCommerce account information underneath the order items table.
- Show customer note: Select whether or not to display any customer notes underneath the order items table.
- Show coupons used in order: Select whether or not to display any promo codes used right below the order items table.
- Show optional fields: Add optional product-related data such as SKU, product thumbnail, line taxes, and unit pricing.
- Show item prices excluding taxes: Choose to see item prices excluding taxes. This will override the shop tax display settings for item prices shown in the invoice.

Moreover, you can also modify the invoice numbers with some additional features:
- Use Order Number as Invoice Number: Set up the invoice number on all invoices instead of the order number.
- Invoice Number Start: If you disable the first option, this feature will allow you to set up a starting number for the invoice number counter. This will be the invoice number for the first printed invoice, and subsequent numbers will be assigned consecutively.
- Reset Counter: Select this setting if Use Order Number as Invoice Number is deactivated. It will reset the starting invoice number. Since existing invoice numbers are never updated, this may result in duplicate invoice numbers.
- Invoice Number Minimum Digits: Enter the minimum number of digits your invoice numbers should have if using Order Number as Invoice Number is disabled. Leading zeroes will be utilized as padding if your minimum digits are more significant than the number of digits in the invoice number. If the minimum digits are five and the starting invoice number is 100, the first invoice number will be printed as 00100.
- Invoice Number Prefix: This setting will provide a prefix to be added before the invoice number. In the prefix, you can utilize merge tags. To deactivate prefixes, leave this field empty.
- Invoice Number Suffix: Enter a suffix to add when you want the invoice number. In the suffix, you can utilize merge tags. Leave blank suffixes to deactivate.
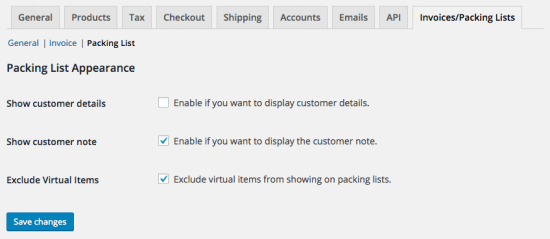
Packing list settings
To decide which fields display on the packing list, go to WooCommerce > Settings > Invoices/Packing Lists > Packing List and change the following settings:
- Show customer details: In packing lists, choose whether to display the customer’s primary WooCommerce account data underneath the order items table.
- Show customer note: In packing lists, check the box to display any customer remarks below the order items table.
- Show terms and conditions: Select whether your terms and conditions (as added to the document template) should be shown on packing lists.
- Show footer: Choose whether or not to display the footer text (as added to the document template) on packing lists.
- Show optional fields: Add optional product-related data such as SKU, total weight, or product thumbnail.
- Exclude virtual items: Hide virtual items (i.e., those that cannot be shipped).
Picklist settings
To determine which fields display on the picklist, go to WooCommerce > Settings > Invoices/Packing Lists > Pick List and configure the following settings:
- Pick List Output: Giving the options to specify whether items should be sorted by order or by category (i.e., when printing a pick list for more than one order).
- Show optional fields: Add optional product-related data such as SKU, product description, total weight, or product thumbnail.
- Exclude virtual items: Select to conceal virtual items (i.e., those that cannot be sent).
Step 4: Set up emails
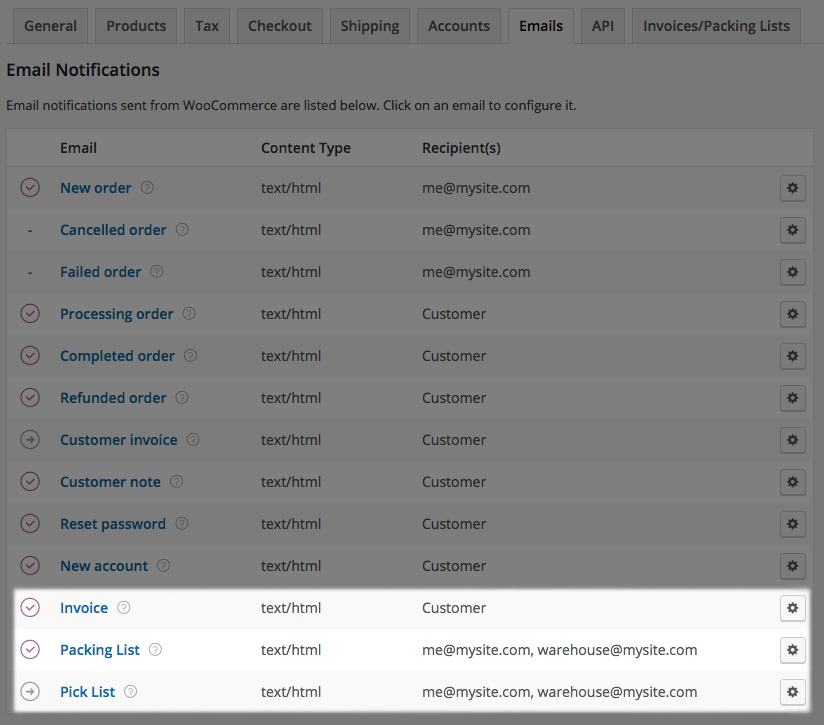
Next, you will need to set up your emails in the default settings. The plugin adds three additional emails to your WooCommerce store, which you can access by heading to WooCommerce > Settings > Emails:
- Invoice: When this option is selected, an HTML invoice will be immediately sent to your clients once the order has been paid. The email contains the same information as a printed invoice.
- Packing List: When enabled, email an HTML packing list to the site administrator (by default) once the purchase has been paid. You may use a comma-separated list to change the Recipient(s) list and send this email to numerous recipients.
- Pick List: Emails from a pick list may only be sent manually using the WooCommerce > Orders page Bulk actions. A combined HTML Picklist will be emailed to the recipients if more orders are chosen before this Bulk operation.
Click the email name from this table to update it (enable/deactivate it, or change the subject lines and recipients).
Step 5: Print the order
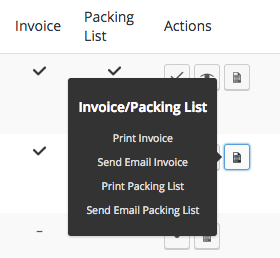
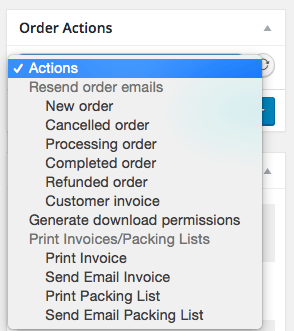
After configuring all the basic setups, you can now print your custom WooCommerce order. With various order actions, you may print and send invoices, packing lists, and pick lists. To do this, on your WooCommerce dashboard, navigate to the Orders list section and click the “documents” icon in the Actions column to see all of the document actions available for that order:
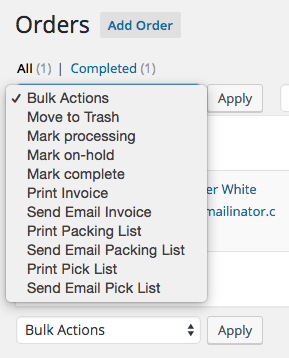
You may also utilize the Bulk Actions option for one or more orders to conduct the following actions:
- Print Invoice: Creates an HTML invoice for all specified orders (with page breaks between invoices). The invoice may be seen, printed, and opened.
- Send Email Invoice: Sends an email to the billing email address with the HTML invoice information for all specified orders.
- Print Packing List: Generates an HTML packing list for all chosen orders (page breaks between packing lists for each order). The packing list items will be categorized by product category. The packing list may be seen, printed, and saved.
- Send Email Packing List: Sends individual emails to the admin recipients specified in your email settings with the HTML packing list content for each selected order. If you choose 40 charges, you will receive 40 packing list emails.
- Print Pick List: Creates a combined HTML pick list for all orders that have been selected. The chosen list items will be arranged by product category. The select list may be browsed, printed, and opened.
- Send Email Pick List: Sends an email to the admin recipients specified in your email settings with the HTML pick list content for all chosen orders. If 15 orders are selected, just one email containing a consolidated choice list for all 15 orders is sent.
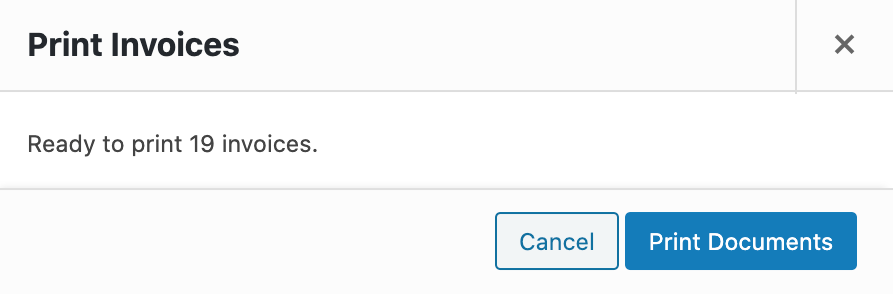
After you’ve selected and executed your Bulk action, a modal will display the number of documents and the option to Print Documents. If you choose Print Documents, a link will appear to open your document(s) in a new window for printing. To preview and print your paper, click the link (s).
In the viewing or updating process, you can access document actions by using the Order Actions menu, which is located in the “Print Invoices/Packing Lists” section:
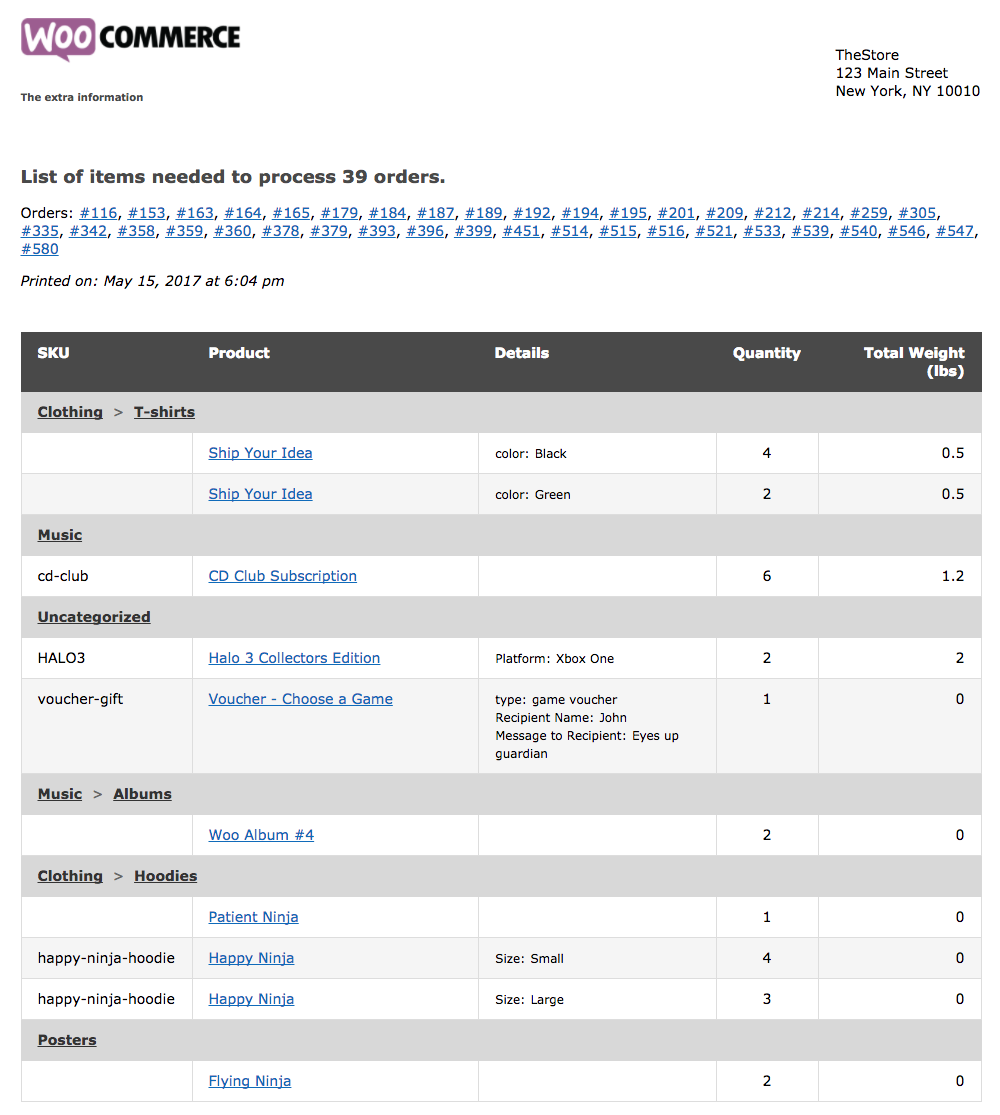
Printing samples
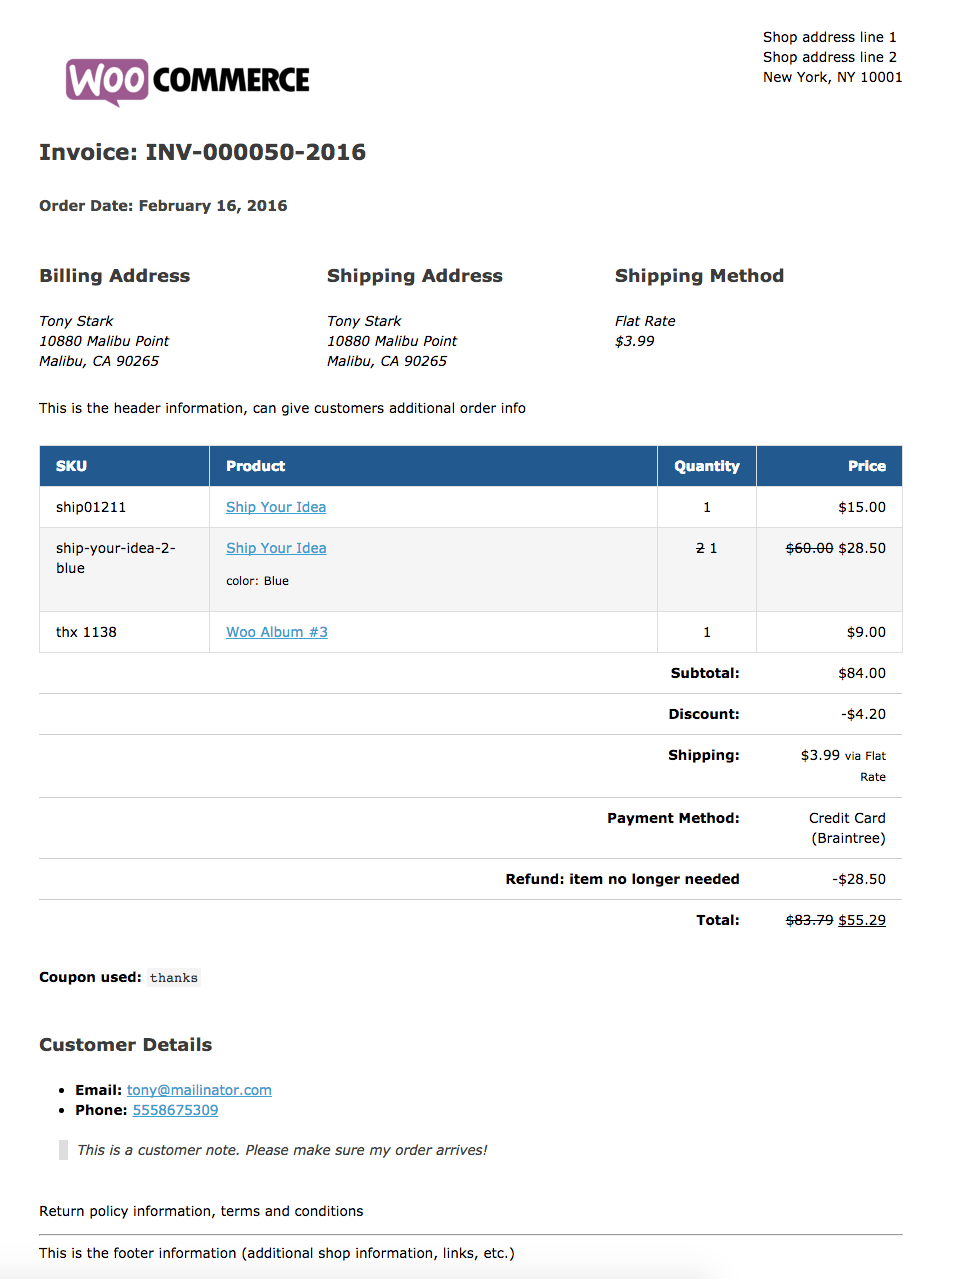
You can see examples of invoices, packing lists, and pick lists in this part. Whether printed or emailed, each document will have the same appearance. Based on the tutorial above, you can change the design and content of these papers to fit the demands of your shop. Invoice numbers, client information, and all order line items are always displayed on invoices. If you have taxes, they will be presented based on the tax settings in WooCommerce. If you choose to show taxes as a single total at checkout, taxes will be added as a single cost line following the subtotal. Multiple taxes will display as individual line expenses if you show itemized taxes. Additional information is displayed depending on your invoice design and preferences.
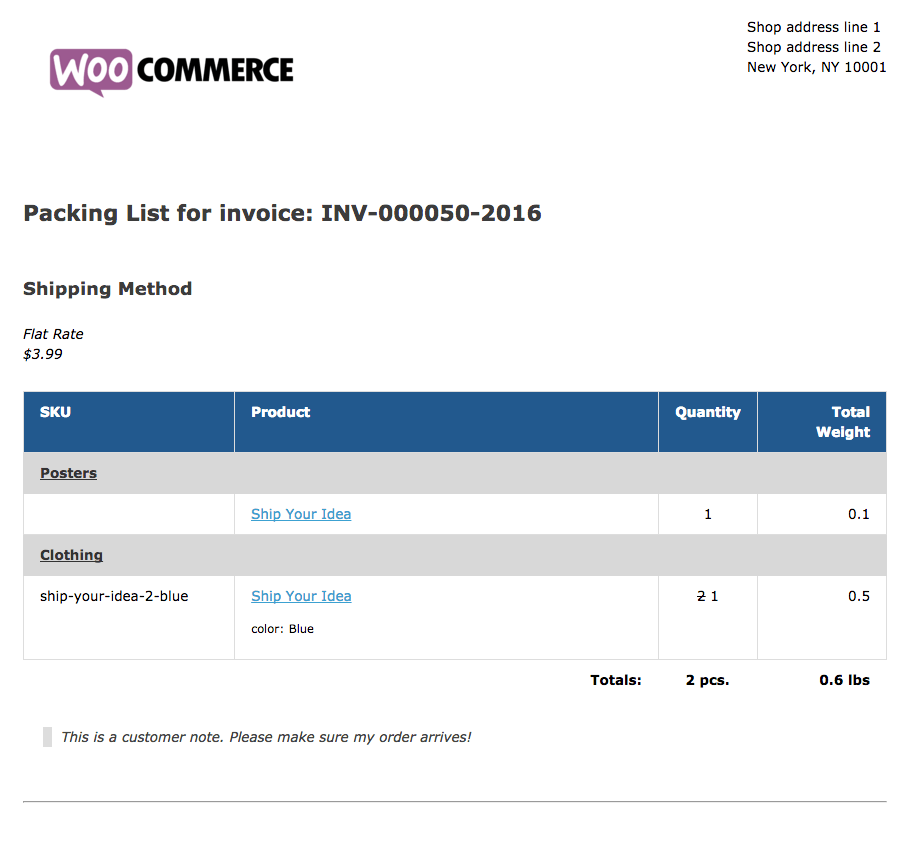
To make choose and package orders easier, packing lists will always arrange ordered items by product category. The item characteristics, attributes (e.g., size), and line weight, as well as any extra information depending on your template and packing list choices, will be shown. If virtual goods are excluded from packing lists, they will not appear on the list at all. If the order solely comprises virtual products, the packing list will indicate no items available.
A picklist is a document that combines information from one or more orders. This can be used as a “warehouse pick list” to obtain packaging materials. Additional information is displayed depending on your invoice design and preferences. If you choose to arrange things by order in the picklist options, products in the combined list will be grouped by order and product category.
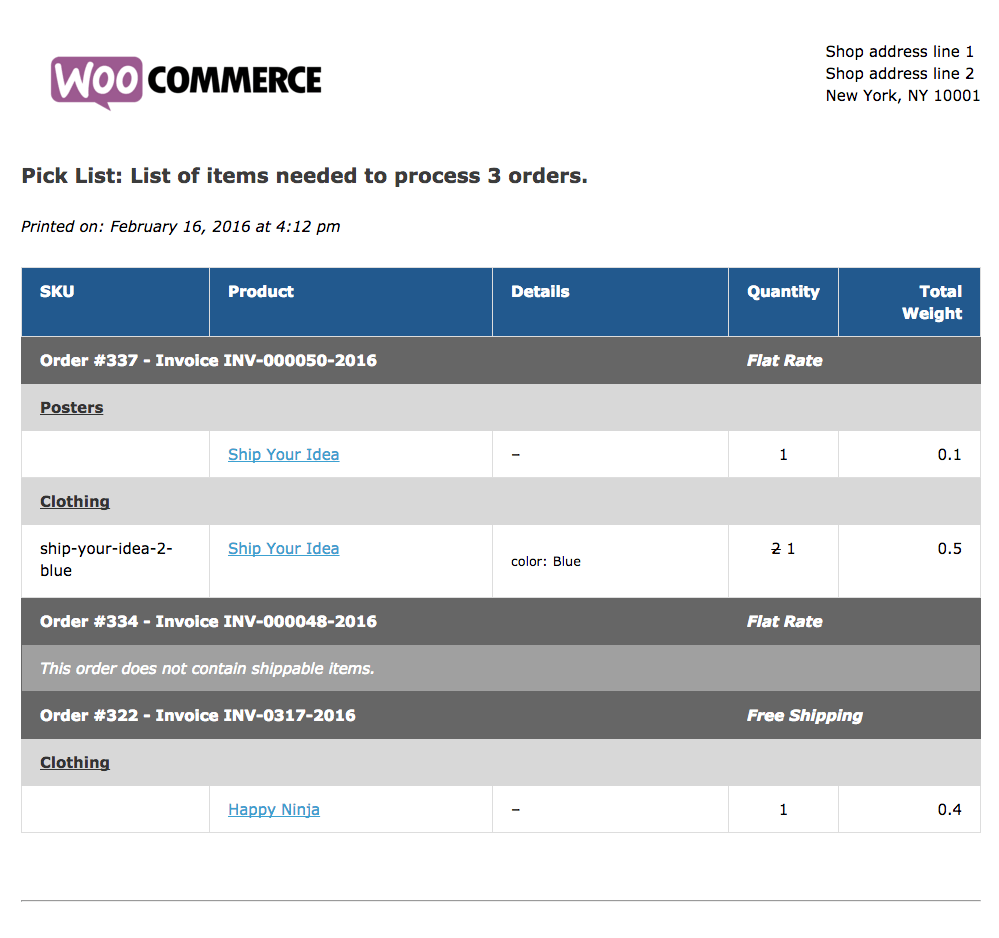
Suppose you have chosen to make arrangements by category in the picklist settings. In that case, products will be sorted in a comprehensive list by category, with total counts for each item (regardless of which order they belong to).
3 Best free plugins to print a WooCommerce order
WooCommerce PDF Invoices and Packing Slips
The WooCommerce PDF Invoices and Packing Slips plugin, created by Ewout Fernhout, allows you to automatically use a PDF invoice to the order confirmation emails you send to your clients. You can customize the provided template to meet your requirements. The printing papers can also be downloaded or printed from the order admin page. Another valuable aspect of this plugin is its multi-language support. This plugin also supports languages such as Ukrainian, Slovenian, and Slovak.
Outstanding features:
- Attach PDF invoices to WooCommerce emails of your choice automatically.
- From the order admin page, you will get a PDF invoice/packing slip.
- Create a large number of PDF invoices and packing slips.
- Invoice templates that are fully customizable in HTML/CSS.
- From the My Account tab, you can download invoices automatically.
Price: This plugin is 100% free for WordPress and WooCommerce users.
WooCommerce PDF Invoices, Packing Slips, Delivery Notes and Shipping Labels
The WooCommerce PDF Invoices, Packing Slips, Delivery Notes and Shipping Labels plugin allows you to create PDF invoices, packing lists/packing slips, delivery notes, and shipping labels directly from the WooCommerce orders page. WooCommerce does not enable you to print any of these documents from the orders page by default. You can easily streamline your online store’s shipping and order procedures by using this plugin. Surprisingly, the plugin’s basic edition has three invoice templates to select from. If you purchase the premium version, you may change the base template to meet your unique needs.

Outstanding features:
- Simple possibilities for customizing and personalizing the templates.
- Address labels, proforma invoices, credit notes, and pick lists may all be generated and printed.
- Customize the return policy and footer.
- Change the invoice number.
- Checkout, order, and product meta fields are all supported (SSN, VAT, etc.).
Price: This plugin offers a free version for new store owners. However, if you have a solid commitment to eCommerce, we recommend you purchase the premium license at the price of $69 for a single site.
WooCommerce Print Invoice and Delivery Notes
The WooCommerce Print Invoice and Delivery Notes plugin has a large number of WooCommerce users. You can quickly print shipping papers from your business, such as invoices and delivery notes, thanks to Triggvy Gunderson’s creation. The plugin allows you to personalize the content that appears on these papers. Using this plugin, you may incorporate a brand name, company regulations, or even messages to consumers. The plugin also adds a new side panel to the order page that allows business owners to print the invoice or delivery note. Registered clients can now print their orders by clicking a button on the order screen.
Outstanding features:
- Print invoices and delivery notes from the “Order Edit” page’s side panel.
- On the “Orders” tab, you may quickly print invoices and delivery notes.
- Print invoices and delivery notes in Bulk.
- Allow clients to print orders from the “My Account” page.
- Add a company address, a logo, and various other details to the invoice and delivery note.
- Customize the invoice and delivery note templates completely
Price: This plugin is 100% free for WordPress and WooCommerce users.
Conclusion
When you manage a WooCommerce business, printing shipping documentation may be a hassle, especially when there are no out-of-the-box alternatives. As you can see from the examples above, there are both effective free and premium plugins available. Which one you select may be a personal preference, but the settings and setup are similar in all alternatives.
We hope this tutorial will help you understand the process of how to print a WooCommerce order - getting some research and finding an appropriate solution to increase your store management process and peak your sales right now!


